Authors of ChucK
Originated by:
Chief Architect and Designer:
Lead Developers:
Documentation:
- Adam Tindale -- adam.tindale@acad.ca
- Ge Wang
- Rebecca Fiebrink
- Philip Davidson
- Ananya Misra
- Spencer Salazar
Lead Testers:
Thank You
Many people have further contributed to ChucK by suggesting great new ideas and improvements, reporting problems, or submitting actual code. Here is a list of these people. Help us keep it complete and exempt of errors.
- Andrew Appel
- Brian Kernighan
- Paul Lansky
- Roger Dannenberg
- Dan Trueman
- Ken Steiglitz
- Max Mathews
- Chris Chafe
- Szymon Rusinkiewicz
- Graham Coleman
- Scott Smallwood
- Mark Daly
- Kassen
- Kijjaz
- Gary Scavone
- Brad Garton
- Nick Collins
- Tom Briggs
- Paul Calamia
- Mikael Johanssons
- Magnus Danielson
- Rasmus Kaj
- Princeton Graphics Group
- Princeton Laptop Orchestra Stanford Laptop Orchestra
- CCRMA community
- Smule
- ChucK users community!!!
Installation
We tried to make ChucK as easy as possible to build (if desired), install, and re-use. All sources files - headers source for compiler, vm, and audio engine - are in the same directory. Platforms differences are abstracted to the lowest level (in part thanks to Gary Scavone). None of the compiler/vm has any OS-depedent code.
There are also pre-compiled executables available for OS X and Windows.
The classic ’chuck’ runs as a command line program. There are GUI-based integrated development and performance environments as well that can be used as standalone chuck virtual machines, or in conjunction with the command version of ’chuck’. GUI-based environments include the miniAudicle (http://audicle.cs.princeton.edu/mini). This section deals mainly with the classic, command-line version of chuck.
Binary Installation
The binary distributions include a directory called bin/ that contains the precompiled binary of ChucK for your operating system. The binary distribution is a great way to dive into ChucK.
OSX
- The terminal is located in the Utilities/ folder in the Applications/ folder of your hard drive. Open terminal (create a shortcut to it in the dock if you want, since we will be using it a lot with the command-line chuck). In the terminal go to the bin/ directory (replace chuck-x.x.x.x-exe with the actual directory name):
%>cd chuck-x.x.x.x-exe/bin
- Install it using the following command.
%>sudo cp chuck /usr/bin/
(enter password when prompted)
%>sudo chmod 755 /usr/bin/chuck
Now you should be able to run ’chuck’ from any directory.
Test to make sure it is was installed properly.
%>chuck
You should see the following message (which is the correct behavior):
[chuck]: no input files... (try –help)
Windows
- Place chuck.exe (found in the 'bin' folder) into c:windowssystem32
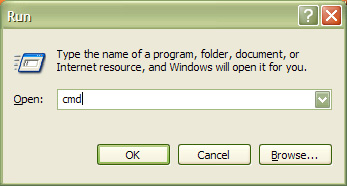
- Open a command window found in start - run
- Type cmd and press return
- Type chuck and press return, you should see:
chuck [chuck]: no input files... (try --help)
Source Installation
To build chuck from the source (Windows users: it’s possible to build ChucK from both Visual
C++ 6.0 and from cygwin - this section describes the cygwin build):
- Go to the src/ directory (replace chuck-x.x.x.x with the actual directory name):
%>cd chuck-x.x.x.x/src/
- If you type 'make' here, you should get the following message: %>make [chuck] : please use one of the following configurations: make osx, make osx-ub, make win32, make linux-oss, make linux-alsa, make linux-jack Now, type the command corresponding to your platform... for example, for MacOS X (universal binary):
%>make osx-ub
for example, for MacOS X (current):
%>make osx
for example, for Windows (under cygwin):
%>make win32
- If you would like to install chuck (cp into /usr/bin by default). If you don't like the destination, edit the makefile under `install', or skip this step altogether. (we recommend putting it somewhere in your path, it makes on-the-fly programming easier)
# (optional: edit the makefile first)
%>make install
You may need to have administrator privileges in order to install ChucK. If you have admin access then you can use the sudo command to install.
%>sudo make install
- If you haven't gotten any egregious error messages up to this point, then you should be done! There should be a `chuck' executable in the current directory. For a quick sanity check, execute the following (use `./chuck' if chuck is not in your path), and see if you get the same output:
%>chuck [chuck]: no input files...
(if you do get error messages during compilation, or you run into some other problem - please let us know and we will do our best to provide support)
You are ready to ChucK. If this is your first time programming in ChucK, you may want to look at the documentation, or take the ChucK Tutorial (http://chuck.cs.princeton.edu/doc). Thank you very much. Go forth and ChucK - email us for support or to make a suggestion or to call us idiots.
Ge + Perry
Linux building and dependencies
Compiling ChucK & miniAudicle on Fedora 10, Planet CCRMA
(as root)
yum install bison flex libsndfile-devel gcc gcc-c++
for alsa:
yum install alsa-lib-devel
for jack:
yum install jack-audio-connection-kit-devel
then in src directory, type
make linux-alsa or make linux-jack
for miniAudicle, add this:
yum install wxGTK-devel
then
make linux-alsa or make linux-jack
the miniAudicle executable file will be in wxw directory, which you may copy to /usr/bin
Compiling ChucK & miniAudicle on Ubuntu 9.10
Get the following packages from Syntaptic package manager;
- build-essential
- bison
- flex
- libsndfile-dev
- libasound-dev (if you're compiling for ALSA)
- libjack-dev (if you're compiling for JACK)
For miniAudicle, you'll also need
To compile ChucK; From the source code's src folder, use
make linux-alsa
if you need alsa or
make linux-jack
if you need a jack version.
to install;
sudo make install
or manually copy to /usr/bin
To compile miniAudicle From the source code folder, use;
make linux-alsa
or
make linux-jack
The resulting executable will be miniAudicle in the wxw folder. It may be moved to /usr/bin for running it from anywhere easily. Instructions for building on Linux adapted from a forum post by Kijjaz.
Hello ChucK
This tutorial was written for the command line version of ChucK (currently the most stable and widely supported). Other ways of running ChucK include using the miniAudicle (download and documentation) and the Audicle (in pre-pre-alpha). The ChucK code is the same, but the way to run them differs, depending the ChucK system.
The first thing we are going to do is do generate a sine wave and send it to the speaker so we can hear it. We can do this easily in ChucK by connecting audio processing modules (unit generators) and having them work together to compute the sound.
We start with a blank ChucK program and add the following line of code:
// connect sine oscillator to D/A convertor (sound card)
SinOsc s => dac;
NOTE: by default, a ChucK program starts executing from the first instruction in the top-level (global) scope.
The above does several things:
- It creates a new unit generator of type `SinOsc' (sine oscillator), and stores its reference in variable `s'.
- `dac' (D/A convertor) is a special unit generator (created by the system) which is our abstraction for the underlying audio interface.
- We are using the ChucK operator () to ChucK `s' to `dac'. In ChucK, when one unit generator is ChucKed to another, we connect them. We can think of this line as setting up a data flow from `s', a signal generator, to `dac', the sound card/speaker. Collectively, we will call this a `patch'.
The above is a valid ChucK program, but all it does so far is make the connection -- if we ran this program, it would exit immediately. In order for this to do what we want, we need to take care of one more very important thing: time. Unlike many other languages, we don't have to explicitly say "play" to hear the result. In ChucK, we simply have to "allow time to pass" for data to be computed. As we will see, time and audio data are both inextricably related in ChucK (as in reality), and separated in the way they are manipulated. But for now, let's generate our sine wave and hear it by adding one more line:
// connect sine oscillator to D/A convertor (sound card)
SinOsc s => dac;
// allow 2 seconds to pass
2::second => now;
Let's now run this (assuming you saved the file as `foo.ck'):
chuck foo.ck
This would cause the sound to play for 2 seconds (the :: operator simply multiplies the arguments), during which time audio data is processed (and heard), after which the program exits (since it has reached the end). For now, we can just take the second line of code to mean ``let time pass for 2 seconds (and let audio compute during that time)''. If you want to play it indefinitely, we could write a loop:
// connect sine oscillator to D/A convertor (sound card) SinOsc s => dac;
// loop in time
while( true ){
  2::second => now;
}
In ChucK, this is called a `time-loop' (in fact this particular one is an `infinite time loop'). This program executes (and generate/process audio) indefinitely. Try running this program.
IMPORTANT: perhaps more important than how to run ChucK is how to stop ChucK. To stop a ongoing ChucK program from the command line, hit (ctrl c).
So far, since all we are doing is advancing time; it doesn't really matter (for now) what value we advance time by - (we used 2::second here, but we could have used any number of `ms', `second', `minute', `hour', `day', and even `week'), and the result would be the same. It is good to keep in mind from this example that almost everything in ChucK happens naturally from the timing.
Now, let's try changing the frequency randomly every 100ms:
// make our patch
SinOsc s => dac;
// time-loop, in which the Osc’s frequency is changed every 100 ms
while( true ) {
  100::ms => now;
  Std.rand2f(30.0, 1000.0) => s.freq;
}
This should sound like computer mainframes in old sci-fi movies. Two more things to note here. (1) We are advancing time inside the loop by 100::ms durations. (2) A random value between 30.0 and 1000.0 is generated and 'assigned' to the oscillator's frequency, every 100::ms.
Go ahead and run this (again replace foo.ck with your filename):
chuck foo.ck
Play with the parameters in the program. Change 100::ms to something else (like 50::ms or 500::ms, or 1::ms, or 1::samp(every sample)), or change 1000.0 to 5000.0.
Run and listen:
chuck foo.ck
Once things work, hold on to this file - we will use it again soon.
Concurrency in ChucK:
Now let's write another (slightly longer) program:
// impulse to filter to dac
Impulse i => BiQuad f => dac;
// set the filter’s pole radius
.99 => f.prad;
// set equal gain zero’s
1 => f.eqzs;
// initialize float variable
0.0 => float v;
// infinite time-loop
while( true ) {
  // set the current sample/impulse
  1.0 => i.next;
  // sweep the filter resonant frequency
  Std.fabs(Math.sin(v)) * 4000.0 => f.pfreq;
  // increment v
  v + .1 => v;
  // advance time
  100::ms => now;
}
Name this moe.ck, and run it:
%>chuck moe.ck
Now, make two copies of moe.ck - larry.ck and curly.ck. Make the following modifications:
- Change larry.ck to advance time by 99::ms (instead of 100::ms)
- Change curly.ck to advance time by 101::ms (instead of 100::ms)
- Optionally, change the 4000.0 to something else (like 400.0 for curly)
Run all three in parallel:
%>chuck moe.ck larry.ck curly.ck
What you hear (if all goes well) should be 'phasing' between moe, larry, and curly, with curly emitting the lower-frequency pulses.
ChucK supports sample-synchronous concurrency via the ChucK timing mechanism. Given any number of source files that uses the timing mechanism above, the ChucK VM can use the timing information to automatically synchronize all of them. Furthermore, the concurrency is 'sample-synchronous', meaning that inter-process audio timing is guaranteed to be precise to the sample. The audio samples generated by our three stooges in this examples are completely synchronized. Note that each process do not need to know about each other - it only has to deal with time locally. The VM will make sure things happen correctly and globally.
Conventions
ChucK is supported under many different operating systems. While ChucK code is intended to be truly ”platform-independent”, each different OS has their own “features” that make the experience of working with ChucK slightly different. This chapter will outline some of these differences. ChucK is used as a terminal application in this tutorial, so you will need to know how to access and navigate in the terminal.
Here are some hints about getting started with the terminal on your operating system.
OS X
The terminal is located in the Utilities/ folder in the Applications/ folder of your hard drive. Double click on Terminal. You can click and hold on the icon in the Dock and select the “Keep in Dock” option. Now the Terminal application will be conveniently located in the Dock.
http://www.macdevcenter.com/pub/ct/51
http://www.atomiclearning.com/macosxterminalx.shtml
Windows
The terminal is accessed by clicking on the Start Menu and then clicking on run. In the window that opens type cmd.
http://www.c3scripts.com/tutorials/msdos/
http://www.ss64.com/nt/
Linux
No hints needed here.
On-the-fly programming
by Adam Tindale
Navigate to the examples folder in the ChucK distribution then run the following command:
%>chuck moe.ck
In this case, ChucK will run whatever is in moe.ck. You can replace moe.ck with the name of
another ChucK file. If this script is a just a loop that never ends then we need to stop ChucK
eventually. Simply press CTRL-C (hold control and press c). This is the ”kill process” hotkey in
the terminal.
Some first things to try is to test the concurrency (running multiple ChucK files in parallel) are
moe, larry, and curly. First, run them each individually ( run chuck on moe.ck, larry.ck, or
curly.ck as shown above). Then, run them all in parallel, like this:
%>chuck moe.ck larry.ck curly.ck
They are written to go in and out of phase with each other. Again, if any of these scripts will go
on forever then you have to use CTRL-C to halt ChucK. Give it a try.
Also try the improved versions of our little friends: larry++.ck curly++.ck moe++.ck
Two Window ChucK
Now lets roll up our sleeves a little bit and see some real ChucK power! We are going to run two window ChucK, and on-the-fly! This section will walk you through a ChucK session.

Here is what you do: open another terminal window just like this one. In this new window type:
%>chuck --loop
This will start ChucK running. ChucK is now waiting for something to do. Go back to your original window where you are in your ChucK home. Be careful. If you type chuck test1.ck you will start a second ChucK running test1.ck. What we want to do is add a script to the ChucK that we set running in our second window. We will use the + operator to add a script to our ChucK and the - operator to remove a script.
%>chuck + test1.ck
%>chuck - 1
%>chuck test.ck
%>chuck test.ck
%>chuck test.ck
What happened? That is the power of on-the-fly programming. We added test1.ck. It was added as the first shred in our ChucK. Since we knew it was shred 1 we removed it by typing chuck - 1. Great. Next we added three copies of the same script! Isn’t that cool? You can also do this chuck + test1.ck test1.ck test1.ck How do you keep track of shreds?
You can ask ChucK how he is doing by typing chuck --status The shortcut is chuck ˆ ChucK will answer in the other window where we left him running. He will tell you what shreds there are and what their id numbers are. He will also tell you how long he has been running.
When you have had enough of ChucK you can go to the other window and use your fancy CTRL-C trick or you can type chuck - -kill in your original window.
%>chuck --kill
One Window ChucK
So you think you're pretty good? One window ChucK is only for the hardest of hardcore.1 You have been warned.
The concept is pretty similar to two window ChucK: first, you start a ChucK going, then you manage the adding and removal of scripts to it. How do you start a ChucK and get the command prompt to return, you ask? In your shell you can add an ampersand (&) after the command and that will tell the shell to run the command as a background process and give you the prompt back.
%>chuck --loop &
The rest is as it should be. You will have to be careful when writing your patches to not put too many print statements. When you print you will temporarily lose control of the prompt as the shell prints. This can be bad when are you are printing MIDI input. The same applies when you use the --status command to ChucK. It can also be fun to fight for your command line. Who will win?
Note that the "&" sytax is part of UNIX terminals like BASH, as found on Linux and OSX, and not a part of the MS Windows prompt.
Modifying Basic Patches
by Adam Tindale
We have a basic patch running in ChucK but it still doesn’t sound very good. In this chapter we will cover some simple ways to rectify that problem. ChucK allows one to quickly make modifications to patches that can drastically change the sound.
First what we can do is change the type of our oscillator. There are many different oscillators available to use: SinOsc (sine wave), SawOsc (sawtooth), SqrOsc (square wave) and PulseOsc (pulse wave). We can simply change the type of oscillator just like below.
SawOsc s => dac;
Try changing the oscillator to all of the different types and a get a feel for how they sound. When changing the different Ugens always be sure to check the rest of your patches so that the parameter calls are valid. If you were to use the .width method of PulseOsc and others on a SinOsc ChucK will complain. You can comment out lines that are temporarily broken by using double slashes (//).
Now let’s add some effects to our patch. ChucK has many different standard effects that can be added to Ugen chains. The simplest effect we can add is an amplifier. In ChucK, this object is Gain.
SawOsc s => Gain g => dac;
Now we can change the parameters of our effect. Gain has a parameter .gain that can be used to change the gain of signals passing through the object. Let’s go about changing the gain.
.5 => g.gain;
This is redundant. All Ugens have the ability to change their gain in a similar manner. (See the UGEN section in Reference for more information about UGEN parameters.)
.5 => s.gain;
However, this is useful when we have multiple Ugens connect to one place. If we were to connect 2 oscillators to the dac then we will get distortion. By default, these oscillators oscillate between -1 and 1. When they are connected to the same input they are added, so now they go between -2 and 2. This will clip our output. What to do? Gain to the rescue!
SinOsc s1 => Gain g => dac;
SinOsc s2 => g;
.5 => g.gain;
Now our oscillators are scaled between -1 and 1 and everything is right in the world.
More effects were promised, now you will see some in action. Again, one of the wonders of ChucK is how easy it is to change Ugens. We can take the above patch and change ‘Gain’ for ‘PRCRev’.
SinOsc s1 => PRCRev g => dac;
SinOsc s2 => g;
.5 => g.gain;
The Gain Ugen has been replaced by a reverb and the output is scaled by using the ‘.gain’ parameter that all Ugens posess. Now we can add a few spices to the recipe. ‘PRCRev’ has a ‘.mix’ parameter that can be changed between 0. and 1. If we wanted to have this parameter set to the same value as what we are ChucKing to g.gain we can chain it along. After assignment a Ugen will return the value that was ChucKed to it. We can use this method to propogate paramters to our oscillators.
.5 => g.gain => g.mix;
500 => s1.freq => s2.freq;
Another technique for setting parameters is to read a parameter, then modify it and then ChucK it back to itself. Accessing parameters requires the addition of brackets () after the name of the parameter. Here is an example of doubling the frequency of an oscillator.
s1.freq() * 2 => s1.freq;
Let’s change the type of oscillators for some more fun. We can simply replace ‘SinOsc’ with any other type of oscillator. Check the Ugen section in the reference for ideas. Try changing the frequency of the oscillators and the mix parameter of the reverb for each type of oscillator you try. Endless fun!
LFOs and Blackholes
by Adam Tindale
A common technique to add variation to synthesis is modulation. Modulation is the process of changing something, usually the parameter of a signal like frequency. A Low Frequency Oscillator (LFO) is typically used for this task because the variations are fast enough to be interesting, yet slow enough to be perceptible. When a signal is modulated quickly (ie. over 20Hz or so) it tends to alter the timbre of the signal rather than add variation.
Ok, let’s use this idea. What we need to do is set up two oscillators and have one modulate a parameter of another. ChucK does not support the connection of Ugen signal outputs to parameter inputs. This piece of code will not work:
SinOsc s => dac;
SinOsc lfo => s.freq;
Foiled. What we need to do is poll our lfo at some rate that we decide on, for now we will update the frequency of s every 20 milliseconds. Remember that a SinOsc oscillates between -1 and 1, so if we just put that directly to the frequency of s we wouldn’t be able to hear it (unless you are using ChucK in a tricked out civic). What we are going to do is multiply the output of the lfo by 10 and add it to the frequency 440. The frequency will now oscillate between 430 and 450.
SinOsc s => dac;
SinOsc lfo;
// set the frequency of the lfo
5 => lfo.freq;
while (20::ms => now)
{
     ( lfo.last() * 10 ) + 440 => s.freq;
}
ChucK is a smart little devil. This didn’t work and now we will look into the reason. Why? Ugens are connected in a network and usually passed to the dac. When a patch is compiled ChucK looks at what is connected to the dac and as each sample is computed ChucK looks through the network of Ugens and grabs the next sample. In this case, we don’t want our Ugen connected to the dac, yet we want ChucK to grab samples from it. Enter blackhole: the sample sucker. If we connect our lfo to blackhole everything will work out just fine.
SinOsc lfo => blackhole;
Play around with this patch in its current form and find interesting values for the poll rate, lfo frequency and the lfo amount. Try changing the Ugens around for more interesting sounds as well.
Working with MIDI
by Adam Tindale
Adding a MIDI controller is a great way to add variety to your ChucK patches. Conversely, ChucK offers a simple and powerful way to utilize a MIDI controller for making music.
The first thing to do when working with MIDI is to make sure that ChucK sees all of your devices. You can do this by using the --probe start flag. Like this:
%>chuck --probe
ChucK will display a list of the connected audio and MIDI devices and their reference ID. We will assume that your controller is found to have and ID of 0. First, we must open a connection between ChucK and the port. We can accomplish this by creating a MidiIn object and then connecting it to a port.
//create object
MidiIn min;

//connect to port 0
min.open(0);
If you want to send MIDI out of ChucK you use the MidiOut object and then open a port.
//create object
MidiOut mout;

//connect to port 0
mout.open(0);
When opening ports it is suggested that you check whether the .open function returns properly. In some situations it doesn’t make any sense for the shred to live on if there is no MIDI data available to be sent along. You can check the return value of the .open function and then exit the shred using the me keyword with the exit() function.
MidiIn min;
min.open( 0 ) => int AmIOpen;

if( !AmIOpen ) { me.exit(); }
We can do this in fewer lines of code. We can put the min.open(0) in the condition of the if statement. This way min.open will return true or false (which is represented as ints with a value of 1 or 0). The ! will give the opposite return value of min.open. Now the statement will mean if min.open doesn’t return true then exit. Yeah?
if( !min.open(0) ) { me.exit(); }
Getting MIDI
In order to receive any of the juicy data you are piping into ChucK we need to ceate a MidiMsg ob ject. This ob ject is used to hold data that can be input into ChucK or output to a MIDI port. Unless you are high skilled at managing the state of these messages (or you enjoy the headache you get from debugging) it is recommended that you create a minimum of one MidiMsg for each port you are using.
What we need to do is get the data from the MidiIn ob ject into a message that we can use inside of ChucK. The MidiMsg ob ject is just a container with three slots: data1, data2 and data3. We fill these slots up by putting our message in the .recv( MidiMsg ) function of a MidiIn object. MidiIn keeps its messages in a queue so that you can poll it for messages and it will keep giving messages until it is empty. The .recv( MidiMsg ) function returns true and false so we can put it in a while loop and it will continue to run through the loop until there are no more messages left.
// check for messages every 10 milliseconds
while(10::ms => now){
  while( min.recv(msg) ){
    <<<msg.data1,msg.data2,msg.data3,"MIDI Message">>>;
  }
}
The Event system makes life a little easier and also makes sure that MIDI input is dealt with as soon as ChucK receives it. All that has to be done is to ChucK the MidiIn object to now and it will wait until a message is received to go further in the program.
while(true){
  // Use the MIDI Event from MidiIn
  min => now;
  while( min.recv(msg) ){
    <<<msg.data1,msg.data2,msg.data3,"MIDI Message">>>;
  }
}
Midi Output
If you have a synthesizer that you want to trigger from ChucK you can send MIDI messages to it simply. All you have to do is have a MidiMsg that will serve as the container for your data and then you will hand it to MidiOut using the .send( MidiMsg ) function.
MidiOut mout;
MidiMsg msg;
// check if port is open
if( !mout.open( 0 ) ) me.exit();

// fill the message with data
144 => msg.data1;
52 => msg.data2;
100 => msg.data3;
// bugs after this point can be sent
// to the manufacturer of your synth
mout.send( msg );
Writing to Disk
by Adam Tindale and Ge Wang
Recording your ChucK session to file is easy!
Say you want to record the output of the following:
%>chuck foo.ck bar.ck
All you have to do is ChucK a shred that writes to file:
%>chuck foo.ck bar.ck rec.ck
No changes to existing files are necessary. An example rec.ck can be found in examples/basic/, this guy/gal writes to “foo.wav”. Edit the file to change the output file. If you don’t want to worry about overwriting the same file everytime, you can substitute rec.ck for rec-auto.ck:
%>chuck foo.ck bar.ck rec-auto.ck
rec-auto.ck will generate a file name using the current time. You can change the prefix of the filename by modifying
"data/session" => w.autoPrefix;
w is the WvOut in the patch.
Oh yeah, you can of course chuck rec.ck on-the-fly.
From terminal 1
%>chuck --loop
From terminal 2
%>⁞chuck + rec.ck
Silent Mode
You can write directly to disk without having real-time audio by starting your programs using the --silent or -s flag.
%>chuck foo.ck bar.ck rec2.ck -s
This will not synchronize to the audio card, and will generate samples as fast as it can.
Start and Stop
You can start and stop the writing to file by:
1 => w.record; // start
0 => w.record; // stop
As with all things ChucKian, this can be done sample-synchronously.
Another halting problem
What if I have infinite time loop, and want to terminate the VM, will my file be written out correctly? the answer: Ctrl-C works just fine.
ChucK STK module keeps track of open file handles and closes them even upon abnormal termination, like Ctrl-C. Actually for many, Ctrl-C is the natural way to end your ChucK session. At any rate, this is quite ghetto, but it works. As for seg-faults and other catastrophic events, like computer catching on fire from ChucK exploding, the file probably is toast.
hmmmm, toast...
The Silent Sample Sucker Strikes Again
As in rec.ck, one patch to write to file is:
dac => Gain g => WvOut w => blackhole;
The WvOut writes to file, and also pass through the incoming samples.
Stereo
by Adam Tindale
Accessing the stereo capabilities of ChucK is relatively simple. dac has three access points.
UGen u;
// standard mono connection
u => dac;
// access stereo halves
u => dac.left;
u => dac.right;
adc functionality mirrors dac.
// this reverses the stereo image of adc
adc.right => dac.left;
adc.left => dac.right;
If you have your great UGen network going and you want to throw it somewhere in the stereo field you can use Pan2. You can use the .pan function to move your sound between left (-1) and right (1).
// this is a stereo connection to the dac
SinOsc s => Pan2 p => dac;
1 => p.pan;
while(1::second => now){
  // this will flip the pan from left to right
  p.pan() * -1. => p.pan;
}
You can also mix down your stereo signal to a mono signal using the Mix2 object.
adc => Mix2 m => dac.left;
If you remove the Mix2 in the chain and replace it with a Gain object it will act the same way. When you connect a stereo object to a mono object it will sum the inputs. You will get the same effect as if you connect two mono signals to the input of another mono signal.
Multi Channel Audio
Individual audio inputs and outputs on available hardware can be addressed using .chan(x).
Audio inputs and outputs are number from 0.
//ChucK Audio input 0 to output 4
adc.chan(0) => dac.chan(4);
Using OSC in ChucK
by Rebecca Fiebrink
To send OSC
Host Decide on a host to send the messages to. E.g., ”splash.local” if sending to computer named ”Splash,” or ”localhost” to send to the same machine that is sending.
Port Decide on a port to which the messages will be sent. This is an integer, like 1234.
Message ”address” For each type of message you’re sending, decide on a way to identify this type of message, formatted like a web URL e.g., ”conductor/downbeat/beat1” or ”Rebecca/message1”
Message contents Decide on whether the message will contain data, which can be 0 or more ints, floats, strings, or any combination of them.
To set up a OSC sender in ChucK you'll need code like the following:
//Create an OscSend object:
OscSend xmit;
//Set the host and port of this object:
xmit.setHost("localhost", 1234);
For every message you want to send, start the message by supplying the address and format of contents, where ”f” stands for float, ”i” stands for int, and ”s” stands for string:
//To send a message with no contents:
xmit.startMsg("conductor/downbeat");
//To send a message with one integer:
xmit.startMsg("conductor/downbeat, i");
//To send a message with a float, an int, and another float:
xmit.startMsg("conductor/downbeat, f, i, f");
For every piece of information in the contents of each message, add this information to the message:
//to add an int:
xmit.addInt(10);
//to add a float:
xmit.addFloat(10.);
//to add a string:
xmit.addString("abc");
Once all parts of the message have been added, the message will automatically be sent.
To receive OSC
Decide what port to listen on. This must be the same as the port number of the sender(s) you want to listener to receive messages from. Message address and format of contents: This must also be the same as what the sender is using; i.e., the same as in the sender’s startMsg function.
The following code shows how to setting up an OSC receiver with ChucK.
//Create an OscRecv object:
OscRecv orec;
//Tell the OscRecv object the port:
1234 => orec.port;
//Tell the OscRecv object to start listening for OSC messages on that port:
orec.listen();
For each type of message, create an event that will be used to wait on that type of message, using the same argument as the sender’s startMsg function:
orec.event("conductor/downbeat, i") @=> OscEvent myDownbeat;
To wait on an OSC message that matches the message type used for a particular event e, do
e => now;
This is just like waiting for regular Events in ChucK.
To process the message first it's necessary to grab the message out of the queue. In our example this can be achieved using e.nextMsg(). After we called this, we can use other methods on e to get the information we're interested in out of the message. We must call these functions in order, according to the formatting string we set up above.
e.getInt() => int i;
e.getFloat() => float f;
e.getString() => string s;
If you expect you may receive more than one message for an event at once, you should process every message waiting in the cue:
while (e.nextMsg() != 0) {
  //process message here (no need to call nextMsg again
}
Overview
ChucK is a strongly-typed, strongly-timed, concurrent audio and multimedia programming language. It is compiled into virtual instructions, which is immediately run in the ChucK Virtual Machine. This guide documents the features of the Language, Compiler, and Virtual Machine for a ChucK programmer.
Running ChucK
Some quick notes:
- You can install ChucK (see build instructions) or run it from a local directory.
- ChucK is a command line application called chuck. (also see the Audicle and the miniAudicle)
- Use the command line prompt/terminal to run ChucK: (e.g. Terminal or xterm on OS X, cmd or cygwin on Windows, on Linux, you surely have your preferred terminal.)
See VM options for a more complete guide to command line options.
To run ChucK with a program/patch called foo.ck simply run chuck and then the name of the file:
%>chuck foo.ck
To run ChucK with multiple patches concurrently (or the same one multiple times):
%>chuck foo.ck bar.ck bar.ck boo.ck
There are several flags you can specify to control how ChucK operates, or to find out about the system. For example,the following probes the audio system and prints out all available audio devices and MIDI devices. You may then refer to them (by number usually) from the command line or from your program (again, see VM Options for a complete list).
%>chuck --probe
ChucK can be run in a different terminal as a host/listener that patches may be sent to. The server should invoke the --loop flag to specify that the virtual machine should not halt automatically (when the current programs exit).
%>chuck --loop
(See the guide to On-the-fly Programming for more information)
If a ChucK listener is running, we can (from a second terminal) send a program/patch to to the listener by using the + command line option:
%>chuck + foo.ck
Similarly, you can use - and = to remove/replace a patch in the listener, and use ˆ to find out the status. Again, see On-the-fly Programming for more information.
To run most of the code or examples in this language specification, you only need to use the basic chuck program.
Comments
Comments are sections of code that are ignored by a compiler. These help other programmers (and yourself ) interpret and document your code. Double slashes indicate to the compiler to skip the rest of the line.
// this is a comment
int foo; // another comment
Block comments are used to write comments that last more than one line, or less than an entire line. A slash followed by an asterisk starts a block comment. The block comment continues until the next asterisk followed by a slash.
/* this
is a
block
comment */
int /* another block comment */ foo;
Comments can also be used to temporarily disable sections of your program, without deleting it entirely. ChucK code that is commented-out will be ignored by the compiler, but can easily be brought back if you change your mind later. In the following example, the PRCRev UGen will be ignored, but we could easily re-insert it by deleting the block comment delimiters.
SinOsc s => /* PRCRev r => */ dac;
Debug Print
ChucK currently lacks a comprehensive system for writing to files or printing to the console. In its place we have provided a debug print syntax:
// prints out value of expression
<<< expression >>>;
This will print the values and types of any expressions placed within them. This debug print construction may be placed around any non-declaration expression ( non l-value ) and will not affect the execution of the code. Expressions which represent an object will print the value of that object’s reference address:
// assign 5 to a newly declared variable
5 => int i;

// prints "5 : (int)"
<<<i>>>;

// prints "hello! : (string)"
<<<"hello!">>>; //prints "hello! : (string)"

// prints "3.5 : (float)"
<<<1.0 + 2.5 >>>=> float x;
For more formatted data output, a comma-separated list of expressions will print only their respective values (with one space between):
// prints "the value of x is 3.5" (x from above)
<<<"the value of x is" , x >>>;

// prints "4 + 5 is 9"
<<<"4 + 5 is", 4 + 5>>>;

// prints "here are 3 random numbers ? ? ?"
<<<"here are 3 random numbers",
Std.rand2(0,9),
Std.rand2(0,9),
Std.rand2(0,9) >>>;
Reserved Words
Primitive types
- int
- float
- time
- dur
- void
- same (unimplemented)
Control structures
- if
- else
- while
- until
- for
- repeat
- break
- continue
- return
- switch (unimplemented)
Class keywords
- class
- extends
- public
- static
- pure
- this
- super (unimplemented)
- interface (unimplemented)
- implements (unimplemented)
- protected (unimplemented)
- private (unimplemented)
Other ChucK keywords
- function
- fun
- spork
- const
- new
Special values
- now
- true
- false
- maybe
- null
- NULL
- me
- pi
Special : Default durations
- samp
- ms
- second
- minute
- hour
- day
- week
Special : Global UGens
Operators
- +
- -
- *
- /
- %
- =>
- =<
- !=>
- ||
- &&
- ==
- ∧
- &
- |
- ˜
- ::
- ++
- – –
- >
- >=
- <
- <=
- @=>
- +=>
- -=>
- *=>
- /=>
- %=>
The ChucK Compiler and Virtual Machine
Let’s start with the compiler/virtual machine, both of which runs in the same process. By now, you should have built/installed ChucK (guide), and perhaps taken the tutorial. This guide is intended to be more complete and referential than the tutorial.
Synposis (a man-esque page)
Usage:
chuck -- [ options|commands ] [ +-=ˆ] file1 file2 file3 ...
     [ options ] =halt|loop|audio|silent|dump|nodump|about|
          srate<N>|bufsize<N>|bufnum<N>|dac<N>|adc<N>|
          remote<hostname>|port<N>|verbose<N>|
          probe|remote<hostname>|port<N>
     [ commands ] =add|remove|replace|status|time|kill
     [ +-=ˆ] = shortcuts for add, remove, replace, status
Description
ChucK can run 1 or more processes in parallel and interactively. The programmer only needs to specify them all on the command line, and they will be compiled and run in the VM. Each input source file (.ck suffix by convention) will be run as a separate ’shred’ (user-level ChucK threads) in the VM. They can ’spork’ additional shreds and interact with existing shreds. Thanks to the ChucK timing mechanism, shreds don’t necessarily need to know about each other in order to be precisely ’shreduled’ in time - they only need to keep track of their own time, so to speak.
Additionally, more shreds can be added/removed/replaced manually at run-time, using on-the-fly programming [ Wang and Cook 2004 ] - (see publications and http://on-the-fly.cs.princeton.edu/).
[ options ] :
--halt / -h
(on by default) - tells the vm to halt and exit if there are no more shreds in the VM.
--loop / -l
Tells the ChucK VM to continue executing even if there no shreds currently in the VM. This is useful because shreds can be added later on-the-fly. Furthermore, it is legal to specify this option without any input files. For example:
%>chuck --loop
The above will ’infinite time-loop’ the VM, waiting for incoming shreds.
--audio / -a
(on by default) - enable real-time audio output.
--silent / -s
Disable real-time audio output - computations in the VM is not changed, except that the actual timing is no longer clocked by the real-time audio engine. Timing manipulations (such as operations on ’now’) still function fully. This is useful for synthesizing audio to disk or network. Also, it is handy for running a non-audio program.
--dump / +d
dump the virtual instructions emitted to stderr, for all the files after this flag on the command line, until a ’nodump’ is encountered (see below). For example:
%>chuck foo.ck +d bar.ck
Will dump the virtual ChucK instructions for bar.ck (only), with argument values, to stderr. --dump can be used in conjunction with --nodump to selectively dump files.
--nodump / -d
(default state) cease the dumping of virtual instructions for files that comes after this flag on the command line, until a ’dump’ is encountered (see above). For example:
%>chuck +d foo.ck -d bar.ck +d doo.ck
Will dump foo.ck, then doo.ck - but not bar.ck.
These are useful to debug ChucK itself, and for other entertainment purposes.
--srate(N)
Set the internal sample rate to (N) Hz. by default, ChucK runs at 44100Hz on OS X and Windows, and 48000Hz on linux/ALSA. even if the VM is running in --silent mode, the sample rate is still used by some unit generaters to compute audio, this is important for computing samples and writing to file. Not all sample rates are supported by all devices!
--bufsize(N)
set the internal audio buffer size to (N) sample frames. larger buffer size often reduce audio artifacts due to system/program timing. smaller buffers reduce audio latency. The default is 512. If (N) is not a power of 2, the next power of 2 larger than (N) is used. For example:
%>chuck --bufsize950
sets the buffer size to 1024.
--dac(N)
Opens audio output device #(N) for real-time audio. by default, (N) is 0.
--adc(N)
Opens audio input device #(N) for real-time audio input. by default, (N) is 0.
--chan(N) / -c(N)
Opens N number of input and output channels on the audio device. by default, (N) is 2.
--in(N) / -i(N)
Opens N number of input channels on the audio device. by default (N) is 2.
--out(N) -o(N)
Opens N number of output channels on the audio device. by default (N) is 2.
--about / --help
Prints the usage message, with the ChucK URL
--callback
Utilizes a callback for buffering (default).
--blocking
Utilizes blocking for buffering.
On-the-fly Programming Commands
These are used for on-the-fly programming (see http://on-the-fly.cs.princeton.edu). By default, this requires that a ChucK virtual machine be already running on the localhost. It communicates via sockets to add/remove/replace shreds in the VM, and to query VM state. These flags may be combined but do note that some are opposites.
--loop
The simplest way to set up a ChucK virtual machine to accept these commands is by starting an empty VM with loop:
%>chuck --loop
This will start a VM, looping (and advancing time), waiting for incoming commands. Successive invocations of `chuck' with the appropriate commands will communicate with this listener VM. (for remote operations over TCP, see below)
--poop
%>chuck --poop
A possible typo when trying to call --loop. See page XX for a in-depth explanation on why this shouldn't be used.
--halt / -h
- Tells the vm to halt and exit if there are no more shreds in the VM (on by default), opposite of --loop .
%>chuck --halt
--add / +
Adds new shreds from source files to the listener VM. this process then exits. for example:
%>chuck + foo.ck bar.ck
Integrates foo.ck and bar.ck into the listener VM. the shreds are internally responsible for finding about the timing and other shreds via the timing mechanism and vm interface.
--remove / -
Removes existing shreds from the VM by ID. how to find out about the id? (see status below) for example:
%>chuck - 2 3 8
Removes shred 2, 3, 8.
--replace / =
Replace existing shred with a new shred. For example:
%>chuck = 2 foo.ck
Replaces shred 2 with foo.ck
--status / ^
Queries the status of the VM - output on the listener VM. For example:
%>chuck ^
This prints the internal shred start at the listener VM, something like:
[chuck](VM): status (now == 0h:2m:34s) ...
     [shred id]: 1 [source]: foo.ck [sporked]: 21.43s ago
     [shred id]: 2 [source]: bar.ck [sporked]: 28.37s ago
--time
Prints out the value of now on the listener VM. For example:
%>chuck --time
Something like:
[chuck](VM): the value of now: now = 403457 (samp)
     = 9.148685 (second)
     = 0.152478 (minute)
     = 0.002541 (hour)
     = 0.000106 (day)
     = 0.000015 (week)
--kill
Semi-gracefully kills the listener VM - removes all shreds first.
%>chuck --kill
--remote
Specifies where to send the on-the-fly command. must appear in the command line before any on-the-fly commands. for example:
%>chuck @192.168.1.1 + foo.ck bar.ck
(or)
%>chuck @foo.example.org -p8888 + foo.ck bar.ck
Sends foo.ck and bar.ck to VM at 192.168.1.1 or foo.example.org:8888
--audio / -a
- Enable real-time audio output(on by default).
%>chuck --audio
--silent / -s
Disable real-time audio output - computations in the VM is not changed, except that the actual timing is no longer clocked by the real-time audio engine. Timing manipulations (such as operations on 'now') still function fully. This is useful for synthesizing audio to disk or network. It is also handy for running a non-audio program. Note that combining this with --loop will take up 100% of your cpu doing nothing and is therefore not recommended.
%>chuck --silent
--srate(N)
Sets the internal sample rate to (N) Hz. by default, ChucK runs at 44100Hz on OS X and Windows, and 48000Hz on linux/ALSA. even if the VM is running in --silent mode, the sample rate is still used by some unit generaters (for example SubNoise) to compute audio, this is important for computing samples and writing to file. Not all sample rates are supported by all devices! Use --probe to consult your the options on your soundcard(s). It has been found that certain soundcards that allow for using any sample-rate in a given range (most notably some RME models) will appear to give responses to --probe calls that do not reflect the full range of what can be set buy --srate. Also note that when combined with --silent you can set rates that couldn't be played back by your device, for example for the purpose of over-sampling when intending to downsample the resultant files in other programs later.
%>chuck --srate22050
--bufsize(N)
Sets the internal audio buffer size to (N) sample frames. Larger buffer size often reduce audio artefacts due to system/program timing. Smaller buffers reduce audio latency. The default is 512. If (N) is not a power of 2, the next power of 2 larger than (N) is used. For example:
%> chuck --bufsize950
sets the buffer size to 1024.
--dac(N)
opens audio output device #(N) for real-time audio. by default, (N) is 0. This should correspond to your system's default sound-device in most cases.
%> chuck --dac0
--adc(N)
Opens audio input device #(N) for real-time audio input. by default, (N) is 0. This should correspond to your system's default sound-device in most cases.
%> chuck --adc0
--chan(N) / -c(N)
Opens (N) number of input and output channels on the audio device. by default, (N) is 2 (or stereo).
%> chuck --chan6
--in(N) / -i(N)
Opens (N) number of input channels on the audio device. by default (N) is 2 (or stereo).
%> chuck --in4
--out(N) / -o(N)
Opens (N) number of output channels on the audio device. by default (N) is 2 (or stereo).
%> chuck --out6
--hostname(host) / -h(host)
Sets the hostname to connect to if accompanied by the on-the-fly programming commands. (host) can be name or ip of the host. default is 127.0.0.1 (localhost).
%> chuck --hostname192.168.0.30
--port(N) / -p(N)
Sets the port to listen on if not used with on-the-fly programming commands. sets the port to connect to if used with on-the-fly programming commands.
%> chuck --port418
--verbose(N) / -v(N)
Sets the report level to (N). 0 is none, 10 is all, default is 1.
%> chuck --verbose4
--probe
Probes the system for all audio devices and MIDI devices, and prints them. Extremely useful for detecting audio and MIDI devices and seeing what values other flags can or should be set to.
%> chuck --probe
--about / --help
Prints the usage message, with the ChucK URL.
%> chuck --about
--version
Prints the version of ChucK installed. Useful for confirming your update worked correctly.
%> chuck --version
--callback
Utilizes a callback for buffering (default).
%> chuck --callback
--blocking
Utilizes blocking for buffering.
%> chuck --blocking
--deprecate
What the parser is to do at finding deprecated syntax/names in files. The argument should be one of ":stop", ":warn" or ":ignore", default is ":warn".
%> chuck --deprecate:stop
--shell
Opens a dialog with the -currently not fully implemented- shell. Note that this implies --loop as well in a way that supersedes --halt
%> chuck --shell
--empty
Opens a ChucK shell without a virtual machine
%> chuck --empty --shell
--standalone
Disable remote commands to this VM
%> chuck --standalone
--server
Enable remote commands to this VM. On by default and --loop implies this
%> chuck --server
--caution-to-the-wind
Enables Std.system(string), which has been disabled by default. Please note that setting this, combined with --server or it's equivalent, enables third parties to run arbitrary commands on your computer with your privileges. Consider using --standalone. Powertools can maim.
%> chuck --caution-to-the-wind
--abort.shred
Aborts the current shred, if there is one (if there is none the VM may be empty or may be calculating the UGen-graph). Similar to the "watchdog" popup-dialogs in the miniAudicle.
%> chuck --abort.shred
Types, Values, and Variables
ChucK is a strongly-typed language, meaning that types are resolved at compile-time. However, it is not quite statically-typed, because the compiler/type system is a part of the ChucK virtual machine, and is a runtime component. This type system helps to impose precision and clarity in the code, and naturally lends to organization of complex programs. At the same time, it is also dynamic in that changes to the type system can take place (in a well-defined manner) at runtime. This dynamic aspect forms the basis for on-the-fly programming.
This section deals with types, values, and the declaration and usage of variables. As in other strongly-typed programming languages, we can think of a type as associated behaviors of data. (For example, an ’int’ is a type that means integer, and adding two integer is defined to produce a third integer representing the sum.) Classes and objects allow us to extend the type system with our own custom types, but we won’t cover them in this section. We will focus mainly on primitive types here, and leave the discussion of more complex types for classes and objects.
Primitive Types
The primitive, or intrinsic types are those which are simple datatypes (they have no additional data attributes). Objects are not primitive types. Primitive types are passed by value. Primitive types cannot be extended. The primitive types in ChucK are:
- int : integer (signed)
- float : floating point number (in ChucK, a float is by default double-precision)
- time : ChucKian time
- dur : ChucKian duration
- complex: complex number ( a + i * b)
- polar: a pair of amplitude and phase
- void : (no type)
For a summary of operations on these types, see the Operations and Operators section.
All other types are derived from 'object', either as part of the ChucK standard library, or as a new class that you create. For specification, see the Classes and Objects section.
Values (literals)
Literal values are specified explicitly in code and are assigned a type by the compiler. The following are some examples of literal values:
int:
42
int (hexidecimal):
0xaf30
float:
1.323
dur:
5.5::second
In the above code, second is an existing duration variable. For more on durations, see the manip- ulating time section.
Variables
Variables are locations in memory that hold data. Variables have to be declared in ChucK before they are used. For example, to declare a variable of type int called foo:
// declare an ’int’ called ’foo’
int foo;
We can assign a value to an existing variable by using the ChucK operator (=> ). This is one of the most commonly used operators in ChucK, it’s the way to do work and take action! We will discuss this family of operators in operators and operations.
// assign value of 2 to ’foo’
2 => foo;
It is possible to combine the two statements into one:
// assign 2 to a new variable ’foo’ of type ’int’
2 => int foo;
To use a variable, just refer to it by name:
// debug-print the value of foo
<<< foo >>>;
To update the value of foo, for example:
// multiply ’foo’ by 10, assign back to ’foo’
foo * 10 => foo;
You can also do the above using a *=>(multi-chuck):
// multiply ’foo’ by 10, and then assign to ’foo’
10 *=> foo;
Here is an example of a duration:
// assign value of ’5 seconds’ to new variable bar
5::second => dur bar;
Once you have bar, you can inductively use it to construct new durations:
// 4 bar, a measure?
4::bar => dur measure;
Since time is central to programming ChucK, it is important to understand time, dur, the relation- ship and operations between them. There is more information in the manipulating time section.
Reference Types
Reference types are types which inherit from the object class. Some default reference types include:
- Object : base type that all classes inherit from (directly or indirectly)
- array : N-dimensional ordered set of data (of the same type)
- Event : fundamental, extendable, synchronization mechanism
- UGen : extendable unit generator base class
- string : string (of characters)
New classes can be created. All classes are reference types. We will leave the full discussion to the objects and classes section.
Complex Types
Two special primitive types are available to to represent complex data, such as the output of an FFT: complex and polar. A complex number of the form a + bi can be declared as
#(2,3) => complex cmp; //cmp is now 2 + 3i
where the #(...) syntax explicitly denotes a complex number in rectangular form. Similarly, explicit complex numbers can be manipulated directly:
#(5, -1.5) => complex cmp; // cmp is 5 - 1.5i
#(2,3) + #(5,6) + cmp => complex sum; // sum is now 12 + 7.5i
The (floating point) real and imaginary parts of a complex number can be accessed with the .re and .im components of a complex number:
#(2.0,3.5) => complex cmp;
cmp.re => float x; // x is 2.0
cmp.im => float y; //y is 3.5
The polar type offers an equivalent, alternative representation of complex numbers in terms of a magnitude and phase value. A polar representation of a complex number can be declared as
%(2, .5*pi) => polar pol; // pol is 2-V.5p
The magnitude and phase values can be accessed via .mag and .phase:
%(2, .5*pi) => polar pol;
pol.mag => float m; // m is 2
pol.phase => float p; //p is .5p
Polar and complex representations can be cast to each other and multiplied/ added/assigned/etc.:
%(2, .5*pi) => polar pol;
#(3, 4) => complex cmp;
pol $ complex + #(10, 3) + cmp => complex cmp2;
cmp $ polar + %(10, .25*pi) - pol => polar pol2;
Operators and Operations
Operations on data are achieved through operators. This sections defines how operators behave on various datatypes. You may have seen many of the operators in other programming languages (C/Java). Some others are native to ChucK. We start with the family of ChucK operators.
The ChucK operator (=> ) is a massively overloaded operator that, depending on the types involved, performs various actions. It denotes action, can be chained, and imposes and clarifies order (always goes from left to right). The ChucK operator is the means by which work is done in ChucK. Furthermore, the ChucK operator is not a single operator, but a family of operators.
=> (foundational ChucK operator)
We start with the standard, plain-vanilla ChucK operator (=> ). It is left-associative (all ChucK operators are), which allows us to specify any ordered flow of data/tasks/modules (such as unit generator connection) from left-to-right, as in written (English) text. What => does depends on the context. It always depends on the type of the entity on the left (the chucker) and the one on the right (the chuckee), and it sometimes also depends on the nature of the entity (such as whether it is a variable or not).
Some examples:
// a unit generator patch - the signal flow is apparent
// (in this case, => connects two unit generators)
SinOsc b => Gain g => BiQuad f => dac;

// add 4 to foo, chuck result to new ’int’ variable ’bar’
// (in this case, => assigns a value to a variable (int)
4 + foo => int bar;

// chuck values to a function == function call
// (same as Math.rand2f( 30, 1000))
( 30, 1000 ) => Math.rand2f;
There are many other well-defined uses of the ChucK operator, depending on the context.
@=> (explicit assignment ChucK operator)
In ChucK, there is no standard assignment operator (=), found in many other programming languages. Assignment is carried out using ChucK operators. In the previous examples, we have used => for assignment:
// assign 4 to variable foo
4 => int foo;

// assign 1.5 to variable bar
1.5 => float bar;

// assign duration of 100 millisecond to duh
100::ms => dur duh;

// assign the time "5 second from now" to later
5::second + now => time later;

// assign a value to a string
"Hello!" => string greeting;
The @=> explicit assignment ChucK operator behaves exactly the same for the above types (int, float, dur, time). However, the difference is that @=> can also be used for reference assignments of objects (see objects and classes) whereas => only does assignment on primitive types (int, float, dur, time, string). The behavior of => on objects is completely context-dependent.
// using @=> is same as => for primitive types
4 @=> int foo;

// assign 1.5 to variable bar
1.5 @=> float bar;

// (only @=> can perform reference assignment on objects)
// reference assign moe to larry
// (such that both moe and larry reference the same object)
Object moe @=> Object @ larry;

// array initialization
[ 1, 2 ] @=> int ar[];

// using new
new Object @=> moe;
While somewhat unusual thas has the advantage of there being no ambiguity between assignment (@=> or > ) and testing for equality (=). In fact the following is not a valid ChucK statement:
// not a valid ChucK statement!
int foo = 4;
+=> -=> *=> /=> etc. (arithmetic ChucK operators)
These operators are used with variables (using ’int’ and ’float’) to perform one operation with assignment.
// add 4 to foo and assign result to foo
foo + 4 => foo;

// add 4 to foo and assign result to foo
4 +=> foo;

// subtract 10 from foo and assign result to foo
// remember this is (foo-10), not (10-foo)
10 -=> foo;

// 2 times foo assign result to foo
2 *=> foo;

// divide 4 into foo and assign result to foo
// again remember this is (foo/4), not (4/foo)
4 /=> foo;
It is important to note the relationship between the value and variable when using -=>and /=>, since these operations are not commutative.
// mod foo by T and assign result to foo
T %=> foo;

// bitwise AND 0xff and bar and assign result to bar
0xff &=> bar;

// bitwise OR 0xff and bar and assign result to bar
0xff |=> bar;
That’s probably enough operator abuse for now.
+ - * / (arithmetic)
Can you add, subtract, multiply and divide? So can ChucK!
// divide (and assign)
16 / 4 => int four;

// multiply
2 * 2 => four;

// add
3 + 1 => four;

// subtract
93 - 89 => four;

//minus (negative) works as you'd expect it to
-4 +=> foo;
Casting
ChucK implicitly casts int values to float when float is expected, but not the other around. The latter could result in a loss of information and requires an explicit cast.
// adding float and int produces a float
9.1 + 2 => float result;

// however, going from float to int requires cast
4.8 $ int => int foo; // foo == 4

// this function expects two floats
Math.rand2f( 30.0, 1000.0 );

// this is ok because of implicit cast
Math.rand2f( 30, 1000 );
% (modulo)
The modulo operator % computes the remainder after division for the primitives int, float, dur and time.
// 7 mod 4 (should yield 3)
7 % 4 => int result;

// 7.3 mod 3.2 floating point mod (should yield .9)
7.3 % 3.2 => float resultf;

// duration mod
5::second % 2::second => dur foo;

// time/duration mod
now % 5::second => dur bar;
The latter (time/duration mod) is one of many ways to dynamically synchronize timing in shreds. the examples otf 01.ck through otf 07.ck (see under examples) make use of this to on-the-fly syn- chronize its various parts, no matter when each shred is added to the virtual machine:
// define period (agreed upon by several shreds)
.5::second => dur T;

// compute the remainder of the current period ...
// and advance time by that amount
T - (now % T) => now;

// when we reach this point, we are synchronized to T period boundary
// the rest of the code
// ...
This is one of many ways to compute and reason about time in ChucK. The appropriate solution(s) in each case depends on the intended functionality. Have fun!
&& || = <= > >= ! (logic)
Logical operators - these need two operands with the exception of "!". The result is an integer value of 0 or 1.
- && : and
- || : or
- == : equals
- != : does not equal
- > : greater than
- >= : greater than or equal to
- < : less than
- <= : less than or equal to
- ! : logical invert
// test some universal truths
if( 1 <= 4 && true )
<<<"hooray!">>>;

// logical invert
if( !true == false )
<<<"yes">>>;
These operate on integers with 0 evaluating to false and anything else to true. Note that the reserved keywords "true" and "false" themselves evaluate to the integers 1 and 0, respectively
>> << & | ˆ (bitwise)
These are used on int values at the bit level, often for bit masking.
- >> : shift bits right ( 8 >>1 = 4 )
- << : shift bits left ( 8 <<1 = 16 )
- & : bitwise AND
- | : bitwise OR
- ˆ : bitwise XOR
- ~ : bitwise invert
++ - - (inc / dec)
Integer values may be incremented or decremented by appending the ++ or -- operator respectively, to variable names.
4 => int foo;
foo++; // foo is now 5
foo--; // foo is 4 again
we can also prepend the operators to the variable. When appended the value is changed after it's returned, when prepended it's first adjusted, then returned. For example;
4 => int foo;
<<< foo++>>> //will print 4 as the change is made after the print
<<<++foo>>>; //willprint 6 as the second change is made before the second print
In case of doubt it's probably safer to make the change as a separate command, instead of as a part of a larger instruction.
@
The @ operator creates a named reference to a object of a given type without instantiating it. Later on a object isntance may be assigned to the reference (see below)
//let's create a reference to a gain
Gain @ mixer;
new
The "new" keyword instantiates a new, nameless, object of the provided type. It may then be assigned to a named reference, appended to a array or returned from a function.
// instantiate object and assign it to a reference
new Object @=> Object @ bar;

//function that returns a new object
fun Gain gainMaker()
{
  return new Gain;
}

//use this to create a Gain to assign a instance to the reference we create above
gainMaker() @=> mixer;
Time and Timing
ChucK is a strongly-timed language, meaning that time is fundamentally embedded in the lan- guage. ChucK allows the programmer to explicitly reason about time from the code. This gives extremely flexible and precise control over time and (therefore) sound synthesis.
In ChucK:
- Time and duration are native types in the language
- Keyword now holds the current logical time
- Time is advanced (and can only be advanced) by explicitly manipulating now
- You have flexible and precise control
Time and Duration
Time and duration are native types in ChucK. time represents an absolute point in time (from the beginning of ChucK time). dur represents a duration (with the same logical units as time).
// a duration of one second
1::second => dur foo;

// a point in time (duration of foo from now)
now + foo => time later;
Later in this section, we outline the various arithmetic operations to perform on time and duration.
Durations can be used to construct new durations, which then be used to inductively construct yet other durations. For example:
// .5 second is a quarter
.5::second => dur quarter;

// 4 quarters is whole
4::quarter => dur whole;
By default, ChucK provides these preset duration values:
- samp : duration of 1 sample in ChucK time
- ms : duration of 1 millisecond
- second : duration of 1 second
- minute : 1 minute
- hour : 1 hour
- day : 1 day
- week : 1 week
Use these to represent any duration.
// the duration of half a sample
.5::samp => dur foo;

// 20 weeks
20::week => dur waithere;

// use in combination
2::minute + 30::second => dur bar;

// same value as above
2.5::minute => dur bar;
Operations on Time and Duration (Arithmetic)
In ChucK, there are well-defined arithmetic operations on values of type time and dur.
Example 1 (time offset):
// time + dur yields time
now + 10::second => time later;
Example 2 (time subtraction):
// time - time yields dur
later - now => dur D;
example 3 (addition):
// dur + dur yields dur
10::second + 100::samp => dur foo;
Example 4 (subtraction):
// dur - dur yields dur
10::second - 100::samp => dur bar;
Example 5 (division):
// dur / dur yields float
10::second / 20::ms => float n;
Example 6 (time mod):
// time mod dur yields dur
now % 1::second => dur remainder;
Example 7 (synchronize to period):
// synchronize to period of .5 second
.5::second => dur T;
T - (now % T) => now;
Example 8 (comparison on time):
// compare time and time
if( t1 < t2 )
  // do something...
Example 9 (comparison on duration):
// compare dur and dur
if( 900::ms < 1::second )
  <<< "yay!" >>>;
The Keyword ‘now’
The keyword now is the key to reasoning about and controlling time in ChucK.
Some properties of now include:
- now is a special variable of type time
- now holds the current ChucK time (when read)
- Modifying now has the side effects of:
- advancing time (see below);
- suspending the current process (called shred) until the desired time is reached - allowing other shreds and audio synthesis to compute;
- The value of now only changes when it is explicitly modified.
For more detail see the Advancing Time section.
Example:
// compute value that represents "5 seconds from now"
now + 5::second => time later;

// while we are not at later yet...
while( now < later )
{
  // print out value of now
  <<< now >>>;

  // advance time by 1 second
  1::second => now;
}
Advancing Time
Advancing time allows other shreds (processes) to run and allows audio to be computed in a controlled manner. There are three ways of advancing time in ChucK:
- chucking (=> ) a duration to now: this will advance time by that duration.
- chucking (=> ) a time to now: this will advance time to that point. (note that the desired time must be later than the current time, or at least be equal to it.)
- chucking (=> ) an Event to now: time will advance until the event is triggered. (also see event)
Advancing Time by Duration
// advance time by 1 second
1::second => now;

// advance time by 100 millisecond
100::ms => now;

// advance time by 1 samp (every sample)
1::samp => now;

// advance time by less than 1 samp
.024::samp => now;
Advancing Time by Absolute Time
// figure out when
now + 4::hour => time later;

// advance time to later
later => now;
A time chucked to now will have ChucK wait until the appointed time. ChucK never misses an appointment (unless it crashes)! Again, the time chucked to now must be greater than or equal to now, otherwise an exception is thrown.
Advancing Time by Event
// wait on event
e => now;
See events for a more complete discussion of using events!
The advancement of time can occur at any point in the code.
// our patch: sine oscillator -> dac
SinOsc s => dac;

// infinite time loop
while( true )
{
  // randomly choose frequency from 30 to 1000
  Std.rand2f( 30, 1000 ) => s.freq;

  // advance time by 100 millisecond
  100::ms => now;
}
Furthermore, there are no restrictions (other than underlying floating point precision) on how much time is advanced. So it is possible to advance time by a microsecond, a samp, 2 hours, or 10 years. The system will behave accordingly and deterministically.
This mechanism allows time to be controlled at any desired rate, according to any programmable pattern. With respect to sound synthesis, it is possible to control any unit generator at literally any rate, even sub-sample rate.
The power of the timing mechanism is extended by the ability to write parallel code, which is discussed in concurrency and shreds.
Concurrency and Shreds
ChucK is able to run many processes concurrently (the process behave as though they were running in parallel). A ChucKian process is called a "shred". "Sporking" a shred means creating and adding a new process to the virtual machine. Shreds may be sporked from a variety of places, and may themselves spork new shreds.
Central to ChucK's timing and concurrency is the "shreduler", a part of the virtual machine that keeps track of what processes are intended (or "shreduled") to run at any geven time. It does so to a very high precision, much more accurate than the sample rate. This is not just because things need to happen at the right time; they also need to happen in the right order. In ChucK the order in which commands are executed is always deterministic; when several commands are shreduled to happen at the same time they will be dealt with in the order in which they were shreduled. Note that any given process/shred does not necessarily need to know about any other - it only has to deal with time locally. The virtual machine will make sure things happen correctly ”across the board”.
The simplest way to to run shreds concurrently is to specify them on the command line:
%>chuck foo.ck bar.ck boo.ck
The above command tells chuck to run foo.ck, bar.ck, and boo.ck concurrently. There are other ways to run shreds concurrently (see on-the-fly programming commands). Next, we show how to create new shreds from within ChucK programs.
Sporking Shreds (In Code)
To spork means to shredule a new shred.
To spork a shred, use the spork keyword/operator:
- Spork dynamically turns functions into processes that run parallel to the shred that sporked them
- This new shred is shreduled to execute immediately
- The parent shred continues to execute, until time is advanced (see manipulating time) or until the parent explicitly yields (see next section).
- In the current implementation, when a parent shred exits, all child shreds all exit (this behavior will be enhanced in the future.)
- Sporking a function returns a reference to the new shred, note that this operation does not return a function's return value, currently only functions of type void can be sporked - the ability to get back the return value at some later point in time will be provided in a future release.
// define function go()
fun void go()
{
  // insert code
}
// spork a new shred to start running from go()
spork ~ go();

// spork another, store reference to new shred in offspring
spork ~ go() => Shred @ offspring;
A slightly longer example:
// define function
fun void foo( string s )
{
  // infinite time loop
  while( true )
  {
    // print s
    <<< s >>>;

    // advance time
    500::ms => now;
  }
}

// spork shred, passing in "you" as argument to foo
spork ~ foo( "you" );

// advance time by 250 ms
250::ms => now;

// spork another shred
spork ~ foo( "me" );

// infinite time loop - to keep child shreds around
while( true )
  1::second => now;
also see the function section for more information on working with functions.
The ’me’ keyword
The me keyword (type Shred) refers the current shred.
Sometimes it is useful to suspend the current shred without advancing time, and give other shreds shreduled for the current time a chance to execute. me.yield() does exactly that. This is often useful immediately after sporking a new shred, when you would like for the new shred to have a chance to run but you do not want to advance time yet for yourself.
// spork shred
spork ~ go();

// suspend the current shred ...
// ... give other shreds (shreduled for ’now’) a chance to run
me.yield();
The me keyword is also useful to exit the current shred. For example if a MIDI device fails to open, you may exit the current shred.
// make a MidiIn object
MidiIn min;

// try to open device 0 (chuck --probe to list all device)
if( !min.open( 0 ) )
{
  // print error message
  <<< "can’t open MIDI device" >>>;

  // exit the current shred
  me.exit();
}
Finally it can be used to get the shred id:
// print out the shred id
<<< me.id(); >>>;
These functions are common to all shreds, but note that yield() can only be used from within the current shred.
using Machine.add()
Machine.add( string path ) takes the path to a chuck program, and sporks it. Unlike with the spork command, there is no parent-child relationship between the shred that calls the function and the new shred that is added. This is useful for dynamically running stored programs.
// spork "foo.ck"
Machine.add( "foo.ck" );
Presently, this returns the id of the new shred, not a reference to the shred. This will likely be changed in the future.
Similarly, you can remove shreds from the virtual machine.
// add
Machine.add( "foo.ck" ) => int id;

// remove shred with id
Machine.remove( id );

// add
Machine.add( "boo.ck" ) => id

// replace shred with "bar.ck"
Machine.replace( id, "bar.ck" );
Inter-Shred Communication
Shreds sporked in the same file can share the same global variables. They can use time and events to synchronize to each other (see Events). Shreds sporked from different files can share data (including events). For now, this is done through a public class with static data (see Classes). Static data is not completely implemented, We will fix this very soon!
Events
In addition to the built-in timing mechanisms for internal control, ChucK has an event class to allow exact synchronization across an arbitrary number of shreds.
What they are
ChucK events are a native class within the ChucK language. We can create an event objects, and then chuck (=>) that event to now. The event places the current shred on the event's waiting list, suspends the current shred (letting time advance from that shred's point of view). When the the event is triggered, one or more of the shreds on its waiting list is shreduled to run immediately. This trigger may originate from another ChucK shred, or from activities taking place outside the Virtual Machine ( MIDI, OSC, or IPC ).
    // declare event
    Event e;

    // function for shred
    fun void eventshred( Event event, string msg )
    {
        // infinite loop
        while ( true )
        {
            // wait on event
            event => now;
            // print
            <<>>;
        }
   }

    // create shreds
    spork   eventshred ( e, "fee" );
    spork   eventshred ( e, "fi" );
    spork   eventshred ( e, "fo" );
    spork   eventshred ( e, "fum" );

    // infinite time loop
    while ( true )
    {
        // either signal or broadcast
        if( maybe )
        {
            <<<"signaling...">>>;
            e.signal();
        }
        else
          {
            <<<"broadcasting...">>>;
            e.broadcast();
          }

        // advance time
        0.5::second => now;
   }
Use
Chucking an event to now suspends the current shred, letting time advance:
    // declare Event
    Event e;

    // ...

    // wait on the event
    e => now;

    // after the event is trigger
    <<< "I just woke up" >>>;
As shown above, events can be triggered in two ways, depending on the desired behavior.
    // signal one shred waiting on the event e
    e.signal();
Signal() releases the first shred in that event's queue, and shredule it to run at the current time, respecting the order in which shreds were added to the queue.
    // wake up all shreds waiting on the event e
    e.broadcast();
broadcast() releases all shreds queued by that event, in the order they were added, and at the same instant in time
The released shreds are shreduled to run immediately. But of course they will respect other shreds also shreduled to run at the same time. Furthermore, the shred that called signal() or broadcast() will continue to run until it advances time itself, or yield the virtual machine without advancing time. (see me.yield() under concurrency)
MIDI events
ChucK contains built-in MIDI classes to allow for interaction with MIDI based software or devices.
    MidiIn min;
    MidiMsg msg;

    // open midi receiver, exit on fail
    if ( !min.open(0) ) me.exit();

    while( true )
    {
        // wait on midi event
        min => now;

        // receive midimsg(s)
        while( min.recv( msg ) )
        {
            // print content
            <<< msg.data1, msg.data2, msg.data3 >>>;
        }
    }
MidiIn is a subclass of Event, as as such can be ChucKed to now. MidiIn then takes a MidiMsg object to its .recv() method to access the MIDI data. As a default, MidiIn events trigger the broadcast() event behavior.
OSC events
In addition to MIDI, ChucK has OSC communication classes as well:
    // create our OSC receiver
    OscRecv orec;
    // port 6449
    6449 => orec.port;
    // start listening (launch thread)
    orec.listen();

    function void rate_control_shred()
    {
        // create an address in the receiver
        // and store it in a new variable.
        orec.event("/sndbuf/buf/rate,f") @=> OscEvent oscdata;

        while ( true )
        {
            oscdata => now; //wait for events to arrive.

            // grab the next message from the queue.
            while( oscdata.nextMsg() != 0 )
             {
                // getFloat fetches the expected float
                // as indicated in the type string ",f"
                buf.rate( oscdata.getFloat() );
                0 => buf.pos;
             }
        }
   }
The OscRecv class listens for incoming OSC packets on the specified port. Each instance of OscRecv can create OscEvent objects using its event() method to listen for packets at any valid OSC address pattern.
An OscEvent event can then be ChucKed to now to wait for messages to arrive, after which the nextMsg() and getFloatStringInt() methods can be used to fetch message data.
Creating custom events
Events, like any other class, can be subclassed to add functionality and transmit data:
    // extended event
    class TheEvent extends Event
    {
        int value;
    }

    // the event
    TheEvent e;

    // handler
    fun int hi( TheEvent event )
    {
        while( true )
         {
            // wait on event
            event => now;
            // get the data
            <<>>;
         }
     }

    // spork
    spork   hi( e );
    spork   hi( e );
    spork   hi( e );
    spork   hi( e );

    // infinite time loop
    while( true )
    {
        // advance time
        1::second => now;

        // set data
        Math.rand2( 0, 5 ) => e.value;

        // signal one waiting shred
        e.signal();
    }
VM Wide Events
Often it can be useful to trigger events across the VM outside of the child/parent shred relationship.
This can be done by declaring a reference to static data within a public class. You may only declare one public class in a file so the following must be added as two files. For more on classes see Objects reference.
This example creates a VM wide event that also has communicates an int value.
File 1: Extend Event to carry int value
//First Extend Event to carry int
public class E extends Event{
    int value;
}
File 2:Declare static version of extend class and instantiate once.
//Create Static Event
public class vmwEvent{
    static E @ gbEvent;
}
new E @=> vmwEvent.gbEvent;
This creates the global VM wide event which can then be used as required.
Write int value and broadcast event
//send values
while (true){
    Std.rand2(100,300) => vmwEvent.gbEvent.value;
    vmwEvent.gbEvent.broadcast();
    500::ms => now;
    <<<"sent">>>;
}
Receive and read int value for VM wide event.
//receive values
while (true){
    vmwEvent.gbEvent => now;
    <<< vmwEvent.gbEvent.value >>>;
    <<<"got">>>;
}
Control Structures
ChucK includes standard control structures similar to those in most programming languages. Control structures make use of blocks of code. A code block is delineated either by semicolons or by curly brackets.
if / else
The if statement executes a block if the condition is evaluated as non-zero.
if( condition )
{
  // insert code here
}
In the above code, "condition" is any expression that evaluates to an int.
The else statement can be put after the if block to handle the case where the condition evaluates to 0.
if( condition )
{
  // your code here
}
else
{
  // your other code here
}
If statements can be nested.
repeat
The repeat statement creates a loop that repeats a certain number of times. This number is evaluated only once (right before the first repetition).
repeat(3)
{
  //this code will run three times
}
while
The while statement is a loop that repeatedly executes the body as long as the condition evaluates as non-zero.
// here is an infinite loop
while( true )
{
  // your code loops forever!
  // (sometimes this is desirable because we can create
  // infinite time loops this way, and because we have
  // concurrency)
}
do
The while loop will first check the condition, and executes the body as long as the condition evaluates as non-zero. To execute the body of the loop before checking the condition, you can use a do/while loop. This guarantees that the body gets executed as least once.
do
{
  // your code executes here at least once
}
while( condition );
A few more points:
- while statements can be nested.
- see break/continue for additional control over your loops
until
The until statement is the opposite of while, semantically. A until loop repeatedly executes the body until the condition evaluates as non-zero.
// an infinite loop
until( false )
{
  // your great code loops forever!
}
The while loop will first check the condition, and executes the body as long as the condition evaluates as zero. To execute the body of the loop before checking the condition, you can use a do/until loop. This guarantees that the body gets executed as least once.
do
{
  // your code executes here at least once
}
until( condition );
A few more points:
- until statements can be nested.
- see break/continue for additional control over your loops
for
A loop that iterates a given number of times. A temporary variable is declared that keeps track of the current index and is evaluated and incremented at each iteration.
// for loop
for( 0 => int foo; foo < 4 ;⁞ foo++ )
{
  // debug-print value of ’foo’
  <<>>>;
}
break / continue
Break allows the program flow to jump out of a loop.
 // infinite loop
while( 1 )
{
  if( condition )
    break;
}
Continue allows a loop to continue looping but not to execute the rest of the block for the iteration where continue was executed.
// another infinite loop
while( 1 )
{
  // check condition
  if( condition )
    continue;

  // some great code that may get skipped (if continue is taken)
}
Functions
Functions provide ways to break up code/common tasks into individual units. This helps to promote code re-usability and readability. When you find you are using the same code a lot of times it's most likely a good idea to put it in a function. This keeps files more compact and when corrections are needed a lot of time is saved and errors are prevented.
Writing
Declare functions with the keyword fun (or function) followed by the return type and then the name of the function. After the name of the function parentheses must be opened to declare the types of the input arguments.
// define function call ’funk’
fun void funk( int arg )
{
  // insert code here
}
The above function returns no values (the return type is void). If the function is declared to return any other type of values, the function body must return a value of the appropriate type.
// define function ’addOne’
fun int addOne(int x)
{
  // result
  return x + 1;
}
Note that the return keyword (without a argument) can be used in functions of type void as well, in which case it breaks off execution of the function and computation resumes from where the function was called. This is not unlike how the break keyword is used in loops and occasionally useful.
fun void noZero( int x)
{
  //stop at zero
  if ( x == 0 ) return;
  //otherwise print the input
  else <<< x >>>;
}
Calling
To call a function use the name of the function with appropriate arugments.
// define ’hey’
fun int hey( int a, int b )
{
  // do something
  return a + b;
}
// call the function; store result
hey( 1, 2 ) => int result;
You can also use the ChucK operator to call functions!
// call hey
( 1, 2 ) => hey => int result;

// same
hey( 1, 2 ) => int result;

// several in a row
( 10, 100 ) => Std.rand2 => Std.mtof => float foo;

// same
Std.mtof( Std.rand2( 10, 100 ) ) => float foo;
Overloading
Overloading a function allows functions with the same name to be defined with different arguments. The function must be written in separate instances to handle the input, and the return type must be the same for all versions.
// funk( int )
fun int add(int x)
{
  return x + x;
}

// funk( int, int )
fun int add(int x, int y)
{
  return x + y;
}

// compiler automatically choose the right one to call
add( 1 ) => int foo;
add( 1, 2 ) => int bar;
⁞
In some cases multiple versions of the function may apply, most notably when type bar extends type foo and our fuction is overloaded to handle both. In that case ChucK should prefer the most speciffic one over the more general case.
Objects
Introduction
Chuck implements an object system that borrows from both C++ and Java conventions. In our case this means:
- You can define custom classes as new types and instantiate objects
- ChucK supports polymorphic inheritance (this is the same model used in Java, and also known as virtual inheritance in C++)
- All object variables are references (like Java), but instantiation resembles C++. We will discuss this in detail below.
- There is a default class library.
- All objects inherit from the Object class (as in Java)
For the sake of clarity we will define these terms:
- A class is an abstraction of data (members) and behavior (methods)
- A class is a type.
- An object is an instantiation of that class
- A reference variable refers indirectly to an object - it is not the object itself. All ChucK object variables are reference variables (like in Java).
- Similarly, reference assignment duplicates a reference to an object and assigns the reference to a reference variable. The object itself is not duplicated. All ChucK object assignments are reference assignments.
Built-in Classes
ChucK has a number of classes defined within the language.
- Object : base class to all ChucK objects.
- Event : ChucK’s basic synchronization mechanism; may be extended to create custom Event functionality (discussed here).
- Shred : basic abstraction for a non-premptive ChucK process.
- UGen : base unit generator class (discussed here).
These are some of the more commonly used classes in ChucK.
Working With Objects
Let’s begin with some examples. For these examples, let’s assume Foo is a defined class.
// create a Foo object; stored in reference variable bar
Foo bar;
The above code does two things:
- A reference variable bar is declared; its type is Foo
- A new instance of Foo is created, and its reference is assigned to bar
Note that in contrast to Java, this statement both declares a reference variable and instantiates a instance of that class and assigns the reference to the variable. Also note that in contrast to C++, bar is a reference, and does not represent the object itself.
To declare a reference variable that refers to nothing (also called a null reference):
// create a null reference to a Foo object
Foo @ bar;
The above code only declare a reference and initializes it to null. (random note: the above statement may be read as ”Foo at bar”).
We can assign a new instance to the reference variable:
// assign new instance of Foo to bar
new Foo @=> Foo @ bar;

// (this statement is equivalent to ’Foo bar’, above)
The code above is exactly equivalent to Foo bar; as shown above. The new operator creates an instance of a class, in this case Foo. The @=> operator performs the reference assignment. (see Operators chapter for more information on @=>)
It is possible to make many references to same object:
// make a Foo
Foo bar;

// reference assign to duh
bar @=> Foo @ duh;

// (now both bar and duh points to the same object)
ChucK objects are reference counted and garbage collection takes place automatically. (note: this is still being implemented!)
As stated above, a classes may contain data and behavior, in the form of member variables and mem- ber functions, respectively. Members are accessed by using ’dot notation’ - reference.memberdata and reference.memberfunc(). To invoke a member function of an object (assuming class Foo has a member function called compute that takes two integers and returns an integer):
// make a Foo
Foo bar;
// call compute(), store result in boo
bar.compute( 1, 2 ) => int boo;
Writing a Class
If a class has already been defined in the ChucK virtual machine (either in the same file or as a public class in a different file) then it can be instantiated similar to primitive types.
Unless declared public, class definitions are scoped to the shred and will not conflict with identically named classes in other running shreds.
Classes encapsulate a set of behaviors and data. To define a new object type, the keyword class is used followed by the name of that class.
// define class X
class X
{
  // insert code here
}
If a class is defined as public, it is integrated into the central namespace (instead of the local one), and can be instantiated from other programs that are subsequently compiled. There can be at most one public class per file.
// define public class MissPopular
public class MissPopular
{
  // ...
}

// define non-public class Flarg
class Flarg
{
  // ...
}

// both MissPopular and Flarg can be used in this file
// only MissPopular can be used from another file
We define member data and methods to specify the data types and functionality required of the class. Members, or instance data and instance functions are associated with individual instances of a class, whereas static data and functions are only associated with the class (and shared by the instances).
Members (Instance Data + Functions)
Instance data and methods are associated with an object.
// define class X
class X
{
  // declare instance variable ’m_foo’
  int m_foo;

  // another instance variable ’m_bar’
  float m_bar;

  // yet another, this time an object
  Event m_event;

  // function that returns value of m_foo
  fun int getFoo() { return m_foo; }

  // function to set the value of m_foo
  fun void setFoo( int value ) { value => m_foo; }

  // calculate something
  fun float calculate( float x, float y )
  {
    // insert code
  }

  // print some stuff
  fun void print()
  {
    <<< m_foo, m_bar, m_event >>>;
  }
}

// instantiate an X
X x;

// set the Foo
x.setFoo( 5 );

// print the Foo
<<< x.getFoo() >>>;

// call print
x.print();
Class Constructors
In the initial release, we do not support constructors yet. However, we have a single pre-constructor. The code immediately inside a class definiton (and not inside any functions) is run every time an instance of that class is created.
// define class X
class X
{
  // we can put any ChucK statements here as pre-constructor
  // initialize an instance data
  109 => int m_foo;

  // loop over stuff
  for( 0 => int i; i < 5; i++ )
  {
    // print out message how silly
    <<< "part of class pre-constructor...", this, i >>>;
  }

  // function
  fun void doit()
  {
    // ...
  }
}

// when we instantiate X, the pre-constructor is run
X x;

// print out m_foo
<<< x.m_foo >>>;
Static (Data + Functions)
Static data and functions are associated with a class, and are shared by all instances of that class – in fact, static elements can be accessed without an instance, by using the name of the class: Classname.element.
// define class X
class X
{
  // static data
  static int our_data;

  // static function
  fun static int doThatThing()
  {
    // return the data
    return our_data;
  }
}

// do not need an instance to access our_data
2 => X.our_data;

// print out
<<< X.our_data >>>;

// print
<<< X.doThatThing() >>>;

// create instances of X
X x1;
X x2;

// print out their static data - should be same
<<< x1.our_data, x2.our_data >>>;

// change use one
5 => x1.our_data;

// the other should be changed as well
<<< x1.our_data, x2.our_data >>>;
Inheritance
Inheritance in ob ject-oriented code allows the programmer to take an existing class and extend or alter its functionality. In doing so we can create a taxonomy of classes that all share a specific set of behaviors, while implementing those behaviors in different, yet well-defined, ways. We indicate that a new class inherits from another class using the extends keyword. The class from which we inherit is referred to as the parent class, and the inheriting class is the child class. The Child class receives all of the member data and functions from the parent class, although functions from the parent class may be overridden ( below ). Because the children contain the functionality of the parent class, references to instances of a child class may be assigned to a parent class reference type.
For now, access modifiers (public, protected, private) are included but not fully implemented. Everything is public by default.
// define class X
class X
{
  // define member function
  fun void doThatThing()
  {
    <<<"Hallo">>>;
  }

  // define another
  fun void hey()
  {
    <<<"Hey!!!">>>;
  }

  // data
  int the_data;
}

// define child class Y
class Y extends X
{
  // override doThatThing()
  fun void doThatThing()
  {
    <<<"No! Get away from me!">>>;
  }
}

// instantiate a Y
Y y;

// call doThatThing
y.doThatThing();

// call hey() - should use X’s hey(), since we didn’t override
y.hey();

// data is also inherited from X
<<< y.the_data >>>;
Inheritance provides us a way of efficiently sharing code between classes which perform similar roles. We can define a particular complex pattern of behavior, while changing the way that certain aspects of the behavior operate.
// parent class defines some basic data and methods
class Xfunc
{
  int x;
  fun int doSomething( int a, int b ) {
    return 0;
  }
}

// child class
// which overrides the doSomething function with an addition operation
class Xadds extends Xfunc
{
  fun int doSomething ( int a, int b )
  {
    return a + b ;
  }
}

// child class, which overrides the doSomething function with a multiply operation
class Xmuls extends Xfunc
{
  fun int doSomething ( int a, int b )
  {
    return a * b;
  }
}

// array of references to Xfunc
Xfunc @ operators[2];

// instantiate two children and assign reference to the array
new Xadds @=> operators[0];
new Xmuls @=> operators[1];

// loop over the Xfunc
for( 0 => int i; i < operators.cap(); i++ )
{
  // doSomething, potentially different for each Xfunc
  <<< operators[i].doSomething( 4, 5 ) >>>;
}
Because Xmuls and Xadds each redefine doSomething( int a, int b ) with their own code, we say that they have overridden the behavior of the parent class. They observe the same interface, but have potentially different implementation. This is known as polymorphism.
Overloading
Function overloading in classes is similar to that of regular functions. see functions.
Arrays
Arrays are used represent N-dimensional ordered sets of data (of the same type). This sections specifies how arrays are declared and used in ChucK. Some quick notes:
- Arrays can be indexed by integer (0-indexed)
- Any array can also be used as an associative map, indexed by strings
- It is important to note that the integer-indexed portion and the associative portion of an array are stored in separate namespaces
- Arrays are objects (see objects and classes), and will behave similarly under reference assign- ment and other operations common to objects
Declaration
Arrays can be declared in the following way:
// declare 10 element array of int, called foo
int foo[10];

// since array of int (primitive type), the contents
// are automatically initialized to 0
Arrays can also be initialized:
// chuck intializer to array reference
[ 1, 1, 2, 3, 5, 8 ] @=> int foo[];
In the above code, there are several things to note.
- Initializers must contain the same or similar types. the compiler will attempt to find the highest common base type of all the elements. if no such common element is found, an error is reported.
- The type of the initializer [ 1, 1, 2, 3, 5, 8 ] is int[ ]. The intializer is an array that can be used directly when arrays are expected.
- The at-chuck operator (@=> ) means assignment, and is discussed at length in the Operators and Operations section.
- int foo[ ] is declaring an empty reference to an array. the statement assigns the initializer array to foo.
- Arrays are objects.
When declaring an array of ob jects, the ob jects inside the array are automatically instantiated.
// objects in arrays are automatically instantiated
Object group[10];
If you only want an array of object references:
// array of null object references
Object @ group[10];
The above examples are 1-dimensional arrays (or vectors). Coming up next are multi-dimensional arrays!
Multi-Dimensional Arrays
Here's a declaration of a multi-dimensional array:
// declare 4 by 6 by 8 array of float
float foo3D[4][6][8];
Initializing a multi-dimensional array works in a similar way:
// declare 2 by 2 array of int
[ [1,3], [2,4] ] @=> int bar[][];
In the above code, note the two [ ][ ] since we make a matrix.
Lookup
Elements in an array can be accessed using [ ] (in the appropriate quantities).
// declare an array of floats
[ 3.2, 5.0, 7 ] @=> float foo[];

// access the 0th element (debug print)
<<< foo[0] >>>; // hopefully 3.2

// set the 2nd element
8.5 => foo[2];
Looping over the elements of an array:
// array of floats again
[ 1, 2, 3, 4, 5, 6 ] @=> float foo[];
// loop over the entire array
for( 0 => int i; i < foo.cap(); i++ ) {
  // do something (debug print)
  <<< foo[i] >>>;
}
Accessing multi-dimensional array:
// 2D array
int foo[4][4];

// set an element
10 => foo[2][2];
If the index exceeds the bounds of the array in any dimension, an exception is issued and the current shred is halted.
// array capacity is 5
int foo[5];

// this should cause ArrayOutOfBoundsException
// access element 6 (index 5)
<<< foo[5] >>>;
A longer program: otf_06.ck from the examples folder:
// the period
.5::second => dur T;
// synchronize to period (for on-the-fly synchronization)
T - (now % T) => now;
// our patch
SinOsc s => JCRev r => dac;
// initialize
.05 => s.gain;
.25 => r.mix;
// scale (pentatonic; in semitones)
[ 0, 2, 4, 7, 9 ] @=> int scale[];
// infinite time loop
while( true ) {
  // pick something from the scale
  scale[ Math.rand2(0,4) ] => float freq;
  // get the final freq
  Std.mtof( 69 + (Std.rand2(0,3)*12 + freq) ) => s.freq;
  // reset phase for extra bandwidth
  0 => s.phase;
  // advance time
  if( Std.randf() > -.5 ) .25::T => now;
  else .5::T => now;
}
Associative Arrays
Any array can be used also as an associative array, indexed on strings. Once the regular array is instantiated, no further work has to be done to make it associative as well - just start using it as such.
// declare regular array (capacity doesn’t matter so much)
float foo[4];

// use as integer-indexed array
2.5 => foo[0];

// use as associative array
4.0 => foo["yoyo"];

// access as associative (print)
<<< foo["yoyo"] >>>;

// access empty element
<<< foo["gaga"] >>>; // -> should print 0.0
It is important to note (again), that the address space of the integer portion and the associative portion of the array are completely separate. For example:
// declare array
int foo[2];

// put something in element 0
10 => foo[0];

// put something in element "0"
20 => foo["0"];

// this should print out 10 20
<<< foo[0], foo["0"] >>>;
The capacity of an array relates only to the integer portion of it. An array with an integer portion of capacity 0, for example, can still have any number of associative indexes.
// declare array of 0 capacity
int foo[0];

// put something in element "here"
20 => foo["here"];

// this should print out 20
<<< foo["here"] >>>

// this should cause an exception
<<< foo[0] >>>
Note: The associative capacity of an array is not defined, so objects used in the associative names- pace must be explicitly instantiated, in contrast to those in the integer namespace.
Accessing an uninstantiated element of the associate array will return a null reference. Please check the class documentation page for an explanation of ChucK objects and references.
class Item {
  float weight;
}
Item box[10];

// integer indices ( up to capacity ) are pre-instantiated.
1.2 => box[1].weight;

// instantiate element "lamp";
new Item @=> box["lamp"];

// access allowed to "lamp"
2.0 => box["lamp"].weight;

// access causes a NullPointerException
2.0 => box["sweater"].weight;
Array Assignment
Arrays are ob jects. So when we declare an array, we are actually (1) declaring a reference to array (reference variable) and (2) instantiating a new array and reference assigned to the variable. A (null) reference is a reference variable that points to no object or null. A null reference to an array can be created in this fasion:
// declare array reference (by not specifying a capacity)
int foo[];

// we can now assign any int[] to foo
[ 1, 2, 3 ] @=> foo;

// print out 0th element
<<< foo[0] >>>;
This is also useful in declaring functions that have arrays as arguments or return type.
// our function
fun void print( int bar[] ) {
  // print it
  for( 0 => int i; i < bar.cap(); i++ )
  <<< bar[0] >>>;
}

// we can call the function with a literal
print( [ 1, 2, 3, 4, 5 ] );

// or can we can pass a reference variable
int foo[10];
print( foo );
Like other objects, it is possible make multiple references to a single array. Like other ob jects, all assignments are reference assignments, meaning the contents are NOT copied, only a reference to array is duplicated.
// our single array
int the_array[10];

// assign reference to foo and bar
the_array => int foo[] => int bar[];

// (the_array, foo, and bar now all reference the same array)
// we change the_array and print foo...
// they reference the same array, changing one is like changing the other
5 => the_array[0];
<<< foo[0] >>>; // should be 5
It is possible to reference sub-sections of multi-dimensional arrays.
// a 3D array
int foo3D[4][4][4];

// we can make a reference to a sub-section
foo3D[2] => int bar[][];

// (note that the dimensions must add up!)
Unit Analyzers
Unit Analyzers (UAnae) are analyis building blocks, similar in concept to unit generators. They perform analysis functions on audio signals and/or metadata input, and produce metadata analysis results as output. Unit analyzers can be linked together and with unit generators to form analysis/synthesis networks. Like unit generators, several unit analyzers may run concurrently, each dynamically controlled at different rates. Because data passed between UAnae is not necessarily audio samples, and the relationship of UAna computation to time is fundamentally different than that of UGens (e.g., UAnae might compute on blocks of samples, or on metadata), the connections between UAnae have a different meaning from the connections between UGens formed with the ChucK operator, => . This difference is reflected in the choice of a new connection operator, the upChucK operator: =^ . Another key difference between UGens and UAnae is that UAnae perform analysis (only) on demand, via the upchuck() function (see below). Some more quick facts about ChucK unit analyzers:
- All ChucK unit analyzers are objects (not primitive types). (see objects)
- All ChucK unit analyzers inherit from the UAna class. The operation foo =^ yah, where foo and yah are UAnae, connects foo to yah.
- Unit analyzer parameters and behaviors are controlled by calling / chucking to member functions over time, just like unit generators.
- Analysis results are always stored in an object called a UAnaBlob. The UAnaBlob contains a time-stamp indicating when it was computed, and it may store an array of floats and/or complex values. Each UAna specifies what information is present in the UAnaBlob it produces.
- All unit analyzers have the function upchuck(), which when called issues a cascade of analysis computations for the unit analyzer and any "upstream" unit analyzers on which its analysis depends. In the example of foo yah, yah.upchuck() will result in foo first performing its analysis (possibly requesting analysis results from unit analyzers further upstream), then yah, using foo's analysis results in its computation. upchuck() returns the analysis results in the form of a UAnaBlob.
- Unit analyzers are specially integrated into the virtual machine such that each unit analyzer performs its analysis on its input whenever it or a downstream UAna is upchuck()-ed. Therefore, we have the ability to assert control over the analysis process at any point in time and at any desired control rate.
declaring
Unit analyzers (UAnae) are objects, and they need to be instantiated before they can be used. We declare unit analyzers the same way we declare UGens and other objects.
// instantiate an FFT, assign reference to variable f
FFT f;
connecting
The upChucK operator () is only meaningful for unit analyzers. Similar to the behavior of the ChucK operator between UGens, using to connect one UAna to another connects the analysis results of the first to the analysis input of the second.
// instantiate FFT and flux objects,
// connect to allow computation of spectrum and spectral flux on adc input
adc => FFT fft =^ Flux flux => blackhole;
Note that the last UAna in any chain must be chucked to the blackhole or dac to "pull" audio samples from the aaddcc or other unit generators upstream. It is also possible to linearly chain many UAnae together in a single statement. In the example below, the analysis of fluxcapacitor depends on the results of flux, so the flux object will always perform its analysis computation before the computation of fluxcapacitor.
// Set up analysis on adc, via an FFT object, a spectral flux object, and a
// made-up object called a FluxCapacitor that operates on the flux value.
adc => FFT f =^ Flux flux =^ FluxCapacitor flux_capacitor => blackhole;
Very importantly, it is possible to create connection networks containing both UAane and UGens. In the example below, an FFT transforms two (added) sinusoidal inputs, one of which has reverb added. An IFFT transforms the spectrum back into the time domain, and the result is processed with a third sinusoid by a gain object before being played through the dac. (No, this example is not supposed to do anything musically interesting, only help you get a feel for the syntax. Notice that any connection through which audio samples are passed is denoted with the operator, and the connection through which spectral data is passed (from the FFT to the IFFT) is denoted with the operator.
//Chain a sine into a reverb, then perform FFT, then IFFT,
//then apply gain, then output
SinOsc s => JCRev r => FFT f =^ IFFT i => Gain g => dac;
// Chuck a second sine into the FFT
SinOsc s2 => f;
// Chuck a third sine into the final gain
SinOsc s3 => g;
FFT, IFFT, and other UAnae that perform transforms between the audio domain and another domain play a special role, as illustrated above. FFT takes audio samples as input, so unit generators connect to it with the ChucK operator =>. However, it outputs analysis results in the spectral domain, so it connects to other UAnae with the upChucK operator =^. Conversely, UAnae producing spectral domain output connect to the IFFT using =>, and IFFT can connect to the dac or other UGens using =>. This syntax allows the programmer to clearly reason about the expected behavior of an analysis/synthesis network, while it hides the internal mechanics of ChucK timing and sample buffering from the programmer. Finally, just as with unit generators, it is possible to dynamically disconnect unit analyzers, using the UnChucK operator (=>or =<).
controlling (over time)
In any ChucK program, it is necessary to advance time in order to pull audio samples through the UGen network and create sound. Additionally, it is necessary to trigger analysis computations explicitly in order for any analysis to be performed, and for sound synthesis that depends on analysis results (e.g., IFFT) to be performed. To explicitly trigger computation at a point in time, the UAna's upchuck() member function is called. In the example below, an FFT computation is triggered every 1024 samples.
adc => FFT fft => dac;
// set the FFT to be of of size 2048 samples
2048 => fft.size;
while (true)
{
     // let 1024 samples pass
     1024::samp => now;
     // trigger the FFT computation on the last 2048 samples (the FFT size)
     fft.upchuck();
}
In the example above, because the FFT size is 2048 samples, the while-loop causes a standard "sliding-window" FFT to be computed, where the hop size is equal to half a window. However, ChucK allows you to perform analysis using nonstandard, dynamically set, or even multiple hop sizes with the same object. For example, in the code below, the FFT object fft performs computation every 5 seconds as triggered by shred1, and it additionally performs computation at a variable rate as triggered by shred2.
adc => FFT fft => dac;
2048 => fft.size;
// spork two shreds: shred1 and shred2
spork ~ shred1();
spork ~ shred2();
// shred1 computes FFT every 5 seconds
shred1()
{
     while (true)
     {
          5::second => now;
          fft.upchuck();
     }
}
// shred2 computes FFT every n seconds, where n is a random number between 1 and 10
shred2()
{
     while (true)
     {
          Std.Rand2f(1, 10)::second => now;
          fft.upchuck();
     }
}
Parameters of unit analyzers may be controlled and altered at any point in time and at any control rate. We only have to assert control at the appropriate points as we move through time, by setting various parameters of the unit analyzer. To set the a value for a parameter of a UAna, a value of the proper type should be ChucKed to the corresponding control function.
// connect the input to an FFT
adc => FFT fft => blackhole;

//start with a size of 1024 and a Blackman-Harris window
1024 => fft.size;
Windowing.blackmanHarris(512) => fft.window;

//advance time and compute FFT
1::minute => now;
fft.upchuck();

// change window to Hamming
Windowing.hamming(512) => fft.window;

// let time pass... and carry on.
Since the control functions are member functions of the unit analyzer, the above syntax is equilavent to calling functions. For example, the line below could alternatively be used to change the FFT window to a Hamming window, as above.
fft.window(Windowing.hamming(512));
For a list of unit analyzers and their control methods, consult UAna reference. Just like unit generators, to read the current value of certain parameters of a Uana, we may call an overloaded function of the same name. Additionally, assignments can be chained together when assigning one value to multiple targets.
// connect adc to FFT
adc => FFT fft => blackhole;
// store the current value of the FFT size
fft.size() => int fft_size;
What if a UAna that performs analysis on a group of audio samples is upchuck()- ed before its internal buffer is filled? This is possible if an FFT of size 1024 is instantiated, then upchuck()-ed after only 1000 samples, for example. In this case, the empty buffer slots are treated as 0's (that is, zero-padding is applied). This same behavior will occur if the FFT object's size is increased from 1024 to 2048, and then only 1023 samples pass after this change is applied; the last sample in the new (larger) buffer will be 0. Keep in mind, then, that certain analysis computations near the beginning of time and analysis computations after certain parameters have changed will logically involve a short "transient" period.
// connect adc to FFT to blackhole
adc => FFT fft => blackhole;
// set the FFT size to 1024 samples
1024 => fft.size;

// allow 1000 samples to pass
1000::samp => now;

// compute the FFT: the last 24 spots in the FFT buffer haven't been filled, so they are zero-ed out
// the computation is nevertheless valid and proceeds.
fft.upchuck();

1::minute => now; // let time pass for a while

// increase the size of the FFT, and therefore the size of the sample buffer it uses
2048 => fft.size;

// let 1023 samples pass
1023::samp => now;

// at this point, only 2047 of the 2048 buffer spots have been filled
// the following computation therefore zeros out the last audio buffer spot
fft.upchuck();

1::minute => now; //let time pass for a while

// now the buffer is happy and
full fft.upchuck(); // proceeds normally on a full buffer
representing metadata: the UAnaBlob
It is great to be able to trigger analysis computations like we've been doing above, but what if you want to actually use the analysis results? Luckily, calling the upchuck() function on a UAna returns a reference to an object that stores the results of any UAna analysis, called a UanaBlob. UanaBlobs can contain an array of floats, and/or an array of complex numbers (see the next section). The meaning and formatting of the UanaBlob fields is different for each UAna subtype. FFT, for example (see specification), fills in the complex array with the spectrum and the floating point array with the magnitude spectrum. Additionally, all UanaBlobs store the time when the blob was last computed.
The example below demonstrates how one might access the results of an FFT:
adc => FFT fft => blackhole;
// ... set FFT parameters here ...

UAnaBlob blob;

while (true)
{
     50::ms => now; // use hop size of 50 ms
     fft.upchuck() @=> blob; // store the result in blob.
     blob.fvals @=> float mag_spec[]; // get the magnitude spectrum as float array
     blob.cvals @=> complex spec[]; // get the whole spectrum as complex array
     mag_spec[0] => float first_mag; // get the first bin of the magnitude spectrum
     blob.fvals(0) => float first_mag2 // equivalent way to get first bin of mag spectrum
     fft.upchuck().fvals(0) => float first_mag3 // yet another equivalent way
     fft.upchuck().cvals(0) => float first_spec // similarly, get 1st spectrum bin

     blob.when => time when_computed; // get the time it was computed
}
Beware: whenever a UAna is upchuck()-ed, the contents of its previous UAnaBlob are overwritten. In the following code, blob1 and blob2 refer to the same UAnaBlob. When fft.upchuck() is called the second time, the contents of the UAnaBlob referred to by blob1 are overwritten.
adc => FFT fft => blackhole;

UAnaBlob blob1, blob2;
1::minute => now; //let time pass for a while
fft.upchuck() @=> blob1; // blob1 points to the analysis results
1::minute => now; // let time pass again
fft.upchuck() @=> blob2; // now both blob1 and blob2 refer to the same object: the new results!
Also beware: if time is not advanced between subsequent upchuck()s of a UAna, any upchuck() after the first will not re-compute the analysis, even if UAna parameters have been changed. After the code below, blob refers to a UAnaBlob that is the result of computing the first (size 1024) FFT.
adc => FFT fft => blackhole;
1024 => fft.size;

UAnaBlob blob;
1::minute => now; //let time pass for a while
fft.upchuck() @=> blob; // blob holds the result of the FFT

512 => fft.size;
fft.upchuck() @=> blob; // time hasn't advanced since the last computation,
//so no re-computation is done
representing complex data: the complex and polar types
In order to represent complex data, such as the output of an FFT, two new datatypes have been added to ChucK: complex and polar. These types are described with examples here.
performing analysis in UAna networks
Often, the computation of one UAna will depend on the computation results of "upstream" UAnae. For example, in the UAna network below, the spectral flux is computed using the results of an FFT.
adc => FFT fft =^ Flux flux => blackhole;
The flow of computation in UAna networks is set up so that every time a UAna aa is upchuck()-ed, each UAna whose output is connected to aa's input via is upchuck()-ed first, passing the results to aa for it to use. For example, a call to flux.upchuck() will first force fft to compute an FFT on the audio samples in its buffer, then flux will use the UanaBlob from fft to compute the spectral flux. This flow of computation is handled internally by ChucK; you should understand the flow of control, but you don't need to do fft.upchuck() explicitly. Just writing code like that below will do the trick:
adc => FFT fft =^ Flux flux => blackhole;
UAnaBlob blob;
while (true)
{
      100::ms => now;
      flux.upchuck() @=> blob;
      // causes fft to compute, then computes flux and stores result in blob
}
Additionally, each time a UAna upchuck()s, its results are cached until time passes. This means that a UAna will only perform its computation once for a particular point in time.
adc => FFT fft =^ Flux flux => blackhole; fft =^ Centroid c => blackhole; UAnaBlob blob, blob2;
while (true)
{
     100::ms => now;
     flux.upchuck() @=> blob; // causes fft to compute,
     //then computes flux and stores result in blob
     c.upchuck() @=> blob2; // uses cached fft results from
     //previous line to compute centroid
}
When no upchuck() is performed on a UAna, or on UAnae that depend on it, it will not do computation. For example, in the network below, the flux is never computed.
adc => FFT fft =^ Flux flux => blackhole;
UAnaBlob blob;
while (true)
{
     100::ms => now;
     fft.upchuck() @=> blob; // compute fft only
}
The combination of this "compute-on-demand" behavior and UAna caching means that different UAnae in a network can be upchuck()-ed at various/varying control rates, with maximum efficiency. In the example below, the FFT, centroid, and flux are all computed at different rates. When the analysis times for flux and fft or centroid and fft overlap, fft is computed just once due to its internal caching. When it is an analysis time point for fft but not for flux, flux will not be computed.
adc => FFT fft =^ Flux flux => blackhole;
fft =^ Centroid c => blackhole;
UAnaBlob blob1, blob2, blob3;

spork do_fft();
spork do_flux();
spork do_centroid();

voi ddo_fft()
{
     while (true)
     {
          50::ms => now;
          fft.upchuck() @=> blob1;
     }
}

void do_flux()
{
      while (true)
      {
           110::ms => now;
           flux.upchuck() @=> blob2;
      }
}

void do_centroid()
{
     while (true)
     {
          250::ms => now;
          c.upchuck()
          @=> blob3;
     }
}
An easy way to synchronize analysis of many UAnae is to upchuck() an "agglomerator" UAna. In the example below, agglom.upchuck() triggers analysis of all upstream UAnae in the network. Because agglom is only a member of the UAna base class, it does no computation of its own. However, after agglom.upcuck() all other UAnae will have up-to-date results that are synchronized, computed, and cached so that they are available to be accessed via upchuck()on each UAna (possibly by a different shred waiting for an event - see below).
adc => FFT fft =^ Flux flux =^ UAna agglom => blackhole;
fft =^ Centroid centroid => agglom;
// could add abitrarily many more UAnae that connect to agglom via =^

while (true)
{
     100::ms => now;
     agglom.upchuck();
     // forces computation of both centroid and flux (and therefore fft, too)
}
Because of the dependency and caching behavior of upchuck()-ing in UAna networks, UAna feedback loops should be used with caution. In the network below, each time cc is upchuck()-ed, it forces bb to compute, which forces aa to compute, which then recognizes that bb has been traversed in this upChucK path but has not been able to complete its computation-- thereby recognizing a loop in the network. aa then uses bb's last computed UAnaBlob to perform its computation. This may or may not be desirable, so be careful.
adc => UAna a =^ UAna b =^ Uana c => blackhole;
b =^ a; // creates a feedback loop

while (true)
{
     100::ms => now;
     c.upchuck(); // involves a using b's analysis results from 100 ms ago
}
using events
When a UAna is upchuck()-ed, it triggers an event. In the example below, a separate shred prints the results of FFT whenever it is computed.
adc => FFT fft => blackhole;
spork ~printer(); // spork a printing shred

while (true)
{
     50::ms => now; // perform FFT every 50 ms
     fft.upchuck();
}

void printer()
{
     UAnaBlob blob;
     while (true)
     {
           // wait until fft has been computed
           fft => now;
           fft.upchuck() @=> blob; // get (cached) fft result

           for (int i = 0; i < blob.fvals().cap(); i++)
               <<< blob.fvals(i) >>>;
     }
}
built-in unit analyzers
ChucK has a number of built-in UAna classes. These classes perform many basic transform functions (FFT, IFFT) and feature extraction methods (both spectral and time-domain features). A list of built-in ChucK unit analyzers can be found here.
creating
( someday soon you will be able to implement your own unit analyzers! )
Standard Libraries API
ChucK Standard Libraries API these libraries are provide by default with ChucK - new ones can also be imported with ChucK dynamic linking (soon to be documented...). The existing libraries are organized by namespaces in ChucK. They are as follows.
Std
Std is a standard library in ChucK, which includes utility functions, random number generation, unit conversions and absolute value.
/* a simple example... */
// infinite time-loop
while( true )
{
    // generate random float (and print)
    Std.rand2f( 100.0, 1000.0 )
    // wait a bit
    50::ms =>now;
}
- [function] int abs ( int value ) - returns absolute value of integer
- [function] float fabs ( float value ) - returns absolute value of floating point number
- [function] int rand ( ) - generates random integer
- [function] int rand2 ( int min, int max ) - generates random integer in the range [min, max]
- [function] float randf ( ) - generates random floating point number in the range [-1, 1]
- [function] float rand2f ( float min, float max ) - generates random floating point number in the range [min, max]
- [function] float srand (int value) - seeds value for random number generation
- [function] float sgn ( float value ) - computes the sign of the input as -1.0 (negative), 0 (zero), or 1.0 (positive)
- [function] int system ( string cmd ) - pass a command to be executed in the shell
- [function] int atoi ( string value ) - converts ascii (string) to integer (int)
- [function] float atof ( string value ) - converts ascii (string) to floating point value (float)
- [function] string getenv ( string value ) - returns the value of an environment variable, such as of "PATH"
- [function] int setenv ( string key, string value ) - sets environment variable named 'key' to 'value
- [function] float mtof ( float value ) - converts a MIDI note number to frequency (Hz) note the input value is of type 'float' (supports fractional note number)
- [function] float ftom ( float value ) - converts frequency (Hz) to MIDI note number space
- [function] float powtodb ( float value ) - converts signal power ratio to decibels (dB)
- [function] float rmstodb ( float value ) - converts linear amplitude to decibels (dB)
- [function] float dbtopow ( float value ) - converts decibels (dB) to signal power ratio
- [function] float dbtorms ( float value ) - converts decibles (dB) to linear amplitude
Machine
Machine is ChucK runtime interface to the virtual machine. this interface can be used to manage shreds. They are similar to the On-the-fly Programming Commands, except these are invoked from within a ChucK program, and are subject to the timing mechanism.
//add a file foo.ck to the VM machine.add("foo.ck");
//check the virtual machine like using 'chuck ^' on the command line
machine.status();
//wait a week and cause ChucK to crash
1::week => now;
machine.crash();
- [function] int add ( string path ) - compile and spork a new shred from file at 'path' into the VM now returns the shred ID (see example/machine.ck)
- [function] int spork ( string path ) - same as add/+
- [function] int remove ( int id ) - remove shred from VM by shred ID (returned by add/spork)
- [function] int replace ( int id, string path ) - replace shred with new shred from file returns shred ID , or 0 on error
- [function] int status ( ) - display current status of VM same functionality as status/ (see example/status.ck)
- [function] void crash ( ) - iterally causes the VM to crash. the very last resort;⁞ use with care. Thanks.
Math
Math contains the standard math functions. all trigonometric functions expects angles to be in radians.
// print sine of pi/2
<<<< Math.sin( pi / 2.0 ) >>>;
- [function] float sin ( float x ) - computes the sine of x
- [function] float cos ( float x ) - computes the cosine of x
- [function] float tan( float x ) - computes the tangent of x
- [function] float asin ( float x ) - computes the arc sine of x
- [function] float acos ( float x ) - computes the arc cosine of x
- [function] float atan ( float x ) - computes the arc tangent of x
- [function] float atan2 ( float x ) - computes the principal value of the arc tangent of y/x, using the signs of both arguments to determine the quadrant of the return value
- [function] float sinh ( float x ) - computes the hyperbolic sine of x
- [function] float cosh ( float x ) - computes the hyperbolic cosine of x
- [function] float tanh ( float x ) - computes the hyperbolic tangent of x
- [function] float hypot ( float x, float y ) - computes the euclidean distance of the orthogonal vectors (x,0) and (0,y)
- [function] float pow ( float x, float y ) - computes x taken to the y-th power
- [function] int ensurePow2( int x ) - returns the next largest integer power of 2.
- [function] float sqrt ( float x ) - computes the nonnegative square root of x (x must be >= 0)
- [function] float exp ( float x ) - computes ex, the base-e exponential of x
- [function] float log ( float x ) - computes the natural logarithm of x
- [function] float log2 ( float x ) - computes the logarithm of x to base 2
- [function] float log10 ( float x ) - computes the logarithm of x to base 10
- [function] float floor ( float x ) - round to largest integral value (returned as float) not greater than x
- [function] float ceil ( float x ) - round to smallest integral value (returned as float) not less than x
- [function] float round ( float x ) - round to nearest integral value (returned as float)
- [function] float trunc ( float x ) - round to largest integral value (returned as float) no greater in magnitude than x
- [function] float fmod ( float x, float y ) - computes the floating point remainder of x / y
- [function] float remainder ( float x, float y ) - computes the value r such that r = x - n * y, where n is the integer nearest the exact value of x / y. If there are two integers closest to x / y, n shall be the even one. If r is zero, it is given the same sign as x
- [function] float min ( float x, float y ) - choose lesser of two values
- [function] float max ( float x, float y ) - choose greater of two values
- [function] int nextpow2 ( int n ) - computes the integeral (returned as int) smallest power of 2 greater than the value of x
- [function] int isinf ( float x ) - is x infinity?
- [function] int isnan ( float x ) - is x "not a number"?
- [function] float pi - (currently disabled - use pi)
- [function] float twopi - (currently disabled)
- [function] float e - (currently disabled - use Math.exp(1) )
- [float] float Math.INFINITY -constant representing infinity
- [float] float Math.FLOAT_MAX -constant set to the largest possible value a float can have.
- [float] float Math.FLOAT_MIN_MAG - constant set to the smallest positive value a float can have
- [int] int Math.INT_MAX -constant set to the largest value a integer can have
events
Event
event handler
- .signal() signals first waiting shred
- .broadcast() signals all shreds
Event e;

fun void hi( Event ee)
{
    ee => now;
    <<<"success">>>;
}

spork ~ hi(e);

1::second => now;
e.signal();
1::second => now;
MidiIn
MIDI receiver
extends Event
- .open (int, READ/WRITE) set port to receive
- .recv (MidiMsg, READ) receives MIDI input (see MIDI tutorial)
MidiOut
MIDI sender
extends Event
- .open (int, READ/WRITE) set port to send
- .send (MidiMsg, WRITE) sends MIDI output (see MIDI tutorial)
MidiMsg
MIDI data holder
- .data1 (int, READ/WRITE) first byte of data (member variable)
- .data2 (int, READ/WRITE) second byte of data (member variable)
- .data3 (int, READ/WRITE) third byte of data (member variable) (see MIDI tutorial)
OscRecv
Open Sound Control receiver
- .port (int, READ/WRITE) set port to receive
- .listen () starts object listening to port
- .event (string(name), string(type), READ/WRITE) define string for event to receive (see events tutorial)
OscSend
Open Sound Control sender
- .setHost (string(host), int(port), READ/WRITE) set port on the host to receive
- .startMsg (string(name), string(type), READ/WRITE) define string for event to send (see events tutorial)
OscEvent
Open Sound Control event
extends Event
- .nextMsg (int, READ) the number of messages in queue
- .getFloat (float, READ) gets float from message
- .getInt (int, READ) gets int from message (see events tutorial)
KBHit
ascii keyboard event
extends Event
- .getchar (int, READ) ascii value
- .more (int, READ only) returns 1 if multiple keys have been pressed (see events tutorial)
Hid
HID receiver
extends Event
- .openJoystick (int which), (WRITE only) open joystick number
- .openMouse (int which), (WRITE only) open mouse number
- .openKeyboard (int which), (WRITE only) open keyboard number
- .openTiltSensor() opens the sudden motion sensor on Apple notebooks
- .globalPollRate( dur period) (OSX only) sets the poll-rate for the sudden motion sensor.
- .open( string name ) open a hid device by name.
- .num () return joystick/mouse/keyboard number
- .recv (HidMsg, READ only) writes the next message available for this device to the argument
- .read( int, int, HidMsg ) (int) TODO; figure out what this does
- .name () return device name (see events tutorial)
HidMsg
HID data holder
- .isAxisMotion (int, READ only) non-zero if this message corresponds to movement of a joystick axis
- .isButtonDown (int, READ only) non-zero if this message corresponds to button down or key down of any device type
- .isButtonUp (int, READ only) non-zero if this message corresponds to button up or key up of any device type
- .isMouseMotion (int, READ only) non-zero if this message corresponds to motion of a pointing device
- .isHatMotion (int, READ only) non-zero if this message corresponds to motion of a joystick hat, point-of-view switch, or directional pad
- .which (int, READ/WRITE) HID element number (member variable)
- .axisPosition (float, READ/WRITE) position of joystick axis in the range [-1.0, 1.0] (member variable)
- .deltaX (float, READ/WRITE) change in X axis of pointing device (member variable)
- .deltaY (float, READ/WRITE) change in Y axis of pointing device (member variable)
- .deviceNum (float, READ/WRITE) device number which produced this message (member variable)
- .deviceType (float, READ/WRITE) device type which produced this message (member variable)
- .type (int, READ/WRITE) message/HID element type (member variable)
- .idata (int, READ/WRITE) data (member variable)
- .fdata (int, READ/WRITE) data (member variable) (see events tutorial)
Reference for other object types
Object
Basic object type that all other objects extend.
Shreds
Objects of type Shred abstract processes running in the virtual machine. They have member functions that deal with how they run relative to each other and to stop them from running if they are no longer needed.
- .exit() removes the relevant shred (and any child shreds it may have) from the VM. Does not destroy the Shred object.
- .id() returns a int representing the id of the shred.
- .done() returns 1 (int) if the process is done, 0 otherwise
- .running() returns 1 (int) if the process is running, 0 otherwise
me
Refers to the current shred from inside it. .yield() is only useful in this case; you can't make other shreds yield.
- .yield() Allows other shreds shreduled for the current time to execute but does not advance time.
StringTokenizer
Splits a string by whitespace (used to be hidden PRC object)
- .set(string) sets the string to be tokenized.
- .more() (int) returns 1 if there are more tokens to be taken from the string, 0 otherwise.
- .next() (string) returns the next token as a string and removes it from the tokenizer
see examples/string/token.ck
ConsoleInput:
Interim console input (until file I/O)(used to be hidden Skot object)
- .prompt(string ) (event) prompts the user for input, can be chucked to now.
- .more() (int) returns 1 if there is data to be treated held by the object, 0 otherwise
- .getLine() (string) returns a string of data entered by the user at the prompt
see examples/string/readline.ck
File IO
TODO
Unit Generators
Unit generators (ugens) can be connected using the ChucK operator ( => )
adc => dac;
the above connects the ugen `adc' (a/d convertor, or audio input) to `dac' (d/a convertor, or audio output).
Ugens can also unlinked (using =<) and relinked (see examples/unchuck.ck).
A unit generator may have 0 or more control parameters. A Ugen's parameters can be set also using the ChucK operator (=>, or ->)
//connect sine oscillator to dac
SinOsc osc => dac;
// set the Osc's frequency to 60.0 hz
60.0 => osc.freq;
(see examples/osc.ck)
All ugen's have at least the following four parameters:
- .gain - (float, READ/WRITE) - set gain.
- .op - (int, READ/WRITE) - set operation type
-
- 0: stop - always output 0.
- 1: normal operation, add all inputs (default).
- 2: normal operation, subtract all inputs starting from the earliest connected.
- 3: normal operation, multiply all inputs.
- 4 : normal operation, divide inputs starting from the earlist connected.
- -1: passthru - all inputs to the ugen are summed and passed directly to output.
- .last - (float, READ/WRITE) - returns the last sample computed by the unit generator as a float.
- .channels - (int, READ only) - the number channels on the UGen
- .chan - (int) - returns a reference on a channel (0 -N-1)
- .isConnectedTo( Ugen ) returns 1 if the unit generator connects to the argument, 0 otherwise.
Multichannel UGens are adc, dac, Pan2, Mix2
Pan2 p;
// assumes you called chuck with at least --chan5 or -c5
p.chan(1) => dac.chan(4);
Audio output
dac
Digital -> analog converter abstraction for underlying audio output device
- .left - (UGen) - input to left channel
- .right - (UGen) - input to right channel
- .chan( int n ) - (UGen) - input to channel N on the device (0 -N-1)
- .channels - (int, READ only) - returns the number of channels open on device
adc
Analog -> digital converter abstraction for underlying audio input device. Note that this is system-wide and so all outputs can be read from as well, for example to record the signals that ChucK is generating to a wave file.
- .left - (UGen) - output to left channel
- .right - (UGen) - output to right channel
- .chan( int n ) - (UGen) - output to channel N on the device (0 -N-1)
- .channels - (int, READ only) - returns the number of channels open on device
blackhole
Sample rate sample sucker ( like dac it ticks ugens, but no more ). Useful for generating modulation signals that aren't ever send to the soundcard. While it is system-wide like dac it can't be read from; it's output will always be zero.
see examples/pwm.ck
UGen
Utility class that all other ugens inherit from. Useful in some cases to abstract sets of ugen types.
wave forms
Impulse
Pulse generator - can set the value of the next sample. Default for each sample is 0 if not set
- .next - (float, READ/WRITE) - set value of next sample
see examples/impulse_example.ck
Step
Step generator - like Impulse, but once a value is set, it is held for all following samples, until the value is set again
- .value - (float, READ/WRITE) - set the current value
- .next - (float, READ/WRITE) - set the step value examples/step_example.ck
see examples/step.ck
basic signal processing
Gain
Gain control (NOTE - all unit generators can themselves change their gain) (this is a way to add N outputs together and scale them). Gain is in fact identical in function to the UGen mother class that all other UGens extend.
- .gain - (float, READ/WRITE) - set gain ( all ugen's have this) examples/gain_example.ck
Used in examples/i-robot.ck
HalfRect
Half wave rectifier for half-wave rectification. Only passes the signal if it's values positive, outputs zero otherwise
FullRect
Full wave rectifier. Transparent for positive input values, inverts negative ones.
ZeroX
Zero crossing detector. Emits a pulse lasting a single sample at the the zero crossing in the direction of the zero crossing.
(see examples/zerox.ck)
filters
Before using filters in ChucK, for the sake of your ears and your speakers, please read the following thread http://www.electro-music.com/forum/topic-37921.html
BiQuad
BiQuad (two-pole, two-zero) filter class. examples/ugen/BiQuad.txt
- .b2 (float, READ/WRITE) filter coefficient
- .b1 (float, READ/WRITE) filter coefficient
- .b0 (float, READ/WRITE) filter coefficient
- .a2 (float, READ/WRITE) filter coefficient
- .a1 (float, READ/WRITE) filter coefficient
- .a0 (float, READ only) filter coefficient
- .pfreq (float, READ/WRITE) set resonance frequency (poles)
- .prad (float, READ/WRITE) pole radius (<= 1 to be stable)
- .zfreq (float, READ/WRITE) notch frequency
- .zrad (float, READ/WRITE) zero radius
- .norm (float, READ/WRITE) normalization
- .eqzs (float, READ/WRITE) equal gain zeroes
BPF
Band pass filter. 2nd order Butterworth. (In the future, this class may be expanded so that order and type of filter can be set.) extends FilterBasic
- .freq (float, READ/WRITE) center frequency (Hz)
- .Q (float, READ/WRITE) Q (default is 1)
- .set (float, float WRITE only) set freq and Q
BRF
Band reject filter. 2nd order Butterworth. (In the future, this class may be expanded so that order and type of filter can be set.) extends FilterBasic
- .freq (float, READ/WRITE) center frequency (Hz)
- .Q (float, READ/WRITE) Q (default is 1)
- .set (float, float WRITE only) set freq and Q
Filter
STK filter class.
- .coefs (string, WRITE only)
examples/ugen/Filter.txt
FilterBasic
base class, don't instantiate.
- .freq (float, READ/WRITE) cutoff/center frequency (Hz)
- .Q (float, READ/WRITE) resonance/Q
- .set (float, float WRITE only) set freq and Q
HPF
Resonant high pass filter. 2nd order Butterworth. (In the future, this class may be expanded so that order and type of filter can be set.) extends FilterBasic
- .freq (float, READ/WRITE) cutoff frequency (Hz)
- .Q (float, READ/WRITE) resonance (default is 1)
- .set (float, float WRITE only) set freq and Q
LPF
Resonant low pass filter. 2nd order Butterworth. (In the future, this class may be expanded so that order and type of filter can be set.) extends FilterBasic
- .freq (float, READ/WRITE) cutoff frequency (Hz)
- .Q (float, READ/WRITE) resonance (default is 1)
- .set (float, float WRITE only) set freq and Q
OnePole
STK one-pole filter class. examples/ugen/OnePole.txt
- .a1 (float, READ/WRITE) filter coefficient
- .b0 (float, READ/WRITE) filter coefficient
- .pole (float, READ/WRITE) set pole position along real axis of z-plane
OneZero
STK one-zero filter class.
- .zero (float, READ/WRITE) set zero position
- .b0 (float, READ/WRITE) filter coefficient
- .b1 (float, READ/WRITE) filter coefficient
examples/ugen/OneZero.txt
PoleZero
STK one-pole, one-zero filter class. examples/ugen/PoleZero.txt
- .a1 (float, READ/WRITE) filter coefficient
- .b0 (float, READ/WRITE) filter coefficient
- .b1 (float, READ/WRITE) filter coefficient
- .blockZero (float, READ/WRITE) DC blocking filter with given pole position
- .allpass (float, READ/WRITE) allpass filter with given coefficient
ResonZ
Resonance filter. Same as BiQuad with equal gain zeros. extends FilterBasic
- .freq (float, READ/WRITE) center frequency (Hz)
- .Q (float, READ/WRITE) Q (default is 1)
- .set (float, float WRITE only) set freq and Q
TwoPole
STK two-pole filter class.
- .a1 (float, READ/WRITE) filter coefficient
- .a2 (float, READ/WRITE) filter coefficient
- .b0 (float, READ/WRITE) filter coefficient
- .freq (float, READ/WRITE) filter resonance frequency
- .radius (float, READ/WRITE) filter resonance radius
- .norm (float, READ/WRITE) toggle filter normalization
see examples/powerup.ck examples/ugen/TwoPole.txt
TwoZero
STK two-zero filter class.
- .b0 (float, READ/WRITE) filter coefficient
- .b1 (float, READ/WRITE) filter coefficient
- .b2 (float, READ/WRITE) filter coefficient
- .freq (float, READ/WRITE) filter notch frequency
- .radius (float, READ/WRITE) filter notch radius
examples/ugen/TwoZero.txt
sound files
LiSa
live sampling utility by Dan Trueman.
LiSa provides basic live sampling functionality. An internal buffer stores samples chucked to LiSa's input. Segments of this buffer can be played back, with ramping and speed/direction control. Multiple voice facility is built in, allowing for a single LiSa object to serve as a source for sample layering and granular textures.
- .duration - ( dur , READ/WRITE ) - sets buffer size; required to allocate memory, also resets all parameter values to default
- .record - ( int , READ/WRITE ) - turns recording on and off
- .getVoice - ( int READ ) - returns the voice number of the next available voice
- .maxVoices - ( int , READ/WRITE ) - sets the maximum number of voices allowable; 10 by default (200 is the current hardwired internal limit)
- .play - ( int, WRITE ) - turn on/off sample playback (voice 0)
- .play - ( int voice, int, WRITE) - for particular voice (arg 1), turn on/off sample playback
- .rampUp - ( dur, WRITE ) - turn on sample playback, with ramp (voice 0)
- .rampUp - ( int voice dur, WRITE ) - for particular voice (arg 1), turn on sample playback, with ramp
- .rampDown - ( dur, WRITE ) - turn off sample playback, with ramp (voice 0)
- .rampDown - ( int voice, dur, WRITE ) - for particular voice (arg 1), turn off sample playback, with ramp
- .rate - ( float, WRITE ) - set playback rate (voice 0). Note that the int/float type for this method will determine whether the rate is being set (float, for voice 0) or read (int, for voice number)
- .rate - ( int voice, float, WRITE ) - for particular voice (arg 1), set playback rate
- .rate - ( READ ) - get playback rate (voice 0)
- .rate - ( int voice, READ ) - for particular voice (arg 1), get playback rate. Note that the int/float type for this method will determine whether the rate is being set (float, for voice 0) or read (int, for voice number)
- .playPos - ( READ ) - get playback position (voice 0)
- .playPos - ( int voice, READ ) - for particular voice (arg 1), get playback position
- .playPos - ( dur, WRITE ) - set playback position (voice 0)
- .playPos - ( int voice, dur, WRITE ) - for particular voice (arg 1), set playback position
- .recPos - ( dur, READ/WRITE ) - get/set record position
- .recRamp - ( dur , READ/WRITE ) - set ramping when recording (from 0 to loopEndRec)
- .loopRec - ( int, READ/WRITE ) - turn on/off loop recording
- .loopEndRec - ( dur, READ/WRITE ) - set end point in buffer for loop recording
- .loopStart - ( dur , READ/WRITE ) - set loop starting point for playback (voice 0). only applicable when 1 => loop.
- .loopStart - ( int voice, dur , WRITE ) - for particular voice (arg 1), set loop starting point for playback. only applicable when .loop(voice, 1).
- .loopEnd - ( dur , READ/WRITE ) - set loop ending point for playback (voice 0). only applicable when 1 => loop.
- .loopEnd - ( int voice, dur , WRITE ) - for particular voice (arg 1), set loop ending point for playback. only applicable when .loop(voice, 1).
- .loop - ( int , READ/WRITE ) - turn on/off looping (voice 0)
- .loop - ( int voice, int, READ/WRITE ) - for particular voice (arg 1), turn on/off looping .bi - ( int , READ/WRITE ) - turn on/off bidirectional playback (voice 0)
- .bi - ( int voice, int , WRITE ) - for particular voice (arg 1), turn on/off bidirectional playback .
- voiceGain - ( float , READ/WRITE ) - set playback gain (voice 0) .voiceGain - ( int voice, float , WRITE ) - for particular voice (arg 1), set gain
- .feedback - ( float , READ/WRITE ) - get/set feedback amount when overdubbing (loop recording; how much to retain)
- .valueAt - ( dur, READ ) - get value directly from record buffer
- .valueAt - ( sample, dur, WRITE ) - set value directly in record buffer
- .sync - (int, READ/WRITE) - set input mode; (0) input is recorded to internal buffer, (1) input sets playback position [0,1] (phase value between loopStart and loopEnd for all active voices), (2) input sets playback position, interpreted as a time value in samples (only works with voice 0)
- .track - (int, READ/WRITE) - identical to sync
- .clear - clear recording buffer
See examples/special (various files)
SndBuf
sound buffer ( now interpolating ) reads from a variety of file formats see examples/sndbuf.ck
- .read - (string, WRITE only) - loads file for reading
- .chunks - (int, READ/WRITE) - size of chunk ( of frames) to read on-demand; 0 implies entire file, default; must be set before reading to take effect.
- .write - (string, WRITE only) - loads a file for writing (currently unimplemented)
- .pos - (int, READ/WRITE) - set position (0 p .samples)
- .valueAt - (int, READ only) - returns the value at sample index .loop - (int, READ/WRITE) - toggle looping
- .interp - (int, READ/WRITE) - set interpolation (0=drop, 1=linear, 2=sinc)
- .rate - (float, READ/WRITE) - playback rate (relative to the file's natural speed)
- .play - (float, READ/WRITE) - play (same as rate)
- .freq - (float, READ/WRITE) - playback rate (file loops/second)
- .phase - (float, READ/WRITE) - set phase position (0-1)
- .channel - (int, READ/WRITE) - select channel (0 x .channels)
- .phaseOffset - (float, READ/WRITE) - set a phase offset
- .samples - (int, READ only) - fetch number of samples
- .length - (dur, READ only) - fetch length as duration
- .channels - (int, READ only) - fetch number of channels
WvIn
STK audio data input base class. examples/ugen/WvIn.txt
- .rate (float, READ/WRITE) playback rate
- .path (string, READ/WRITE) specifies file to be played
WaveLoop
STK waveform oscillator class. see examples/dope.ck examples/ugen/WaveLoop.txt
- .freq (float, READ/WRITE) frequency of playback (loops/second)
- .addPhase (float, READ/WRITE) offset by phase
- .addPhaseOffset (float, READ/WRITE) set phase offset
WvOut
STK audio data output base class. examples/ugen/WvOut.txt
- .matFilename (string, WRITE only) open a matlab file for writing
- .sndFilename (string, WRITE only) open snd file for writing
- .wavFilename (string, WRITE only) open WAVE file for writing
- .rawFilename (string, WRITE only) open raw file for writing
- .aifFilename (string, WRITE only) open AIFF file for writing
- .closeFile () close file properly
network
netout
UDP-based network audio transmitter
- .addr (string, READ/WRITE) target address
- .port (int, READ/WRITE) target port
- .size (int, READ/WRITE) packet size
- .name (string, READ/WRITE) name
netin
UDP-based network audio receiver
- .port (int, READ/WRITE) set port to receive
- .name (string, READ/WRITE) name
mono <- -> stereo
Pan2
Spread mono signal to stereo see examples/stereo/moe2.ck
- .left (UGen) left (mono) channel out
- .right (UGen) right (mono) channel out
- .pan (float, READ/WRITE) pan location value (-1 to 1)
Mix2
Mixes stereo input down to mono channel. Note that without this UGen or gain adjustment chucking stereo signals into a mono input will result in summing them, which may cause clipping.
- .left - (UGen) left (mono) channel in
- .right - (UGen) right (mono) channel in
- .pan - (float, READ/WRITE) mix parameter value (0 - 1)
STK - Delay
Delay
STK non-interpolating delay line class
see examples/netrelay.ck
- .delay (dur, READ/WRITE) length of delay
- .max (dur, READ/WRITE) max delay (buffer size)
DelayA
STK allpass interpolating delay line class. examples/ugen/DelayA.txt
- .delay (dur, READ/WRITE) length of delay
- .max (dur, READ/WRITE) max delay (buffer size)
DelayL
STK linear interpolating delay line class.
- .delay (dur, READ/WRITE) length of delay
- .max (dur, READ/WRITE) max delay (buffer size)
see examples/i-robot.ck
Echo
STK echo effect class.
- .delay (dur, READ/WRITE) length of echo
- .max (dur, READ/WRITE) max delay
- .mix (float, READ/WRITE) mix level (wet/dry)
STK - Envelopes
Envelope
STK envelope base class.
- .keyOn (int, WRITE only) ramp to 1.0
- .keyOff (int, WRITE only) ramp to 0.0
- .target (float, READ/WRITE) ramp to arbitrary value
- .time (float, READ/WRITE) time to reach target (in second)
- .duration (dur, READ/WRITE) time to reach target
- .rate (float, READ/WRITE) rate of change
- .value (float, READ/WRITE) set immediate value
see examples/sixty.ck
ADSR
STK ADSR envelope class.
- .keyOn (int, WRITE only) start the attack for non-zero values
- .keyOff (int, WRITE only) start the release for non-zero values
- .attackTime (dur, WRITE only) attack time
- .attackRate (float, READ/WRITE) attack rate
- .decayTime (dur, READ/WRITE) decay
- .decayRate (float, READ/WRITE) decay rate
- .sustainLevel (float, READ/WRITE) sustain level
- .releaseTime (dur, READ/WRITE) release time
- .releaseRate (float, READ/WRITE) release rate
- .state (int, READ only) attack=0, decay=1, sustain=2, release=3,done=4
see examples/adsr.ck
STK - Reverbs
JCRev
John Chowning's reverberator class.
- .mix (float, READ/WRITE) mix level
NRev
CCRMA's NRev reverberator class.
- .mix (float, READ/WRITE) mix level
PRCRev
Perry's simple reverberator class.
- .mix (float, READ/WRITE) mix level
STK - Components
Chorus
STK chorus effect class.
- .modFreq (float, READ/WRITE) modulation frequency
- .modDepth (float, READ/WRITE) modulation depth
- .mix (float, READ/WRITE) effect mix
- .baseDelay( dur ) sets current base delay
PitShift
STK simple pitch shifter effect class.
- .mix (float, READ/WRITE) effect dry/wet mix level
- .shift (float, READ/WRITE) degree of pitch shifting
Dyno
Dynamics processor by Matt Hoffman and Graham Coleman. Includes limiter, compressor, expander, noise gate, and ducker (presets)
| preset |
slopeAbove
|
slopeBelow
|
tresh
|
attackTime
|
releaseTime
|
ext.side
|
limiter
|
0.1
|
1.0 |
0.5
|
5::ms
|
300::ms
|
false |
| compressor |
0.5
|
1.0
|
0.5 |
5::ms |
300::ms
|
false |
expander
|
2.0
|
1.0
|
0.5
|
20::ms
|
400::ms
|
false
|
noise gate
|
1.0
|
10000000 |
0.1
|
11::ms
|
100::ms
|
false
|
| ducker |
0.5
|
1.0 |
0.1
|
100::ms
|
second
|
true |
(control parameters)
- .limit - () -
- .compress - () -
- .expand - () -
- .gate - () -
- .duck - () -
- .thresh - ( float, READ/WRITE ) -
- .attackTime - ( dur, READ/WRITE ) -
- .releaseTime - ( dur, READ/WRITE ) -
- .ratio - ( float, READ/WRITE ) -
- .slopeBelow - ( float, READ/WRITE ) -
- .slopeAbove - ( float, READ/WRITE ) -
- .sideInput - ( float, READ/WRITE ) -
- .externalSideInput - ( int, READ/WRITE ) -
See examples/special/Dyno-limit.ck
Oscillator ugens
Basic Oscillators
Phasor
simple ramp generator ( 0 to 1 ) this can be fed into other oscillators ( with sync mode of 2 ) as a phase control. see examples/sixty.ck for an example
- .freq (float, READ/WRITE) oscillator frequency (Hz)
- .sfreq (float, READ/WRITE) oscillator frequency (Hz), phase-matched
- .phase (float, READ/WRITE) current phase
- .sync (int, READ/WRITE) (0) sync frequency to input, (1) sync phase to input, (2) fm synth
- .width (float, READ/WRITE) set duration of the ramp in each cycle. (default 1.0)
SinOsc
sine wave oscillator
- .freq (float, READ/WRITE) oscillator frequency (Hz)
- .sfreq (float, READ/WRITE) oscillator frequency (Hz), phase-matched
- .phase (float, READ/WRITE) current phase
- .sync (int, READ/WRITE) (0) sync frequency to input, (1) sync phase to input, (2) fm synth
SinOsc s => dac;

440 => s.freq;

1::second => now;
see examples/osc.ck
PulseOsc
pulse oscillators a pulse wave oscillator with variable width.
- .freq (float, READ/WRITE) oscillator frequency (Hz)
- .sfreq (float, READ/WRITE) oscillator frequency (Hz), phase-matched
- .phase (float, READ/WRITE) current phase
- .sync (int, READ/WRITE) (0) sync frequency to input, (1) sync phase to input, (2) fm synth
- .width (float, WRITE) length of duty cycle (0 - 1)
SawOsc
sawtooth wave oscillator ( triangle, width forced to 0.0 or 1.0 )
- .freq (float, READ/WRITE) oscillator frequency (Hz)
- .sfreq (float, READ/WRITE) oscillator frequency (Hz), phase-matched
- .phase (float, READ/WRITE) current phase
- .sync (int, READ/WRITE) (0) sync frequency to input, (1) sync phase to input, (2) fm synth .width (float, READ/WRITE) increasing ( w 0.5 ) or decreasing ( w 0.5 )
TriOsc
triangle wave oscillator
- .freq (float, READ/WRITE) oscillator frequency (Hz)
- .sfreq (float, READ/WRITE) oscillator frequency (Hz), phase-matched
- .phase (float, READ/WRITE) current phase
- .sync (int, READ/WRITE) (0) sync frequency to input, (1) sync phase to input, (2) fm synth
- .width (float, READ/WRITE) control midpoint of triangle (0 - 1)
SqrOsc
square wave oscillator
- .freq (float, READ/WRITE) oscillator frequency (Hz)
- .sfreq (float, READ/WRITE) oscillator frequency (Hz), phase-matched
- .phase (float, READ/WRITE) current phase
- .sync (int, READ/WRITE) (0) sync frequency to input, (1) sync phase to input, (2) fm synth
- .width (float, WRITE) fixed duty cycle of 0.5
Band Limited Oscillators
Blit
band limited impulse train oscillator
- .freq (float, READ/WRITE) oscillator frequency (Hz)
- .phase (float, READ/WRITE) current phase
- .harmonics (int, READ/WRITE) number of harmonics
see examples/impulse_example.ck
BlitSaw
band limited sawtooth wave oscillator
- .freq (float, READ/WRITE) oscillator frequency (Hz)
- .phase (float, READ/WRITE) current phase
- .harmonics (int, READ/WRITE) number of harmonics
BlitSquare
band limited square wave oscillator
- .freq (float, READ/WRITE) oscillator frequency (Hz)
- .phase (float, READ/WRITE) current phase
- .harmonics (int, READ/WRITE) number of harmonics
Noise Sources
Noise
white noise generator
See examples/noise.ck examples/powerup.ck
SubNoise
STK sub-sampled noise generator.
- .rate (int, READ/WRITE) subsampling rate in samples
see examples/ugen/SubNoise.txt
Modulation Sources
Modulate
STK periodic/random modulator. Generates modultion signals to affect other UGens (for example the basic oscillators using a sync value of 2)
- .vibratoRate (float, READ/WRITE) set rate of vibrato
- .vibratoGain (float, READ/WRITE) gain for vibrato
- .randomGain (float, READ/WRITE) gain for random contribution
STK - Instruments
Physical Modelling
StkInstrument
Super-class for STK instruments. Useful for abstracting sets of such ugens.
- .noteOn - (float velocity) - trigger note on
- .noteOff - (float velocity) - trigger note off
- .freq - (float frequency) - set/get frequency (Hz)
- .controlChange - (int number, float value) - assert control change - numbers are instrument specific, value range: [0.0 - 128.0]
See examples/ugen/STKinstrument.txt
BandedWG
Banded waveguide modeling class. Extends STKInstrument
- .bowPressure (float, READ/WRITE) bow pressure [0.0 - 1.0]
- .bowMotion (float, READ/WRITE) bow motion [0.0 - 1.0]
- .bowRate (float, READ/WRITE) strike Position
- .strikePosition (float, READ/WRITE) strike Position
- .integrationConstant - ( float , READ/WRITE ) - ?? [0.0 - 1.0]
- .modesGain (float, READ/WRITE) amplitude for modes [0.0 - 1.0]
- .preset (int, READ/WRITE) instrument presets (0 - 3, see above)
- .pluck (float, READ/WRITE) pluck instrument [0.0 - 1.0]
- .startBowing (float, READ/WRITE) start bowing [0.0 - 1.0]
- .stopBowing (float, READ/WRITE) stop bowing [0.0 - 1.0] (inherited from StkInstrument)
- .noteOn - (float velocity) - trigger note on
- .noteOff - (float velocity) - trigger note off
- .freq - (float frequency) - set/get frequency (Hz)
- .controlChange - (int number, float value) - assert control change
See examples/ugen/BandedWG.txt
BlowBotl
STK blown bottle instrument. Extends STKInstrument
- .noiseGain - ( float , READ/WRITE ) - noise component gain [0.0 - 1.0]
- .vibratoFreq - ( float , READ/WRITE ) - vibrato frequency (Hz)
- .vibratoGain - ( float , READ/WRITE ) - vibrato gain [0.0 - 1.0]
- .volume - ( float , READ/WRITE ) - yet another volume knob [0.0 - 1.0]
- .startBlowing (float, READ/WRITE) begin blowing [0.0 - 1.0]
- .stopBlowing (float, READ/WRITE) stop blowing [0.0 - 1.0]
- .rate (float, READ/WRITE) - rate of attack (sec) (inherited from StkInstrument)
- .noteOn - (float velocity) - trigger note on
- .noteOff - (float velocity) - trigger note off
- .freq - (float frequency) - set/get frequency (Hz)
- .controlChange - (int number, float value) - assert control change
See examples/ugen/BlowBotl.txt
BlowHole
STK clarinet physical model with one register hole and one tonehole. Extends STKInstrument
- .reed (float, READ/WRITE) reed stiffness [0.0 - 1.0]
- .noiseGain - ( float , READ/WRITE ) - noise component gain [0.0 - 1.0]
- .vent (float, READ/WRITE) vent frequency [0.0 - 1.0]
- .pressure (float, READ/WRITE) pressure [0.0 - 1.0]
- .tonehole (float, READ/WRITE) tonehole size [0.0 - 1.0]
- .startBlowing (float, READ/WRITE) start blowing [0.0 - 1.0]
- .stopBlowing (float, READ/WRITE) stop blowing [0.0 - 1.0]
- .rate (float, READ/WRITE) rate of change (sec) (inherited from StkInstrument)
- .noteOn - (float velocity) - trigger note on
- .noteOff - (float velocity) - trigger note off
- .freq - (float frequency) - set/get frequency (Hz)
- .controlChange - (int number, float value) - assert control change
See examples/ugen/BlowHole.txt
Bowed
STK bowed string instrument class. Extends STKInstrument
- .bowPressure - ( float , READ/WRITE ) - bow pressure [0.0 - 1.0]
- .bowPosition - ( float , READ/WRITE ) - bow position [0.0 - 1.0]
- .vibratoFreq - ( float , READ/WRITE ) - vibrato frequency (Hz)
- .vibratoGain - ( float , READ/WRITE ) - vibrato gain [0.0 - 1.0]
- .volume - ( float , READ/WRITE ) - volume [0.0 - 1.0]
- .startBowing (float, READ/WRITE) begin bowing [0.0 - 1.0]
- .stopBowing (float, READ/WRITE) stop bowing [0.0 - 1.0]
- .rate (float, READ/WRITE) - rate of attack (sec) (inherited from StkInstrument)
- .noteOn - (float velocity) - trigger note on
- .noteOff - (float velocity) - trigger note off
- .freq - (float frequency) - set/get frequency (Hz)
- .controlChange - (int number, float value) - assert control change
See examples/ugen/Bowed.txt
Brass
STK simple brass instrument class. Extends STKInstrument
- .lip - ( float , READ/WRITE ) - lip tension [0.0 - 1.0]
- .slide - ( float , READ/WRITE ) - slide length [0.0 - 1.0]
- .vibratoFreq - ( float , READ/WRITE ) - vibrato frequency (Hz)
- .vibratoGain - ( float , READ/WRITE ) - vibrato gain [0.0 - 1.0]
- .volume - ( float , READ/WRITE ) - volume [0.0 - 1.0]
- .clear - ( float , WRITE only ) - clear instrument
- .startBlowing (float, READ/WRITE) start blowing [0.0 - 1.0]
- .stopBlowing (float, READ/WRITE) stop blowing [0.0 - 1.0]
- .rate (float, READ/WRITE) rate of change (sec) (inherited from StkInstrument)
- .noteOn - (float velocity) - trigger note on
- .noteOff - (float velocity) - trigger note off
- .freq - (float frequency) - set/get frequency (Hz)
- .controlChange - (int number, float value) - assert control change
See examples/ugen/Brass.txt
Clarinet
STK clarinet physical model class. Extends STKInstrument
- .reed - ( float , READ/WRITE ) - reed stiffness [0.0 - 1.0]
- .noiseGain - ( float , READ/WRITE ) - noise component gain [0.0 - 1.0]
- .clear - ( ) - clear instrument .vibratoFreq - ( float , READ/WRITE ) - vibrato frequency (Hz)
- .vibratoGain - ( float , READ/WRITE ) - vibrato gain [0.0 - 1.0]
- .pressure - ( float , READ/WRITE ) - pressure/volume [0.0 - 1.0]
- .startBlowing - ( float , WRITE only ) - start blowing [0.0 - 1.0]
- .stopBlowing - ( float , WRITE only ) - stop blowing [0.0 - 1.0]
- .rate - ( float , READ/WRITE ) - rate of attack (sec) (inherited from StkInstrument)
- .noteOn - (float velocity) - trigger note on
- .noteOff - (float velocity) - trigger note off
- .freq - (float frequency) - set/get frequency (Hz)
- .controlChange - (int number, float value) - assert control change
See examples/ugen/Clarinet.txt
Flute
STK flute physical model class. Extends STKInstrument
- .jetDelay - ( float , READ/WRITE ) - jet delay [...] item
- .jetReflection - ( float , READ/WRITE ) - jet reflection [...]
- .endReflection - ( float , READ/WRITE ) - end delay [...]
- .noiseGain - ( float , READ/WRITE ) - noise component gain [0.0 - 1.0]
- .clear - ( ) - clear instrument .vibratoFreq - ( float , READ/WRITE ) - vibrato frequency (Hz)
- .vibratoGain - ( float , READ/WRITE ) - vibrato gain [0.0 - 1.0]
- .pressure - ( float , READ/WRITE ) - pressure/volume [0.0 - 1.0]
- .startBlowing (float, READ/WRITE) begin bowing [0.0 - 1.0]
- .stopBlowing (float, READ/WRITE) stop bowing [0.0 - 1.0]
- .rate (float, READ/WRITE) - rate of attack (sec) (inherited from StkInstrument)
- .noteOn - (float velocity) - trigger note on
- .noteOff - (float velocity) - trigger note off
- .freq - (float frequency) - set/get frequency (Hz)
- .controlChange - (int number, float value) - assert control change
See examples/ugen/Flute.txt
Mandolin
STK mandolin instrument model class. Extends STKInstrument
- .bodySize (float, READ/WRITE) body size (percentage)
- .pluckPos (float, READ/WRITE) pluck position [0.0 - 1.0]
- .stringDamping (float, READ/WRITE) string damping [0.0 - 1.0]
- .stringDetune (float, READ/WRITE) detuning of string pair [0.0 - 1.0]
- .afterTouch (float, READ/WRITE) aftertouch (currently unsupported)
- .pluck - ( float , WRITE only ) - pluck instrument [0.0 - 1.0] (inherited from StkInstrument)
- .noteOn - (float velocity) - trigger note on
- .noteOff - (float velocity) - trigger note off
- .freq - (float frequency) - set/get frequency (Hz)
- .controlChange - (int number, float value) - assert control change
See examples/mand-o-matic.ck examples/ugen/Mandolin.txt
ModalBar
STK resonant bar instrument class. Extends STKInstrument
- .stickHardness - ( float , READ/WRITE ) - stick hardness [0.0 - 1.0]
- .strikePosition - ( float , READ/WRITE ) - strike position [0.0 - 1.0]
- .vibratoFreq - ( float , READ/WRITE ) - vibrato frequency (Hz)
- .vibratoGain - ( float , READ/WRITE ) - vibrato gain [0.0 - 1.0]
- .directGain - ( float , READ/WRITE ) - direct gain [0.0 - 1.0]
- .masterGain - ( float , READ/WRITE ) - master gain [0.0 - 1.0]
- .volume - ( float , READ/WRITE ) - volume [0.0 - 1.0]
- .preset - ( int , READ/WRITE ) - choose preset (see above)
- .strike - ( float , WRITE only ) - strike bar [0.0 - 1.0]
- .damp - ( float , WRITE only ) - damp bar [0.0 - 1.0]
- .clear - ( ) - reset [none]
- .mode - ( int , READ/WRITE ) - select mode [0.0 - 1.0]
- .modeRatio - ( float , READ/WRITE ) - edit selected mode ratio [...]
- .modeRadius - ( float , READ/WRITE ) - edit selected mode radius [0.0 - 1.0]
- .modeGain - ( float , READ/WRITE ) - edit selected mode gain [0.0 - 1.0] (inherited from StkInstrument)
- .noteOn - (float velocity) - trigger note on
- .noteOff - (float velocity) - trigger note off
- .freq - (float frequency) - set/get frequency (Hz)
- .controlChange - (int number, float value) - assert control change
See examples/modalbot.ck examples/ugen/ModalBar.txt
Saxofony
STK faux conical bore reed instrument class. Extends STKInstrument
- .stiffness - ( float , READ/WRITE ) - reed stiffness [0.0 - 1.0]
- .aperture - ( float , READ/WRITE ) - reed aperture [0.0 - 1.0]
- .blowPosition - ( float , READ/WRITE ) - lip stiffness [0.0 - 1.0]
- .noiseGain - ( float , READ/WRITE ) - noise component gain [0.0 - 1.0]
- .vibratoFreq - ( float , READ/WRITE ) - vibrato frequency (Hz)
- .vibratoGain - ( float , READ/WRITE ) - vibrato gain [0.0 - 1.0]
- .clear - ( ) - clear instrument
- .pressure - ( float , READ/WRITE ) - pressure/volume [0.0 - 1.0]
- .startBlowing (float, READ/WRITE) begin blowing [0.0 - 1.0]
- .stopBlowing (float, READ/WRITE) stop blowing [0.0 - 1.0]
- .rate (float, READ/WRITE) - rate of attack (sec) (inherited from StkInstrument)
- .noteOn - (float velocity) - trigger note on
- .noteOff - (float velocity) - trigger note off
- .freq - (float frequency) - set/get frequency (Hz)
- .controlChange - (int number, float value) - assert control change
See examples/ugen/Saxofony.txt
Shakers
PhISEM and PhOLIES class emulating systems of particles. Extends STKInstrument
- .preset - ( int , READ/WRITE ) - select instrument (0 - 22; see below)
- .energy - ( float , READ/WRITE ) - shake energy [0.0 - 1.0]
- .decay - ( float , READ/WRITE ) - system decay [0.0 - 1.0]
- .objects - ( float , READ/WRITE ) - number of objects [0.0 - 128.0] (inherited from StkInstrument)
- .noteOn - (float velocity) - trigger note on
- .noteOff - (float velocity) - trigger note off
- .freq - (float frequency) - set/get frequency (Hz)
- .controlChange - (int number, float value) - assert control change
Instrument preset numbers;
- Maraca = 0
- Cabasa = 1
- Sekere = 2
- Guiro = 3
- Water Drops = 4
- Bamboo Chimes = 5
- Tambourine = 6
- Sleigh Bells = 7
- Sticks = 8
- Crunch = 9
- Wrench = 10
- Sand Paper = 11
- Coke Can = 12
- Next Mug = 13
- Penny + Mug = 14
- Nickle + Mug = 15
- Dime + Mug = 16
- Quarter + Mug = 17
- Franc + Mug = 18
- Peso + Mug = 19
- Big Rocks = 20
- Little Rocks = 21
- Tuned Bamboo Chimes = 22
See examples/shake-o-matic.ck examples/ugen/Shakers.txt
Sitar
STK sitar string model class. extends STKInstrument
- .pluck (float, WRITE only) pluck string [0.0 - 1.0]
- .clear () reset (inherited from StkInstrument)
- .noteOn - (float velocity) - trigger note on
- .noteOff - (float velocity) - trigger note off
- .freq - (float frequency) - set/get frequency (Hz)
- .controlChange - (int number, float value) - assert control change
See examples/ugen/Sitar.txt
StifKarp
STK plucked stiff string instrument named after and based on the "Karplus-Strong" method of delay-based plucked string synthesis. Extends STKInstrument
- .pickupPosition - ( float , READ/WRITE ) - pickup position [0.0 - 1.0]
- .sustain - ( float , READ/WRITE ) - string sustain [0.0 - 1.0]
- .stretch - ( float , READ/WRITE ) - string stretch [0.0 - 1.0]
- .pluck - ( float , WRITE only ) - pluck string [0.0 - 1.0]
- .baseLoopGain - ( float , READ/WRITE ) - ?? [0.0 - 1.0]
- .clear - ( ) - reset instrument (inherited from StkInstrument)
- .noteOn - (float velocity) - trigger note on
- .noteOff - (float velocity) - trigger note off
- .freq - (float frequency) - set/get frequency (Hz)
- .controlChange - (int number, float value) - assert control change
See examples/stifkarp.ck examples/ugen/StifKarp.txt
VoicForm
Four formant synthesis instrument. Extends STKInstrument
- .phoneme (string, READ/WRITE) select phoneme ( see "name" in the table below )
- .phonemeNum - ( int , READ/WRITE ) - select phoneme by number [0.0 - 128.0] (see "number" in the table below)
- .speak (float, WRITE only) start singing [0.0 - 1.0]
- .quiet (float, WRITE only) stop singing [0.0 - 1.0]
- .voiced (float, READ/WRITE) set mix for voiced component [0.0 - 1.0]
- .unVoiced (float, READ/WRITE) set mix for unvoiced component [0.0 - 1.0]
- .pitchSweepRate (float, READ/WRITE) pitch sweep [0.0 - 1.0]
- .voiceMix (float, READ/WRITE) voiced/unvoiced mix [0.0 - 1.0]
- .vibratoFreq (float, READ/WRITE) vibrato frequency (Hz)
- .vibratoGain (float, READ/WRITE) vibrato gain [0.0 - 1.0]
- .loudness (float, READ/WRITE) 'loudness' of voice [0.0 - 1.0] (inherited from StkInstrument)
- .noteOn - (float velocity) - trigger note on
- .noteOff - (float velocity) - trigger note off
- .freq - (float frequency) - set/get frequency (Hz)
- .controlChange - (int number, float value) - assert control change
| number |
name
|
description |
notes |
| 0 |
"eee" |
beet |
|
| 1 |
"ihh" |
bit |
|
2
|
"ehh" |
bet |
|
3
|
"aaa" |
bat |
|
4
|
"ahh" |
father |
|
5
|
"aww" |
bought |
|
| 6 |
"ohh" |
bone |
same as aww (bought)
|
7
|
"uhh" |
but |
|
8
|
"uuu" |
foot |
|
9
|
"ooo" |
boot |
|
| 10 |
"rrr" |
bird |
|
11
|
"lll" |
lull |
|
12
|
"mmm" |
mom |
|
13
|
"nnn" |
nun |
|
14
|
"nng" |
sang |
|
15
|
"ngg" |
bong |
|
16
|
"fff" |
|
|
17
|
"sss" |
|
|
18
|
"thh" |
|
|
19
|
"shh" |
|
|
20
|
"xxx" |
|
not done yet
|
21
|
"hee" |
beet |
|
22
|
"hoo" |
boot |
|
23
|
"hah" |
father |
|
24
|
"bbb" |
|
not done yet |
25
|
"ddd" |
|
not done yet |
26
|
"jjj" |
|
not done yet |
27
|
"ggg" |
|
not done yet |
28
|
"vvv" |
|
not done yet |
29
|
"zzz" |
|
not done yet |
30
|
"thz" |
|
not done yet |
31
|
"zhh" |
|
|
See examples/voic-o-form.ck examples/ugen/VoicForm.txt
STK Wavetable Synthesis
Moog
STK moog-like swept filter sampling synthesis class Extends ugen_STKStkInstrument
- .filterQ - ( float , READ/WRITE ) - filter Q value [0.0 - 1.0]
- .filterSweepRate - ( float , READ/WRITE ) - filter sweep rate [0.0 - 1.0]
- .vibratoFreq - ( float , READ/WRITE ) - vibrato frequency (Hz)
- .vibratoGain - ( float , READ/WRITE ) - vibrato gain [0.0 - 1.0]
- .afterTouch - ( float , WRITE only ) - aftertouch [0.0 - 1.0] (inherited from StkInstrument)
- .noteOn - (float velocity) - trigger note on
- .noteOff - (float velocity) - trigger note off
- .freq - (float frequency) - set/get frequency (Hz)
- .controlChange - (int number, float value) - assert control change
See examples/moogie.ck examples/ugen/Moog.txt
STK - FM Synths
FM
STK abstract FM synthesis base. Extends STKInstrument.
- .lfoSpeed (float, READ/WRITE) modulation speed (Hz)
- .lfoDepth (float, READ/WRITE) modulation depth [0.0 - 1.0]
- .afterTouch (float, READ/WRITE) aftertouch [0.0 - 1.0]
- .control1 (float, READ/WRITE) FM control 1 [instrument specific]
- .control2 (float, READ/WRITE) FM control 2 [instrument specific] it (inherited from StkInstrument)
- .noteOn - (float velocity) - trigger note on
- .noteOff - (float velocity) - trigger note off
- .freq - (float frequency) - set/get frequency (Hz)
- .controlChange - (int number, float value) - assert control change
See class examples/ugen/FM.txt
BeeThree
STK Hammond-oid organ FM synthesis instrument. Extends FM (see super classes)
See examples/ugen/BeeThree.txt
FMVoices
STK singing FM synthesis instrument. Extends FM (see super classes).
- .vowel (float, WRITE only) select vowel [0.0 - 1.0]
- .spectralTilt (float, WRITE only) spectral tilt [0.0 - 1.0]
- .adsrTarget (float, WRITE only) adsr targets [0.0 - 1.0]
See examples/ugen/FMVoices.txt
HevyMetl STK
STK heavy metal FM synthesis instrument. Extends FM (see super classes)
See examples/ugen/HevyMetl.txt
PercFlut
STK percussive flute FM synthesis instrument. Extends FM (see super classes)
See examples/ugen/PercFlut.txt
Rhodey
STK Fender Rhodes-like electric piano. Extends FM (see super classes)
extends FM (see super classes)
See examples/rhodey.ck examples/ugen/Rhodey.txt
TubeBell
STK tubular bell (orchestral chime) FM bell. Extends FM (see super classes).
See examples/ugen/TubeBell.txt
Wurley
STK Wurlitzer electric piano. Extends FM (see super classes).
See examples/wurley.ck
UAna objects
UAna
Base class from which all unit analyzers (UAnae) inherit; UAnae (note plural form) can be interconnected via => (standard chuck operator) or via =^ (upchuck operator), specify the the types of and when data is passed between UAnae and UGens. When .upchuck() is invoked on a given UAna, the UAna-chain (UAnae connected via =^) is traversed backwards from the upchucked UAna, and analysis is performed at each UAna along the chain; the updated analysis results are stored in UAnaBlobs.
extends UGen
- UAnaBlob .upchuck() initiate analysis at the UAna returns result.
[object]:UAnaBlob
- Unit Analyzer blob for contain of data
This object contains results associated with UAna analysis. There is a UAnaBlob associated with every UAna. As a UAna is upchucked, the result is stored in the UAnaBlob’s floating point vector and/or complex vector. The intended interpretation of the results depends on the specific UAna.
- float .fval(int index) get blob's float value at index
- complex .cval(int index) get blob's complex value at index
- float[] .fvals() get blob's float array
- complex[] .cvals() get blob's complex array
- time .when() get the time when blob was last upchucked
[object]: Windowing
- Helper class for generating transform windows
This class contains static methods for generating common transform windows for use with FFT/IFFT. The windows are returned in a static array associated with the Windowing class (note: do not use the returned array for anything other than reading/setting windows in FFT/IFFT).
- float[] .rectangle(int length) generate a rectangular window
- float[] .triangle(int length) generate a triangular (or Barlett) window
- float[] .hann(int length) generate a Hann window
- float[] .hamming(int length) generate a Hamming window
- float[] .blackmanHarris(int length) generate a blackmanHarris window
examples: win.ck
domain transformations
[uana]: FFT Fast Fourier Transform
This object contains results associated with UAna analysis. There is a UAnaBlob associated with every UAna. As a UAna is upchucked, the result is stored in the UAnaBlob’s floating point vector and/or complex vector. The intended interpretation of the results depends on the specific UAna. This UAna computes the Fast Fourier Transform on incoming audio samples, and outputs the result via its UAnaBlob as both the complex spectrum and the magnitude spectrum. A buffering mechanism maintains the previous FFTsize # of samples, allowing FFT’s to be taken at any point in time, on demand (via .upchuck() or by upchucking a downstream UAna; The window size (along with an arbitry window shape) is controlled via the .window method. The hop size is complete dynamic, and is throttled by how time is advanced.
extends UAna
- .size ( float, READ/WRITE ) get/set the FFT size
- .window() ( float[], READ/WRITE ) get/set the transform window/size (also see AAA Windowing)
- .windowSize ( int, READ only ) get the current window size
- .transform ( float[], WRITE only ) manually take FFT (as opposed to using .upchuck() / upchuck operator)
- .spectrum ( complex[], READ only ) manually retrieve the results of a transform
(UAna input/output)
- input: audio samples from an incoming UGen output spectrum in complex array, magnitude spectrum in float array
examples: fft.ck, fft2.ck, fft3.ck win.ck
[uana]: IFFT Inverse Fast Fourier Transform
- Inverse Fast Fourier Transform
This UAna computes the inverse Fast Fourier Transform on incoming spectral frames (on demand), and overlap-adds the results into its internal buffer, ready to be sent to other UGen’s connected via =>. The window size (along with an arbitry window shape) is controlled via the .window method.
- .size - ( float, READ/WRITE ) get/set the IFFT size
- .window() - ( float[], READ/WRITE ) get/set the transform window/size (also see AAA Windowing)
- .windowSize - ( int, READ only ) get the current window size
- .transform - ( complex[], WRITE only ) manually take IFFT (as opposed to using .upchuck() / upchuck operator)
- .samples - ( float[], READ only ) manually retrieve the result of the previous IFFT (UAna input/output) input: complex spectral frames (either via UAnae connected via , or manullay via .transform()) output audio samples (overlap-added and streamed out to UGens connected via )
examples: ifft.ck, fft2.ck, ifft3.ck
[uana]: DCT Discrete Cosine Transform
This UAna computes the Discrete Cosine Transform on incoming audio samples, and outputs the result via its UAnaBlob as real values in the D.C. spectrum. A buffering mechanism maintains the previous DCT size # of samples, allowing DCT to be taken at any point in time, on demand (via .upchuck() or by upchucking a downstream UAna; The window size (along with an arbitry window shape) is controlled via the .window method. The hop size is complete dynamic, and is throttled by how time is advanced.
extends UAna
- .size - ( float, READ/WRITE ) get/set the DCT size
- .window() - ( float[], READ/WRITE ) get/set the transform window/size (also see AAA Windowing)
- .windowSize - ( int, READ only ) get the current window size
- .transform - ( float[], WRITE ) manually take DCT (as opposed to using .upchuck() / upchuck operator)
- .spectrum - ( float[], READ only ) manually retrieve the results of a transform
(UAna input/output)
- [function] input: audio samples (either via UAnae connected via =^, or manullay via .transform())
- [function] output discrete cosine spectrum
examples: dct.ck
[uana]: IDCT Inverse Discrete Cosine Transform
This UAna computes the inverse Discrete Cosine Transform on incoming spectral frames (on demand), and overlap-adds the results into its internal buffer, ready to be sent to other UGen’s connected via =>. The window size (along with an arbitry window shape) is controlled via the .window method.
extends UAna
- .size - ( float, READ/WRITE ) get/set the IDCT size
- .window() - ( float[], READ/WRITE ) get/set the transform window/size (also see AAA Windowing)
- .windowSize - ( int, READ only ) get the current window size
- .transform - ( float[], WRITE ) manually take IDCT (as opposed to using .upchuck() / upchuck operator)
- .samples - ( float[], WRITE ) manually get result of previous IDCT
(UAna input/output)
- input: real-valued spectral frames (either via UAnae connected via , or manullay via .transform())
- output audio samples (overlap-added and streamed out to UGens connected via )
examples: idct.ck feature extractors
[uana]: Centroid Spectral Centroid
This UAna computes the spectral centroid from a magnitude spectrum (either from incoming UAna or manually given), and outputs one value in its blob.
extends UAna
- float .compute(float[]) manually computes the centroid from a float array
(UAna input/output)
- input: complex spectral frames (e.g., via UAnae connected via )
- output the computed Centroid value is stored in the blob's floating point vector, accessible via .fval(0). This is a normalized value in the range (0,1), mapped to the frequency range 0Hz to Nyquist
examples: centroid.ck
[uana]: Flux Spectral Flux
This UAna computes the spectral flux between successive magnitude spectra (via incoming UAna, or given manually), and outputs one value in its blob.
extends UAna
- void .reset( ) reset the extractor
- float .compute(float[] f1, float[] f2) manually computes the flux between two frames
- float .compute(float[] f1, float[] f2, float[] diff) manually computes the flux between two frames, and stores the difference in a third array
(UAna input/output)
- input: complex spectral frames (e.g., via UAnae connected via )
- output the computed Flux value is stored in the blob's floating point vector, accessible via .fval(0)
examples: flux.ck, flux0.ck
[uana]: RMS
This UAna computes the RMS power mean from a magnitude spectrum (either from an incoming UAna, or given manually), and outputs one value in its blob.
extends UAna
- float .compute(float[]) manually computes the RMS from a float array
(UAna input/output)
- input: complex spectral frames (e.g., via UAnae connected via )
- output the computed RMS value is stored in the blob's floating point vector, accessible via .fval(0)
examples: rms.ck
[uana]: RollOff
This UAna computes the spectral rolloff from a magnitude spectrum (either from incoming UAna, or given manually), and outputs one value in its blob.
extends UAna
- float .percent((float val)) set the percentage for computing rolloff
- float .percent(( )) get the percentage specified for the rolloff
- float .compute(float[]) manually computes the rolloff from a float array
-
(UAna input/output)
- input: complex spectral frames (e.g., via UAnae connected via )
- output the computed rolloff value is stored in the blob's floating point vector, accessible via .fval(0). This is a normalized value in the range [0,1), mapped to the frequency range 0 to nyquist frequency.
examples: rolloff.ck
LiCK Library for ChucK
Summary
LiCK, a Library for ChucK, was born out of frequent requests on the chuck-users mailing list to have a shared repository for various bits of reusable ChucK code.
LiCK currently provides
- int, float, and Object Lists
- Functor classes
- Interpolating functions
- Composite procedures for building loops
- An Assert class for writing unit tests
Download and installation
To download LiCK, visit the LiCK repository page on GitHub
http://github.com/heuermh/lick
Use git to clone to a local repository, or use the download link for a zip archive or a tarball.
To install and use LiCK in your own ChucK scripts, use the import.ck script
$ chuck --loop &

$ chuck + import.ck
...
"LiCK imported." : (string)

$ chuck + my-script.ck
If you don't want to include all of LiCK, use Machine.add(file name) to include individual LiCK source files. Do be careful to include the LiCK source files of dependencies as well.
Machine.add("FloatFunction.ck");
Machine.add("Interpolation.ck");
Machine.add("ExponentialOut.ck");
Hopefully, a future version of ChucK will support a proper include and namespace mechanism, simplifying the use of external libraries like LiCK.
Contributing to LiCK
LiCK is welcome to any contributions! Don’t worry too much about style or formatting, that can all be worked out later.
Please add the license header (HEADER.txt) to the top of each file and provide an author statement if you wish.
If you add classes to LiCK, be sure to update import.ck with the new classes and their dependencies in the correct order. If you have unit tests for those classes, be sure to update tests.ck with the new unit tests.
Any suggestions as to where examples should live in the repository are also welcome.
int, float, and Object Lists
For those more comfortable with Smalltalk, C#, or Java-style collections than arrays, LiCK provides int, float, and Object Lists.
Lists are created and sized in manner similar to that of ChucK arrays
// create a new object list
ArrayList list;

// initially the size of the list is zero
Assert.assertTrue(0, list.size());
Assert.assertTrue(list.isEmpty());

// pass an argument to the size method to resize the array
list.size(16);
Assert.assertTrue(16, list.size());
Assert.assertFalse(list.isEmpty());

list.clear();
Assert.assertTrue(0, list.size());
Assert.assertTrue(list.isEmpty());

// or add elements to the list to resize it dynamically
Object foo;
list.add(foo);
Assert.assertTrue(1, list.size());
Assert.assertFalse(list.isEmpty());
Indexed access is provided via get and set methods
ArrayList list;
Object foo;
Object bar;
Object baz;

list.set(0, foo);
list.set(1, bar);
list.set(2, baz);

Assert.assertEquals(foo, list.get(0));
Assert.assertEquals(bar, list.get(1));
Assert.assertEquals(baz, list.get(2));
All the elements in a list can be accessed using a for loop over the indices
for (0 => int i; i < list.size(); i++)
{
  list.get(i) @=> Object value;
  Assert.assertNotNull(value);
}
an Iterator
list.iterator() @=> Iterator iterator;
while (iterator.hasNext())
{
  iterator.next() @=> Object value;
  Assert.assertNotNull(value);
}
or an internal iterator via any of the forEach methods
class AssertNotNull extends UnaryProcedure
{
  fun void run(Object value)
  {
    Assert.assertNotNull(value);
  }
}

AssertNotNull assertNotNull;
list.forEach(assertNotNull);
Int and float list implementations also provide similar behaviour.
IntArrayList intList;
intList.add(42);
intList.set(1, -42);
Assert.assertEquals(42, intList.get(0));
Assert.assertEquals(-42, intList.get(1));

FloatArrayList floatList;
floatList.size(16);
floatList.assign(3.14);
floatList.iterator() @=> Iterator iterator;
while (iterator.hasNext())
{
  iterator.next() => float value;
  Assert.assertEquals(3.14, value, 0.001);
}
Functor classes
LiCK provides a suite of Functor classes [1], objects that act as functions or procedures. Functor objects can be passed to methods, as shown above in the ArrayList.forEach(UnaryProcedure) example.
A procedure accepts argument(s)
class Write extends UnaryProcedure
{
  fun void run(Object value)
  {
    <<<value>>>;
  }
}
A function accepts argument(s) and returns a value
class Multiply extends FloatFloatFunction
{
  fun float evaluate(float value0, float value1)
  {
    return value0 * value1;
  }
}
A predicate accepts argument(s) and returns a boolean value
class AllPositive extends IntIntIntPredicate
{
  fun int test(int value0, int value1, int value2)
  {
    return (value > 0) && (value1 > 0) && (value2 > 0);
  }
}
Functor classes are provided for int, float, and Object arguments, in varying number of arguments. For Object functors, the prefix indicates the number of arguments, i.e. Unary is 1 argument, Binary is 2 arguments, Tertiary is 3 arguments, Quaternary is 4 arguments. Thus a QuaternaryFunction accepts 4 Object arguments and returns an Object value.
Similarly, for int and float functors, the number of prefix repeats is the number of arguments, e.g. an IntIntIntIntFunction accepts four int arguments and returns an int value.
For convenience, all of the functions in Math are implemented as functors
// functors can be evaluated against scalar values
Log10 log10;
log10.evaluate(3.14) => float result;

// ...however, they really show their utility when you can pass them to a method
ArrayList list;
list.size(16);
list.assign(3.14);
list.transform(log10);  // log10 is used to transform all the values in list
Interpolating functions
Interpolating functions.
Composite procedures
Composite procedures.
Sample-based drum machine emulators
LiCK provides classes that trigger samples for various vintage drum machines, such as the Oberheim DMX (OberheimDmx.ck) and the Roland TR-909 (RolandTr909.ck). To use these classes, find or record samples of each instrument and copy them to the paths in the source code, or alternatively edit the paths in the source code to match your samples directory.
For example, the samples directory layout for the Roland CR-78 defaults to
samples/RolandCr78/Claves.wav
samples/RolandCr78/ClosedHat.wav
samples/RolandCr78/CowBell.wav
samples/RolandCr78/Crash.wav
samples/RolandCr78/Guiro.wav
samples/RolandCr78/HighBongo.wav
samples/RolandCr78/Kick.wav
samples/RolandCr78/LowBongo.wav
samples/RolandCr78/LowConga.wav
samples/RolandCr78/Maracas.wav
samples/RolandCr78/OpenHat.wav
samples/RolandCr78/Rim.wav
samples/RolandCr78/Snare.wav
samples/RolandCr78/Tamborine.wav
Each sample is triggered by an IntProcedure that accepts a MIDI velocity value (0 .. 127) mapped to gain. The sample procedures also have rate and maxGain fields. Call these procedures directly in ChucK code
RolandCr78 cr78;
while (true)
{
  cr78.kick.run(127);
  400::ms => now;
  cr78.snare.run(80);
  400::ms => now;
}
or use a MIDI controller class, such as the nanoPAD (NanoPad.ck)
NanoPad nanoPad;
RolandCr78 cr78;

// assign sample triggers to nanoPAD buttons
cr78.kick @=> nanoPad.button1;
cr78.snare @=> nanoPad.button2;
cr78.closedHat @=> nanoPad.button3;

// open nanoPAD MIDI device 0
nanoPad.open(0);
Unit tests
Unit testing is a software verification, validation, and documentation method in which a programmer tests if individual units of source code are fit for use [2]. LiCK provides support for unit testing via its Assert.ck class and the following implementation pattern.
ChucK currently does not support calling methods via reflection, so unit tests in LiCK should follow the pattern described below to be executed properly.
Each unit test should be a class which extends Assert.ck
class MyUnitTest extends Assert
{
}
Next, provide test methods that utilize assertXxx methods to make assertions about the class under test. Assertion messages are optional.
class MyUnitTest extends Assert
{

  fun void testFoo()
  {
    assertTrue("this should be true", true);
  }

  fun void testBar()
  {
    assertFalse("this should be false", false);
  }
}
Provide an pseudo-constructor method that sets exitOnFailure as desired, calls each of the testXxx methods, and prints out a message to stdout on success
class MyUnitTest extends Assert
{
  {
    true => exitOnFailure;
    testFoo();
    testBar();
    <<<"MyUnitTest ok">>>;
  }

  fun void testFoo()
  {
    assertTrue("this should be true", true);
  }

  fun void testBar()
  {
    assertFalse("this should be false", false);
  }
}
Finally, instantiate the unit test and allow ChucK time to pass.
class MyUnitTest extends Assert
{
  {
    true => exitOnFailure;
    testFoo();
    testBar();
    <<<"MyUnitTest ok">>>;
  }

  fun void testFoo()
  {
    assertTrue("this should be true", true);
  }

  fun void testBar()
  {
    assertFalse("this should be false", false);
  }
}

MyUnitTest myUnitTest;
1::second => now;
See http://www.junit.org for further documentation on assertions and unit testing in general.
For examples of actual unit tests, see e.g. ArrayListTest.ck, FloatArrayListTest.ck, or IntArrayListTest.ck in LiCK.
License
LiCK  Library for ChucK.
Copyright (c) 2007-2010 held jointly by the individual authors.

LiCK is free software: you can redistribute it and/or modify
it under the terms of the GNU General Public License as published by
the Free Software Foundation, either version 3 of the License, or
(at your option) any later version.

LiCK is distributed in the hope that it will be useful,
but WITHOUT ANY WARRANTY; without even the implied warranty of
MERCHANTABILITY or FITNESS FOR A PARTICULAR PURPOSE.  See the
GNU General Public License for more details.
References
1, http://c2.com/cgi/wiki?FunctorObject
2, http://en.wikipedia.org/wiki/Unit_testing