Drawing With Code
"Art is created by artists so that the viewer has the opportunity to create something." - Brian Eno
We are now about to take the first steps of what has the potential to become a long and illustrious journey as we learn how to program. In the remaining chapters we will learn that programming, or coding, is another environment in which to produce creative works. At this point the reader may ask, "Why? What is the reason to delve into this large and complicated topic when there are so many fantastic tools available for creating digital art."
To answer that, we'll begin with a short definition. Tools like Photoshop and Illustrator are great, and the metaphors for the media they produce are clear: one may think of a photograph, a drawing, or a painting. With Processing - the coding environment detailed in Chapters 18, 19 and 20, and tools like it, the medium is the computer program. So what is the metaphor for understanding the essence of a program? A program is kind of like a little machine. It consists of a set of instructions that a computer can understand, that need to be executed in a specific order to run properly. Creating these machines is called programming or coding. We can create programs that produce the digital artifacts we are already familiar with - images, moving or still, by using the computer interface that is already available on your desktop or laptop machine.
So why bother to create a program in order to make an image when we already have so many great tools to do so ourselves? The answer: because a program is dynamic. A program can make an image or a video, or it can respond to user input, or execute huge amounts of repetition, or process a large data set. It can even be a tool that others use to make images. As a programmer, you have the power to create a system that allows other people to express their creativity.
See:
Results of Chapter 18 Exercises
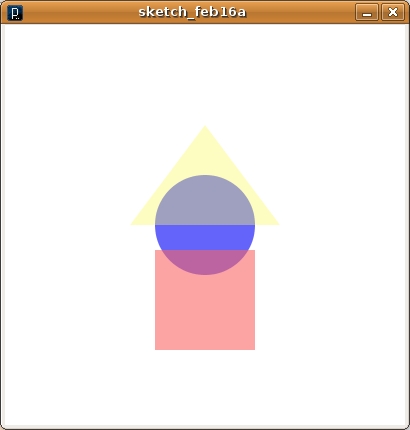
Exercise 1: Hello World
Drawing a circle in Processing is essentially the "Hello World" practiced in the Processing Development Environment.
1. Type or copy and paste the following code snippet into the Processing Development Environment:
size(400, 400);
ellipse(200,200,100,100);
2. Run the code.
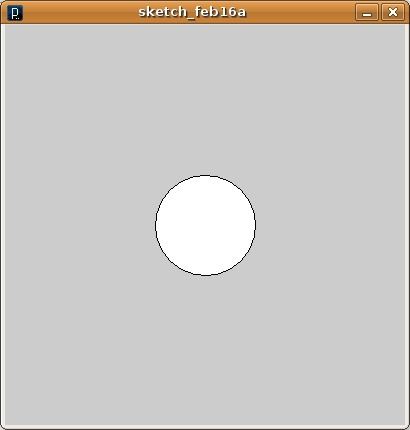
In Processing parlance, this is called playing the sketch. Play the sketch by clicking on the play button at the top left of the Processing Development Environment. An image of a white circle on a gray background will appear.
3. Analyze the code.
Just like selecting paper size when drawing, or specifying your document size in graphic design, we have to initialize our drawing space with a fixed size. The first line of code does just that, instructing Processing to create a window of a fixed size. Ours is 400 pixels tall and 400 pixels wide.
The next line of code is what draws the circle on the screen. Processing (like most computer-based drawing programs) is based on a grid system, similar to the (x,y) coordinate system you learned in algebra class. The x variable specifies the horizontal position and y specifies the vertical position. Unlike algebra, (0,0) is the set of coordinates that express the top left position in your window. The y variable increases as you move down the window. The first two numbers after the ellipse command indicate the (x,y) position of the center of the shape, and the next two indicate the shape width and height.
Notice that the command is called ellipse, even though a circle is drawn. Since we specified the same value (100) for the ellipse width and height, the resulting shape is a circle.
4. Place comments in your code.
Most programmers borrow snippets of code from online references or resources. It is nearly impossible to remember what all of the commands you type or paste into the PDE do or why you included each snippet of code within your document. Fortunately, we can leave notes to ourselves in the middle of the code explaining the code we are using to ourselves or anyone else who might work on the code. These notes are called comments.
Type the following into your sketch:
/*
Creators: Rory Solomon and Becky Heritage
Date: Feb. 8, 2009
License: CC-BY-SA
*/

size(400, 400);  // the size of the sketch
// draw a circle
ellipse(200,200,100,100);
The syntax, slash-star (/*) in the beginning and star-slash (*/) at the end of the comments tell Processing that the enclosed text is a comment. So in this example, the first five lines of code between /* and */ are comments. Processing ignores all comments when it is playing the sketch. In other words, comments are not executed. This type of comment is called a block comment.
If you are new to coding, you should develop good habits and practice leaving comments by putting your name, the date, and the license you will release your code under in a block comment at the beginning of your sketch. Since Processing is an open-source project supported by a large, like-minded community, you will often build your applications from things other people have produced. When you do this, you must give them attribution for their work.
Review Chapter 2 for more information about types of licenses and the sharing nature of digital culture.Inline comments are controlled by another syntax for commenting. You can comment one line at a time, or in just parts of a line, by using slash-slash (//). Everything that follows // becomes a comment, but only to the end of a line.
If you run the sketch again, you will see the same image. Even though we added more lines to our code, they do not affect the output of the sketch.
Exercise 2: Debugging
Sometimes your code will not result in the playback you expect to see. This is a fact of life. In this exercise we will deliberately introduce an error in the code and see what this looks like.
1. Remove the semicolon from line 9 so that your code looks like ours:
/*
Creators: Rory Solomon and Becky Heritage
Date: Feb. 8, 2009
License: CC-BY-SA
*/

size(400, 400);  // the size of your sketch
// draw a circle
ellipse(200,200,100,100)
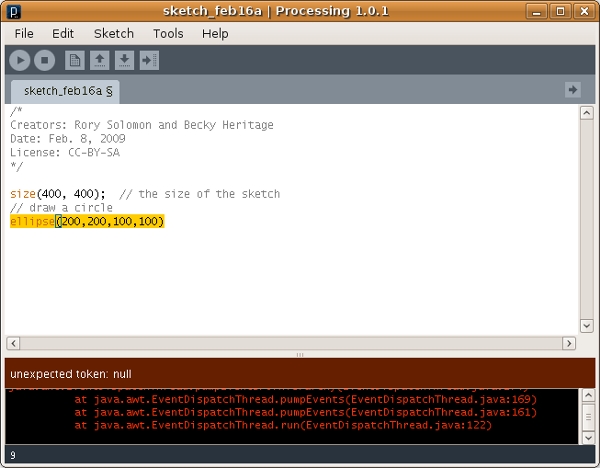
2. Play the sketch. The sketch will refuse to run. Instead, you will get error messages at the bottom of your environment.
3. Analyze the code.
When your sketch does not play and you get an error message, there is an error in the code. It could be that your code is not abiding by the rules of the Processing syntax, or it could be as simple as a mistyped command name.
Fixing errors in your code is called debugging. There is a great resource on common errors and debugging in Processing at the Processing reference page: http://www.processing.org/reference/⁞
In this case, the error is the missing semicolon. For now, assume that every line of Processing code requires a semi-colon at the end. (We will learn a couple of exceptions to this rule soon.) Fix your code by re-typing the semicolon to line 9 and play the sketch again.
Exercise 3: Color and drawing styles
For now we can think of Processing commands as being one of two types: those that draw things on the screen, and those that determine the appearance of those things. For example, ellipse() is a command with direct visual output -- we specify its location and size. In this exercise we will add commands that change its color and visual style.
1. Type or copy and paste the new code we introduced here:
/*
Creators: Rory Solomon and Becky Heritage
Date: Feb. 8, 2009
License: CC-BY-SA
*/

size(400, 400);  // the size of your sketch

smooth();
noStroke();
fill(100,100,250);

// draw a circle
ellipse(200,200,100,100);
2. Play the sketch or run the code.
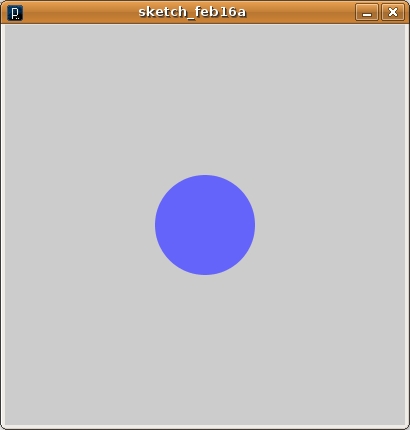
3. Analyze the code.
We used three new commands as follows:
noStroke()is an instruction to use no outline when drawing the circle.smooth()is an instruction to use aliasing to make the stepped lines smoother.fill(100,100,250)declares what color will be used to fill the shape.
The numbers in parenthesis after a command are called "parameters" or "arguments". Not all commands require arguments. The fill() command requires an argument for color, and all colors in Processing are specified with 3 numbers corresponding to the RGB values of the color you want to use. Each number must be between 0 and 255. (Colors can also be specified in HSB mode, see http://processing.org/reference/colorMode_.html for details.)
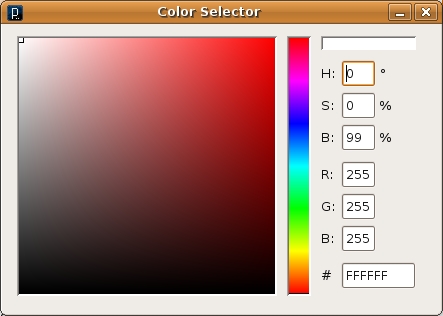
Try modifying the RGB numbers to produce different colors when you play the sketch. If you need a specific color, Processing also offers a color selector at Tools > Color Selector that you can use to find an RGB value from a visual reference.
Exercise 4: Understanding draw order
Processing commands are executed in a top-down fashion, so any command that changes the appearance of drawn objects, like noStroke() or fill() applies to all subsequent commands until another command overrides it. (There are ways to modify this top-down behavior by using "control structures." We will learn about some of them in later chapters.)
Add the following line to the end of your sketch, and click run:
rect(150,225,100,100);
Like the ellipse command, rect() (shortened from "rectangle") draws a new shape in our window. As with ellipse(), the first two numbers specify the location, but in this case they specify the top-left corner of our shape, not the center. Also as with ellipse(), we specify 100 for both the width and the height, so the result is a square.
5. Play the sketch. Notice that we have a blue blob on the screen.
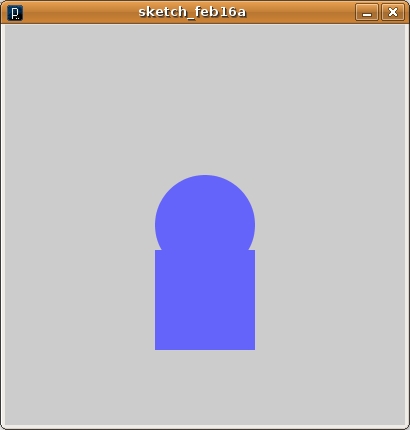
That is because the previous fill() command is still in effect. Try adding another fill() before rect() and specify a red color. Your code should now look something like this:
/*
Creators: Rory Solomon and Becky Heritage
Date: Feb. 8, 2009
License: CC-BY-SA
*/

size(400, 400);  // the size of your sketch

smooth();
noStroke();
fill(100,100,250);

// draw a circle
ellipse(200,200,100,100);

fill(250,100,100);

// draw a square
rect(150,225,100,100);
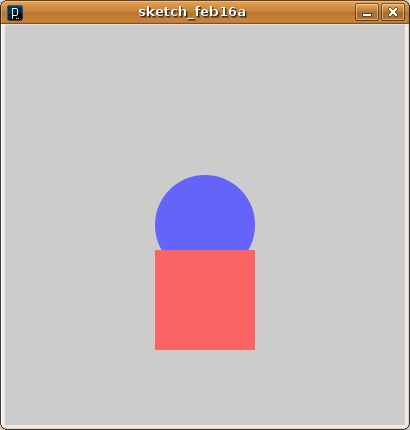
Notice how the red square appears layered on top of the blue circle. Due to the top-down nature of Processing's execution, shapes drawn first appear beneath shapes drawn later.
Exercise 5: Add transparency
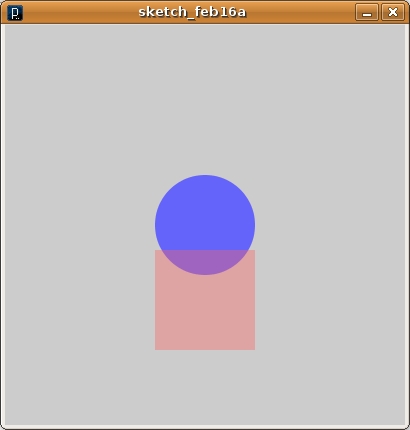
Processing allows any RGB color to be given an optional 4th numerical argument representing the degree of opacity. This fourth number is called alpha. This number should be set between 0 and 255, where zero (0) indicates complete transparency and 255 indicates completely opaque.
1. Add a 4th number to your red fill() to create transparency for your square.
2. Play the sketch.
Exercise 6: Add a background an a triangle
We'll finish our composition by adding a yellow triangle.
1. At the end of your code, add the following command:
fill(250,250,100,100);
triangle(125,200, 275,200, 200,100);
Unlike ellipse() and rect(), a triangle is specified with three points. The above code draws a translucent yellow triangle (notice our fourth RGB alpha value of 100) with vertices at (125, 200), (275,200), and (200,100).
2. Add a white background to the window with the background() command. Color in Processing can also be specified with a single number (between 0 and 255) that represents a shade of gray -- with 0 being black and 255 being white. Note that because of draw order, background() has to come before any other shape or it will lay on top of the shape. Add this command right after size(). Your code should now look like the below.
/*
Creators: Rory Solomon and Becky Heritage
Date: Feb. 8, 2009
License: CC-BY-SA
*/

size(400,400); // the size of the sketch

background(255);

smooth();
noStroke();
fill(100,100,250);

// draw a circle
ellipse(200,200,100,100);

fill(250,100,100,150);

// draw a square
rect(150,225,100,100);

fill(250,250,100,100);
triangle(125,200, 275,200, 200,100);

Exercise 7: Find more instructions to try on your own
The reference section of the Processing website, http://processing.org/reference/index_ext.html contains a definitive list of all Processing instructions. This is often called an API which stands for "application program interface". You can refer to the Processing reference for details about the commands we have used here, and to find new commands for your own projects. For example, in addition to the shapes we've drawn here, Processing has a quad() command for quadrilaterals, and beginShape() and endShape() for arbitrary forms.


