


Making A Book Scanner

The first three e-books I made I used the cardboard box book scanner shown in the chapter on scanning book pages. After three books it became clear that a better book scanner would save me much work and improve the quality of the finished product. It was also obvious that I would have to find a way to make a book scanner without sawing, painting, or anything else that would need a real home workshop. It would have to be made by someone who could be handy mending a fuse...and that's about it. The last time I did any serious woodworking was in Junior High, and it isn't an experience I look back on fondly.
On the other hand, I was able to put up some curtain rods awhile back and they turned out all right, so I figured that if the project only involved measuring, drilling and screwing I'd be fine. I began designing my scanner by wandering around various hardware stores waiting for the items on the shelves to speak to me. In retrospect I should have done this at the Dollar Store. The items there speak to me too, and they're cheaper.
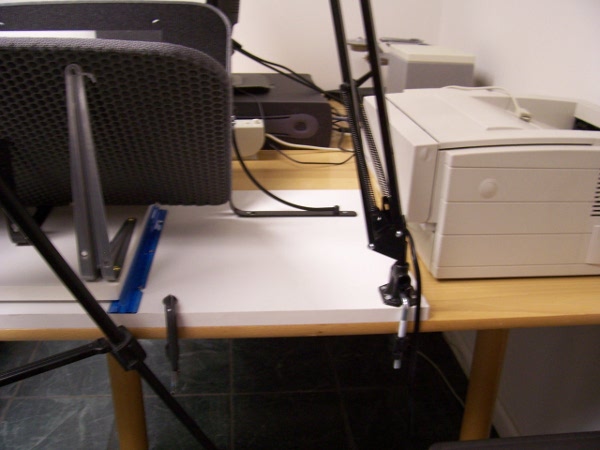
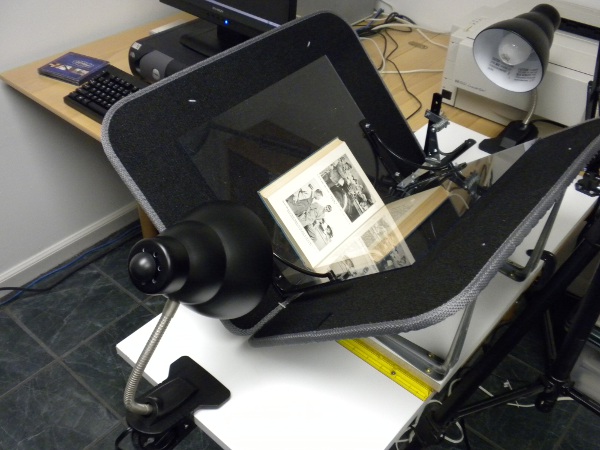
This is the book scanner I ended up building:
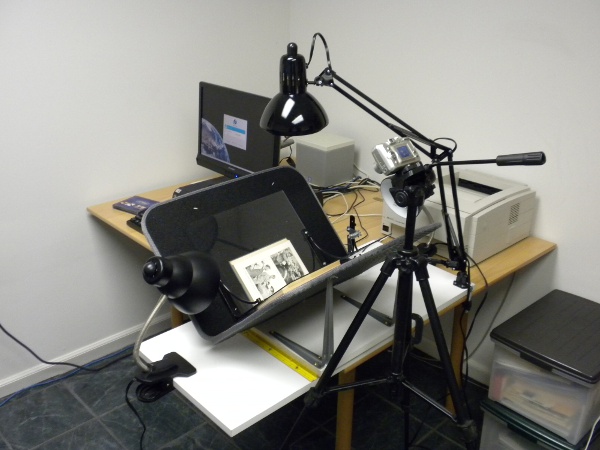
A book scanner consists of a cradle that holds a book open at a 90 degree angle, plus two sheets of glass or plastic mounted at right angles to each other that press down on the book pages and hold them flat so they may be photographed. The part that holds the pages flat is called a platen.
The platen is generally mounted on a hinge or a column so it can be moved out of the way when you flip the pages. This also keeps the platen in the same position relative to the camera. In the cardboard box book scanner the position of the book was fixed, so you needed to adjust the camera from time to time while you photograph the pages. With a proper book scanner you don't move the camera; you move the book. Therefore the book cradle is placed on a track so you can slide the pages of the book to where the platen needs them to be.
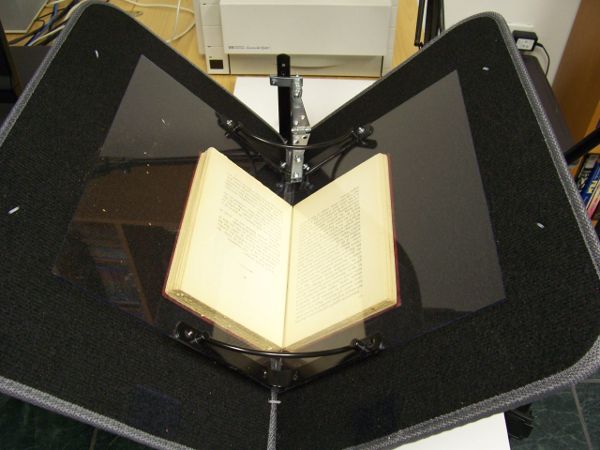
This view shows the platen resting on the book. The platen is made from two sheets of Lexan precut to 11" x 14" which I found at Menard's. I got two shelf mounting brackets and used epoxy to glue the Lexan sheets to them. The glue came undone when I tried to attach a hinge, so I ended up using #6-32 stove bolts and nuts (1/2" long, 1/8" diameter round head) to attach the sheets to the brackets. If I was doing it over again I would skip the epoxy and just use the stove bolts. The brackets already had holes in the right place, and Lexan is easy to drill. I found Lexan works as well as glass would for photographing book pages, and is much easier to deal with.
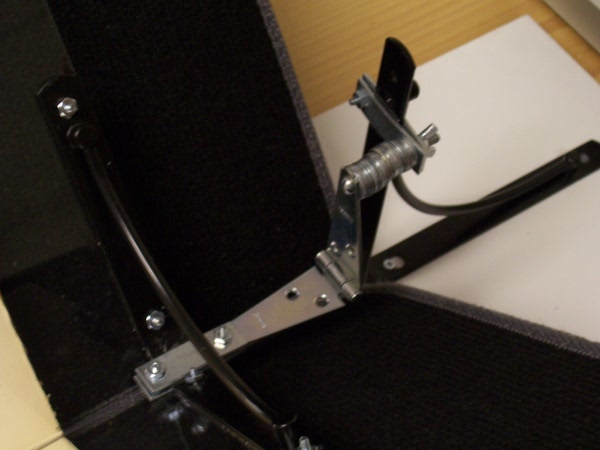
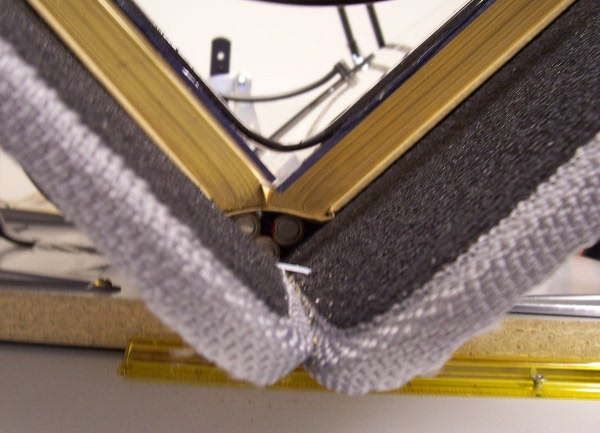
This shows the detail of the platen hinge. I use another shelf mounting bracket to hang the hinge on. The hinge is attached to the bracket with stove bolts screwed through 2" mending plates I found at the Dollar Store. Mending plates are just small rectangles of metal with two holes. I used a 2" long bolt with a wing nut to provide a means of adjusting the vertical position of the platen so it fits nicely in the book. I had a package of washers left over from fixing the windshield wipers on a car I used to have so I used a bunch of them as spacers. As you can see I used more stove bolts and mending plates to attach the hinge to the platen bracket.
The book cradle is made from a couple of car floor mats I found at the Dollar Store. It is supported by four 8x10 shelf brackets screwed into an 3/4" x 11 3/4" x 24" white shelf I found at Menard's. I used #8 x 3/4" brass round head wood screws. You need to position the shelf brackets 4" apart so that when the floor mats rest on them each one is at a 45 degree angle. Also, not every floor mat is suitable for this purpose. You need something stiff that can hold a book without sagging. These mats have a stiff plastic backing. If you can't find floor mats like this use something else, as long as it is stiff. As you can see, I stuck some small shelf brackets underneath the mats for extra support.
The mats are stitched together with plastic tie-downs like you use to hold wires in place. Additional tie-downs are used to attach the mats to the shelf brackets.
I use another white shelf for the base, this one 3/4" x 15 3/4" x 36". I use a desk lamp with an incandescent bulb, 100 watts, and I screw the base of the lamp into the book scanner base. I use the clamp for the desk lamp to hold the book scanner base to the table, and use a small C-clamp for more stability.
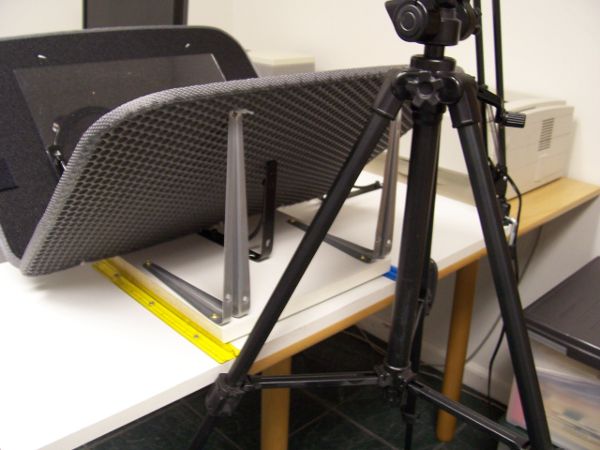
This shows what the platen looks like in the up position.

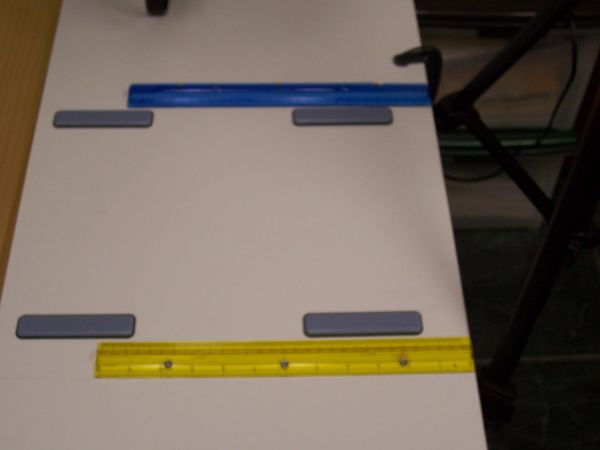
You need to have some kind of track for the book cradle base to slide back and forth on. Most of the designs at diybookscanner.org use drawer sliders for this purpose, but one design I saw there just used two pieces of plastic to hold the cradle base in a straight line and plastic furniture sliders to provide easy low friction movement. I liked this idea a lot, and I found some plastic rulers with a ridge down the middle of them at the Dollar Store that would make a nice track for the cradle. I attached them to the base with wood screws. You probably won't be able to find the rulers I found, so just improvise.
I use a 5 megapixel camera on a tripod to photograph the book pages. If I found a suitable table I could use two cameras on tripods to do all the pages in one pass. Digital cameras and tripods are pretty cheap these days.
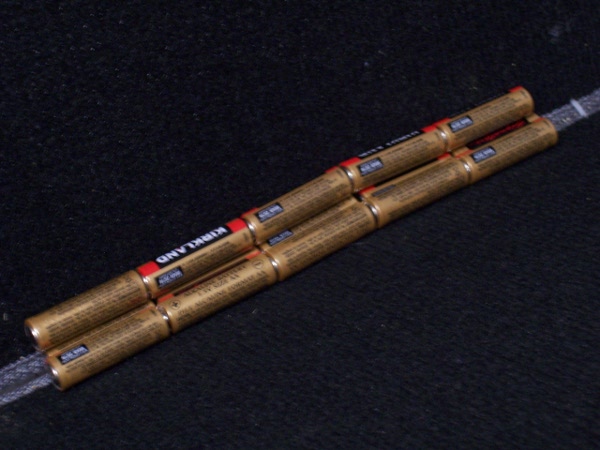
Last, but not least, you need a flat platform at the bottom of the cradle to hold the spine of the book level, like this:
As you can see, I just stuck a few batteries in the bottom of the "V". I may come up with something more presentable in the future, but for now the batteries are doing fine.
Here is a view showing the clip-on desk lamps I added to the scanner. Having just one overhead lamp creates a bright spot in the middle of the page which the camera uses to adjust the exposure, resulting in pages that are dingy. Adjusting the exposure compensation on the camera just washes out the middle of the page. What you really need is a page that is evenly lit, which having three light sources like this should provide. The clip-on lamps are cheap, about five dollars at Menard's. The lamps are supposed to use 60 watt bulbs to minimize the risk of fire, but I put 75 watters in because I like to live dangerously.
Here is the Bill Of Materials:
| Qty | Description | Unit Cost |
|---|---|---|
| 1 | white shelf 3/4" x 15 3/4" x 36" | 5.00 |
| 1 | white shelf 3/4" x 11 3/4" x 24" | 3.97 |
| 4 |
8x10 shelf brackets |
.78 |
| 1 package |
#8 x 3/4" brass round head wood screws |
.78 |
| 1 package of 4 |
24mm x 100 mm (5/16" x 4") furniture sliders |
6.98 |
| 1 package |
3" strap hinge, light |
2.49 |
| 1 package |
plastic wire tie-downs |
1.00 |
| 1 package |
#6-32 stove bolts, round head with nuts |
1.00 |
| 1 package of 4 |
2" mending plates (Dollar Store) |
1.00 |
| 1 set |
black floor mats (Dollar Store) |
14.00 |
| 1 |
desk lamp with adjustable arm |
30.00 |
| 2 |
clip-on desk lamps |
5.00 |
| 1 package of 3 |
plastic rulers (Dollar Store) |
1.00 |
| 2 |
Lexan sheets, 11" x 14" |
8.00 |
| 4 |
black shelf supports, 6" x 6" |
1.00 |
| 1 |
black shelf support, 8" x 8" |
1.00 |
| 1 |
C-clamp |
1.00 |