


Advanced Video Effects
In the chapter on Single Track editing we learned how to Fade to Black. Fade to black is a basic effect and is only one from a large range that you could use to make an appealing video.
Minimal / invisible effects
Many video effects, including the Fade to Black, should not be noticeable to the viewer. For example, fading, cropping or adjusting the colour balance of a clip. These effects are often designed to fix problems caused by the recoding or editing process, for example jumpy cutting, mismatching footage or ugly/sudden changes in colour - so, while these effects change the video in an "artificial" way, they should look in fact look natural.

Above is an example of a colour correction effect. The unedited footage (left) was an unnatural looking shade of green. On the right, the colour has been corrected and looks quite normal: this effect would be invisible to the audience.
Narrative Effects
Some effects can be useful to create a stronger narrative. You may often see footage slow down and freeze while a voice-over describes what is happening on the screen or gives background information. A particular area of the footage may be physically highlighted too, for example, an assault weapon may be circled while the footage is paused (see image below). While these effects are noticeable, they add flow and clarify, rather than confuse the footage. 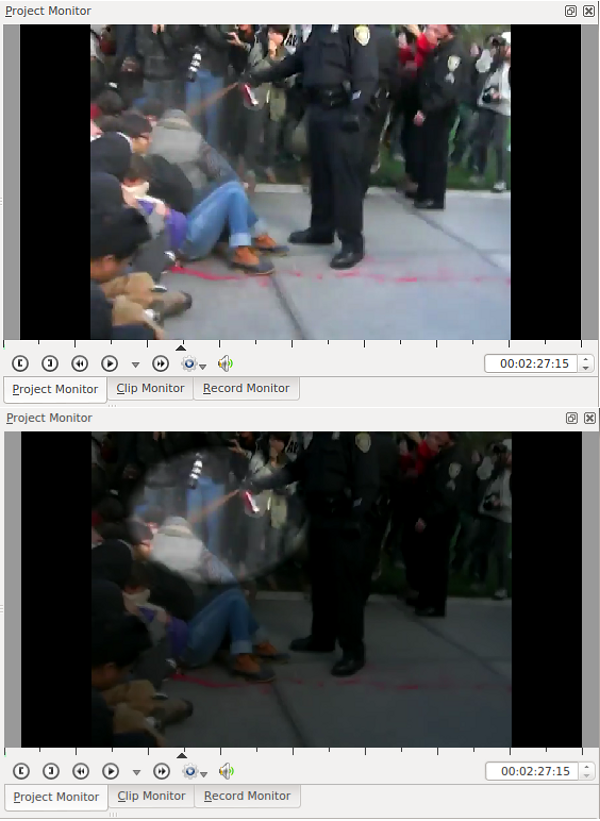
Fun and creative effects
When you want to use something more noticeable, there are lots of fun and creative effects to choose from, however, make sure that you don't go overboard - less is (often) more in video editing. It is perhaps ideal to use these effects in celebratory videos, for example, footage of a party or a Mash up video.
Hands on - Masking video with the Automask Effect
There may be times where you wish to pixeleate an area of your video to protect the identity of a colleague/minor or disguise a disturbing image. It's likely that you have seen this effect before.
Auto-masking can be a dramatic tool, as well as a practical one: it can reiterate the serious or upsetting nature of a video. For example, as people become desensitised to images of suffering and/or violence - pixelating an upsetting image could create a bigger impact than the exposed image itself. Also, by drawing attention to the need to protect an activists identity, you are saying "we are in danger because we fight for what we believe in." This task will show you how to create an Automask.
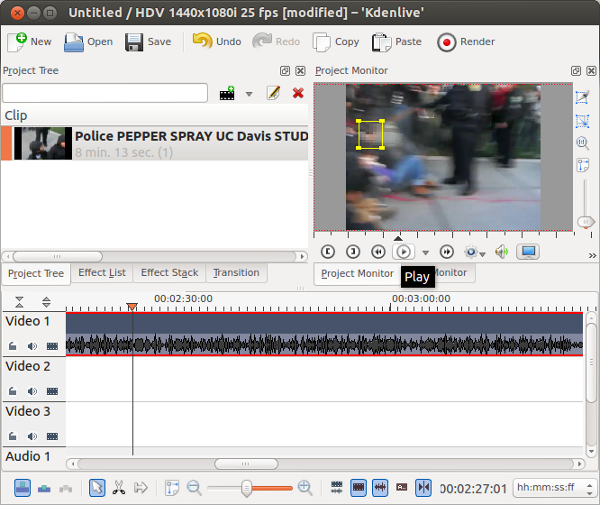
First, put your clip in the timeline as usual, and then search for "mask" in your Effect List. Drag and drop the effect onto your clip.
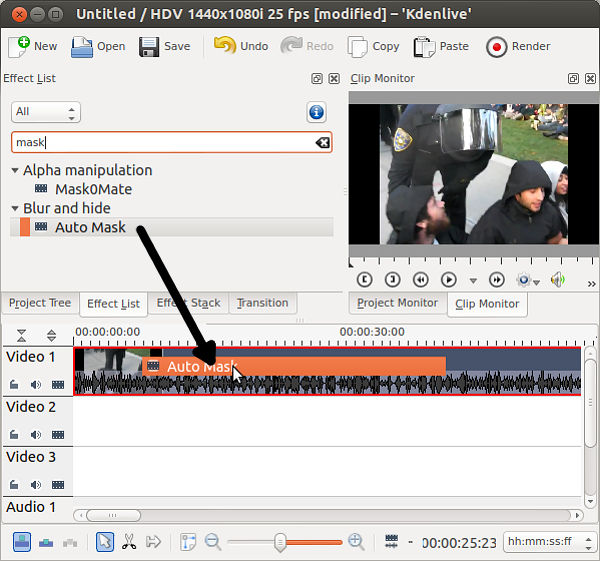
You will now see the effect in your Effects Stack and you can also see a yellow box in your Project Monitor :

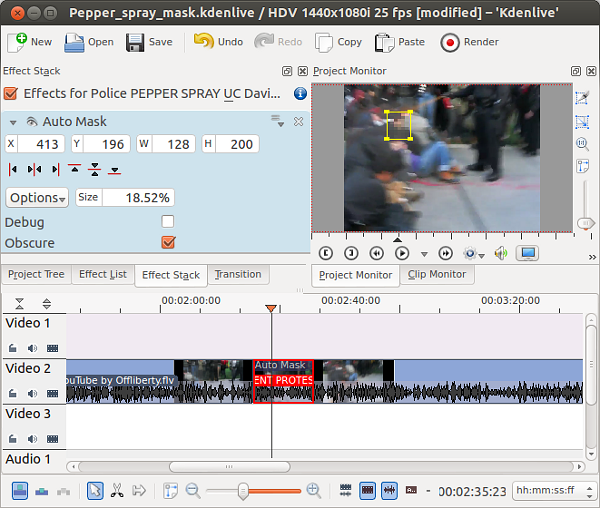
You can use the width (W), hight (H) and X/Y axis dialogues in your Effects Stack to position the mask, however, it is simpler to drag the yellow square and resize/move the mask manually.
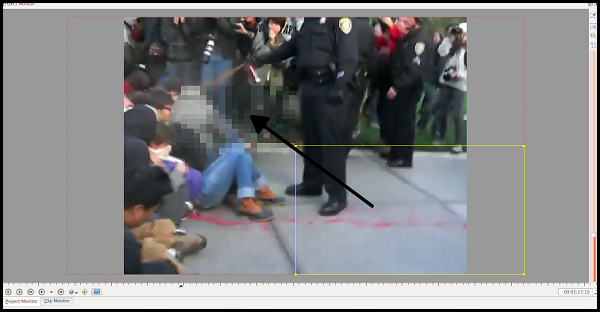
Firstly, move the mask by clicking in the centre of the yellow square and dragging and dropping it onto the area you would like to mask.

To resize the mask, drag the sides of the yellow box in towards the object you are masking, until only the desired area is covered.
 Continue to reposition and resize the mask until you are happy.
 Play your video and check the mask in the Project Monitor. Make further adjustments if needed.
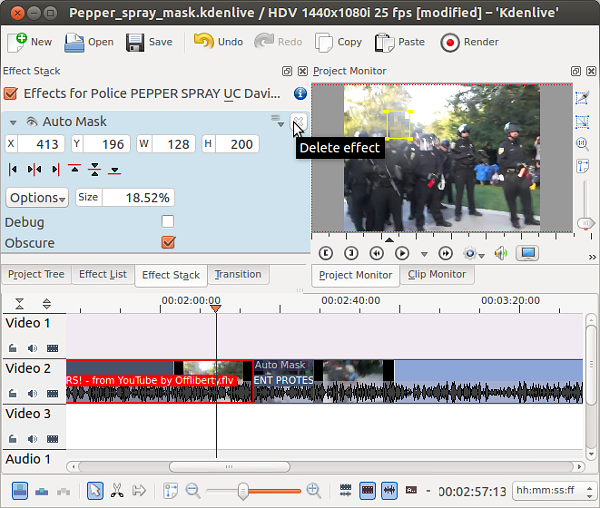
You may only wish to apply the mask to one part of your video: in this case, you can use your razor tool to snip out the desired section and then delete the mask from the rest of the video.
Once you have isolated the area you wish to mask, select the remaining clips one at a time, and click the X button in your Effects Stack, leaving the mask effect applied to the desired clip only.
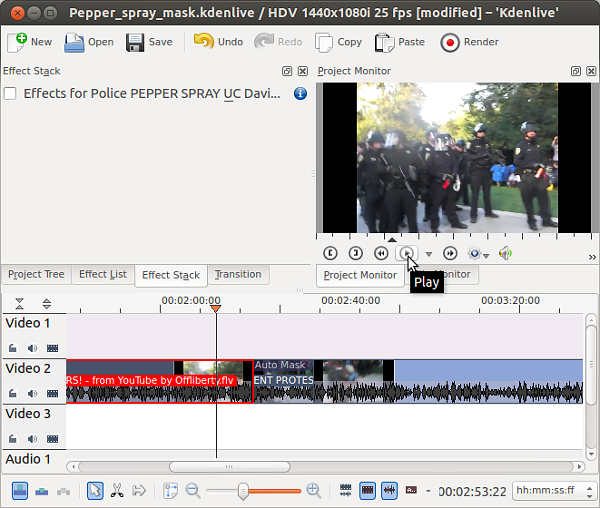
Now preview your video. While the cuts you have made should be invisible, the mask effect will only be applied to the appropriate section.
Remember, the more that you hide, the harder it will be for your viewer to understand what they are watching: at the same time, you must make sure all the required details are covered.
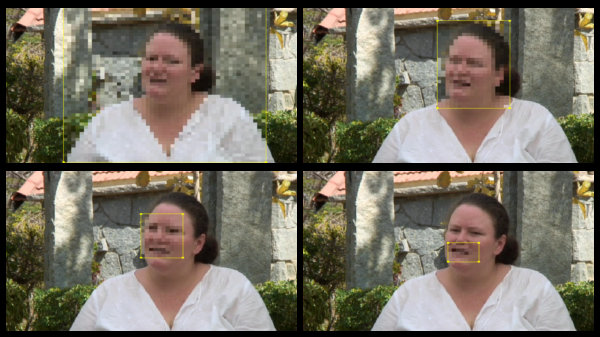
In the example above, the first clip has a oversized mask. The second clip strikes a good balance between revealing to much or to little. The third image, however, masks too little - the woman could be recognised by face-shape or hair. The final image masks only her mouth: you could use this if you simply wish to hide a word or sentence, for example, a name. By using a "beep" sound and a small mask, the word/sentence can neither be heard nor lip-read.
Transferring your skills: The Auto-mask effect demonstrated here has limits because it does not move around with the video. In other video editing software you could use motion key framing to achieve the same goal. Motion key framing is covered in the chapter concerning the Ken Burns effect.
Beyond masking
If you are planing to interview someone who wishes to remain anonymous, consider using lighting effects to hide their identity (see below for an example). Masking is useful for "on the go" footage, however, more attractive/effective techniques can be used when there is time.
