


M3W Interface
Software name : M3W
Software version : 2.1
The user interface for M3W is very simple:
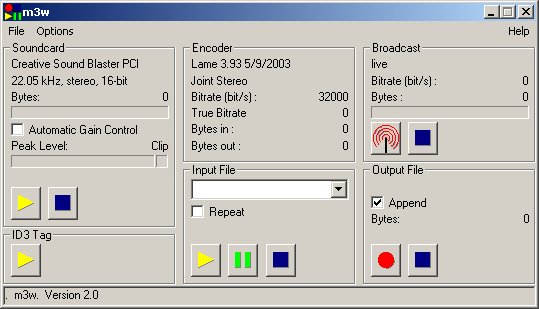
It is divided into the following sections:
Soundcard
This section is used for giving you feedback about the soundcard and for setting a few options:
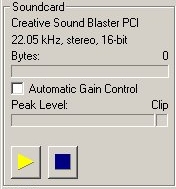
If everything is running properly you should see information about your soundcard displayed in the window. In the above example, you can see that M3W has identified the computer has a Creative Sound Blaster PCI soundcard. Additionally, you can see the volume level (loudness) of the soundcard displayed as the Peak Level, and the Bytes of audio received from the soundcard. The Peak Level is interesting because it tells you if your audio is likely to distort. You can't control the input level from M3W. You should do it using your Microsoft Windows Sound Controls. You can open the Windows Sond Controlls, by a doubleclick on the loudspeaker symbol in the taskbar or in the Windows Controll Panel. Once the Windows Sond Controlls are open, select the the recording controlls through the Options menu. Moving the sliders up and down changes the volume of the input to m3w. If you see the levels peak into the clip segment then you should turn down the sound input levels.
The yellow and blue buttons at the bottom turn the soundcard input on and off. You use these buttons to stream from the soundcard mic-in or line-in inputs (eg. for live streaming events etc):
![]()
ID3 Tag
The ID3 Tag section is where you set the information to be displayed in the clients player when they play your stream. This infomration is embedded in the stream in a format know as ID3. If you click on the yellow button in this section you will see the kind of information that you can enter:
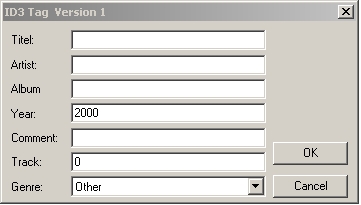
This information does not effect how you connect to the streaming server or any part of the delivery of the audio. The information in this form only will effect the text data displayed in a player (like Winamp, xmms, iTunes) when you stream is played. In fact, you don't even have to follow the catergories of information here, you could put anything you wanted into these fileds for display in the player, for example you could put a message for your users, a phone number, chat room details, whatever you like.
Encoder
The encoder section displays the information about the outgoing audio stream. This information can not be changed directly form the main interface window. Instead, you have to choose Encoder from the Options menu:
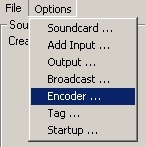
This will then open a window where you can edit the details of the outgoing (encoded) audio stream.
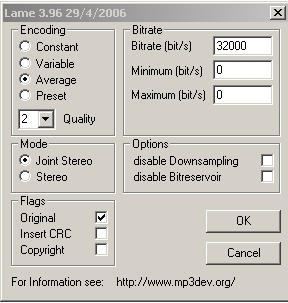
These details refer to the type of MP3 stream you will send. M3W uses the lame encoding libraries, which output a MP3 stream. The label at the top of this window reads lame 3.96. It gives you the version of the lame library currently in use. The lame library is installed by M3W so you don't have to do this yourself. This window in itself offers a variey of variables that you can change. They include :
Bitrate
An outgoing MP3 stream has a certain bitrate. The bitrate is the amount of data used to deliver one second of audio. The higher the bitrate the higher the quality of the audio. However the higher the bitrate the more bandwidth (speed of your internet connection) you will need. The default is set at 32000 meaning you will need an internet connection of 56kbps or higher to deliver the audio stream to the server and users will need to have the same (or higher) speed internet connection to listen to the stream. The needed bitrate is higher than the streams raw bitrate, because every stream contains some overhead (headers, addresses, confirmation packets etc...).
You can choose whatever value you like here but be careful that your bitrate settings do not exceed the available bandwidth of your internet connection or your listeners internet connections.
As stated, the bitrate also effects the quality of your audio stream. It is difficult to recommend a bitrate but in general 32000 would be sufficient to deliver voice very clearly. If, however, you require stereo audio or music, then try 56000 or higher.
Encoding
The encoding setting also refer to the outgoing bitrate. If a stream or audio file is encoded at a constant bitrate (CBR) it means every part of the file is encoded at constant (exact) amount of data per second - the bitrate does not vary at any point in the stream.
A variable bitrate (VBR)is slightly different. With VBR the bitrate is adjusted according to how how complex the audio source is. For example, if you encoded a stream or audio file with VBR then the bitrate would fluctuate often. The bitrate used at any given point is worked out by the encoder. Essentially the encoder analyses the audio to be encoded and works out how much data is required to accurately describe it. When you choose VBR you forgo the choice of a bitrate setting in M3W, and instead you get a drop down box from which you choose the 'quality' of the outgoing encoding.
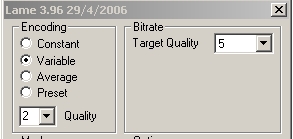
The setting on the right (bitrate) is now a choice between 0 and 9, with 0 being the highest quality. VBR is not the best choice for encoding live streams because the actual bitrate used is unpredictable.
The default setting for M3W is the average bitrate (ABR). This method is halfway between VBR and CBR. With this method you do not have a constant bitrate, instead it is variable but it is variable between a fixed high and a fixed low point. You can choose the maximum and minimum bitrates in the Bitrate area if you choose to encode with ABR. While the actuall bitrate varies between the high and low bitrate according to the complexity of the audio signal, the average bitrate will match the given target bitrate. Typically the receiving player uses some buffering of the stream to cope with this kind of variable bitrate. If it can not recieve bits fast enough, it will play from the buffer, which gets refilled later, when the bitrate is again lower than the available bandwidth.
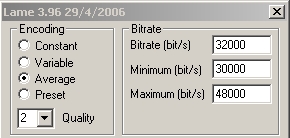
It is recommended that you use either CBR or ABR when streaming live audio.
Mode
The mode refers to how much data and processing goes into producing a stereo output. Stereo encoding preserves the channel separation between the left and right channels whereas Joint Stereo encoding calculates what is in the middle and side of the stereo input. For lower bitrates the Joint Stereo is better and for higher bitrates full Stereo encoding is generally recommended, but this is an argument that haunts many mailing lists and forums. Some argue that Joint Stereo creates odd stereo artifacts (unwanted distortions). The answer is - experiment. The mode setting is used only if the input from the soundcard is in stereo.
Flags
These three options are unrelated and generally speaking, you don't need to use them. CRC (cyclic redundancy check) is a number that is used to check for errors when streaming the audio. It uses 2 byte of extra data per frame, which is aabout a 1 percent overhead. Often however the receiving played do not use this extra information. If you are extremly short on bandwith go without it. The Copyright option just marks the out going stream as copyrighted, presumably so all good law abiding citizens won't then attempt to copy it (Creative Commons blew that assumption up). The Original flag is actually associated to the copyright flag, and marks the stream as an original (not a copy). These all seem pretty useless to me especially as they make no difference to the listener.
Options
The Options can generally be ignored.
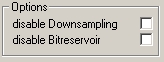
disable Downsampling means that if you select this the sample rate will be preserved. If you are learning about streaming, then ignore this for now. disable Bitreservoir means that certain quality negotiations undertaken by the lame MP3 encoder will not take place, potentially reducing the quality of your outgoing stream.
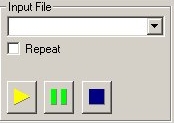
Input File
If you wish to stream a file instead of a live input then you will need to use this section of the interface.
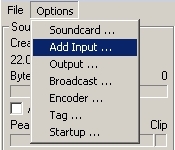
To add a file to the drop down box displayed you have to choose Add Input... from the Options file menu:
This will open a file browser and you can browse to the file you wish to load, highlight (select) it and press OK: 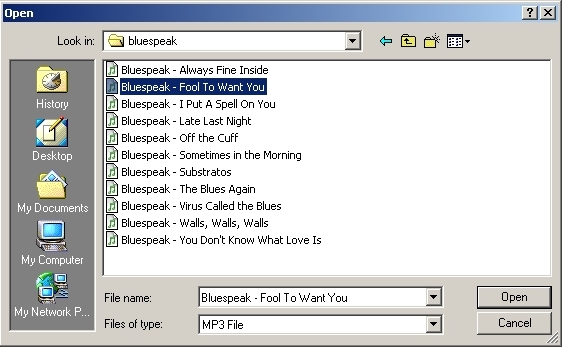
The file will then be loaded in the main interface, in the drop down box of the Input Area:
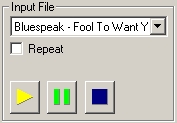
To play, pause or stop playing the file you can use the buttons at the bottom. To loop the playback check the Repeat box. This feature can be used to send a prerecorded announcement just before or after you start your live broadcast, and repeat the announcement over and over.
![]()
Broadcast
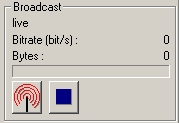
This section gives you feedback on the status of the outgoing stream. It will tell you how many bytes have been sent and the true measured bitrate of the outgoing stream. The true bitrate can be lower than the encoders bitrate, if your connection is bad, or too slow. In this case the progress bar below it will show you how the output buffer slowly fills up. If the congestion of your connection is only temporary, the output buffer should become empty again later. If not, the true bitrate gives you a clear indication of the maximum bitrate you should use for the encoder. The two buttons at the botton are for starting and stopping the broadcast (stream).
Output File
This section allows you to start and stop archiving the outgoing stream to your harddisk. The big red button is record and the blue square will stop the archiving process. If you choose the append option then each time you start and stop the archiving, the archived files will be joined together in order. If you choose the autoname option then each archived file will be named automatically by M3W. This section also gives you feedback on the amount of bytes archived (archive file size).