


Student Proposals and Acceptance
As a Program Administrator, your role in the Student proposal phase is (somewhat) limited. Once the student application phase has ended it is now up to you to complete four tasks:
- Slot Allocation
- De-duplication
- Accept proposals
- Reject proposals
Slot Allocation
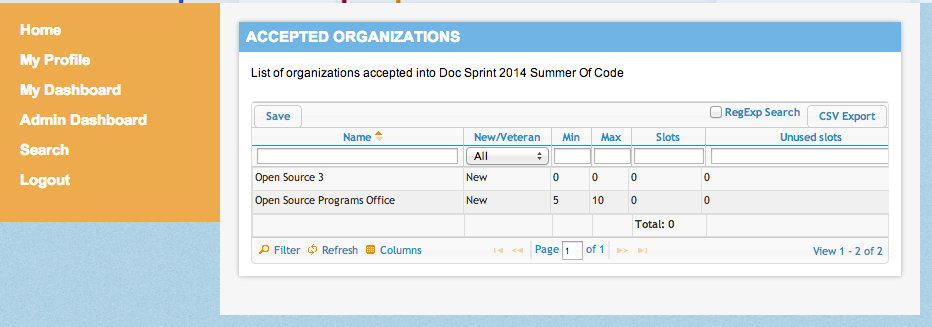
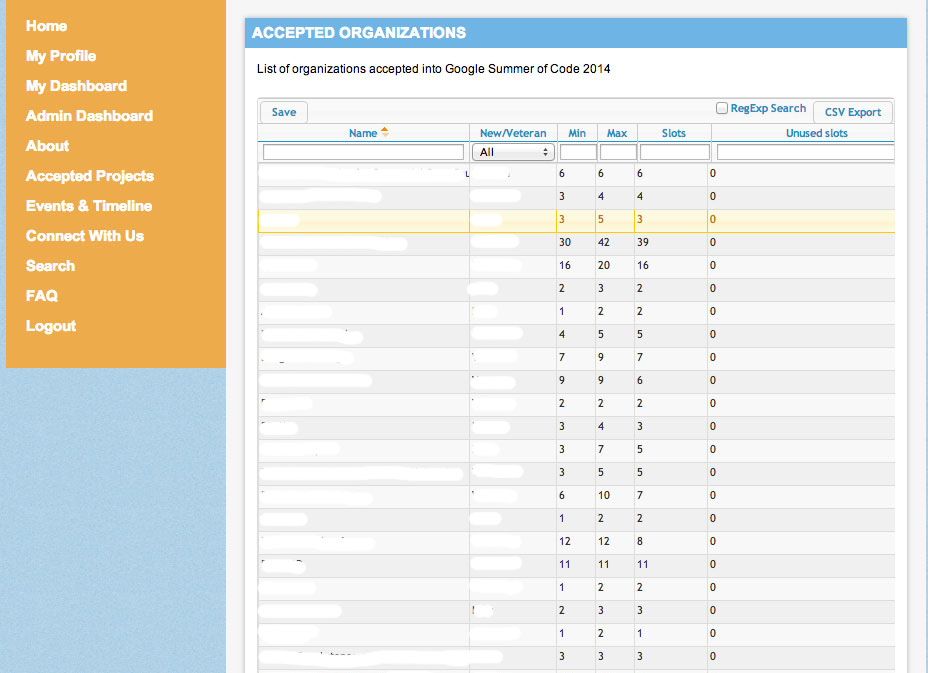
As part of the Google Summer of Code program process, each organization is given a number of slots into which they decide how many student proposals they want to accept. The slot allocation page (Admin Dashboard -> Allocate Slots) is available to Program Administrators in Melange as soon as a new program has been created. This page will list all the accepted Mentoring Organizations for the current program. It displays the total number of slots you have allocated at the bottom of the page and text fields to add notes if desired for each organization.
Click directly on the individual field you want to change, enter the number of slots to allocate, and press Return to save the number you've entered. The save button does not do anything on this page.
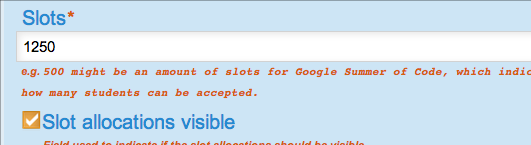
You can then make the individual slot allocations visible to each mentoring organization by going to the Program Profile (Admin Dashboard -> Program Settings -> Edit program settings) and checking the box for "Slots allocations visible".
Once the organizations have been chosen, the Organization Adminstrators submit their minimum and maximum number of students that they would like to accept via their organization profile.
Program Administrators then decide the number of slots each organization will receive. Those numbers are manually entered by the Program Administrator into the Allocate Slots (Admin Dashboard -> Allocate Slots) page under 'Slots'.
If there are Mentoring Organizations that do not need some of their assigned slots, the Transfer slots to pool page is used by the Organization Administrators.
The Program Administrator then manually reassigns the extra slots via the Transfer slots to pool page.
![]()
Ticking the box next to the Mentoring Organization's name and clicking the Accept button will take the slots away from the Mentoring Organization and make them available to reallocate on the Slots page. The Program Administrator can then change the slot allocations for another Mentoring Organization in the list if she so chooses. The slots will otherwise just remain in the "pool" for allocation.
Deduplication
Once Organization Administrators have marked their student proposals as either Accept or Reject, this will put some Students into a situation where multiple Mentoring Organizations want to accept them. Students can only be accepted by one Mentoring Organization. To resolve these potential conflicts, the Duplicates page (Admin Dashboard -> Duplicates) is accessible by Program Administrators. On your first visit to the page, you will need to press the "Initialize Calculation" button on the Duplicates page.

The script takes 2-3 minutes to run for the first time - refresh the page to see the full list of Mentoring Organizations who are in a duplicate situation. After the first calculation (and as duplicates resolve themselves and you want to see a new list) you will need to click the "Recalculate" button on that page. The script will give an indicator of its current status as either "calculating" or "idle."
.png)
Only when the list is empty and the script indicates it is idle after a calculation are all duplicates resolved in Melange. Make sure the organizations work with each other during this time to resolve their duplicates and decide who will accept the student and who will release the student from the accepted state.
Rejection/Acceptance emails
When all duplications are resolved, you can then send notifications of the decisions to the Students. You should edit the emails through the Admin Dashboard -> Edit program settings -> Edit messages links. Melange will retrieve the information regarding the program name, organization, etc. automatically for you. For more information on editing messages, see the 'Setting up a new Program' chapter in this manual.
Accepting/Rejecting Proposals
When you are finally ready to accept and reject proposals, you will find the Bulk accept proposals and send acceptance/rejection emails link from the Admin Dashboard.
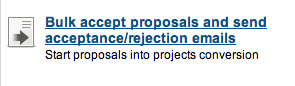
You will need to click on the link, visit the next page, and then click on the "Start" button in order to start the proposal to project conversion. Only click "Start" when you are really ready to begin. The process to convert the proposals and send emails to Students takes 10-15 minutes.
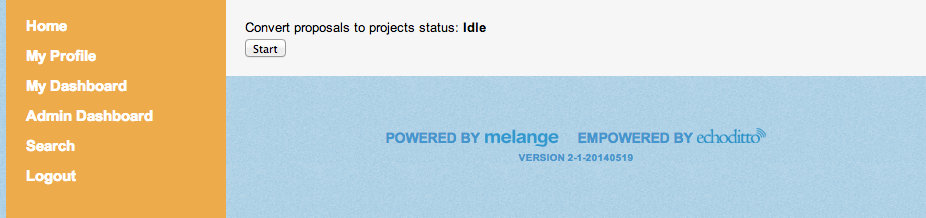
Once you press the "Start" button the page will refresh and you will receive a new screen.
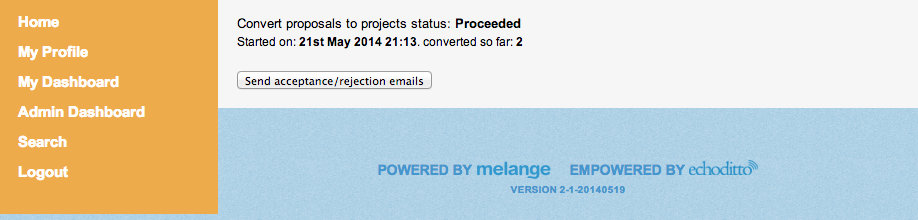
You will need to press the "Send acceptance/rejection emails" button after the process has completed to notify Students of their acceptance or rejection.
In rare circumstances every year there are Students who need to be accepted after the acceptance deadline and Students who drop out. To withdraw a Student after the accepted students deadline, visit Admin Dashboard -> Accept/withdraw projects. Once the full list loads (this may take a minute), filter to find the student you want. Then check the box to the left of their name, and then click on the "Withdraw" button on the top of the list. The list will refresh and the status of the Student will be changed.
If you want to accept a student after the acceptance deadline, visit Admin Dashboard -> Proposals submitted. Once the full list loads (this will take about 20 minutes), filter to find the student you want. Then check the box to the left of their name, and then click the "Accept" button on the top of the list. The list will refresh and the status of the Student will be changed. No email will be sent to the Student to notify him of this change.