


How to work with offices
Once you understand the current hierarchy of offices, you can view existing offices, define new ones (if you have the appropriate permissions), and change the specifications for existing offices.
How to view existing offices
Click Admin > View Offices. You might see a screen like this:
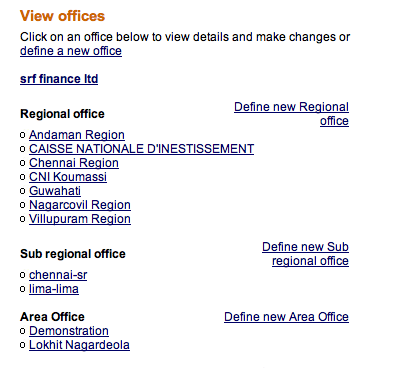
If a level of office is checked (this is set during configuration, see How to Set Office Structure), it is possible to create offices at that level.
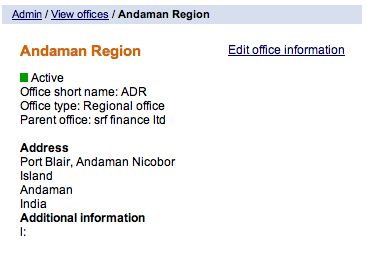
Click the name of any office to see details about it, as shown below.
How to define an office
You can define an office two ways:
- From the previous screen, you can click the Define new xxxx office link, where xxx is the type of office.
- You can click Admin > Define New Office.
Either way, you see this screen next:
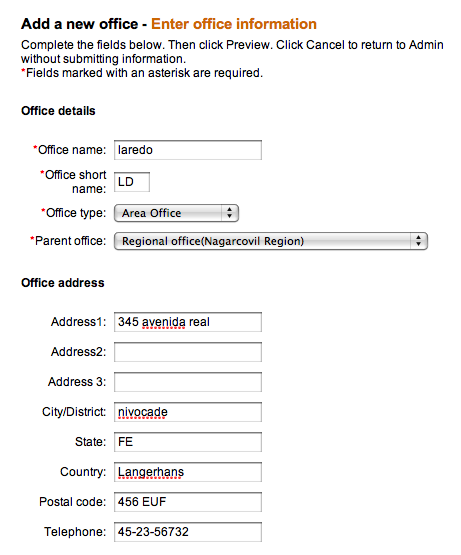
Enter information using the descriptions in the following table:
|
Box |
Description |
Example |
|
Office details |
|
|
|
Office name |
The name of the office |
Kakakpura |
|
Office short name |
A short name for the office |
knkp |
|
Office code |
The office code |
Code 1 |
|
Office type |
Area Office, Branch Office, etc. |
Area Office |
|
Parent office |
The office that is a level higher in the office hierarchy |
Office 1 |
|
Office address |
|
|
|
Office address |
|
#224 Wheeler Road, NGEF Layout, Cooke Town, Bangalore, Karnataka, India, 560090 +91 80 23456787 |
|
Additional information |
|
|
|
Custom field |
Type additional custom information in fields 1-6. See How to define and change additional fields for information on how to create custom fields. |
|
- Click Preview to check your entries.
- If you want to change anything, click Edit Office Information to return to the earlier screen.
- When the entries are correct, click Submit to save them. (If you want to discard all information about this office, click Cancel.)
The new office appears in the display of offices you can see when you click Admin > View Offices.
How to change the details of offices
- From the details screen for a specific office, click Edit Office Information. Use the table above for information on how to fill in new information for the office details.
- Click Preview to review your changes. If you want to make further changes, click Edit Office Information, make those changes, and click Preview again.
- When you are satisfied with your changes, click Submit to save the changes.