


Using ownCloud Desktop Clients
In other parts of this guide we explain how version control and synchronizing folders and files works using WebDAV and the file manager of your operating system.
The ownCloud client is a good way to have more control over the way files are synchronized between your ownCloud server on the web and your computer. This can be helpful if a simple WebDAV set up isn't performing as it should or if you want to take advantage of the extra settings the ownCloud client gives you. These include limiting the bandwidth used, viewing the space allocated and used, and setting certain files and folders to be ignored during the syncing process.
Installing client on Windows and Mac
Point your browser to http://owncloud.org/install/ and click on the button for either Windows or Mac and follow the instructions to download and install your client.

Installing client on Ubuntu
First you will need to add a new repository to your software sources list. To do this, open the Software Center.
Click the Other Software tab.
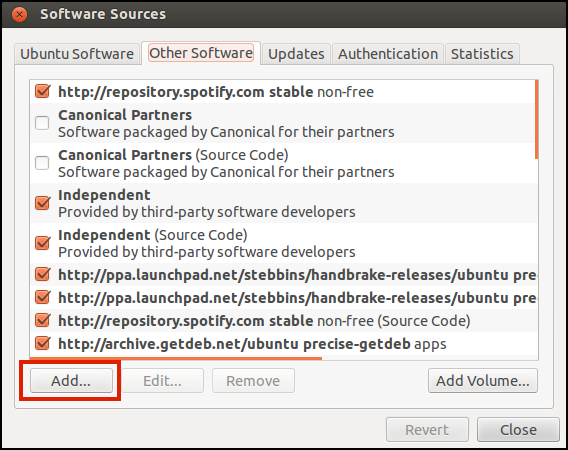
Click on Add source.
Enter one of the following lines into the box, choosing the correct one for your version of Ubuntu. The version numbers are in bold:
deb http://download.opensuse.org/repositories/isv:ownCloud:devel/xUbuntu_13.10/ /
deb http://download.opensuse.org/repositories/isv:ownCloud:devel/xUbuntu_13.04/ /
deb http://download.opensuse.org/repositories/isv:ownCloud:devel/xUbuntu_12.10/ /
deb http://download.opensuse.org/repositories/isv:ownCloud:devel/xUbuntu_12.04/ /
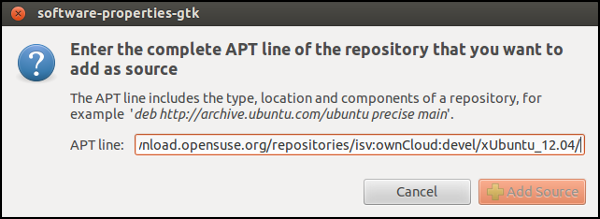
Select Add Source.
Click Close. You will need to enter your admin password for your Ubuntu install.
Now you have installed the repository, you can search for owncloud-client in the top right of the Software Center.
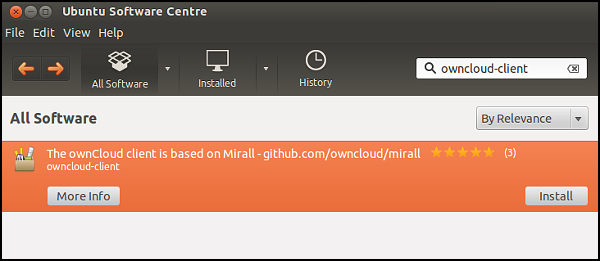
Select the ownCloud client and click on Install. Enter your password to confirm.
Setting up your ownCloud client
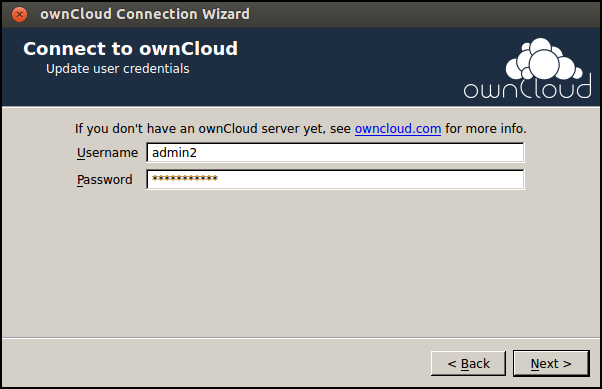
After you have installed ownCloud you should be able to follow the ownCloud connection wizard to configure your client. If the wizard doesn't start automatically after install you can either restart your computer to trigger it or type the command 'owncloud' from your terminal window.
Note: if the wizard doesn't start, read on to configure it in a different way.When the the ownCloud wizard starts follow these steps:
Enter the Server Address of your client.

Enter your Username and Password.
Next, choose a directory to use as your Local Folder to be synchronized with the server.
By default the wizard may choose a directory called ownCloud in your home directory / My Documents.
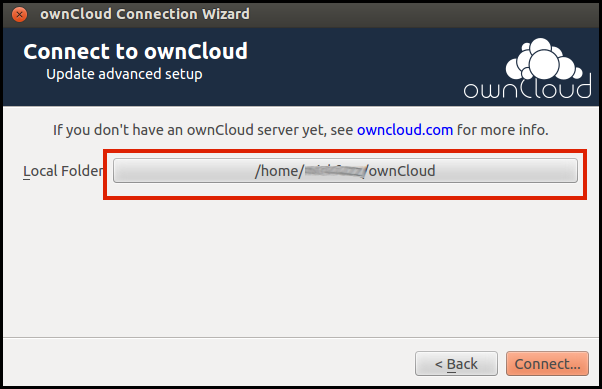
You can click on the button next to Local Folder, highlighted in red in the image above, to choose another folder.
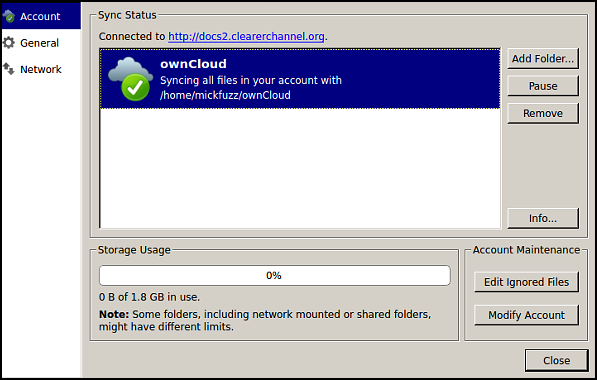
If these stages were successful you should see a green tick next to the icon of the cloud detailing your local folder in the Sync Status window. This means the local file is being synced with the remote files.
Using the ownCloud client
Once the ownCloud client is installed and configured you can view, edit and save files using the directory that you have set to sync to your ownCloud. These changes will be be available to you on the server and on other computers that you have synced-up to the server.
There are also also a helpful status icon and toolbar menu available to you.
In Ubuntu or other similar operating systems this toolbar menu is available at the top right of the desktop. If all is going well it should consist of an icon of a cloud and a green tick sign.
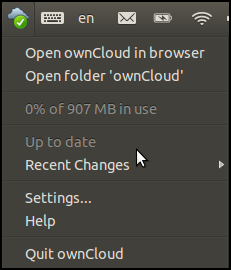
You will see some useful options here which you can select:
- Open ownCloud in browser: This will direct you to log in to your ownCloud server via a web page
- Open folder 'ownCloud': This will open your local version of your ownCloud directory, which you created when you set up the client
- X% of x G/MB in user: This is a quick way of seeing how much storage space is available to you and how much of your quota you have used
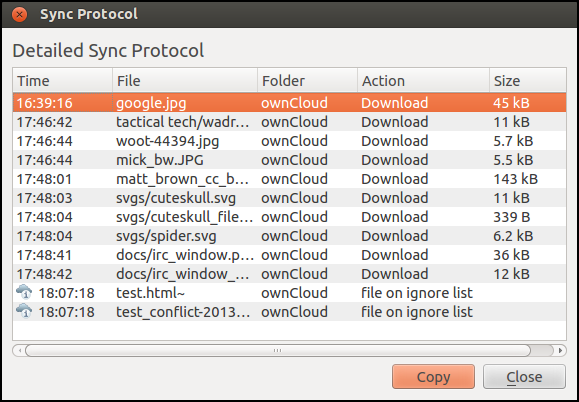
- Recent Changes: Clicking on this will show recent activity, such as which files have been uploaded or downloaded to/from the server to keep the folders in sync. Clicking on Details will show this information in greater detail as a table
- Settings...: This opens the settings window of your client including options for Account, General and Network
- Help: Takes you to the relevant help pages online
- Quit ownCloud: This exits the ownCloud settings until you restart your computer
Configuring the ownCloud client
After opening the Settings window, as described in the section above, there are three main tabs which allow you to configure the use of the client. These are Account, General and Network.
Account settings
In account settings you have the option to add new folders to snyc, to remove existing ones and to pause syncing.
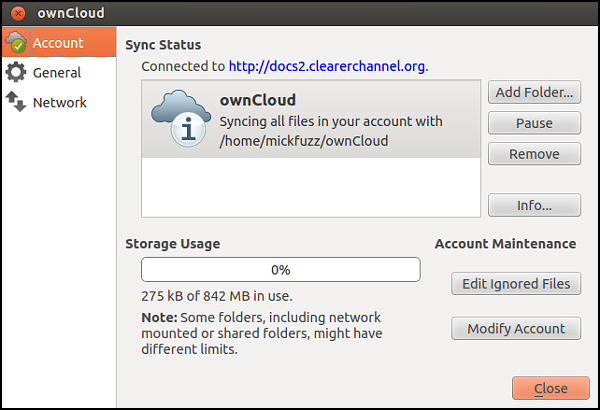
There is a useful section on Storage Usage which shows you how much of your allocation of space on the server you have used.
The Info button gives a more detailed view of the files that have been transferred or any problems with the synchronization.
There is also an option to Edit Ignored Files. This opens the Ignored Files Editor.
This option allows you to not sync certain files or folders on your local or remote server.
By default you can see that there are already some files that are ignored. These are normally files that are automatically created by other applications, rather than files you would normally use yourself.

There is also an option to add patterns for file or folder names/types to be ignored. There is more information on this in the ownCloud documentation.
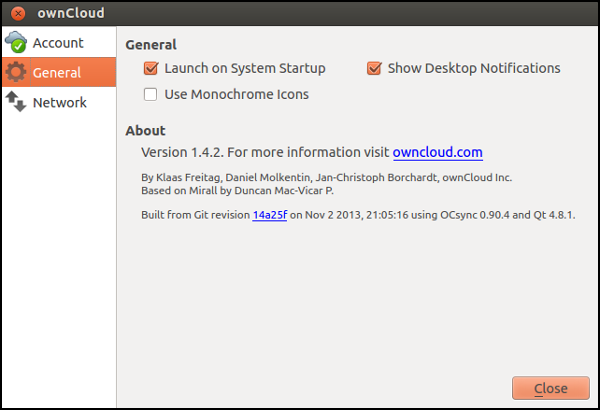
General settings
Under the General settings tab there are options to disable or Show Desktop Notifications which show next to your client icon when files are synced successfully.
There is also an option to stop your ownCloud client from loading automatically when you start your computer, called Launch on System Startup.
Both of these options are enabled by default. Remove the tick in the relevant box to stop this functionality.
Configuring network settings
In the Network tab, you can change the Bandwith Limits depending on the bandwidth of your connection. If you have a slower connection and don't want to overload it (which would slow down your internet access every time you are syncing) then you can set these limits to be low.
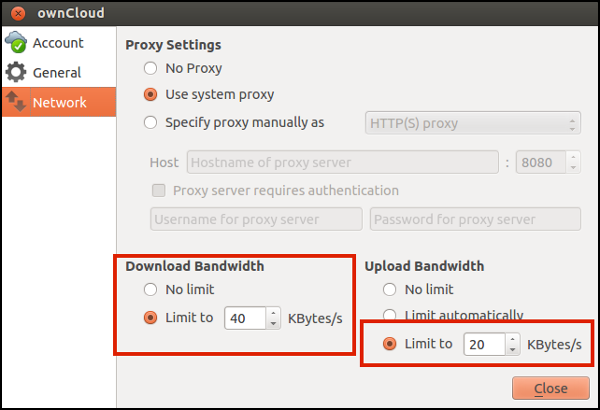
There also options for setting up Proxy Settings:
- No Proxy: Check this if you do not wish ownCloud client to use the default proxy
- Use system proxy: This is the default option. ownCloud will then use your computer's proxy settings
- Specify proxy manually as: This allows users to fill in custom proxy settings