


Uploading Media
Before you begin uploading your media to UpStage, please read the section of this manual "Creating Media".
Media (graphical avatars, props and backdrops, and audio files) is uploaded to UpStage via the Workshop interface. We are currently developing a new interface, as the current system was not designed for the numbers of artists now using UpStage and has become quite cumbersome. We ask for your patience, while we wait for the new system to be ready.
Unless you are a superuser, media uploads are limited to 1MB per file; this is to help avoid the uploading of unnecessarily large files, which will mean that stages take longer to load. Players with superuser permissions can over-ride this limitation.
Avatars
In the Avatar section of the Workshop, you can upload new avatar images and video streams, delete unwanted avatars, listen to available voices and change an avatar’s voice.
Uploading a new avatar
Avatars can be:
- still images in .jpg, .png or .swf format
- multi-frame avatars
- animated .swf files
- motion jpegs from a web cam.
Once you have created your avatar in a graphics application, click on “Add a new avatar” in the Workshop; give it a name (every avatar must have a unique name – UpStage will add a number if you give an avatar the same name as another avatar) and browse to the file(s) on your hard drive. Click OK and the file(s) will be uploaded to UpStage, and you will see the avatar’s edit screen. This is where you can select a voice for your avatar (see the chapters on Speech and Text Chat for more information about the voices available on UpStage, and the appendix on Text2Speech Voices for information about how to add more voices).
![]()
If you are creating a new web cam avatar, you will first need to set up your web cam with FTP access to your UpStage server (see the Webcams chapter for details and recommended software). Once your image or video stream is ready, follow the link from the Workshop to “Add a new avatar” and find your filename in the drop down list of available video streams. Choose a name for the avatar then click OK.
Go back to the Workshop and follow the link to “Manage Avatars” and you will see a list of the stages, plus "unassigned" – this is where you will find your avatar before you have assigned it to a particular stage. It will also appear in the list of avatars uploaded by you when you are in the "Manage Stages" section, allowing you to assign it to a particular stage. Note that there is no limit to how many stages one avatar (or other media) can be assigned to.
Manage Avatars
This screen lets you access information pages for all the avatars on the server, grouped according to the stages they have been assigned to, plus an "unassigned" category for avatars that have not yet been assigned to a stage. Click on a stage name or "unassigned" and then on the name of an avatar to go to that avatar's edit screen.
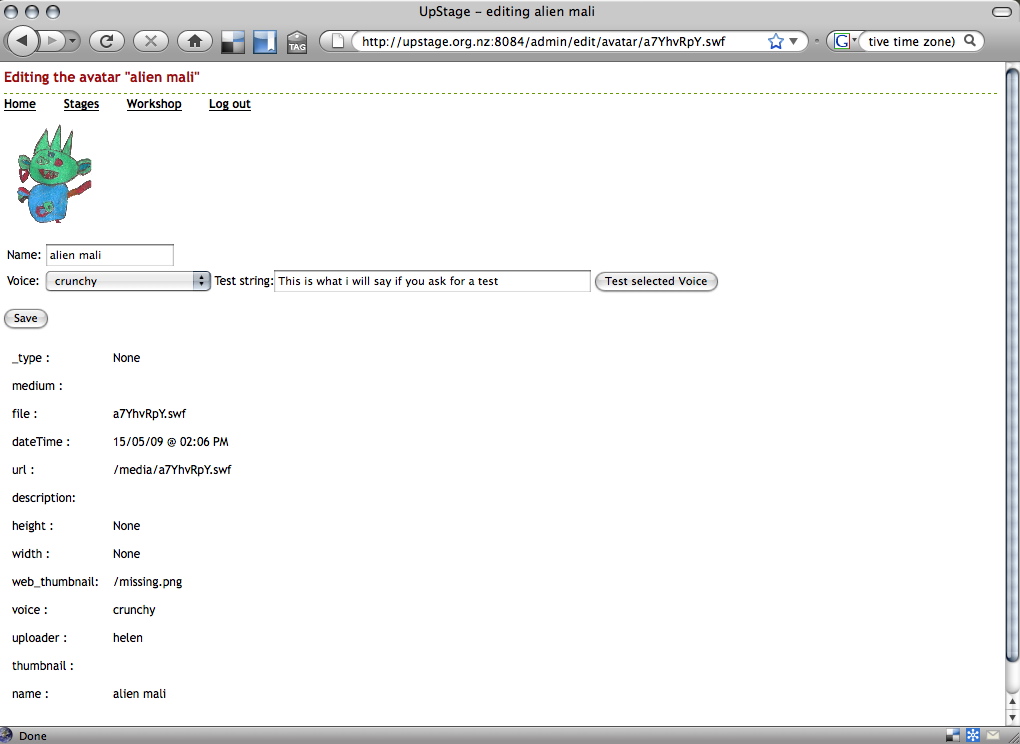
You will see a thumbnail image of the avatar, information about the file, and a dropdown list of available voices. You can change the name of the avatar and its voice, and test the voices to see what they sound like.
Props
Props function in a similar way to avatars, but they can’t speak, and you must be holding an avatar in order to hold a prop. When an avatar is holding a prop, it appears on stage at the top left corner of the avatar. If another player clicks on the same prop, it will appear to be passed to the second player’s avatar. Invisible avatars are useful for placing props on the stage, appearing independently of the visible avatars.
Uploading a new prop
Props are created in the same way as avatars, and should be still images in .png or .swf format; see Section 4 for recommendations about creating graphics for UpStage.
From the Workshop, follow the link to “Add a new prop”, and navigate to the appropriate file on your hard drive. Choose a name for it and click OK to upload.
Manage Props
This screen shows a list of available props, grouped according to the stages they have been assigned to; you can change the prop name, and delete unwanted props.
Backdrops
Backdrops can be still images in .jpg, .gif, .png or .swf format. See the section Creating Graphics for recommendations about creating backdrops for UpStage.
Uploading a new backdrop
From the “Add a new backdrop” link in the Workshop, navigate to the appropriate file on your hard drive. Name it and click OK to upload.
Manage backdrops
This screen shows a list of available backdrops, grouped according to the stages they are assigned to; you can change the backdrop name and delete unwanted backdrops.
Multiframe backdrops
Multiframe backdrops work in the same way as multiframe avatars – see section 4 Graphics for more information about creating multiframe backdrops. To change the frame of a multiframe backdrop on stage, the command is /b 1, /b 2 etc. and /b 0 to animate the frames.
Audio
You can upload MP3 files and assign them to a stage. Up to three audio tracks can be played at simultaneously on a stage (more than three can be assigned to a stage).
Uploading a new audio file
From the "Add new audio" link in the Workshop, navigate to your MP3 file on your hard drive. Name it and select either "Sound effect" or "Music" then click OK to upload.
Manage audio
This screen shows the list of audio files that have been uploaded. You can delete files, or click on the file name to edit its information – you can change the name or the type of file (sound effect or music).