Encoding Video
Software name : VLC
Software version : 0.8.6
It is a good idea to get as good a quality a file as you can before you start encoding. If you can get a DV file if exported from a video editing application or captured from tape or an MPEG-2 or VOB file if taken from a DVD.
However this method will work with all video files that VLC will play, which is an impressive amount!

Choose the file you want to encode to another format.
Select Stream/Save by ticking the box in the lower, Advanced Options part of the Open File box.
Then click on Settings again in Advanced Options
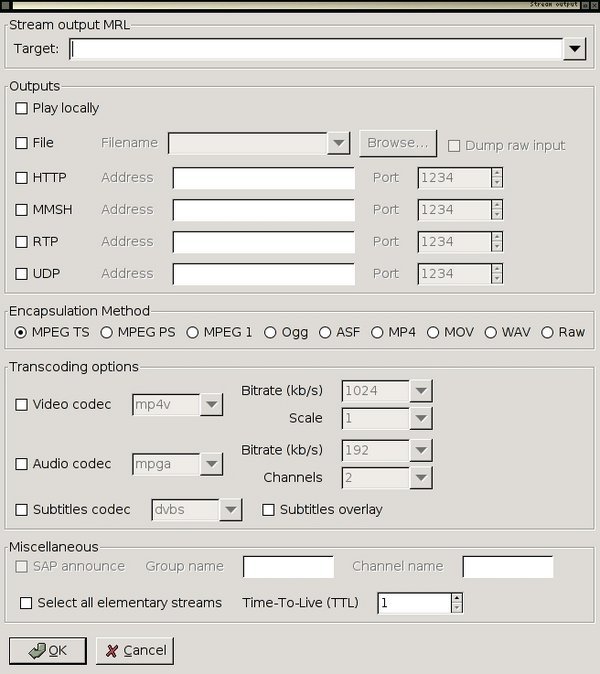
In the Outputs Section click File. Then click on the Browse button next to it an select where you woud like your target file to be saved.
Creating an MP4 file
Make sure the filename you created in the above step ends *.mp4
In the Encapsulation part of the Stream output box select MP4
Video codec : h264 Bitrate 1024
Audio codec: mp4a Bitrate 128

The next bit is a bit tricky part. Go back up to the "Stream output MRL Target:" box. Notice that the box is full of text. Look for the part that has :
#transcode{ }, and type width=352,canvas-height=288
this will be somewhere inside the { }. Do not add extra spaces. You might need to add a comma, as you'll notice all the values are seperated by a comma.
Be careful here. If you change any of the settings below this box, you will have to re-enter the width and height settings.
You may wish to use other width and height settings or user a lower video or audio bitrate if you want to make the file size smaller. This setting will create files that are about 10Mb per minute. This file should be iPod compatible.
Click OK to close the Stream ouput dialog, then click OK to close the File open dialog. The movie should now start playing without showing the picture on the screen.
When it has finished, you can check to see if your file works by playing it in VLC. Don't forget to take the tick out of the Stream / Save box when you open the file.
Creating an Ogg Theora file
Make sure the filename you created in the Outputs section ends *.ogg
Choose
Encapsulation Method: Ogg
Video codec : theo Bitrate 1024
Audio codec: vorb Bitrate 128
The next bit is a bit tricky part. Go back up to the "Stream output MRL Target:" box. Notice that the box is full of text. Look for the part that has :
#transcode{ }, and type width=352,canvas-height=288
the above appears somewhere inside the { }. Do not add extra spaces. You might need to add a comma, as you'll notice all the values are seperated by a comma.
Be careful here. If you change any of the settings below this box, you will have to re-enter the width and height settings.
Click OK to close the Stream ouput dialog, then click OK to close the File open dialog. The movie should now start playing without showing the picture on the screen.
When it has finished, you can check to see if your file works by playing it in VLC. Don't forget to take the tick out of the Stream / Save box when you open the file.
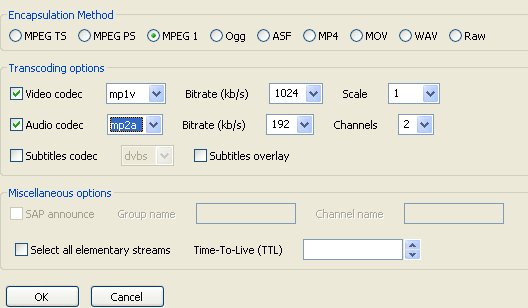
Creating an MPEG-1 file
The MPEG-1 container and video encoding method is so old now that all computers support it in their default video player with no extra downloads. Also older and cheaper computers can play these files without problems. This can be especially useful if you are creating a CDrom that you want to be universally compatible.
Follow the process opening a file in VLC to encode to another file format to open your file and get it ready to re-encode to another format.
Make sure the file name you choose ends with *.mpg
Choose
Encapsulation Method: Mpeg1
Video codec : mp1v Bitrate 1024
Audio codec: mp2a Bitrate 192
The next bit is a bit tricky part. Go back up to the "Stream output MRL Target:" box. Notice that the box is full of text. Look for the part that has :
#transcode{ }, and type width=352,canvas-height=288
somewhere inside the { }. Do not add extra spaces. You might need to add a comma, as you'll notice all the values are seperated by a comma.
Be careful here. If you change any of the settings below this box, you will have to re-enter the width and height settings.
Click OK to close the Stream ouput dialog, then click OK to close the File open dialog. The movie should now start playing without showing the picture on the screen.
When it has finished, you can check to see if your file works by playing it in hopefully any Media player on any system.
Installing VLC on Ubuntu
Software name : VLC
Homepage : http://www.videolan.org/vlc/
Software version used for this installation : 0.86
Operating System use for this installation : Ubuntu 7.04
Recommended Hardware : 300MHz processor
If you are used to an Operating System like Windows or MacOSX you may have installed software by downloading it from a website and double clicking on the downloaded file, and clicking through all the licence agreements, configuration options etc. This is the 'old' way of installing software. The 'new' way is much smarter - you choose what you want to install from a list and press 'go'. The rest - finding the files, downloading the files, installing software, is taken care of by Ubuntu itself while you go and get a cup of tea or work on something else. It can't get much easier.
However, new ways take a little getting used to, and so we will first look at the basic tool needed to install software this way, and then how to use it to install VLC.
Synaptic Package Manager
The Synaptic Package Manager (SPM) is used for more than just installing software. It can also upgrade your entire operating system, and manage all software installed on your computer. However most people use SPM for just installing new software. Before you embark on this process there are a few concepts that you may wish to get familiar with. Its not crucial you understand them throughly, so just read the explanations and then let it soak in over time. The ideas behind SPM will become clearer with use.
What is a repository?
SPM can automate the installation of software on your computer because it has a direct connection to one or more online software repositories. These repositories are vast archives of softwares that have been pre-configured for installation on your operating system . When your computer is online SPM can connect to these archives, check what software is available for installation, and present you with a list of installable software. All you have to do is select the software from the list that you want. SPM then downloads the software from the repository and takes care of the installation process.
So SPM is actually a repository manager, it manages which repositories (there are many) you wish to access, and which softwares to download and install from those repositories.
SPM allows you to choose which repositories it accesses through its settings. The default repositories used by Ubuntu can be extended through the SPM settings so you can access a wider range of softwares. Ubuntu calls each repository by a simple name. They are : Main, Universe, Multiverse, Restricted. By default Ubuntu only uses the Main online repository. If you wish to access you the other repositories you must do this by changing repository settings of SPM.
What is a package?
When SPM downloads a software for installation it is in the form known as a 'package'. This means that it is a compressed archive of the software, pre-configured so that it will install nicely on your computer. If the package has been configured nicely, and Ubuntu spends a lot of time making sure this is the case, then many of the headaches that installing software can bring are taken away - its the panadol of software installation. One of the biggest issues with installing software on any form of Linux (Ubuntu is one of many types of Linux), are dependencies. Dependencies are all the other softwares required by a particular software. If, for example, I want to install a audio editor, that audio editor software may use some functionality of other softwares to do its job.
SPM takes the (often) dark art of dependencies away from you, and manages this itself. So if you wish to install a software and it has dependencies (and the list can be long), you don't have to work this out yourself, SPM knows already what is needed, finds it, and installs it along with the software you have chosen.
So, SPM, as well as managing which repositories you access, is also a package management software. Hence the name - Synaptic Package Manager.
apt
You don't really need to know about apt, so if you are on the verge of being confused then don't read this short section. If you are a geek wannabe then read on.
Ubuntu is a form of Linux that has derived from another form of Linux - Debian. This family of Linux has in common (amongst other things) the package/repository management system. Both Ubuntu and Debian use the apt system for managing packages. APT is actually an acronym short for Advanced Package Tool.
SPM is actually a 'front end' (graphical interface) for controlling apt. So SPM is the nice user interface that you see, but the real work is done by apt. There are other ways of managing apt also, such as the command line interface known as apt-get. In the world of Linux there are many varieties of Linux users and they have their own ways of doing things. In general its safe to say most Debian users use apt-get, and most Ubuntu users are happier using SPM.
Configuring Synaptic Package Manager for installing VLC
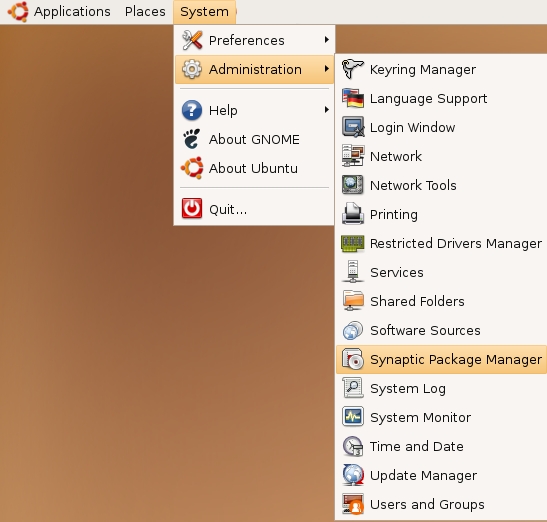
To install VLC on Ubuntu you will need to change the default repository settings of SPM as VLC is not contained in the default repository. To do this you will need to open the Synaptic Package Manager and you can do this via the System menu. If you haven't changed the default Desktop of Ubuntu then the System menu can be accessed at the top left of your screen:
If all is good you will be prompted for a password.
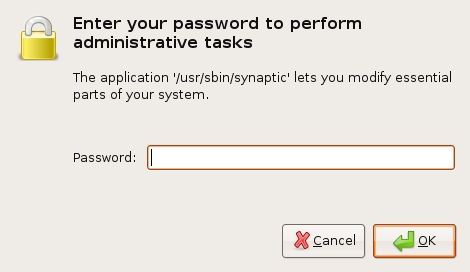
Here you must enter your password (the same one you use to log into the system). If you don't know the password then you have a problem and its probably caused by the fact that the computer you are using is not yours. In this case you have to find the computers owner and ask them for the password (which is usually not polite unless you know them well) or ask them to input the password while you look casually in the other direction.
Assuming the password entered is correct - you will now see the SPM open infront of you. It may be that you first see the following 'Quick Introduction' (this appears if you ahven't used SPM before).
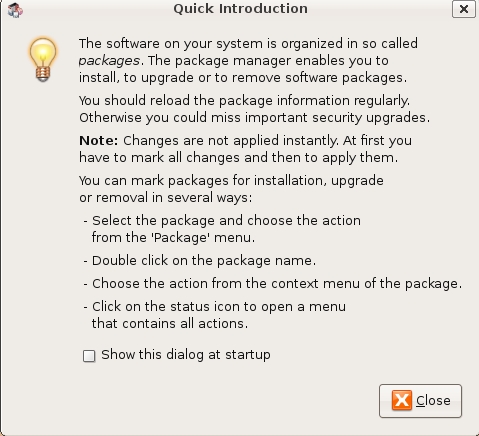
Just click Close and move on. Lets look at the Synaptic Package Manager interface...

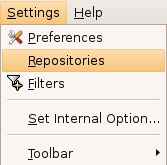
Lets not worry about the details of the interface for now. All we want to do is change the repository settings. To do this click on the Settings and choose Repositories
Now we get to where we can do some business. Make sure that Community-maintained Open Source software (universe) is checked :

Now close that window by pressing the big close button at the bottom right.

Next, you will see a warning telling you the repository has changed :
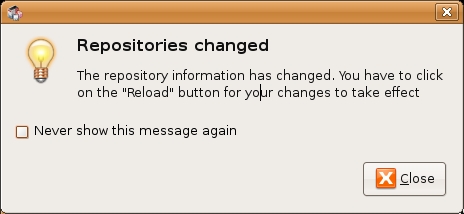
Click the Close button and move on to SPM so you can refresh the repositories as the warning suggests. To do this, do as the warning says - click on Reload :

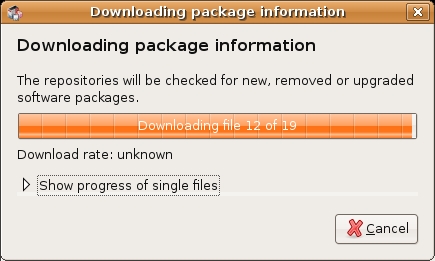
You should then get some feedback saying the repositories are being updated and showing the progress.
Installing VLC with Synaptic Package Manager
Now the real business. Its pretty easy. Click on the nice big Search button:

The search window will open and now enter 'vlc' in the field:
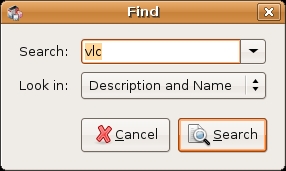
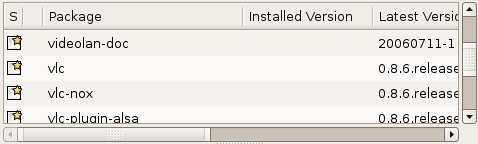
Great. Now press Search at the bottom right of the above window. The search should not take very long and when it is complete you will get a long list of software that can be installed, scroll down the list until you see vlc :
If you highlight vlc (by clicking once on the name) you will see some information about vlc displayed :
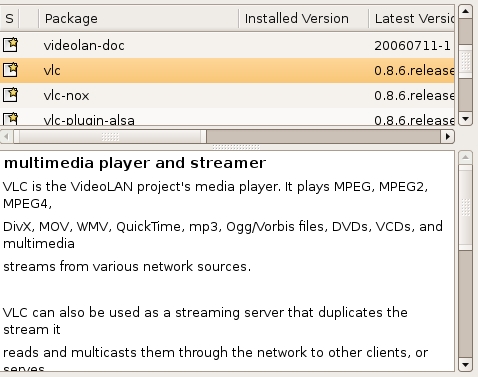
Now you can read the information if you wish but there is nothing critical i there. Best thing to do is just to double-click on vlc. By doing this you are 'marking' (choosing) the software for installation. If you do so then an additional window appears:
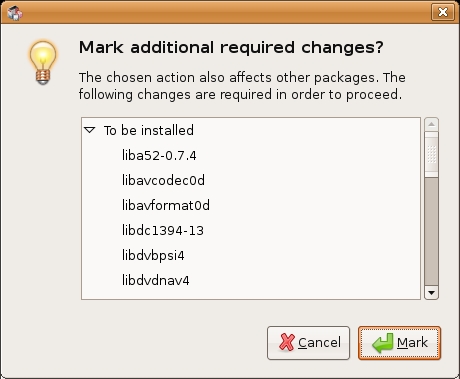
Now click Mark:

You have now told Synaptic Package Manager that you want to install VLC and all the additionall softwares that it needs to function. If all is well then the package will be highlighted:
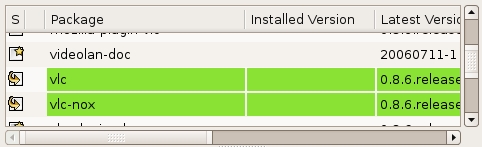
You will see that there are two packages highlighted here. Infact if you browse up and down the list you will see other packages highlighted to. These are the softwares that will be installed so that vlc has all the functionality it requires.
Now press the Apply button with the nice big tick next to it :

Next SPM informs you of how much space will be taken by the installation :
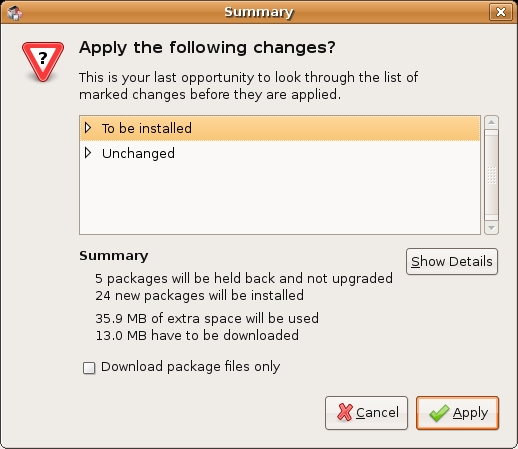
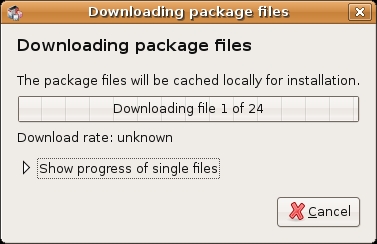
Now you can just click Apply at the bottom right of the screen and the installation will start. A progress bar will be shown:
When it is completed (downloading and installing) you will have this screen :
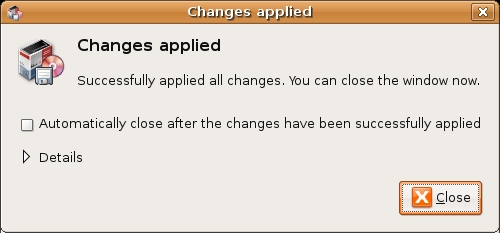
That means all is well. Pat yourself on the back and press Close. Synaptic Package Manager will then return to its original state. Close it :

Now you can open vlc...just browse to the Applications menu, choose Sound & Video, select VLC media player and release the mouse :
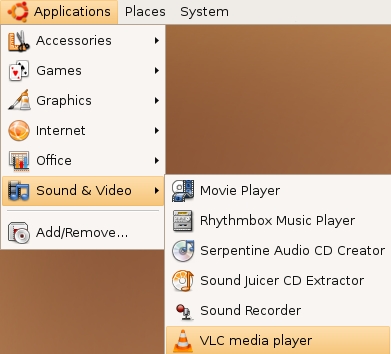
If all is well you will see vlc :
Congrats!
Installing VLC on OS X
Software name: VLC media player
Homepage: http://www.videolan.org/vlc
Software version used for this installation: 0.8.5
Operating System use for this installation: OS X (10.3)
Recommended Hardware: G3 minimum
Downloading VLC
The latest stable version of VLC for OS X can be downloaded from http://www.videolan.org/vlc/download-macosx.html. The latest version at the time of writing this document is VLC 0.8.6e.
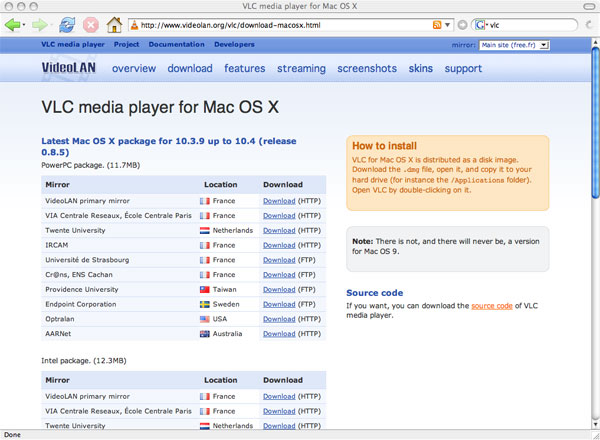
The download page for VLC for OS X lists many locations around the world where the software can be downloaded. The idea is that the downloads can be faster and more efficient if you choose a location near to you. There is a separate list for PowerPC? and the newer Intel based Macs so you will need to choose a download from the correct list for the type of computer that you are installing on.
Click on the download link of the location nearest you to begin downloading.
Depending on your web browser and its settings you may see the following window at the start of the download:
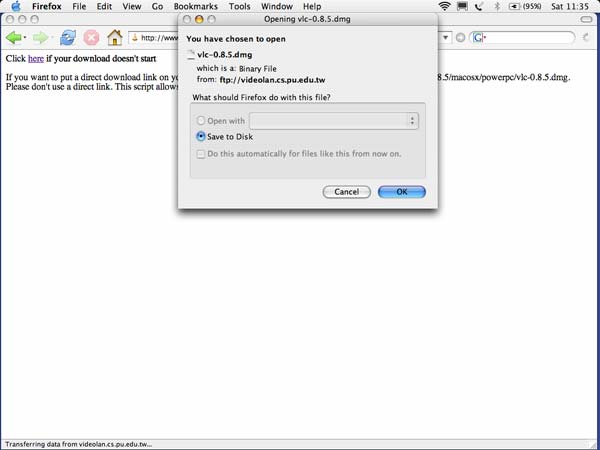
Simply select "Save to Disk" and then click "OK" to proceed with the download.
Once the download is complete you should see something like this on your desktop or in the folder that your web browser is set to download into:

Double click on it to begin installing the software.
You should now see a "finder window" with a disk image? named "vlc-0.8.5" (the name of the disk image may be different if you are installing a different version than shown here) open:
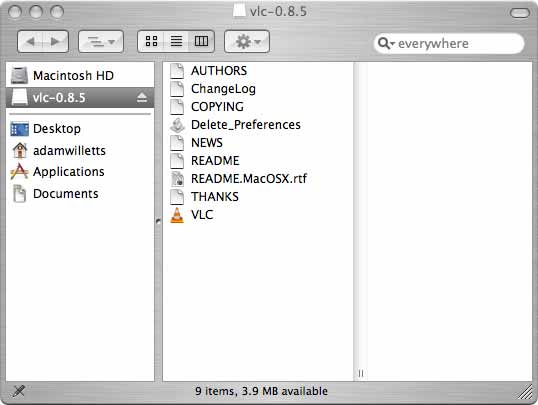
All you need to do now to complete the installation is copy the disk image into your "Applications" folder. To do this click on the disk image to select it then press the Apple and C keys together to copy it. Now select your "Applications" folder and press the Apple and V keys together. This will create a VLC folder containing all of the contents of the disk image in your "Applications" folder.
The installation is now complete so you can eject the disk (by clicking the eject icon or dragging it to the trash) and start using VLC.
To open VLC double click on the following icon in the VLC folder:

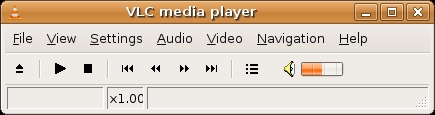
You should be able to see the VLC - controller interface which looks like this:
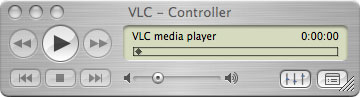
That's it! You now have VLC up and running.
Installing VLC on MS Windows
Software name: VLC
Homepage: http://www.videolan.org/vlc/
Software version used for this installation: 0.85
Operating System use for this installation: Windows 2000
Recommended Hardware: 300MHz processor
Installing VLC on Microsoft Windows is a reasonably straight forward process. First you need to download the installer, at the time of writing the latest VLC version is 0.8.6e. You can download it here. When this is downloaded browse to where you have the installer, in this example the file was downloaded to the desktop:

Now double-click on this icon and a language selection box will appear:
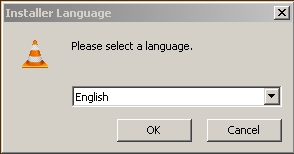
Choose the appropriate language from the dropdown box and press OK. The following should appear (in this case, in English):
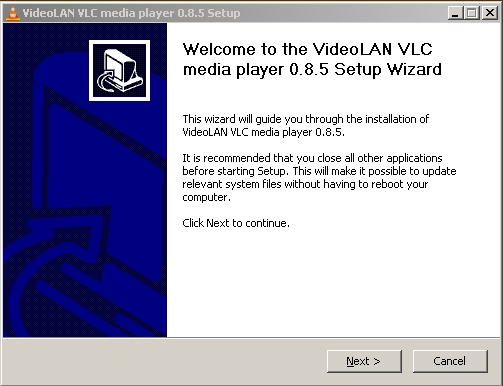
Press Next > and the licence box now appears. VLC is licenced under the GPL which means you can do with it what you want for free, but there are no warranties. For more information on this licence see: http://www.gnu.org/copyleft/gpl.html
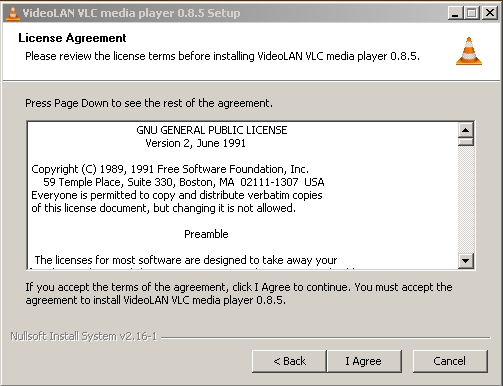
If you do agree with this licence (I hope you do!) then press I Agree and you will see the Choosing Components Window.
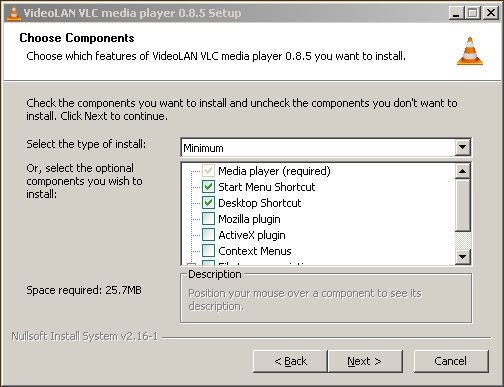
You can just continue without changing the selections on this window. The options won't do anything drastic to your computer and it might be interesting to try some. For basic usage however, just leave the options as is and press Next >. You will now be presented with options on where you should install VLC on your computer:
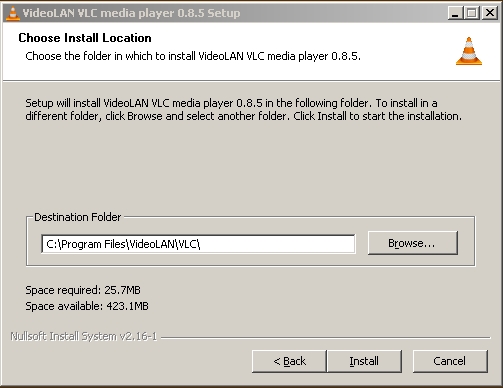
You can click on the Browse button and look through your files and directories for a suitable place to install VLC but for most cases you want to keep this at the default settings and press Install. With luck the install process starts:
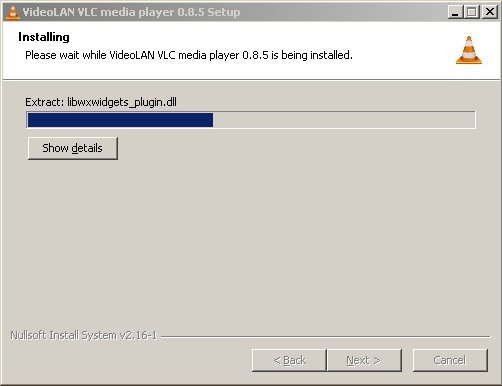
When the install has finished you will see the following screen:
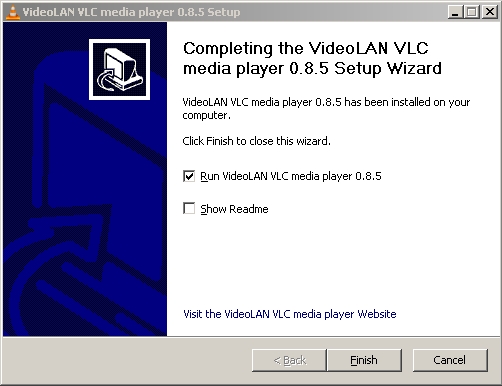
Press Finish and hopefully you see the player:
Installing from Source (Linux)
Software name : VLC
Homepage : http://www.videolan.org/vlc/
Software version used for this installation : 0.84
Operating System use for this installation : Debian (this process will work on any version of Linux)
Recommended Hardware : 300MHz processor
Downloading
First, get the sources. To do this you should visit the VideoLan website (http://www.videolan.org) and download the sources from the website. At the time of writing the URL for downloading VLC source is this:
http://www.videolan.org/vlc/download-sources.html
Make sure you download the sources to somewhere you can access using a terminal ('shell'). If you do not know how to use a terminal then please also read up on this otherwise the following is going to be very difficult to follow. If you know how to use the terminal then copy the sources to the directory you are currently in or change your current working directory to the directory where the sources are.
The sources, once downloaded, will need to be 'unpacked'. This means that they source code has been compressed and needs to be uncompressed. Most Linux applications have their source code compressed in the tar and gzip formats. You can recognise this type of compression if the file you downloaded ends with the suffix:
.tar.gz
In this case the source code I have downloaded is named vlc-0.8.4a.tar.gz
Before I start the installation I need to check the sources are in the same working directory as my terminal. To do this I type ls and I shoudl see something like this in my termial:
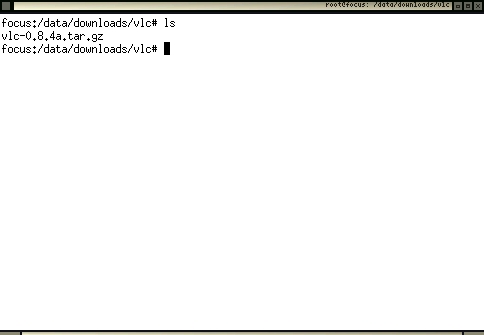
The above is just an example. The information will vary in your window, but it is critical that you see the sources you downloaded in the list of files.
Now we will decompress the files. To do this we need to use the tar application. If your version of Linux doesn't have this then you will need to first download and install it. The best way to find out if it is installed is just to type tar and press return. You should see somehting like this:
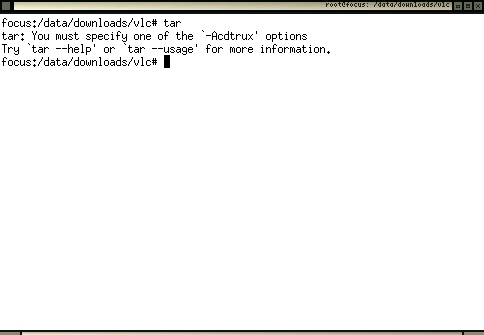
The above message is actually an error message, but if you see it ignore the message as we only executed the command to check if tar was installed. If tar is installed then type the following:
tar -zxvf vlc-0.8.4a.tar.gz
Make sure you replace vlc-0.8.4a.tar.gz with the name of your sources file. If all is well you will see a lot of information shoot through the terminal which is simply a list of all the uncompressed files. These files are the source code and you will now need to transform the source code into the VLC program. This process is called compiling. However before you compile VLC from the source code you need to configure VLC. This might seem strange, software should be configured after it has been installed right? Well, yes, but also in Linux you can enable or disable many options to be included into the program when you compile it. This process actually changes the software so that it includes or excludes different functional components. This process is also called configuring.
Configure
The way you install software on Linux is dependanton the type of Linux you may have. There are many types of Linux and each has its own way of installing software using what is known as a Package Manager. A Package Manager is a system dedicated to downloading and installing software on your computer, usually in an semi-automatic way.
This can be really good if you don't care about the way a software is configured. However in Linux you can change the configuration of a software dramatically in the install process. It is possible, for example, to enable and disable many options in VLC when you prepare the software for installation. Generally speaking, automatic install processes don't always give you so much control over the install options. Notably the Gentoo version of Linux gives you a lot of control. However with Debian, Ubuntu and Redhat you will have a default install with default options turned on and off. Most of the time this will probably be ok. However if you need a 'special' function enabled in a software it is often only available if you enable it during installation, otherwise the functionality you require just simply won't exist.
VLC has a lot of options you can include or exclude when you go through the pre-compiling configure process. The configure process is triggered by the configure command. However this command can also give you feedback so you know what the options are before you actually configure the application. To check the configure options of (almost) any source type the following from within the uncompressed source directory:
./configure --help
This will give you an enormous amount of information in the terminal. Probably the information will flow by faster than you can read it and you will be left with the tail of the data. To control this better, try the following command :
./configure --help | less
This command is actually two commands combined. The less command allows you to control the information flowing past on the screen by the use of the page up and page down buttons on your keyboard. The character in between the two commands is called the pipe and it allows commands to be combined. It might be that you do not have less installed which means that the above is quite useless to you. In this case you can try the following:
./configure --help | more
The more command displays a page of text and then waits for you to press the space bar before showing you the next page. If you don't have any luck with the above two suggestions it might be that you don't have either installed, in which case it is a good idea to install them.
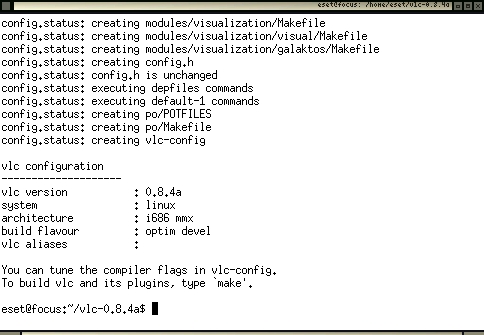
The options displayed, should look (it total) something like this:
Optional Features:
  --disable-FEATURE       do not include FEATURE (same as --enable-FEATURE=no)
  --enable-FEATURE[=ARG]  include FEATURE [ARG=yes]
  --enable-maintainer-mode  enable make rules and dependencies not useful
                          (and sometimes confusing) to the casual installer
  --disable-dependency-tracking  speeds up one-time build
  --enable-dependency-tracking   do not reject slow dependency extractors
  --disable-rpath         do not hardcode runtime library paths
  --disable-nls           do not use Native Language Support
  --enable-pth            GNU Pth support (default disabled)
  --enable-st             State Threads (default disabled)
  --enable-hal            Linux HAL services discovery (default enabled)
  --enable-gprof          gprof profiling (default disabled)
  --enable-cprof          cprof profiling (default disabled)
  --enable-mostly-builtin most modules will be built-in (default disabled)
  --enable-optimize-memory      optimize memory usage over performance
  --disable-optimizations disable compiler optimizations (default enabled)
  --disable-altivec       disable AltiVec optimizations (default enabled on PPC)
  --enable-debug          debug mode (default disabled)
  --enable-release        activate extra optimizations (default disabled)
  --enable-sout           Stream output modules (default enabled)
  --enable-shout          libshout output plugin (default disabled)
  --enable-httpd          HTTP daemon (default enabled)
  --enable-vlm            VideoLAN manager (default enabled)
  --enable-gnutls         gnutls TLS/SSL support (default enabled)
  --enable-livedotcom     live.com RTSP input plugin (default disabled)
  --enable-dvdread        dvdread input module (default disabled)
  --enable-dvdnav         dvdnav input module (default enabled)
  --enable-dshow          Win32 DirectShow support (default enabled on Win32)
  --enable-smb            smb input module (default enabled)
  --enable-dvbpsi         dvbpsi ts mux and demux module (default enabled)
  --enable-v4l            Video4Linux input support (default disabled)
  --enable-pvr            PVR cards access module (default disabled)
  --enable-gnomevfs      GnomeVFS access module (default enabled)
  --enable-libcdio        CD input and control library support (default enabled)
  --enable-cddax          audio CD plugin with CD Text and CD paranoia via libcd
  --enable-libcddb        CDDB support for libcdio audio CD (default enabled)
  --enable-vcdx           VCD with navigation via libvcdinfo (default disabled)
  --enable-cdda           audio CD via built-in VCD (default enabled)
  --enable-vcd            built-in VCD (default enabled)
  --enable-dvb            DVB-S/T/C card support (default disabled)
  --enable-screen         Screen capture support (default enabled)
  --enable-ogg            Ogg demux support (default enabled)
  --enable-mkv            Matroska demux support (default enabled)
  --enable-mod            Mod demux support (default enabled)
  --enable-mpc            Mpc demux support (default enabled)
  --enable-mad            libmad module (default enabled)
  --enable-ffmpeg         ffmpeg codec (default enabled)
  --enable-ffmpegaltivec  ffmpegaltivec codec (DO NOT USE)
  --enable-faad           faad codec (default disabled)
  --enable-twolame        twolame codec (default disabled)
  --enable-quicktime      QuickTime module (default enabled on MacOS X)
  --enable-real           Real audio module (default disabled)
  --enable-realrtsp       Real RTSP module (default disabled)
  --enable-a52            A/52 support with liba52 (default enabled)
--enable-dts            DTS Coherent Acoustics support with libdts (default enabled)
  --enable-flac           flac decoder support (default disabled)
  --enable-libmpeg2       libmpeg2 decoder support (default enabled)
  --enable-vorbis         Vorbis decoder support (default enabled)
  --enable-tremor         Tremor decoder support (default disabled)
  --enable-speex          Speex decoder support (default enabled)
  --enable-tarkin         experimental tarkin codec (default disabled)
  --enable-theora         experimental theora codec (default disabled)
  --enable-dirac          experimental dirac codec (default disabled)
  --enable-png            PNG support (default enabled)
  --enable-x264           H264 encoding support with libx264 (default enabled)
  --enable-cmml           CMML support (default enabled)
  --enable-x11            X11 support (default enabled)
  --enable-xvideo         XVideo support (default enabled)
  --enable-glx            X11 OpenGL (GLX) support (default enabled)
  --enable-opengl         OpenGL support (default enabled)
  --enable-sdl            SDL support (default enabled)
  --enable-freetype       freetype support (default enabled)
  --enable-fribidi        fribidi support (default enabled)
  --enable-libxml2        libxml2 support (default enabled)
  --enable-svg            SVG support (default disabled)
  --enable-qte            QT Embedded support (default disabled)
  --enable-hd1000v        HD1000 Video Output module (default enabled on HD1000)
  --enable-directx        Win32 DirectX support (default enabled on Win32)
  --enable-fb             Linux framebuffer support (default enabled on Linux)
  --enable-mga            Linux kernel Matrox support (default disabled)
  --enable-svgalib        SVGAlib support (default disabled)
  --enable-ggi            GGI support (default disabled)
  --enable-glide          Glide (3dfx) support (default disabled)
  --enable-aa             aalib output (default disabled)
  --enable-caca           libcaca output (default disabled)
  --enable-wingdi         Win32 GDI module (default enabled on Win32)
  --enable-oss            Linux OSS /dev/dsp support (enabled on Linux)
  --enable-esd            Esound library support (default disabled)
  --enable-portaudio      Portaudio library support (default disabled)
  --enable-arts           aRts sound server (default disabled)
  --enable-alsa           ALSA sound support for Linux (default enabled)
  --enable-waveout        Win32 waveOut module (default enabled on Win32)
  --enable-macosx-audio   Mac OS X audio module (default enabled on MacOS X)
  --enable-hd1000a        HD1000 audio module (default enabled on HD1000)
  --enable-cyberlink      CyberLink for C++ UPnP stack (default disabled)
  --enable-skins2         Skins2 interface module (experimental)
  --enable-pda            PDA interface needs Gtk2 support (default disabled)
  --enable-wxwidgets      wxWidgets support (default enabled)
  --enable-opie           Qt embedded interface support (default disabled)
  --enable-macosx         MacOS X support (default enabled on MacOS X)
  --enable-qnx            QNX RTOS support (default enabled on QNX RTOS)
  --enable-ncurses        ncurses interface support (default disabled)
  --enable-xosd           xosd interface support (default disabled)
  --enable-visual         visualisation plugin (default enabled)
  --enable-galaktos       OpenGL visualisation plugin (default disabled)
  --enable-goom           goom visualisation plugin (default disabled)
  --enable-slp            SLP service discovery support (default disabled)
  --enable-daap           DAAP shares services discovery support (default enabled)
  --enable-bonjour        Bonjour services discovery (default enabled)
  --enable-lirc           lirc support (default disabled)
  --enable-joystick       joystick control (default enabled)
  --enable-corba          corba interface support (default disabled)
  --enable-loader         build DLL loader for ELF i386 platforms (default disabled)
  --enable-activex        build a vlc-based ActiveX control (default enabled on Win32)
  --enable-mozilla        build a vlc-based Mozilla plugin (default disabled)
  --enable-testsuite      build test modules (default disabled)
  --disable-plugins       make all plugins built-in (default plugins enabled)
  --enable-shared-libvlc  shared libvlc (default disabled EXPERIMENTAL)
These options are very many and very confusing. You will see that many are enabled by default. The main ones to know about are:
--enable-theora experimental theora codec (default disabled)
--enable-ncurses ncurses interface support (default disabled)
--enable-mozilla build a vlc-based Mozilla plugin (default disabled
--enable-v4l Video4Linux input support (default disabled)
--enable-shout libshout output plugin (default disabled)
The process of installing from source can be a little experimental. You may find that certain libraries are required that you don't have installed on your computer. For example, the following command will disable ffmpeg, libmpeg2, and skins2.
./configure --disable-ffmpeg --disable-libmpeg2 --disable-skins2
The above command should then return alot of information in the terminal and finish with some lines looking like this:
Make
If all is ok then you will need to run the make command and make install. You can do this on one command line in conjunction with the sudo command. sudo gives you the permissions to install software. If you don't have the rights to do this (you get an error or message when using sudo) then you will need to contact your system adminsitrator. If you the system administrator and don't know how to do this then you may need to read up on how to set up sudo or su commands. The following command will compile and install your newly configured VLC:
sudo make;makeinstall;
If, however when you get some errors when installing
VLC it is probably due to missing libraries. For example, if the
./configure command gives an error like this:
configure: error: Missing header file ffmpeg/avcodec.h
This means that a header file is missing. Usually this means you need to install the header files, each version of Linux deals with these seperately and you will need to search online to find the right solution. The best method I have found is to copy the error message into a web search and see what postings exist online which discuss the same error.
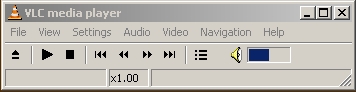
Interface Basics
Software name : VLC
Software version : 0.8.6
The nice thing about VLC is that it looks the same and functions the same across Linux and Microsoft Windows and looks similar in MacOSX.
Linux Interface

Windows Interface
OSX Interface
In the case of OSX the menu items are located not on the software itself but in the general OSX 'finder'.
Interface Elements
The main elements are :
- File
- View
- Settings
- Audio
- Video
- Navigation
- Help
Lets look at them briefly, one at a time.
File Menu
You use the File menu for opening files and media.

| option |
action |
| Quick Open File |
Open a file quickly from your computer |
| Open File |
This gives a much more complicated menu than the above. This option essentially gives you the opportunity to open any kind of media from a disc, across the net, or from you computer.
|
| Open Directory |
This will open a directory and play each file one after the other. |
| Open Disc |
Open a disc. This can be a DVD, audio CD, VCD etc
|
| Open network Stream |
Open a file on the internet (usually a live stream). |
| Open Capture Device |
If you have a webcam or other camera/sound device, connected to your computer then you can see/hear it via this option in VLC.
|
| Wizard |
This is used for creating streams, or converting media formats (transcoding). This is really for the more advanced user. |
| Exit |
quit VLC |
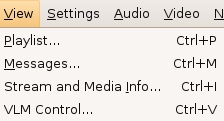
View Menu
The View menu allows you to see various VLC information windows.
| option |
action |
| Playlist |
If you have loaded many items to play in VLC then you can see and manage the playlist here. |
| Messages |
Messages on the operations of VLC are displayed here including useful error messages.
|
| Stream and Media Info |
Information about the media playing now. |
| VLM Control |
VideoLAN Manager - allows you to send several streams at once through vlc. This is really an advanced function and shouldn't be attempted by those with weak hearts. |
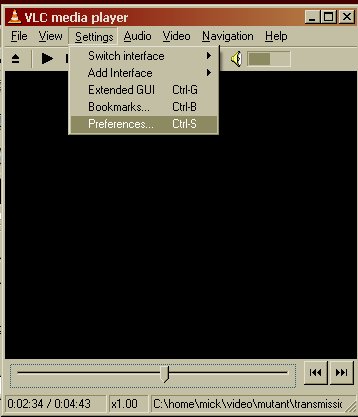
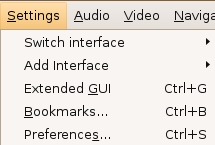
Settings Menu
All the settings and preferences are set here.
| option |
action |
| Switch Interface |
VLC has more than one graphic user interface type and you can choose your favourite from this list.
|
| Add Interface |
Apart from the graphical interface, VLC can be controlled through many other methods including through its very own webpage, and through the command line. To use these features you'll need to be a bit of an 'advanced' user.
|
| Extended GUI |
Beyond the default interface you see when you open VLC there is an extended interface available with more options. These options allow you to control the color (brightness, hue, contrast etc) of the video played, as well as the quality and volume of the audio.
|
| Bookmarks |
Bookmark your media like you would bookmark a webpage with a webbrowser.
|
| Preferences |
All the preferences for every function.
|
Audio Menu
This allows you to control the audio played back when listening to a media file. Nothing will appear in this menu unless something is being played back.
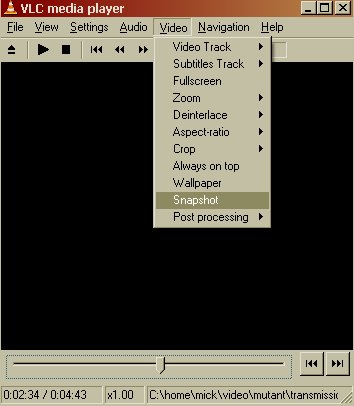
Video Menu
This allows you to control the video played back when watching to a media file - the most interesting feature is the fullscreen video mode. Nothing will appear in this menu unless something is being played back.
Navigation
Usually empty.
Help
Basic information about VLC.
Playing Video
Software name : VLC
Software version : 1.0.3
VLC supports a wide range of video file formats including: MPEG, WMV, DIVX, H.264, and Real Video, making it one of the most versatile media players out there. VLC can also play network streams and most commercial DVDs with ease.
In this chapter, we’ll focus on two common tasks: playing video files and playing DVDs.
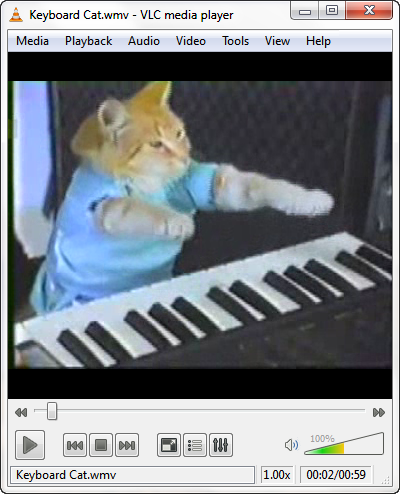
Let’s take a look at the interface in Windows 7:
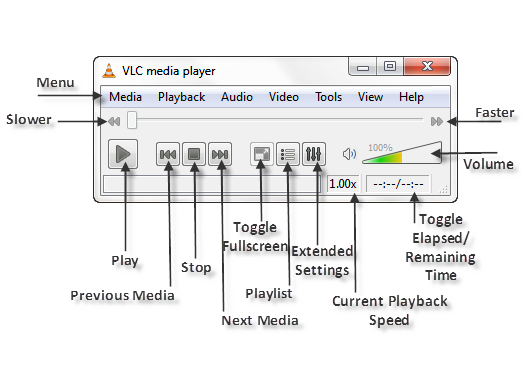
VLC features most standard playback options and more. For instance, you can slow or speed playback using the Slower and Faster buttons. The Toggle Fullscreen button allows you to switch back and forth between fullscreen and normal view modes. The Playlist button opens the Playlist menu which allows you to drag-and-drop video files into a playlist for continuous playing. The Extended Settings button opens a tab-based menu that allows you to adjust audio and video effects during playback. For instance, the brightness and contrast levels can be adjusted to suit your needs.
Playing video files
The easiest way to play (open) video files is the method of drag-and-drop directly into VLC.
In this example, we’re opening a sample video file of ‘Keyboard Cat’ on the Windows 7 desktop. Both the video file and the icon to launch VLC are on the desktop. This particular video file is a .WMV file type, which is supported by VLC.
To drag-and-drop a video file into VLC:
1. Hover the mouse pointer over the video file.
2. Click and hold the left mouse button.
3. Still holding the left mouse button, move the pointer to the VLC icon and release the left mouse button.
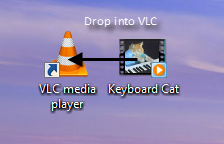
The video file begins playback.
Another method of opening a video file is through the menu.
To open a video file using the menu:
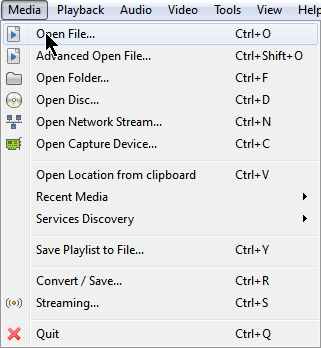
1. On the menu, click Media > Open File….
2. Browse to the directory of your desired video file.
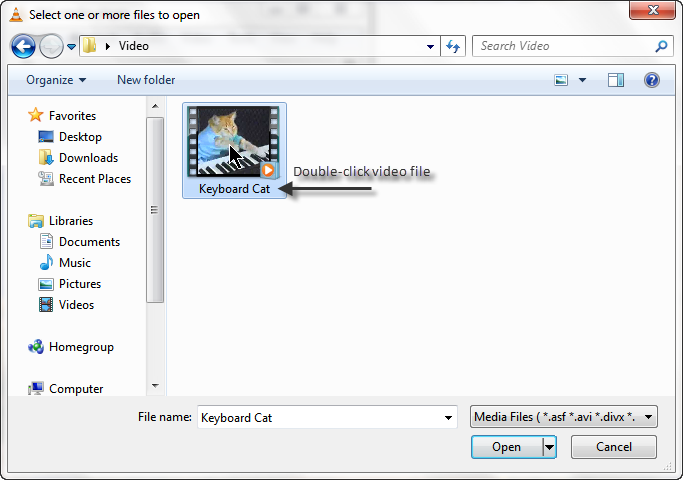
3. Double-click the video file.
The video file begins playback.
Playing a commercial DVD with VLC is nearly the same process as playing a video file. While drag-and-drop can be used, the fastest method is using the menu. Before we begin, make sure your computer can play DVDs, which requires a DVD-ROM drive installed on your computer.
To play a DVD:
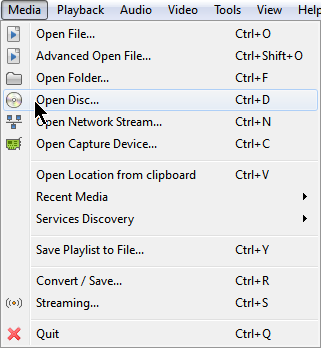
1. With a DVD inserted into the DVD-ROM drive, click Media > Open Disc…
The Disc tab is now selected.
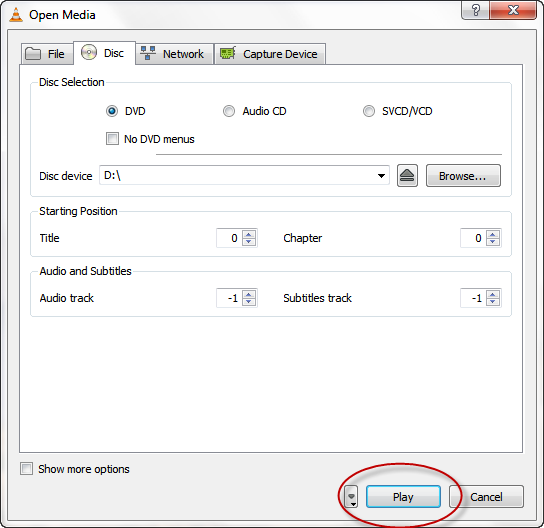
2. Make sure the Disc device box has the DVD-ROM drive selected. By default, VLC selects the most common location, but you may need to browse and find it.
3. Click the Play button.
The DVD opens and begins playback.
While in play mode, DVD menu items can be accessed with the pointer, but this ability varies with DVD.
Using VLC to play Streams
Software name: VLC
Software version: 0.8.6
VLC can play just about every format out there. Notably, it is one of the few players across platforms that plays back Ogg streams. Ogg is a free software video format.
Streaming is a way of broadcasting audio and video online, a bit like an online TV or radio. To play streams, follow these quick steps:
With VLC installed, launch the application. You should have something that looks like this on all platforms:
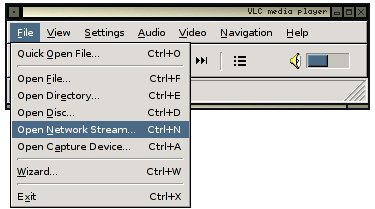
Next, select the Open Network Stream from the File menu:
Now you should see a window that looks something like this:
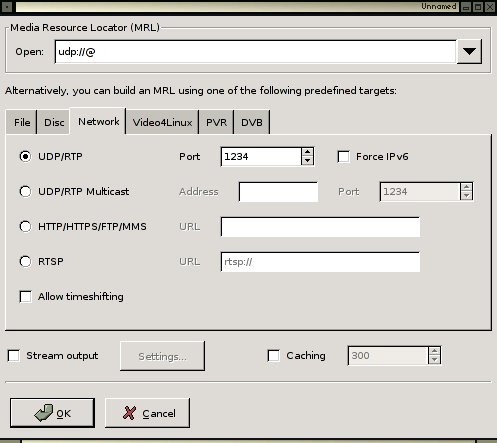
Let's assume you are going to open an Ogg Theora live stream with an address like:
http://24.72.34.35:8000/theora.ogg
If this is the case, then you need to enter this information (the stream location) into the interface.
First, select the HTTP/HTTPS/FTP/MMS checkbox:
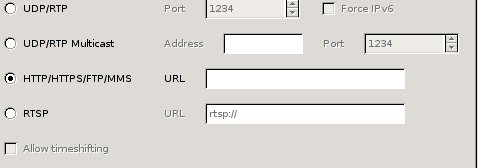
Then enter the stream address into the Open field:

Finally, press OK, and the stream should begin playback.
Playing Multilingual Video
Software name : VLC
Software version : 0.8.6
I assume you have VLC player installed and you have a file or DVD with subtitles which you want to display when you are playing the Video.
There are three ways you may want to use VLC to display subtitles.
1) From a DVD
2) From a Multilingual file (ie Matroska)
3) From a separate subtitle file which is distributed with the Video file.
Play subtitles on a DVD disk
To do this put the DVD disk into your DVD drive. Open up VLC player and select File > Open Disk.
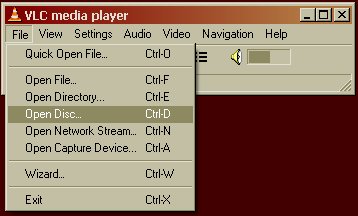
Enter the DVD Drive letter. It may appear automatically. Mine is drive D:
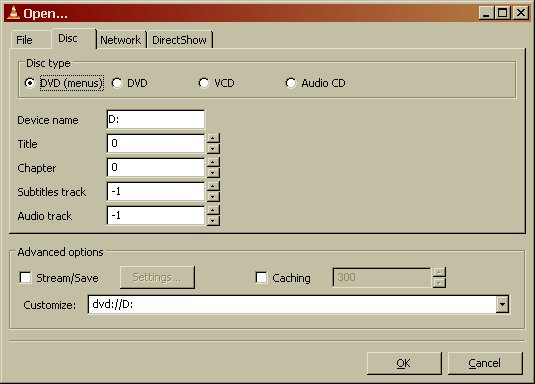
Then click OK.
The menu page of your DVD should appear.
Click on the video you want to watch. Then when the video starts quickly right hand click the mouse on the Video image. Select the Subtitle track you wish to view.

The subtitles should then appear on screen.
Play subtitles in Matroska files
The process for this is exactly the same as above except when starting the process you select File > Open File
You then see this screen.
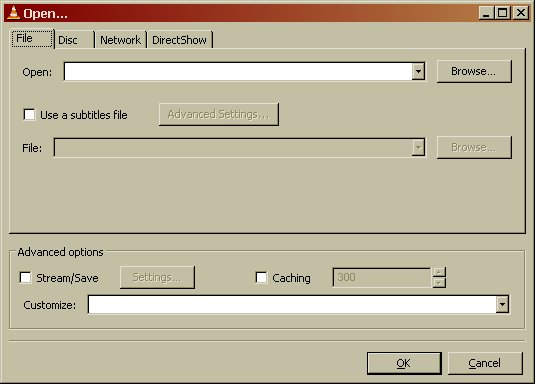
You should then click on the Browse button to select the video file you want to play. If this file is a matroska file with an *.mkv extension then you can click OK after browsing for the file as the file already has the subtitle infomation.
Then Select the subtitle language stream by right clicking the video screen and selecting Subtitle Track > and choose the language
Play Video files with external subtitles
Using VLC to play Video file with external subtitle files.
If you want to play an external subtitle file for example a srt file.
Select File > Open File
In the Open box click the Browse button and choose your video file.
Then put a tick in the box Use a subtitle file, and click Browse to locate your external subtitle file.
Then Select the subtitle language stream by right clicking the video screen and selecting Subtitle Track > and select the track of subtitles (for an external file like an srt file there will normally only be one track).
Playing a VIDEO_TS file
Software name : VLC
Software version : 0.8.6
This is especially useful if you are testing DVD's that you have created, or if you save your DVD's on your harddrive for safekeeping or if you need the subtitle options that are given you to you by the DVD format and menus.
The process is slightly different for Mac and Window / Linux.
Mac
Select Open > Disk from the top menu
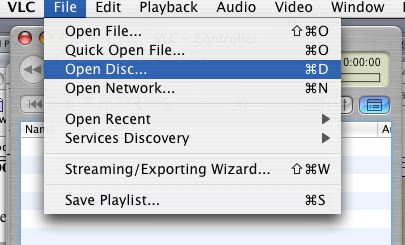
Then click in the VIDEO_TS entry and browse for that DVD data specifically the VIDEO_TS directory.
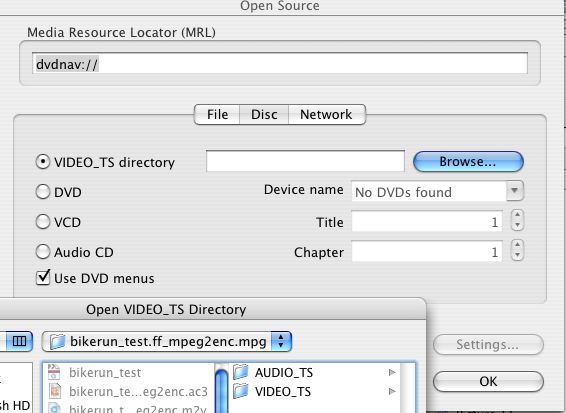
Windows / Linux
Select File > Open Directory and browse for the VIDEO_TS folder of the DVD you want to play.
What is streaming?
Streaming Media is the term used to describe the
real-time delivery of audio and video over the internet. Streaming Media allows for
live transmission of audio or video over the internet, transforming the internet into a broadcasting medium. Content can also be archived in streaming
file formats? , allowing internet users to experience recordings of events after they happen.
Varieties of Streaming
There are three types of delivery of audio and video data over the internet: Download and Play, Progressive Download, and True Streaming.
Download and play
To experience Download and Play media you must first download the entire media file to your hard disk before you can play it. For this reason Download and Play media cannot be used for live broadcasts, however it is often a good way to deliver high quality media content over any bandwidth. A high quality movie, for example, can be downloaded over any internet connection. However because you cannot play the movie until you have downloaded the entire file, download time becomes a factor. To download a DVD movie (usually about 4.6 GB in size) over a dial-up modem (56kbps) it would take over 8 days! Most people would find this quite tedious!
Download and Play media is not streaming media (more on this later) but it is a lot more popular than streaming. File sharing networks are Download and Play mechanisms, and this is an extremely popular activity on the internet. As many countries make high bandwidth connections more accesible there is an increasing popularity of trading Download and Play movies on these networks.
Progressive download
This enables you to experience media as it downloads to your harddrive. Progressive Download is useful but is less efficient than True Streaming and cannot provide some functionality such as multiple bitrate encoding. However this method has an advantage over Download and Play as you do not have to wait for the file to finish downloading before you can start playing it. There are some constraints - for example, if the file does not download as fast as you are playing it, then you will find that playback will stop while you wait for more of the file to download. This can be annoying and it is often the reason why some choose True Streaming as a preferred method of delivery.
Quicktime (Apple's suite of streaming technologies) calls Progressive Download "Fast Start". This highlights one of the difficulties of learning streaming - in the effort to differentiate technologies, each technology provider has made up their own jargon. However throughout this manual I will stick to the more generic terminologies wherever possible.
True streaming
This enables the user to view or listen to the media as it is delivered over the internet in real-time. True Streaming is the only variety of streaming that allows for live broadcasting, and it also supports more advanced functionality than Progressive Download, enabling the user to control the media experience by pausing, skipping forward, or rewinding. Although different terms have been used to describe True Streaming, including webcasting, livecasting, web tv, or net.radio, the term that has prevailed is "streaming media" (more often it is just refered to as "streaming").
The difference between Progressive Download and True Streaming is not always obvious. If, for example, a user has a very fast connection to the internet then Progressive Download may appear to behave in exactly the same way as True Streaming.
Within Download and Play, Progressive Download, and True Streaming there are two distinct varieties : static file streaming and live streaming.
Static file streaming
The delivery of pre-recorded media files over the internet in real time. Typically when we refer to archives of online media we are discussing static file streaming. A large archive of video art encoded into streaming files is an example of a collection of static file streaming files. This content is also known as on-demand or archived content. This content can be delivered by Download and Play, Progressive Download, or True Streaming processes.
Live streaming
The delivery of live audio and/or video over the internet. This allows the user to experience an event as it occurs in realtime. There are many examples of this such as online radio or viewing live performances. Only True Streaming supports live streaming.
This manual will mainly deal with True Streaming of both live and archived content.
Encoding
To stream static files over the internet the files must be compressed and encoded into a 'streaming format'.
Ripping CDs into
MP3 is doing just this and is done using encoding softwares. In this process a CD audio recording is converted by the encoding software from a CD (Compact Disc) audio format into a 'streaming audio format' (MP3). This will involve compressing the data, which reduces its quality and file size, and converting the data into a 'streaming format' (for example MP3).
Compression
There are two forms of compression - lossy, and lossless compression.
When the encoding process compresses the source file so that it can be delivered over internet connections in real-time this process degrades the quality of the audio and video. The more a file is compressed, the lower bandwidth required to be able to play the file, but the more the quality is reduced. A compromise has to be achieved whereby the level of compression achieves an acceptable audio and video experience, while reducing the amount of data enough to enable delivery over the internet.
Live encoding is similar except that an audio or video (or both) input is encoded instead of a file. With this process the encoding software delivers the encoded data in a continuous stream to the streaming server.
Lossless compression
This is the process of compressing data information into a smaller size without removing data. To visualise this process imagine a paper bag with an object in it. When you remove the air in the bag by creating a vacuum the object in the bag is not affected even tough the total size of the bag is reduced
Lossy compression
Sometimes called 'Perceptual Encoding', this is the process of 'throwing away' data to reduce the file size. The compression algorithms used are complex and try to preserve the qualitative perceptual experience as much as possible while discarding as much data as necessary.
Lossy compression is a very fine art. The algorithms that enable this take into account how the brain precieves sounds and images and then discards information from the audio or video file while maintaining an aural and visual experience resembling the original source material. To do this the process follows Psychoacoustic and Psychovisual modelling principles.
Codecs
The algorithms used to compress and encode audio and video and create the file format are known as "codecs". The word is made from two common terms compress and decompress. The encoding software uses a codec to 'compress' the streaming content for delivery over the net, and the player softwares use a codec to 'decompress' the content for replay.
The codec is mathematical wizardry and is the heart and soul of streaming. It is on this ground that we have the various technology providers battling it out for dominance. Each codec has its own unique way of doing things depending on what the developer believes is best, and some come with their own minefield of licencing issues too.
Bitrate
Compression is the process of reducing the amount of data
Multiple bitrate encoding allows the server and player to negotiate the best quality (highest bandwidth) stream to be delivered from a single static file or live stream. Hence the player is delivered the best quality stream possible over the user's internet connection. Multiple bitrate? encoding produces only one encoded stream.
Choosing the bitrate(s) will require the consideration of several factors, including: The target audience's connectivity; The desirable frame size of the video (if including video); The amount of movement in the frame (if including video); The level of video contrast (if including video); The type of audio encoded (e.g. ambient noise/voice/stereo music);The amount of camera movement (if including video); The quality of the camera and camera lens (if including video).
Delivery
Streaming static ("archived") files can be achieved using a normal web server. This is often the cheapest way to deliver content on a small scale. This method cannot be used for live streaming and does not allow for the advanced features of True Streaming such as multiple bitrate encoding. This method will also enhance the likelihood for time-outs ('buffering') and cannot deliver the same amount of simultaneous player connections as True Streaming.
To enable live streaming and to gain full functionality and efficiency a streaming media server is required. This server is usually standard server hardware but with the necessary streaming server softwares installed. It is quite normal to install a streaming server on the same machine as an existing web server.
Streaming servers
Perhaps a good way to understand what a streaming server does is to imagine a radio station. A radio station comprises of three components - a studio, a transmitter, and the receivers that your audience has.
Above is a basic diagram showing how a transmitting radio station works. The radio studio is the source of the audio. In this space there are usually mixing desks, cd-players, minidisc players, turntables etc. Then from the studio an audio signal is sent to the transmitter. This can be sent from the studio to the transmitter by either a cable (sometimes called a "landline") or by a microwave link. Then the transmitter sends the audio via FM so that radio receivers (tuners) can pick it up and play it.
Radio works this way because it is trying to distribute the studio audio to as many people as possible. If you imagine the radio studio without the transmitter then the station would have have a fairly reduced audience! Essentially only people that could fit into the studio would be able to listen. So the transmitter works as a distributer, allowing more people to connect via their radio receivers and hence the potential audience is enlarged.
This is a close analogy to why streaming exists and how it works. If you were just playing audio on a computer in your room then the audience isn't going to be so big... so, we utilise streaming to distribute this audio to more people.
The analogy is obvious....the computer replaces the radio studio, the streaming server replaces the transmitter, and your listeners connect by computers to the server rather than with radio receivers to the broadcast signal. The analog can be taken quite a long way. Having a bigger radio transmitter is like having more bandwidth available at the streaming server - both allow more people to connect.
Icecast Streaming (a/v)
Software name : VLC
Software version : 0.8.6
To stream audio or video to Icecast using VLC you need to first ensure you have the right module installed. If you are using Linux you will need to download the latest source code and install VLC with the shout module. To install this module in Linux you will need to configure VLC with the --enable--shout parameter.
Linux :: Check Shout Module is Installed
If you are using Linux you will need to double check the shout module is installed before you progress. To do this type the following into a terminal:
vlc -l | grep shout
If all is well you will see something like the following in the terminal window:
VLC media player 0.8.5 Janus
  access_output_shout   IceCAST output
  playlist              New winamp 5.2 shoutcast import
  shout                 Shoutcast radio listings
The important part of the above output is the access_output_shout IceCAST output. This means you have the right module available for streaming to an Icecast Server. If you don't have this module you are going to have to read up on how to install it. Note : It might be that the Shout libraries store the shout.h file in the wrong place, this is a bug in the latest versions of Shout. To work around this, you may need to re-compile VLC but before doing so edit the file shout.c file in the VLC sources. This file is located here:
modules/access_output
you will need to edit this line:
#include <shout/shout.h>
to this:
#include <shout.h>
Windows :: Check Shout Module is Installed
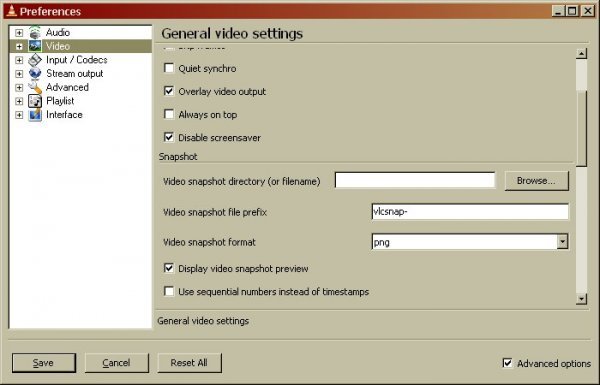
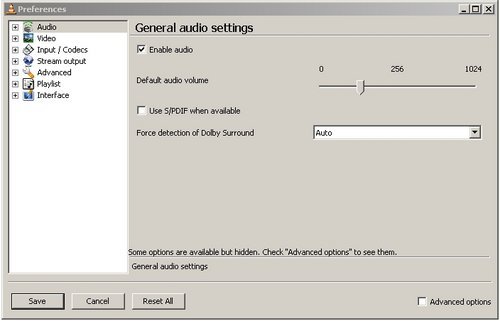
To check if the Shout Module is installed on Microsoft Windows you will need to open the Preferences window from the Settings menu:
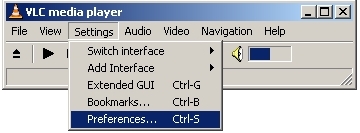
The preferences interface will open:
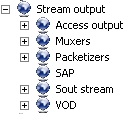
Now click on the tiny "+" next to Stream Output :

You will get a drop down menu:
Click on the "+" next to Access output and with luck you will see something like this:
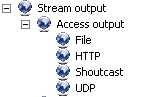
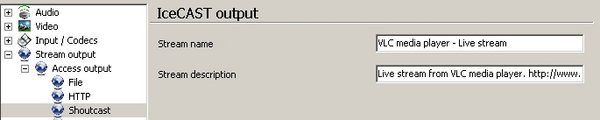
Notably, there will be an item labled Shoutcast. If you don't see this then the Shoutcast module is not installed. If it is not installed then try downloading the latest installer and install VLC again. If you do see it then you should be able to stream to Icecast. Clicking on the Shoutcast icon should show you something like this:
Streaming Server Requirements
We will look at streaming archived files to an Icecast Server. To do this you need access to an Icecast Server or someone needs to create you an account and give you the access details. You need to know the following details about the Icecast Server :
- Hostname or IP Number of the Icecast Server
- Port (default is 8000)
- Password
- Username (this may not be necessary depending on how Icecast is configured)
- Mountpoint (this may not be necessary depending on how Icecast is configured)
Choosing Audio File to Stream
You can stream audio or video with VLC to Icecast. However this has variable results depending on what operating system you are using. For now we will look at streaming an audio file. The first thing you need to do of course is open VLC. Now from the File menu choose Open File

This will open a file browser so you can browse (click the Browse button) through your harddisk and choose an audio file to stream.
For the purpose of this excercise choose an MP3 audo file, and then press the Open button at the bottom right. When you have done this there should be the title and location of your chosen file displayed in the interface:
Stream Settings
Now click on the Stream/Save check box:
This should then make the Settings... button clickable:
Now click the Settings... button and you should see somehting like this:
This is the configuration window for your stream. It might look complicated, and truth be told, it is! However we can go through this process quickly to configure and outgoing audio stream to an Icecast Server. The way that VLC works with outgoing streams is by creating what the good people at Videolan call an output chain. An output chain is a rather complicated way of refering to the the process of configuring VLC so that it streams. Unfortunately VLC doesn't (yet) incorporate a handy GUI (Graphical User Interface) for doing this. GUIs are much easier if you aren't used to configuring software using command line interfaces (CLI). We can get some of the way to configuring our stream settings through the interface but the rest will have to be typed into the Stream Output MRL at the top of the above dialog.
First of all, click on the HTTP check box in the Outputs section of the window:

When checked you will see two things happen, firstly the information to the right of the check box will allow you to input data:

The other thing you will see is that the Stream output MRL box will display some information:

The above information is what we need to tweak to make VLC stream and to do this you will need to alter the information in this text box using the Icecast Server details you should have.
Entering Server Information
In the above example the following information is shown in the Stream output MRL:
:sout=#duplicate{dst=std{access=http,mux=ts,dst=:1234}}
We need to alter this information to refect the details you have of your streaming server (Icecast). You shoudl have the following details:
- Hostname or IP Number of the Icecast Server
- Port (default is 8000)
- Password
- Username (this may not be necessary depending on how Icecast is configured)
- Mountpoint (this may not be necessary depending on how Icecast is configured)
These need to be incorporated in the Stream output MRL box as follows:
:sout=#duplicate{dst=std{access=shout,mux=ogg,dst=username:pass@hostname:port/mountpoint}}
Notice that the two following chains were also important:
access=shout
mux=ogg
For example, lets say I had the following details:
- Hostname : icey.me.net
- Port : 8000
- Password : floss
- Username : streamer
- Mountpoint : live
Then the Stream output MRL would read as follows:
:sout=#duplicate{dst=std{access=shout,mux=ogg,dst=streamer:floss@icy.me.net:8000/live}}

There are a couple of things to note here. First, with Icecast you don't always need a username to stream. If you are in this situation then use "source" in the text above where the password should be. For example, the text in the Stream output MRL would be something like:
:sout=#duplicate{dst=std{access=shout,mux=ogg,dst=source:floss@icy.me.net:8000/live}}
Also, if you haven't been given a mountpoint you can usually make one up but don't use any special characters in the text, and if you haven't been given a port then try the default 8000.
Start Streaming
All that is left to do is to press the OK button at the bottom of the window, you will be returned to the previous window:
Now you are almost ready to stream. Press OK again, and you should start streaming. VLC provides minimal feedback to let you know how things are going, but if all is ok, you should check your streaming server status page, or try and connect to your stream.
Streaming Video with VLC
The same process will work for streaming video to Icecast. However, at the time of writing the Linux version of VLC (8.5) does not seem to support this. However you can try it with the Microsoft Windows version. Just follow the same steps as above, except that you will choose a video file instad of an audio file. The out going live stream will be Ogg Theora and can be played in many players includign VLC, MPlayer, and even the latest RealPlayer.
Streaming with the Wizard
Software name : VLC
Software version : 0.8.6
VLC makes the process of streaming quite easy by supplying a wizard. This particular method means that VLC itself is the streaming encoder and server. Hence you can encode and deliver the content from one machine. This can be very useful for streaming within a Local Area Network (LAN), however it is not very effective for streaming on the internet unless you have a Dedicated IP. This is because other machines will not be able to 'find' your stream from outside the local network unless your computer has a Dedicated IP Number.
Streaming with VLC in this way however does allow for interesting options for streaming material from cameras, pre-recorded files, or even DVDs. You can also relay other live streams and converting them to another format as you do it.
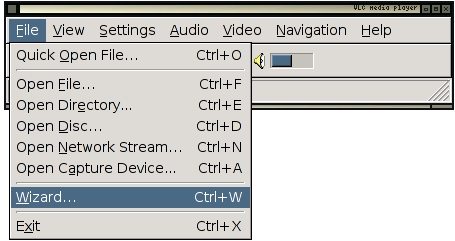
Opening the Wizard
First thing you need to do is open the wizard from the VLC interface:
This will open the Wizard interface. If all is well it should appear and look somehting like this:
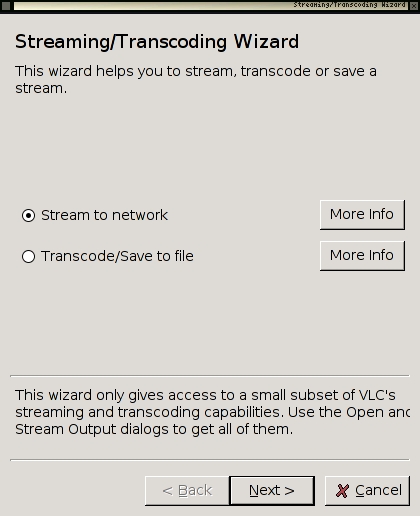
You will now need to choose the Stream to netowrk option:

Now press Next >
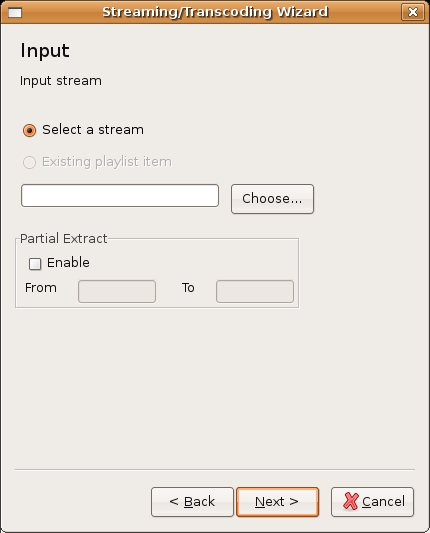
Choose Input
If all is well the following dialog will have appeared:
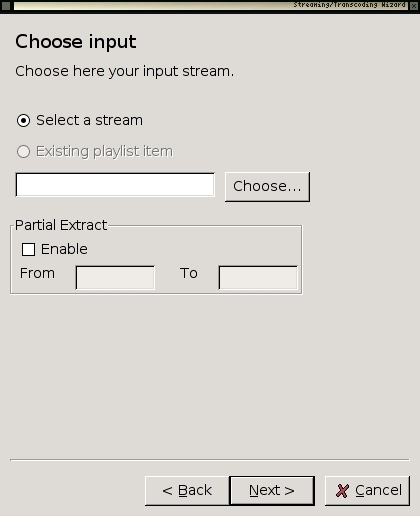
Now click on Choose and you will see a dialog that will show you options for choosing the input.
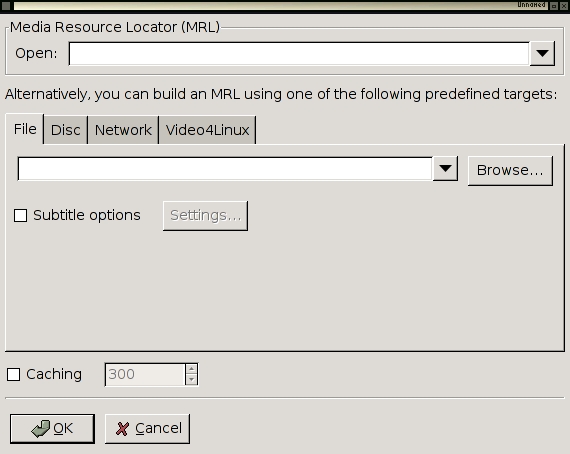
You can choose many options for stream inputs. In the following we will choose a file from our harddisk to stream. To choose a file you will need to first press Browse. A file browser will appear and you can use this to browse your harddisk and choose the file you wish to stream. In the following example the file we will use is called gaialive050318_tennis-live.mov.ogg
The location of this example file is displayed in the wizard when I have chosen it:
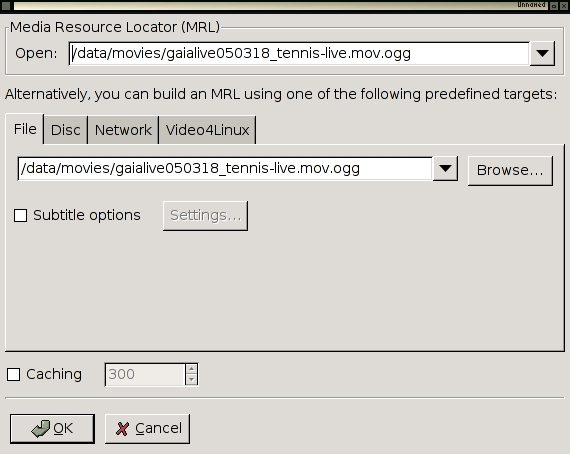
Note : it is a good idea to have first played the media you wish to stream to make sure VLC can actually play it.
Now press OK and proceed with configuring your stream.
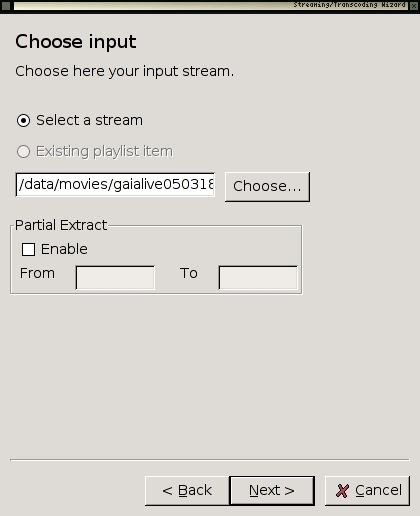
Now press Next >
Choose Streaming Method
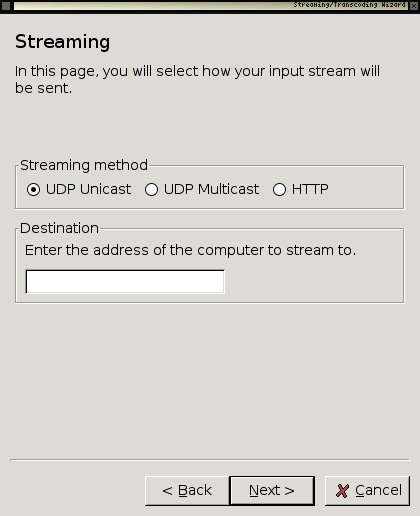
We will choose http as the streaming method. This means that the VLC application will act as a server as well as a media player. Other players can then connect to your computer and also watch the stream.
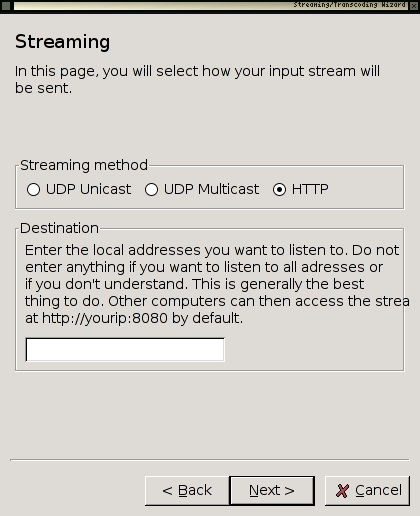
Now you need to just press Next >
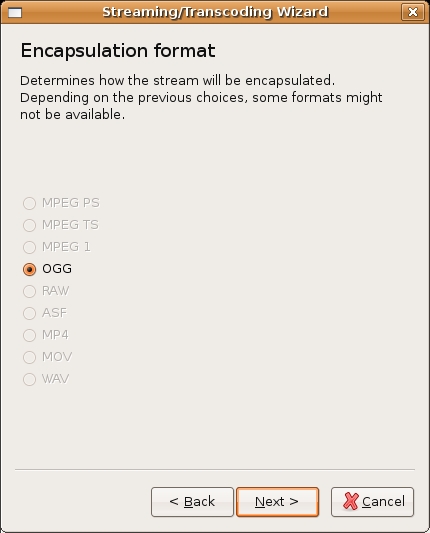
Encapsulate Method
Now you need to choose what type of stream (format) you will send. The choices presented to you in this window will be formed from the modules you have installed so they may appear different from the following:
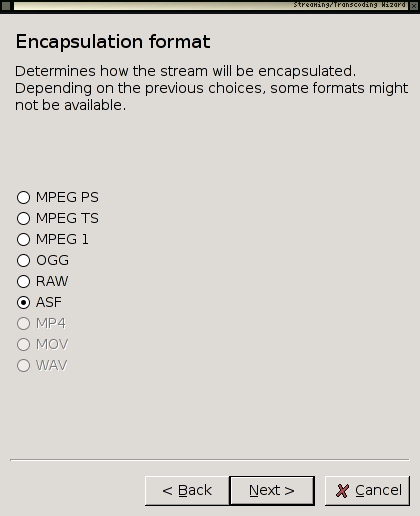
I am going to choose OGG as the encapsulation method, this means my video for the stream will be OGG THEORA and the audio will be OGG VORBIS. The encapsulation method (stream format) does not have to be the same as the file that you have loaded to stream. So, I choose OGG with the select button:

Additional Options
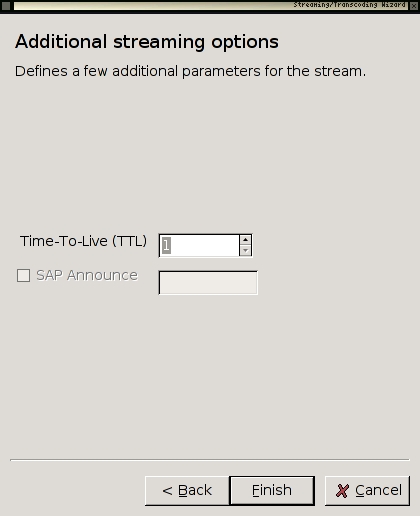
There is nothing you need to worry about on this screen. Just hit Finish and you will start streaming.
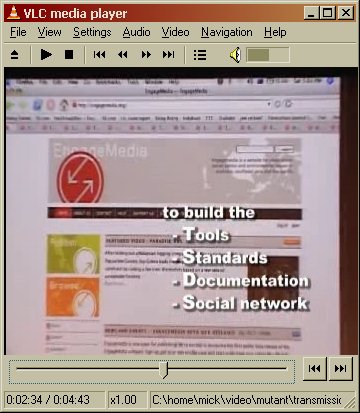
Checking the Stream is Working
If all is well VLC will give you some feedback to say it is streaming. You won't actually be able to see the content played back as it is streamed unless you do it through another player. However VLC itself should look somehting like this if all is well:
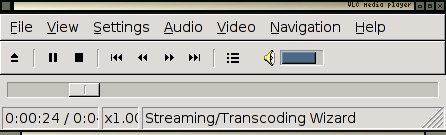
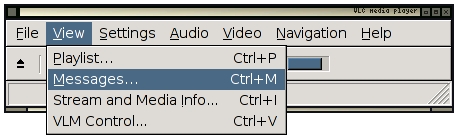
You can there is a timeline at the bottom of the player which should be moving, and there will be feedback in the bottom 'status' bar of the player saying Streaming/Transcoding. If you see neither of these then all is not well. To get more feedback choose the Messages dialog from the View menu:
Now you should see a window with better feedback:
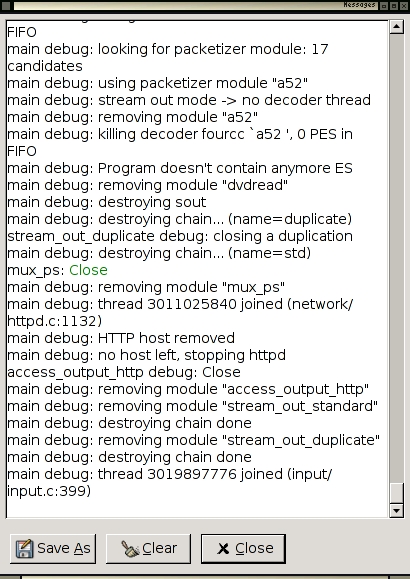
You can use this infomration to help trouble shoot. I recommend first using a search engine to copy and paste the error message (error messages will be highlighted in red in the message window). If you can't find anything through a search engine then try the VLC forums ( http://forum.videolan.org/ ). You can also try the irc (chat) room where a lot of the developers hang out. If you know how to use irc they can be located at :
- IRC network:
irc.freenode.net
- Channel:
#videolan
If you done know how to use irc then try this web based version:
http://krishna.videolan.org/cgi-bin/irc/irc.cgi
Playing your Streams
If you have followed everything above and you seem to be streaming now is the time to try and playback the material. You can do this with a player the supports the Encapsulation Format that you chose. In the above example OGG was the chosen format, so I will need to play back the content in a player that supports OGG Theora and OGG Vorbis. I also need to know the location (URL) of my stream. The URL will be in the format:
http://yourip:8080/
Where yourip is the IP Number of your computer. If you don't know this then you need to find it out by reading about how to read the network settings on your operating system. If you don't know your IP Number then you can possibly test your stream by opening a player on the same machine as the one you are using to send the stream and using this URL:
http://localhost:8080/
You need to use your favourite player, open it and enter the above in the Open Location (or other) field. If all is well the stream will play back.

The above image shows VLC streaming and the playback of the video in mplayer on the same machine.
Using VLC to RIP a CD
Software name : VLC
Software version : 0.8.6
VLC can copy audio tracks from a CD into other audio file types through a process called 'ripping'. For example, a CD audio track can be ripped to your hard drive as an MP3 file. VLC has several output file types to select from depending on your desired quality or file size. The only downside is that VLC cannot handle an entire CD at once, files must be converted one at a time.
To begin, you will need to have a CD to 'rip' and know which particular track you want to copy. Next, insert the CD into your computer's CD drive.
Using the Wizard
We will use the VLC Wizard to rip the track from the CD.
To open the wizard, select File > Wizard.
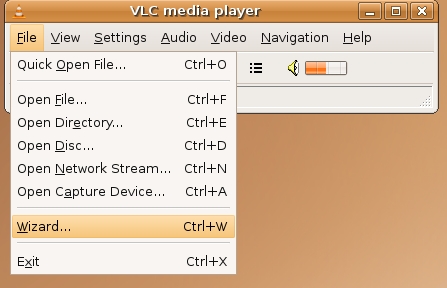
This opens the following window:
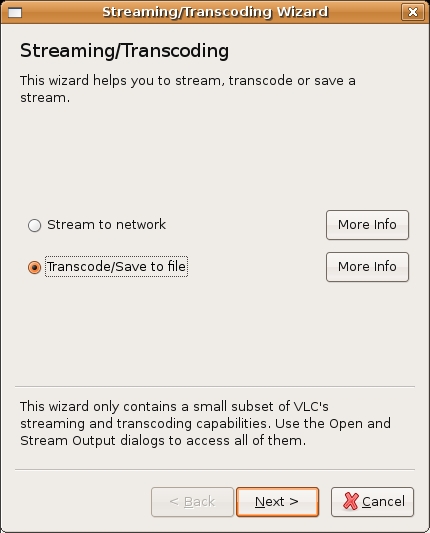
We want to Transcode the file. Transcoding is a fancy name for converting the file from one type to another. In this example, we are converting the CD audio to Ogg Vorbis (you could also choose MP3 or another type of audio file). Make sure Transcode is selected:

Then press Next, and the following window appears:
Here is where we select the CD and the particular track for ripping.
Press the Choose button, and this window appears:
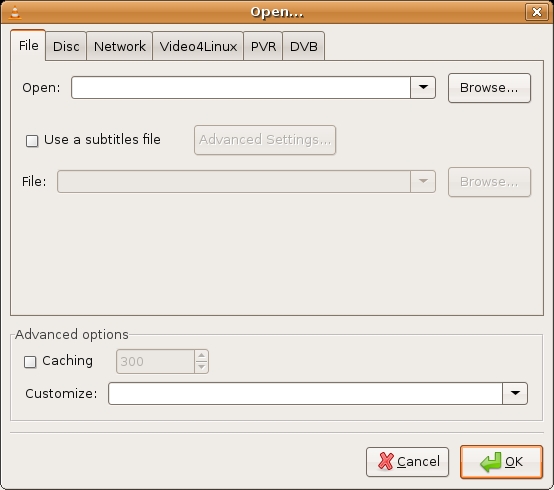
Here you can select from any number of sources to copy. We are going to choose a disc (CD) so we choose Disc. You could also copy DVDs following a similar process, but for now we will just look at audio. When you click on the Disc tab, the following options appear:
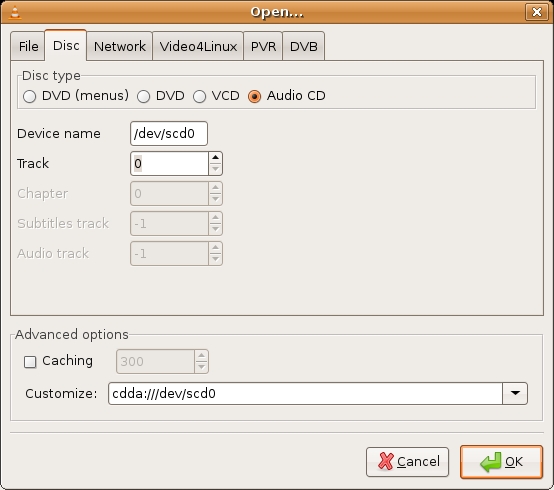
Select Audio CD:

Now select which track number to rip. In this example, we are using the first track, so press the up arrow and change it from '0' to '1':

Press OK, and you return to the same screen of the Wizard. Press OK again, and we move forward to the next screen:
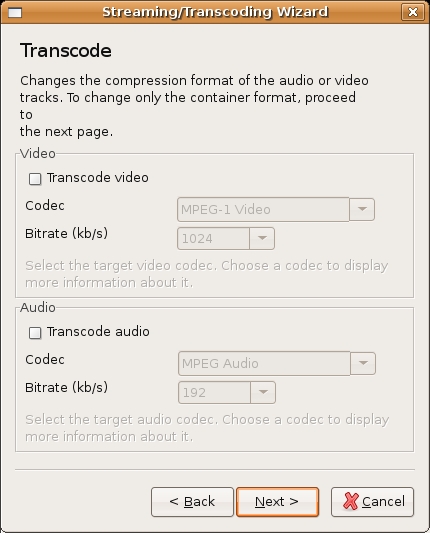
Here is where we select your desired file format to convert the audio to. We don't need to worry about video options.
Check the Transcode audio box:
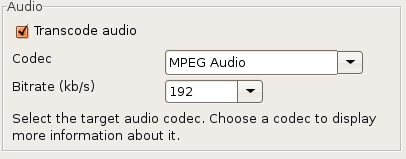
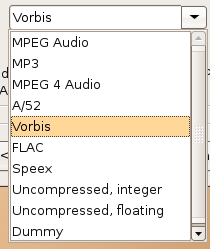
Options in the audio box are now highlighted, which means you can change them. We want to convert the CD audio to a OGG Vorbis audio file, so we select Vorbis from the drop down menu :
Leave the bitrate option as is and then press Next:
We have no choices here so press Next.
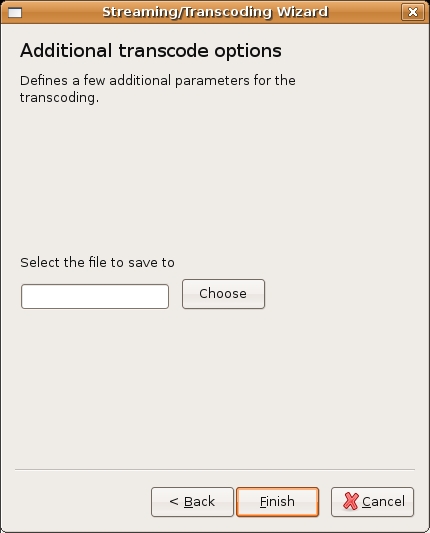
The above window asks us to choose where on our computer we wish to save the file. Press Choose and the Save to file window appears:
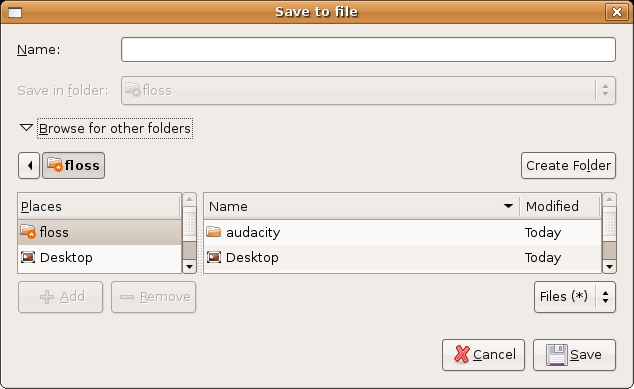
Browse to the directory you wish to save the new audio file, and then enter the name of the file in the Name box. We must also include the correct file extension in the name. We will call the file 'myfile' and the extension for OGG Vorbis files is '.ogg' (MP3 files use '.mp3'), so the complete name is 'myfile.ogg' :
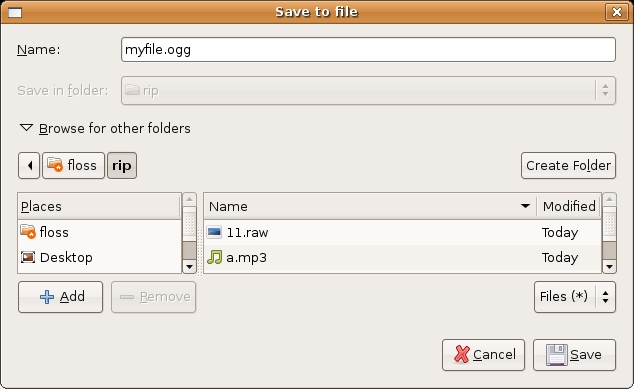
When you have chosen your desired directory and given your file a name, press Save.
Encoding Video
Software name : VLC
Software version : 0.8.6
It is a good idea to get as good a quality a file as you can before you start encoding. If you can get a DV file if exported from a video editing application or captured from tape or an MPEG-2 or VOB file if taken from a DVD.
However this method will work with all video files that VLC will play, which is an impressive amount!
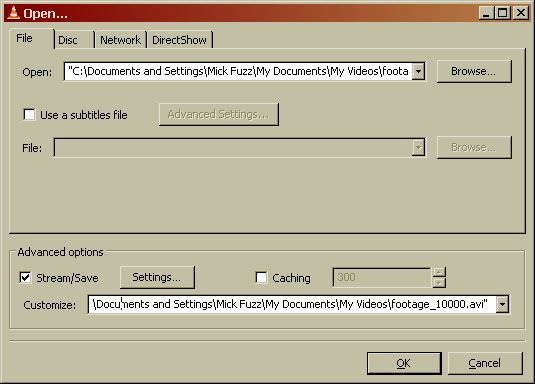
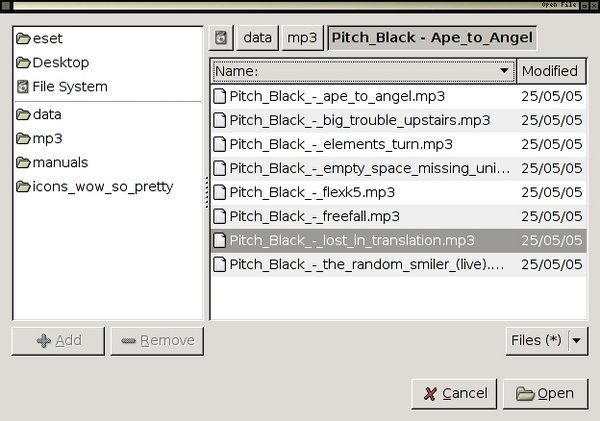
Choose the file you want to encode to another format.
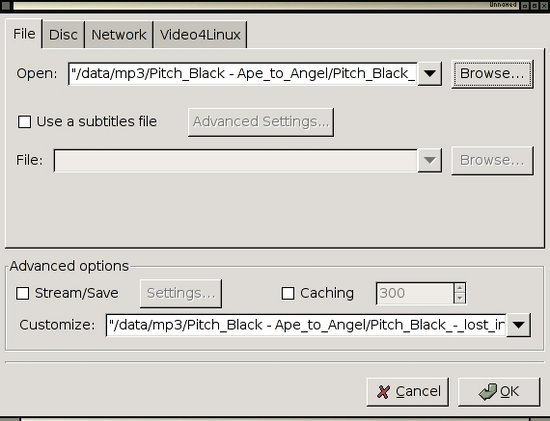
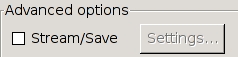
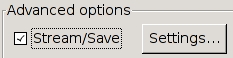
Select Stream/Save by ticking the box in the lower, Advanced Options part of the Open File box.
Then click on Settings again in Advanced Options
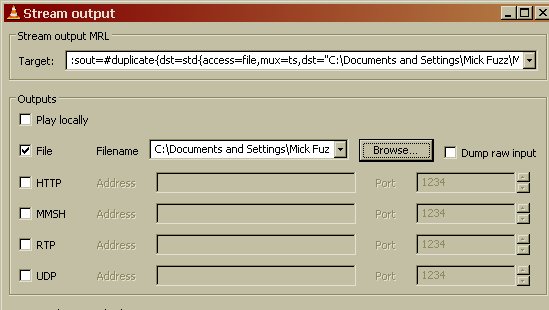
In the Outputs Section click File. Then click on the Browse button next to it an select where you woud like your target file to be saved.
Creating an MP4 file
Make sure the filename you created in the above step ends *.mp4
In the Encapsulation part of the Stream output box select MP4
Video codec : h264 Bitrate 1024
Audio codec: mp4a Bitrate 128
The next bit is a bit tricky part. Go back up to the "Stream output MRL Target:" box. Notice that the box is full of text. Look for the part that has :
#transcode{ }, and type width=352,canvas-height=288
this will be somewhere inside the { }. Do not add extra spaces. You might need to add a comma, as you'll notice all the values are seperated by a comma.
Be careful here. If you change any of the settings below this box, you will have to re-enter the width and height settings.
You may wish to use other width and height settings or user a lower video or audio bitrate if you want to make the file size smaller. This setting will create files that are about 10Mb per minute. This file should be iPod compatible.
Click OK to close the Stream ouput dialog, then click OK to close the File open dialog. The movie should now start playing without showing the picture on the screen.
When it has finished, you can check to see if your file works by playing it in VLC. Don't forget to take the tick out of the Stream / Save box when you open the file.
Creating an Ogg Theora file
Make sure the filename you created in the Outputs section ends *.ogg
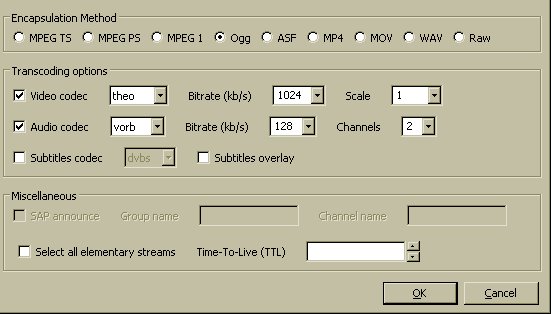
Choose
Encapsulation Method: Ogg
Video codec : theo Bitrate 1024
Audio codec: vorb Bitrate 128
The next bit is a bit tricky part. Go back up to the "Stream output MRL Target:" box. Notice that the box is full of text. Look for the part that has :
#transcode{ }, and type width=352,canvas-height=288
the above appears somewhere inside the { }. Do not add extra spaces. You might need to add a comma, as you'll notice all the values are seperated by a comma.
Be careful here. If you change any of the settings below this box, you will have to re-enter the width and height settings.
Click OK to close the Stream ouput dialog, then click OK to close the File open dialog. The movie should now start playing without showing the picture on the screen.
When it has finished, you can check to see if your file works by playing it in VLC. Don't forget to take the tick out of the Stream / Save box when you open the file.
Creating an MPEG-1 file
The MPEG-1 container and video encoding method is so old now that all computers support it in their default video player with no extra downloads. Also older and cheaper computers can play these files without problems. This can be especially useful if you are creating a CDrom that you want to be universally compatible.
Follow the process opening a file in VLC to encode to another file format to open your file and get it ready to re-encode to another format.
Make sure the file name you choose ends with *.mpg
Choose
Encapsulation Method: Mpeg1
Video codec : mp1v Bitrate 1024
Audio codec: mp2a Bitrate 192
The next bit is a bit tricky part. Go back up to the "Stream output MRL Target:" box. Notice that the box is full of text. Look for the part that has :
#transcode{ }, and type width=352,canvas-height=288
somewhere inside the { }. Do not add extra spaces. You might need to add a comma, as you'll notice all the values are seperated by a comma.
Be careful here. If you change any of the settings below this box, you will have to re-enter the width and height settings.
Click OK to close the Stream ouput dialog, then click OK to close the File open dialog. The movie should now start playing without showing the picture on the screen.
When it has finished, you can check to see if your file works by playing it in hopefully any Media player on any system.
Related Links
Manuals
Center for Independent Journalism
Some great manuals on Sound Editing, Sound Effects, Turning Sound Online, Sound Editing (advanced), Setting Up a Station and a Studio, Designing a Website http://www.cijmalaysia.org/resources.htm
Spot
Good site for some tips and tricks, especially if you use Dyne::bolic
http://spot.river-styx.com/linkage.php
Encoders
MuSE.MuSE (Linux / OSX)
The best audio encoder for Linux.
http://muse.dyne.org/
Oddcast (Windows)
Great plugin for encoding Ogg and MP3 using Winamp.
http://www.oddsock.org/tools/oddcastv3/
ostream (Windows / Linux)
A cool ogg encoder that runs on Linux, Microsoft Windows, and MacOSX.
http://radiostudio.org/ostream
oggment (Linux)
An interesting tool which can encode a single audio source into a real stream and a ogg stream simultaneously... made by August Black (radio/software/media artist)... there are some other interesting tools on this site too
http://oggment.sourceforge.net/ogg-real.php
oggcaster (Linux)
A plug-in for xmms to stream ogg files to icecast2... looked interesting but i couldn't get it to compile... I think there was quite some activity on the development side, so it might be fixed soon... if doing encoding this way is your thing then don't forget the excellent xmms-oddcast plug-in (for icecast2) and the liveice plug-in (for icecast1 only) - both of which are available from the xmms (http://www.xmms.org) website in the plug-ins directories
http://xmms-oggcaster.sourceforge.net/
Soma (Linux)
A very interesting set of tools... sound daemon, player, encoder and scheduler... ate a whole lot of my cpu and wasn't so nice with the crossfades, otherwise i might have used it...
http://www.somasuite.org/
darkice (Linux)
A very light weight, easy to deploy command line live mp3 streamer. You may also wish to look at the GUI interface, which you need to install seperately, it's called darksnow.
http://darkice.sourceforge.net/
liveice (Linux)
Encoder for icecast1. Command line
http://star.arm.ac.uk/~spm/software/liveice.html
MuSE.IceS (Linux)
Command line encoder for icecast1 and icecast2
http://svn.xiph.org/releases/ices/
Oddcast (Windows)
A great plugin for XMMS that allows you to stream MP3 or Ogg. It can be tricky to install as it requires WXWindows.
http://www.oddsock.org
MuSE.MPEG4IP (Linux)
A great how to for mpeg4ip streaming to a Darwin Server
http://www.linuxjournal.com/node/6720/print
Players
VLC (Windows / Linux / OSX)
The all purpose cross-platform media player. Does much more too...
http://www.videolan.org/vlc/
zinf (Windows / Linux)
A many featured player but couldn't see the advantage over xmms (my preferred gui player) except that it has a built in streaming encoder/server.
http://www.zinf.org/
soundplay (beOS)
This is good if you have beOS (i thought it was for linux at first)... comes with a built in streaming server....
http://www.xs4all.nl/~marcone/soundplay.html
snackAmp (Linux/ Windows)
A hugely featured gui player... almost too many features... has a built in web-server for remote control, and a built in streaming server... I would have used it for the project I was researching if it could work as a command line interface.
http://snackamp.sourceforge.net/
sonic-rainbow (Linux)
This looks nice and simple but i havenever tried it... it plays video too
http://sonic-rainbow.sourceforge.net/
impish (Linux)
This looked like a very sophisticated command line player but alas it has no crossfade and I couldn't get it to compile.
http://www.geocities.com/kman_can/
xmms (Linux)
This is my favorite player if only because it does so much
http://www.xmms.org
mplayer (Linux / Windows / OSX)
This is more a video player but also support audio. You can run it with or without a gui
http://www.mplayerhq.hu/
Embedded Players
Flam
Flash Mp3player
http://www.flamplayer.com/
Make your own flash mp3 player
http://web.uvic.ca/hrd/halfbaked/howto/audio.htm http://www.sonify.org/home/feature/remixology/026_mp3player/
Flow
Flash Video Player (open source)
http://flowplayer.sourceforge.net/
Streaming Servers
Icecast
The best audio server on the net.
http://www.icecast.org/
An excellent Icecast Howto from Kerry Cox
http://www.gnuware.com/icecast/
Quicktime / Darwin Streaming Server
An excellent how-to for Quicktime Streaming Server, it also covers embedding Quicktime, compression, relaying streams etc
http://www.soundscreen.com/
A great quick how-to for Darwin and VLC (as a server) on Linux http://viz.aset.psu.edu/ga5in/StreamingMedia.html
gini
Looks good... haven't tried it
http://gini.sourceforge.net/
Oyez
Python streaming server
http://ubertechnique.com/seth/oyez/doc/Oyez.html
oggserv
A php based daemon
http://oggserv.sourceforge.net/
litestream
An excellent streaming server with source clients and re-streamer... ultra stable
http://www.litestream.org
ample
A small streaming server
http://ample.sf.net
edna
This allows streaming of files stored on your 'server'
http://edna.sf.net
gnump3d
Another streaming server, also supports ogg
http://www.gnump3d.org
Software Repositories
Dyne
The home of really good streaming software for Linux.
http://www.dyne.org/
Oddsock
A great home for streaming tools for Windows and Linux.
http://www.oddsock.org/
Freshmeat
If you don't know it you are guaranteed to spend the next x hours browsing it.
http://freshmeat.net/
MuSE.SourceForge
Repository for many softwares.
http://www.sf.net
Version Tracker
Good for MacHeads.
http://www.versiontracker.com/
Tucows
Who said I don't look after newbies...an oldie but still useful, especially for Windows users.
http://www.tucows.com/
GNU
Good old GNU roll your own software repository for GPL software.
http://savannah.gnu.org/
Open Content Repositories
Archive.org
Archive.org, otherwise known as the 'Internet Archive' is a place where you can store all your archived streaming files for free. The material must be licenced under Creative Commons or released to the public domain.
http://www.archive.org
ourmedia.org
Free hosting of media content for 'grass roots' media. Also for creative commons or public domain content
http://www.ourmedia.org/
v2v
Independent and activist media content storage (in ogg theora)
http://www.v2v.cc/
cc mixer
Sharing of audio samples licenced under creative commons
http://ccmixter.org/
Digital Audio and Codecs
Information on Formats
Good article on codec comparisons
http://www.cdburner.ca/digital-audio-formats-article/
ARS Technica Codecs
Good article on the difference between average, constant and variable bitrate codec settings
http://arstechnica.com/guides/tweaks/encoding.ars
Free Codecs
xiph
The home of free codecs.
http://www.xiph.org/
ogg vorbis and theora
Information about free audio codecs and third party applications.
http://www.vorbis.com/
Very good posting on OGG
http://forum.doom9.org/showthread.php?s=&threadid=77314
An embeded ogg java player
http://www.flumotion.net/cortado/
Good Howto for streaming Theora to Icecast2
http://www.oddsock.org/guides/video.php
XVID
Open Source codec mostly used for ripping and playing DVDs. http://www.xvid.org/
Dirac
Upcoming free video codec developed by the BBC
http://dirac.sourceforge.net/
MP3 Patents
Good detailed information on MPEG related patents
http://swpat.ffii.org/patents/effects/mpeg/index.en.html
Licencing Content
Creative Commons
Alternative content licencing models.
http://creativecommons.org/
Licencing Software
Free Software Foundation
http://www.fsf.org/
What is FLOSS?
http://en.wikibooks.org/wiki/FLOSS_Concept_Booklet
PD Streaming Externals
A complete list:
http://pd.iem.at/pdb/query.html?ext=y&alb=y&qry=complete
MuSE.Peer2Peer Streaming
If you want a peer2peer Ogg streamer (ogglive~) for Windows and Mac OSX versions of PD then go here:
http://www.nullmedium.de/dev/ogglive~/
Speex, MP3, MuSE.P2P
Speex Codex external (Speex~) for Linux and MP3 streaming externals (Mp3cast~) for Windows and Linux (includes a MP3 peer2peer external - mp3live~ ) versions of PD available here:
http://ydegoyon.free.fr/software.html
OGG
If you want Ogg streaming for PD then you can get the pdogg~ externals in an installed version of pd-extended or by installing the pd-externals package, both are available from here:
http://pure-data.sourceforge.net/download.php
MAX/MSP Streaming Externals
MP3
Shoutcast external for streaming MP3 from MAX/MSP:
http://www.akustische-kunst.org/maxmsp/
OGG
If you want Ogg streaming for MAX then check here:
http://www.nullmedium.de/dev/oggpro/
Transcoding and Ripping
Mencoder
A good guide to transcoding using Linux and Mencoder
http://gentoo-wiki.com/HOWTO_Mencoder_Introduction_Guide
Ripping Guides
A good DVD ripping guide for Linux
http://www.bunkus.org/dvdripping4linux/ a good how to for creating MP3s (for the slightly geeky)
http://howtos.linux.com/howtos/MP3-HOWTO-10.shtml
Video Editors (GPL)
Jahshaka
The best I've seen for Linux
http://www.jahshaka.org/
There is also a very good beginners tutorial for Jahshaka here:
http://users.pandora.be/acp/jah/
Pitivi
Under Development
http://www.pitivi.org/
Cinelerra
Good but you need lots of screen space
http://heroinewarrior.com/cinelerra.php3
Cinelerra Tutorials
http://www.ftconsult.com/twiki/bin/view/Cinelerra/CinelerraManualTOC http://supreetsethi.net/drupal/?q=node/20
Kino
Great editor
http://www.kinodv.org/
General
Some good notes on editing video on Linux
http://users.dslextreme.com/~craig.lawson/linux_notes/video.html The same site has a great section on CD and DVD authoring under Linux
http://users.dslextreme.com/~craig.lawson/linux_notes/cds.html
Miscellaneous
History of MP3
A brief overview of the most popular audio format on the net.
http://www.mp3-mac.com/Pages/History_of_MP3.html
Low Tech
Great spot to learn more about software and hardware if you are in the UK. http://lowtech.org
Your Machines
Cultural event and ongoing research/writings about free software.
http://www.yourmachines.org/
MuSE.OggPlay
Play Ogg on your mobile phone
http://symbianoggplay.sourceforge.net/
Googles beta video search
Using the VLC plugin for replay of content....
http://video.google.com/
swf.open4all
Experiment with collecting and transcoding (to flash) most commonly linked video content
http://swf.open4all.info/
Workshops
The Streaming Suitcase does various workshops including streaming, PureData, open source audio, linux etc. Workshops and resources by these people are also highly recommended:
Julian Oliver
Blender and gaming workshops (etc)
http://selectparks.net/
http://selectparks.net/~julian
http://selectparks.net/modules.php?name=News&file=article&sid=395
Derek Holzer
MuSE.PureData and open source audio workshops (etc)
http://www.umatic.nl/info_derek.html
Tetsuo Kogawa
MuSE.MiniFM
http://anarchy.translocal.jp/MiniTV
http://www.silenttv.net
License
All chapters copyright of the authors (see below). Unless otherwise stated all chapters in this manual licensed with GNU General Public License version 2
This documentation is free documentation; you can redistribute it and/or modify it under the terms of the GNU General Public License as published by the Free Software Foundation; either version 2 of the License, or (at your option) any later version.
This documentation is distributed in the hope that it will be useful, but WITHOUT ANY WARRANTY; without even the implied warranty of MERCHANTABILITY or FITNESS FOR A PARTICULAR PURPOSE. See the GNU General Public License for more details.
You should have received a copy of the GNU General Public License along with this documentation; if not, write to the Free Software Foundation, Inc., 51 Franklin Street, Fifth Floor, Boston, MA 02110-1301, USA.
Authors
GRABBING STILLS
© mick fuzz 2007
Modifications:
adam hyde 2007
Thomas Middleton 2008
CREDITS
© adam hyde 2006, 2007
Modifications:
mick fuzz 2007
BASIC ENCODING
© mick fuzz 2007
Modifications:
adam hyde 2007
Jakub Misak 2008
Thomas Middleton 2008
GLOSSARY
© adam hyde 2007
LINUX (advanced)
© adam hyde 2006, 2007
Modifications:
mick fuzz 2007
Thomas Middleton 2008
OSX
© Adam Willetts 2006
Modifications:
adam hyde 2006, 2007
Andrew Lowenthal 2008
mick fuzz 2007
UBUNTU
© adam hyde 2007
Modifications:
mick fuzz 2007
Thomas Middleton 2008
WINDOWS
© adam hyde 2006, 2007
Modifications:
Andrew Lowenthal 2008
mick fuzz 2007
Thomas Middleton 2008
INTERFACE
© adam hyde 2006, 2007
Modifications:
Andrew Lowenthal 2008
mick fuzz 2007
Thomas Middleton 2008
INTRODUCTION
© adam hyde 2006, 2007, 2008
Modifications:
Andrew Lowenthal 2008
mick fuzz 2007
Nomis Armata 2010
Thomas Middleton 2008
Ti Shovel 2007
LINKS
© adam hyde 2005, 2006, 2007
Modifications:
Stella Brennan 2005
Thomas Middleton 2008
Zita Joyce 2008
PLAYING STREAMS
© adam hyde 2006, 2007
Modifications:
Andrew Lowenthal 2008
mick fuzz 2007
Nomis Armata 2010
Thomas Middleton 2008
PLAYING VIDEO
© Nomis Armata 2010
RIPPING CDS
© adam hyde 2007
Modifications:
mick fuzz 2007
Nomis Armata 2010
Thomas Middleton 2008
STREAMING TO ICECAST
© adam hyde 2006, 2007
Modifications:
jordi sala 2007
mick fuzz 2007
Queen Victoria 2007
Thomas Middleton 2008
Thomas Mulcaire 2006
WHAT IS STREAMING?
© adam hyde 2005, 2006, 2007
Modifications:
Ruckert Martin 2006
Stella Brennan 2005
Thomas Middleton 2008
Zita Joyce 2008
STREAMING WIZARD
© adam hyde 2006, 2007
Modifications:
mick fuzz 2007
Thomas Middleton 2008
PLAYING VIDEO_TS FILES
© adam hyde 2007
Modifications:
mick fuzz 2007
Thomas Middleton 2008
VIEWING SUBTITLES
© mick fuzz 2007
Modifications:
adam hyde 2007
Andrew Nicholson 2009
Thomas Middleton 2008

Free manuals for free software
General Public License
Version 2, June 1991
Copyright (C) 1989, 1991 Free Software Foundation, Inc.
51 Franklin Street, Fifth Floor, Boston, MA 02110-1301, USA
Everyone is permitted to copy and distribute verbatim copies
of this license document, but changing it is not allowed.
Preamble
The licenses for most software are designed to take away your freedom to share and change it. By contrast, the GNU General Public License is intended to guarantee your freedom to share and change free software--to make sure the software is free for all its users. This General Public License applies to most of the Free Software Foundation's software and to any other program whose authors commit to using it. (Some other Free Software Foundation software is covered by the GNU Lesser General Public License instead.) You can apply it to your programs, too.
When we speak of free software, we are referring to freedom, not price. Our General Public Licenses are designed to make sure that you have the freedom to distribute copies of free software (and charge for this service if you wish), that you receive source code or can get it if you want it, that you can change the software or use pieces of it in new free programs; and that you know you can do these things.
To protect your rights, we need to make restrictions that forbid anyone to deny you these rights or to ask you to surrender the rights. These restrictions translate to certain responsibilities for you if you distribute copies of the software, or if you modify it.
For example, if you distribute copies of such a program, whether gratis or for a fee, you must give the recipients all the rights that you have. You must make sure that they, too, receive or can get the source code. And you must show them these terms so they know their rights.
We protect your rights with two steps: (1) copyright the software, and (2) offer you this license which gives you legal permission to copy, distribute and/or modify the software.
Also, for each author's protection and ours, we want to make certain that everyone understands that there is no warranty for this free software. If the software is modified by someone else and passed on, we want its recipients to know that what they have is not the original, so that any problems introduced by others will not reflect on the original authors' reputations.
Finally, any free program is threatened constantly by software patents. We wish to avoid the danger that redistributors of a free program will individually obtain patent licenses, in effect making the program proprietary. To prevent this, we have made it clear that any patent must be licensed for everyone's free use or not licensed at all.
The precise terms and conditions for copying, distribution and modification follow.
TERMS AND CONDITIONS FOR COPYING, DISTRIBUTION AND MODIFICATION
0. This License applies to any program or other work which contains a notice placed by the copyright holder saying it may be distributed under the terms of this General Public License. The "Program", below, refers to any such program or work, and a "work based on the Program" means either the Program or any derivative work under copyright law: that is to say, a work containing the Program or a portion of it, either verbatim or with modifications and/or translated into another language. (Hereinafter, translation is included without limitation in the term "modification".) Each licensee is addressed as "you".
Activities other than copying, distribution and modification are not covered by this License; they are outside its scope. The act of running the Program is not restricted, and the output from the Program is covered only if its contents constitute a work based on the Program (independent of having been made by running the Program). Whether that is true depends on what the Program does.
1. You may copy and distribute verbatim copies of the Program's source code as you receive it, in any medium, provided that you conspicuously and appropriately publish on each copy an appropriate copyright notice and disclaimer of warranty; keep intact all the notices that refer to this License and to the absence of any warranty; and give any other recipients of the Program a copy of this License along with the Program.
You may charge a fee for the physical act of transferring a copy, and you may at your option offer warranty protection in exchange for a fee.
2. You may modify your copy or copies of the Program or any portion of it, thus forming a work based on the Program, and copy and distribute such modifications or work under the terms of Section 1 above, provided that you also meet all of these conditions:
- a) You must cause the modified files to carry prominent notices stating that you changed the files and the date of any change.
- b) You must cause any work that you distribute or publish, that in whole or in part contains or is derived from the Program or any part thereof, to be licensed as a whole at no charge to all third parties under the terms of this License.
- c) If the modified program normally reads commands interactively when run, you must cause it, when started running for such interactive use in the most ordinary way, to print or display an announcement including an appropriate copyright notice and a notice that there is no warranty (or else, saying that you provide a warranty) and that users may redistribute the program under these conditions, and telling the user how to view a copy of this License. (Exception: if the Program itself is interactive but does not normally print such an announcement, your work based on the Program is not required to print an announcement.)
These requirements apply to the modified work as a whole. If identifiable sections of that work are not derived from the Program, and can be reasonably considered independent and separate works in themselves, then this License, and its terms, do not apply to those sections when you distribute them as separate works. But when you distribute the same sections as part of a whole which is a work based on the Program, the distribution of the whole must be on the terms of this License, whose permissions for other licensees extend to the entire whole, and thus to each and every part regardless of who wrote it.
Thus, it is not the intent of this section to claim rights or contest your rights to work written entirely by you; rather, the intent is to exercise the right to control the distribution of derivative or collective works based on the Program.
In addition, mere aggregation of another work not based on the Program with the Program (or with a work based on the Program) on a volume of a storage or distribution medium does not bring the other work under the scope of this License.
3. You may copy and distribute the Program (or a work based on it, under Section 2) in object code or executable form under the terms of Sections 1 and 2 above provided that you also do one of the following:
- a) Accompany it with the complete corresponding machine-readable source code, which must be distributed under the terms of Sections 1 and 2 above on a medium customarily used for software interchange; or,
- b) Accompany it with a written offer, valid for at least three years, to give any third party, for a charge no more than your cost of physically performing source distribution, a complete machine-readable copy of the corresponding source code, to be distributed under the terms of Sections 1 and 2 above on a medium customarily used for software interchange; or,
- c) Accompany it with the information you received as to the offer to distribute corresponding source code. (This alternative is allowed only for noncommercial distribution and only if you received the program in object code or executable form with such an offer, in accord with Subsection b above.)
The source code for a work means the preferred form of the work for making modifications to it. For an executable work, complete source code means all the source code for all modules it contains, plus any associated interface definition files, plus the scripts used to control compilation and installation of the executable. However, as a special exception, the source code distributed need not include anything that is normally distributed (in either source or binary form) with the major components (compiler, kernel, and so on) of the operating system on which the executable runs, unless that component itself accompanies the executable.
If distribution of executable or object code is made by offering access to copy from a designated place, then offering equivalent access to copy the source code from the same place counts as distribution of the source code, even though third parties are not compelled to copy the source along with the object code.
4. You may not copy, modify, sublicense, or distribute the Program except as expressly provided under this License. Any attempt otherwise to copy, modify, sublicense or distribute the Program is void, and will automatically terminate your rights under this License. However, parties who have received copies, or rights, from you under this License will not have their licenses terminated so long as such parties remain in full compliance.
5. You are not required to accept this License, since you have not signed it. However, nothing else grants you permission to modify or distribute the Program or its derivative works. These actions are prohibited by law if you do not accept this License. Therefore, by modifying or distributing the Program (or any work based on the Program), you indicate your acceptance of this License to do so, and all its terms and conditions for copying, distributing or modifying the Program or works based on it.
6. Each time you redistribute the Program (or any work based on the Program), the recipient automatically receives a license from the original licensor to copy, distribute or modify the Program subject to these terms and conditions. You may not impose any further restrictions on the recipients' exercise of the rights granted herein. You are not responsible for enforcing compliance by third parties to this License.
7. If, as a consequence of a court judgment or allegation of patent infringement or for any other reason (not limited to patent issues), conditions are imposed on you (whether by court order, agreement or otherwise) that contradict the conditions of this License, they do not excuse you from the conditions of this License. If you cannot distribute so as to satisfy simultaneously your obligations under this License and any other pertinent obligations, then as a consequence you may not distribute the Program at all. For example, if a patent license would not permit royalty-free redistribution of the Program by all those who receive copies directly or indirectly through you, then the only way you could satisfy both it and this License would be to refrain entirely from distribution of the Program.
If any portion of this section is held invalid or unenforceable under any particular circumstance, the balance of the section is intended to apply and the section as a whole is intended to apply in other circumstances.
It is not the purpose of this section to induce you to infringe any patents or other property right claims or to contest validity of any such claims; this section has the sole purpose of protecting the integrity of the free software distribution system, which is implemented by public license practices. Many people have made generous contributions to the wide range of software distributed through that system in reliance on consistent application of that system; it is up to the author/donor to decide if he or she is willing to distribute software through any other system and a licensee cannot impose that choice.
This section is intended to make thoroughly clear what is believed to be a consequence of the rest of this License.
8. If the distribution and/or use of the Program is restricted in certain countries either by patents or by copyrighted interfaces, the original copyright holder who places the Program under this License may add an explicit geographical distribution limitation excluding those countries, so that distribution is permitted only in or among countries not thus excluded. In such case, this License incorporates the limitation as if written in the body of this License.
9. The Free Software Foundation may publish revised and/or new versions of the General Public License from time to time. Such new versions will be similar in spirit to the present version, but may differ in detail to address new problems or concerns.
Each version is given a distinguishing version number. If the Program specifies a version number of this License which applies to it and "any later version", you have the option of following the terms and conditions either of that version or of any later version published by the Free Software Foundation. If the Program does not specify a version number of this License, you may choose any version ever published by the Free Software Foundation.
10. If you wish to incorporate parts of the Program into other free programs whose distribution conditions are different, write to the author to ask for permission. For software which is copyrighted by the Free Software Foundation, write to the Free Software Foundation; we sometimes make exceptions for this. Our decision will be guided by the two goals of preserving the free status of all derivatives of our free software and of promoting the sharing and reuse of software generally.
NO WARRANTY
11. BECAUSE THE PROGRAM IS LICENSED FREE OF CHARGE, THERE IS NO WARRANTY FOR THE PROGRAM, TO THE EXTENT PERMITTED BY APPLICABLE LAW. EXCEPT WHEN OTHERWISE STATED IN WRITING THE COPYRIGHT HOLDERS AND/OR OTHER PARTIES PROVIDE THE PROGRAM "AS IS" WITHOUT WARRANTY OF ANY KIND, EITHER EXPRESSED OR IMPLIED, INCLUDING, BUT NOT LIMITED TO, THE IMPLIED WARRANTIES OF MERCHANTABILITY AND FITNESS FOR A PARTICULAR PURPOSE. THE ENTIRE RISK AS TO THE QUALITY AND PERFORMANCE OF THE PROGRAM IS WITH YOU. SHOULD THE PROGRAM PROVE DEFECTIVE, YOU ASSUME THE COST OF ALL NECESSARY SERVICING, REPAIR OR CORRECTION.
12. IN NO EVENT UNLESS REQUIRED BY APPLICABLE LAW OR AGREED TO IN WRITING WILL ANY COPYRIGHT HOLDER, OR ANY OTHER PARTY WHO MAY MODIFY AND/OR REDISTRIBUTE THE PROGRAM AS PERMITTED ABOVE, BE LIABLE TO YOU FOR DAMAGES, INCLUDING ANY GENERAL, SPECIAL, INCIDENTAL OR CONSEQUENTIAL DAMAGES ARISING OUT OF THE USE OR INABILITY TO USE THE PROGRAM (INCLUDING BUT NOT LIMITED TO LOSS OF DATA OR DATA BEING RENDERED INACCURATE OR LOSSES SUSTAINED BY YOU OR THIRD PARTIES OR A FAILURE OF THE PROGRAM TO OPERATE WITH ANY OTHER PROGRAMS), EVEN IF SUCH HOLDER OR OTHER PARTY HAS BEEN ADVISED OF THE POSSIBILITY OF SUCH DAMAGES.
END OF TERMS AND CONDITIONS
License
All chapters copyright of the authors (see below). Unless otherwise stated all chapters in this manual licensed with GNU General Public License version 2
This documentation is free documentation; you can redistribute it and/or modify it under the terms of the GNU General Public License as published by the Free Software Foundation; either version 2 of the License, or (at your option) any later version.
This documentation is distributed in the hope that it will be useful, but WITHOUT ANY WARRANTY; without even the implied warranty of MERCHANTABILITY or FITNESS FOR A PARTICULAR PURPOSE. See the GNU General Public License for more details.
You should have received a copy of the GNU General Public License along with this documentation; if not, write to the Free Software Foundation, Inc., 51 Franklin Street, Fifth Floor, Boston, MA 02110-1301, USA.
Authors
GRABBING STILLS
© mick fuzz 2007
Modifications:
adam hyde 2007
Thomas Middleton 2008
CREDITS
© adam hyde 2006, 2007
Modifications:
mick fuzz 2007
BASIC ENCODING
© mick fuzz 2007
Modifications:
adam hyde 2007
Jakub Misak 2008
Thomas Middleton 2008
GLOSSARY
© adam hyde 2007
LINUX (advanced)
© adam hyde 2006, 2007
Modifications:
mick fuzz 2007
Thomas Middleton 2008
OSX
© Adam Willetts 2006
Modifications:
adam hyde 2006, 2007
Andrew Lowenthal 2008
mick fuzz 2007
UBUNTU
© adam hyde 2007
Modifications:
mick fuzz 2007
Thomas Middleton 2008
WINDOWS
© adam hyde 2006, 2007
Modifications:
Andrew Lowenthal 2008
mick fuzz 2007
Thomas Middleton 2008
INTERFACE
© adam hyde 2006, 2007
Modifications:
Andrew Lowenthal 2008
mick fuzz 2007
Thomas Middleton 2008
INTRODUCTION
© adam hyde 2006, 2007, 2008
Modifications:
Andrew Lowenthal 2008
mick fuzz 2007
Simon Armata 2010
Thomas Middleton 2008
Ti Shovel 2007
LINKS
© adam hyde 2005, 2006, 2007
Modifications:
Stella Brennan 2005
Thomas Middleton 2008
Zita Joyce 2008
PLAYING STREAMS
© adam hyde 2006, 2007
Modifications:
Andrew Lowenthal 2008
mick fuzz 2007
Simon Armata 2010
Thomas Middleton 2008
PLAYING AUDIO AND VIDEO
© Simon Armata 2010, 2011, 2013
RIPPING CDS
© adam hyde 2007
Modifications:
mick fuzz 2007
Simon Armata 2010
Thomas Middleton 2008
STREAMING TO ICECAST
© adam hyde 2006, 2007
Modifications:
jordi sala 2007
mick fuzz 2007
Queen Victoria 2007
Thomas Middleton 2008
Thomas Mulcaire 2006
WHAT IS STREAMING?
© adam hyde 2005, 2006, 2007
Modifications:
Ruckert Martin 2006
Stella Brennan 2005
Thomas Middleton 2008
Zita Joyce 2008
STREAMING WIZARD
© adam hyde 2006, 2007
Modifications:
mick fuzz 2007
Thomas Middleton 2008
PLAYING VIDEO_TS FILES
© adam hyde 2007
Modifications:
mick fuzz 2007
Thomas Middleton 2008
VIEWING SUBTITLES
© mick fuzz 2007
Modifications:
adam hyde 2007
Andrew Nicholson 2009
Thomas Middleton 2008
Free manuals for free software
General Public License
Version 2, June 1991
Copyright (C) 1989, 1991 Free Software Foundation, Inc.
51 Franklin Street, Fifth Floor, Boston, MA 02110-1301, USA
Everyone is permitted to copy and distribute verbatim copies
of this license document, but changing it is not allowed.
Preamble
The licenses for most software are designed to take away your freedom to share and change it. By contrast, the GNU General Public License is intended to guarantee your freedom to share and change free software--to make sure the software is free for all its users. This General Public License applies to most of the Free Software Foundation's software and to any other program whose authors commit to using it. (Some other Free Software Foundation software is covered by the GNU Lesser General Public License instead.) You can apply it to your programs, too.
When we speak of free software, we are referring to freedom, not price. Our General Public Licenses are designed to make sure that you have the freedom to distribute copies of free software (and charge for this service if you wish), that you receive source code or can get it if you want it, that you can change the software or use pieces of it in new free programs; and that you know you can do these things.
To protect your rights, we need to make restrictions that forbid anyone to deny you these rights or to ask you to surrender the rights. These restrictions translate to certain responsibilities for you if you distribute copies of the software, or if you modify it.
For example, if you distribute copies of such a program, whether gratis or for a fee, you must give the recipients all the rights that you have. You must make sure that they, too, receive or can get the source code. And you must show them these terms so they know their rights.
We protect your rights with two steps: (1) copyright the software, and (2) offer you this license which gives you legal permission to copy, distribute and/or modify the software.
Also, for each author's protection and ours, we want to make certain that everyone understands that there is no warranty for this free software. If the software is modified by someone else and passed on, we want its recipients to know that what they have is not the original, so that any problems introduced by others will not reflect on the original authors' reputations.
Finally, any free program is threatened constantly by software patents. We wish to avoid the danger that redistributors of a free program will individually obtain patent licenses, in effect making the program proprietary. To prevent this, we have made it clear that any patent must be licensed for everyone's free use or not licensed at all.
The precise terms and conditions for copying, distribution and modification follow.
TERMS AND CONDITIONS FOR COPYING, DISTRIBUTION AND MODIFICATION
0. This License applies to any program or other work which contains a notice placed by the copyright holder saying it may be distributed under the terms of this General Public License. The "Program", below, refers to any such program or work, and a "work based on the Program" means either the Program or any derivative work under copyright law: that is to say, a work containing the Program or a portion of it, either verbatim or with modifications and/or translated into another language. (Hereinafter, translation is included without limitation in the term "modification".) Each licensee is addressed as "you".
Activities other than copying, distribution and modification are not covered by this License; they are outside its scope. The act of running the Program is not restricted, and the output from the Program is covered only if its contents constitute a work based on the Program (independent of having been made by running the Program). Whether that is true depends on what the Program does.
1. You may copy and distribute verbatim copies of the Program's source code as you receive it, in any medium, provided that you conspicuously and appropriately publish on each copy an appropriate copyright notice and disclaimer of warranty; keep intact all the notices that refer to this License and to the absence of any warranty; and give any other recipients of the Program a copy of this License along with the Program.
You may charge a fee for the physical act of transferring a copy, and you may at your option offer warranty protection in exchange for a fee.
2. You may modify your copy or copies of the Program or any portion of it, thus forming a work based on the Program, and copy and distribute such modifications or work under the terms of Section 1 above, provided that you also meet all of these conditions:
- a) You must cause the modified files to carry prominent notices stating that you changed the files and the date of any change.
- b) You must cause any work that you distribute or publish, that in whole or in part contains or is derived from the Program or any part thereof, to be licensed as a whole at no charge to all third parties under the terms of this License.
- c) If the modified program normally reads commands interactively when run, you must cause it, when started running for such interactive use in the most ordinary way, to print or display an announcement including an appropriate copyright notice and a notice that there is no warranty (or else, saying that you provide a warranty) and that users may redistribute the program under these conditions, and telling the user how to view a copy of this License. (Exception: if the Program itself is interactive but does not normally print such an announcement, your work based on the Program is not required to print an announcement.)
These requirements apply to the modified work as a whole. If identifiable sections of that work are not derived from the Program, and can be reasonably considered independent and separate works in themselves, then this License, and its terms, do not apply to those sections when you distribute them as separate works. But when you distribute the same sections as part of a whole which is a work based on the Program, the distribution of the whole must be on the terms of this License, whose permissions for other licensees extend to the entire whole, and thus to each and every part regardless of who wrote it.
Thus, it is not the intent of this section to claim rights or contest your rights to work written entirely by you; rather, the intent is to exercise the right to control the distribution of derivative or collective works based on the Program.
In addition, mere aggregation of another work not based on the Program with the Program (or with a work based on the Program) on a volume of a storage or distribution medium does not bring the other work under the scope of this License.
3. You may copy and distribute the Program (or a work based on it, under Section 2) in object code or executable form under the terms of Sections 1 and 2 above provided that you also do one of the following:
- a) Accompany it with the complete corresponding machine-readable source code, which must be distributed under the terms of Sections 1 and 2 above on a medium customarily used for software interchange; or,
- b) Accompany it with a written offer, valid for at least three years, to give any third party, for a charge no more than your cost of physically performing source distribution, a complete machine-readable copy of the corresponding source code, to be distributed under the terms of Sections 1 and 2 above on a medium customarily used for software interchange; or,
- c) Accompany it with the information you received as to the offer to distribute corresponding source code. (This alternative is allowed only for noncommercial distribution and only if you received the program in object code or executable form with such an offer, in accord with Subsection b above.)
The source code for a work means the preferred form of the work for making modifications to it. For an executable work, complete source code means all the source code for all modules it contains, plus any associated interface definition files, plus the scripts used to control compilation and installation of the executable. However, as a special exception, the source code distributed need not include anything that is normally distributed (in either source or binary form) with the major components (compiler, kernel, and so on) of the operating system on which the executable runs, unless that component itself accompanies the executable.
If distribution of executable or object code is made by offering access to copy from a designated place, then offering equivalent access to copy the source code from the same place counts as distribution of the source code, even though third parties are not compelled to copy the source along with the object code.
4. You may not copy, modify, sublicense, or distribute the Program except as expressly provided under this License. Any attempt otherwise to copy, modify, sublicense or distribute the Program is void, and will automatically terminate your rights under this License. However, parties who have received copies, or rights, from you under this License will not have their licenses terminated so long as such parties remain in full compliance.
5. You are not required to accept this License, since you have not signed it. However, nothing else grants you permission to modify or distribute the Program or its derivative works. These actions are prohibited by law if you do not accept this License. Therefore, by modifying or distributing the Program (or any work based on the Program), you indicate your acceptance of this License to do so, and all its terms and conditions for copying, distributing or modifying the Program or works based on it.
6. Each time you redistribute the Program (or any work based on the Program), the recipient automatically receives a license from the original licensor to copy, distribute or modify the Program subject to these terms and conditions. You may not impose any further restrictions on the recipients' exercise of the rights granted herein. You are not responsible for enforcing compliance by third parties to this License.
7. If, as a consequence of a court judgment or allegation of patent infringement or for any other reason (not limited to patent issues), conditions are imposed on you (whether by court order, agreement or otherwise) that contradict the conditions of this License, they do not excuse you from the conditions of this License. If you cannot distribute so as to satisfy simultaneously your obligations under this License and any other pertinent obligations, then as a consequence you may not distribute the Program at all. For example, if a patent license would not permit royalty-free redistribution of the Program by all those who receive copies directly or indirectly through you, then the only way you could satisfy both it and this License would be to refrain entirely from distribution of the Program.
If any portion of this section is held invalid or unenforceable under any particular circumstance, the balance of the section is intended to apply and the section as a whole is intended to apply in other circumstances.
It is not the purpose of this section to induce you to infringe any patents or other property right claims or to contest validity of any such claims; this section has the sole purpose of protecting the integrity of the free software distribution system, which is implemented by public license practices. Many people have made generous contributions to the wide range of software distributed through that system in reliance on consistent application of that system; it is up to the author/donor to decide if he or she is willing to distribute software through any other system and a licensee cannot impose that choice.
This section is intended to make thoroughly clear what is believed to be a consequence of the rest of this License.
8. If the distribution and/or use of the Program is restricted in certain countries either by patents or by copyrighted interfaces, the original copyright holder who places the Program under this License may add an explicit geographical distribution limitation excluding those countries, so that distribution is permitted only in or among countries not thus excluded. In such case, this License incorporates the limitation as if written in the body of this License.
9. The Free Software Foundation may publish revised and/or new versions of the General Public License from time to time. Such new versions will be similar in spirit to the present version, but may differ in detail to address new problems or concerns.
Each version is given a distinguishing version number. If the Program specifies a version number of this License which applies to it and "any later version", you have the option of following the terms and conditions either of that version or of any later version published by the Free Software Foundation. If the Program does not specify a version number of this License, you may choose any version ever published by the Free Software Foundation.
10. If you wish to incorporate parts of the Program into other free programs whose distribution conditions are different, write to the author to ask for permission. For software which is copyrighted by the Free Software Foundation, write to the Free Software Foundation; we sometimes make exceptions for this. Our decision will be guided by the two goals of preserving the free status of all derivatives of our free software and of promoting the sharing and reuse of software generally.
NO WARRANTY
11. BECAUSE THE PROGRAM IS LICENSED FREE OF CHARGE, THERE IS NO WARRANTY FOR THE PROGRAM, TO THE EXTENT PERMITTED BY APPLICABLE LAW. EXCEPT WHEN OTHERWISE STATED IN WRITING THE COPYRIGHT HOLDERS AND/OR OTHER PARTIES PROVIDE THE PROGRAM "AS IS" WITHOUT WARRANTY OF ANY KIND, EITHER EXPRESSED OR IMPLIED, INCLUDING, BUT NOT LIMITED TO, THE IMPLIED WARRANTIES OF MERCHANTABILITY AND FITNESS FOR A PARTICULAR PURPOSE. THE ENTIRE RISK AS TO THE QUALITY AND PERFORMANCE OF THE PROGRAM IS WITH YOU. SHOULD THE PROGRAM PROVE DEFECTIVE, YOU ASSUME THE COST OF ALL NECESSARY SERVICING, REPAIR OR CORRECTION.
12. IN NO EVENT UNLESS REQUIRED BY APPLICABLE LAW OR AGREED TO IN WRITING WILL ANY COPYRIGHT HOLDER, OR ANY OTHER PARTY WHO MAY MODIFY AND/OR REDISTRIBUTE THE PROGRAM AS PERMITTED ABOVE, BE LIABLE TO YOU FOR DAMAGES, INCLUDING ANY GENERAL, SPECIAL, INCIDENTAL OR CONSEQUENTIAL DAMAGES ARISING OUT OF THE USE OR INABILITY TO USE THE PROGRAM (INCLUDING BUT NOT LIMITED TO LOSS OF DATA OR DATA BEING RENDERED INACCURATE OR LOSSES SUSTAINED BY YOU OR THIRD PARTIES OR A FAILURE OF THE PROGRAM TO OPERATE WITH ANY OTHER PROGRAMS), EVEN IF SUCH HOLDER OR OTHER PARTY HAS BEEN ADVISED OF THE POSSIBILITY OF SUCH DAMAGES.
END OF TERMS AND CONDITIONS
Interface Basics
Software name : VLC
Software version : 0.8.6
The nice thing about VLC is that it looks the same and functions the same across Linux and Microsoft Windows and looks similar in MacOSX.
Linux Interface
Windows Interface
OSX Interface
In the case of OSX the menu items are located not on the software itself but in the general OSX 'finder'.
Interface Elements
The main elements are :
- File
- View
- Settings
- Audio
- Video
- Navigation
- Help
Lets look at them briefly, one at a time.
File Menu
You use the File menu for opening files and media.
| option |
action |
| Quick Open File |
Open a file quickly from your computer |
| Open File |
This gives a much more complicated menu than the above. This option essentially gives you the opportunity to open any kind of media from a disc, across the net, or from you computer.
|
| Open Directory |
This will open a directory and play each file one after the other. |
| Open Disc |
Open a disc. This can be a DVD, audio CD, VCD etc
|
| Open network Stream |
Open a file on the internet (usually a live stream). |
| Open Capture Device |
If you have a webcam or other camera/sound device, connected to your computer then you can see/hear it via this option in VLC.
|
| Wizard |
This is used for creating streams, or converting media formats (transcoding). This is really for the more advanced user. |
| Exit |
quit VLC |
View Menu
The View menu allows you to see various VLC information windows.
| option |
action |
| Playlist |
If you have loaded many items to play in VLC then you can see and manage the playlist here. |
| Messages |
Messages on the operations of VLC are displayed here including useful error messages.
|
| Stream and Media Info |
Information about the media playing now. |
| VLM Control |
VideoLAN Manager - allows you to send several streams at once through vlc. This is really an advanced function and shouldn't be attempted by those with weak hearts. |
Settings Menu
All the settings and preferences are set here.
| option |
action |
| Switch Interface |
VLC has more than one graphic user interface type and you can choose your favourite from this list.
|
| Add Interface |
Apart from the graphical interface, VLC can be controlled through many other methods including through its very own webpage, and through the command line. To use these features you'll need to be a bit of an 'advanced' user.
|
| Extended GUI |
Beyond the default interface you see when you open VLC there is an extended interface available with more options. These options allow you to control the color (brightness, hue, contrast etc) of the video played, as well as the quality and volume of the audio.
|
| Bookmarks |
Bookmark your media like you would bookmark a webpage with a webbrowser.
|
| Preferences |
All the preferences for every function.
|
Audio Menu
This allows you to control the audio played back when listening to a media file. Nothing will appear in this menu unless something is being played back.
Video Menu
This allows you to control the video played back when watching to a media file - the most interesting feature is the fullscreen video mode. Nothing will appear in this menu unless something is being played back.
Navigation
Usually empty.
Help
Basic information about VLC.
Related Links
Manuals
Center for Independent Journalism
Some great manuals on Sound Editing, Sound Effects, Turning Sound Online, Sound Editing (advanced), Setting Up a Station and a Studio, Designing a Website http://www.cijmalaysia.org/resources.htm
Spot
Good site for some tips and tricks, especially if you use Dyne::bolic
http://spot.river-styx.com/linkage.php
Encoders
MuSE.MuSE (Linux / OSX)
The best audio encoder for Linux.
http://muse.dyne.org/
Oddcast (Windows)
Great plugin for encoding Ogg and MP3 using Winamp.
http://www.oddsock.org/tools/oddcastv3/
ostream (Windows / Linux)
A cool ogg encoder that runs on Linux, Microsoft Windows, and MacOSX.
http://radiostudio.org/ostream
oggment (Linux)
An interesting tool which can encode a single audio source into a real stream and a ogg stream simultaneously... made by August Black (radio/software/media artist)... there are some other interesting tools on this site too
http://oggment.sourceforge.net/ogg-real.php
oggcaster (Linux)
A plug-in for xmms to stream ogg files to icecast2... looked interesting but i couldn't get it to compile... I think there was quite some activity on the development side, so it might be fixed soon... if doing encoding this way is your thing then don't forget the excellent xmms-oddcast plug-in (for icecast2) and the liveice plug-in (for icecast1 only) - both of which are available from the xmms (http://www.xmms.org) website in the plug-ins directories
http://xmms-oggcaster.sourceforge.net/
Soma (Linux)
A very interesting set of tools... sound daemon, player, encoder and scheduler... ate a whole lot of my cpu and wasn't so nice with the crossfades, otherwise i might have used it...
http://www.somasuite.org/
darkice (Linux)
A very light weight, easy to deploy command line live mp3 streamer. You may also wish to look at the GUI interface, which you need to install seperately, it's called darksnow.
http://darkice.sourceforge.net/
liveice (Linux)
Encoder for icecast1. Command line
http://star.arm.ac.uk/~spm/software/liveice.html
MuSE.IceS (Linux)
Command line encoder for icecast1 and icecast2
http://svn.xiph.org/releases/ices/
Oddcast (Windows)
A great plugin for XMMS that allows you to stream MP3 or Ogg. It can be tricky to install as it requires WXWindows.
http://www.oddsock.org
MuSE.MPEG4IP (Linux)
A great how to for mpeg4ip streaming to a Darwin Server
http://www.linuxjournal.com/node/6720/print
Players
VLC (Windows / Linux / OSX)
The all purpose cross-platform media player. Does much more too...
http://www.videolan.org/vlc/
zinf (Windows / Linux)
A many featured player but couldn't see the advantage over xmms (my preferred gui player) except that it has a built in streaming encoder/server.
http://www.zinf.org/
soundplay (beOS)
This is good if you have beOS (i thought it was for linux at first)... comes with a built in streaming server....
http://www.xs4all.nl/~marcone/soundplay.html
snackAmp (Linux/ Windows)
A hugely featured gui player... almost too many features... has a built in web-server for remote control, and a built in streaming server... I would have used it for the project I was researching if it could work as a command line interface.
http://snackamp.sourceforge.net/
sonic-rainbow (Linux)
This looks nice and simple but i havenever tried it... it plays video too
http://sonic-rainbow.sourceforge.net/
impish (Linux)
This looked like a very sophisticated command line player but alas it has no crossfade and I couldn't get it to compile.
http://www.geocities.com/kman_can/
xmms (Linux)
This is my favorite player if only because it does so much
http://www.xmms.org
mplayer (Linux / Windows / OSX)
This is more a video player but also support audio. You can run it with or without a gui
http://www.mplayerhq.hu/
Embedded Players
Flam
Flash Mp3player
http://www.flamplayer.com/
Make your own flash mp3 player
http://web.uvic.ca/hrd/halfbaked/howto/audio.htm http://www.sonify.org/home/feature/remixology/026_mp3player/
Flow
Flash Video Player (open source)
http://flowplayer.sourceforge.net/
Streaming Servers
Icecast
The best audio server on the net.
http://www.icecast.org/
An excellent Icecast Howto from Kerry Cox
http://www.gnuware.com/icecast/
Quicktime / Darwin Streaming Server
An excellent how-to for Quicktime Streaming Server, it also covers embedding Quicktime, compression, relaying streams etc
http://www.soundscreen.com/
A great quick how-to for Darwin and VLC (as a server) on Linux http://viz.aset.psu.edu/ga5in/StreamingMedia.html
gini
Looks good... haven't tried it
http://gini.sourceforge.net/
Oyez
Python streaming server
http://ubertechnique.com/seth/oyez/doc/Oyez.html
oggserv
A php based daemon
http://oggserv.sourceforge.net/
litestream
An excellent streaming server with source clients and re-streamer... ultra stable
http://www.litestream.org
ample
A small streaming server
http://ample.sf.net
edna
This allows streaming of files stored on your 'server'
http://edna.sf.net
gnump3d
Another streaming server, also supports ogg
http://www.gnump3d.org
Software Repositories
Dyne
The home of really good streaming software for Linux.
http://www.dyne.org/
Oddsock
A great home for streaming tools for Windows and Linux.
http://www.oddsock.org/
Freshmeat
If you don't know it you are guaranteed to spend the next x hours browsing it.
http://freshmeat.net/
MuSE.SourceForge
Repository for many softwares.
http://www.sf.net
Version Tracker
Good for MacHeads.
http://www.versiontracker.com/
Tucows
Who said I don't look after newbies...an oldie but still useful, especially for Windows users.
http://www.tucows.com/
GNU
Good old GNU roll your own software repository for GPL software.
http://savannah.gnu.org/
Open Content Repositories
Archive.org
Archive.org, otherwise known as the 'Internet Archive' is a place where you can store all your archived streaming files for free. The material must be licenced under Creative Commons or released to the public domain.
http://www.archive.org
ourmedia.org
Free hosting of media content for 'grass roots' media. Also for creative commons or public domain content
http://www.ourmedia.org/
v2v
Independent and activist media content storage (in ogg theora)
http://www.v2v.cc/
cc mixer
Sharing of audio samples licenced under creative commons
http://ccmixter.org/
Digital Audio and Codecs
Information on Formats
Good article on codec comparisons
http://www.cdburner.ca/digital-audio-formats-article/
ARS Technica Codecs
Good article on the difference between average, constant and variable bitrate codec settings
http://arstechnica.com/guides/tweaks/encoding.ars
Free Codecs
xiph
The home of free codecs.
http://www.xiph.org/
ogg vorbis and theora
Information about free audio codecs and third party applications.
http://www.vorbis.com/
Very good posting on OGG
http://forum.doom9.org/showthread.php?s=&threadid=77314
An embeded ogg java player
http://www.flumotion.net/cortado/
Good Howto for streaming Theora to Icecast2
http://www.oddsock.org/guides/video.php
XVID
Open Source codec mostly used for ripping and playing DVDs. http://www.xvid.org/
Dirac
Upcoming free video codec developed by the BBC
http://dirac.sourceforge.net/
MP3 Patents
Good detailed information on MPEG related patents
http://swpat.ffii.org/patents/effects/mpeg/index.en.html
Licencing Content
Creative Commons
Alternative content licencing models.
http://creativecommons.org/
Licencing Software
Free Software Foundation
http://www.fsf.org/
What is FLOSS?
http://en.wikibooks.org/wiki/FLOSS_Concept_Booklet
PD Streaming Externals
A complete list:
http://pd.iem.at/pdb/query.html?ext=y&alb=y&qry=complete
MuSE.Peer2Peer Streaming
If you want a peer2peer Ogg streamer (ogglive~) for Windows and Mac OSX versions of PD then go here:
http://www.nullmedium.de/dev/ogglive~/
Speex, MP3, MuSE.P2P
Speex Codex external (Speex~) for Linux and MP3 streaming externals (Mp3cast~) for Windows and Linux (includes a MP3 peer2peer external - mp3live~ ) versions of PD available here:
http://ydegoyon.free.fr/software.html
OGG
If you want Ogg streaming for PD then you can get the pdogg~ externals in an installed version of pd-extended or by installing the pd-externals package, both are available from here:
http://pure-data.sourceforge.net/download.php
MAX/MSP Streaming Externals
MP3
Shoutcast external for streaming MP3 from MAX/MSP:
http://www.akustische-kunst.org/maxmsp/
OGG
If you want Ogg streaming for MAX then check here:
http://www.nullmedium.de/dev/oggpro/
Transcoding and Ripping
Mencoder
A good guide to transcoding using Linux and Mencoder
http://gentoo-wiki.com/HOWTO_Mencoder_Introduction_Guide
Ripping Guides
A good DVD ripping guide for Linux
http://www.bunkus.org/dvdripping4linux/ a good how to for creating MP3s (for the slightly geeky)
http://howtos.linux.com/howtos/MP3-HOWTO-10.shtml
Video Editors (GPL)
Jahshaka
The best I've seen for Linux
http://www.jahshaka.org/
There is also a very good beginners tutorial for Jahshaka here:
http://users.pandora.be/acp/jah/
Pitivi
Under Development
http://www.pitivi.org/
Cinelerra
Good but you need lots of screen space
http://heroinewarrior.com/cinelerra.php3
Cinelerra Tutorials
http://www.ftconsult.com/twiki/bin/view/Cinelerra/CinelerraManualTOC http://supreetsethi.net/drupal/?q=node/20
Kino
Great editor
http://www.kinodv.org/
General
Some good notes on editing video on Linux
http://users.dslextreme.com/~craig.lawson/linux_notes/video.html The same site has a great section on CD and DVD authoring under Linux
http://users.dslextreme.com/~craig.lawson/linux_notes/cds.html
Miscellaneous
History of MP3
A brief overview of the most popular audio format on the net.
http://www.mp3-mac.com/Pages/History_of_MP3.html
Low Tech
Great spot to learn more about software and hardware if you are in the UK. http://lowtech.org
Your Machines
Cultural event and ongoing research/writings about free software.
http://www.yourmachines.org/
MuSE.OggPlay
Play Ogg on your mobile phone
http://symbianoggplay.sourceforge.net/
Googles beta video search
Using the VLC plugin for replay of content....
http://video.google.com/
swf.open4all
Experiment with collecting and transcoding (to flash) most commonly linked video content
http://swf.open4all.info/
Workshops
The Streaming Suitcase does various workshops including streaming, PureData, open source audio, linux etc. Workshops and resources by these people are also highly recommended:
Julian Oliver
Blender and gaming workshops (etc)
http://selectparks.net/
http://selectparks.net/~julian
http://selectparks.net/modules.php?name=News&file=article&sid=395
Derek Holzer
MuSE.PureData and open source audio workshops (etc)
http://www.umatic.nl/info_derek.html
Tetsuo Kogawa
MuSE.MiniFM
http://anarchy.translocal.jp/MiniTV
http://www.silenttv.net
Installing from Source (Linux)
Software name : VLC
Homepage : http://www.videolan.org/vlc/
Software version used for this installation : 0.84
Operating System use for this installation : Debian (this process will work on any version of Linux)
Recommended Hardware : 300MHz processor
Downloading
First, get the sources. To do this you should visit the VideoLan website (http://www.videolan.org) and download the sources from the website. At the time of writing the URL for downloading VLC source is this:
http://www.videolan.org/vlc/download-sources.html
Make sure you download the sources to somewhere you can access using a terminal ('shell'). If you do not know how to use a terminal then please also read up on this otherwise the following is going to be very difficult to follow. If you know how to use the terminal then copy the sources to the directory you are currently in or change your current working directory to the directory where the sources are.
The sources, once downloaded, will need to be 'unpacked'. This means that they source code has been compressed and needs to be uncompressed. Most Linux applications have their source code compressed in the tar and gzip formats. You can recognise this type of compression if the file you downloaded ends with the suffix:
.tar.gz
In this case the source code I have downloaded is named vlc-0.8.4a.tar.gz
Before I start the installation I need to check the sources are in the same working directory as my terminal. To do this I type ls and I shoudl see something like this in my termial:
The above is just an example. The information will vary in your window, but it is critical that you see the sources you downloaded in the list of files.
Now we will decompress the files. To do this we need to use the tar application. If your version of Linux doesn't have this then you will need to first download and install it. The best way to find out if it is installed is just to type tar and press return. You should see somehting like this:
The above message is actually an error message, but if you see it ignore the message as we only executed the command to check if tar was installed. If tar is installed then type the following:
tar -zxvf vlc-0.8.4a.tar.gz
Make sure you replace vlc-0.8.4a.tar.gz with the name of your sources file. If all is well you will see a lot of information shoot through the terminal which is simply a list of all the uncompressed files. These files are the source code and you will now need to transform the source code into the VLC program. This process is called compiling. However before you compile VLC from the source code you need to configure VLC. This might seem strange, software should be configured after it has been installed right? Well, yes, but also in Linux you can enable or disable many options to be included into the program when you compile it. This process actually changes the software so that it includes or excludes different functional components. This process is also called configuring.
Configure
The way you install software on Linux is dependanton the type of Linux you may have. There are many types of Linux and each has its own way of installing software using what is known as a Package Manager. A Package Manager is a system dedicated to downloading and installing software on your computer, usually in an semi-automatic way.
This can be really good if you don't care about the way a software is configured. However in Linux you can change the configuration of a software dramatically in the install process. It is possible, for example, to enable and disable many options in VLC when you prepare the software for installation. Generally speaking, automatic install processes don't always give you so much control over the install options. Notably the Gentoo version of Linux gives you a lot of control. However with Debian, Ubuntu and Redhat you will have a default install with default options turned on and off. Most of the time this will probably be ok. However if you need a 'special' function enabled in a software it is often only available if you enable it during installation, otherwise the functionality you require just simply won't exist.
VLC has a lot of options you can include or exclude when you go through the pre-compiling configure process. The configure process is triggered by the configure command. However this command can also give you feedback so you know what the options are before you actually configure the application. To check the configure options of (almost) any source type the following from within the uncompressed source directory:
./configure --help
This will give you an enormous amount of information in the terminal. Probably the information will flow by faster than you can read it and you will be left with the tail of the data. To control this better, try the following command :
./configure --help | less
This command is actually two commands combined. The less command allows you to control the information flowing past on the screen by the use of the page up and page down buttons on your keyboard. The character in between the two commands is called the pipe and it allows commands to be combined. It might be that you do not have less installed which means that the above is quite useless to you. In this case you can try the following:
./configure --help | more
The more command displays a page of text and then waits for you to press the space bar before showing you the next page. If you don't have any luck with the above two suggestions it might be that you don't have either installed, in which case it is a good idea to install them.
The options displayed, should look (it total) something like this:
Optional Features:
  --disable-FEATURE       do not include FEATURE (same as --enable-FEATURE=no)
  --enable-FEATURE[=ARG]  include FEATURE [ARG=yes]
  --enable-maintainer-mode  enable make rules and dependencies not useful
                          (and sometimes confusing) to the casual installer
  --disable-dependency-tracking  speeds up one-time build
  --enable-dependency-tracking   do not reject slow dependency extractors
  --disable-rpath         do not hardcode runtime library paths
  --disable-nls           do not use Native Language Support
  --enable-pth            GNU Pth support (default disabled)
  --enable-st             State Threads (default disabled)
  --enable-hal            Linux HAL services discovery (default enabled)
  --enable-gprof          gprof profiling (default disabled)
  --enable-cprof          cprof profiling (default disabled)
  --enable-mostly-builtin most modules will be built-in (default disabled)
  --enable-optimize-memory      optimize memory usage over performance
  --disable-optimizations disable compiler optimizations (default enabled)
  --disable-altivec       disable AltiVec optimizations (default enabled on PPC)
  --enable-debug          debug mode (default disabled)
  --enable-release        activate extra optimizations (default disabled)
  --enable-sout           Stream output modules (default enabled)
  --enable-shout          libshout output plugin (default disabled)
  --enable-httpd          HTTP daemon (default enabled)
  --enable-vlm            VideoLAN manager (default enabled)
  --enable-gnutls         gnutls TLS/SSL support (default enabled)
  --enable-livedotcom     live.com RTSP input plugin (default disabled)
  --enable-dvdread        dvdread input module (default disabled)
  --enable-dvdnav         dvdnav input module (default enabled)
  --enable-dshow          Win32 DirectShow support (default enabled on Win32)
  --enable-smb            smb input module (default enabled)
  --enable-dvbpsi         dvbpsi ts mux and demux module (default enabled)
  --enable-v4l            Video4Linux input support (default disabled)
  --enable-pvr            PVR cards access module (default disabled)
  --enable-gnomevfs      GnomeVFS access module (default enabled)
  --enable-libcdio        CD input and control library support (default enabled)
  --enable-cddax          audio CD plugin with CD Text and CD paranoia via libcd
  --enable-libcddb        CDDB support for libcdio audio CD (default enabled)
  --enable-vcdx           VCD with navigation via libvcdinfo (default disabled)
  --enable-cdda           audio CD via built-in VCD (default enabled)
  --enable-vcd            built-in VCD (default enabled)
  --enable-dvb            DVB-S/T/C card support (default disabled)
  --enable-screen         Screen capture support (default enabled)
  --enable-ogg            Ogg demux support (default enabled)
  --enable-mkv            Matroska demux support (default enabled)
  --enable-mod            Mod demux support (default enabled)
  --enable-mpc            Mpc demux support (default enabled)
  --enable-mad            libmad module (default enabled)
  --enable-ffmpeg         ffmpeg codec (default enabled)
  --enable-ffmpegaltivec  ffmpegaltivec codec (DO NOT USE)
  --enable-faad           faad codec (default disabled)
  --enable-twolame        twolame codec (default disabled)
  --enable-quicktime      QuickTime module (default enabled on MacOS X)
  --enable-real           Real audio module (default disabled)
  --enable-realrtsp       Real RTSP module (default disabled)
  --enable-a52            A/52 support with liba52 (default enabled)
--enable-dts            DTS Coherent Acoustics support with libdts (default enabled)
  --enable-flac           flac decoder support (default disabled)
  --enable-libmpeg2       libmpeg2 decoder support (default enabled)
  --enable-vorbis         Vorbis decoder support (default enabled)
  --enable-tremor         Tremor decoder support (default disabled)
  --enable-speex          Speex decoder support (default enabled)
  --enable-tarkin         experimental tarkin codec (default disabled)
  --enable-theora         experimental theora codec (default disabled)
  --enable-dirac          experimental dirac codec (default disabled)
  --enable-png            PNG support (default enabled)
  --enable-x264           H264 encoding support with libx264 (default enabled)
  --enable-cmml           CMML support (default enabled)
  --enable-x11            X11 support (default enabled)
  --enable-xvideo         XVideo support (default enabled)
  --enable-glx            X11 OpenGL (GLX) support (default enabled)
  --enable-opengl         OpenGL support (default enabled)
  --enable-sdl            SDL support (default enabled)
  --enable-freetype       freetype support (default enabled)
  --enable-fribidi        fribidi support (default enabled)
  --enable-libxml2        libxml2 support (default enabled)
  --enable-svg            SVG support (default disabled)
  --enable-qte            QT Embedded support (default disabled)
  --enable-hd1000v        HD1000 Video Output module (default enabled on HD1000)
  --enable-directx        Win32 DirectX support (default enabled on Win32)
  --enable-fb             Linux framebuffer support (default enabled on Linux)
  --enable-mga            Linux kernel Matrox support (default disabled)
  --enable-svgalib        SVGAlib support (default disabled)
  --enable-ggi            GGI support (default disabled)
  --enable-glide          Glide (3dfx) support (default disabled)
  --enable-aa             aalib output (default disabled)
  --enable-caca           libcaca output (default disabled)
  --enable-wingdi         Win32 GDI module (default enabled on Win32)
  --enable-oss            Linux OSS /dev/dsp support (enabled on Linux)
  --enable-esd            Esound library support (default disabled)
  --enable-portaudio      Portaudio library support (default disabled)
  --enable-arts           aRts sound server (default disabled)
  --enable-alsa           ALSA sound support for Linux (default enabled)
  --enable-waveout        Win32 waveOut module (default enabled on Win32)
  --enable-macosx-audio   Mac OS X audio module (default enabled on MacOS X)
  --enable-hd1000a        HD1000 audio module (default enabled on HD1000)
  --enable-cyberlink      CyberLink for C++ UPnP stack (default disabled)
  --enable-skins2         Skins2 interface module (experimental)
  --enable-pda            PDA interface needs Gtk2 support (default disabled)
  --enable-wxwidgets      wxWidgets support (default enabled)
  --enable-opie           Qt embedded interface support (default disabled)
  --enable-macosx         MacOS X support (default enabled on MacOS X)
  --enable-qnx            QNX RTOS support (default enabled on QNX RTOS)
  --enable-ncurses        ncurses interface support (default disabled)
  --enable-xosd           xosd interface support (default disabled)
  --enable-visual         visualisation plugin (default enabled)
  --enable-galaktos       OpenGL visualisation plugin (default disabled)
  --enable-goom           goom visualisation plugin (default disabled)
  --enable-slp            SLP service discovery support (default disabled)
  --enable-daap           DAAP shares services discovery support (default enabled)
  --enable-bonjour        Bonjour services discovery (default enabled)
  --enable-lirc           lirc support (default disabled)
  --enable-joystick       joystick control (default enabled)
  --enable-corba          corba interface support (default disabled)
  --enable-loader         build DLL loader for ELF i386 platforms (default disabled)
  --enable-activex        build a vlc-based ActiveX control (default enabled on Win32)
  --enable-mozilla        build a vlc-based Mozilla plugin (default disabled)
  --enable-testsuite      build test modules (default disabled)
  --disable-plugins       make all plugins built-in (default plugins enabled)
  --enable-shared-libvlc  shared libvlc (default disabled EXPERIMENTAL)
These options are very many and very confusing. You will see that many are enabled by default. The main ones to know about are:
--enable-theora experimental theora codec (default disabled)
--enable-ncurses ncurses interface support (default disabled)
--enable-mozilla build a vlc-based Mozilla plugin (default disabled
--enable-v4l Video4Linux input support (default disabled)
--enable-shout libshout output plugin (default disabled)
The process of installing from source can be a little experimental. You may find that certain libraries are required that you don't have installed on your computer. For example, the following command will disable ffmpeg, libmpeg2, and skins2.
./configure --disable-ffmpeg --disable-libmpeg2 --disable-skins2
The above command should then return alot of information in the terminal and finish with some lines looking like this:
Make
If all is ok then you will need to run the make command and make install. You can do this on one command line in conjunction with the sudo command. sudo gives you the permissions to install software. If you don't have the rights to do this (you get an error or message when using sudo) then you will need to contact your system adminsitrator. If you the system administrator and don't know how to do this then you may need to read up on how to set up sudo or su commands. The following command will compile and install your newly configured VLC:
sudo make;makeinstall;
If, however when you get some errors when installing
VLC it is probably due to missing libraries. For example, if the
./configure command gives an error like this:
configure: error: Missing header file ffmpeg/avcodec.h
This means that a header file is missing. Usually this means you need to install the header files, each version of Linux deals with these seperately and you will need to search online to find the right solution. The best method I have found is to copy the error message into a web search and see what postings exist online which discuss the same error.
Installing VLC on OS X
Software name: VLC media player
Homepage: http://www.videolan.org/vlc
Software version used for this installation: 0.8.5
Operating System use for this installation: OS X (10.3)
Recommended Hardware: G3 minimum
Downloading VLC
The latest stable version of VLC for OS X can be downloaded from http://www.videolan.org/vlc/download-macosx.html. The latest version at the time of writing this document is VLC 0.8.6e.
The download page for VLC for OS X lists many locations around the world where the software can be downloaded. The idea is that the downloads can be faster and more efficient if you choose a location near to you. There is a separate list for PowerPC? and the newer Intel based Macs so you will need to choose a download from the correct list for the type of computer that you are installing on. (If you are not sure which type of processor your Mac has, you can go to the Apple menu at the top of the screen and select "About this Mac")
Click on the download link of the location nearest you to begin downloading.
Depending on your web browser and its settings you may see the following window at the start of the download:
Simply select "Save to Disk" and then click "OK" to proceed with the download.
Once the download is complete you should see something like this in your downloads folder or in the folder that your web browser is set to download into:
Double click on it to begin installing the software.
You should now see a "finder window" with a disk image? named "vlc-0.8.5" (the name of the disk image may be different if you are installing a different version than shown here) open:
All you need to do now to complete the installation is copy the disk image into your "Applications" folder. To do this click on the disk image to select it then press the Command (⌘) and C keys together to copy it. Now select your "Applications" folder and press the Command (⌘) and V keys together. This will create a VLC folder containing all of the contents of the disk image in your "Applications" folder.
The installation is now complete so you can eject the disk (by clicking the eject icon or dragging it to the trash) and start using VLC.
To open VLC double click on the following icon in the VLC folder:
You should be able to see the VLC - controller interface which looks like this:
That's it! You now have VLC up and running.
Using VLC to play Streams
Software name: VLC
Software version: 0.8.6
VLC can play just about every format out there. Notably, it is one of the few players across platforms that plays back Ogg streams. Ogg is a free software video format.
Streaming is a way of broadcasting audio and video online, a bit like an online TV or radio. To play streams, follow these quick steps:
With VLC installed, launch the application. You should have something that looks like this on all platforms:
Next, select the Open Network Stream from the File menu:
Now you should see a window that looks something like this:
Let's assume you are going to open an Ogg Theora live stream with an address like:
http://24.72.34.35:8000/theora.ogg
If this is the case, then you need to enter this information (the stream location) into the interface.
First, select the HTTP/HTTPS/FTP/MMS checkbox:
Then enter the stream address into the Open field:
Finally, press OK, and the stream should begin playback.
Playing Audio and Video
Software name : VLC
Software version : 1.0.3
VLC supports a wide range of audio and video file formats including: MP3, WAV, AAC, MPEG, WMV, H.264, and Real Video, making it one of the most versatile media players available. VLC can also play CDs, DVDs, and even network streams with ease.
This chapter focuses on two common tasks: playing audio and video files, and playing discs.
Let's take a look at the user interface in Windows 7:
VLC includes most standard playback options and more. For instance, VLC has the ability to slow or speed up playing using the Slower and Faster buttons. You can add a directory or individual files into the Playlist with various playing options using the Playlist menu. You can even adjust audio and video settings, such as using the graphic equalizer to filter music, or changing the brightness and contrast levels of video in the Adjustments and Effects menu.
Playing audio and video files
The easiest way to open audio and video files is the method of drag-and-drop directly into VLC.
In this example, we're opening a sample video of "Flowers." Both the video file and the icon to launch VLC are on the desktop. This particular video is a .MOV file type, which is supported by VLC.
To drag-and-drop a file into VLC:
1. Hover the mouse pointer over the file.
2. Click and hold the left mouse button.
3. Still holding the left mouse button, move the pointer to the VLC icon and release the left mouse button.
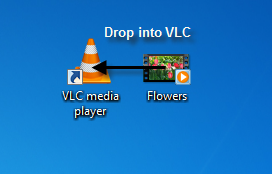
The file begins playback.
Another method of opening an audio or video file is through the menu.
To open an audio or video file using the menu:
1. On the menu, click Media > Open File….
2. Browse to the directory of your desired file.
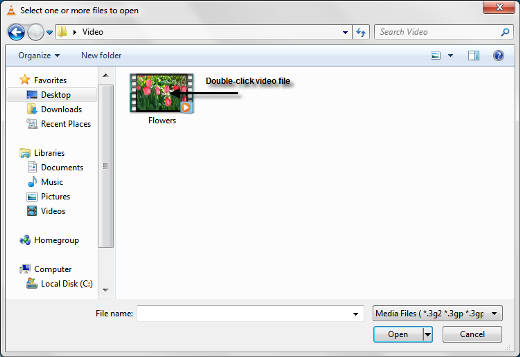
3. Double-click the file.
The file begins playback.
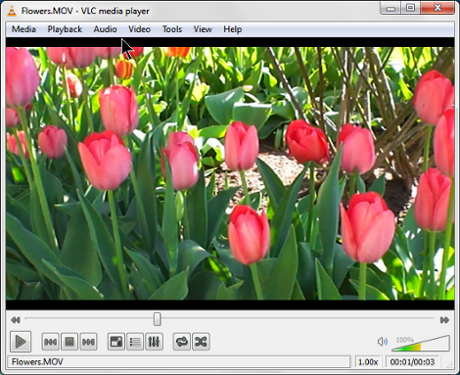
Similarly, a folder of multiple files can be opened for playback, such as a music album.
To open a folder:
1. On the menu, click Media > Open Folder….

2. Browse to the directory of your desired folder.
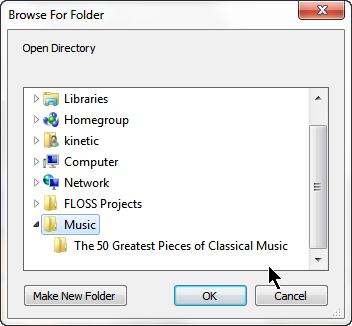
3. Click on the folder, and then click OK.
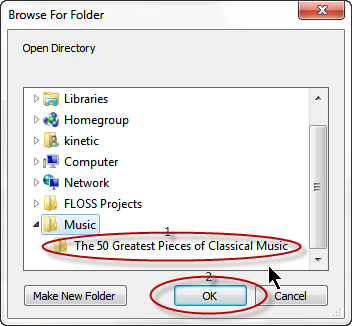
The folder begins playback.
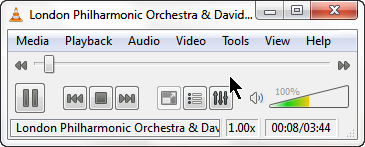
Playing a CD or DVD with VLC is nearly the same process. While drag-and-drop can be used, the easiest method is using the menu.
Before you begin, make sure your computer is capable of playing your specific disc. For example, playing a DVD requires at minimum a DVD-ROM drive installed on your computer.
To play a CD or DVD:
1. With a disc inserted into the drive, click Media > Open Disc….
The Disc tab is now selected from the Open Media window.

2. Select your disc type from the Disc Selection menu.
3. In the Disc device box, make sure the correct drive is selected (the drive reading the disc). By default, VLC selects the most common location, but you may need to browse and select it.
4. Click the Play button.
The CD or DVD opens and begins playback.
Playing a VIDEO_TS file
Software name : VLC
Software version : 0.8.6
This is especially useful if you are testing DVD's that you have created, or if you save your DVD's on your harddrive for safekeeping or if you need the subtitle options that are given you to you by the DVD format and menus.
The process is slightly different for Mac and Window / Linux.
Mac
Select Open > Disk from the top menu
Then click in the VIDEO_TS entry and browse for that DVD data specifically the VIDEO_TS directory.
Windows / Linux
Select File > Open Directory and browse for the VIDEO_TS folder of the DVD you want to play.
Using VLC to RIP a CD
Software name : VLC
Software version : 0.8.6
VLC can copy audio tracks from a CD into other audio file types through a process called 'ripping'. For example, a CD audio track can be ripped to your hard drive as an MP3 file. VLC has several output file types to select from depending on your desired quality or file size. The only downside is that VLC cannot handle an entire CD at once, files must be converted one at a time.
To begin, you will need to have a CD to 'rip' and know which particular track you want to copy. Next, insert the CD into your computer's CD drive.
Using the Wizard
We will use the VLC Wizard to rip the track from the CD.
To open the wizard, select File > Wizard.
This opens the following window:
We want to Transcode the file. Transcoding is a fancy name for converting the file from one type to another. In this example, we are converting the CD audio to Ogg Vorbis (you could also choose MP3 or another type of audio file). Make sure Transcode is selected:
Then press Next, and the following window appears:
Here is where we select the CD and the particular track for ripping.
Press the Choose button, and this window appears:
Here you can select from any number of sources to copy. We are going to choose a disc (CD) so we choose Disc. You could also copy DVDs following a similar process, but for now we will just look at audio. When you click on the Disc tab, the following options appear:
Select Audio CD:
Now select which track number to rip. In this example, we are using the first track, so press the up arrow and change it from '0' to '1':
Press OK, and you return to the same screen of the Wizard. Press OK again, and we move forward to the next screen:
Here is where we select your desired file format to convert the audio to. We don't need to worry about video options.
Check the Transcode audio box:
Options in the audio box are now highlighted, which means you can change them. We want to convert the CD audio to a OGG Vorbis audio file, so we select Vorbis from the drop down menu :
Leave the bitrate option as is and then press Next:
We have no choices here so press Next.
The above window asks us to choose where on our computer we wish to save the file. Press Choose and the Save to file window appears:
Browse to the directory you wish to save the new audio file, and then enter the name of the file in the Name box. We must also include the correct file extension in the name. We will call the file 'myfile' and the extension for OGG Vorbis files is '.ogg' (MP3 files use '.mp3'), so the complete name is 'myfile.ogg' :
When you have chosen your desired directory and given your file a name, press Save.
Icecast Streaming (a/v)
Software name : VLC
Software version : 0.8.6
To stream audio or video to Icecast using VLC you need to first ensure you have the right module installed. If you are using Linux you will need to download the latest source code and install VLC with the shout module. To install this module in Linux you will need to configure VLC with the --enable--shout parameter.
Linux :: Check Shout Module is Installed
If you are using Linux you will need to double check the shout module is installed before you progress. To do this type the following into a terminal:
vlc -l | grep shout
If all is well you will see something like the following in the terminal window:
VLC media player 0.8.5 Janus
  access_output_shout   IceCAST output
  playlist              New winamp 5.2 shoutcast import
  shout                 Shoutcast radio listings
The important part of the above output is the access_output_shout IceCAST output. This means you have the right module available for streaming to an Icecast Server. If you don't have this module you are going to have to read up on how to install it. Note : It might be that the Shout libraries store the shout.h file in the wrong place, this is a bug in the latest versions of Shout. To work around this, you may need to re-compile VLC but before doing so edit the file shout.c file in the VLC sources. This file is located here:
modules/access_output
you will need to edit this line:
#include <shout/shout.h>
to this:
#include <shout.h>
Windows :: Check Shout Module is Installed
To check if the Shout Module is installed on Microsoft Windows you will need to open the Preferences window from the Settings menu:
The preferences interface will open:
Now click on the tiny "+" next to Stream Output :
You will get a drop down menu:
Click on the "+" next to Access output and with luck you will see something like this:
Notably, there will be an item labled Shoutcast. If you don't see this then the Shoutcast module is not installed. If it is not installed then try downloading the latest installer and install VLC again. If you do see it then you should be able to stream to Icecast. Clicking on the Shoutcast icon should show you something like this:
Streaming Server Requirements
We will look at streaming archived files to an Icecast Server. To do this you need access to an Icecast Server or someone needs to create you an account and give you the access details. You need to know the following details about the Icecast Server :
- Hostname or IP Number of the Icecast Server
- Port (default is 8000)
- Password
- Username (this may not be necessary depending on how Icecast is configured)
- Mountpoint (this may not be necessary depending on how Icecast is configured)
Choosing Audio File to Stream
You can stream audio or video with VLC to Icecast. However this has variable results depending on what operating system you are using. For now we will look at streaming an audio file. The first thing you need to do of course is open VLC. Now from the File menu choose Open File
This will open a file browser so you can browse (click the Browse button) through your harddisk and choose an audio file to stream.
For the purpose of this excercise choose an MP3 audo file, and then press the Open button at the bottom right. When you have done this there should be the title and location of your chosen file displayed in the interface:
Stream Settings
Now click on the Stream/Save check box:
This should then make the Settings... button clickable:
Now click the Settings... button and you should see somehting like this:
This is the configuration window for your stream. It might look complicated, and truth be told, it is! However we can go through this process quickly to configure and outgoing audio stream to an Icecast Server. The way that VLC works with outgoing streams is by creating what the good people at Videolan call an output chain. An output chain is a rather complicated way of refering to the the process of configuring VLC so that it streams. Unfortunately VLC doesn't (yet) incorporate a handy GUI (Graphical User Interface) for doing this. GUIs are much easier if you aren't used to configuring software using command line interfaces (CLI). We can get some of the way to configuring our stream settings through the interface but the rest will have to be typed into the Stream Output MRL at the top of the above dialog.
First of all, click on the HTTP check box in the Outputs section of the window:
When checked you will see two things happen, firstly the information to the right of the check box will allow you to input data:
The other thing you will see is that the Stream output MRL box will display some information:
The above information is what we need to tweak to make VLC stream and to do this you will need to alter the information in this text box using the Icecast Server details you should have.
Entering Server Information
In the above example the following information is shown in the Stream output MRL:
:sout=#duplicate{dst=std{access=http,mux=ts,dst=:1234}}
We need to alter this information to refect the details you have of your streaming server (Icecast). You shoudl have the following details:
- Hostname or IP Number of the Icecast Server
- Port (default is 8000)
- Password
- Username (this may not be necessary depending on how Icecast is configured)
- Mountpoint (this may not be necessary depending on how Icecast is configured)
These need to be incorporated in the Stream output MRL box as follows:
:sout=#duplicate{dst=std{access=shout,mux=ogg,dst=username:pass@hostname:port/mountpoint}}
Notice that the two following chains were also important:
access=shout
mux=ogg
For example, lets say I had the following details:
- Hostname : icey.me.net
- Port : 8000
- Password : floss
- Username : streamer
- Mountpoint : live
Then the Stream output MRL would read as follows:
:sout=#duplicate{dst=std{access=shout,mux=ogg,dst=streamer:floss@icy.me.net:8000/live}}
There are a couple of things to note here. First, with Icecast you don't always need a username to stream. If you are in this situation then use "source" in the text above where the password should be. For example, the text in the Stream output MRL would be something like:
:sout=#duplicate{dst=std{access=shout,mux=ogg,dst=source:floss@icy.me.net:8000/live}}
Also, if you haven't been given a mountpoint you can usually make one up but don't use any special characters in the text, and if you haven't been given a port then try the default 8000.
Start Streaming
All that is left to do is to press the OK button at the bottom of the window, you will be returned to the previous window:
Now you are almost ready to stream. Press OK again, and you should start streaming. VLC provides minimal feedback to let you know how things are going, but if all is ok, you should check your streaming server status page, or try and connect to your stream.
Streaming Video with VLC
The same process will work for streaming video to Icecast. However, at the time of writing the Linux version of VLC (8.5) does not seem to support this. However you can try it with the Microsoft Windows version. Just follow the same steps as above, except that you will choose a video file instad of an audio file. The out going live stream will be Ogg Theora and can be played in many players includign VLC, MPlayer, and even the latest RealPlayer.
Streaming with the Wizard
Software name : VLC
Software version : 0.8.6
VLC makes the process of streaming quite easy by supplying a wizard. This particular method means that VLC itself is the streaming encoder and server. Hence you can encode and deliver the content from one machine. This can be very useful for streaming within a Local Area Network (LAN), however it is not very effective for streaming on the internet unless you have a Dedicated IP. This is because other machines will not be able to 'find' your stream from outside the local network unless your computer has a Dedicated IP Number.
Streaming with VLC in this way however does allow for interesting options for streaming material from cameras, pre-recorded files, or even DVDs. You can also relay other live streams and converting them to another format as you do it.
Opening the Wizard
First thing you need to do is open the wizard from the VLC interface:
This will open the Wizard interface. If all is well it should appear and look somehting like this:
You will now need to choose the Stream to netowrk option:
Now press Next >
Choose Input
If all is well the following dialog will have appeared:
Now click on Choose and you will see a dialog that will show you options for choosing the input.
You can choose many options for stream inputs. In the following we will choose a file from our harddisk to stream. To choose a file you will need to first press Browse. A file browser will appear and you can use this to browse your harddisk and choose the file you wish to stream. In the following example the file we will use is called gaialive050318_tennis-live.mov.ogg
The location of this example file is displayed in the wizard when I have chosen it:
Note : it is a good idea to have first played the media you wish to stream to make sure VLC can actually play it.
Now press OK and proceed with configuring your stream.
Now press Next >
Choose Streaming Method
We will choose http as the streaming method. This means that the VLC application will act as a server as well as a media player. Other players can then connect to your computer and also watch the stream.
Now you need to just press Next >
Encapsulate Method
Now you need to choose what type of stream (format) you will send. The choices presented to you in this window will be formed from the modules you have installed so they may appear different from the following:
I am going to choose OGG as the encapsulation method, this means my video for the stream will be OGG THEORA and the audio will be OGG VORBIS. The encapsulation method (stream format) does not have to be the same as the file that you have loaded to stream. So, I choose OGG with the select button:
Additional Options
There is nothing you need to worry about on this screen. Just hit Finish and you will start streaming.
Checking the Stream is Working
If all is well VLC will give you some feedback to say it is streaming. You won't actually be able to see the content played back as it is streamed unless you do it through another player. However VLC itself should look somehting like this if all is well:
You can there is a timeline at the bottom of the player which should be moving, and there will be feedback in the bottom 'status' bar of the player saying Streaming/Transcoding. If you see neither of these then all is not well. To get more feedback choose the Messages dialog from the View menu:
Now you should see a window with better feedback:
You can use this infomration to help trouble shoot. I recommend first using a search engine to copy and paste the error message (error messages will be highlighted in red in the message window). If you can't find anything through a search engine then try the VLC forums ( http://forum.videolan.org/ ). You can also try the irc (chat) room where a lot of the developers hang out. If you know how to use irc they can be located at :
- IRC network:
irc.freenode.net
- Channel:
#videolan
If you done know how to use irc then try this web based version:
http://krishna.videolan.org/cgi-bin/irc/irc.cgi
Playing your Streams
If you have followed everything above and you seem to be streaming now is the time to try and playback the material. You can do this with a player the supports the Encapsulation Format that you chose. In the above example OGG was the chosen format, so I will need to play back the content in a player that supports OGG Theora and OGG Vorbis. I also need to know the location (URL) of my stream. The URL will be in the format:
http://yourip:8080/
Where yourip is the IP Number of your computer. If you don't know this then you need to find it out by reading about how to read the network settings on your operating system. If you don't know your IP Number then you can possibly test your stream by opening a player on the same machine as the one you are using to send the stream and using this URL:
http://localhost:8080/
You need to use your favourite player, open it and enter the above in the Open Location (or other) field. If all is well the stream will play back.
The above image shows VLC streaming and the playback of the video in mplayer on the same machine.
Installing VLC on Ubuntu
Software name : VLC
Homepage : http://www.videolan.org/vlc/
Software version used for this installation : 0.86
Operating System use for this installation : Ubuntu 7.04
Recommended Hardware : 300MHz processor
If you are used to an Operating System like Windows or MacOSX you may have installed software by downloading it from a website and double clicking on the downloaded file, and clicking through all the licence agreements, configuration options etc. This is the 'old' way of installing software. The 'new' way is much smarter - you choose what you want to install from a list and press 'go'. The rest - finding the files, downloading the files, installing software, is taken care of by Ubuntu itself while you go and get a cup of tea or work on something else. It can't get much easier.
However, new ways take a little getting used to, and so we will first look at the basic tool needed to install software this way, and then how to use it to install VLC.
Synaptic Package Manager
The Synaptic Package Manager (SPM) is used for more than just installing software. It can also upgrade your entire operating system, and manage all software installed on your computer. However most people use SPM for just installing new software. Before you embark on this process there are a few concepts that you may wish to get familiar with. Its not crucial you understand them throughly, so just read the explanations and then let it soak in over time. The ideas behind SPM will become clearer with use.
What is a repository?
SPM can automate the installation of software on your computer because it has a direct connection to one or more online software repositories. These repositories are vast archives of softwares that have been pre-configured for installation on your operating system . When your computer is online SPM can connect to these archives, check what software is available for installation, and present you with a list of installable software. All you have to do is select the software from the list that you want. SPM then downloads the software from the repository and takes care of the installation process.
So SPM is actually a repository manager, it manages which repositories (there are many) you wish to access, and which softwares to download and install from those repositories.
SPM allows you to choose which repositories it accesses through its settings. The default repositories used by Ubuntu can be extended through the SPM settings so you can access a wider range of softwares. Ubuntu calls each repository by a simple name. They are : Main, Universe, Multiverse, Restricted. By default Ubuntu only uses the Main online repository. If you wish to access you the other repositories you must do this by changing repository settings of SPM.
What is a package?
When SPM downloads a software for installation it is in the form known as a 'package'. This means that it is a compressed archive of the software, pre-configured so that it will install nicely on your computer. If the package has been configured nicely, and Ubuntu spends a lot of time making sure this is the case, then many of the headaches that installing software can bring are taken away - its the panadol of software installation. One of the biggest issues with installing software on any form of Linux (Ubuntu is one of many types of Linux), are dependencies. Dependencies are all the other softwares required by a particular software. If, for example, I want to install a audio editor, that audio editor software may use some functionality of other softwares to do its job.
SPM takes the (often) dark art of dependencies away from you, and manages this itself. So if you wish to install a software and it has dependencies (and the list can be long), you don't have to work this out yourself, SPM knows already what is needed, finds it, and installs it along with the software you have chosen.
So, SPM, as well as managing which repositories you access, is also a package management software. Hence the name - Synaptic Package Manager.
apt
You don't really need to know about apt, so if you are on the verge of being confused then don't read this short section. If you are a geek wannabe then read on.
Ubuntu is a form of Linux that has derived from another form of Linux - Debian. This family of Linux has in common (amongst other things) the package/repository management system. Both Ubuntu and Debian use the apt system for managing packages. APT is actually an acronym short for Advanced Package Tool.
SPM is actually a 'front end' (graphical interface) for controlling apt. So SPM is the nice user interface that you see, but the real work is done by apt. There are other ways of managing apt also, such as the command line interface known as apt-get. In the world of Linux there are many varieties of Linux users and they have their own ways of doing things. In general its safe to say most Debian users use apt-get, and most Ubuntu users are happier using SPM.
Configuring Synaptic Package Manager for installing VLC
To install VLC on Ubuntu you will need to change the default repository settings of SPM as VLC is not contained in the default repository. To do this you will need to open the Synaptic Package Manager and you can do this via the System menu. If you haven't changed the default Desktop of Ubuntu then the System menu can be accessed at the top left of your screen:
If all is good you will be prompted for a password.
Here you must enter your password (the same one you use to log into the system). If you don't know the password then you have a problem and its probably caused by the fact that the computer you are using is not yours. In this case you have to find the computers owner and ask them for the password (which is usually not polite unless you know them well) or ask them to input the password while you look casually in the other direction.
Assuming the password entered is correct - you will now see the SPM open infront of you. It may be that you first see the following 'Quick Introduction' (this appears if you ahven't used SPM before).
Just click Close and move on. Lets look at the Synaptic Package Manager interface...
Lets not worry about the details of the interface for now. All we want to do is change the repository settings. To do this click on the Settings and choose Repositories
Now we get to where we can do some business. Make sure that Community-maintained Open Source software (universe) is checked :
Now close that window by pressing the big close button at the bottom right.
Next, you will see a warning telling you the repository has changed :
Click the Close button and move on to SPM so you can refresh the repositories as the warning suggests. To do this, do as the warning says - click on Reload :
You should then get some feedback saying the repositories are being updated and showing the progress.
Installing VLC with Synaptic Package Manager
Now the real business. Its pretty easy. Click on the nice big Search button:
The search window will open and now enter 'vlc' in the field:
Great. Now press Search at the bottom right of the above window. The search should not take very long and when it is complete you will get a long list of software that can be installed, scroll down the list until you see vlc :
If you highlight vlc (by clicking once on the name) you will see some information about vlc displayed :
Now you can read the information if you wish but there is nothing critical i there. Best thing to do is just to double-click on vlc. By doing this you are 'marking' (choosing) the software for installation. If you do so then an additional window appears:
Now click Mark:
You have now told Synaptic Package Manager that you want to install VLC and all the additionall softwares that it needs to function. If all is well then the package will be highlighted:
You will see that there are two packages highlighted here. Infact if you browse up and down the list you will see other packages highlighted to. These are the softwares that will be installed so that vlc has all the functionality it requires.
Now press the Apply button with the nice big tick next to it :
Next SPM informs you of how much space will be taken by the installation :
Now you can just click Apply at the bottom right of the screen and the installation will start. A progress bar will be shown:
When it is completed (downloading and installing) you will have this screen :
That means all is well. Pat yourself on the back and press Close. Synaptic Package Manager will then return to its original state. Close it :
Now you can open vlc...just browse to the Applications menu, choose Sound & Video, select VLC media player and release the mouse :
If all is well you will see vlc :
Congrats!
Playing Multilingual Video
Software name : VLC
Software version : 0.8.6
I assume you have VLC player installed and you have a file or DVD with subtitles which you want to display when you are playing the Video.
There are three ways you may want to use VLC to display subtitles.
1) From a DVD
2) From a Multilingual file (ie Matroska)
3) From a separate subtitle file which is distributed with the Video file.
Play subtitles on a DVD disk
To do this put the DVD disk into your DVD drive. Open up VLC player and select File > Open Disk.
Enter the DVD Drive letter. It may appear automatically. Mine is drive D:
Then click OK.
The menu page of your DVD should appear.
Click on the video you want to watch. Then when the video starts quickly right hand click the mouse on the Video image. Select the Subtitle track you wish to view.
The subtitles should then appear on screen.
Play subtitles in Matroska files
The process for this is exactly the same as above except when starting the process you select File > Open File
You then see this screen.
You should then click on the Browse button to select the video file you want to play. If this file is a matroska file with an *.mkv extension then you can click OK after browsing for the file as the file already has the subtitle infomation.
Then Select the subtitle language stream by right clicking the video screen and selecting Subtitle Track > and choose the language
Play Video files with external subtitles
Using VLC to play Video file with external subtitle files.
If you want to play an external subtitle file for example a srt file.
Select File > Open File
In the Open box click the Browse button and choose your video file.
Then put a tick in the box Use a subtitle file, and click Browse to locate your external subtitle file.
Then Select the subtitle language stream by right clicking the video screen and selecting Subtitle Track > and select the track of subtitles (for an external file like an srt file there will normally only be one track).
What is streaming?
Streaming Media is the term used to describe the
real-time delivery of audio and video over the internet. Streaming Media allows for
live transmission of audio or video over the internet, transforming the internet into a broadcasting medium. Content can also be archived in streaming
file formats? , allowing internet users to experience recordings of events after they happen.
Varieties of Streaming
There are three types of delivery of audio and video data over the internet: Download and Play, Progressive Download, and True Streaming.
Download and play
To experience Download and Play media you must first download the entire media file to your hard disk before you can play it. For this reason Download and Play media cannot be used for live broadcasts, however it is often a good way to deliver high quality media content over any bandwidth. A high quality movie, for example, can be downloaded over any internet connection. However because you cannot play the movie until you have downloaded the entire file, download time becomes a factor. To download a DVD movie (usually about 4.6 GB in size) over a dial-up modem (56kbps) it would take over 8 days! Most people would find this quite tedious!
Download and Play media is not streaming media (more on this later) but it is a lot more popular than streaming. File sharing networks are Download and Play mechanisms, and this is an extremely popular activity on the internet. As many countries make high bandwidth connections more accesible there is an increasing popularity of trading Download and Play movies on these networks.
Progressive download
This enables you to experience media as it downloads to your harddrive. Progressive Download is useful but is less efficient than True Streaming and cannot provide some functionality such as multiple bitrate encoding. However this method has an advantage over Download and Play as you do not have to wait for the file to finish downloading before you can start playing it. There are some constraints - for example, if the file does not download as fast as you are playing it, then you will find that playback will stop while you wait for more of the file to download. This can be annoying and it is often the reason why some choose True Streaming as a preferred method of delivery.
Quicktime (Apple's suite of streaming technologies) calls Progressive Download "Fast Start". This highlights one of the difficulties of learning streaming - in the effort to differentiate technologies, each technology provider has made up their own jargon. However throughout this manual I will stick to the more generic terminologies wherever possible.
True streaming
This enables the user to view or listen to the media as it is delivered over the internet in real-time. True Streaming is the only variety of streaming that allows for live broadcasting, and it also supports more advanced functionality than Progressive Download, enabling the user to control the media experience by pausing, skipping forward, or rewinding. Although different terms have been used to describe True Streaming, including webcasting, livecasting, web tv, or net.radio, the term that has prevailed is "streaming media" (more often it is just refered to as "streaming").
The difference between Progressive Download and True Streaming is not always obvious. If, for example, a user has a very fast connection to the internet then Progressive Download may appear to behave in exactly the same way as True Streaming.
Within Download and Play, Progressive Download, and True Streaming there are two distinct varieties : static file streaming and live streaming.
Static file streaming
The delivery of pre-recorded media files over the internet in real time. Typically when we refer to archives of online media we are discussing static file streaming. A large archive of video art encoded into streaming files is an example of a collection of static file streaming files. This content is also known as on-demand or archived content. This content can be delivered by Download and Play, Progressive Download, or True Streaming processes.
Live streaming
The delivery of live audio and/or video over the internet. This allows the user to experience an event as it occurs in realtime. There are many examples of this such as online radio or viewing live performances. Only True Streaming supports live streaming.
This manual will mainly deal with True Streaming of both live and archived content.
Encoding
To stream static files over the internet the files must be compressed and encoded into a 'streaming format'.
Ripping CDs into
MP3 is doing just this and is done using encoding softwares. In this process a CD audio recording is converted by the encoding software from a CD (Compact Disc) audio format into a 'streaming audio format' (MP3). This will involve compressing the data, which reduces its quality and file size, and converting the data into a 'streaming format' (for example MP3).
Compression
There are two forms of compression - lossy, and lossless compression.
When the encoding process compresses the source file so that it can be delivered over internet connections in real-time this process degrades the quality of the audio and video. The more a file is compressed, the lower bandwidth required to be able to play the file, but the more the quality is reduced. A compromise has to be achieved whereby the level of compression achieves an acceptable audio and video experience, while reducing the amount of data enough to enable delivery over the internet.
Live encoding is similar except that an audio or video (or both) input is encoded instead of a file. With this process the encoding software delivers the encoded data in a continuous stream to the streaming server.
Lossless compression
This is the process of compressing data information into a smaller size without removing data. To visualise this process imagine a paper bag with an object in it. When you remove the air in the bag by creating a vacuum the object in the bag is not affected even tough the total size of the bag is reduced
Lossy compression
Sometimes called 'Perceptual Encoding', this is the process of 'throwing away' data to reduce the file size. The compression algorithms used are complex and try to preserve the qualitative perceptual experience as much as possible while discarding as much data as necessary.
Lossy compression is a very fine art. The algorithms that enable this take into account how the brain precieves sounds and images and then discards information from the audio or video file while maintaining an aural and visual experience resembling the original source material. To do this the process follows Psychoacoustic and Psychovisual modelling principles.
Codecs
The algorithms used to compress and encode audio and video and create the file format are known as "codecs". The word is made from two common terms compress and decompress. The encoding software uses a codec to 'compress' the streaming content for delivery over the net, and the player softwares use a codec to 'decompress' the content for replay.
The codec is mathematical wizardry and is the heart and soul of streaming. It is on this ground that we have the various technology providers battling it out for dominance. Each codec has its own unique way of doing things depending on what the developer believes is best, and some come with their own minefield of licencing issues too.
Bitrate
Compression is the process of reducing the amount of data
Multiple bitrate encoding allows the server and player to negotiate the best quality (highest bandwidth) stream to be delivered from a single static file or live stream. Hence the player is delivered the best quality stream possible over the user's internet connection. Multiple bitrate? encoding produces only one encoded stream.
Choosing the bitrate(s) will require the consideration of several factors, including: The target audience's connectivity; The desirable frame size of the video (if including video); The amount of movement in the frame (if including video); The level of video contrast (if including video); The type of audio encoded (e.g. ambient noise/voice/stereo music);The amount of camera movement (if including video); The quality of the camera and camera lens (if including video).
Delivery
Streaming static ("archived") files can be achieved using a normal web server. This is often the cheapest way to deliver content on a small scale. This method cannot be used for live streaming and does not allow for the advanced features of True Streaming such as multiple bitrate encoding. This method will also enhance the likelihood for time-outs ('buffering') and cannot deliver the same amount of simultaneous player connections as True Streaming.
To enable live streaming and to gain full functionality and efficiency a streaming media server is required. This server is usually standard server hardware but with the necessary streaming server softwares installed. It is quite normal to install a streaming server on the same machine as an existing web server.
Streaming servers
Perhaps a good way to understand what a streaming server does is to imagine a radio station. A radio station comprises of three components - a studio, a transmitter, and the receivers that your audience has.
Above is a basic diagram showing how a transmitting radio station works. The radio studio is the source of the audio. In this space there are usually mixing desks, cd-players, minidisc players, turntables etc. Then from the studio an audio signal is sent to the transmitter. This can be sent from the studio to the transmitter by either a cable (sometimes called a "landline") or by a microwave link. Then the transmitter sends the audio via FM so that radio receivers (tuners) can pick it up and play it.
Radio works this way because it is trying to distribute the studio audio to as many people as possible. If you imagine the radio studio without the transmitter then the station would have have a fairly reduced audience! Essentially only people that could fit into the studio would be able to listen. So the transmitter works as a distributer, allowing more people to connect via their radio receivers and hence the potential audience is enlarged.
This is a close analogy to why streaming exists and how it works. If you were just playing audio on a computer in your room then the audience isn't going to be so big... so, we utilise streaming to distribute this audio to more people.
The analogy is obvious....the computer replaces the radio studio, the streaming server replaces the transmitter, and your listeners connect by computers to the server rather than with radio receivers to the broadcast signal. The analog can be taken quite a long way. Having a bigger radio transmitter is like having more bandwidth available at the streaming server - both allow more people to connect.
Installing VLC on MS Windows
Software name: VLC
Homepage: http://www.videolan.org/vlc/
Software version used for this installation: 0.85
Operating System use for this installation: Windows 2000
Recommended Hardware: 300MHz processor
Installing VLC on Microsoft Windows is a reasonably straight forward process. First you need to download the installer, at the time of writing the latest VLC version is 0.8.6e. You can download it here. When this is downloaded browse to where you have the installer, in this example the file was downloaded to the desktop:
Now double-click on this icon and a language selection box will appear:
Choose the appropriate language from the dropdown box and press OK. The following should appear (in this case, in English):
Press Next > and the licence box now appears. VLC is licenced under the GPL which means you can do with it what you want for free, but there are no warranties. For more information on this licence see: http://www.gnu.org/copyleft/gpl.html
If you do agree with this licence (I hope you do!) then press I Agree and you will see the Choosing Components Window.
You can just continue without changing the selections on this window. The options won't do anything drastic to your computer and it might be interesting to try some. For basic usage however, just leave the options as is and press Next >. You will now be presented with options on where you should install VLC on your computer:
You can click on the Browse button and look through your files and directories for a suitable place to install VLC but for most cases you want to keep this at the default settings and press Install. With luck the install process starts:
When the install has finished you will see the following screen:
Press Finish and hopefully you see the player: