Add Another Sound File
Software name : Audacity
Software version : 1.2
Audacity enables you to mix multiple sounds together. You will need Audacity open and an audio file already loaded, and then you can add as many new files as you like.
Adding your new track
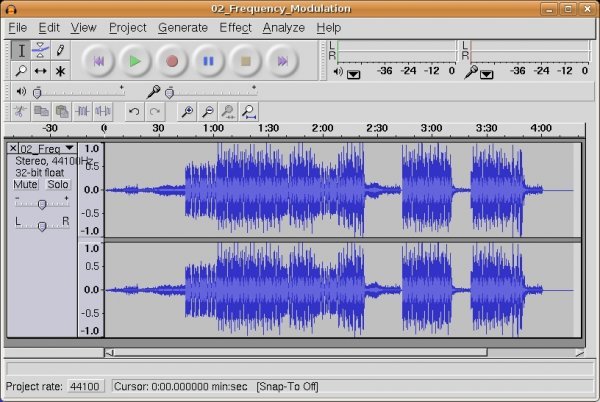
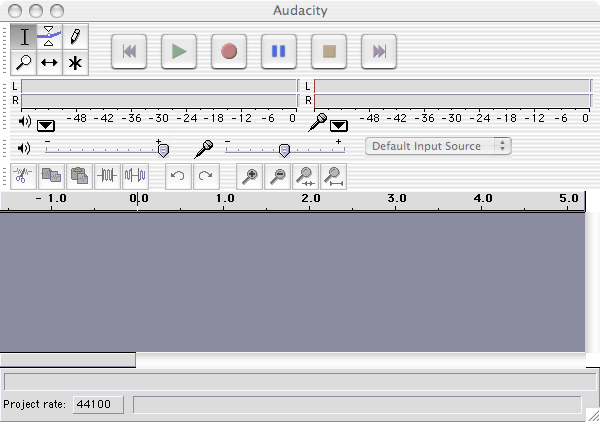
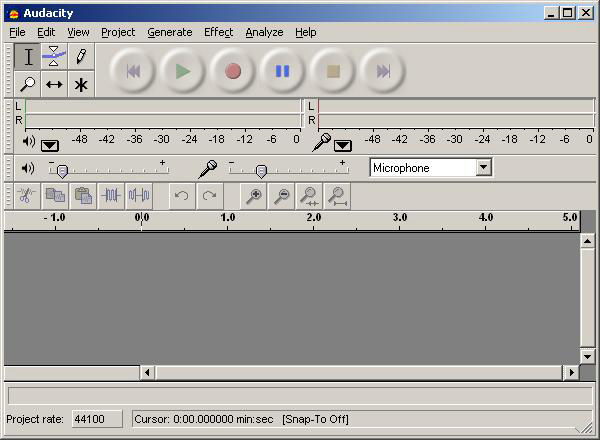
Ok, so Audacity should be open in front of you and you will have some audio already loaded. In this example we will be working with a sound file I have opened from my computer, and so my Audacity window looks like this :
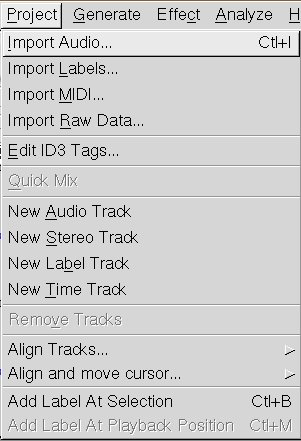
Now, we wish to add another sound file. To do this you will need to have another sound piece on your computer ready to go, and you will need to know where this file is located on your computer. Then click on Project and choose 'Import Audio...' :
When you have done this a file browser will open :
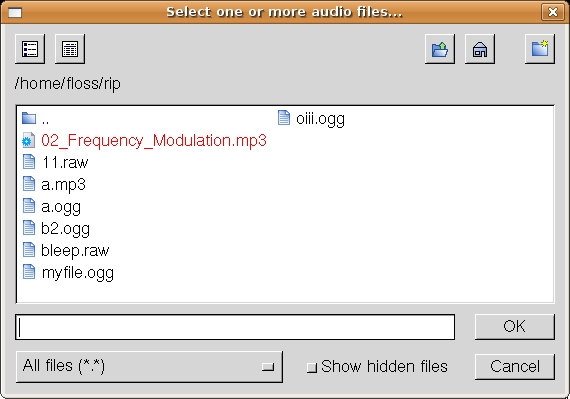
In the above example I am very lucky as the file I wish to load is in the directory shown. If the file was not here I would have to use the file browser to locate the file on my computer. To do this you would open directories by double-clicking on the directory icons, or you can go 'up a directory' by clicking on the button with the directory icon and green arrow :

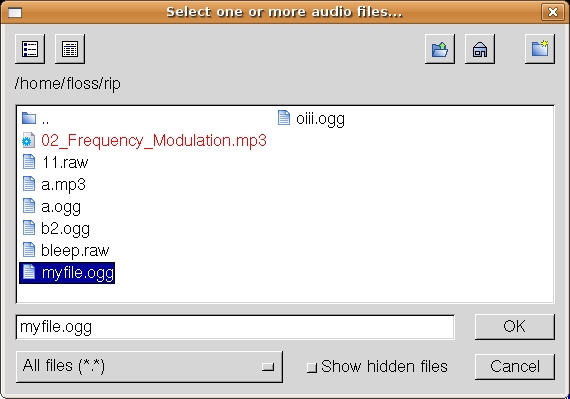
In my case I will click on the 'myfile.ogg' :
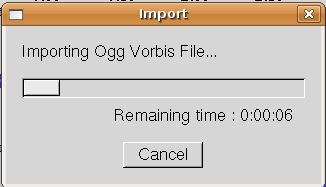
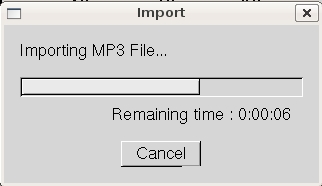
I know press OK and the file will be imported. 'Importing' means that the file will be converted into a format that Audacity understands and appear in the Audacity window as a new track. So you when you press 'OK' the importing process begins :
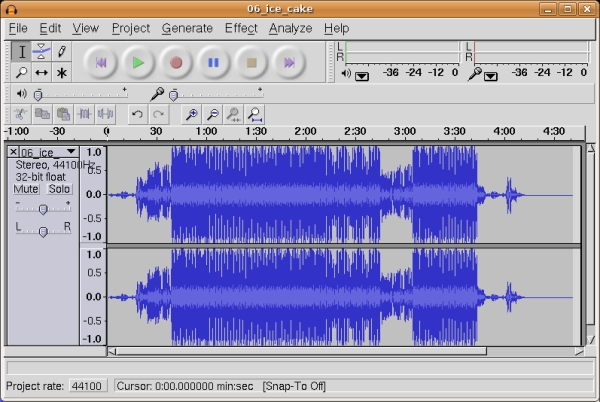
When it is complete the new track can be seen in the Audacity window :
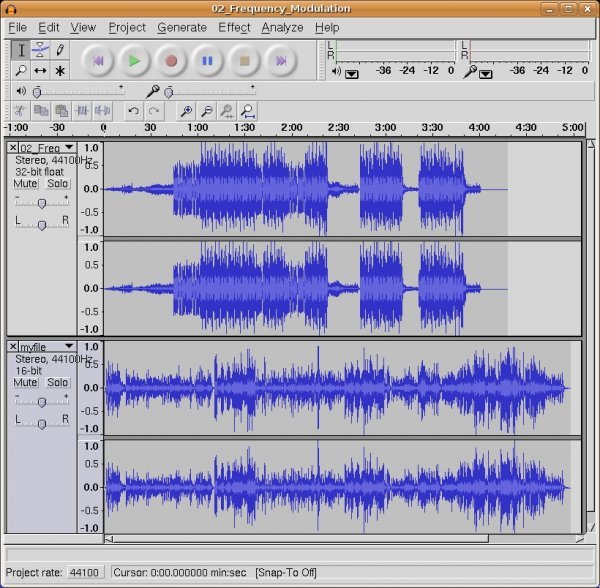
You will notice that in the above example there is a new stereo track added at the bottom of the window. If you don't see this then you might need to scroll down on your Audacity window.
Note on Playback and Exporting
If you now press the 'Play' Button :

you will hear both tracks playing back at once. If you were now to export this file the tracks would be combined together into one sound file.
More Help
For more help with Audacity you can try these avenues:
Audacity Documentation
You should first look at the very good documentation at the developers site - http://audacity.sourceforge.net
Also try the Audacity FAQ (Frequenctly Asked Questions) - http://audacity.sourceforge.net/help/faq
Online Forums
You can also try searching through the forums for information.
http://audacityteam.org/forum/
The forums contain a lot of postings from users on many topics. You can use the search system to locate topics or just browse the categories. If you don't find what you want then try subscribing to the forums and posting your question to the relevant category.
There are a few things to keep in mind when asking a question in a forum or to a mailing list. First, be as clear as you can with your question and provide any infromation that you might think would help some to try to help you. You might, for example, include information about the operating system you are using, or various specifics that relate to what you are trying to achieve. Additionally, it is always good practice to also post back to any forum or mailing list if you manage to solve your query and include clear information on how you solved the puzzle. This is so that someone else that may have the same issue can resolve it using what you have found out. If possible post back to the same thread (discussion topic) so that anyone searching through the forum can follow the discussion including the solution.
Mailing Lists
Mailing lists are good places to look through for answers to questions. The subscription (also the archives are listed on each info page) information is located here :
http://audacity.sourceforge.net/contact/lists
You can also subscribe to the mailing lists and ask a question. Please note the suggestions about posting to forums and mailing lists in the above section.
IRC
IRC is a type of online chat. it is not the easiest to use if you are not familair with it but it is a very good system. There are a variety of softwares for all operating systems that enable you to use IRC. The IRC channel for Audacity is where a number of the developers are online and some 'superusers'. So logging into this channel can be useful but it is very important that you know exactly what you are trying to find out before trying this route. The protocol for using the channel is just to log in, and ask the question immediately. Don't try and be too chatty as you are probably going to be ignored. It is also preferable if you have done some research using the other methods above before trying the channel. The details for the IRC channel are:
- IRC network: freenode
-
Channel: #audacity
Web Search
Searching the web is always useful. If you are looking for problems arising from errors reported by the software then try entering the error text into the search engine. Be sure to edit out any information that doesn't look generic when doing this. Some search engines also enable you to try searches of mailing lists, online groups etc, this can also provide good results.
Advanced Editing
Software name : Audacity
Software version : 1.3
There are some more advanced steps for editing that you can carry out with Audacity. Some of these include, adding silence, trimming audio, splitting and joining tracks, using panning.
Add Silence
You may want to add a silence to a track for several reasons. If we take the example of a two track project with one track as music and the other track as a voice track then we can imagine a situation where we would want to insert a silence in the voice track for several seconds to allow us to fade up the music. This would work in an advert or introduction for a radio show.
To start with your workspace should look a little like the still below.

Click in the voice track where you want to insert your silence.
When the voice track is selected you will see the whole track go a darker colour.

You are now ready to insert some silence. Do this by selecting Generate > Silence from the menus at the top of the screen.

When you are inserting a number of seconds for your Silence, it is easier to add more and then delete some silence later than to add to it. So I'm going to over estimate and put in 20 seconds of silence, as shown below.

Enter the number of seconds silence you want to insert and then click 'OK'. You'll see the silence appear as a flat line on the relevant track of your project.

What we are going to do next is to decrease the volume of the music track while the voice track contains some voice audio.
This is done using a combination for the Time shift tool and the Envelope tool.
Time Shift Tool
The time shift tool allows you to alter the time location of the audio on a particular track. This is useful when you are arranging audio on different tracks to be placed on after the other in a sequence.
In the example below we have imported two audio files into a project. They both are set to start at 0.00 seconds.

Our goal is to place the music track after the audio track. To do this use the mouse to select the Time Shift tool  from the menu at the top of the workspace.

You can select the track you want and drag it left or right to occupy a new time location.

As you click and drag the second track to the right you may see some yellow guidelines appear to shows you the ending point of the other tracks. In the shot above the yellow guideline appeared when the start of the second track matched up with the end of the first one.
You should let go of the mouse when you are happy with the new time location of the track you a shifting.
Trimming Audio
Trimming audio tracks is useful when you only want to keep one part of the track. It is also different from using the cutting function as it maintains the time location of the part of the track you want to keep.
As an example we are going to trim a music track to only include the first 30 seconds or so. To do this select only the part of the track that you want to keep. Use the Selection tool to do this 

When you have selected the part of the audio that you want to keep it should show up in a darker colour. You should then select 'Edit > Trim' .

If all works well then only the part you had selected will still be present on your track

Splitting Stereo Tracks
Sometimes when you are recording you may only record one channel of your track correctly. Or there may be another reason that you want to only work with either the left or right channel.
Below shows a track with one channel much louder than the other.

We are going to work on only the left channel (the top one). So we need to Select 'Split Stereo Track' from the drop down menu by the right of the track.

We can then delete the Right channel signal, as it has now become a separate track. Click on the X on the left of the track area.

If we play the remaining track then we'll be able to hear that the sound is only coming through one channel. This can be seen in the green signal in the screenshot below.

To adjust this we can select 'Mono' from the drop down menu on the left of the track bar.

This track will now play the same mono audio signal through both channels. You can export it to a stereo track if you need to.
Basic Editing with Audacity
Software name : Audacity
Software version : 1.2
As far as audio editing software goes, Audacity is about as easy as it gets. Thats not to say its easy, if you haven't edited audio before then the whole concept can get a little bewildering. However with a minimal of practice you should be able to make fast work of editing.
Firstly, you will have to have some audio to edit. You can either record some using Audacity, or open an audio file from your computer.
There are some simple methods that form the basis of editing with Audacity. We will look at deleting sections of audio ('cutting') and shifting audio. With these two methods you can already do quite a lot.
Cutting
You will of course have Audacity open in front of you with an audio file ready to edit. The process of editing requires that you first know your source file (the file you will edit). You need to know where a cut needs to be made so play the audio file and listen for where you want to make your first edit.
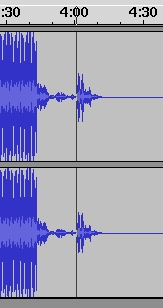
Lets assume you have chosen the area to be cut. You need to know select the area by clicking on where the cut should start, holding down the mouse button, and dragging the mouse to the end of the area to be cut. If you do this correctly the area to be deleted will be highlighted in grey :
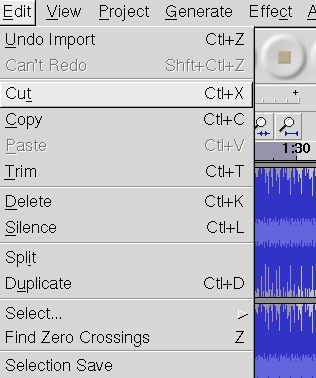
In the above example you can see that I have highlighted the area from 1 minute (1:00) to one and a half minutes (1:30). A selection of thirty seconds. To delete the file I can now click on the Edit menu and choose 'cut' :
When you release the mouse button you will see that the selected area has disappeared and the length of your file will have been reduced.
Focusing on the area to be cut
If you have just opened an audio file just press the green play button to listen to the entire file :
Once you have listened to it you may wish to take some notes to help you decide which area you wish to delete ('cut'). It is also a good idea to replay the area that you will cut to make sure you are selecting the right area. To do this you can select the area, as described above, and then press the play button and Audacity will only playback the selected area. This will help you decide if the selected area is actually the audio you wish to delete. If its not the right area then start again by selecting another area.
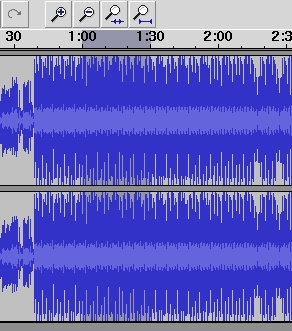
If you need to focus closer to the audio to make a 'finer' cut, then press on the magnifying glass icon :

This will enlarge the time scale shown and give you a 'closer' view of the audio. You can 'zoom out' of the audio again by pressing the magnifying glass with the minus sign in it:

Pasting
If you wish to shift audio from one place to another then you can easily do so with Audacity. First select the area you wish to shift. I will use the same area I used in the cutting example :
Now choose cut like you did in the above example.
The audio will now be cut from the track. Now click on the audio that is left at the point you where you want this audio to be shifted to.
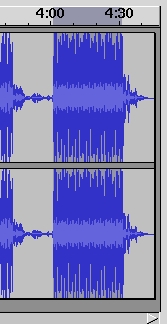
In the above example you can can see that I ahve decided to insert the audio at the 4 minute mark. Now choose the Edit menu and select Paste:

The audio will now be inserted and you if you look at the Audacity window you should see the selected audio in its new place :
Now experiment with cutting and pasting audio!
What is sound?
Sounds are waves of air. We hear sounds because our ears are sensitive to these waves. One of the easiest types of sound waves to understand is a short, sudden sound like a hand clap. When hands clap together, they create a pressurised wave of air which moves at about 340 meters per second ( "the speed of sound" ). When this wave reaches ones ear, it pushes on the eardrum slightly, causing it to vibrate and the individual hears the clap.
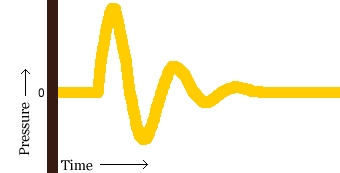
A hand clap is a short event that causes a single wave of air that quickly dies out. The image above shows the shape of the wave ("waveform") for a typical hand clap.
Other sound waves are longer events. A ringing bell serves as a good example of this. When a bell rings, after the initial strike, the sound comes from the ongoing "ringing" of the bell. While the bell rings, it vibrates at a particular speed ("frequency") and this causes the nearby air to vibrate at the same speed. This causes waves of air to travel from the bell, again, at the speed of sound. Pressure waves from continuous vibration look more like this:

Both of these types of waves are called sound waves or acoustic waves.
Digital recording and playback
A microphone consists of a small membrane which vibrates when it meets these acoustic waves. The microphone translates movements of the membrane into electrical signals. Basically, a microphone converts acoustic waves into electrical waves.
If one examined the shape of an electrical wave from a microphone, that person would notice that it looks very similar to the shape of the original sound wave. The following is the sound wave we saw in the above explanation:
The following is the electrical wave created by the microphone (notice the measurement for "Current"):
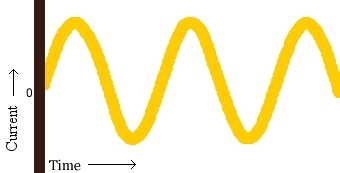
One could say that the shape of the electrical wave is analogous to ("similar to") the shape of the original sound wave. This is why these electrical waves that represent sound waves are called analog waves.
The main device used in digital recording is an Analog-to-Digital Converter (ADC). The ADC measures the voltage of an electrical wave thousands of times per second. It then uses these measurements to create a map of an electrical wave:
Each dot in the figure above represents one audio sample. The more samples per second, the more accurate the mapping of the electrical wave.
Playback of digital audio uses a Digital-to-Analog Converter (DAC). This takes the samples and converts them back into an electrical wave. In a computer, this electrical wave is sent to a sound card's headphone or speaker sockets and the speakers recreate the original sound wave by vibrating their diaphragms.
A computer's sound card comes with an Analog-to-Digital Converter (ADC) for recording, and a Digital-to-Analog Converter (DAC) for playing audio. Your operating system (Windows, Mac OS X, Linux, etc.) talks to the sound card to actually handle the recording and playback, and audio applications talk to your operating system so that you can play sound files, capture sounds to a file, edit them, and mix multiple tracks while playing, etc.
Quality
Two factors determine the quality of a digital recording:
-
Sample rate: this is the rate which the ADC records samples or a DAC plays them back. Sample Rate is measured in Hertz (Hz), or samples per second. An audio CD has a sample rate of 44,100 Hz (often written as "44 KHz" for short).
-
Sample format or sample size: Essentially, this is the number of digits in the digital representation of each sample. Think of the sample rate as the horizontal precision, and the sample format as the vertical precision. An audio CD has a precision of 16 bits.
Higher sampling rates allow a digital recording to accurately record higher frequencies.
Higher sample sizes allow for more dynamic range—better reproduction of loud and soft sounds.
Audio file formats
There are two main types of audio files on a computer:
-
PCM stands for Pulse Code Modulation. This is just a fancy name for the technique where each number in the digital audio file represents exactly one sample in the waveform. Common examples of PCM files are WAV files, AIFF files, and Sound Designer II files.
-
Compressed audio files are the other type. Modern compressed audio files use sophisticated psychoacoustic algorithms to represent the essential frequencies of the audio signal in far less space than PCM files. Examples include MP3 (MPEG I, layer 3), Ogg Vorbis, and WMA (Windows Media Audio). Creating one of these files sacrifices some quality in order to use less disk space.
Installing Audacity on Ubuntu
Software name : Audacity
Homepage : http://audacity.sourceforge.net
Software version used for this installation : 1.2.6
Operating System use for this installation : Ubuntu 9.04
Recommended Hardware : 300 Mhz processor (CPU) minimum, 64 Mb RAM, internet connection
If you are used to an Operating System like Windows or MacOSX you may have installed software by downloading it from a website and double clicking on the downloaded file, and clicking through all the licence agreements, configuration options etc. This is the 'old' way of installing software. The 'new' way is much smarter - you choose what you want to install from a list and press 'go'. The rest - finding the files, downloading the files, installing software, is taken care of by Ubuntu itself while you go and get a cup of tea or work on something else. It can't get much easier.
However, new ways take a little getting used to, and so we will first look at the basic tool needed to install software this way, and then how to use it to install Audacity.
Synaptic Package Manager
The Synaptic Package Manager (SPM) is used for more than just installing software. It can also upgrade your entire operating system, and manage all software installed on your computer. However most people use SPM for just installing new software. Before you embark on this process there are a few concepts that you may wish to get familiar with. Its not crucial you understand them throughly, so just read the explanations and then let it soak in over time. The ideas behind SPM will become clearer with use.
What is a repository?
SPM can automate the installation of software on your computer because it has a direct connection to one or more online software repositories. These repositories are vast archives of softwares that have been pre-configured for installation on your operating system . When your computer is online SPM can connect to these archives, check what software is available for installation, and present you with a list of installable software. All you have to do is select the software from the list that you want. SPM then downloads the software from the repository and takes care of the installation process.
So SPM is actually a repository manager, it manages which repositories (there are many) you wish to access, and which softwares to download and install from those repositories.
SPM allows you to choose which repositories it accesses through its settings. The default repositories used by Ubuntu can be extended through the SPM settings so you can access a wider range of softwares. Ubuntu calls each repository by a simple name. They are : Main, Universe, Multiverse, Restricted. By default Ubuntu only uses the Main online repository. If you wish to access you the other repositories you must do this by changing repository settings of SPM.
What is a package?
When SPM downloads a software for installation it is in the form known as a 'package'. This means that it is a compressed archive of the software, pre-configured so that it will install nicely on your computer. If the package has been configured nicely, and Ubuntu spends a lot of time making sure this is the case, then many of the headaches that installing software can bring are taken away - its the panadol of software installation. One of the biggest issues with installing software on any form of Linux (Ubuntu is one of many types of Linux), are dependencies. Dependencies are all the other softwares required by a particular software. If, for example, I want to install a audio editor, that audio editor software may use some functionality of other softwares to do its job.
SPM takes the (often) dark art of dependencies away from you, and manages this itself. So if you wish to install a software and it has dependencies (and the list can be long), you don't have to work this out yourself, SPM knows already what is needed, finds it, and installs it along with the software you have chosen.
So, SPM, as well as managing which repositories you access, is also a package management software. Hence the name - Synaptic Package Manager.
apt
You don't really need to know about apt, so if you are on the verge of being confused then don't read this short section. If you are a geek wannabe then read on.
Ubuntu is a form of Linux that has derived from another form of Linux - Debian. This family of Linux has in common (amongst other things) the package/repository management system. Both Ubuntu and Debian use the apt system for managing packages. APT is actually an acronym short for Advanced Package Tool.
SPM is actually a 'front end' (graphical interface) for controlling apt. So SPM is the nice user interface that you see, but the real work is done by apt. There are other ways of managing apt also, such as the command line interface known as apt-get. In the world of Linux there are many varieties of Linux users and they have their own ways of doing things. In general its safe to say most Debian users use apt-get, and most Ubuntu users are happier using SPM.
Configuring Synaptic Package Manager for installing Audacity
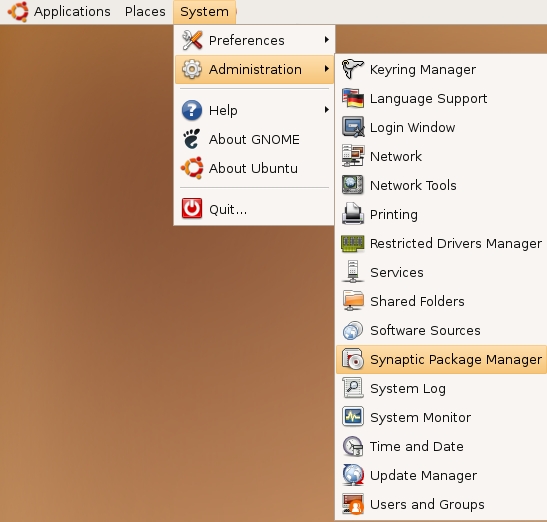
To install Audacity on Ubuntu you will need to change the default repository settings of SPM as Audacity is not contained in the default repository. To do this you will need to open the Synaptic Package Manager and you can do this via the System menu. If you haven't changed the default Desktop of Ubuntu then the System menu can be accessed at the top left of your screen:
If all is good you will be prompted for a password.
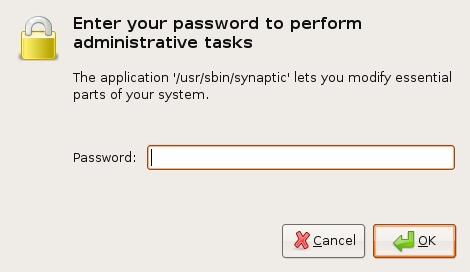
Here you must enter your password (the same one you use to log into the system). If you don't know the password then you have a problem and its probably caused by the fact that the computer you are using is not yours. In this case you have to find the computers owner and ask them for the password (which is usually not polite unless you know them well) or ask them to input the password while you look casually in the other direction.
Assuming the password entered is correct - you will now see the SPM open infront of you. It may be that you first see the following 'Quick Introduction' (this appears if you haven't used SPM before).
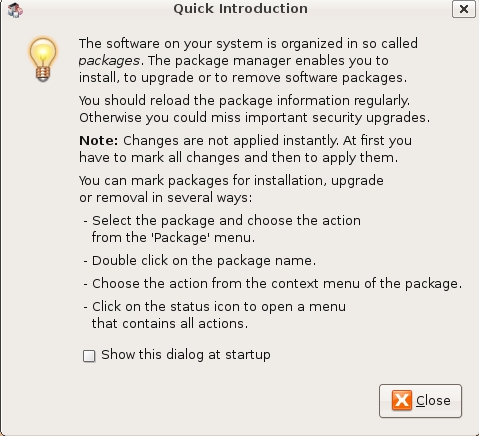
Just click Close and move on. Lets look at the Synaptic Package Manager interface...
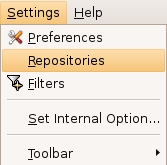
Lets not worry about the details of the interface for now. All we want to do is change the repository settings. To do this click on the Settings and choose Repositories
Now we get to where we can do some business. Make sure that Community-maintained Open Source software (universe) is checked :

Now close that window by pressing the big close button at the bottom right.

Next, you will see a warning telling you the repository has changed :
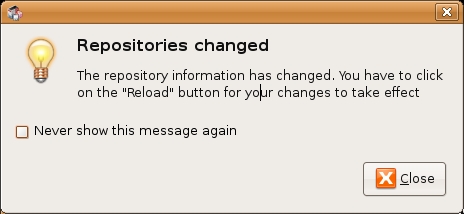
Click the Close button and move on to SPM so you can refresh the repositories as the warning suggests. To do this, do as the warning says - click on Reload :

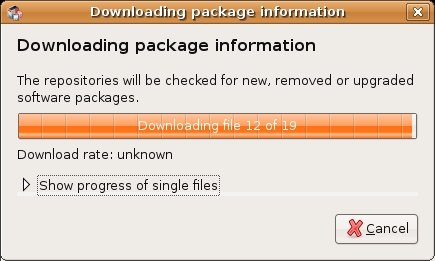
You should then get some feedback saying the repositories are being updated and showing the progress.
Installing Audacity with Synaptic Package Manager
Now the real business. Its pretty easy. Click on the nice big Search button:

The search window will open and now enter 'audacity' in the field:

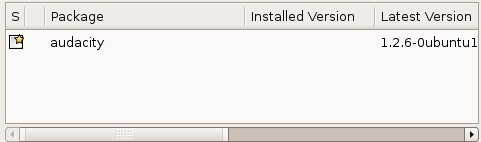
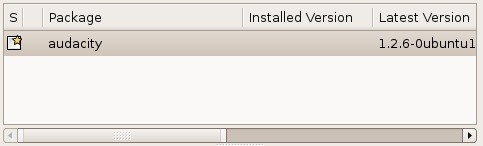
Great. Now press Search at the bottom right of the above window. The search should not take very long and when it is complete you will see Audacity listed :
If you highlight audacity (by clicking once on the name) you will see some information about Audacity displayed :
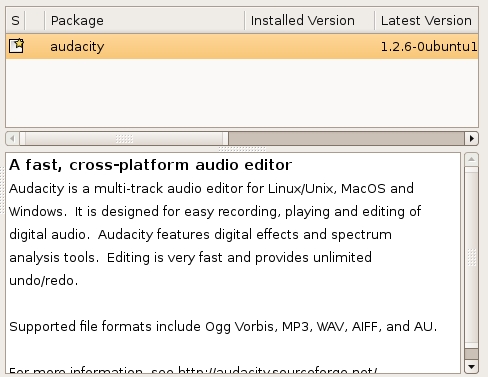
Now you can read the information if you wish but there is nothing critical there. Best thing to do is just to double-click on audacity. By doing this you are 'marking' (choosing) the software for installation. If you do so then an additional window appears:
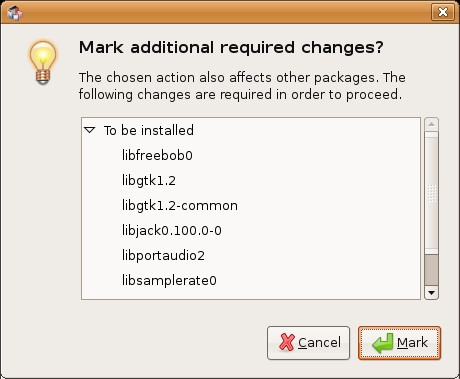
Now click Mark:

You have now told Synaptic Package Manager that you want to install Audacity. If all is well then the package will be highlighted:
Now press the Apply button with the nice big tick next to it :

Next SPM informs you of how much space will be taken by the installation :
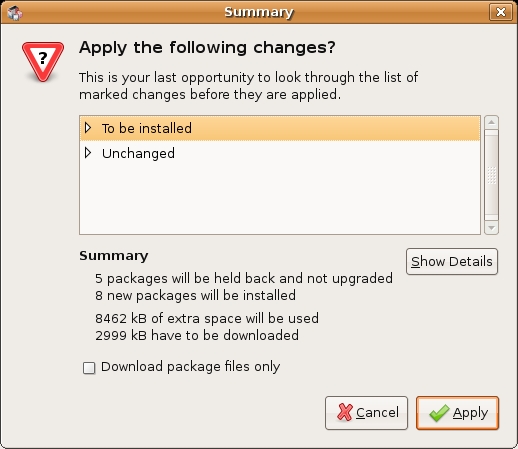
Now you can just click Apply at the bottom right of the screen and the installation will start. A progress bar will be shown:
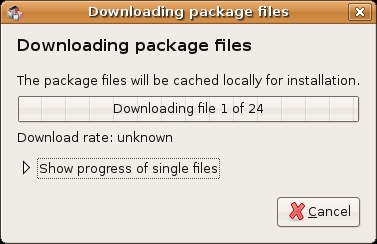
When it is completed (downloading and installing) you will have this screen :
That means all is well. Pat yourself on the back and press Close. Synaptic Package Manager will then return to its original state. Close it :
Now you can open audacity...just browse to the Applications menu, choose Sound & Video, select Audacity and release the mouse :
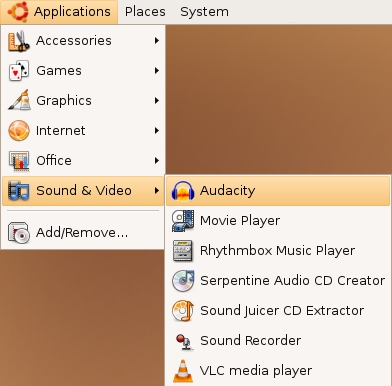
If all is well you will see Audacity:
Congrats!
Installing Audacity on OS X
Software name : Audacity
Homepage : http://audacity.sourceforge.net
Software version used for this installation : 1.2.6
Operating System use for this installation : OSX (10.3)
Recommended Hardware : 300 MHz processor, 64 Mb RAM
Downloading Audacity
The latest stable version of Audacity for OS X can be downloaded from http://audacity.sourceforge.net/download/mac. The latest version at the time of writing this document is Audacity 1.2.5 (Intel) or Audacity 1.2.6a (PPC).
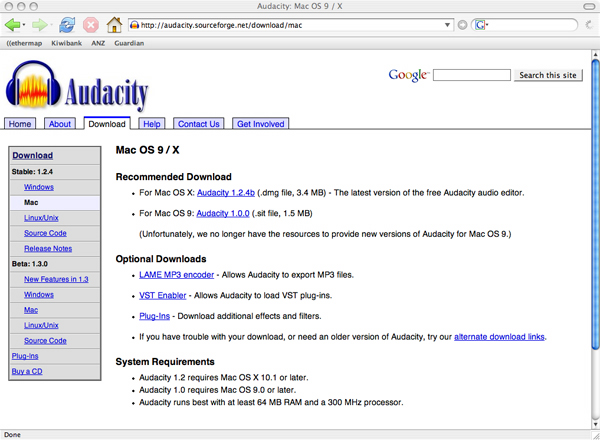
Click on the link labelled "For Mac OS X : Audacity 1.2.*" that corresponds to your system (PPC or Intel processors). This will take you to a download page. The page lists many locations around the world where the software can be downloaded. The idea is that the downloads can be faster and more efficient if you choose a location near to you. To begin downloading, click on the download link of the location nearest you.
Regardless of the package you download for your specific processor, in OS X the installation process is the same. Once the download is complete, you should see something like this on your desktop or in the folder that your web browser is set to download into:

Double click on it to begin installing the software.
You should now see a finder window with a disk image named "Audacity 1.2.5" or "Audacity 1.2.6b" open (the name of the disk image may be different if you are installing a different version than shown here):
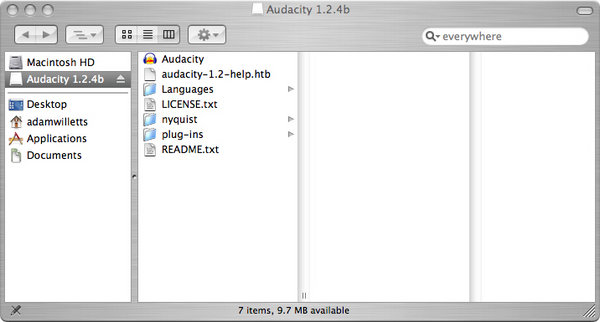
All you need to do now to complete the installation is copy the disk image into your "Applications" folder. To do this, click on the disk image to select it then press the Apple and C keys together to copy it. Now select your Applications folder and press the Apple and V keys together. This will paste an Audacity folder containing all of the contents of the disk image into your applications folder.
The installation is now complete, so you can eject the installer folder (by dragging it to the eject icon) and start using Audacity.
To open Audacity double click on the following icon in the Audacity folder:

The first time you launch Audacity you will be prompted to select which language you want it to use.
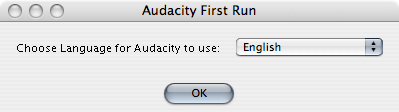
Click on the dropdown menu to select the language you want.
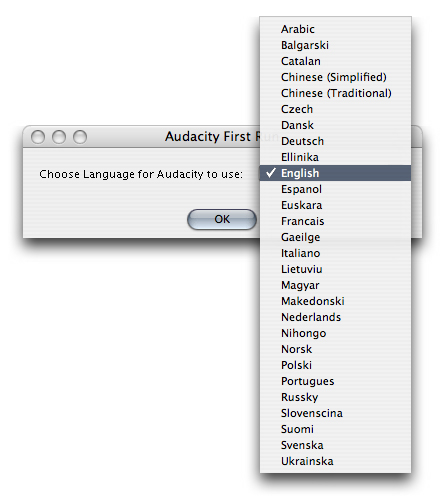
Once you have chosen the language you want click on OK to finish launching Audacity.
You should be able to see the Audacity interface which looks like this:
That's it! You now have Audacity up and running and can begin making and editing recordings.
Installing Audacity on Windows
Software name : Audacity
Homepage : http://audacity.sourceforge.net
Software version used for this installation : 1.2.6
Operating System use for this installation : Microsoft Windows XP
Recommended Hardware :
| Windows version |
Recommended RAM/
processor speed |
Minimum RAM/
processor speed |
| Windows 98, ME |
128 MB / 500 MHz |
64 MB / 300 MHz |
| Windows 2000, XP |
512 MB/1 GHz |
128 MB/300 MHz |
| Windows Vista Home Basic |
2 GB / 1 GHz |
512 MB / 1 GHz |
Windows Vista Home Premium/
Business/Ultimate |
4 GB / 2 GHz |
1 GB / 1 GHz |
Downloading Audacity
The latest stable version of Audacity for Microsoft Windows can be downloaded from http://audacity.sourceforge.net/download/windows. The latest stable version at the time of writing this document is Audacity 1.2.6.
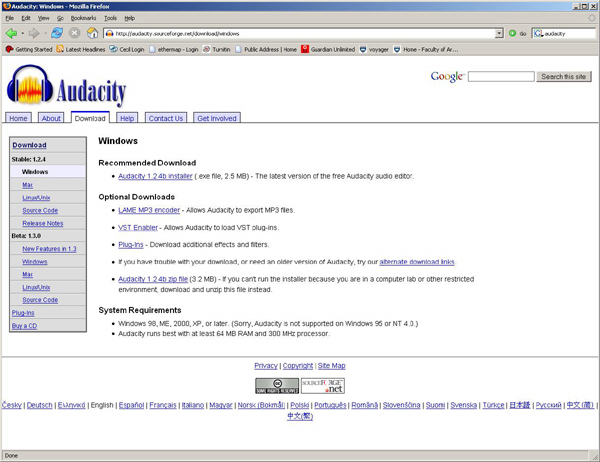
Click on the "Audacity 1.2.6 installer" link. This will take you to a download page. This page lists locations around the world where the software can be downloaded. The idea is that downloads can be faster if they come from a place near you. To begin downloading, click on the download link of the location nearest you.
Once the download is complete you should see a downloads window like this:
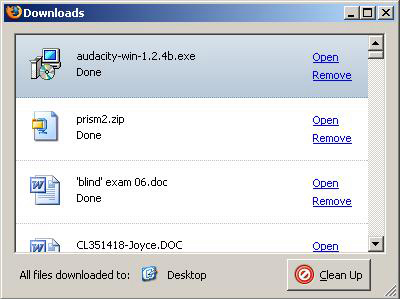
or something like this on your desktop:

Open this file to begin installing Audacity by double clicking on the icon or clicking on "Open" on the downloads window.
You should now see a Setup Wizard like this:
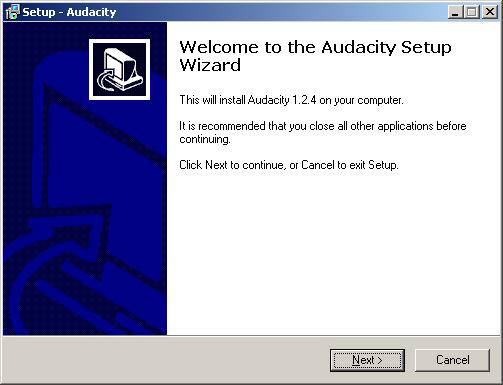
Click "Next" to proceed.
The next step asks you to read and accept the License Agreement.
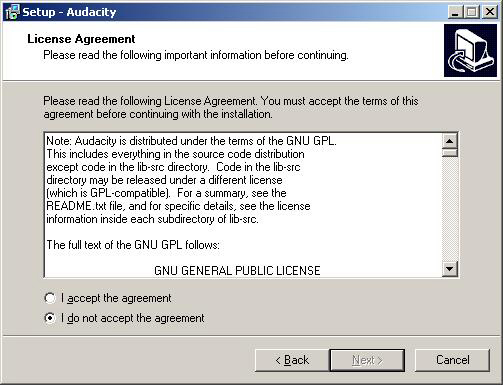
You cannot continue with the installation until you have accepted the agreement, so click on the radio button labelled "I accept the agreement" and then click "Next" to continue.
You should now see an Information window like this:
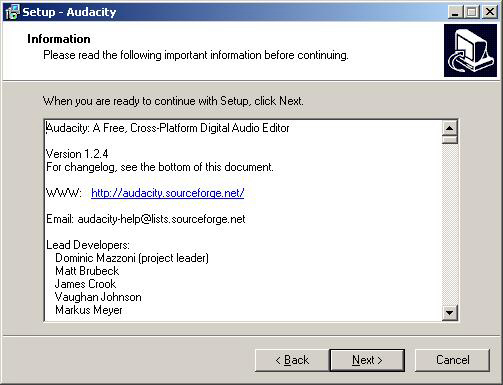
This window contains information such as credits and a changelog that you may find useful to read. Click "Next" continue.
You will now be prompted to select the folder Audacity will be installed into.
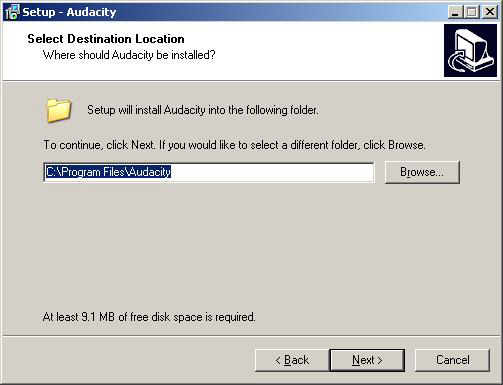
The Setup Wizard will automatically create a folder called "Audacity" in your "Program Files" folder so unless you want to install it somewhere else you can simply click "Next" to continue. If you wish to install Audacity somewhere else click "Browse".
You will now be asked to select which additional tasks you would like Setup to perform during the installation.
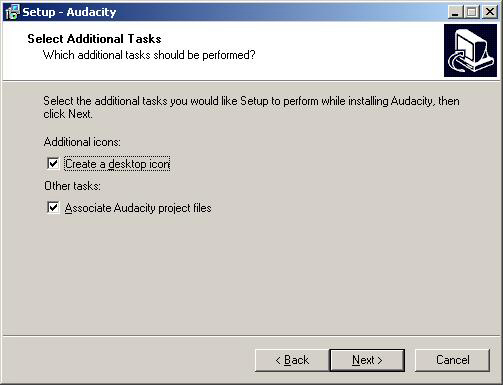
Click the check boxes to select or deselect the additional tasks then click "Next" to continue.
You will now see a window displaying the destination location and additional tasks.

Check that this information all correct and if it is click "Install" to continue. Click "Back" if you wish to change any of the installation settings.
You should now see a window like this:
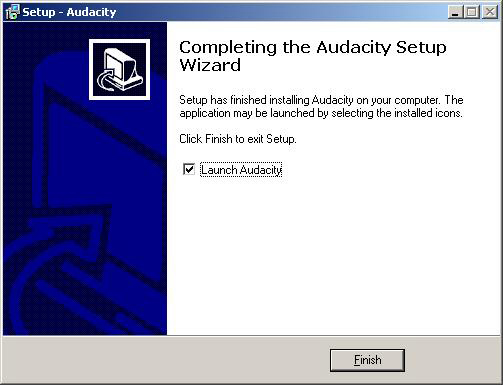
Click "Finish" to complete the installation. If the check box labelled "Launch Audacity" is ticked Audacity will open straight away.
Installation is now complete. If you didn't choose "Launch Audacity" in the options above then you can launch Audacity by double clicking the following icon in the Audacity folder:
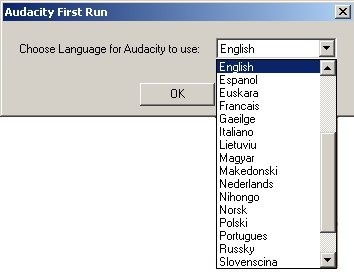
The first time you launch Audacity you will be prompted to select which language you want it to use.
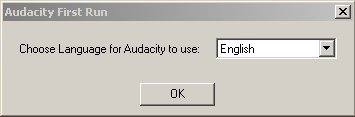
Click on the dropdown menu to select the language you want.
Once you have chosen the language you want, click on "OK" to finish launching Audacity.
The Audacity interface should look like this:
That's it! You now have Audacity up and running and can begin making and editing recordings.
You may need to install an extra library to be able to export a file as an mp3.
Mp3 Capability Installation
Software name : Audacity
Software version : 1.3
By default Audacity can play and edit mp3 files. However it can't export a project as an mp3 file unless you install an extra bit of software called 'library'.
This sounds complicated but what it really involved is downloading the right file and then linking to it in Audacity.
To download the file we need, which is called the 'Lame Mp3 Library'. Please point your browser to the following page http://lame.buanzo.com.ar/
You should see the following text or something similar.

You should click on the link to 'Lame x for Audacity on Windows.exe' and download that file to your computer.

Click on Save File when you see the above dialogue box. And choose where you want to save your file.

When you have downloaded the file, find it on your computer and double click it. This will start the installation process.

Click OK when asked 'Open Executable File?'
Click on Next for the following steps and then when you are asked to choose a folder to install the Lame library in keep this as the default.

Click on Install.
Click on Finish.
When you come to use Audacity and need to export a file, if you haven't already told Audacity where the Mp3 Encoder is located it should prompt you to locate it.
It's best to do this now while you remember where it is installed. So open up Audacity and with a small test project open click on File > Export
Fill in some test entries for the Metadata and then click OK on the following screen.

Choose a file name and a place to save it. Then select mp3 from the drop down menu.

If you are prompted to locate the Lame Library then you can locate this in the location you saved it in - by default in Windows this would be C:\Program Files\Lame for Audacity
You may not need to do this as from version 1.3 Audacity will scan your hard drive looking for the relevant file. If it succeeds then it will save your file without asking you anything.
When you save the mp3 you have the option to change the bit rate by clicking on the Options box.

You can see more on this in other chapters about Exporting.
Track Area
Software name : Audacity
Software version : 1.2
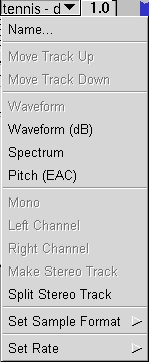
In Audacity, a channel of sound is represented by one mono audio track, a two channel sound by one stereo audio track. The example below is a stereo track :

Lets look at some of the controls available to you from this interface :
| option |
action |
| Name |
edit the name of the track |
| Move Track Up/Down |
move Track Up or Down in the display |
| Waveform |
traditional display of audio material. |
| Waveform (dB) |
like Waveform, but logarithmic instead of linear vertical units . |
| Spectrum |
displays the frequency spectrum of the audio over time. |
| Pitch (EAC) |
tries to detect the pitch of the current audio and displays that information over time. |
| Mono |
set playback of this single channel track on the left and right channels. |
| Left Channel |
set playback of this single channel track on the left channel. |
| Right Channel |
set playback of single channel track on the right channel. |
| Make Stereo Track |
the selected track and that beneath it is turned in to one stereo track. |
| Split Stereo Track |
turn one stereo track in to two single channel tracks. |
| Set Sample Format |
pick the sample format for this track.
|
| Set Rate |
set the sample rate of this track.
|
Solo and Mute Mode

In solo mode, only tracks that have the solo button activated.

With mute a track is switched off without deleting it.
Gain and Pan Controls

This slider set the panning position of the track in the stereo field.

This slider controls the track volume, or rather the overall gain of that particular track.
Menu Bar
Software name : Audacity
Software version : 1.2
Lets look at the basic elements of the Audacity Menu Bar :

The Menu Bar is a typical element in many applications. It will look slightly different to this if you are not using Linux, most notably in Mac OSX this Menu Bar is not located on the application window itself but at the top of the screen in the "Apple Menu". Lets go through the Menu Bar one item at a time.
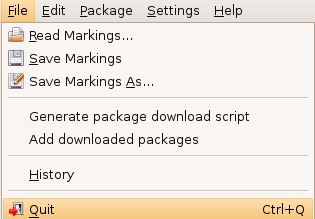
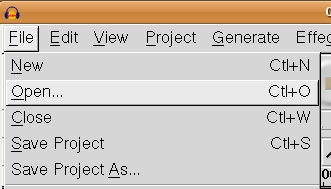
File
By clicking on "File" in the Menu Bar you get a drop down menu with several options to choose from. Some options maybe "greyed out" meaning you can't select them, you will only be able to choose the options that appear in solid black. The options available depend on the state of Audacity at the time. For example the following image was taken from Audacity with when the program had just been opened and no recording or editing had been started:
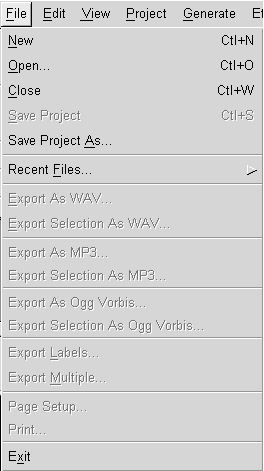
The File Menu is where you can process all the things related to the audio and project (.aup) files.
| option |
action |
| New |
creates a new empty project window. |
| Open... |
selecting "Open" presents you with a dialog where you can choose a file to open.
|
| Close |
closes the current project window. |
| Save Project |
saves the current Audacity project (AUP) file. |
| Save Project As... |
allows you to save the current Audacity project (AUP) file with a different name or in a new location. |
| Recent Files... |
gives a list of recent files you ahve been working on. |
| Export As WAV... |
exports the current Audacity project as a standard audio file format such as WAV or AIFF. |
| Export Selection As WAV... |
this is the same as Export, but it only exports the part of the project that is selected. |
| Export As MP3... |
exports the current Audacity project as an MP3 file. |
| Export Selection As MP3... |
this is the same as Export MP3, but it only exports the part of the project that is selected. |
| Export As OGG... |
exports the current Audacity project as an Ogg Vorbis file. |
| Export Selection As OGG... |
this is the same as Export As OGG, but it only exports the part of the project that is selected. |
| Export Labels... |
if you have any Label Tracks, this command will export them as a text file. This feature is commonly used in Speech Recognition. |
| Export Multiple... |
this allows you to do multiple exports from Audacity. |
| Exit/Quit |
closes all project windows and exits Audacity. It will ask you if you want to save changes. |
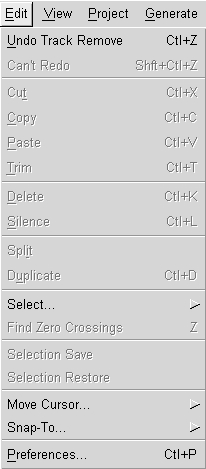
Edit Menu
The Edit Menu is only accessible when you are editing an audio file.
| option |
action |
| Undo |
this will undo the last editing operation you performed to your project. |
| Redo |
this will redo any editing operations that were just undone. |
| Cut |
removes the selected audio data and places it on the clipboard. |
| Copy |
copies the selected audio data to the clipboard without removing it from the project. |
| Paste |
inserts whatever is on the clipboard at the position of the selection cursor in the project. |
| Trim |
deletes everything but the selection. |
| Delete |
removes the audio data that is currently selected without copying it to the clipboard. |
| Silence |
erases the audio data currently selected, replacing it with silence. |
| Split |
moves the selected region into its own track or tracks. |
| Duplicate |
makes a copy of all or part of a track or set of tracks into new tracks. |
Select...
|
selects part of the audio depending on the option chosen.
|
| Find Zero Crossings |
moves the cursor or the edges of the selection to the nearest point where the audio waveform passes though zero. |
| Selection Save |
saves the current selection and position. |
| Selection Restore |
restores the selection to the project. |
| Move Cursor... |
these commands provide quick and accurate ways to manoeuvre the cursor around the project to the start and end of tracks and selections. |
| Snap-To... |
turns snapping of the cursor to a grid of time values on or off. |
| Preferences |
opens a dialog window that lets you configure Audacity. |
View
The View Menu is used to manage the display of the tracks ("channels") and various options to show and hide some interface elements :
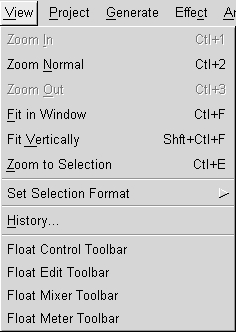
| name |
action |
| Zoom In |
zooms in on the horizontal axis of the audio displaying less time. |
| Zoom Normal |
zooms to the default view, which displays about one inch per second. |
| Zoom Out |
zooms out displaying more time. |
| Fit in Window |
Zooms out until the entire project just fits in the window. |
| Fit Vertically |
adjusts the height of all the tracks until they fit in the project window. |
| Zoom to Selection |
zooms in until the selected audio fills the width of the screen to show the selection in more detail. |
| Set Selection Format |
sets the format in which selections are measured in at the bottom of the application window. |
| History |
brings up the history window. It shows all the actions you have performed during the current session. |
| Float or Dock Control Toolbar |
toggles between displaying the Tool Bar docked at the top of each project window, or in a separate floating window. |
| Float or Dock EditToolbar |
toggles between displaying the Edit Tool Bar docked at the top of each project window, or in a separate floating window. |
| Float or Dock Mixer Toolbar |
toggles between displaying the Mixer Tool Bar docked at the top of each project window, or in a separate floating window. |
| Float or Dock Meter Toolbar |
toggles between displaying the Dock Meter Bar docked at the top of each project window, or in a separate floating window. |
Project
The Project Menu is used to add / remove / align tracks in the existing project :
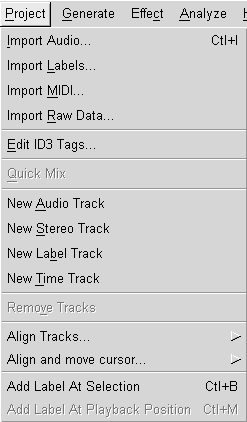
| name |
action |
| Import Audio... |
imports audio into your project. |
| Import Labels... |
import Label Tracks (text files). |
| Import MIDI... |
imports MIDI files. |
| Import Raw Data... |
tries to open a file in virtually any format, as long as it is not compressed. |
| Edit ID3 Tags... |
opens a dialog allowing you to edit the ID3 tags associated with a project, for MP3 exporting. |
| Quick Mix |
this command mixes all of the selected tracks down to one or two tracks. |
| New Audio Track |
this creates a new empty audio track. |
| New Stereo Track |
creates a stereo version of the new audio track above. |
| New Label Track |
creates a new Label track. |
| New Time Track |
creates a special track that can be used to speed up and slow down playback over the course of the project. |
| Remove Track(s) |
this command removes the selected track or tracks from the project. |
Align Tracks
|
aligns tracks according to the options chosen.
|
Align and move cursor
|
same as "Align Tracks" but it also followed by the "Move Cursor" command (from the Edit Menu).
|
| Add Label at Selection |
this menu item lets you create a new label at the current selection. |
| Add Label at Playback Position |
like "Add Label at Selection" but the label is added at the current position during playback. |
Generate
The Generate Menu allows you to insert various generated audio elements into a track :
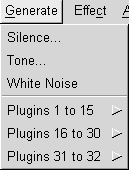
The length of the generated audio is determined by the length of your selection and the position by the left boundary of your selection. If no selection is made, the default length inserted at the cursor position is 30 seconds.
| name |
action |
| Silence |
inserts silence.
|
| Tone |
inserts a wave of chosen type, frequency and amplitude. |
| White Noise |
inserts white noise. |
Plugins
|
there are too many plugins to describe here, experiment!
|
Effect
The Effect Menu allows you to apply effects to audio. Note : this menu cannot be accessed while any tracks are in Playback or Record mode.

| name |
action |
| Amplify |
this effect increases or decreases the volume of a track or set of tracks. |
| Bass Boost |
this is a smooth filter which can amplify the lower frequencies while leaving most of the other frequencies alone. |
| Change Pitch |
changes the pitch/frequency of the selected audio without changing the tempo. |
| Change Speed |
changes the speed of the audio by resampling. Making the speed higher will also increase the pitch. |
| Change Tempo |
changes the tempo (speed) of the audio without changing the pitch. |
| Click Removal |
this effect is designed to remove the annoying clicks on recordings from vinyl records without damaging the rest of the audio. |
| Compressor |
compresses the dynamic range of the selection so that the loud parts are softer while keeping the volume of the soft parts the same. |
| Echo |
this effect repeats the audio you have selected again and again, softer each time. There is a fixed time delay between each repeat. |
| Equalization |
boost or reduce frequencies. |
| Fade In |
applies a linear fade-in to the selected audio. |
| Fade Out |
applies a linear fade-out to the selected audio. |
FFT Filter
|
you define a curve that shows how much louder or quieter each frequency in the signal should be made. |
| Invert |
this effect flips the audio samples upside-down. This normally does not affect the sound of the audio at all. |
| Noise Removal |
this effect is ideal for removing constant background noise such as fans, tape noise, or hums. It will not work very well for removing talking or music in the background. |
| Normalize |
allows you to amplify such that the maximum amplitude is a fixed amount, -3 dB. |
| Nyquist Prompt |
allows you to express arbitrary transormations using a powerful functional programming language (for advanced users). |
Phaser
|
the name "Phaser" comes from "Phase Shifter", because it works by combining phase-shifted signals with the original signal. |
| Repeat |
repeats the selection a certain number of times. |
Reverse
|
this effect reverses the selected audio.
|
Wahwah
|
just like that guitar sound so popular in the 1970's. |
Plugins
|
there are too many plugins to describe here. Experiment!
|
Analyze
The Analyze Menu gives you many options for measuring your audio :
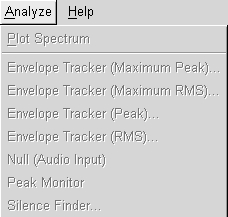
| name |
action |
Plot Spectrum
|
displays the Power Spectrum of the audio over a selected region. |
Envelope Tracker (Maximum Peak)
|
|
Envelope Tracker (Maximum RMS)
|
|
| Envelope Tracker (Peak) |
|
| Envelope Tracker (RMS) |
|
Null
|
|
Peak Monitor
|
|
Silence Finder
|
Marks periods of silence within a selection.
|
Open a Sound File
You will need to have an audio file available to edit. If you don't have one and you are online then download an MP3 from somewhere. Make sure its not too big, a 1 minute file is fine. Choose the 'Open' option from the File menu :
You will then be presented with a window where you can browse to the location of the audio file on your computer :
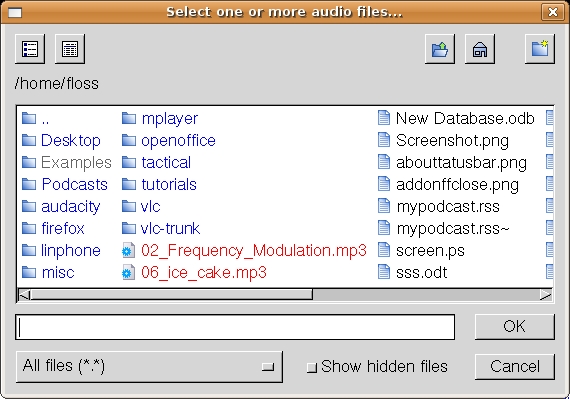
You can see in the above example there are a couple of audio files. I will click on one (06_ice_cake.mp3) :

If I now press OK the file will be imported into Audacity.
Now its worth noting that Audacity has its own way of storing audio files. These are known as 'Audacity project files'. So when audio is imported into Audacity it is stored in the Audacity format. You cannot then go and edit these files with another audio editor unless you first export the file to another format (for example, to MP3).
Once the import has finished you will see the audio file displayed in the Audacity window :
Recording a sound
Software name : Audacity
Software version : 1.2
Recording sound with Audacity is very straightforward you just need to have a computer that has a sound card with at least a microphone (mic) or line input.
Getting started
Before making a recording you need to make sure that what you want to record from ( the "sound source") connected to the audio input of your computer's sound card. Once you have done that you can launch Audacity.
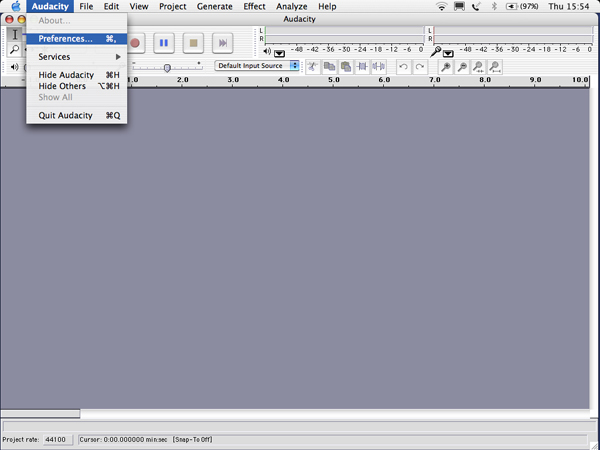
MacOSX
OS X has a unique way to configure the audio hardware, which is not shared by other operating systems (Windows, and Linux). So if you use OSX you will need to make sure that it is set up appropriately. To do this first open the "Preferences" window by clicking on "Preferences" under "Audacity" in the Menu Bar :
The Preferences window open and look something like this:

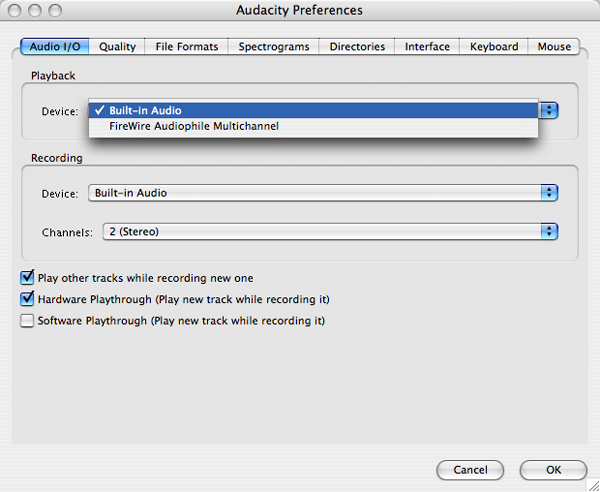
Click on "Audio I/O". The use of "I/O" means "Input or Output", so "Audio I/O" means "Audio Input or Output". The Audio I/O preferences page is where you can choose the sound source (audio input) and how you play back the sounds so you can hear them (the output settings). This can turn into a jungle of terms but essentially these things are the same:
- input
- sound source
- audio input
- input device
- recording device
and these are the same :
- output
- playback device
- output device
- sound output
The way you configure the input effects how you will record sounds. The configuration of the output effects how you will play back sounds so you can hear them.
Lets start with the output settings, these are refered to within the "Playback" section. In the "Playback" section use the "Device:" dropdown menu to select the audio output you wish to use. Unless you have another sound card installed "Built-in Audio" will be the only option available.
The input settings are chosen from the "Recording" section. In the "Recording" section use the "Device:" dropdown menu to select the audio input device you wish to use. Unless you have another sound card installed "Built-in Audio" will be the only option available.
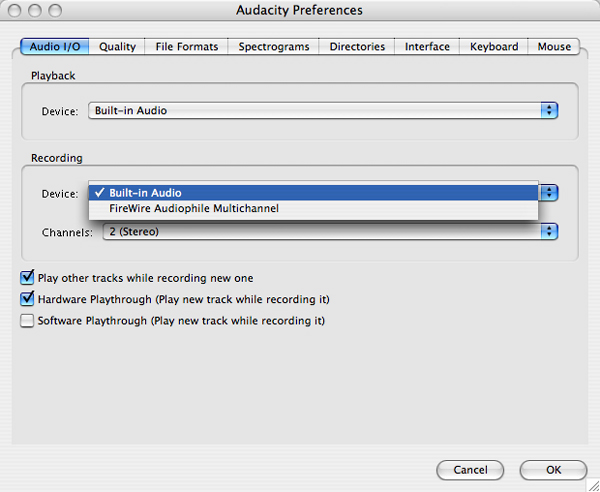
In the "Recording" section use the "Channels" dropdown menu to select the number of channels you wish to use. A "Channel" (also known as a "track") refers to the number of audio signals you wish to use to record or playback. A mono recording uses one audio signal (1 channel), and a stereo recording records two audio signals (2 channels).
Audacity defaults to "1 (mono)" so you can leave it at this if you are recording from a mono audio input. Most microphones are only capable of producing a mono signal. Select "2 (stereo)" if you are recording from a stereo audio input such as a cassette or mini disc player (or a stereo microphone). It is possible to select up to 16 channels but do not select more than 2 unless you have something other than a 'normal' sound card.
Below the "Playback" and "Recording" sections are three check boxes.
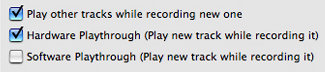
The first check box is not important for this exercise because we are only recording one channel. If you want to listen to the sound as you are recording it you will need to have either "Hardware Playthough" or "Software Playthrough" ticked. "Hardware Playthrough" lets you hear the sound directly from the input source while "Software Playthrough" lets you hear the sound as it will be when the recording is played back.
Now click on "Quality" to bring up this page of preferences:
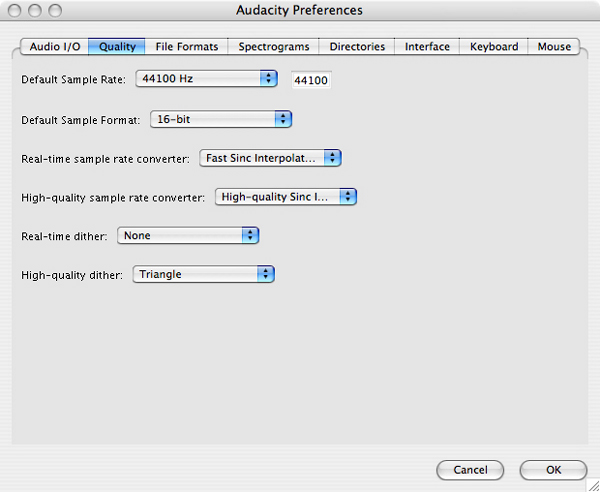
For this exercise you only need to worry about the first two settings; Default Sample Rate and Default Sample Format. Unless you really know what you are doing, use the dropdown menus to set Default Sample Rate to "44100 Hz" and Default Sample Format to "16-bit". This will give you CD quality recording.
Those are the only preferences you need to adjust before beginning to record so click "OK" to save the changes and close the Preferences Window. Audacity remembers these preferences so the next time you go to make a recording you will not have to repeat the steps above unless you wish to make changes.
Windows and Linux
Windows and Linux use the same kind of controls. First you need to choose the input device. The Mixer Toolbar has three controls, used to set the volume levels of your audio device and choose the input source.

The leftmost slider controls the output volume, the other slider controls the recording volume, and the control on the right lets you choose the input source (such as "Microphone", "Line In", "Audio CD", etc.). You will need to choose "Mic" or "Line In" as one of the inputs. If you are using a microphone choose "Mic". If you are using another audio device (CD Player, Mini disc etc), choose "Line In".
Testing Audio Levels
Now that you have everything set up and ready to go you can begin the recording process.
Before making the recording it is important to preview the loudest section of the source audio so that you do not end up with a distorted recording.
First you need to switch the input meter on. This can be set in the main interface :
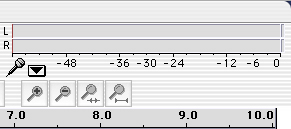
Simply click on the bars above the microphone symbol or click on the arrow next to the microphone symbol and select "Monitor input" like so :

Now play the loudest passage of the audio you are recording and, while doing so, look at the input level meter.
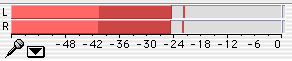
At the loudest point the red bars should be at about -12. You can adjust the input level by moving the slider next to the microphone symbol.

Keep playing back the loudest passage while adjust the input level until it peaks at about -12. Once you have done that click the "Stop" button :

Recording
Now you are ready to make your proper recording.
Click the "Record" button,

then play the audio you wish to record. Once the sound source has finished click the "Stop" button.
Your recording is now complete so save it immediately by selecting "Save Project" from the "File" menu.

That's it! Your recording is completed and saved. You can play it back by clicking the "Play" button.
Troubleshooting - Linux
Linux :: Host Error?
If you are a Linux user and you see a message similar to this "Error Initializing Audio: There was an error initializing the audio i/o layer. You will not be able to play or record audio. Error: Host error." then you may have to try one of the following :
Kill esd
It maybe that the esd sound server is running which is not permitting Audacity to access the sound card. You can try running this in a terminal:
ps ax | grep esd
If you see an output similar to this :
5164 ?        Ss     0:00 /usr/bin/esd -terminate -nobeeps -as 1 -spawnfd 18
10352 pts/1    R+     0:00 grep esd
Then you can see from the first line that esd is running ("/usr/bin/esd"). To kill the esd sound server you need to type this in a terminal (you need to have the permissions to run the sudo command) :
sudo killall esd
You will then be prompted for a password, enter your password notthe superuser password (also known as the "root" or "admin" password). Then try and start Audacity again, hopefully you won't get this error.
Start with aRts
You could also try running Audacity through the aRts sound server ("analog Real time synthesizer"). To do this quit Audacity if you already have it opened and restart it with this command in a terminal:
artsdsp audacity
Kill aRts
Lastly, you may wish to try starting Audacity after killing the aRts sound server. You can try this:
sudo killall artsd
Then try starting Audacity again.
Add Another Sound File
Software name : Audacity
Software version : 1.2
Audacity enables you to mix multiple sounds together. You will need Audacity open and an audio file already loaded, and then you can add as many new files as you like.
Adding your new track
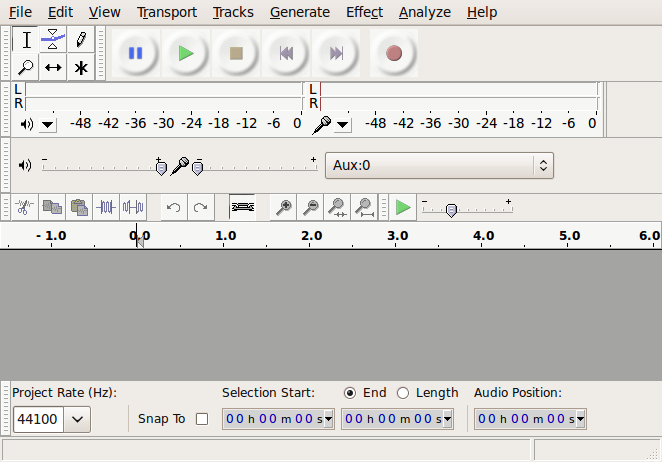
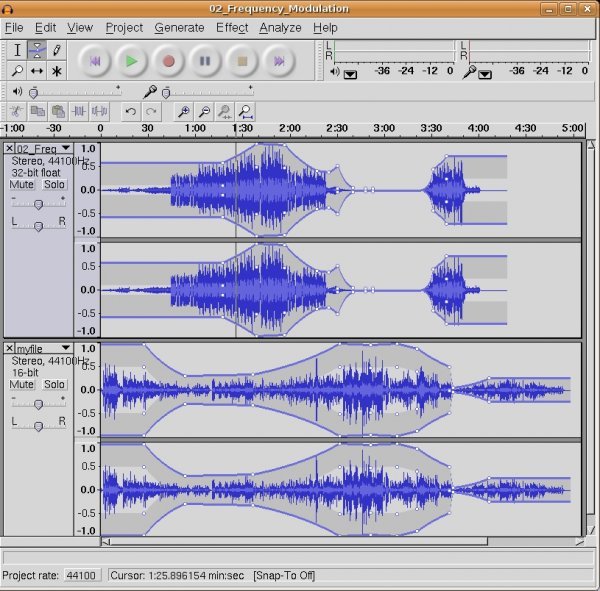
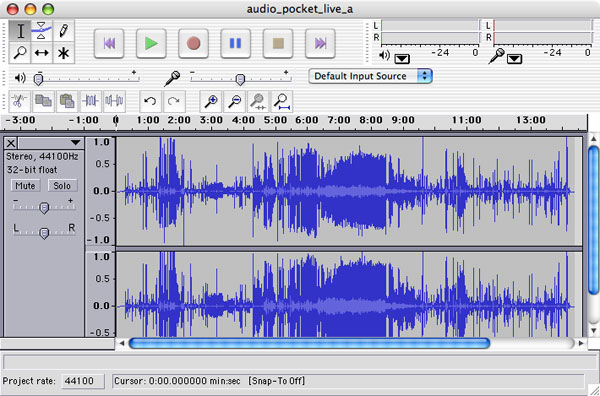
Ok, so Audacity should be open in front of you and you will have some audio already loaded. In this example we will be working with a sound file I have opened from my computer, and so my Audacity window looks like this :
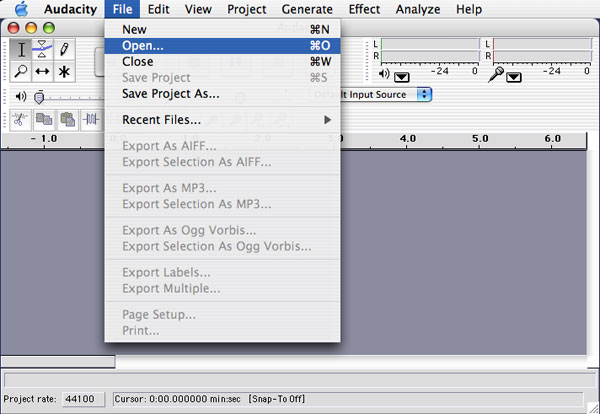
Now, we wish to add another sound file. To do this you will need to have another sound piece on your computer ready to go, and you will need to know where this file is located on your computer. Then click on Project and choose 'Import Audio...' :
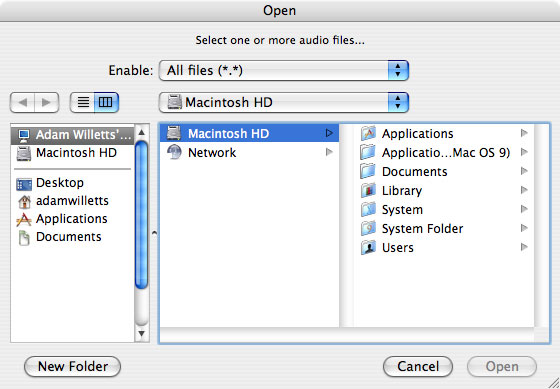
When you have done this a file browser will open :
In the above example I am very lucky as the file I wish to load is in the directory shown. If the file was not here I would have to use the file browser to locate the file on my computer. To do this you would open directories by double-clicking on the directory icons, or you can go 'up a directory' by clicking on the button with the directory icon and green arrow :
In my case I will click on the 'myfile.ogg' :
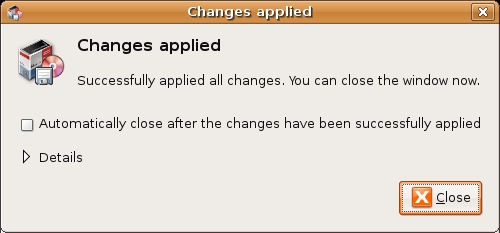
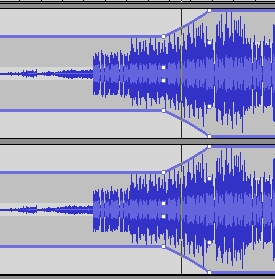
I know press OK and the file will be imported. 'Importing' means that the file will be converted into a format that Audacity understands and appear in the Audacity window as a new track. So you when you press 'OK' the importing process begins :
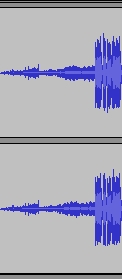
When it is complete the new track can be seen in the Audacity window :
You will notice that in the above example there is a new stereo track added at the bottom of the window. If you don't see this then you might need to scroll down on your Audacity window.
Note on Playback and Exporting
If you now press the 'Play' Button :
you will hear both tracks playing back at once. If you were now to export this file the tracks would be combined together into one sound file.
Envelope Tool
The envelope tool is probably the most important tool for Audacity users. It allows you to alter the volume of the sounds in Audacity which is especially important when you are combining ('mixing') several tracks together.
Open Audacity
You will first have to have Audacity open with more than one track. We will use two stereo music files to mix together using the Envleope Tool. So my Audacity initially looks like this :
Activating the Envelope Tool
The Envelope Tool has an icon in the Audacity Tool Bar, it looks like this :

When you click on it there are two parts of the Audacity interface that change, the first is that the Envelope Tool button looks like it has been pressed :

The second is that the tracks are surrounded by a blue line. Before pressing the Envelope Tool a track looks like this :
After pressing it looks like this:
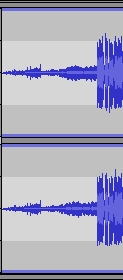
You can see the blue line around the track in the above image. This means the Envelope Tool is activated.
Alter the volume
The thin blue line actually represents the volume of the track. You can now lower the volume on chosen sections of the track by changing the shape of this blue line. To do this click on the blue line, you will see small white squares appear where you clicked :
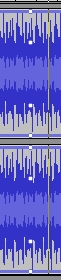
Now you can 'grab' the blue line at the point where these squares appear. To show you how this can change the volume of just one part of the audio click on the blue line close to where you first clicked :
Now point your mouse cursor on the top white square on the left side, and while your mouse finger is still down, drag the square downwards :
You will notice the area to the left gets smaller (the volume is lowered), and the area to the right gets bigger until it reaches the second set of squares. If you now play back the track you will hear the volume levels follow the lines you have made.
Mixing 2 tracks together
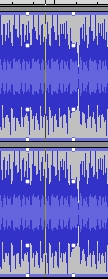
Using the Envelope Tool is the secret to mixing two or more tracks together into one sound piece. You can now experiment using the Envelope Tool and playing back the audio so you can hear how the tracks blend together. At the end you might have a lot of sections affected to create a single sound piece :
Basic Editing with Audacity
Software name : Audacity
Software version : 1.2
As far as audio editing software goes, Audacity is about as easy as it gets. Thats not to say its easy, if you haven't edited audio before then the whole concept can get a little bewildering. However with a minimal of practice you should be able to make fast work of editing.
Firstly, you will have to have some audio to edit. You can either record some using Audacity, or open an audio file from your computer.
There are some simple methods that form the basis of editing with Audacity. We will look at deleting sections of audio ('cutting') and shifting audio. With these two methods you can already do quite a lot.
Cutting
You will of course have Audacity open in front of you with an audio file ready to edit. The process of editing requires that you first know your source file (the file you will edit). You need to know where a cut needs to be made so play the audio file and listen for where you want to make your first edit.
Lets assume you have chosen the area to be cut. You need to know select the area by clicking on where the cut should start, holding down the mouse button, and dragging the mouse to the end of the area to be cut. If you do this correctly the area to be deleted will be highlighted in grey :
In the above example you can see that I have highlighted the area from 1 minute (1:00) to one and a half minutes (1:30). A selection of thirty seconds. To delete the file I can now click on the Edit menu and choose 'cut' :
When you release the mouse button you will see that the selected area has disappeared and the length of your file will have been reduced.
Focusing on the area to be cut
If you have just opened an audio file just press the green play button to listen to the entire file :
Once you have listened to it you may wish to take some notes to help you decide which area you wish to delete ('cut'). It is also a good idea to replay the area that you will cut to make sure you are selecting the right area. To do this you can select the area, as described above, and then press the play button and Audacity will only playback the selected area. This will help you decide if the selected area is actually the audio you wish to delete. If its not the right area then start again by selecting another area.
If you need to focus closer to the audio to make a 'finer' cut, then press on the magnifying glass icon :
This will enlarge the time scale shown and give you a 'closer' view of the audio. You can 'zoom out' of the audio again by pressing the magnifying glass with the minus sign in it:
Pasting
If you wish to shift audio from one place to another then you can easily do so with Audacity. First select the area you wish to shift. I will use the same area I used in the cutting example :
Now choose cut like you did in the above example.
The audio will now be cut from the track. Now click on the audio that is left at the point you where you want this audio to be shifted to.
In the above example you can can see that I ahve decided to insert the audio at the 4 minute mark. Now choose the Edit menu and select Paste:
The audio will now be inserted and you if you look at the Audacity window you should see the selected audio in its new place :
Now experiment with cutting and pasting audio!
Advanced Editing
Software name : Audacity
Software version : 1.3
There are some more advanced steps for editing that you can carry out with Audacity. Some of these include, adding silence, trimming audio, splitting and joining tracks, using panning.
Add Silence
You may want to add a silence to a track for several reasons. If we take the example of a two track project with one track as music and the other track as a voice track then we can imagine a situation where we would want to insert a silence in the voice track for several seconds to allow us to fade up the music. This would work in an advert or introduction for a radio show.
To start with your workspace should look a little like the still below.
Click in the voice track where you want to insert your silence.
When the voice track is selected you will see the whole track go a darker colour.
You are now ready to insert some silence. Do this by selecting Generate > Silence from the menus at the top of the screen.
When you are inserting a number of seconds for your Silence, it is easier to add more and then delete some silence later than to add to it. So I'm going to over estimate and put in 20 seconds of silence, as shown below.
Enter the number of seconds silence you want to insert and then click 'OK'. You'll see the silence appear as a flat line on the relevant track of your project.
What we are going to do next is to decrease the volume of the music track while the voice track contains some voice audio.
This is done using a combination for the Time shift tool and the Envelope tool.
Time Shift Tool
The time shift tool allows you to alter the time location of the audio on a particular track. This is useful when you are arranging audio on different tracks to be placed on after the other in a sequence.
In the example below we have imported two audio files into a project. They both are set to start at 0.00 seconds.
Our goal is to place the music track after the audio track. To do this use the mouse to select the Time Shift tool from the menu at the top of the workspace.
You can select the track you want and drag it left or right to occupy a new time location.
As you click and drag the second track to the right you may see some yellow guidelines appear to shows you the ending point of the other tracks. In the shot above the yellow guideline appeared when the start of the second track matched up with the end of the first one.
You should let go of the mouse when you are happy with the new time location of the track you a shifting.
Trimming Audio
Trimming audio tracks is useful when you only want to keep one part of the track. It is also different from using the cutting function as it maintains the time location of the part of the track you want to keep.
As an example we are going to trim a music track to only include the first 30 seconds or so. To do this select only the part of the track that you want to keep. Use the Selection tool to do this
When you have selected the part of the audio that you want to keep it should show up in a darker colour. You should then select 'Edit > Trim' .
If all works well then only the part you had selected will still be present on your track
Splitting Stereo Tracks
Sometimes when you are recording you may only record one channel of your track correctly. Or there may be another reason that you want to only work with either the left or right channel.
Below shows a track with one channel much louder than the other.
We are going to work on only the left channel (the top one). So we need to Select 'Split Stereo Track' from the drop down menu by the right of the track.
We can then delete the Right channel signal, as it has now become a separate track. Click on the X on the left of the track area.
If we play the remaining track then we'll be able to hear that the sound is only coming through one channel. This can be seen in the green signal in the screenshot below.
To adjust this we can select 'Mono' from the drop down menu on the left of the track bar.
This track will now play the same mono audio signal through both channels. You can export it to a stereo track if you need to.
Exporting A File
Software name : Audacity
Software version : 1.2
Projects created in Audacity are always saved in Audacity's own unique file format that cannot be opened by most other software. It is therefore necessary to export projects to more common file formats in order to use them with other audio software or media players.
Audacity can export the following formats: AIFF, MP3 and Ogg Vorbis.
AIFF files provide uncompressed CD quality audio so this format should be used if you want to open your Audacity project with other music production software or CD authoring software.
MP3 and Ogg Vorbis are both compressed? audio formats so they have lower sound quality but much smaller file sizes making them ideal for use in media players. The most important difference between these two formats is that Ogg Vorbis is completely open while MP3 is not. For this reason you will need to download and install the LAME MP3 encoder before you can export in MP3 format.
To export a file from Audacity you need to have an Audacity file open. If you do not already have a file open from a recording or editing session then you can open one by pressing the Apple and O keys together or by clicking on "Open" in the Audacity File menu.
You should now see a window like this:
Use this window to browse to the file that you wish to open. Once you have selected the file simply click "Open" to open it. You should now see something a bit like this:
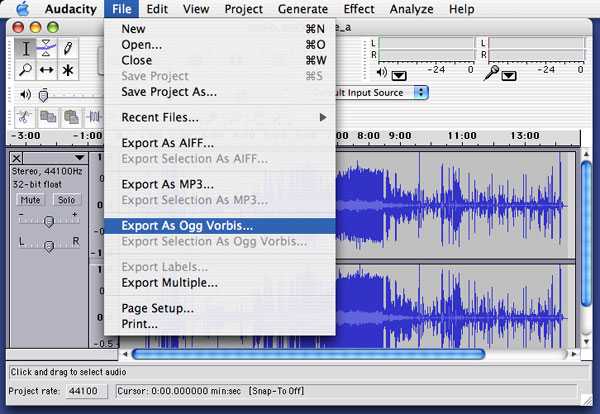
To export the file click "File" then click on the format that you want to export as.
You should now see a window like this:
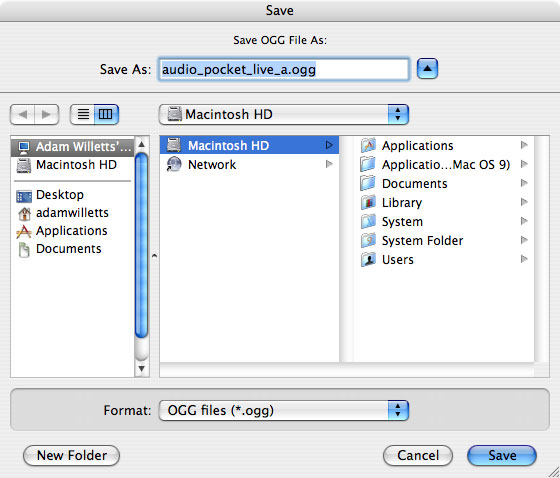
Use this window to edit the file name and select or create an appropriate folder into which to save the new file. Once you are happy with that simply click on "Save" to begin exporting.
You should now see a window like this:
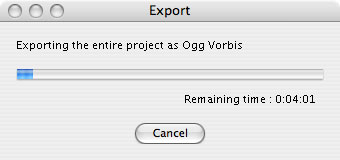
The time it takes to export the project will depend on the length of the recording and the speed of your computer.
When exporting is complete the above window will disappear. You should now be able to see the file in the folder that you chose to save it into looking something like this:

That's it. You can now enjoy listening to the results of your Audacity project through other audio software or transfer it on to your portable media player.
More Help
For more help with Audacity you can try these avenues:
Audacity Documentation
You should first look at the very good documentation at the developers site - http://audacity.sourceforge.net
Also try the Audacity FAQ (Frequenctly Asked Questions) - http://audacity.sourceforge.net/help/faq
Online Forums
You can also try searching through the forums for information.
http://audacityteam.org/forum/
The forums contain a lot of postings from users on many topics. You can use the search system to locate topics or just browse the categories. If you don't find what you want then try subscribing to the forums and posting your question to the relevant category.
There are a few things to keep in mind when asking a question in a forum or to a mailing list. First, be as clear as you can with your question and provide any infromation that you might think would help some to try to help you. You might, for example, include information about the operating system you are using, or various specifics that relate to what you are trying to achieve. Additionally, it is always good practice to also post back to any forum or mailing list if you manage to solve your query and include clear information on how you solved the puzzle. This is so that someone else that may have the same issue can resolve it using what you have found out. If possible post back to the same thread (discussion topic) so that anyone searching through the forum can follow the discussion including the solution.
Mailing Lists
Mailing lists are good places to look through for answers to questions. The subscription (also the archives are listed on each info page) information is located here :
http://audacity.sourceforge.net/contact/lists
You can also subscribe to the mailing lists and ask a question. Please note the suggestions about posting to forums and mailing lists in the above section.
IRC
IRC is a type of online chat. it is not the easiest to use if you are not familair with it but it is a very good system. There are a variety of softwares for all operating systems that enable you to use IRC. The IRC channel for Audacity is where a number of the developers are online and some 'superusers'. So logging into this channel can be useful but it is very important that you know exactly what you are trying to find out before trying this route. The protocol for using the channel is just to log in, and ask the question immediately. Don't try and be too chatty as you are probably going to be ignored. It is also preferable if you have done some research using the other methods above before trying the channel. The details for the IRC channel are:
- IRC network: freenode
-
Channel: #audacity
Web Search
Searching the web is always useful. If you are looking for problems arising from errors reported by the software then try entering the error text into the search engine. Be sure to edit out any information that doesn't look generic when doing this. Some search engines also enable you to try searches of mailing lists, online groups etc, this can also provide good results.
License
All chapters copyright of the authors (see below). Unless otherwise stated all chapters in this manual licensed with GNU General Public License version 2
This documentation is free documentation; you can redistribute it and/or modify it under the terms of the GNU General Public License as published by the Free Software Foundation; either version 2 of the License, or (at your option) any later version.
This documentation is distributed in the hope that it will be useful, but WITHOUT ANY WARRANTY; without even the implied warranty of MERCHANTABILITY or FITNESS FOR A PARTICULAR PURPOSE. See the GNU General Public License for more details.
You should have received a copy of the GNU General Public License along with this documentation; if not, write to the Free Software Foundation, Inc., 51 Franklin Street, Fifth Floor, Boston, MA 02110-1301, USA.
Authors
ADD A NEW TRACK
© adam hyde 2007, 2008
Modifications:
Flosstest Two 2007
TWikiGuest 2010
douglas 2010
ADVANCED EDITING
© mick fuzz 2009
BASIC EDITING
© adam hyde 2007, 2008
Modifications:
TWikiGuest 2010
douglas 2010
CREDITS
© adam hyde 2006, 2007, 2008
WHAT IS DIGITAL AUDIO?
© Anthony Oetzmann 2006
Modifications:
adam hyde 2006, 2007, 2008
Aleksandar Erkalović 2008
mick fuzz 2009
Rafe DiDomenico 2008
Seth Woodworth 2008
TWikiGuest 2010
douglas 2010
CREATING FADES
© adam hyde 2007, 2008
Modifications:
TWikiGuest 2010
Tom Kleen 2008
douglas 2010
EXPORTING
© Adam Willetts 2006
Modifications:
adam hyde 2007, 2008
Peter Shanks 2007
TWikiGuest 2010
douglas 2010
ADDITIONAL HELP
© adam hyde 2006, 2007, 2008
OSX
© Adam Willetts 2006
Modifications:
adam hyde 2006, 2007, 2008
Carla Morris 2008
Maria Inmaculada de la Torre 2009
TWikiGuest 2010
douglas 2010
UBUNTU
© adam hyde 2007, 2008
Modifications:
Maria Inmaculada de la Torre 2009
TWikiGuest 2010
Tomi Toivio 2009
douglas 2010
WINDOWS
© Adam Willetts 2006
Modifications:
adam hyde 2006, 2007, 2008
Carla Morris 2008
Maria Inmaculada de la Torre 2009
mick fuzz 2009
TWikiGuest 2010
douglas 2010
INTRODUCTION
© Adam Willetts 2006
Modifications:
adam hyde 2006, 2007, 2008, 2009
Rafe DiDomenico 2008
TWikiGuest 2010
douglas 2010
MENU BAR
© Anthony Oetzmann 2006
Modifications:
adam hyde 2006, 2007, 2008
TWikiGuest 2010
douglas 2010
MP3 INSTALLATION WINDOWS
© mick fuzz 2009
OPEN (IMPORT) A FILE
© adam hyde 2007, 2008
Modifications:
TWikiGuest 2010
douglas 2010
RECORDING
© Adam Willetts 2006
Modifications:
adam hyde 2006, 2007, 2008
mick fuzz 2009
TWikiGuest 2010
douglas 2010
TOOL BAR
© Anthony Oetzmann 2006
Modifications:
adam hyde 2006, 2007, 2008
Brent Simpson 2008
TWikiGuest 2010
douglas 2010
TRACK BAR
© Anthony Oetzmann 2006
Modifications:
adam hyde 2006, 2007, 2008
TWikiGuest 2010
douglas 2010

Free manuals for free software
General Public License
Version 2, June 1991
Copyright (C) 1989, 1991 Free Software Foundation, Inc.
51 Franklin Street, Fifth Floor, Boston, MA 02110-1301, USA
Everyone is permitted to copy and distribute verbatim copies
of this license document, but changing it is not allowed.
Preamble
The licenses for most software are designed to take away your freedom to share and change it. By contrast, the GNU General Public License is intended to guarantee your freedom to share and change free software--to make sure the software is free for all its users. This General Public License applies to most of the Free Software Foundation's software and to any other program whose authors commit to using it. (Some other Free Software Foundation software is covered by the GNU Lesser General Public License instead.) You can apply it to your programs, too.
When we speak of free software, we are referring to freedom, not price. Our General Public Licenses are designed to make sure that you have the freedom to distribute copies of free software (and charge for this service if you wish), that you receive source code or can get it if you want it, that you can change the software or use pieces of it in new free programs; and that you know you can do these things.
To protect your rights, we need to make restrictions that forbid anyone to deny you these rights or to ask you to surrender the rights. These restrictions translate to certain responsibilities for you if you distribute copies of the software, or if you modify it.
For example, if you distribute copies of such a program, whether gratis or for a fee, you must give the recipients all the rights that you have. You must make sure that they, too, receive or can get the source code. And you must show them these terms so they know their rights.
We protect your rights with two steps: (1) copyright the software, and (2) offer you this license which gives you legal permission to copy, distribute and/or modify the software.
Also, for each author's protection and ours, we want to make certain that everyone understands that there is no warranty for this free software. If the software is modified by someone else and passed on, we want its recipients to know that what they have is not the original, so that any problems introduced by others will not reflect on the original authors' reputations.
Finally, any free program is threatened constantly by software patents. We wish to avoid the danger that redistributors of a free program will individually obtain patent licenses, in effect making the program proprietary. To prevent this, we have made it clear that any patent must be licensed for everyone's free use or not licensed at all.
The precise terms and conditions for copying, distribution and modification follow.
TERMS AND CONDITIONS FOR COPYING, DISTRIBUTION AND MODIFICATION
0. This License applies to any program or other work which contains a notice placed by the copyright holder saying it may be distributed under the terms of this General Public License. The "Program", below, refers to any such program or work, and a "work based on the Program" means either the Program or any derivative work under copyright law: that is to say, a work containing the Program or a portion of it, either verbatim or with modifications and/or translated into another language. (Hereinafter, translation is included without limitation in the term "modification".) Each licensee is addressed as "you".
Activities other than copying, distribution and modification are not covered by this License; they are outside its scope. The act of running the Program is not restricted, and the output from the Program is covered only if its contents constitute a work based on the Program (independent of having been made by running the Program). Whether that is true depends on what the Program does.
1. You may copy and distribute verbatim copies of the Program's source code as you receive it, in any medium, provided that you conspicuously and appropriately publish on each copy an appropriate copyright notice and disclaimer of warranty; keep intact all the notices that refer to this License and to the absence of any warranty; and give any other recipients of the Program a copy of this License along with the Program.
You may charge a fee for the physical act of transferring a copy, and you may at your option offer warranty protection in exchange for a fee.
2. You may modify your copy or copies of the Program or any portion of it, thus forming a work based on the Program, and copy and distribute such modifications or work under the terms of Section 1 above, provided that you also meet all of these conditions:
- a) You must cause the modified files to carry prominent notices stating that you changed the files and the date of any change.
- b) You must cause any work that you distribute or publish, that in whole or in part contains or is derived from the Program or any part thereof, to be licensed as a whole at no charge to all third parties under the terms of this License.
- c) If the modified program normally reads commands interactively when run, you must cause it, when started running for such interactive use in the most ordinary way, to print or display an announcement including an appropriate copyright notice and a notice that there is no warranty (or else, saying that you provide a warranty) and that users may redistribute the program under these conditions, and telling the user how to view a copy of this License. (Exception: if the Program itself is interactive but does not normally print such an announcement, your work based on the Program is not required to print an announcement.)
These requirements apply to the modified work as a whole. If identifiable sections of that work are not derived from the Program, and can be reasonably considered independent and separate works in themselves, then this License, and its terms, do not apply to those sections when you distribute them as separate works. But when you distribute the same sections as part of a whole which is a work based on the Program, the distribution of the whole must be on the terms of this License, whose permissions for other licensees extend to the entire whole, and thus to each and every part regardless of who wrote it.
Thus, it is not the intent of this section to claim rights or contest your rights to work written entirely by you; rather, the intent is to exercise the right to control the distribution of derivative or collective works based on the Program.
In addition, mere aggregation of another work not based on the Program with the Program (or with a work based on the Program) on a volume of a storage or distribution medium does not bring the other work under the scope of this License.
3. You may copy and distribute the Program (or a work based on it, under Section 2) in object code or executable form under the terms of Sections 1 and 2 above provided that you also do one of the following:
- a) Accompany it with the complete corresponding machine-readable source code, which must be distributed under the terms of Sections 1 and 2 above on a medium customarily used for software interchange; or,
- b) Accompany it with a written offer, valid for at least three years, to give any third party, for a charge no more than your cost of physically performing source distribution, a complete machine-readable copy of the corresponding source code, to be distributed under the terms of Sections 1 and 2 above on a medium customarily used for software interchange; or,
- c) Accompany it with the information you received as to the offer to distribute corresponding source code. (This alternative is allowed only for noncommercial distribution and only if you received the program in object code or executable form with such an offer, in accord with Subsection b above.)
The source code for a work means the preferred form of the work for making modifications to it. For an executable work, complete source code means all the source code for all modules it contains, plus any associated interface definition files, plus the scripts used to control compilation and installation of the executable. However, as a special exception, the source code distributed need not include anything that is normally distributed (in either source or binary form) with the major components (compiler, kernel, and so on) of the operating system on which the executable runs, unless that component itself accompanies the executable.
If distribution of executable or object code is made by offering access to copy from a designated place, then offering equivalent access to copy the source code from the same place counts as distribution of the source code, even though third parties are not compelled to copy the source along with the object code.
4. You may not copy, modify, sublicense, or distribute the Program except as expressly provided under this License. Any attempt otherwise to copy, modify, sublicense or distribute the Program is void, and will automatically terminate your rights under this License. However, parties who have received copies, or rights, from you under this License will not have their licenses terminated so long as such parties remain in full compliance.
5. You are not required to accept this License, since you have not signed it. However, nothing else grants you permission to modify or distribute the Program or its derivative works. These actions are prohibited by law if you do not accept this License. Therefore, by modifying or distributing the Program (or any work based on the Program), you indicate your acceptance of this License to do so, and all its terms and conditions for copying, distributing or modifying the Program or works based on it.
6. Each time you redistribute the Program (or any work based on the Program), the recipient automatically receives a license from the original licensor to copy, distribute or modify the Program subject to these terms and conditions. You may not impose any further restrictions on the recipients' exercise of the rights granted herein. You are not responsible for enforcing compliance by third parties to this License.
7. If, as a consequence of a court judgment or allegation of patent infringement or for any other reason (not limited to patent issues), conditions are imposed on you (whether by court order, agreement or otherwise) that contradict the conditions of this License, they do not excuse you from the conditions of this License. If you cannot distribute so as to satisfy simultaneously your obligations under this License and any other pertinent obligations, then as a consequence you may not distribute the Program at all. For example, if a patent license would not permit royalty-free redistribution of the Program by all those who receive copies directly or indirectly through you, then the only way you could satisfy both it and this License would be to refrain entirely from distribution of the Program.
If any portion of this section is held invalid or unenforceable under any particular circumstance, the balance of the section is intended to apply and the section as a whole is intended to apply in other circumstances.
It is not the purpose of this section to induce you to infringe any patents or other property right claims or to contest validity of any such claims; this section has the sole purpose of protecting the integrity of the free software distribution system, which is implemented by public license practices. Many people have made generous contributions to the wide range of software distributed through that system in reliance on consistent application of that system; it is up to the author/donor to decide if he or she is willing to distribute software through any other system and a licensee cannot impose that choice.
This section is intended to make thoroughly clear what is believed to be a consequence of the rest of this License.
8. If the distribution and/or use of the Program is restricted in certain countries either by patents or by copyrighted interfaces, the original copyright holder who places the Program under this License may add an explicit geographical distribution limitation excluding those countries, so that distribution is permitted only in or among countries not thus excluded. In such case, this License incorporates the limitation as if written in the body of this License.
9. The Free Software Foundation may publish revised and/or new versions of the General Public License from time to time. Such new versions will be similar in spirit to the present version, but may differ in detail to address new problems or concerns.
Each version is given a distinguishing version number. If the Program specifies a version number of this License which applies to it and "any later version", you have the option of following the terms and conditions either of that version or of any later version published by the Free Software Foundation. If the Program does not specify a version number of this License, you may choose any version ever published by the Free Software Foundation.
10. If you wish to incorporate parts of the Program into other free programs whose distribution conditions are different, write to the author to ask for permission. For software which is copyrighted by the Free Software Foundation, write to the Free Software Foundation; we sometimes make exceptions for this. Our decision will be guided by the two goals of preserving the free status of all derivatives of our free software and of promoting the sharing and reuse of software generally.
NO WARRANTY
11. BECAUSE THE PROGRAM IS LICENSED FREE OF CHARGE, THERE IS NO WARRANTY FOR THE PROGRAM, TO THE EXTENT PERMITTED BY APPLICABLE LAW. EXCEPT WHEN OTHERWISE STATED IN WRITING THE COPYRIGHT HOLDERS AND/OR OTHER PARTIES PROVIDE THE PROGRAM "AS IS" WITHOUT WARRANTY OF ANY KIND, EITHER EXPRESSED OR IMPLIED, INCLUDING, BUT NOT LIMITED TO, THE IMPLIED WARRANTIES OF MERCHANTABILITY AND FITNESS FOR A PARTICULAR PURPOSE. THE ENTIRE RISK AS TO THE QUALITY AND PERFORMANCE OF THE PROGRAM IS WITH YOU. SHOULD THE PROGRAM PROVE DEFECTIVE, YOU ASSUME THE COST OF ALL NECESSARY SERVICING, REPAIR OR CORRECTION.
12. IN NO EVENT UNLESS REQUIRED BY APPLICABLE LAW OR AGREED TO IN WRITING WILL ANY COPYRIGHT HOLDER, OR ANY OTHER PARTY WHO MAY MODIFY AND/OR REDISTRIBUTE THE PROGRAM AS PERMITTED ABOVE, BE LIABLE TO YOU FOR DAMAGES, INCLUDING ANY GENERAL, SPECIAL, INCIDENTAL OR CONSEQUENTIAL DAMAGES ARISING OUT OF THE USE OR INABILITY TO USE THE PROGRAM (INCLUDING BUT NOT LIMITED TO LOSS OF DATA OR DATA BEING RENDERED INACCURATE OR LOSSES SUSTAINED BY YOU OR THIRD PARTIES OR A FAILURE OF THE PROGRAM TO OPERATE WITH ANY OTHER PROGRAMS), EVEN IF SUCH HOLDER OR OTHER PARTY HAS BEEN ADVISED OF THE POSSIBILITY OF SUCH DAMAGES.
END OF TERMS AND CONDITIONS
Envelope Tool
The envelope tool is probably the most important tool for Audacity users. It allows you to alter the volume of the sounds in Audacity which is especially important when you are combining ('mixing') several tracks together.
Open Audacity
You will first have to have Audacity open with more than one track. We will use two stereo music files to mix together using the Envleope Tool. So my Audacity initially looks like this :
Activating the Envelope Tool
The Envelope Tool has an icon in the Audacity Tool Bar, it looks like this :
When you click on it there are two parts of the Audacity interface that change, the first is that the Envelope Tool button looks like it has been pressed :
The second is that the tracks are surrounded by a blue line. Before pressing the Envelope Tool a track looks like this :
After pressing it looks like this:
You can see the blue line around the track in the above image. This means the Envelope Tool is activated.
Alter the volume
The thin blue line actually represents the volume of the track. You can now lower the volume on chosen sections of the track by changing the shape of this blue line. To do this click on the blue line, you will see small white squares appear where you clicked :
Now you can 'grab' the blue line at the point where these squares appear. To show you how this can change the volume of just one part of the audio click on the blue line close to where you first clicked :
Now point your mouse cursor on the top white square on the left side, and while your mouse finger is still down, drag the square downwards :
You will notice the area to the left gets smaller (the volume is lowered), and the area to the right gets bigger until it reaches the second set of squares. If you now play back the track you will hear the volume levels follow the lines you have made.
Mixing 2 tracks together
Using the Envelope Tool is the secret to mixing two or more tracks together into one sound piece. You can now experiment using the Envelope Tool and playing back the audio so you can hear how the tracks blend together. At the end you might have a lot of sections affected to create a single sound piece :
License
All chapters copyright of the authors (see below). Unless otherwise stated all chapters in this manual licensed with GNU General Public License version 2
This documentation is free documentation; you can redistribute it and/or modify it under the terms of the GNU General Public License as published by the Free Software Foundation; either version 2 of the License, or (at your option) any later version.
This documentation is distributed in the hope that it will be useful, but WITHOUT ANY WARRANTY; without even the implied warranty of MERCHANTABILITY or FITNESS FOR A PARTICULAR PURPOSE. See the GNU General Public License for more details.
You should have received a copy of the GNU General Public License along with this documentation; if not, write to the Free Software Foundation, Inc., 51 Franklin Street, Fifth Floor, Boston, MA 02110-1301, USA.
Authors
ADD A NEW TRACK
© adam hyde 2007, 2008
Modifications:
Flosstest Two 2007
TWikiGuest 2010
douglas 2010
ADVANCED EDITING
© mick fuzz 2009
BASIC EDITING
© adam hyde 2007, 2008
Modifications:
TWikiGuest 2010
douglas 2010
CREDITS
© adam hyde 2006, 2007, 2008
WHAT IS DIGITAL AUDIO?
© Anthony Oetzmann 2006
Modifications:
adam hyde 2006, 2007, 2008
Aleksandar Erkalović 2008
mick fuzz 2009
Rafe DiDomenico 2008
Seth Woodworth 2008
TWikiGuest 2010
douglas 2010
CREATING FADES
© adam hyde 2007, 2008
Modifications:
TWikiGuest 2010
Tom Kleen 2008
douglas 2010
EXPORTING
© Adam Willetts 2006
Modifications:
adam hyde 2007, 2008
Peter Shanks 2007
TWikiGuest 2010
douglas 2010
ADDITIONAL HELP
© adam hyde 2006, 2007, 2008
OSX
© Adam Willetts 2006
Modifications:
adam hyde 2006, 2007, 2008
Carla Morris 2008
Maria Inmaculada de la Torre 2009
TWikiGuest 2010
douglas 2010
UBUNTU
© adam hyde 2007, 2008
Modifications:
Maria Inmaculada de la Torre 2009
TWikiGuest 2010
Tomi Toivio 2009
douglas 2010
WINDOWS
© Adam Willetts 2006
Modifications:
adam hyde 2006, 2007, 2008
Carla Morris 2008
Maria Inmaculada de la Torre 2009
mick fuzz 2009
TWikiGuest 2010
douglas 2010
INTRODUCTION
© Adam Willetts 2006
Modifications:
adam hyde 2006, 2007, 2008, 2009
Rafe DiDomenico 2008
TWikiGuest 2010
douglas 2010
MENU BAR
© Anthony Oetzmann 2006
Modifications:
adam hyde 2006, 2007, 2008
TWikiGuest 2010
douglas 2010
MP3 INSTALLATION WINDOWS
© mick fuzz 2009
OPEN (IMPORT) A FILE
© adam hyde 2007, 2008
Modifications:
TWikiGuest 2010
douglas 2010
RECORDING
© Adam Willetts 2006
Modifications:
adam hyde 2006, 2007, 2008
mick fuzz 2009
TWikiGuest 2010
douglas 2010
TOOL BAR
© Anthony Oetzmann 2006
Modifications:
adam hyde 2006, 2007, 2008
Brent Simpson 2008
TWikiGuest 2010
douglas 2010
TRACK BAR
© Anthony Oetzmann 2006
Modifications:
adam hyde 2006, 2007, 2008
TWikiGuest 2010
douglas 2010
Free manuals for free software
General Public License
Version 2, June 1991
Copyright (C) 1989, 1991 Free Software Foundation, Inc.
51 Franklin Street, Fifth Floor, Boston, MA 02110-1301, USA
Everyone is permitted to copy and distribute verbatim copies
of this license document, but changing it is not allowed.
Preamble
The licenses for most software are designed to take away your freedom to share and change it. By contrast, the GNU General Public License is intended to guarantee your freedom to share and change free software--to make sure the software is free for all its users. This General Public License applies to most of the Free Software Foundation's software and to any other program whose authors commit to using it. (Some other Free Software Foundation software is covered by the GNU Lesser General Public License instead.) You can apply it to your programs, too.
When we speak of free software, we are referring to freedom, not price. Our General Public Licenses are designed to make sure that you have the freedom to distribute copies of free software (and charge for this service if you wish), that you receive source code or can get it if you want it, that you can change the software or use pieces of it in new free programs; and that you know you can do these things.
To protect your rights, we need to make restrictions that forbid anyone to deny you these rights or to ask you to surrender the rights. These restrictions translate to certain responsibilities for you if you distribute copies of the software, or if you modify it.
For example, if you distribute copies of such a program, whether gratis or for a fee, you must give the recipients all the rights that you have. You must make sure that they, too, receive or can get the source code. And you must show them these terms so they know their rights.
We protect your rights with two steps: (1) copyright the software, and (2) offer you this license which gives you legal permission to copy, distribute and/or modify the software.
Also, for each author's protection and ours, we want to make certain that everyone understands that there is no warranty for this free software. If the software is modified by someone else and passed on, we want its recipients to know that what they have is not the original, so that any problems introduced by others will not reflect on the original authors' reputations.
Finally, any free program is threatened constantly by software patents. We wish to avoid the danger that redistributors of a free program will individually obtain patent licenses, in effect making the program proprietary. To prevent this, we have made it clear that any patent must be licensed for everyone's free use or not licensed at all.
The precise terms and conditions for copying, distribution and modification follow.
TERMS AND CONDITIONS FOR COPYING, DISTRIBUTION AND MODIFICATION
0. This License applies to any program or other work which contains a notice placed by the copyright holder saying it may be distributed under the terms of this General Public License. The "Program", below, refers to any such program or work, and a "work based on the Program" means either the Program or any derivative work under copyright law: that is to say, a work containing the Program or a portion of it, either verbatim or with modifications and/or translated into another language. (Hereinafter, translation is included without limitation in the term "modification".) Each licensee is addressed as "you".
Activities other than copying, distribution and modification are not covered by this License; they are outside its scope. The act of running the Program is not restricted, and the output from the Program is covered only if its contents constitute a work based on the Program (independent of having been made by running the Program). Whether that is true depends on what the Program does.
1. You may copy and distribute verbatim copies of the Program's source code as you receive it, in any medium, provided that you conspicuously and appropriately publish on each copy an appropriate copyright notice and disclaimer of warranty; keep intact all the notices that refer to this License and to the absence of any warranty; and give any other recipients of the Program a copy of this License along with the Program.
You may charge a fee for the physical act of transferring a copy, and you may at your option offer warranty protection in exchange for a fee.
2. You may modify your copy or copies of the Program or any portion of it, thus forming a work based on the Program, and copy and distribute such modifications or work under the terms of Section 1 above, provided that you also meet all of these conditions:
- a) You must cause the modified files to carry prominent notices stating that you changed the files and the date of any change.
- b) You must cause any work that you distribute or publish, that in whole or in part contains or is derived from the Program or any part thereof, to be licensed as a whole at no charge to all third parties under the terms of this License.
- c) If the modified program normally reads commands interactively when run, you must cause it, when started running for such interactive use in the most ordinary way, to print or display an announcement including an appropriate copyright notice and a notice that there is no warranty (or else, saying that you provide a warranty) and that users may redistribute the program under these conditions, and telling the user how to view a copy of this License. (Exception: if the Program itself is interactive but does not normally print such an announcement, your work based on the Program is not required to print an announcement.)
These requirements apply to the modified work as a whole. If identifiable sections of that work are not derived from the Program, and can be reasonably considered independent and separate works in themselves, then this License, and its terms, do not apply to those sections when you distribute them as separate works. But when you distribute the same sections as part of a whole which is a work based on the Program, the distribution of the whole must be on the terms of this License, whose permissions for other licensees extend to the entire whole, and thus to each and every part regardless of who wrote it.
Thus, it is not the intent of this section to claim rights or contest your rights to work written entirely by you; rather, the intent is to exercise the right to control the distribution of derivative or collective works based on the Program.
In addition, mere aggregation of another work not based on the Program with the Program (or with a work based on the Program) on a volume of a storage or distribution medium does not bring the other work under the scope of this License.
3. You may copy and distribute the Program (or a work based on it, under Section 2) in object code or executable form under the terms of Sections 1 and 2 above provided that you also do one of the following:
- a) Accompany it with the complete corresponding machine-readable source code, which must be distributed under the terms of Sections 1 and 2 above on a medium customarily used for software interchange; or,
- b) Accompany it with a written offer, valid for at least three years, to give any third party, for a charge no more than your cost of physically performing source distribution, a complete machine-readable copy of the corresponding source code, to be distributed under the terms of Sections 1 and 2 above on a medium customarily used for software interchange; or,
- c) Accompany it with the information you received as to the offer to distribute corresponding source code. (This alternative is allowed only for noncommercial distribution and only if you received the program in object code or executable form with such an offer, in accord with Subsection b above.)
The source code for a work means the preferred form of the work for making modifications to it. For an executable work, complete source code means all the source code for all modules it contains, plus any associated interface definition files, plus the scripts used to control compilation and installation of the executable. However, as a special exception, the source code distributed need not include anything that is normally distributed (in either source or binary form) with the major components (compiler, kernel, and so on) of the operating system on which the executable runs, unless that component itself accompanies the executable.
If distribution of executable or object code is made by offering access to copy from a designated place, then offering equivalent access to copy the source code from the same place counts as distribution of the source code, even though third parties are not compelled to copy the source along with the object code.
4. You may not copy, modify, sublicense, or distribute the Program except as expressly provided under this License. Any attempt otherwise to copy, modify, sublicense or distribute the Program is void, and will automatically terminate your rights under this License. However, parties who have received copies, or rights, from you under this License will not have their licenses terminated so long as such parties remain in full compliance.
5. You are not required to accept this License, since you have not signed it. However, nothing else grants you permission to modify or distribute the Program or its derivative works. These actions are prohibited by law if you do not accept this License. Therefore, by modifying or distributing the Program (or any work based on the Program), you indicate your acceptance of this License to do so, and all its terms and conditions for copying, distributing or modifying the Program or works based on it.
6. Each time you redistribute the Program (or any work based on the Program), the recipient automatically receives a license from the original licensor to copy, distribute or modify the Program subject to these terms and conditions. You may not impose any further restrictions on the recipients' exercise of the rights granted herein. You are not responsible for enforcing compliance by third parties to this License.
7. If, as a consequence of a court judgment or allegation of patent infringement or for any other reason (not limited to patent issues), conditions are imposed on you (whether by court order, agreement or otherwise) that contradict the conditions of this License, they do not excuse you from the conditions of this License. If you cannot distribute so as to satisfy simultaneously your obligations under this License and any other pertinent obligations, then as a consequence you may not distribute the Program at all. For example, if a patent license would not permit royalty-free redistribution of the Program by all those who receive copies directly or indirectly through you, then the only way you could satisfy both it and this License would be to refrain entirely from distribution of the Program.
If any portion of this section is held invalid or unenforceable under any particular circumstance, the balance of the section is intended to apply and the section as a whole is intended to apply in other circumstances.
It is not the purpose of this section to induce you to infringe any patents or other property right claims or to contest validity of any such claims; this section has the sole purpose of protecting the integrity of the free software distribution system, which is implemented by public license practices. Many people have made generous contributions to the wide range of software distributed through that system in reliance on consistent application of that system; it is up to the author/donor to decide if he or she is willing to distribute software through any other system and a licensee cannot impose that choice.
This section is intended to make thoroughly clear what is believed to be a consequence of the rest of this License.
8. If the distribution and/or use of the Program is restricted in certain countries either by patents or by copyrighted interfaces, the original copyright holder who places the Program under this License may add an explicit geographical distribution limitation excluding those countries, so that distribution is permitted only in or among countries not thus excluded. In such case, this License incorporates the limitation as if written in the body of this License.
9. The Free Software Foundation may publish revised and/or new versions of the General Public License from time to time. Such new versions will be similar in spirit to the present version, but may differ in detail to address new problems or concerns.
Each version is given a distinguishing version number. If the Program specifies a version number of this License which applies to it and "any later version", you have the option of following the terms and conditions either of that version or of any later version published by the Free Software Foundation. If the Program does not specify a version number of this License, you may choose any version ever published by the Free Software Foundation.
10. If you wish to incorporate parts of the Program into other free programs whose distribution conditions are different, write to the author to ask for permission. For software which is copyrighted by the Free Software Foundation, write to the Free Software Foundation; we sometimes make exceptions for this. Our decision will be guided by the two goals of preserving the free status of all derivatives of our free software and of promoting the sharing and reuse of software generally.
NO WARRANTY
11. BECAUSE THE PROGRAM IS LICENSED FREE OF CHARGE, THERE IS NO WARRANTY FOR THE PROGRAM, TO THE EXTENT PERMITTED BY APPLICABLE LAW. EXCEPT WHEN OTHERWISE STATED IN WRITING THE COPYRIGHT HOLDERS AND/OR OTHER PARTIES PROVIDE THE PROGRAM "AS IS" WITHOUT WARRANTY OF ANY KIND, EITHER EXPRESSED OR IMPLIED, INCLUDING, BUT NOT LIMITED TO, THE IMPLIED WARRANTIES OF MERCHANTABILITY AND FITNESS FOR A PARTICULAR PURPOSE. THE ENTIRE RISK AS TO THE QUALITY AND PERFORMANCE OF THE PROGRAM IS WITH YOU. SHOULD THE PROGRAM PROVE DEFECTIVE, YOU ASSUME THE COST OF ALL NECESSARY SERVICING, REPAIR OR CORRECTION.
12. IN NO EVENT UNLESS REQUIRED BY APPLICABLE LAW OR AGREED TO IN WRITING WILL ANY COPYRIGHT HOLDER, OR ANY OTHER PARTY WHO MAY MODIFY AND/OR REDISTRIBUTE THE PROGRAM AS PERMITTED ABOVE, BE LIABLE TO YOU FOR DAMAGES, INCLUDING ANY GENERAL, SPECIAL, INCIDENTAL OR CONSEQUENTIAL DAMAGES ARISING OUT OF THE USE OR INABILITY TO USE THE PROGRAM (INCLUDING BUT NOT LIMITED TO LOSS OF DATA OR DATA BEING RENDERED INACCURATE OR LOSSES SUSTAINED BY YOU OR THIRD PARTIES OR A FAILURE OF THE PROGRAM TO OPERATE WITH ANY OTHER PROGRAMS), EVEN IF SUCH HOLDER OR OTHER PARTY HAS BEEN ADVISED OF THE POSSIBILITY OF SUCH DAMAGES.
END OF TERMS AND CONDITIONS
Exporting A File
Software name : Audacity
Software version : 1.2
Projects created in Audacity are always saved in Audacity's own unique file format that cannot be opened by most other software. It is therefore necessary to export projects to more common file formats in order to use them with other audio software or media players.
Audacity can export the following formats: AIFF, MP3 and Ogg Vorbis.
AIFF files provide uncompressed CD quality audio so this format should be used if you want to open your Audacity project with other music production software or CD authoring software.
MP3 and Ogg Vorbis are both compressed? audio formats so they have lower sound quality but much smaller file sizes making them ideal for use in media players. The most important difference between these two formats is that Ogg Vorbis is completely open while MP3 is not. For this reason you will need to download and install the LAME MP3 encoder before you can export in MP3 format.
To export a file from Audacity you need to have an Audacity file open. If you do not already have a file open from a recording or editing session then you can open one by pressing the Apple and O keys together or by clicking on "Open" in the Audacity File menu.
You should now see a window like this:
Use this window to browse to the file that you wish to open. Once you have selected the file simply click "Open" to open it. You should now see something a bit like this:
To export the file click "File" then click on the format that you want to export as.
You should now see a window like this:
Use this window to edit the file name and select or create an appropriate folder into which to save the new file. Once you are happy with that simply click on "Save" to begin exporting.
You should now see a window like this:
The time it takes to export the project will depend on the length of the recording and the speed of your computer.
When exporting is complete the above window will disappear. You should now be able to see the file in the folder that you chose to save it into looking something like this:
That's it. You can now enjoy listening to the results of your Audacity project through other audio software or transfer it on to your portable media player.
Menu Bar
Software name : Audacity
Software version : 1.2
Lets look at the basic elements of the Audacity Menu Bar :
The Menu Bar is a typical element in many applications. It will look slightly different to this if you are not using Linux, most notably in Mac OSX this Menu Bar is not located on the application window itself but at the top of the screen in the "Apple Menu". Lets go through the Menu Bar one item at a time.
File
By clicking on "File" in the Menu Bar you get a drop down menu with several options to choose from. Some options maybe "greyed out" meaning you can't select them, you will only be able to choose the options that appear in solid black. The options available depend on the state of Audacity at the time. For example the following image was taken from Audacity with when the program had just been opened and no recording or editing had been started:
The File Menu is where you can process all the things related to the audio and project (.aup) files.
| option |
action |
| New |
creates a new empty project window. |
| Open... |
selecting "Open" presents you with a dialog where you can choose a file to open.
|
| Close |
closes the current project window. |
| Save Project |
saves the current Audacity project (AUP) file. |
| Save Project As... |
allows you to save the current Audacity project (AUP) file with a different name or in a new location. |
| Recent Files... |
gives a list of recent files you ahve been working on. |
| Export As WAV... |
exports the current Audacity project as a standard audio file format such as WAV or AIFF. |
| Export Selection As WAV... |
this is the same as Export, but it only exports the part of the project that is selected. |
| Export As MP3... |
exports the current Audacity project as an MP3 file. |
| Export Selection As MP3... |
this is the same as Export MP3, but it only exports the part of the project that is selected. |
| Export As OGG... |
exports the current Audacity project as an Ogg Vorbis file. |
| Export Selection As OGG... |
this is the same as Export As OGG, but it only exports the part of the project that is selected. |
| Export Labels... |
if you have any Label Tracks, this command will export them as a text file. This feature is commonly used in Speech Recognition. |
| Export Multiple... |
this allows you to do multiple exports from Audacity. |
| Exit/Quit |
closes all project windows and exits Audacity. It will ask you if you want to save changes. |
Edit Menu
The Edit Menu is only accessible when you are editing an audio file.
| option |
action |
| Undo |
this will undo the last editing operation you performed to your project. |
| Redo |
this will redo any editing operations that were just undone. |
| Cut |
removes the selected audio data and places it on the clipboard. |
| Copy |
copies the selected audio data to the clipboard without removing it from the project. |
| Paste |
inserts whatever is on the clipboard at the position of the selection cursor in the project. |
| Trim |
deletes everything but the selection. |
| Delete |
removes the audio data that is currently selected without copying it to the clipboard. |
| Silence |
erases the audio data currently selected, replacing it with silence. |
| Split |
moves the selected region into its own track or tracks. |
| Duplicate |
makes a copy of all or part of a track or set of tracks into new tracks. |
Select...
|
selects part of the audio depending on the option chosen.
|
| Find Zero Crossings |
moves the cursor or the edges of the selection to the nearest point where the audio waveform passes though zero. |
| Selection Save |
saves the current selection and position. |
| Selection Restore |
restores the selection to the project. |
| Move Cursor... |
these commands provide quick and accurate ways to manoeuvre the cursor around the project to the start and end of tracks and selections. |
| Snap-To... |
turns snapping of the cursor to a grid of time values on or off. |
| Preferences |
opens a dialog window that lets you configure Audacity. |
View
The View Menu is used to manage the display of the tracks ("channels") and various options to show and hide some interface elements :
| name |
action |
| Zoom In |
zooms in on the horizontal axis of the audio displaying less time. |
| Zoom Normal |
zooms to the default view, which displays about one inch per second. |
| Zoom Out |
zooms out displaying more time. |
| Fit in Window |
Zooms out until the entire project just fits in the window. |
| Fit Vertically |
adjusts the height of all the tracks until they fit in the project window. |
| Zoom to Selection |
zooms in until the selected audio fills the width of the screen to show the selection in more detail. |
| Set Selection Format |
sets the format in which selections are measured in at the bottom of the application window. |
| History |
brings up the history window. It shows all the actions you have performed during the current session. |
| Float or Dock Control Toolbar |
toggles between displaying the Tool Bar docked at the top of each project window, or in a separate floating window. |
| Float or Dock EditToolbar |
toggles between displaying the Edit Tool Bar docked at the top of each project window, or in a separate floating window. |
| Float or Dock Mixer Toolbar |
toggles between displaying the Mixer Tool Bar docked at the top of each project window, or in a separate floating window. |
| Float or Dock Meter Toolbar |
toggles between displaying the Dock Meter Bar docked at the top of each project window, or in a separate floating window. |
Project
The Project Menu is used to add / remove / align tracks in the existing project :
| name |
action |
| Import Audio... |
imports audio into your project. |
| Import Labels... |
import Label Tracks (text files). |
| Import MIDI... |
imports MIDI files. |
| Import Raw Data... |
tries to open a file in virtually any format, as long as it is not compressed. |
| Edit ID3 Tags... |
opens a dialog allowing you to edit the ID3 tags associated with a project, for MP3 exporting. |
| Quick Mix |
this command mixes all of the selected tracks down to one or two tracks. |
| New Audio Track |
this creates a new empty audio track. |
| New Stereo Track |
creates a stereo version of the new audio track above. |
| New Label Track |
creates a new Label track. |
| New Time Track |
creates a special track that can be used to speed up and slow down playback over the course of the project. |
| Remove Track(s) |
this command removes the selected track or tracks from the project. |
Align Tracks
|
aligns tracks according to the options chosen.
|
Align and move cursor
|
same as "Align Tracks" but it also followed by the "Move Cursor" command (from the Edit Menu).
|
| Add Label at Selection |
this menu item lets you create a new label at the current selection. |
| Add Label at Playback Position |
like "Add Label at Selection" but the label is added at the current position during playback. |
Generate
The Generate Menu allows you to insert various generated audio elements into a track :
The length of the generated audio is determined by the length of your selection and the position by the left boundary of your selection. If no selection is made, the default length inserted at the cursor position is 30 seconds.
| name |
action |
| Silence |
inserts silence.
|
| Tone |
inserts a wave of chosen type, frequency and amplitude. |
| White Noise |
inserts white noise. |
Plugins
|
there are too many plugins to describe here, experiment!
|
Effect
The Effect Menu allows you to apply effects to audio. Note : this menu cannot be accessed while any tracks are in Playback or Record mode.
| name |
action |
| Amplify |
this effect increases or decreases the volume of a track or set of tracks. |
| Bass Boost |
this is a smooth filter which can amplify the lower frequencies while leaving most of the other frequencies alone. |
| Change Pitch |
changes the pitch/frequency of the selected audio without changing the tempo. |
| Change Speed |
changes the speed of the audio by resampling. Making the speed higher will also increase the pitch. |
| Change Tempo |
changes the tempo (speed) of the audio without changing the pitch. |
| Click Removal |
this effect is designed to remove the annoying clicks on recordings from vinyl records without damaging the rest of the audio. |
| Compressor |
compresses the dynamic range of the selection so that the loud parts are softer while keeping the volume of the soft parts the same. |
| Echo |
this effect repeats the audio you have selected again and again, softer each time. There is a fixed time delay between each repeat. |
| Equalization |
boost or reduce frequencies. |
| Fade In |
applies a linear fade-in to the selected audio. |
| Fade Out |
applies a linear fade-out to the selected audio. |
FFT Filter
|
you define a curve that shows how much louder or quieter each frequency in the signal should be made. |
| Invert |
this effect flips the audio samples upside-down. This normally does not affect the sound of the audio at all. |
| Noise Removal |
this effect is ideal for removing constant background noise such as fans, tape noise, or hums. It will not work very well for removing talking or music in the background. |
| Normalize |
allows you to amplify such that the maximum amplitude is a fixed amount, -3 dB. |
| Nyquist Prompt |
allows you to express arbitrary transormations using a powerful functional programming language (for advanced users). |
Phaser
|
the name "Phaser" comes from "Phase Shifter", because it works by combining phase-shifted signals with the original signal. |
| Repeat |
repeats the selection a certain number of times. |
Reverse
|
this effect reverses the selected audio.
|
Wahwah
|
just like that guitar sound so popular in the 1970's. |
Plugins
|
there are too many plugins to describe here. Experiment!
|
Analyze
The Analyze Menu gives you many options for measuring your audio :
| name |
action |
Plot Spectrum
|
displays the Power Spectrum of the audio over a selected region. |
Envelope Tracker (Maximum Peak)
|
|
Envelope Tracker (Maximum RMS)
|
|
| Envelope Tracker (Peak) |
|
| Envelope Tracker (RMS) |
|
Null
|
|
Peak Monitor
|
|
Silence Finder
|
Marks periods of silence within a selection.
|
Mp3 Capability Installation
Software name : Audacity
Software version : 1.3
By default Audacity can play and edit mp3 files. However it can't export a project as an mp3 file unless you install an extra bit of software called 'library'.
This sounds complicated but what it really involved is downloading the right file and then linking to it in Audacity.
To download the file we need, which is called the 'Lame Mp3 Library'. Please point your browser to the following page http://lame.buanzo.com.ar/
You should see the following text or something similar.
You should click on the link to 'Lame x for Audacity on Windows.exe' and download that file to your computer.
Click on Save File when you see the above dialogue box. And choose where you want to save your file.
When you have downloaded the file, find it on your computer and double click it. This will start the installation process.
Click OK when asked 'Open Executable File?'
Click on Next for the following steps and then when you are asked to choose a folder to install the Lame library in keep this as the default.
Click on Install.
Click on Finish.
When you come to use Audacity and need to export a file, if you haven't already told Audacity where the Mp3 Encoder is located it should prompt you to locate it.
It's best to do this now while you remember where it is installed. So open up Audacity and with a small test project open click on File > Export
Fill in some test entries for the Metadata and then click OK on the following screen.
Choose a file name and a place to save it. Then select mp3 from the drop down menu.
If you are prompted to locate the Lame Library then you can locate this in the location you saved it in - by default in Windows this would be C:\Program Files\Lame for Audacity
You may not need to do this as from version 1.3 Audacity will scan your hard drive looking for the relevant file. If it succeeds then it will save your file without asking you anything.
When you save the mp3 you have the option to change the bit rate by clicking on the Options box.
You can see more on this in other chapters about Exporting.
Open a Sound File
You will need to have an audio file available to edit. If you don't have one and you are online then download an MP3 from somewhere. Make sure its not too big, a 1 minute file is fine. Choose the 'Open' option from the File menu :
You will then be presented with a window where you can browse to the location of the audio file on your computer :
You can see in the above example there are a couple of audio files. I will click on one (06_ice_cake.mp3) :
If I now press OK the file will be imported into Audacity.
Now its worth noting that Audacity has its own way of storing audio files. These are known as 'Audacity project files'. So when audio is imported into Audacity it is stored in the Audacity format. You cannot then go and edit these files with another audio editor unless you first export the file to another format (for example, to MP3).
Once the import has finished you will see the audio file displayed in the Audacity window :
Installing Audacity on OS X
Software name : Audacity
Homepage : http://audacity.sourceforge.net
Software version used for this installation : 1.2.6
Operating System use for this installation : OSX (10.3)
Recommended Hardware : 300 MHz processor, 64 Mb RAM
Downloading Audacity
The latest stable version of Audacity for OS X can be downloaded from http://audacity.sourceforge.net/download/mac. The latest version at the time of writing this document is Audacity 1.2.5 (Intel) or Audacity 1.2.6a (PPC).
Click on the link labelled "For Mac OS X : Audacity 1.2.*" that corresponds to your system (PPC or Intel processors). This will take you to a download page. The page lists many locations around the world where the software can be downloaded. The idea is that the downloads can be faster and more efficient if you choose a location near to you. To begin downloading, click on the download link of the location nearest you.
Regardless of the package you download for your specific processor, in OS X the installation process is the same. Once the download is complete, you should see something like this on your desktop or in the folder that your web browser is set to download into:
Double click on it to begin installing the software.
You should now see a finder window with a disk image named "Audacity 1.2.5" or "Audacity 1.2.6b" open (the name of the disk image may be different if you are installing a different version than shown here):
All you need to do now to complete the installation is copy the disk image into your "Applications" folder. To do this, click on the disk image to select it then press the Apple and C keys together to copy it. Now select your Applications folder and press the Apple and V keys together. This will paste an Audacity folder containing all of the contents of the disk image into your applications folder.
The installation is now complete, so you can eject the installer folder (by dragging it to the eject icon) and start using Audacity.
To open Audacity double click on the following icon in the Audacity folder:
The first time you launch Audacity you will be prompted to select which language you want it to use.
Click on the dropdown menu to select the language you want.
Once you have chosen the language you want click on OK to finish launching Audacity.
You should be able to see the Audacity interface which looks like this:
That's it! You now have Audacity up and running and can begin making and editing recordings.
Recording a sound
Software name : Audacity
Software version : 1.2
Recording sound with Audacity is very straightforward you just need to have a computer that has a sound card with at least a microphone (mic) or line input.
Getting started
Before making a recording you need to make sure that what you want to record from ( the "sound source") connected to the audio input of your computer's sound card. Once you have done that you can launch Audacity.
MacOSX
OS X has a unique way to configure the audio hardware, which is not shared by other operating systems (Windows, and Linux). So if you use OSX you will need to make sure that it is set up appropriately. To do this first open the "Preferences" window by clicking on "Preferences" under "Audacity" in the Menu Bar :
The Preferences window open and look something like this:
Click on "Audio I/O". The use of "I/O" means "Input or Output", so "Audio I/O" means "Audio Input or Output". The Audio I/O preferences page is where you can choose the sound source (audio input) and how you play back the sounds so you can hear them (the output settings). This can turn into a jungle of terms but essentially these things are the same:
- input
- sound source
- audio input
- input device
- recording device
and these are the same :
- output
- playback device
- output device
- sound output
The way you configure the input effects how you will record sounds. The configuration of the output effects how you will play back sounds so you can hear them.
Lets start with the output settings, these are refered to within the "Playback" section. In the "Playback" section use the "Device:" dropdown menu to select the audio output you wish to use. Unless you have another sound card installed "Built-in Audio" will be the only option available.
The input settings are chosen from the "Recording" section. In the "Recording" section use the "Device:" dropdown menu to select the audio input device you wish to use. Unless you have another sound card installed "Built-in Audio" will be the only option available.
In the "Recording" section use the "Channels" dropdown menu to select the number of channels you wish to use. A "Channel" (also known as a "track") refers to the number of audio signals you wish to use to record or playback. A mono recording uses one audio signal (1 channel), and a stereo recording records two audio signals (2 channels).
Audacity defaults to "1 (mono)" so you can leave it at this if you are recording from a mono audio input. Most microphones are only capable of producing a mono signal. Select "2 (stereo)" if you are recording from a stereo audio input such as a cassette or mini disc player (or a stereo microphone). It is possible to select up to 16 channels but do not select more than 2 unless you have something other than a 'normal' sound card.
Below the "Playback" and "Recording" sections are three check boxes.
The first check box is not important for this exercise because we are only recording one channel. If you want to listen to the sound as you are recording it you will need to have either "Hardware Playthough" or "Software Playthrough" ticked. "Hardware Playthrough" lets you hear the sound directly from the input source while "Software Playthrough" lets you hear the sound as it will be when the recording is played back.
Now click on "Quality" to bring up this page of preferences:
For this exercise you only need to worry about the first two settings; Default Sample Rate and Default Sample Format. Unless you really know what you are doing, use the dropdown menus to set Default Sample Rate to "44100 Hz" and Default Sample Format to "16-bit". This will give you CD quality recording.
Those are the only preferences you need to adjust before beginning to record so click "OK" to save the changes and close the Preferences Window. Audacity remembers these preferences so the next time you go to make a recording you will not have to repeat the steps above unless you wish to make changes.
Windows and Linux
Windows and Linux use the same kind of controls. First you need to choose the input device. The Mixer Toolbar has three controls, used to set the volume levels of your audio device and choose the input source.
The leftmost slider controls the output volume, the other slider controls the recording volume, and the control on the right lets you choose the input source (such as "Microphone", "Line In", "Audio CD", etc.). You will need to choose "Mic" or "Line In" as one of the inputs. If you are using a microphone choose "Mic". If you are using another audio device (CD Player, Mini disc etc), choose "Line In".
Testing Audio Levels
Now that you have everything set up and ready to go you can begin the recording process.
Before making the recording it is important to preview the loudest section of the source audio so that you do not end up with a distorted recording.
First you need to switch the input meter on. This can be set in the main interface :
Simply click on the bars above the microphone symbol or click on the arrow next to the microphone symbol and select "Monitor input" like so :
Now play the loudest passage of the audio you are recording and, while doing so, look at the input level meter.
At the loudest point the red bars should be at about -12. You can adjust the input level by moving the slider next to the microphone symbol.
Keep playing back the loudest passage while adjust the input level until it peaks at about -12. Once you have done that click the "Stop" button :
Recording
Now you are ready to make your proper recording.
Click the "Record" button,
then play the audio you wish to record. Once the sound source has finished click the "Stop" button.
Your recording is now complete so save it immediately by selecting "Save Project" from the "File" menu.
That's it! Your recording is completed and saved. You can play it back by clicking the "Play" button.
Troubleshooting - Linux
Linux :: Host Error?
If you are a Linux user and you see a message similar to this "Error Initializing Audio: There was an error initializing the audio i/o layer. You will not be able to play or record audio. Error: Host error." then you may have to try one of the following :
Kill esd
It maybe that the esd sound server is running which is not permitting Audacity to access the sound card. You can try running this in a terminal:
ps ax | grep esd
If you see an output similar to this :
5164 ?        Ss     0:00 /usr/bin/esd -terminate -nobeeps -as 1 -spawnfd 18
10352 pts/1    R+     0:00 grep esd
Then you can see from the first line that esd is running ("/usr/bin/esd"). To kill the esd sound server you need to type this in a terminal (you need to have the permissions to run the sudo command) :
sudo killall esd
You will then be prompted for a password, enter your password notthe superuser password (also known as the "root" or "admin" password). Then try and start Audacity again, hopefully you won't get this error.
Start with aRts
You could also try running Audacity through the aRts sound server ("analog Real time synthesizer"). To do this quit Audacity if you already have it opened and restart it with this command in a terminal:
artsdsp audacity
Kill aRts
Lastly, you may wish to try starting Audacity after killing the aRts sound server. You can try this:
sudo killall artsd
Then try starting Audacity again.
Track Area
Software name : Audacity
Software version : 1.2
In Audacity, a channel of sound is represented by one mono audio track, a two channel sound by one stereo audio track. The example below is a stereo track :
Lets look at some of the controls available to you from this interface :
| option |
action |
| Name |
edit the name of the track |
| Move Track Up/Down |
move Track Up or Down in the display |
| Waveform |
traditional display of audio material. |
| Waveform (dB) |
like Waveform, but logarithmic instead of linear vertical units . |
| Spectrum |
displays the frequency spectrum of the audio over time. |
| Pitch (EAC) |
tries to detect the pitch of the current audio and displays that information over time. |
| Mono |
set playback of this single channel track on the left and right channels. |
| Left Channel |
set playback of this single channel track on the left channel. |
| Right Channel |
set playback of single channel track on the right channel. |
| Make Stereo Track |
the selected track and that beneath it is turned in to one stereo track. |
| Split Stereo Track |
turn one stereo track in to two single channel tracks. |
| Set Sample Format |
pick the sample format for this track.
|
| Set Rate |
set the sample rate of this track.
|
Solo and Mute Mode
In solo mode, only tracks that have the solo button activated.
With mute a track is switched off without deleting it.
Gain and Pan Controls
This slider set the panning position of the track in the stereo field.
This slider controls the track volume, or rather the overall gain of that particular track.
Installing Audacity on Ubuntu
Software name : Audacity
Homepage : http://audacity.sourceforge.net
Software version used for this installation : 1.2.6
Operating System use for this installation : Ubuntu 9.04
Recommended Hardware : 300 Mhz processor (CPU) minimum, 64 Mb RAM, internet connection
If you are used to an Operating System like Windows or MacOSX you may have installed software by downloading it from a website and double clicking on the downloaded file, and clicking through all the licence agreements, configuration options etc. This is the 'old' way of installing software. The 'new' way is much smarter - you choose what you want to install from a list and press 'go'. The rest - finding the files, downloading the files, installing software, is taken care of by Ubuntu itself while you go and get a cup of tea or work on something else. It can't get much easier.
However, new ways take a little getting used to, and so we will first look at the basic tool needed to install software this way, and then how to use it to install Audacity.
Synaptic Package Manager
The Synaptic Package Manager (SPM) is used for more than just installing software. It can also upgrade your entire operating system, and manage all software installed on your computer. However most people use SPM for just installing new software. Before you embark on this process there are a few concepts that you may wish to get familiar with. Its not crucial you understand them throughly, so just read the explanations and then let it soak in over time. The ideas behind SPM will become clearer with use.
What is a repository?
SPM can automate the installation of software on your computer because it has a direct connection to one or more online software repositories. These repositories are vast archives of softwares that have been pre-configured for installation on your operating system . When your computer is online SPM can connect to these archives, check what software is available for installation, and present you with a list of installable software. All you have to do is select the software from the list that you want. SPM then downloads the software from the repository and takes care of the installation process.
So SPM is actually a repository manager, it manages which repositories (there are many) you wish to access, and which softwares to download and install from those repositories.
SPM allows you to choose which repositories it accesses through its settings. The default repositories used by Ubuntu can be extended through the SPM settings so you can access a wider range of softwares. Ubuntu calls each repository by a simple name. They are : Main, Universe, Multiverse, Restricted. By default Ubuntu only uses the Main online repository. If you wish to access you the other repositories you must do this by changing repository settings of SPM.
What is a package?
When SPM downloads a software for installation it is in the form known as a 'package'. This means that it is a compressed archive of the software, pre-configured so that it will install nicely on your computer. If the package has been configured nicely, and Ubuntu spends a lot of time making sure this is the case, then many of the headaches that installing software can bring are taken away - its the panadol of software installation. One of the biggest issues with installing software on any form of Linux (Ubuntu is one of many types of Linux), are dependencies. Dependencies are all the other softwares required by a particular software. If, for example, I want to install a audio editor, that audio editor software may use some functionality of other softwares to do its job.
SPM takes the (often) dark art of dependencies away from you, and manages this itself. So if you wish to install a software and it has dependencies (and the list can be long), you don't have to work this out yourself, SPM knows already what is needed, finds it, and installs it along with the software you have chosen.
So, SPM, as well as managing which repositories you access, is also a package management software. Hence the name - Synaptic Package Manager.
apt
You don't really need to know about apt, so if you are on the verge of being confused then don't read this short section. If you are a geek wannabe then read on.
Ubuntu is a form of Linux that has derived from another form of Linux - Debian. This family of Linux has in common (amongst other things) the package/repository management system. Both Ubuntu and Debian use the apt system for managing packages. APT is actually an acronym short for Advanced Package Tool.
SPM is actually a 'front end' (graphical interface) for controlling apt. So SPM is the nice user interface that you see, but the real work is done by apt. There are other ways of managing apt also, such as the command line interface known as apt-get. In the world of Linux there are many varieties of Linux users and they have their own ways of doing things. In general its safe to say most Debian users use apt-get, and most Ubuntu users are happier using SPM.
Configuring Synaptic Package Manager for installing Audacity
To install Audacity on Ubuntu you will need to change the default repository settings of SPM as Audacity is not contained in the default repository. To do this you will need to open the Synaptic Package Manager and you can do this via the System menu. If you haven't changed the default Desktop of Ubuntu then the System menu can be accessed at the top left of your screen:
If all is good you will be prompted for a password.
Here you must enter your password (the same one you use to log into the system). If you don't know the password then you have a problem and its probably caused by the fact that the computer you are using is not yours. In this case you have to find the computers owner and ask them for the password (which is usually not polite unless you know them well) or ask them to input the password while you look casually in the other direction.
Assuming the password entered is correct - you will now see the SPM open infront of you. It may be that you first see the following 'Quick Introduction' (this appears if you haven't used SPM before).
Just click Close and move on. Lets look at the Synaptic Package Manager interface...
Lets not worry about the details of the interface for now. All we want to do is change the repository settings. To do this click on the Settings and choose Repositories
Now we get to where we can do some business. Make sure that Community-maintained Open Source software (universe) is checked :
Now close that window by pressing the big close button at the bottom right.
Next, you will see a warning telling you the repository has changed :
Click the Close button and move on to SPM so you can refresh the repositories as the warning suggests. To do this, do as the warning says - click on Reload :
You should then get some feedback saying the repositories are being updated and showing the progress.
Installing Audacity with Synaptic Package Manager
Now the real business. Its pretty easy. Click on the nice big Search button:
The search window will open and now enter 'audacity' in the field:
Great. Now press Search at the bottom right of the above window. The search should not take very long and when it is complete you will see Audacity listed :
If you highlight audacity (by clicking once on the name) you will see some information about Audacity displayed :
Now you can read the information if you wish but there is nothing critical there. Best thing to do is just to double-click on audacity. By doing this you are 'marking' (choosing) the software for installation. If you do so then an additional window appears:
Now click Mark:
You have now told Synaptic Package Manager that you want to install Audacity. If all is well then the package will be highlighted:
Now press the Apply button with the nice big tick next to it :
Next SPM informs you of how much space will be taken by the installation :
Now you can just click Apply at the bottom right of the screen and the installation will start. A progress bar will be shown:
When it is completed (downloading and installing) you will have this screen :
That means all is well. Pat yourself on the back and press Close. Synaptic Package Manager will then return to its original state. Close it :
Now you can open audacity...just browse to the Applications menu, choose Sound & Video, select Audacity and release the mouse :
If all is well you will see Audacity:
Congrats!
What is sound?
Sounds are waves of air. We hear sounds because our ears are sensitive to these waves. One of the easiest types of sound waves to understand is a short, sudden sound like a hand clap. When hands clap together, they create a pressurised wave of air which moves at about 340 meters per second ( "the speed of sound" ). When this wave reaches ones ear, it pushes on the eardrum slightly, causing it to vibrate and the individual hears the clap.
A hand clap is a short event that causes a single wave of air that quickly dies out. The image above shows the shape of the wave ("waveform") for a typical hand clap.
Other sound waves are longer events. A ringing bell serves as a good example of this. When a bell rings, after the initial strike, the sound comes from the ongoing "ringing" of the bell. While the bell rings, it vibrates at a particular speed ("frequency") and this causes the nearby air to vibrate at the same speed. This causes waves of air to travel from the bell, again, at the speed of sound. Pressure waves from continuous vibration look more like this:
Both of these types of waves are called sound waves or acoustic waves.
Digital recording and playback
A microphone consists of a small membrane which vibrates when it meets these acoustic waves. The microphone translates movements of the membrane into electrical signals. Basically, a microphone converts acoustic waves into electrical waves.
If one examined the shape of an electrical wave from a microphone, that person would notice that it looks very similar to the shape of the original sound wave. The following is the sound wave we saw in the above explanation:
The following is the electrical wave created by the microphone (notice the measurement for "Current"):
One could say that the shape of the electrical wave is analogous to ("similar to") the shape of the original sound wave. This is why these electrical waves that represent sound waves are called analog waves.
The main device used in digital recording is an Analog-to-Digital Converter (ADC). The ADC measures the voltage of an electrical wave thousands of times per second. It then uses these measurements to create a map of an electrical wave:
Each dot in the figure above represents one audio sample. The more samples per second, the more accurate the mapping of the electrical wave.
Playback of digital audio uses a Digital-to-Analog Converter (DAC). This takes the samples and converts them back into an electrical wave. In a computer, this electrical wave is sent to a sound card's headphone or speaker sockets and the speakers recreate the original sound wave by vibrating their diaphragms.
A computer's sound card comes with an Analog-to-Digital Converter (ADC) for recording, and a Digital-to-Analog Converter (DAC) for playing audio. Your operating system (Windows, Mac OS X, Linux, etc.) talks to the sound card to actually handle the recording and playback, and audio applications talk to your operating system so that you can play sound files, capture sounds to a file, edit them, and mix multiple tracks while playing, etc.
Quality
Two factors determine the quality of a digital recording:
-
Sample rate: this is the rate which the ADC records samples or a DAC plays them back. Sample Rate is measured in Hertz (Hz), or samples per second. An audio CD has a sample rate of 44,100 Hz (often written as "44 KHz" for short).
-
Sample format or sample size: Essentially, this is the number of digits in the digital representation of each sample. Think of the sample rate as the horizontal precision, and the sample format as the vertical precision. An audio CD has a precision of 16 bits.
Higher sampling rates allow a digital recording to accurately record higher frequencies.
Higher sample sizes allow for more dynamic range—better reproduction of loud and soft sounds.
Audio file formats
There are two main types of audio files on a computer:
-
PCM stands for Pulse Code Modulation. This is just a fancy name for the technique where each number in the digital audio file represents exactly one sample in the waveform. Common examples of PCM files are WAV files, AIFF files, and Sound Designer II files.
-
Compressed audio files are the other type. Modern compressed audio files use sophisticated psychoacoustic algorithms to represent the essential frequencies of the audio signal in far less space than PCM files. Examples include MP3 (MPEG I, layer 3), Ogg Vorbis, and WMA (Windows Media Audio). Creating one of these files sacrifices some quality in order to use less disk space.
Installing Audacity on Windows
Software name : Audacity
Homepage : http://audacity.sourceforge.net
Software version used for this installation : 1.2.6
Operating System use for this installation : Microsoft Windows XP
Recommended Hardware :
| Windows version |
Recommended RAM/
processor speed |
Minimum RAM/
processor speed |
| Windows 98, ME |
128 MB / 500 MHz |
64 MB / 300 MHz |
| Windows 2000, XP |
512 MB/1 GHz |
128 MB/300 MHz |
| Windows Vista Home Basic |
2 GB / 1 GHz |
512 MB / 1 GHz |
Windows Vista Home Premium/
Business/Ultimate |
4 GB / 2 GHz |
1 GB / 1 GHz |
Downloading Audacity
The latest stable version of Audacity for Microsoft Windows can be downloaded from http://audacity.sourceforge.net/download/windows. The latest stable version at the time of writing this document is Audacity 1.2.6.
Click on the "Audacity 1.2.6 installer" link. This will take you to a download page. This page lists locations around the world where the software can be downloaded. The idea is that downloads can be faster if they come from a place near you. To begin downloading, click on the download link of the location nearest you.
Once the download is complete you should see a downloads window like this:
or something like this on your desktop:
Open this file to begin installing Audacity by double clicking on the icon or clicking on "Open" on the downloads window.
You should now see a Setup Wizard like this:
Click "Next" to proceed.
The next step asks you to read and accept the License Agreement.
You cannot continue with the installation until you have accepted the agreement, so click on the radio button labelled "I accept the agreement" and then click "Next" to continue.
You should now see an Information window like this:
This window contains information such as credits and a changelog that you may find useful to read. Click "Next" continue.
You will now be prompted to select the folder Audacity will be installed into.
The Setup Wizard will automatically create a folder called "Audacity" in your "Program Files" folder so unless you want to install it somewhere else you can simply click "Next" to continue. If you wish to install Audacity somewhere else click "Browse".
You will now be asked to select which additional tasks you would like Setup to perform during the installation.
Click the check boxes to select or deselect the additional tasks then click "Next" to continue.
You will now see a window displaying the destination location and additional tasks.
Check that this information all correct and if it is click "Install" to continue. Click "Back" if you wish to change any of the installation settings.
You should now see a window like this:
Click "Finish" to complete the installation. If the check box labelled "Launch Audacity" is ticked Audacity will open straight away.
Installation is now complete. If you didn't choose "Launch Audacity" in the options above then you can launch Audacity by double clicking the following icon in the Audacity folder:
The first time you launch Audacity you will be prompted to select which language you want it to use.
Click on the dropdown menu to select the language you want.
Once you have chosen the language you want, click on "OK" to finish launching Audacity.
The Audacity interface should look like this:
That's it! You now have Audacity up and running and can begin making and editing recordings.
You may need to install an extra library to be able to export a file as an mp3.