


Metaphor
Computer software interfaces are built on metaphors. These metaphors link the digital interface to real life tools and processes.
All software operates in an operating system such as Mac OS, Windows, or Linux. An operating system is the computer's software. It runs all additional software. Regardless of the operating system you are using, all of them share a few central metaphors such as Document, Folder, Hard Drive, File System, and the Desktop. Before today's so-called "paperless office," office workers created documents on paper, filed them in folders and organized the folders in cabinets near their desks. The most important or current project folders might have been sitting on their desktops. Of course the original paper system persists along side the computerized system, as well as in the computer's metaphorical structure.
The metaphors of design software are built around the tools of the artist and designer: pencils, brushes, palettes, artboards, and photographic equipment. These tools do what you would expect: pencils make hard edged lines, brushes make lines with pressure control, colors are "mixed" in the color palette.
These metaphors are consistent across the interfaces of operating systems and design applications. For example, the palettes and the toolbars look and behave in the same way, despite subtle application differences, in Illustrator, Inkscape, Gimp, Kompozer, Photoshop, InDesign, Dreamweaver, and Flash. Learning the metaphors and similarities among these application interfaces will be one of the fastest routes to mastering the tools.


Illustrator panel Photoshop panel Gimp dialog
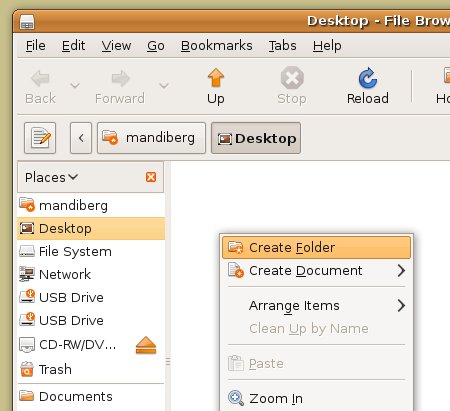
Exercise 1: Create a new folder
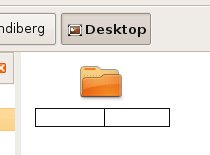
1. To create a new folder on your computer, navigate to the place where you want your new folder to reside. Most computer users typically store folders in the Documents folder or on the Desktop. You can do this by clicking on the Places menu on the Ubuntu task bar and selecting the preferred location. This will open a new window for that location, where you can create a new folder by pressing Shift+Control+N. As soon as you create a new folder, the operating system temporarily names it untitled folder. As long as you do not click outside of the folder name, the name area remains highlighted in orange, and is ready for you to type a new name. We named ours digital_foundations and pressed the Return key.


2. If you clicked somewhere on the Desktop after creating the new folder, it may seem like you are stuck with a folder named 'untitled folder'. All folders can be renamed.

To rename a folder, right-click once on the folder and select rename from the contextual menu that opens. The contextual menus appear by right-clicking the mouse.

This will highlight the name of the folder. Contextual menu options change depending on the context in which you click. If you right-click on a folder, you will see a list of actions that can be performed on that folder. This menu is different from the menu that would appear if you right-clicked on a file instead.
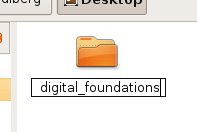
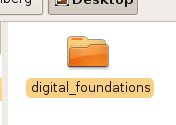
Simply rename it and press return. We renamed our folder digital_foundations.
3. Move the new digital_foundations folder you just created to the Documents folder by clicking and dragging it from the Desktop into the Documents folder which will appear in the places submenu on the left on any open window.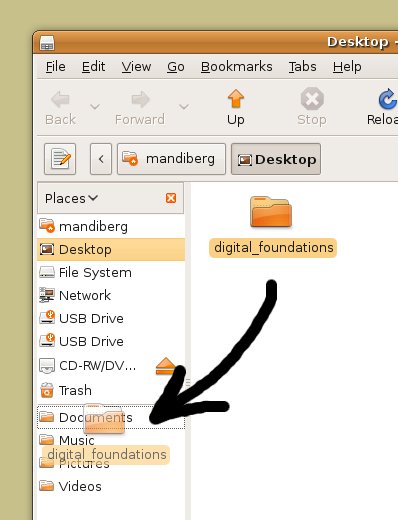
Delete a file
4. Next we will review three ways to delete a file or folder. Choose one method and delete the new folder you just created. The metaphorical trash or recycle bin appears in the bottom right hand corner of the Ubuntu interface. To delete a document, drag it onto the Trash.

It is important to remember that there is almost always more than one way to complete any given task. The best method is usually the one that fits most efficiently within your personal work habits.
Another way to move an item to the trash is by selecting the item and pressing Delete. Contextual menus provide yet another way to delete a file. Right click on the file and select Move to Trash.

Vector vs. Bitmap
Computer graphics are created in one of two formats: vector and or bitmap. Computer files containing these graphics may contain vectors, bitmaps, or both.
Vector graphics are created by using mathematical algorithms: formulas that describe where points, lines, and planes exist and how these elements relate to one another. Vector graphics can be scaled up to any size and retain their smooth edges. Vector graphics look smooth and crisp at their edges, and they can be easily scaled to any size. Logos are nearly always developed as vector graphics, as a logo has to fit easily on a business card, a website, and possibly a billboard or bus wrapping.
Inkscape, Illustrator and Flash are applications most often used to create and modify vector images.
Bitmap or raster graphics are built from grids of pixels. Each tiny pixel contains a unit of color information. Bitmaps are used for digital photography and scanned images. Bitmap files are not as easily scalable as vector graphics.

Exercise 2: Creating a new file in Inkscape
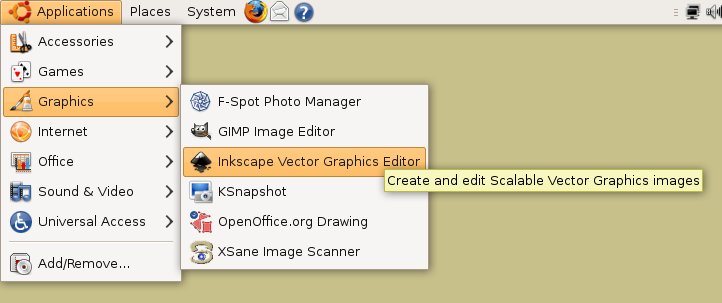
1. Select Applications from the top left dock, and select Graphics > Inkscape.
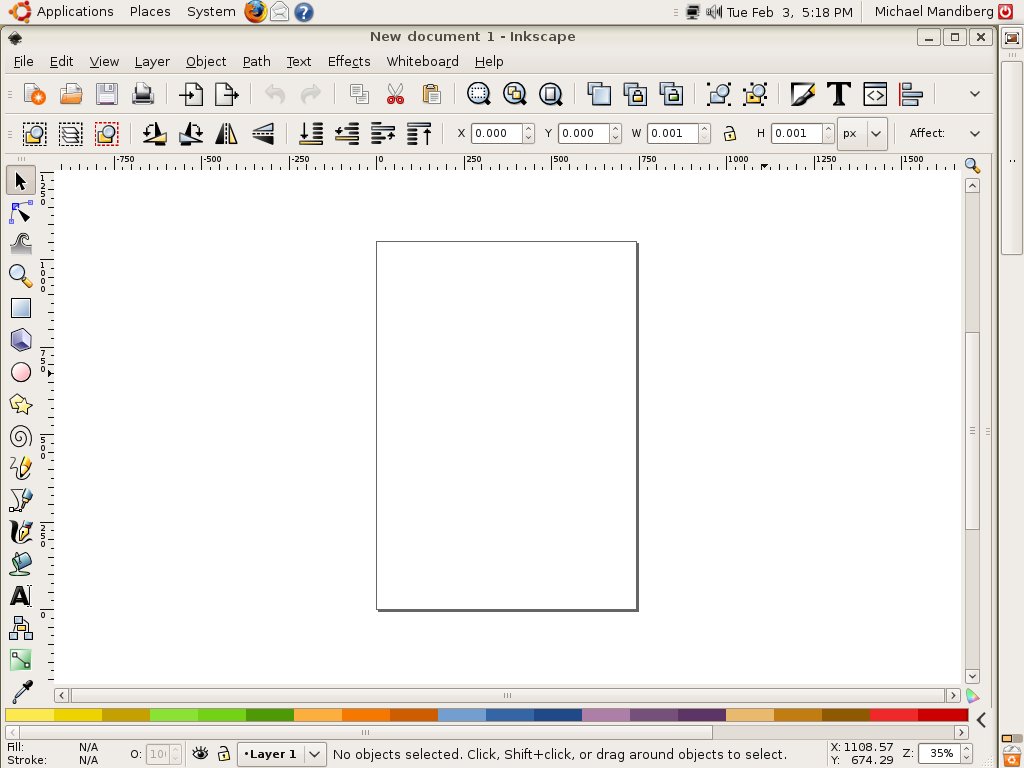
2. When Inkscape opens, a blank document opens.
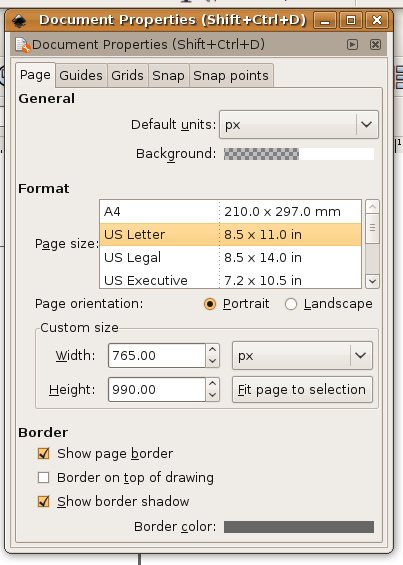
When defining a new file, several settings must be taken into consideration. By default, the document that Inskscape creates is the size of A4 paper with white background and a vertical orientation. You can change these options by choosing File > Document Properties, or pressing Shift+Control+D.
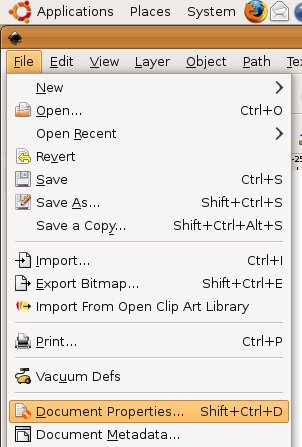
3. In the Document Properties dialog, choose "US Letter" under Format and click on the X in the top of right corner of the dialog.
A dialog is an interface that pops-up when the computer needs information in order to complete a task. To highlight the metaphor, the computer needs to have a conversation with you, hence the word "dialog."
Look around your new document and notice the interface elements. In the center is the Canvas. Analog design was created on paper (taped to board), which was referred to as the artboard. Inkscape reproduces the analog experience through metaphor.
On the left side of the Canvas are the tools. Like an artist's or designer's toolbox, the Toolbar holds pens, pencils, brushes, shape tools, and so on.
At the bottom of the Canvas is the Color palette. Painters mix together individual paint colors on a palette. In Inkscape colors are created by virtually mixing colors.
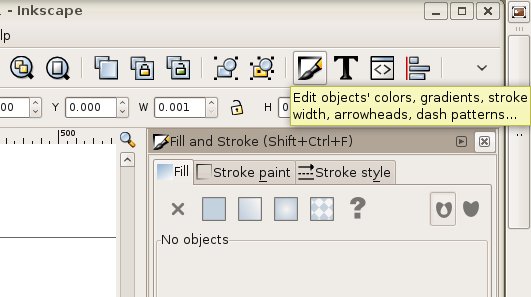
To the right of the Canvas any number of information dialogs are available. Take notice of the Fill and Stroke dialog (available from the Object menu in the toolbar). Painters mix together individual paint colors on a palette. In Inkscape colors are created by virtually mixing colors.
4. The tools can be moved around the screen, and they can be hidden or available based on the amount of workspace on the monitor. To hide any element of the screen, click View > Show/Hide >Tool Controls Bar.
Exercise 3: Creating a dynamic composition

Seated-Nude, 1909, Amedeo Modigliani, oil on canvas.

The Poet, 1911, Egon Schiele, oil on canvas.
Compositions can be static or dynamic. In this exercise, we will recreate the dynamic movement found within a painting. Dynamic compositions are full of energy or movement. Angles are used to create motion. While a flat horizon line is at rest, a triangle is in motion. The repetition of even spacing is easy on the eye as our minds predict the simple rhythm of an evenly spaced grid. Angles and uneven spacing between objects causes our eyes to move back and forth. This physical movement translates into the perception of movement within a composition. Use the Modigliani or Schiele painting as the guideline for your dynamic composition with rectangles. The final composition could be like the following image, if yours is based on the Schiele painting.

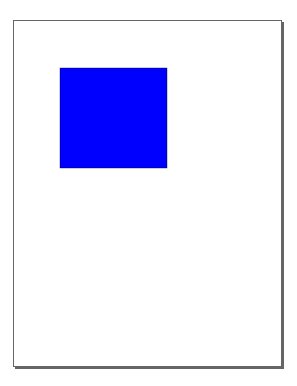
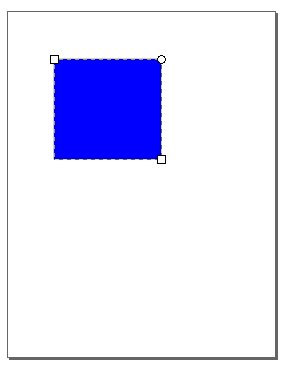
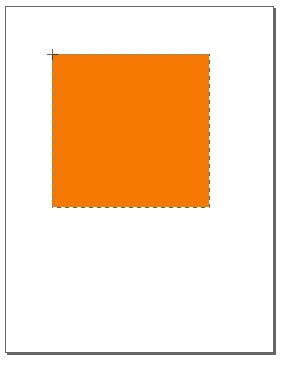
1. In Inkscape, click on the Rectangle tool from the Toolbar. Use this tool to click and drag a rectangle on the Canvas.
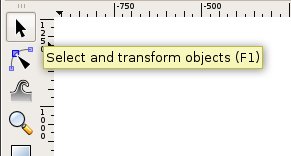
2. Once the rectangle is created, release the mouse and choose the Selector tool in the Toolbar. The Selector tool is used to select an object in order to move, scale, or copy it.
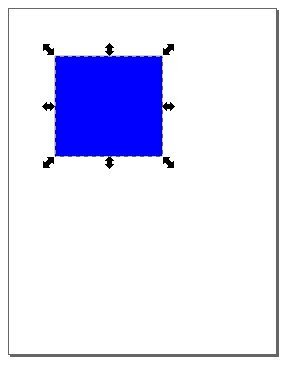
Click on the square with the Selector tool. The rectangle is selected when it becomes outlined and transformation arrows appear at the border of the object. Objects can only be modified when they are selected. To deselect the object click on the Canvas in any area outside the rectangle.
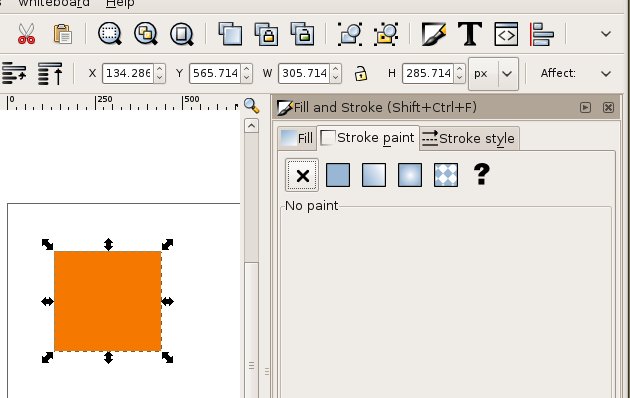
3. With the rectangle selected, notice how the shape is made. The rectangle is an area filled with color and there may or may not be a line surrounding the edges. The interior color is called the "fill." The outline is called the "stroke."
4. With the rectangle selected, look at the bottom left corner of the Inkscape interface and notice which colors appear beside Fill and Stroke.
5. With the rectangle selected, click on one of the swatches in the palette. It is assigned to the fill area of the rectangle and it also appears as the color in the fill icon. The rectangle will change because it was selected before a new color was applied.
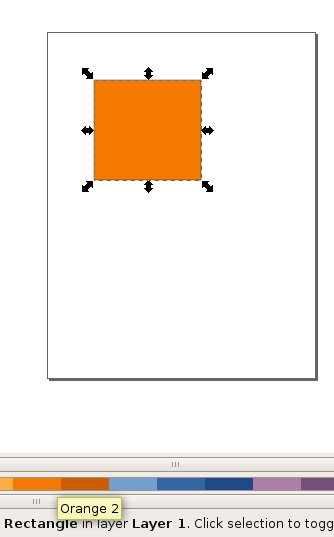
6. Click on the Swatches palette, then click on any color. It is assigned to the fill area of the rectangle and it also appears as the color in the fill icon. The rectangle will change because it was selected before a new color was applied.
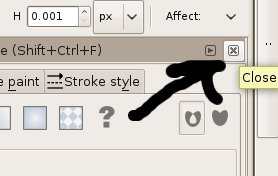
7. With the rectangle selected choose the Fill and Stroke dialog from the Object menu. This will open a new window on the right side of the screen. Click the Stroke paint tab. In the first row of icons, select the "X" on the left, indicating you do not want an outline. This will leave the rectangle with a solid color and no outline.
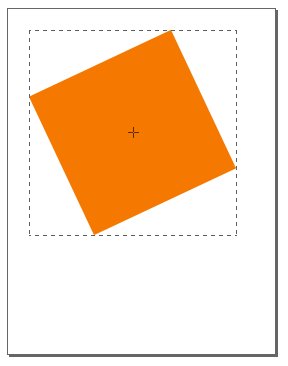
To rotate the rectangle, click on the rectangle again and the transform arrows will change to rotate arrows. Click and drag on one of these arrows in order to rotate.
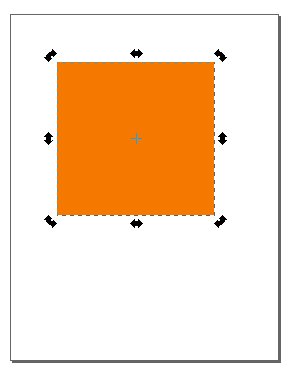
9. When the first rectangle is complete (with the color, scale, and rotation of your choosing), deselect the rectangle by clicking on the Canvas. Notice that the bounding box and transform and rotate arrows disappear.
10. Use the Rectangle tool to begin the process again. Once a rectangle is made and modified, use the Selector tool to reposition it to the right, left, or on top of the other rectangle. Recreate the composition with up to 15 shapes. You should feel comfortable creating a shape and changing its fill and stroke colors.
11. Arrange the rectangles so that they can be seen as one dynamic composition. Notice that as you create and position each rectangle, they appear stacked on top of each other. While you are creating this composition you may want a rectangle to be "sent behind" another rectangle. Select the rectangle that you would send backwards, then click "Lower selection one step" button on the Tool Controls bar. You can change the stacking order of every object on your Canvas by using the neighboring buttons: Lower to bottom, Lower one step, Raise one step, and Raise to top.


Exercise 4: Saving a file
Click File > Save As to open the Save dialog. Choose a location in which to save your file. It is common to save files in the Documents folder. To access the Documents folder from the Save As dialog, click on the Browse for other folders arrow and navigate to the Documents folder. Earlier we created a folder called "digital_foundations" in the Documents folder. We will save our work there.
Note : All actions that can be performed on your file are located in the File menu.
You must name your file when you save it. Follow these naming conventions:
- Avoid spaces. Instead, use_underscores_to_separate_words. Spaces are dangerous in web browsers. Any designer who plans to work with interactive media should form good habits by eliminating spaces from their file names.
- Use lowercase letters. This is also a convention of designers who name files that will be referenced in code. Spaces and upper case letters will not damage your files, but if you are just beginning to form good habits, you might as well learn all of the rules at once.
- Never use characters such as those in the nearby list, as these reserved characters mean special things to applications and operating systems and can disable websites and crash applications.
- The following are examples of reserved characters: ! @ # $ % ^ & * ( ) + = ~ [ ] ' " ? / \ , : ; > <
- Use a descriptive title, such as xtine_dynamiccomp.svg. Including your full name in a file name is especially important if you are submitting a file in a classroom or professional setting.
- Make sure the file includes an extension. In this exercise, the file is saved as an SVG (.svg) document. The extension is .svg. In other words, the very worst file name that you could use is something like this: "My best ever/first file!" Not only does the name include spaces and reserved characters, it also fails to describe the file or format. Other bad names include the likes of "FINAL edit.svg," "final.svg," "composition.svg," and other names that do not specify who made the file, or what is in the file. A better model for naming your files includes your individual or group name, a descriptive word about the contents of the file, and a date or versioning system. For example, when we sent a copy of our cover to the publisher on October 20th, we named it digitalfoundations_cover_1020.svg.
-
Native file format for master files
Most applications have a native file format for master files. This format can only be opened in the original program, and should be saved frequently throughout the working process. A copy of a master file is often created in a compressed, non-editable format when the author has finished editing the work. Compressing the file makes it smaller and easier to transfer. These compressed formats are readable by many applications, not just the original program. A .svg suffix indicates the file is an Inkscape master file. If a logo, for example, was created in Inkscape, it could be shared with a friend or collaborator as a PDF file, which is viewable in Document Viewer, Ghostview, xpdf, Adobe Acrobat or Preview. PDF readers such as this are installed on most computers. The exported files cannot be edited and are usually much smaller in file size. If the friend asks for revisions on the logo, the original SVG file would be modified. After modification, a new PDF file would be saved and sent to the friend.
File Formats
It is very important that file extensions, or suffixes, remain intact. The extension assists the computer operating system. It tells the system the type of file and the application to use when opening the file. This is especially important when bringing a file from one operating system to another (such as going from a Mac to a PC).
Some important file formats include:
.svg - Scalable Vector Graphics format, the native format for Inkscape
.doc or .docx - Microsoft Word document
.rtf - Rich Text Format, non-proprietary word processing format
.txt - Text only, no formatting
.ai - Adobe Illustrator file
.pdf - Portable Document Format
.psd - Photoshop document
.tif or .tiff - Tagged Image File - format for photographs, saved with lossless compression and used for scanning and printing. This format will be revisited in Chapter 7.
.jpg or .jpeg - Joint Photographic Experts Group - a compressed image file format often used for photographs on the web
.gif - Graphic Interchange Format - a compressed image file format often used on the web for logos, design elements, and other graphics with low numbers of colors.
.html - HyperText Markup Language - a text file written in the language used to create web pages.
.fla - Flash master file
.swf - Shock Wave Format - exported Flash file for the web