


Audio Editing with Hindenburg
This chapter is about editing your recordings with the Hindenburg Journalist Pro Version 1.21 to produce an explanatory report.
Before you start editing, choose a volume setting on your speakers that is not too loud and not too soft, to listen to your recordings.
Before using Hindenburg for Freedom Fone purposes you must define your default settings:
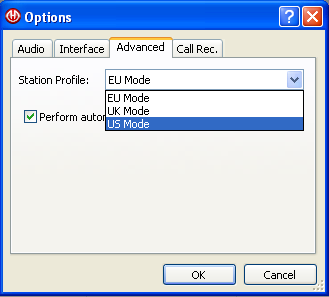
- Go to Tools > Options > Audio where you define the recording and playback channel of your sound card.
- From there go to the Advanced Tab and change the station profile to US Mode. This will set your default auto level to -6db.
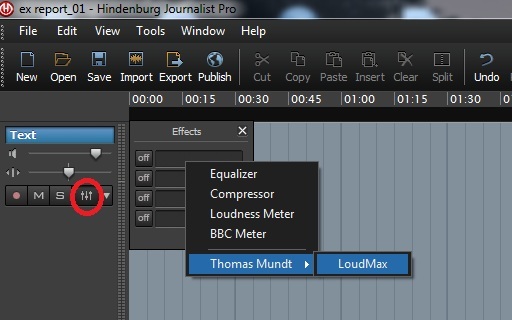
- Download and unzip the free LoudMax VST-Plugin from http://loudmax.blogspot.com/
- Copy the .dll file to C:\Program Files\Steinberg\VSTPlugins. If the folder is not already there, just create it manually. After installation, restart Hindenburg and it should discover the new plug-ins in the Effects bin. To view the Effects bin, click the icon circled in the image below, then click anywhere in the Effects panel that pops up.
Setting up your project
- First copy the files from your recorder to a folder on your computer
- Open the Hindenburg application
- Import one file after the other to your project via File > Import or drag and drop into one of your tracks. Notice that you only can import one file at a time. Hindenburg will automatically set the level of your file to the defined setting of -6db (like the Normalize function of Audacity).
Basic Editing
Hindenburg is nondestructive editing software. That means whatever you do with your recording, you will not touch or destroy your original file.
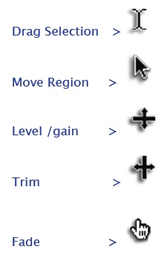
Editing in Hindenburg is all done in one view. You can move, trim, gain and make selections. The cursor will change depending on where you are in the region.
Editing Exercise using sample files
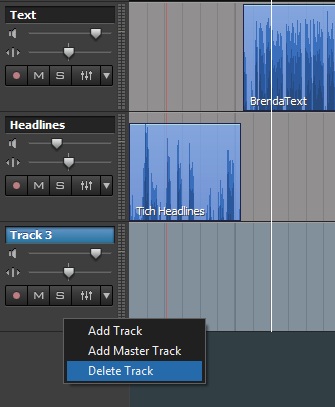
In our example we have two files. One large audio file from a female voice and a short one with the headlines from a male voice. This means we need only two tracks for editing.
You can delete tracks with a right mouse click in the control area of your track on the left hand side of the screen.
Zoom In and Out horizontally with the In and Out Option from the toolbar, or by holding the Ctrl Key and using the Mouse wheel. To zoom vertically hold Shift + Ctrl + use the mouse wheel.

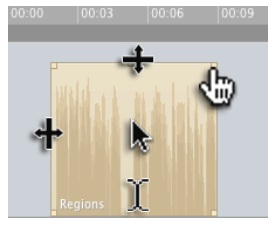
To move a region just select it by clicking on it (colour turns from blue to orange). With the cursor in the upper part of the selection, drag the region to the new location.
Audio editing example
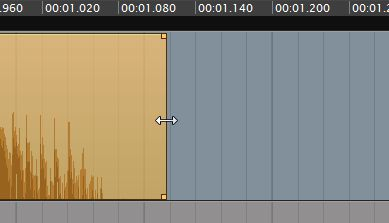
- First we will clean the recording of the headlines. To trim the beginning of the recording grab the left border of the region and move it to the right. Do the same with the right border to shorten the end.
- To delete spaces in between the headlines, just drag a selection at the bottom of the region and use Edit > Clear or press Del on the keyboard.
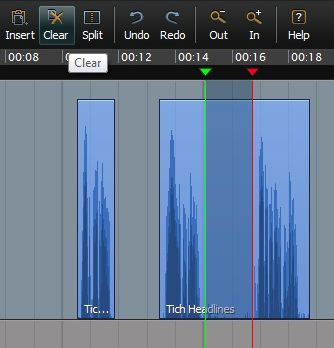
- If you want to delete AND close the gap in one action, make a selection and use Edit > Cut or Ctrl+X.
- Use Edit > Split or Ctrl+B to separate one region into 2 regions the current position. You can also split a selection at the In and Out Point.
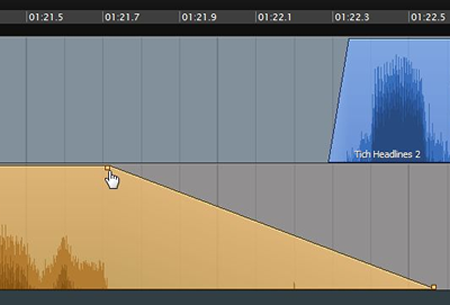
- Create Fades at the borders of your regions using the fade points in the upper corner.
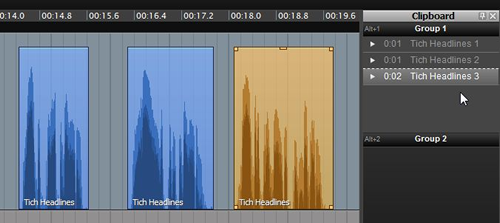
- You can copy regions of audio to the Clipboard on the right hand side by holding the Ctrl key and dragging the files into a group in the Clipboard panel. You will see the cursor change to a + symbol as you move into the Clipboard panel. You can rename the copied clip by right clicking the file name in the Clipboard panel. This is a very useful tool for keeping your workspace organised.
If you want to, you can delete the regions/clips from the main edit panel and copy them back from the Clipboard later.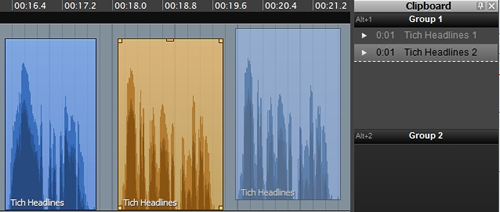
- Take the BrendaText file and clean it by deleting the paragraph repeated at the end of the recording.
- If you want to Group clips/regions select the first one hold Shift and select the last one. All regions in between will turn orange. Press Ctrl+G. Now you can move all regions together.
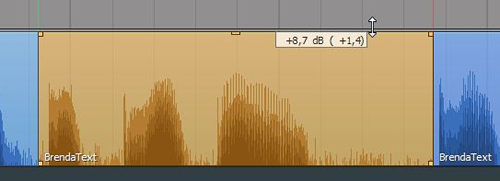
- To adjust the volume of a region manually grab the top of the region and drag it up and down to raise or reduce the level.
- Once you have finished editing, select all the regions by clicking the first one, holding the Shift key and clicking the last one. All regions will turn orange. Use the Tools > Auto Level function or Ctrl+L to normalize all regions at the same time. Now you should have a good balanced level of -6 db in average.

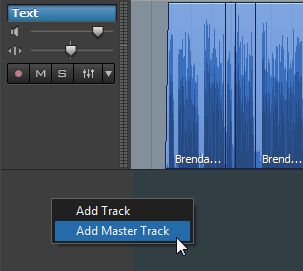
At the end of our production we must raise the loudness of our piece to enhance the speech clarity for telephone networks.
- Add a Master Track to the project with a right mouse click in a free area in the grey left hand margin under the other tracks. All other Tracks are routed to this Master Track.
- Load the LoudMax plugin into the effect bin by clicking on the 'fader' symbol of the master track (see image towards the beginning of this chapter) and choosing one of the four empty effect slots. Choose the Thomas Mund LoudMax Plugin with the settings below:
- Threshold: -15db
- Output Level: -1db
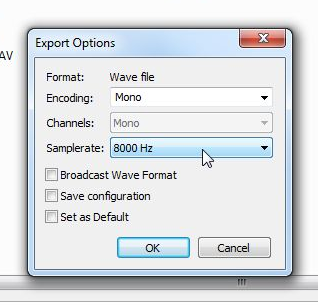
Save and then Export your Project with the following settings:
Mono, wav, choose 8 kHz Sample rate from the options dialog
After production, upload the file to a Freedom Fone Voice Menu and listen to it on the phone! Listen through the whole file carefully to ensure everything is understandable.
To be thorough, make sure that you can exit the audio playback by pressing any number on your phone's keypad. You should be returned to the instruction menu. If there is a problem, check your Audacity export settings. They should be 8kHz, mono, wav.