Installing ObscuraCam
There are several ways of installing ObscuraCam. If you are used to installing Android Apps from the Google Play store then this is possible to do with ObscuraCam. However, if you are concerned about being tracked you may wish to install ObscuraCam directly from the website of the makers, the Guardian Project.
To continue, you will need to be connected to the Internet via wifi or a data connection.
Installing directly from the Guardian Project
Before you can install an app in the following way you will need to adjust the security settings on your device to Allow installation of apps from unknown sources.
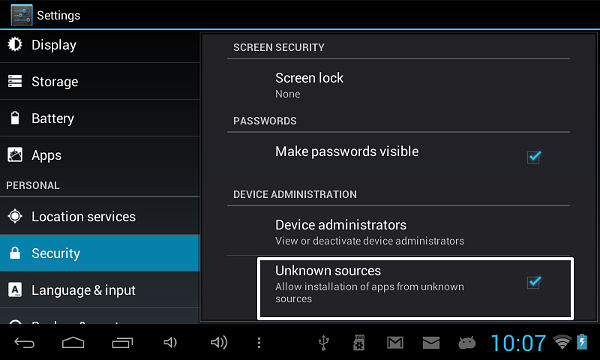
While it is great to have an alternative to Google Play and to be able to install apps directly to our devices, it is important to know that there are risks to installing apps from untrusted sources. Make sure you either use Google Play, a trusted source like the f-droid project OR the website of the developers. Don't download apps (apk files) from just anywhere on the web.
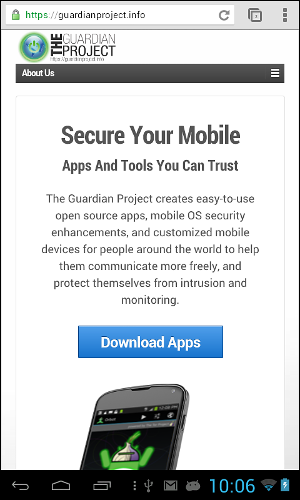
To install directly from the Guardian Project point the web browser of your Android device to http://guardianproject.info.

Click on the Download Apps link. This takes you to a page where you can find out more about the apps offered by the Guardian Project and lists a few different ways of installing them. Scroll down the page until you see the details for ObscuraCam and click on the Direct Download (.apk) link.

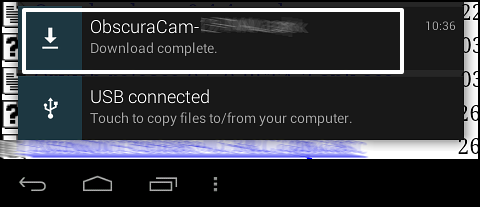
When you have clicked on the link you should get a notification on your navigation bar that you are downloading a file.

When this disappears your download should have completed and you can click this area of the screen to see your downloaded file.
If the above technique doesn't work for you then you should be able to find the file in your Download file by using the file manager on your Android device.
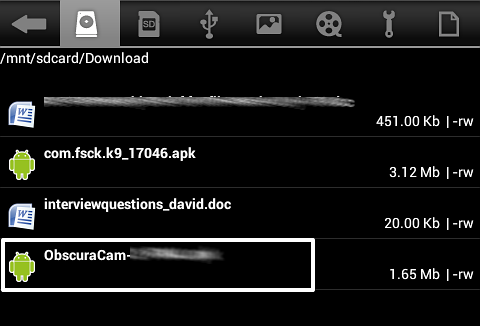
Using either of the ways above, click on the name of the downloaded .apk file, in this case to start the installation process. You will be given a choice on how to install the application. Select Package installer and click on Just once.
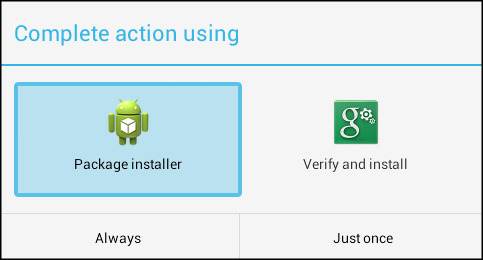
You are then shown the permissions that ObscuraCam application needs to run on your device. You should allow this by selection Install.

Then click Open when you are done and Accept to the terms of service when you are happy with them.
You are now ready to use ObscuraCam on your device.
Installing ObscuraCam from Google Play
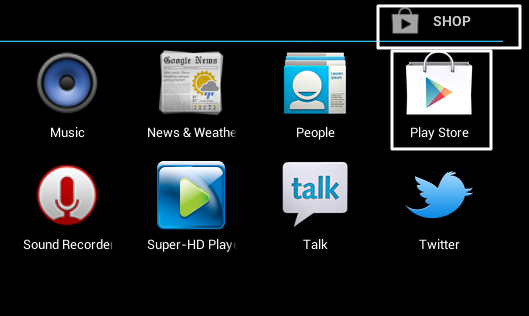
Start Google Play by clicking on the Play icon or the Shop icon on your android device.
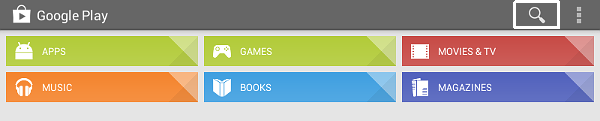
In the top bar, you should then be able to see a search icon that looks like a magnifying glass.
In the top left corner of the screen you should see a flashing cursor allowing you to type a search term to search the Google Play store.
Type in "ObscuraCam".

To search click on the search icon.

The application you want in the list shown is called "ObscuraCam". Click on the panel to see information on the application. You will also see the option to INSTALL.
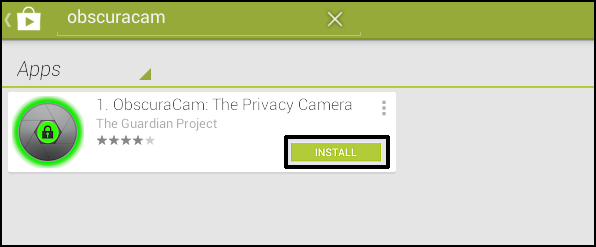
Click on the INSTALL option and follow the instructions. You will need to agree to allow ObscuraCam access to storage. This is normal and you should accept to be able to use the application.
You are now ready to use ObscuraCam on your device.
More Information on Guardian Project
Other apps from the Guardian Project
There are many other apps available from the creators of ObscuraCam. Many of them are designed to improve the security of the use of your phone.
Gibberbot, Orbot, Orweb provide other ways of communicating more securely via your Android device. They give you options for using encryption during live chat, web browsing and generally connecting to the Internet.
Details and tutorials on these apps are available at the Guardian Project's website. https://guardianproject.info/apps/
https://guardianproject.info/apps/tutorials/
InformaCam
While ObscuraCam aims to subtract information from images, including metadata of images taken, InformaCam does the opposite by making sure that accurate and verifiably metadata is taken along with images and video. The thinking behind this is to make sure that footage can be used in courts with good authority.
According to WITNESS' Bryan Nunez, ObscuraCam is part of a larger app suite called SecureSmartCam, a “suite of mobile media apps designed for activists, journalists, and citizen witnesses. The other app in the suite is InformaCam, which adds an array of smartphone sensor data (GPS, network information, etc.) to the video and images captured. The idea is that this information could be important in cases where the pictures and videos shot with the smartphone are used as legal evidence.”
The importance of Open Source
The fact that the Guardian Project code is open source (specifically Free Software) is advantageous for a number of reasons. One of the most relevant is that anyone can inspect the 'source' of the programme to see how the code works.
A large amount of surveillance happens through 'backdoors' in software. This allows contractors to bypass normal security and makes spying much easier. In Open Source projects such backdoors would be viewable in the source code and identified.
Additionally, when choosing Open Source apps we also should check that there is a healthy community of developers and peers inspecting the work being done to check it does exactly what it should do, and most importantly nothing more than it should do.
There are a few ways to test this. You can look the project's code home which is often at Github. Here you can see how often the project is updated and how many people are working on it and how good the documentation and help files are. You can also check the communications channels of the project to see if there is an active mailing list or IRC (chat channel).
There are many interesting Android and iPhone apps that may be free to download but are unfortunately no longer available or kept up to date. This situation is partly due to the high turn-over of start up companies that try out free apps but then withdraw them if they are not very successful. This is much less likely to happen to Open Source projects with a strong community.
Getting involved
There are many ways that you can get involved with the Guardian Project and the development of ObscuraCam. If you are a techie then you could apply to be an alpha tester. Alpha testers are invited to test out apps before they are released - https://guardianproject.info/contact/alpha-testers-apply-here/
There is also a page which details other ways to work with the project which is targeted more towards group and partner projects.
https://guardianproject.info/home/how-you-can-work-with-us/
Getting Help
You can also contact the team via the contact page of their website.
https://guardianproject.info/contact. This page has details of their twitter account (@guardianproject) and relevant email lists for users and developers to get help.
Another way of getting help is probably via the chat client called IRC. You can find many of the team and supporters there in the network irc.freenode.net channel #guardianproject.
Obscuring Photos
To start the process of taking and obscuring photos start the ObscuraCam app on your Android device.
After installing you should find an icon to start ObscuraCam in one of your applications pages.
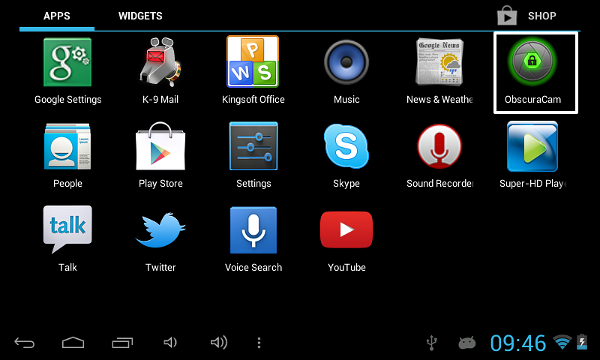
Select/ touch the icon to start.
Obscuring a new picture
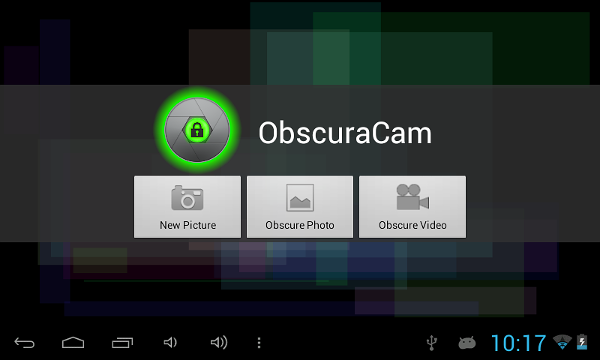
To take a picture using the inbuilt camera of your device start the app and select New Picture.
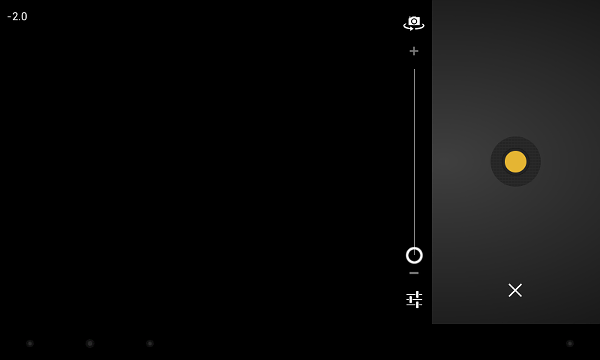
You should see the default layout of your camera phone's app with some slight alterations.
For this device you click on the round button to take a photo.
If have a different device you may have to click on an icon of a camera or something similar.
When you have taken a photo you may be presented with different options. For some devices You can click on the tick at the top to start obscuring the photo.

You can click on the middle icon to retry and take another photo. You can click on the X to return to ObscuraCam main main menu.
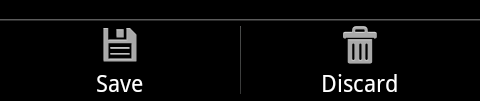
Other devices may give you an option to Save or Discard your photo.
The next stages of the process of obscuring your new photo is exactly the same as for working with existing photos, so read on to find out how to do it.
Obscuring an existing photo
Let's take the situation where you want to obscure a photo that you already have on your device. Start the app as before and select the option to Obscure Photo.
You should see a list of the different places on your device that have photos stored in them.
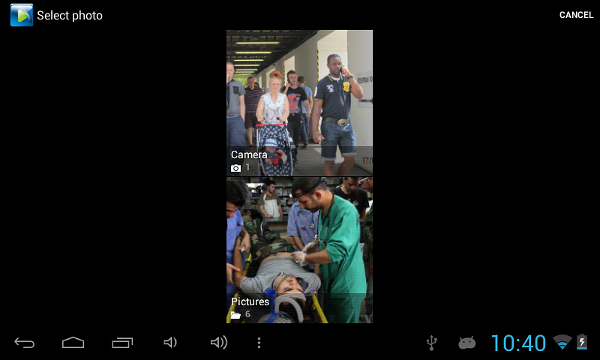
Browse until you see the photo you want to obscure. This may be a photo you have already taken on your device or another one that has been sent to you via email, web, twitter or other means.
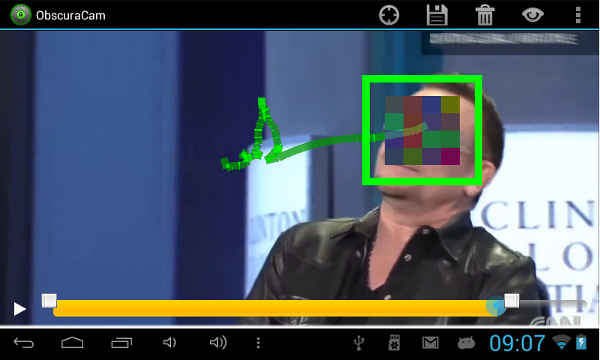
Obscuring faces and other areas
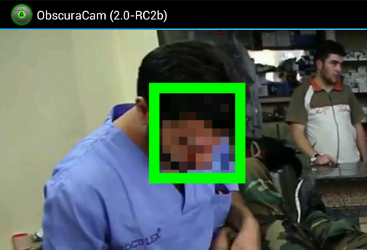
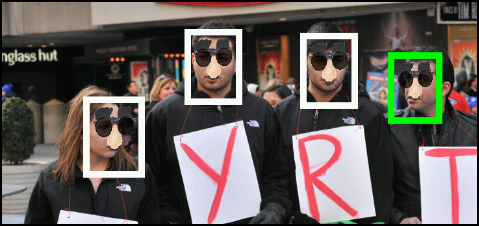
When you have selected your photo it will open up in ObscuraCam and immediately it will try to detect the faces in the photo.
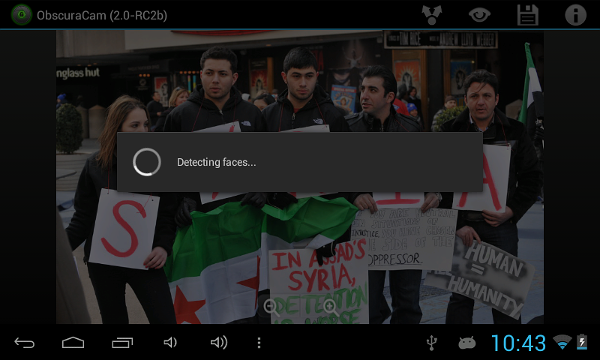
Depending on the photo it will detect all or some of the faces.
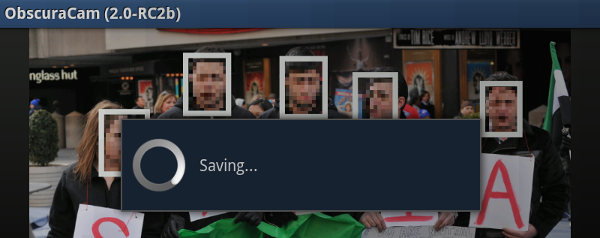
In this case of this example, all faces were detected automatically and set to do the default pixelation to obscure facial details.
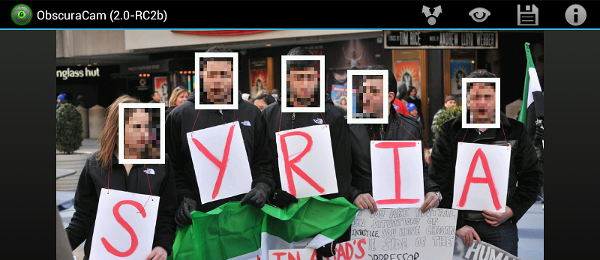
If we are happy with the areas tagged we can continue. If not, read on to see the section about adding more tags manually.
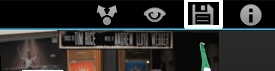
We can now save the obscured image by clicking on the icon of the disc.
You should see notification message saying you are saving your new image to the Gallery on your device.
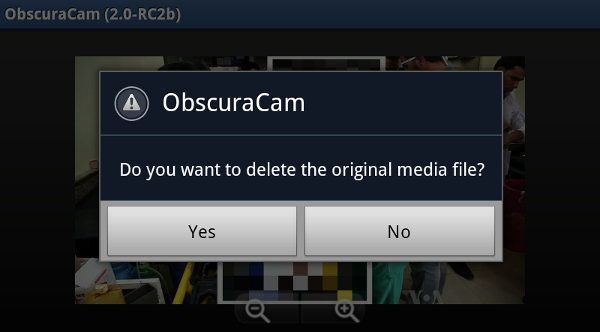
You should also get the option to delete the original file.
This is a chance to make a decision about if the original file is too risky to keep on your device.
Adding and configuring more Tags manually to the photo
We may want to pixelate another part of the photo or another faces that were missed by the automatic facial detection process. We can also delete tagged areas so that they are unpixelated or obscured in a different way.
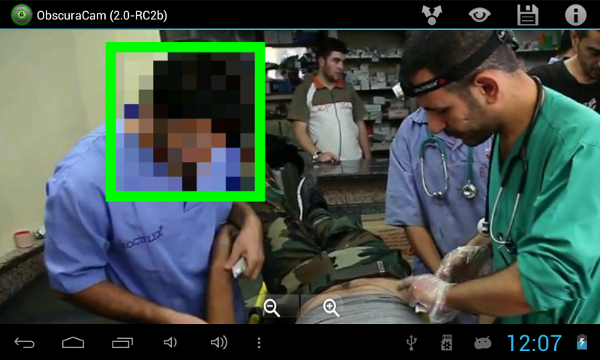
In the following photo only one of the faces has been recognised and the area selected it a bit big.
To alter the size of a tagged area you can touch and slide the corner of the selected area.
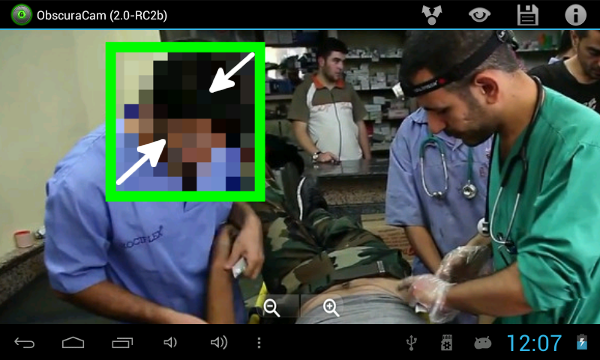
For example to make this area smaller touch and slide the corners together.
You can also touch the middle of the selected area and slide it to move it with our resizing it.
Creating a new tagged area
To create a new obscured area simply touch the area you want to obscure.
This will create quite a large tagged area which you can move or resize as you wish.
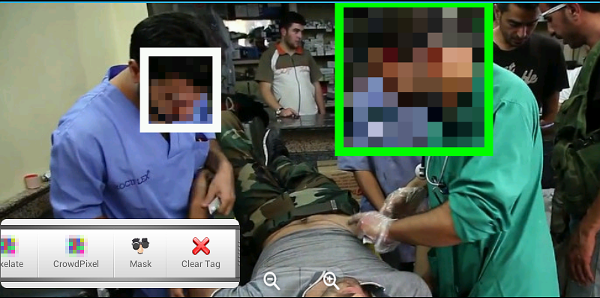
When you have selected an area if you touch it again you get the option to delete the area. This can be handy if you create new areas by mistake. To do this select the Clear Tag options
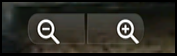
Zooming in with the zoom tool makes it easier to select some of the smaller faces in your photos. Zooming is also a good way of checking if faces that are small still need to be blurred.

You can repeat the process until all the faces you need are obscured and then Save your photo in the normal way.

If you want to check what the photo will look like before saving it, then you can touch the Preview icon. 
Other options for obscuring
When you touch each of the areas to obscure there are different options for obscuring.
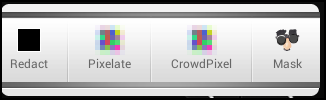
The default option we have been using is Pixelate. You can see other options here. This includes Redact which replaces the tagged area with a black square.
CrowdPixel reverses the area to be pixelated and so it pixelates everything outside the box and keeps the area inside clearly visible.
Mask puts a mask over the top of faces. This may help to keep the photo light-hearted but may not be appropriate for serious subjects.
Obscuring Videos
The process of obscuring videos demands quite a lot from your phone. You may find that the process works better with newer devices with more powerful processing power, especially for longer videos.
To obscure videos start ObscuraCam in the normal way and click on Obscure Video.
Automatically obscuring videos
You will then be asked to find a video file on your Android device. If you have your videos in various locations you will get a choice.

After selecting your video. You will be asked if you want ObscuraCam to try to automatically detect faces in the video.
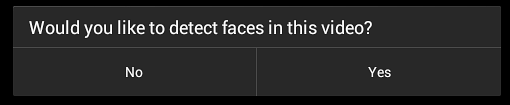
Try it by selecting Yes.
You will see the ObscuraCam app trying to recognise the faces in the video.
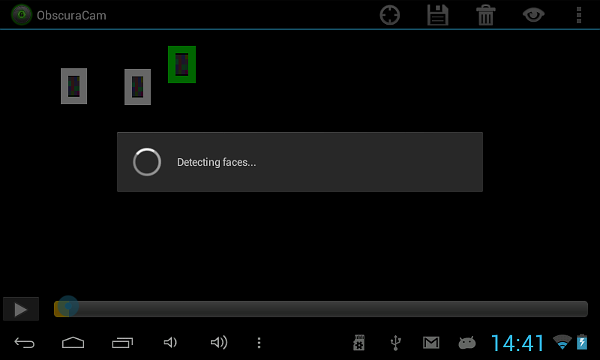
If this process is successful we should click on the Save button to start the process of saving our obscured video.
If this automatic process does not detect all the faces that we want to obscure or if we want to make other changes we can do this manually. It is possible add regions to be tagged, change their size and also move them.
Manually adding and altering video regions to obscure
To manually add video regions to obscure, start by selecting the first area you want to obscure. If the area is too small or too big you can resize it in the same way as with a still image.
Now touch on the the play icon on the video play bar at the bottom of the screen.

As the video plays, touch and hold the selected area. As the face moves around on the screen, follow it by moving the selected area.
You will see a green trail start to emerge which maps the movement of the selected area.
As you are tracking you can select the Pause button to resize or move your selected area accurately.

Press Play again to resume the process.
When you have finished tracking the face you can touch the selected area again and select Set Out Point.

This process creates a Trail a series of Keyframes which map the location and size of the selected area (tag) to be blurred.
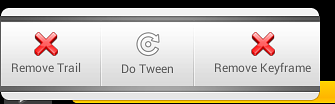
If you make a mistake it is possible to Remove Keyframes. Or if you make a big mistake you can remove the whole trail to start again.
 ]
]
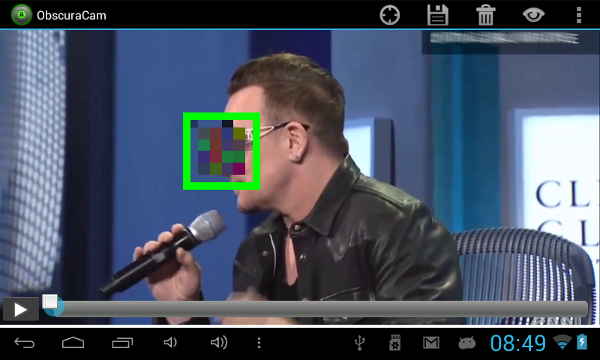
As you play the video you will see a circle moving to the right showing the progress along the timeline at the bottom of the screen.
You can touch and drag this circle backwards or forwards to review the video and check if the areas are obscured correctly.
If there is more than one face or area that you want to obscured then you can repeat the process above. When you are happy with the areas to be obscured you can touch the Save icon on your options.

You should see a progress bar letting you know the progress of the outputting of your obscured video.
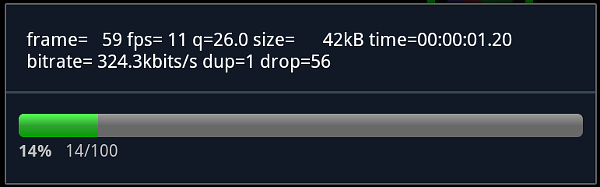
When this is complete, you can use a video player to review the video you have created before you upload it or share it in other ways.
It is possible to click on the Share icon to list the different apps on your phone that can help you do this. 
Video output options
Selecting the more actions bar allows you to change video Preferences. 
These preferences affect the video output settings.

If we look at the defaults for a device after installing ObscuraCam, there are as follows.
Output Framerate: 15 fps
Output Bitrate: 300 kbps
Custom Video Width: 480px
Custom Video Height: 320px
Output Format: 3gp
Output Video Codec: libx264
Output Audio Codec: copy
These default settings are very suitable for sharing a video file quickly as the file size will be relatively small. However, with these settings you may lose a fair amount of quality. Many android devices record video at high quality. As such, there is a trade off between how quickly you can upload your clip and its quality.
If you wanted to change the settings to keep some of this quality but still reduce the file size you may choose some settings like the following.
Output Framerate: 30 fps
Output Bitrate: 900 kbps
Custom Video Width: 640px
Custom Video Height: 360px
Output Format: mp4
Output Video Codec: libx264
Output Audio Codec: copy
Other tools for obscuring video
Blurring using YouTube
YouTube blurring is a feature that has been introduced to the video sharing service relatively recently. Here is a short guide on the process.
When signed in, click the arrow next to the Upload button at the top of any YouTube page. Select Video Manager then select the Edit button for the video you want to blur. Next select Enhancements and select Face Blurring.
When this is done, make sure to preview the video. Often not all faces will be blurred. You need to check this carefully. If you are happy with the result then, click Save rather than Save As this will delete the original video from YouTube's servers.
This subject is covered in more details on the blog of Witness.
http://blog.witness.org/2012/07/visual-anonymity-and-youtubes-new-blurring-tool/