Why use a manual on Internet security?
In the eighties when the Internet was in its infancy, its main usage came from university students and professors in an atmosphere of implicit trust. This means that security was not the first thing in mind when the basic uses and functions of the Internet were first developed.
Nowadays the Internet is everywhere both in public and in private life. It has become a vital means for professional and personal - often confidential - communication. This has required security enhancements to be added to the various communication methods used on the internet after it became widely used. A lot of these enhancements are not implemented by default or require additional configuration.
In addition, most people do not have the appropriate knowledge or skills to secure their internet usage enough or they might simply feel it they don't need it. Also vendors and providers are to blame for not pushing more secure technology and methods by default. But maybe you worry about your login codes being accessed when using wireless networks on a trip, or you want to securely lock your laptop when leaving it in a hotel. Possibly you need to encrypt your e-mails, because you have contacts in countries with a high level of internet censorship.
This manual tries to fill that gap by providing some basic knowledge, and also more sophisticated techniques for those who need them, to make sure that your data is not easily accessed by others. As a matter of fact, internet security is not that difficult.
What is security?
Absolute security does not exist, security is always related to who your adversaries might be. Security is therefore about informing yourself and assessing the possible risks you, and others you communicate with, are facing. Make sure you reserve some time to choose the right tools, install everything properly, and test if it works. Compare it with driving a car: it takes a little bit of practice, and some judgement on others' behaviour, but as soon you are in control it can safely get you where you want.
To make a choice between the types of tools you need, it helps to make a distinction between two basic types of 'threats': undirected threats and directed threats.
Most of the threats we are facing are automated undirected threats and luckily these are also the easiest to defend against. Unfortunately, we are sometimes also subjected to directed threats, for which we need some extra safety measures. We will shortly go into these issues and refer to the appropriate chapters so you can start your way.
Undirected and directed threats
Undirected threats are threats that are not directed at you personally, but might still affect you. Examples include phishing emails and computer virus infections. These methods are always automated and are just looking to get new victims, that can be everyone. Some schemes can evolve into a directed threat (for example when responding to e-mails telling you you won the "Spanish online lottery"). Also unprotected websites, or networks, can be dangerous if you fill in your login codes or credit card information.
These threats can be compared to walking around in an unknown city, ending up in the wrong neighborhood and getting mugged. This book aims to be your city guide helping to prevent you to be at the wrong place at the wrong time. To protect yourself from this type of threats we recommend you to read at least the sections on General Computer Security, Secure E-mailing and Secure Browsing. Next to that it is key to keep your wits about you, keep your eyes and ears open and don't loose your common sense.
Directed threats are the most dangerous ones. A long known wisdom amongst security specialists is the notion that "Only amateurs attack machines, professionals attack people." Directed threats are aimed at you personally or your organization and might involve a lot of different techniques. Attackers will use a mix of social engineering, sophisticated tools, luck and hard work. Directed attacks are a lot more expensive to undertake than undirected ones, as mostly they require more skills and work hours.
One source for directed attacks can be people you know, for example co-workers, your boss, your spouse or friends. They might do so out of curiosity or for worse purposes. Small measurements might be enough to counter these attacks, like using a password on your computer and locking your screen when leaving your computer unattended.
Also thieves that gained access to your bank account, for example through phishing or spying on unprotected networks, are considered a serious threat to the internet user.
Another source of directed threats are (repressive) societies. Governments have a range of motivations for monitoring or restricting different kinds of people's online activity.
Who might need this manual?
Of course, there are several reasons why you might need some guidance for internet security. Who are possible users that can have personal or professional reasons to take extra safety measures.
Journalists probably face directed threats. Organized crime, corruption, and government brutality are dangerous subjects to cover. You may need to protect yourself and your sources of information.
Bloggers can encounter similar problems. You may want to write about everyday life, but issues are silenced or unpopular because of ethnicity or gender. You might prefer anonymity or need it to connect with a support group.
Diplomats are also under heavy surveillance, as we know from the Wikileaks affair. You'd rather communicate in a safe way with your colleagues because the the content of your e-mails could have damaging effects.
Activists may want to improve your government or are seeking a new one. You may want to expose environmental issues, labor abuses, fraud, or corruption at your place of work. Your government and employers are not going to be happy about this no matter the time of year, but they may put more effort into monitoring you if they suspect that there will be protests in the streets soon.
Internet users: You might want to increase your security while browsing or mailing so you are better defended against undirected attack, or you might be just fed up with companies storing all your data for financial purposes, or suggesting you all sorts of things about yourself and your friends.
How to use this manual?
If you think you need to secure your internet use, we'd be happy to give you a hand with this manual and helping counter-attacking some of the problems you face. The chapters encompass general introductions that indicate which are the more basic steps to be taken for internet security, and what are the more complex operations to be handled. Even if those techniques of assurance may sound more demanding, they are explained step by step with illustrations and turn out to be not so difficult to implement.
In the end you are the only one who can best asses the risks you are taking and to which threats you are exposing yourself and your peers. If you are in need of more in depth information aimed at human rights defenders, there is an excellent one called "Security in-a-box"created by the Tactical Technology Collective and Frontline. It is freely available online and as a download at https://security.ngoinabox.org. Additionally, if you live in a country that actively restricts access to parts of the Internet you might find the Floss Manual on bypassing censorship to be of interest to you, it is located at http://en.flossmanuals.net/bypassing-censorship. Know that manuals in general can't guarantee total security and that it is by no means a replacement for a professional risk assessment and an organization wide security (and travel) policy.
This manual is also to be used in an interactive way. In order to work, it needs to be kept reflected upon and updated. Do get in touch if we missed something, if you want to contribute, or if you just want to get in touch!
Understanding basic Internet security
To understand basic internet security we should have a basic understanding of how the Internet is organised and which path our information travels. With this knowledge we can easier assess which measures we can take to protect ourselves.
The mail game
 To have a notion of how the Internet works you can compare it with the normal world wide mail network. If you want to communicate with a friend you can send her a letter and post it to the nearest mailbox; it then travels through an extensive network to (hopefully) reach the person the information is intended for. Internet is just like that, however, the message is sent in an open envelope and every postman on the way can read the message, alter its content and/or the destination without you knowing.

To counter this, people have long used secret languages to communicate safely. In this chapter we will explain two methods of encryption. The first method explains an end-to-end encryption, encrypting the whole way from sender to receiver. The second method partly encrypts the route.
End-to-end encryption
If you encrypt your message and only the recipient can read it, it will be meaningless to all the postmen in between, and if they alter it you will notice it directly. In order to make such an encryption work, you still have to be sure to trust the recipient and be sure that you are really exchanging information with her and not with someone pretending to be her. This method is called end-to-end encryption and is the safest way of communication. You also have to be sure that no one is watching over your shoulder while you write your message. Some of the end-to-end encryption methods that we cover in this book are HTTPS for browsing and PGP for e-mailing.

Unfortunately for end-to-end encryption to work, both you and your friend (source, co-worker) need to have the tools to use it and have to agree on the secret language used. On the internet this means the website you are visiting or the people you are e-mailing. This not always the case, still, we can considerably increase our online safety by encrypting a part of the route.
Partly encrypted mail through a proxy
To get back to the mail analogy you might be on a field trip in a repressive country and want to send a message to your friend at home. You don't trust the post offices and the postmen in this country. So before you left, you asked your local post office to act as an intermediary (the proxy) and agreed to use a secret language. Now you can just write a message to your friend in the secret language of your post office. You will send this to your post office and they will take care of the delivery of the message to your friend. In this scenario you have to trust your local post office, all the postmen after that, and of course your friend.

Visiting websites is communicating
Because in this example an analogy was drawn with mail messages, you probably thought of e-mails when reading this. While this is true, the example also counts for all other internet communications. Visiting a website is just like sending the message to your friend "please mail me your copy of the book 1984", after which she sends it to you.
Let's follow the example of visiting a website from your home computer:
- You type in http://freepressunlimited.org/.
- The request goes through a series of routers, each one forwarding a copy of the request to a router closer to the destination, until it reaches a router that finds the specific computer needed.
- This computer sends information back to you, allowing your browser to display the page.
The message that is transmitted from the website to you travels through other devices (computers or routers). The amount of devices your message comes in contact with along its way is often between 5 and 30.
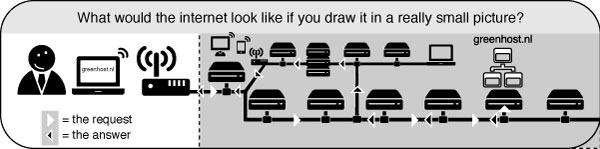
By default, information travels on the internet in an insecure way. This means that your message can be eavesdropped or tampered with on every device. If you are connecting wirelessly, people can also just "tune in" to the information send through the air.
To keep information from being compromised you have to be careful to make sure of the following:
- Can you trust the entry point (your internet connection) to the internet? If this is an insecure wireless connection anyone can eavesdrop on it, if it is a physical (cable connection) it can be eavesdropped by the operator.
- Can you trust the exit point (the site you will be visiting) of your information?
- Are you really communicating to the right destination? Or did your request end up on a server trying to appear like the server you were looking for, but really isn't.
At the end of the book there is a more in depth and technical explanation on how the net works. You can read that if you like to know more about it.
Secure your computer
There are steps that everyone with a computer should take to keep it secure. This may involve protecting information about your network of activists, your credit card number or your human-biology collection; but some of the tools you need are the same. Your computer holds valuable information and this need to be protected.
Beware of programs or people that promise perfect security: online safety is a combination of good software and human behavior. Knowing what should be kept offline, who to trust, and other security questions cannot be answered by technology alone. Look for programs that list risks on their Web sites or have been peer reviewed.
Keep your OS updated
Keep your operating system up-to-date: the developers of operating systems provide updates that you should install from time to time. These may be automatic or you may have to request them by entering a command or adjusting your system settings. Some of these updates make your computer more efficient and easier to use, and others fix security holes. Attackers learn about these security holes rapidly, sometimes even before they're fixed, so fixing them promptly is crucial. Luckily most operating systems do a quite good job in keeping the system updated and safe, if at least you allow them to do so.
Installing new updates on a new computer is very important. A new computer you buy in the shop, can be there for some months already. This means the computer is often behind with the security updates. So when buying a new computer, please take some time to update your Operating System.
User account and password
Every computer needs an account to login. This account is needed to access your data and use the functions of your computer. Please be sure to setup a password for every account.
Use good passwords: no password selection system can guard against being threatened with violence, but you can improve your security by making it harder to guess. Use combinations of letters, punctuation, and numbers. Combine lower and upper case letters. Do not use birth dates, telephone numbers, or words that can be guessed by going through public information about you. More information about this can be found in the chapter on passwords.
Modern operating systems separate normal tasks from administrative tasks like installing software. This division is very important, as administrative tasks need extra privileges and have total access to your hardware and software. Be sure to create a normal user account for day to day usage and never use the administrative account for this.
Last but not least: Never store your password on a post-it on you computer or underneath your keyboard.
Physical protection
A lot of people do not realize the information on your computer can be very valuable for others. If you are working in an unknown/uncontrolled environment or area, always keep a good look on your belongings and never leave them unattended. Take some time to think over what the risks are if the data on your computers fall in the wrong hands. Ask yourself, "which information is actually stored on my computer and what can other people do with this information?". Please realize, a password on your computer will maybe protect against quick access, but it doesn't protect your data once the whole system is lost. With physical access to a computer it's very simple to access the data on your harddisk (with the use of an other computer) without knowing even the first character of your password. If the information on your laptop is very valuable, have special attention to the section about securing personal data. The above is also true when you lend your equipment to someone else. Although you might completely trust the person you lend to, you don't have control on how secure they may handle your equipment.
Smoking a cigarette
It is very well possible you are working in a cafe or other (semi) public place on your laptop. Maybe you have opened some password protected websites (webmail) and maybe even have opened some encrypted files or emails. Once you go out for a quick break and a cigarette, please be sure at least your screen is locked. All mainstream operating systems can be used to lock your screen automatically if you close your lid or after a few minutes of inactivity. Be sure to enable these options, failing to do so will certainly at least sometimes result in good opportunity for attackers to access your private data. Unfortunately this habit is still not very common with users but very important.
Use anti-virus software
 If you're still using Microsoft Windows, use anti-virus software and keep it updated. Malware is software written in order to steal information or to use your computer for other purposes. Viruses and malware can gain access to your system, make changes and hide themselves. They could be sent to you in an e-mail, be on a Web page you visit, or be part of a file that does not appear to be suspicious. Anti-virus software providers constantly research emerging threats and add them to lists of things that your computer will block. In order to allow the software to recognize new threats, you must install updates as they are released.
Be aware of scareware. Scareware is software which advertises itself as anti-virus software, but is in fact a virus or spyware itself. If you install (free or commercial) anti-virus software, please be sure it's not scareware. A quick search of the name of the vendor/product in combination of the term "scareware" on Google will be enough to find out if you've just downloaded scareware. Scareware can be often found in "advertisements" on dodgy websites with warnings about "found viruses"
External data (USB-sticks, E-mail attachments)
 Transferring virusses with USB-sticks or with E-mail attachments is very easy and often done by the virus itself rather then the owner/sender, especially under Microsoft Windows. Be careful when inserting USB-sticks or lent out your stick to others. It's just recently Microsoft changed it's policy regarding automatically opening USB-sticks. This should make Windows a little safer, but still watch out suspicious programs on USB-sticks. Never open any file you do not trust, regardless to if it was distributed via E-mail, USB or other methods.
Only use trusted and Open Source Software
Be sure you can trust the vendor of the applications you use. A lot of companies are offering applications on the internet. Between these companies there are several with other intentions then they will tell you.
Use Free and Open Source Software (FOSS). Open source software is made available both as a working product and as a work in progress to users and software engineers. This offers several security advantages over closed source, for-profit software that may only be available in your country through illegal channels due to export restrictions or expense. You may not be able to download official updates for pirated software and often pirated versions already includes viruses. With Open Source software there is no need to search through several suspicious sites for a copy free of spyware and security glitches. Any legitimate copy will be free and is available from the creators. If security flaws emerge, they can be spotted by volunteers or interested users. A community of software engineers will then work on a solution, often very quickly.
Another problem that has occurred in some countries with regards to illegally installed closed source software is that equipment of NGOs or journalists were confiscated by the government based on copyright regulations as a measure to gain access to the information that was on the devices.
Be updated
 Keep yourself updated on the latest security threats: the effort put into harming you may change. Methods to protect yourself that works today may stop working or even become a threat themselves tomorrow. Even if you don't need it now, know where to find information and use different sources of information.
And if you do find some essential piece of information we didn't cover in this book, please update the book at booki.flossmanual.net or tell us so we can update the book.
Internet Cafes
 The fact that you access the Internet in a public space does not make it anonymous or safe for you. It is quite often the very opposite. Some of the main threats are:
- The owner of the computer, or even a person who used the computer before you, could easily program the computer to spy on everything you do, including recording all of your passwords. The computer can also be programmed to circumvent or nullify the protections of any privacy and security software you use on it.
- In some countries, such as Burma, Cuba and Italy, Internet cafe clients are required to show their ID or passport before using the service. This ID information can be stored and filed together with the clients' Web browsing history.
- Any data you leave on the computer you have used may be logged (browsing history, cookies, downloaded files, etc).
- Software or hardware keyloggers installed in the client's computer may record every keystroke during your session, including your passwords, even before this information is sent over the Internet. In Vietnam, an apparently innocuous virtual keyboard for typing Vietnamese characters was being used by the government to monitor user activity at Internet cafes and other public access spots.
- Your screen activity may be recorded by special software that takes screenshots at frequent intervals, monitored through CCTV cameras, or simply observed by a person (e.g. the Internet cafe manager) looking over your shoulder.
- In some countries, such as Burma, Internet cafe owners have to display posters about banned Web content and are responsible for the enforcement censorship law inside their business.
- Computers are often configured so that users are prevented from installing any software, including circumvention tools, or connecting any kind of devices to the USB port (such as USB flash drives). In Cuba, authorities have begun deploying a controlling software for Internet cafes named AvilaLink that prevents users from installing or executing specific software or running applications from a USB flash drive.
- Users may be prevented from using any other browser but Internet Explorer, to prevent the use of privacy or security Add-ons or settings for browsers such as Mozilla Firefox or Google Chrome.
Best practices
 Depending on the environment in which you use your shared computer, you can try the following:
- Identify the surveillance measures implemented based on the list mentioned above (CCTV, human surveillance, keyloggers, etc.) and behave accordingly.
- Run portable software from a USB flash drive if possible.
- Keep your data on your own USB flash drive and do not copy it to the shared computer.
- Encrypt any data you are sending.
- Use an operating system on which you have control through the use of a Live CD.
- Change Internet cafes often if you fear recurring surveillance, or stick to one where you trust it is safe to connect.
- Take your own laptop to the Internet cafe and use it instead of the public computers.
Software on USB or CD
It is possible to install applications on a CD-ROM or USB-drive. This will enable you to bring your favourite settings, extensions and bookmarks with you anywhere you go. It will also limit the amount of data and traces you leave on the computer you are using. This could prove to be exceptionally useful when you have to use untrusted computers or internet cafs. The latter is almost always a Windows environment. We will describe a handy tool in this chapter called 'Portable Apps'. With this tool you can easily prepare a USB-drive with Windows application.
The most easy and by far most secure way to do this is at home, or in your office or any other save environment, with a high speed internet connection as it requires you to download a special package of software including all the programs you might need. You want to make sure that the computer you use to do this is protected by a firewall and has no viruses (so use your own computer of from somebody you trust).
If you need only Firefox, which can be used on any platform, install Firefox on a CD or USB. If you need other programs to mail, chat, use ftp etc. you can install a whole bunch of programs with the help from the installer available from the website Portable Apps. The installer and the resulting removable drive with application will only work on the Windows platform.
Another option is to install an entire OS on a flash drive, external hard-drive or iPod and start the computer from that.
Portable Apps for Windows
For Windows users there exist a handy tool called Portable Apps. For this method we are going to use a package from Portable Apps. This website allows you to download packages with software that you can install on a USB-drive or any other removable medium like an iPod or SD Card.
Things you will need for this method:
- A save, clean and secure Windows computer;
- A portable drive of at least 256Mb but preferably bigger then 1GB;
- An internet connection. (You will need to download files between 2Mb to 137Mb).
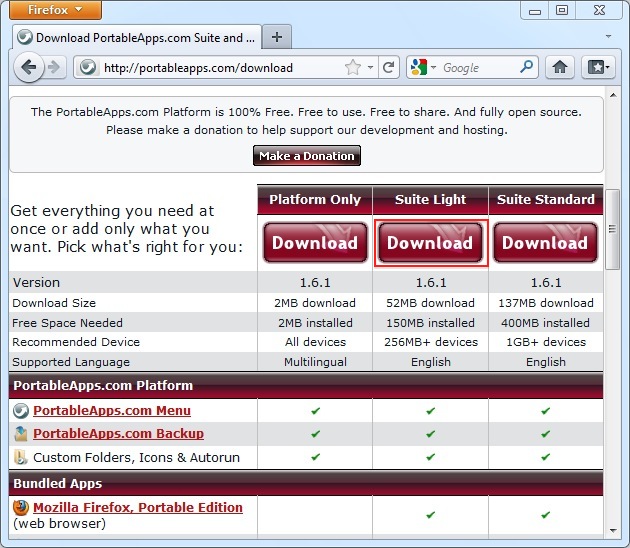
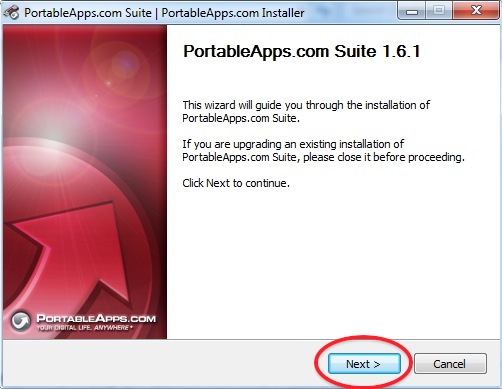
Direct your browser to http://portableapps.com/download and look at the different columns to see what is included in which download. For this manual we are using the 'Suite Light' of 52mb download. At the time of writing the version number is 1.6.1.
1. Download your desired suite by clicking the download button. You will be redirected to the download page and asked if you want to 'save' or 'run' the program. Choose to save it to your desktop (or any other place you might find convenient).
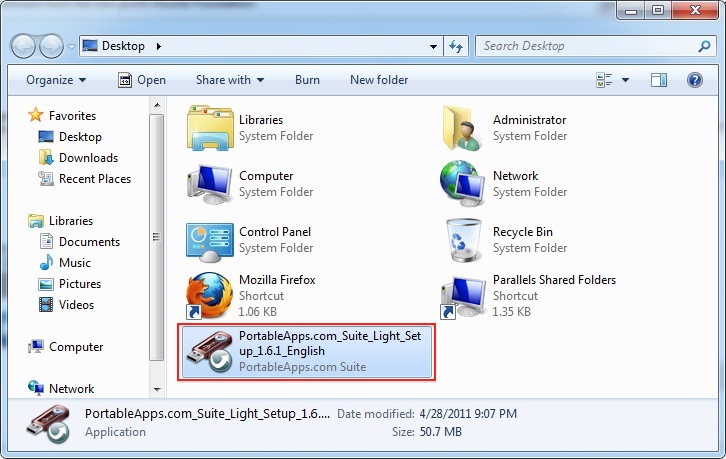
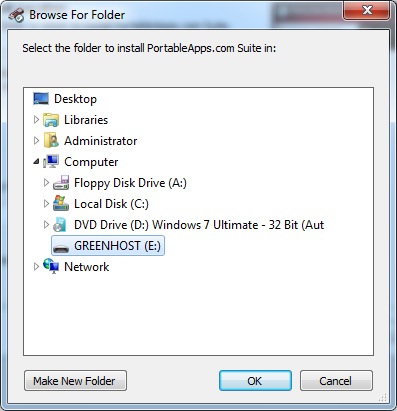
2. Insert you USB-Drive into your computer and locate the PortableApps file on your computer and double click to open it.
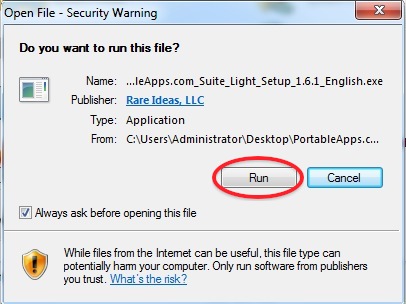
4. It will ask you if you want to run the software. Choose 'Run'.
5. It will now open the installer allowing you to install the programs on your removable drive.
6. It is best practice to install the software on a clean formatted drive at the first level. (i.e. not in a folder.) In our case that is directly on the E: partition.
7. The installation will take some time and afterwards you can set some options and then start using the drive.
Make sure to test on at least one computer if it works and if you understand how to operate it before taking it with you. You can modify the programs on the drive, by changing preferences or adding extensions, like you would with any other program.
Especially for Firefox and Thunderbird this means that any extensions you might want to use can be and should be installed up-front on the USB drive.
Caveats
 Deploying this technique doesn't guard you from many other threats such as key-loggers, malicious programs that intercept your keystrokes. See the chapter on Internet cafs for an explanation of the dangers of accessing your private information from a public environment.
Keeping passwords safe
 Passwords are for the computer world basically what keys are in the physical world. If you loose a password you will not be able to get in, and if others copy or steal it they can use it to enter. As a minimum measure a good password should not be easy to guess by people and not easy to crack by computers, while still easy enough for you to remember.
Password length and complexity
To protect your passwords from being guessed, length and complexity are the key factors. Passwords like the name of your pet or a birth date are very unsafe; also any word that appears in a dictionary is easily guessed by a computer. You should also never use a password containing only numbers. You should use a password containing a combination of lower case letters, capitals, numbers and special characters and it should have a minimum length of 8 characters for basic security.
Minimizing damage
If your password is leaked or guessed, it is very important to minimize the damage as much as possible. To this end there are two measures you can take. Firstly, be sure to keep different passwords for different sites, otherwise if your password for one site is compromised it is very easy for the attacker to gain access to your other accounts. You can for example do this by choosing a few basic passwords to which you add a unique suffix per site. Secondly, change your password from time to time, at least for things you consider to be sensitive. In that way, if an attacker has got access to your account without you noticing, you effectively block him out.
Physical protection
 Especially if you are traveling and using internet cafes, or other untrusted computers, you have to be aware that there are other ways for people to obtain your passwords. Firstly there is "over the shoulder" surveillance, where someone, or a camera, watches your actions and might see the password you are typing (or where you are browsing). A second typical threat is the presence of key loggers. Key loggers are software or hardware devices that record keystrokes, they can be hidden inside a computer or keyboard and hence totally invisible to you. Be very careful what you do in those places and which sites you visit there. If you really have to use such a place be sure to change your passwords as soon as possible. For more tips on Internet Cafes read the chapter on them.
Easy-to-remember and secure passwords
 One way to create strong and easy-to-remember passwords is to start with a sentence you can easily remember, like:
"this book really helps for securing my digital life!"
Take for instance the first letter of every word: "tbrhfsmdl" and now add some more substitutions, the "f" can be the 4 (for "for") and we can add some capitals and special characters. The end result might be something like "TbRh4$mdL!" Which is secure and easy to remember. Just try to think of a system that works for you to remember the passwords. Alternatively you might want to use one strong password that is easy to remember and keep all your other secure (less easy to remember) passwords by using a tool that keeps them securely on your computer or phone.
Using an application to keep your passwords
Even easy-to-remember passwords might be difficult to manage. One solution is to use a dedicated application to manage most of your passwords. The application we will discuss is Keepass which is a free and open password manager that is considered to be secure (given that you chose a sane and secure "master password" for the keepass application).
For website passwords a more convenient solution that is probably safe enough for most of your passwords is to use the built-in password manager of the Firefox browser. Be sure to set a master password as is explained in the chapter on safe browsing, otherwise this is very insecure! Other browsers might also come with built-in password managers, but remember that if you don't have to unlock them with a master password they are mostly unsafe and easily retrievable by attackers having access to your computer.
Protect your Website Passwords
Browsers offer to save the login information and passwords for websites you use. If you choose to save the passwords, you should make sure that the passwords are stored in a safe way. See the chapter about Keeping your internet passwords safe in Firefox.
Caveats
- If an application on your computer, like a chat or mail program, stores the password it uses, and you are not asked for it after reopening the program, it often means that it can be easily retrieved from your computer by someone having access (physical or otherwise) to it.
- If your login information is sent over an insecure connection or channel, it might fall into the wrong hands. (see the chapters on secure browsing for more information)
- Over the shoulder surveillance or key logging might compromise your passwords.
Installing KeePass
We will cover installing KeePass on Ubuntu and Windows.
Mac OSX comes with an excellent built-in password manager called Keychain that is just as save. Downsides are that it isn't Open Source and doesn't work on other systems. If you'd need to take your passwords from one Operating System to another it is better to stick with Keepass after all. How to use Keychain is covered in the next chapter.
Installing KeePassX on Ubuntu
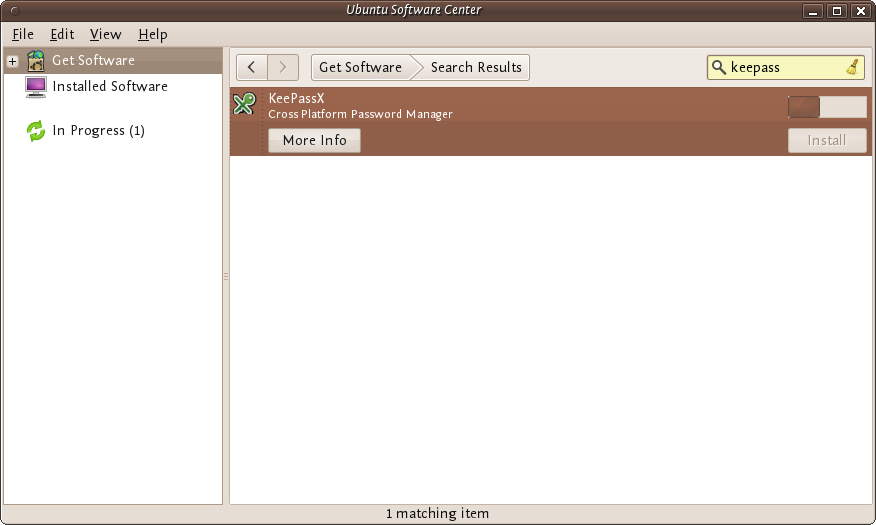
To install on Ubuntu we will use the Ubuntu Software Center from Applications->Ubuntu Software Center.
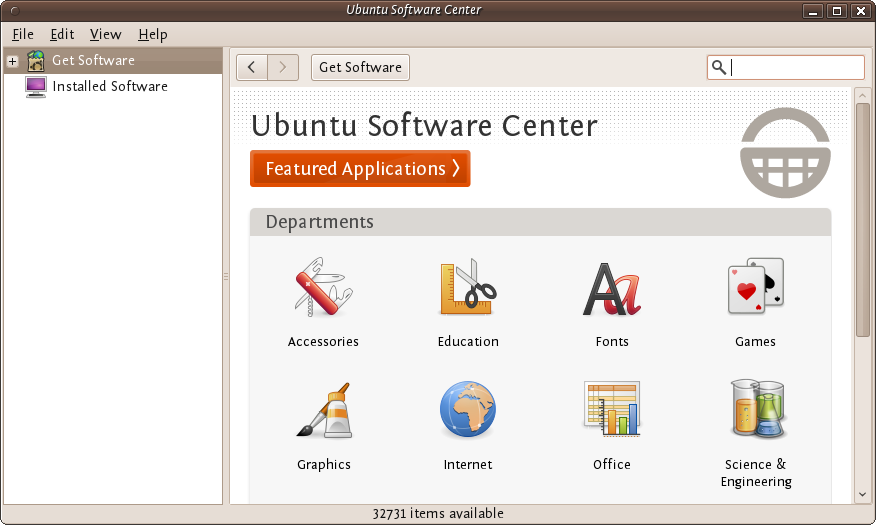
Type KeePass in the search field at the top right and the application KeePassX should automatically appear in the listing.
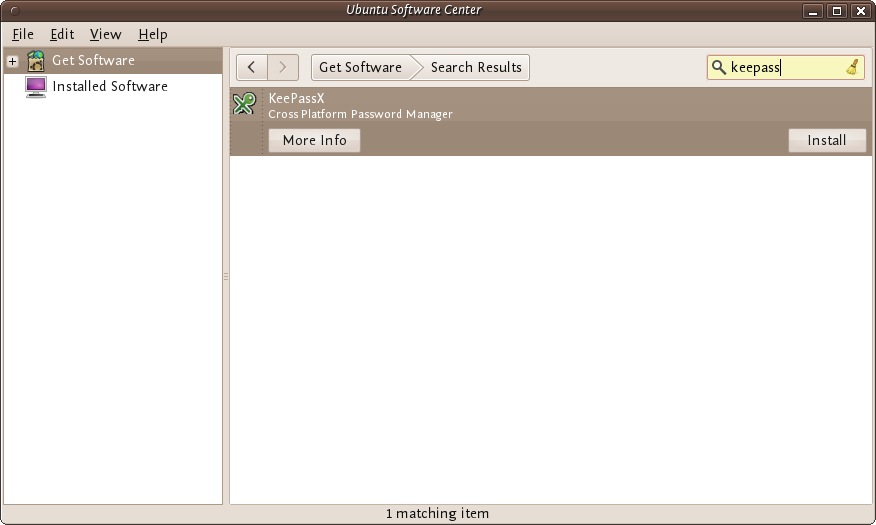
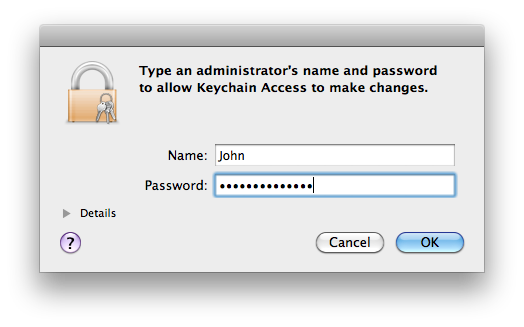
Highlight the item (it may already be highlighted by default) and then press 'Install'. You will be asked to Authorise the installation process:
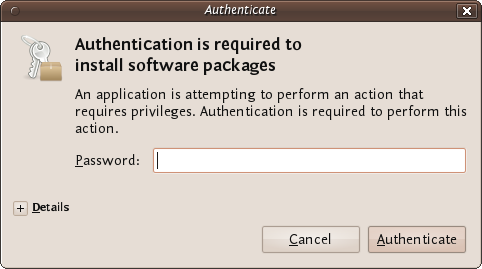
Enter your password and press 'Authenticate' the installation process will then begin.

Ubuntu does not offer very good feedback to show the software is installed. If the green progress indicator on the left has gone and the progress bar on the right has gone then you can assumed the software is installed. To check you can open the program from the menu Applications->Accessories->KeyPassX
Installing KeePass on Windows
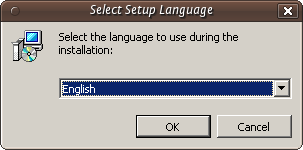
First visit the KeePass download webpage (http://keepass.info/download.html) and choose the appropriate installer. For this chapter we are using the current installer (KeePass-2.15-Setup.exe which can also be directly downloaded from here http://downloads.sourceforge.net/keepass/KeePass-2.15-Setup.exe).
Download this to your computer then double click on the installer. You will firt be asked to select a language, we will choose English:
Press 'OK' and you will be shown the following screen:
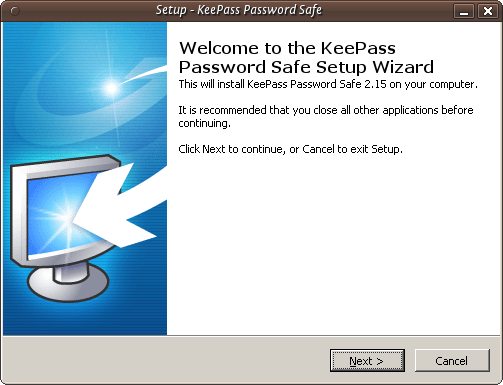
Just press 'Next >' and go to the next screen :
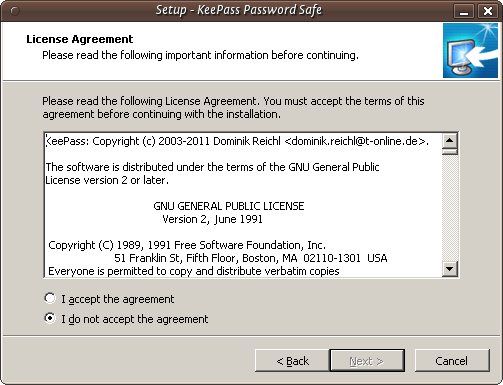
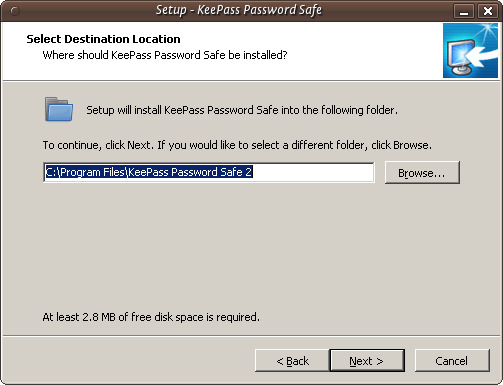
In the screen shown above we must select 'I accept the agreement' otherwise we will not be able to install the software. Choose this option and then press 'Next >'. In the next screen you will be asked to determine the installation location. You can leave this with the defaults unless you have good reason to change them.
Click on 'Next >' and continue.
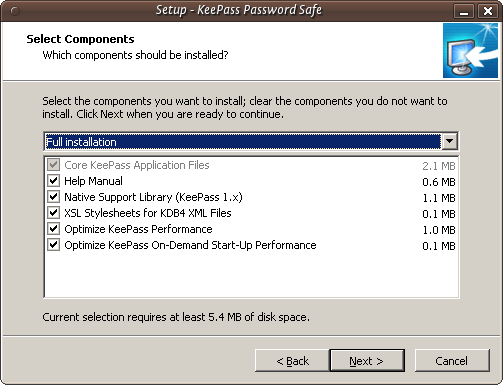
The above image shows the KeePass components you can choose from. Just leave the defaults as they are and press 'Next >'. You will come to a new screen:
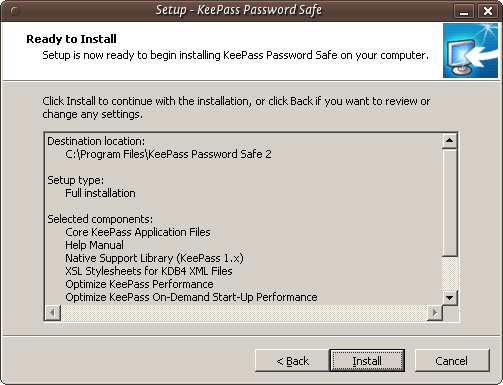
This doesn't do anything but give you a summary of your options. Press 'Install' and the installation process will begin.
Encrypting Passwords with a Password Manager
To encrypt password we use KeePass on Windows and KeePassX Ubuntu, and Keychain on OSX. The basic principle is the same; you have a file on your computer which is encrypted with one single very secure password. This is sometimes referred to as a 'Master Password', 'Admin-Password', 'Root-Password' etc. but they are all the ultimate key to all your other keys and secure data. For this reason you can't and shouldn't think to light about creating this password.
If a password manager is part of your OS (like it is with OSX) it unlocks automatically for you after you login to your account and so opening secure information like passwords. For this, and other, reasons you should disable 'Automatically Login'. When you start-up your computer you should always have to login and, even better, set your computer to automatically logout or lock the screen after a set amount of time.
Encrypting Passwords with KeePassX on Ubuntu
First open KeePassX from the Applications->Accessories -> KeePassX menu.
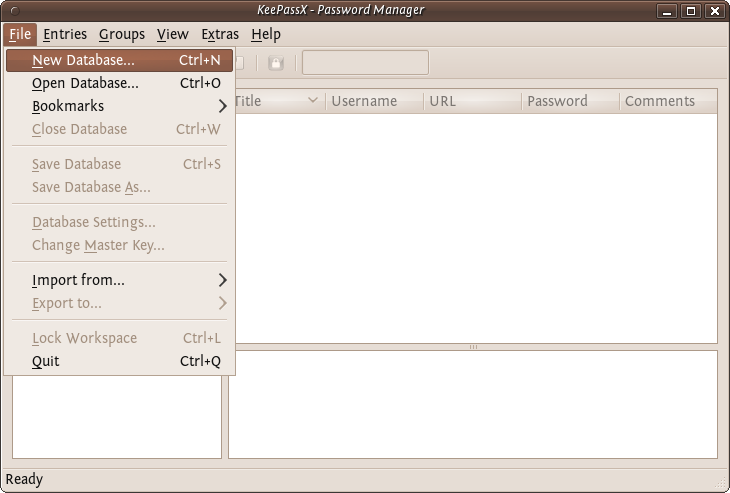
The first time you use KeePassX you need to set up a new database to store your passwords. Click on File->New Database
You will be asked to set a master key (password).
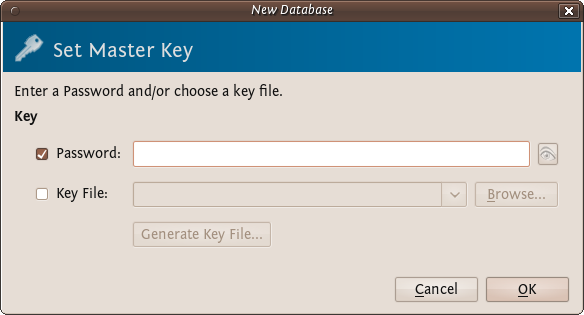
Choose a strong password for this field - refer to the chapter about passwords if you would like some tips on how to do this. Enter the password and press 'OK'. You then are asked to enter the password again. Do so and press 'OK'. If the passwords are the same you will see a new KeePassX 'database' ready for you to use.
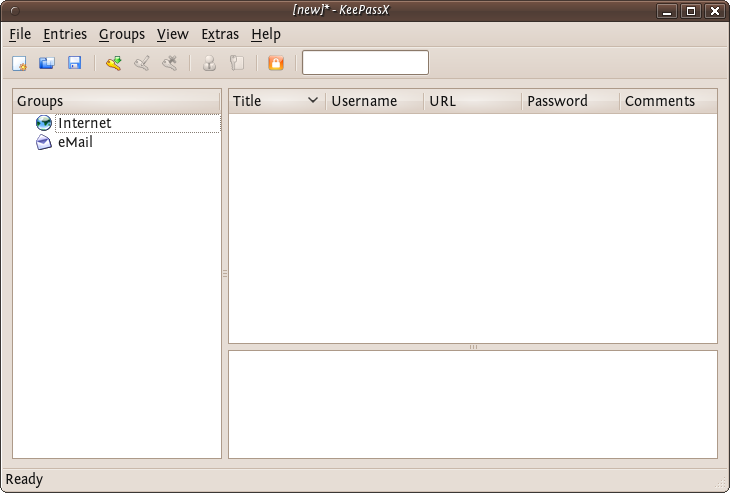
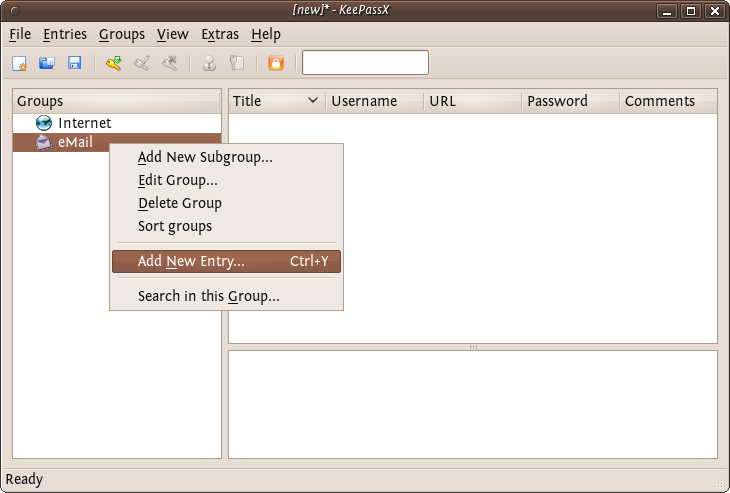
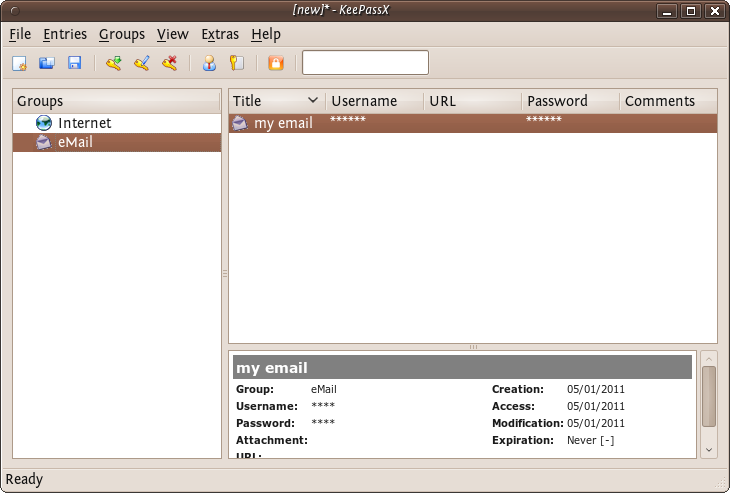
Now you have a place to store all your passwords and protect them by the 'master' password you just set. You will see two default categories 'Internet' and 'Email' - you can store passwords just under these two categories, you can delete categories, add sub-groups, or create new categories. For now we just want to stay with these two and add a password for our email to the email group. Right click on the email category and choose 'Add New Entry...':
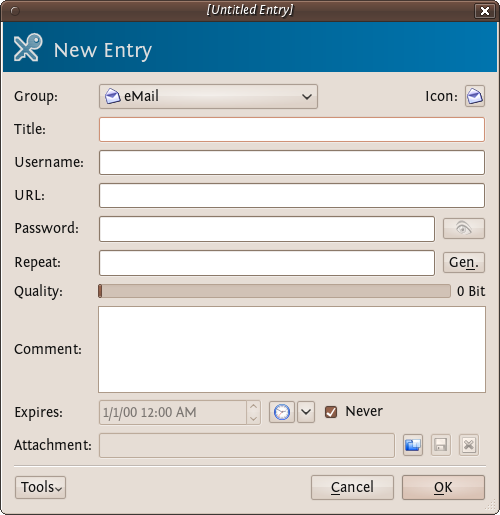
So now fill this form out with the details so you can correctly identify which email account the passwords are associated with. You need to fill out the fields 'Title' and the password fields. All else is optional.
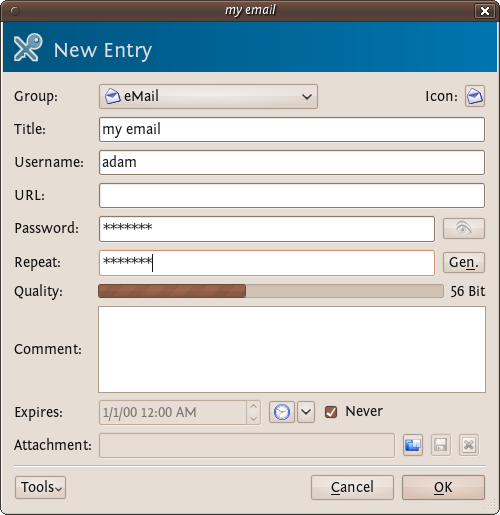
KeePassX gives some indication if the passwords you are using are 'strong' or 'weak'...you should try and make passwords stronger and for advice on this read the chapter about creating good passwords. Press 'OK' when you are done and you will see something like this:
To recover the passwords (see them) you must double click on the enter and you will see the same window you used for recording the information. If you click on the 'eye' icon to the right of the passwords they will be converted from stars (***) to the plain text so you can read it.
Now you you can use KeePassX to store your passwords. However before getting too excited you must do one last thing. When you close KeePassX (choose File->Quit) it asks you if you would like to save the changes you have made.
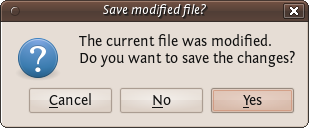
Press 'Yes'. If it is the first time you used KeePassX (or you have just created a new database) you must choose a place to store your passwords. Otherwise it will save the updated information in the file you have previously created.
When you want to access the passwords you must then open KeePassX and you will be asked for the master key. After typing this in you can add all your passwords to the database and see all your entries. It is not a good idea to open KeePassX and have it open permanently as then anyone could see your passwords if they can access your computer. Instead get into the practice of just opening it when you need it and then closing it again.
Encrypting Passwords with KeePass on Windows
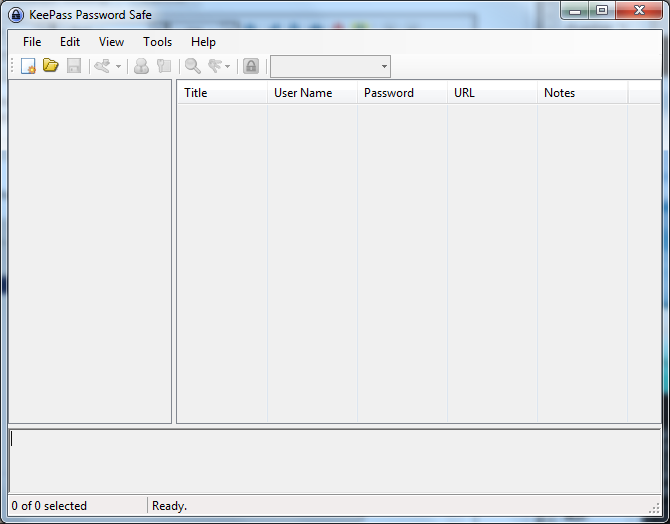
After you installed KeePass on Windows you can find it in the application menu. Launch the application and the following window should appear.
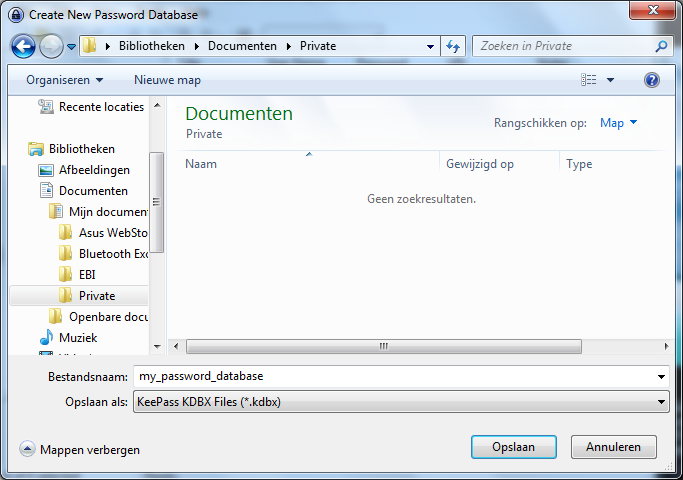
You start by making a database, the file which will contain your key. From the menu select File > New. You have to chose the name and the location of the file in the dialog window below. In this example we call our database 'my_password_database'.
The next screen will ask you for the master password. Enter the password and click on 'OK'. You will not need to select anything else.
The next window allows you to add special configuration settings for your new database. We do not need to edit anything. Just click on 'OK'.
Now the main window appears again and we see some default password categories on the left side. Lets add a new password in the category 'Internet'. First click on the word 'Internet', then click on the add entry icon  under the menu bar.
A widow will appear like below. Use the fields to give a description of this particular password, and of course, enter the password itself. When done, click on 'OK'.
Encrypting Passwords with Keychain on Mac OSX
Mac OSX comes pre-installed with the build in password manager 'Keychain'. Because of it's tight integration with the OS most of the time you will hardly know it exists. But every now and then you will have a pop-up window in almost any application asking 'do you want to store this password in your keychain?'. This happens when you add new email accounts to your mail client, login to a protected wireless network, enter your details in your chat client etc. etc. etc.
Basically what happens is that Mac OSX offers you to store all that login data and different passwords in an encrypted file which it unlocks as soon as you login to your account. You can then check your mail, logon to your WiFi and use your chat client without having to enter your login data all the time over and over again. This is a fully automated process, but if you want to see what is stored where and alter passwords, or lookup a password you will have to open the Keychain program.
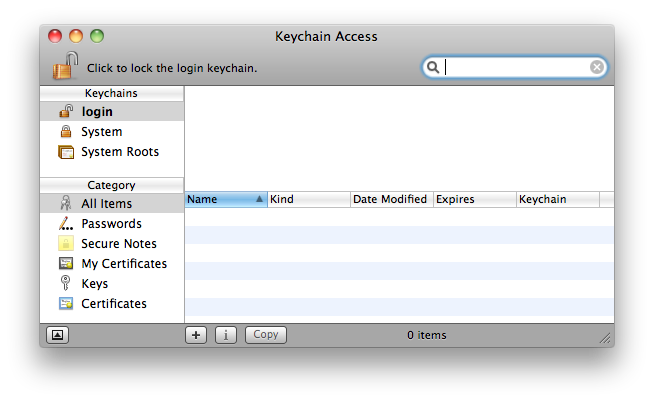
You can find the Keychain program in the Utilities folder which lives in the Applications folder.
When you open it you will see that your 'Login' keychain is unlocked and see all the items contained in it on the right bottom side of the window.
(note: the window here is empty because it seemed to be deceiving the purpose of this manual to make a screenshot of my personal keychain items and share it here with you)
You can double click any of the items in the Keychain to view it's details and tick 'Show password:' to see the password associated with the item.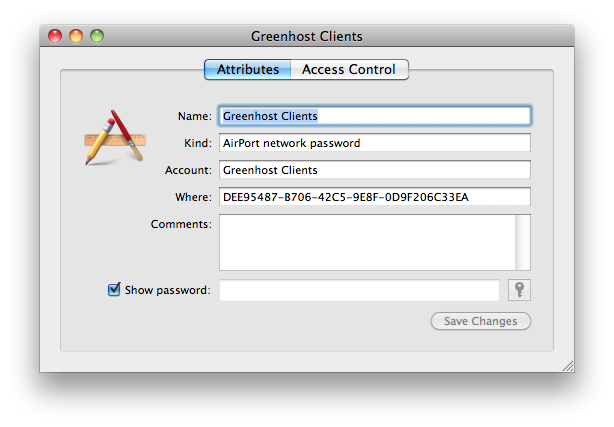
You will note that it will ask you for your master or login password to view the item.
You can access modify any of the items and also use the Keychain to securely save any bits and pieces of text using the notes. To do this click on notes and than choose 'New secure Note item' from the file menu.
That's it
Introduction to safe browsing
Web browsing is one of the key activities we engage in while using the internet. Our browsing histories, the things we search for, the sites we visit and the things we might post might be of interest to others, it is valuable to them either for commercial or political reasons. The following chapter deals with securing the way you browse the internet and makes you more familiar with threats you are facing so you can recognize them and act appropriately.
 The first thing to consider is which web browser to use. Windows comes pre-installed with Internet Explorer while Apple computers come shipped with Safari. In this book we will exclusively look at the excellent and freely available Firefox browser.
Firefox runs on all the major operating systems Windows, MacOS and Linux and it has been translated into more than 75 languages. When concerned about securing your browsing activities there it is the only viable option when choosing a browser. Therefore this section only deals with Firefox and its add-ons. Know that you can also install Firefox on a CD or USB, so you can take it with you where ever you go, so you know you have it installed from a trusted source (see also the chapter on portable software).
Why browsing is unsafe
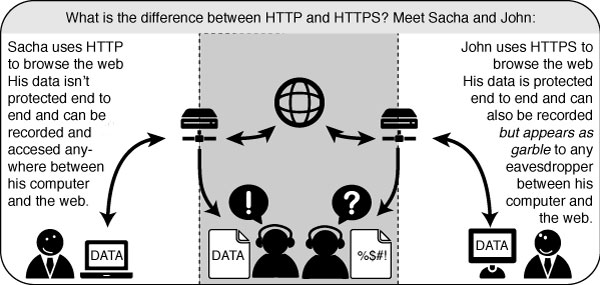
The Hypertext Transfer Protocol (HTTP) is the networking protocol used by browsers that allows communication between you and a site you are visiting. Because communication is transmitted in plain text it is unsafe, especially when using wireless networks. It is like transmitting a message with personal information on a postcard. Data, such as user names and passwords, sent to and received by Web sites, are easy to read by third parties.
To solve this problem the Hypertext Transfer Protocol Secure (HTTPS) was invented to provide encrypted communication and secure identification of a network web server. Most major Web sites, including Google, Wikipedia, and popular social networking platforms such as Facebook and Twitter. can also be reached via a secure connection, but not necessarily by default. Note that most sites do not provide encryption.
In this section will discuss several safety measures: how to install Firefox, how to extend Firefox with add-ons to ensure safer browsing, and how to finder safer routes through TOR, proxy settings and FoxyProxy.
Installing Firefox on Ubuntu
Firefox is already installed on Ubuntu as part of the normal installation. If you want to install a different (most commonly newer) version of Firefox on your Ubuntu system (or other GNU/Linux systems) that is also possible and is explained below.
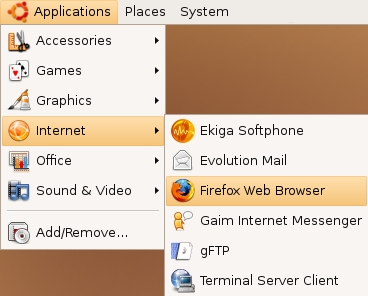
Accessing it is easy. If you are using an installation of Ubuntu with no changes to the default Desktop, select Applications > Internet > Firefox Web Browser:
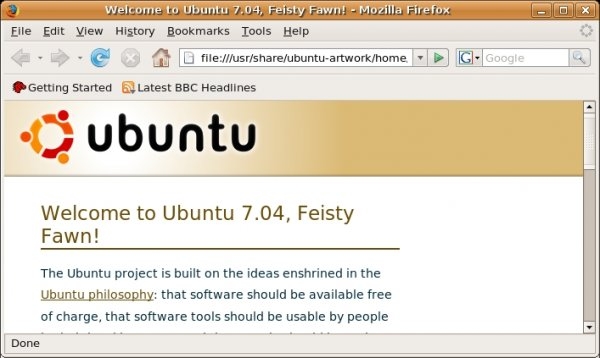
Firefox starts and a welcome window opens:
If you want to upgrade the version of Firefox included with Ubuntu to the latest version, such as a beta version or a new stable version, replacing your existing version, a detailed guide is available on the Ubuntu wiki at https://help.ubuntu.com/community/FirefoxNewVersion
Installing on Mac OS X
- To download Firefox, visit http://www.mozilla.com/ and click on the big green button labeled "Firefox Free Download.", and the download starts. If it does not start automattically, click the link on the page.

- When prompted, click OK.
Once the download is complete a window similar to this appears:
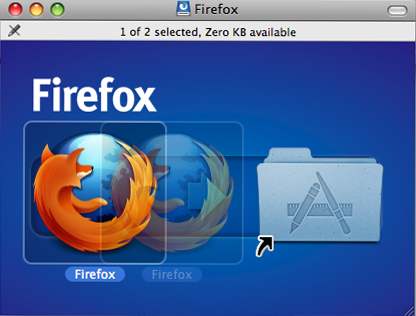
- Click and hold the Firefox icon, then drag it on top of the Applications icon. When it is on top of the Applications icon, release the mouse button. This starts copying the program files to the Applications directory on your computer.
- When the installation step is finished, close the two small Firefox windows.
- Eject the Firefox disk image. If this does not work by normal means, select the disk image icon and then, in the Finder menu, select File > Eject Firefox.
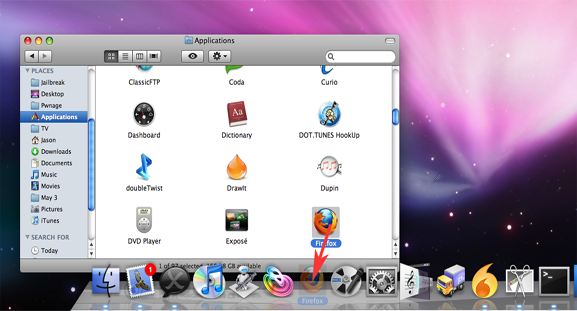
- Now, open the Applications directory and drag the Firefox icon to the dock:
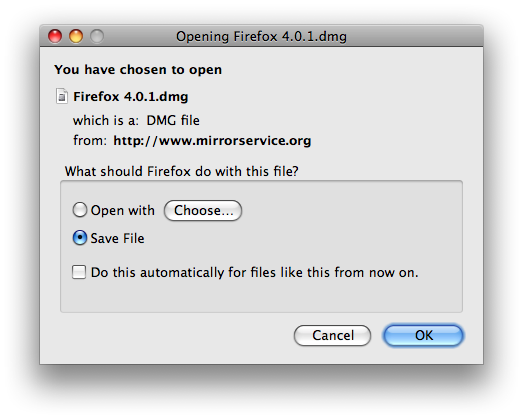
- Click either icon (in the Dock or the Applications folder) to start Firefox. The Import Wizard dialog box appears:
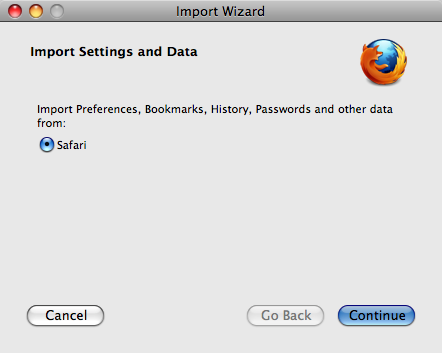
- To import your bookmarks, passwords and other data from Safari, click Continue. If you don't want to import anything, just select Cancel.
- Click Continue. Now you see the Welcome to Firefox page.

- To learn basic information about Firefox, click Getting Started.
- For assistance, click Visit Support.
- To customize your new installation using the addons wizard, click Customize Now!
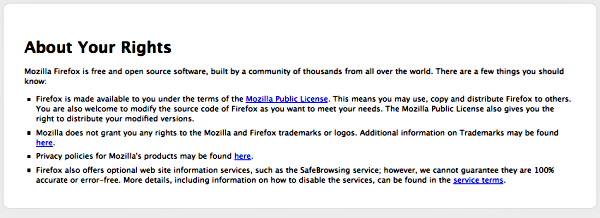
- In the upper right of the Welcome page is a button labeled Know your rights. Click this button to display the following screen, which tells you about your rights under the Mozilla Public License and provides links to Mozilla's privacy policies and service terms, as well as trademark information.
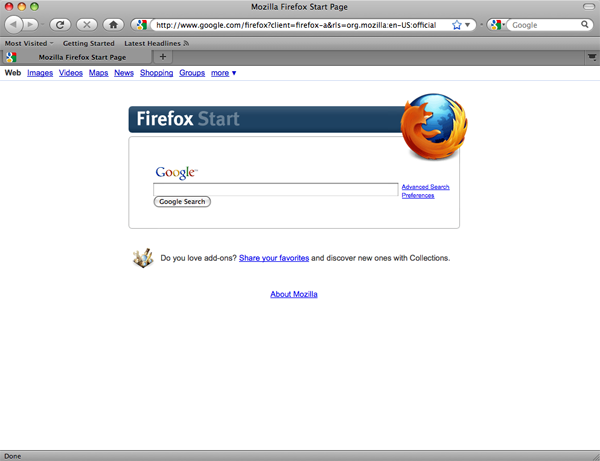
- Close the Welcome to Firefox page (click the x in the tab at the top of the page). Now you see the Firefox Start page.
Congratulations, you are now ready to use Firefox!
If you have permission problems when trying to copy Firefox from the disk image to your Applications folder, first try deleting your old Firefox copy, then proceeding.
If you're installing a beta and that you want to keep your former Firefox copy, first rename your old Firefox copy to something like "Firefox old" and then copy the beta to your Applications folder.
Installing Firefox on Windows
Firefox requires a computer with a minimum of a 233 MHz processor, running Windows 2000 or later. To check system requirements for Firefox, go to: http://www.mozilla.com/firefox/system-requirements.html
Download and Install Firefox
- Visit the Firefox Download Page at http://www.mozilla.com/firefox/ in any browser (such as Microsoft Internet Explorer). The download page automatically detects the operating system and language on your computer and recommends the best edition(s) of Firefox for you. If you want to download Firefox for a different language or for a different operating system than the one detected, click "Other Systems and Languages" to see a list of all the others available.

- Click the download button and the setup file will begin to download to your computer. Once the download completes, it is recommended that you exit all your running programs before running the installation.
- Double-click the file to start the Firefox install wizard.
- If you are running Windows Vista, you may get a User Account Control prompt. In this case, allow the setup to run by clicking Continue.
- If you are running Windows 7, you will be asked whether to allow Firefox to make changes to your computer. Click on Yes.
A welcome screen appears.
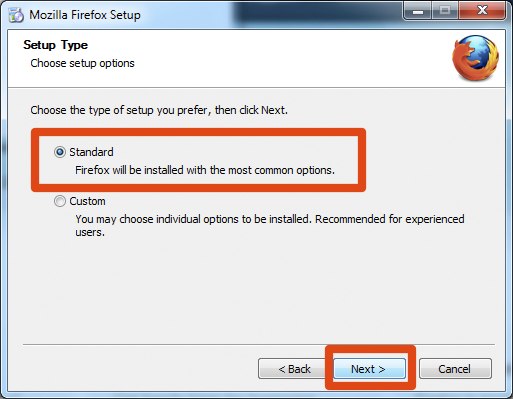
- Click Next to continue. The Setup Type screen appears. A "Standard" setup is selected by default (using the custom option is only recommended for experienced users).
- Firefox installs itself as your default browser. If you do not want Firefox to be your default browser, clear the check box Use Firefox as my default web browser.
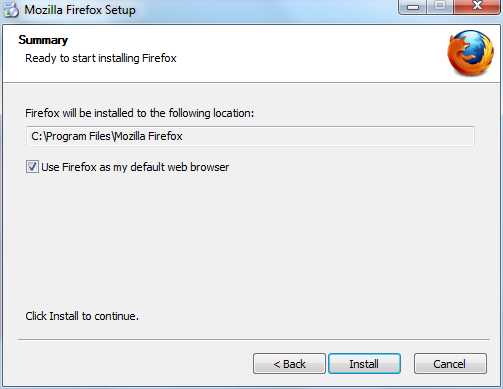
- Click Next.
- Firefox asks whether to import the settings, like bookmarks, from other browsers. Select the browser you are currently using, then click on Next.
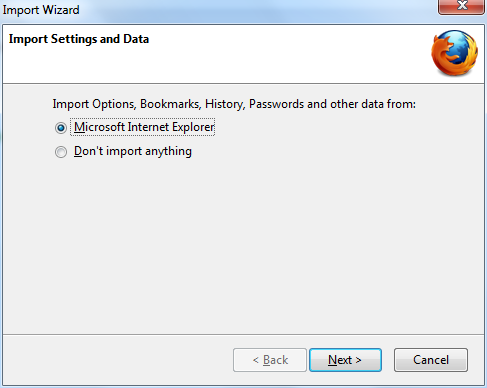
- Firefox will confirm you have imported the setting and continue the installation. Click on Continue. Once Firefox has been installed, click Finish to close the setup wizard.
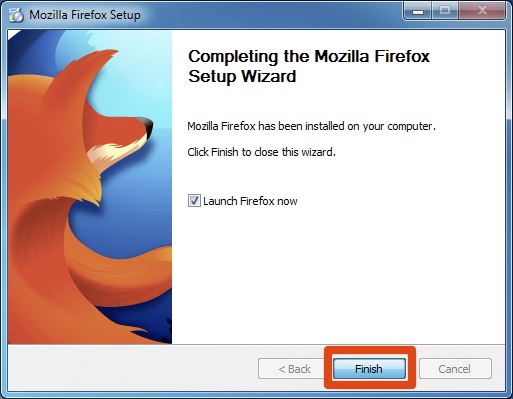
If the Launch Firefox now check box is checked, Firefox will start after you click Finish.
Windows Vista Users:
If at any time throughout the installation process you are prompted with a User Account Control (UAC) window, press Continue, Allow, or Accept.
Troubleshooting
If you have problems starting Firefox, see http://support.mozilla.com/kb/Firefox+will+not+start
Protecting your internet passwords
Firefox can remember your internet passwords. This can be a very convenient option to use with all those different sites requiring passwords nowadays. However, if you use this function you have to set a master password, otherwise this feature is a real security threat. To enable a master password open your Firefox preferences and select the security icon. Check the "use a master password" box.
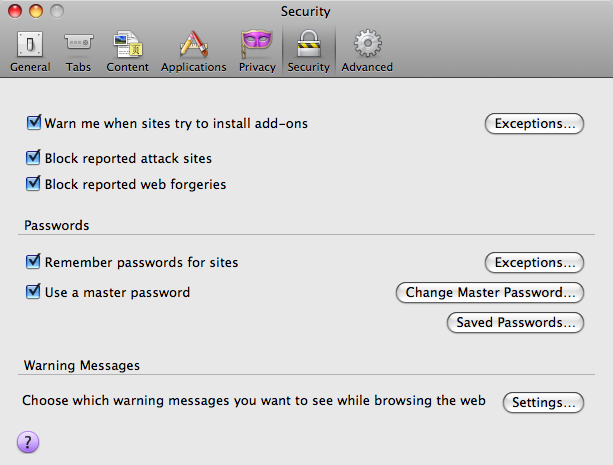
After launching Firefox is will ask you once for the master password, after that the internet password keyring will be unlocked. If the internet password keyring is unlocked, you can inspect all saved passwords in the Preferences -> Security -> "Saved Passwords ..." dialog. If you browse to a known website with a login form, the password is entered automatically.
Please note that at the time of this writing the implementation of Firefox' internet password keyring is not complete, as it is not locked automatically after a certain time of inactivity or before closing your laptop lid. If you want Firefox to lock your internet password keyring automatically after a certain time of you not using your computer, you might install the "Master Password Timeout" Plugin.
Extending Firefox
When you first download and install Firefox, it can handle basic browser tasks immediately. You can also add extra capabilities or change the way Firefox behaves by installing add-ons, small additions that extend Firefox's power.
Firefox extensions can pimp your browser, but they can also collect and transmit information about you. Before you install any add-on, keep in mind to choose add-ons from trusted sources. Otherwise, an add-on might share information about you without your knowing, keep a record on the sites you have visited, or even harm your computer.
There are several kinds of add-ons:
- Extensions add functionality to Firefox
- Themes change the appearance of Firefox.
- Plugins help Firefox handle things it normally can't process (i.e. Flash movies, Java applications).
For the topics covered in this book we are only going to need extensions. We will look at some add-ons that are particularly relevant for dealing with Internet security. The variety of available extensions is enormous. You can add dictionaries for different languages, track the weather in other countries, get suggestions for Web sites that are similar to the one you are currently viewing, and much more. Firefox keeps a list of current extensions on its site (https://addons.mozilla.org/firefox), or you can browse them by category at https://addons.mozilla.org/firefox/browse.
Caution: We recommend that you never install an add-on for Firefox unless it is available from the Firefox add-on pages. You should also never install Firefox unless you get the installation files from a trusted source. It is important to note that using Firefox on someone else's computer or in an Internet caf increases your potential vulnerability. Know that you can take Firefox on a CD or USB-stick (check our chapter on that issue).
While no tool can protect you completely against all threats to your online privacy and security, the Firefox extensions described in this chapter can significantly reduce your exposure to the most common ones, and increase your chances of remaining anonymous.
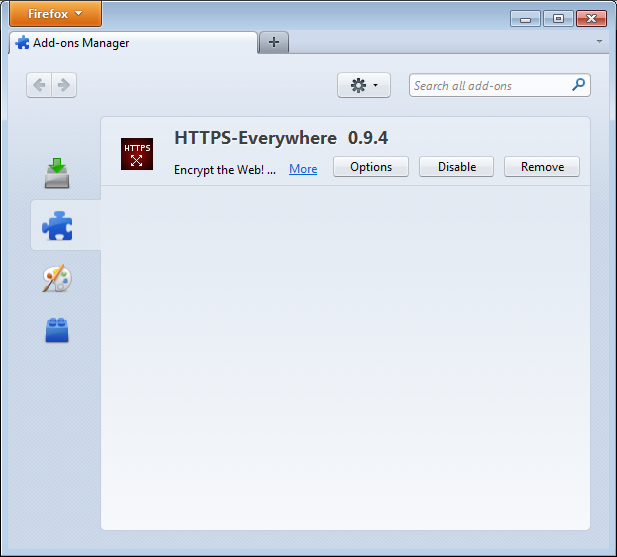
HTTPS Everywhere
HTTP is considered unsafe, because communication is transmitted in plain text. Many sites on the Web offer some support for encryption over HTTPS, but make it difficult to use. For instance, they may connect you to HTTP by default, even when HTTPS is available, or they may fill encrypted pages with links that go back to the unencrypted site. The HTTPS Everywhere extension fixes these problems by rewriting all requests to these sites to HTTPS. Although the extension is called "HTTPS Everywhere", it only activates HTTPS on a particular list of sites and can only use HTTPS on sites that have chosen to support it. It cannot make your connection to a site secure if that site does not offer HTTPS as an option.
Please note that some of those sites still include a lot of content, such as images or icons, from third party domains that is not available over HTTPS. As always, if the browser's lock icon is broken or carries an exclamation mark, you may remain vulnerable to some adversaries that use active attacks or traffic analysis. However, the effort required to monitor your browsing should still be usefully increased.
Some Web sites (such as Gmail) provide HTTPS support automatically, but using HTTPS Everywhere will also protect you from SSL-stripping attacks, in which an attacker hides the HTTPS version of the site from your computer if you initially try to access the HTTP version.
Additional information can be found at: https://www.eff.org/https-everywhere.
Installation
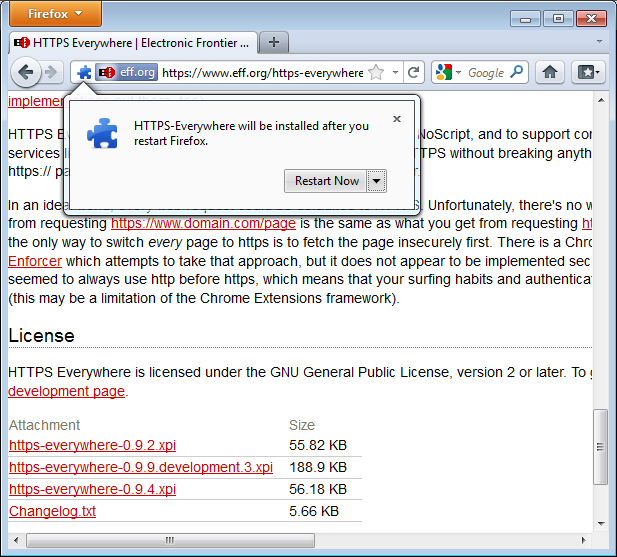
First, download the HTTPS Everywhere extension from the official Web site: https://www.eff.org/https-everywhere.
Select the newest release. In the example below, version 0.9.4 of HTTPS Everywhere was used. (A newer version may be available now.)

Click on "Allow". You will then have to restart Firefox by clicking on the "Restart Now" button. HTTPS Everywhere is now installed.
Configuration
To access the HTTPS Everywhere settings panel in Firefox 4 (Linux), click on the Firefox menu at the top left on your screen and then select Add-ons Manager. (Note that in different versions of Firefox and different operating systems, the Add-ons Manager may be located in different places in the interface.)
Click on the Options button.
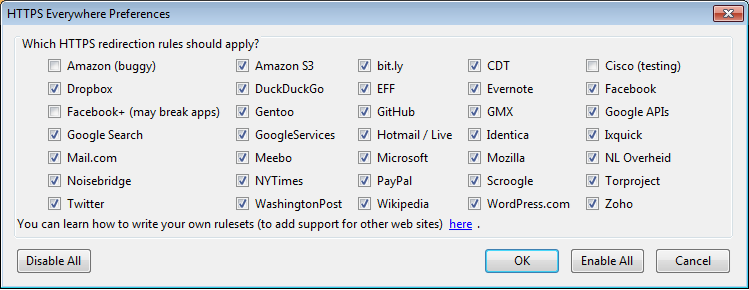
A list of all supported Web sites where HTTPS redirection rules should be applied will be displayed. If you have problems with a specific redirection rule, you can uncheck it here. In that case, HTTPS Everywhere will no longer modify your connections to that specific site.
Usage
Once enabled and configured, HTTPS Everywhere is very easy and transparent to use. Type an insecure HTTP URL (for example, http://www.google.com).

Press Enter. You will be automatically redirected to the secure HTTPS encrypted Web site (in this example: https://encrypted.google.com). No other action is needed.

If networks block HTTPS
Your network operator may decide to block the secure versions of Web sites in order to increase its ability to spy on what you do. In such cases, HTTPS Everywhere could prevent you from using these sites because it forces your browser to use only the secure version of these sites, never the insecure version. (For example, we heard about an airport Wi-Fi network where all HTTP connections were permitted, but not HTTPS connections. Perhaps the Wi-Fi operators were interested in watching what users did. At that airport, users with HTTPS Everywhere were not able to use certain Web sites unless they temporarily disabled HTTPS Everywhere.)
In this scenario, you might choose to use HTTPS Everywhere together with a circumvention technology such as Tor or a VPN in order to bypass the network's blocking of secure access to Web sites.
Adding support for additional sites in HTTPS Everywhere
You can add your own rules to the HTTPS Everywhere add-on for your favorite Web sites. You can find out how to do that at: https://www.eff.org/https-everywhere/rulesets. The benefit of adding rules is that they teach HTTPS Everywhere how to ensure that your access to these sites is secure. But remember: HTTPS Everywhere does not allow you to access sites securely unless the site operators have already chosen to make their sites available through HTTPS. If a site does not support HTTPS, there is no benefit to adding a ruleset for it.
If you are managing a Web site and have made an HTTPS version of the site available, a good practice would be to submit your Web site to the official HTTPS Everywhere release.
Adblock Plus
Adblock Plus (http://www.adblockplus.org) is mainly known for blocking advertisements on websites. But it also can be used to block other content that may try to track you. To keep current with the latest threats, Adblock Plus relies on blacklists maintained by volunteers.
Extra Geek info: How does Adblock Plus block addresses?
The hard work here is actually done by Gecko, the engine on top of which Firefox, Thunderbird and other applications are built. It allows something called "content policies". A content policy is simply a JavaScript (or C++) object that gets called whenever the browser needs to load something. It can then look at the address that should be loaded and some other data and decide whether it should be allowed. There is a number of built-in content policies (when you define which sites shouldn't be allowed to load images in Firefox or SeaMonkey, you are actually configuring one of these built-in content policies) and any extension can register one. So all that Adblock Plus has to do is to register its content policy, other than that there is only application logic to decide which addresses to block and user interface code to allow configuration of filters.
Getting started with Adblock Plus
Once you have Firefox installed:
- Download the latest version of Adblock Plus from the Add-On database of Firefox
- Confirm that your want Adblock Plus by clicking "Install Now".
- After Adblock Plus has been installed, Firefox will ask to restart.
Choosing a filter subscription
Adblock Plus by itself doesn't do anything. It can see each element that a Web site attempts to load, but it doesn't know which ones should be blocked. This is what Adblock's filters are for. After restarting Firefox, you will be asked to choose a filter subscription (free).
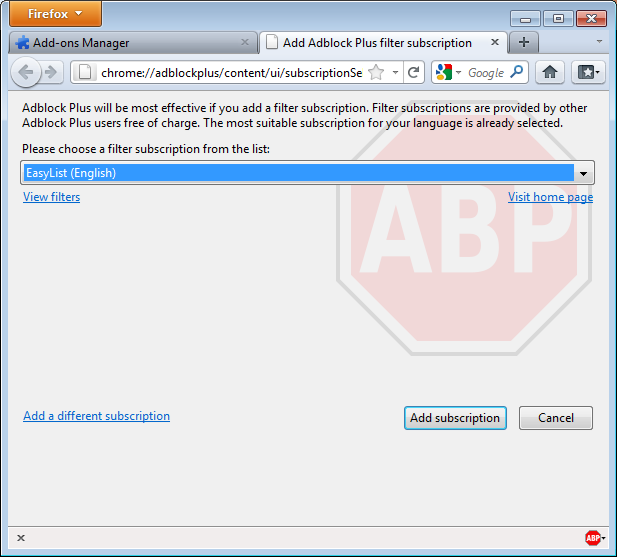
Which filter subscription should you choose? Adblock Plus offers a few in its dropdown menu and you may wish to learn about the strengths of each. A good filter to start protecting your privacy is EasyList (also available at http://easylist.adblockplus.org/en).
As tempting as it may seem, don't add as many subscriptions as you can get, since some may overlap, resulting in unexpected outcomes. EasyList (mainly targeted at English-language sites) works well with other EasyList extensions (such as region-specific lists like RuAdList or thematic lists like EasyPrivacy). But it collides with Fanboy's List (another list with main focus on English-language sites).
You can always change your filter subscriptions at any time within preferences. Once you've made your changes, click OK.
Creating personalized filters
AdBlock Plus also lets you create your own filters, if you are so inclined. To add a filter, start with Adblock Plus preferences and click on "Add Filter" at the bottom left corner of the window. Personalized filters may not replace the benefits of well-maintained blacklists like EasyList, but they're very useful for blocking specific content that isn't covered in the public lists. For example, if you wanted to prevent interaction with Facebook from other Web sites, you could add the following filter:
||facebook.*$domain=~facebook.com|~127.0.0.1
The first part (||facebook.*) will initially block everything coming from Facebook's domain. The second part ($domain=~facebook.com|~127.0.0.1) is an exception that tells the filter to allow Facebook requests only when you are in Facebook or if the Facebook requests come from 127.0.0.1 (your own computer) in order to keep certain features of Facebook working.
A guide on how to create your own Adblock Plus filters can be found at http://adblockplus.org/en/filters.
Enabling and disabling AdBlock Plus for specific elements or Web sites
You can see the elements identified by AdBlock Plus by clicking on the ABP icon  in your browser (usually next to the search bar) and selecting "Open blockable items". A window at the bottom of your browser will let you enable or disable each element on a case-by-case basis. Alternatively, you can disable AdBlock Plus for a specific domain or page by clicking on the ABP icon and ticking the option "Disable on [domain name]" or "Disable on this page only".
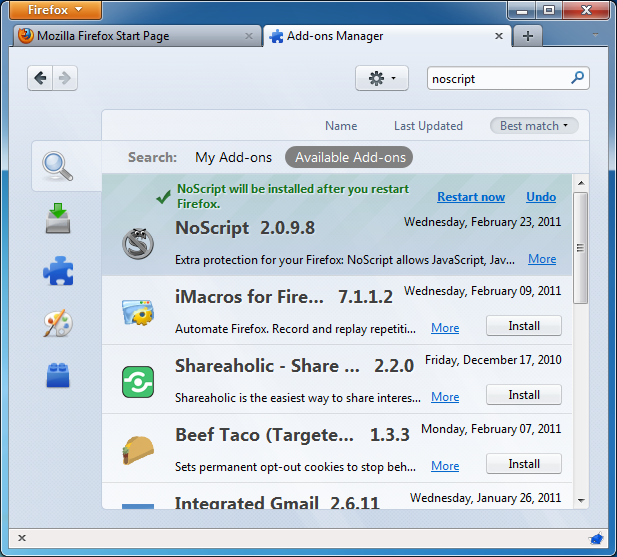
NoScript
The NoScript extension takes browser protection further by globally blocking all JavaScript, Java and other executable content that could load from a Web site and run on your computer. To tell NoScript to ignore specific sites, you need to add them to a whitelist. This may sound tedious, but NoScript does a good job in protecting Internet users from several threats such as cross-site scripting (when attackers place malicious code from one site in another site) and clickjacking (when clicking on an innocuous object on a page reveals confidential information or allows the attacker to take control of your computer). To get NoScript, visit http://addons.mozilla.org or http://noscript.net/getit.
The same method by which NoScript protects you can alter the appearance and functionality of good Web pages, too. Luckily, you can adjust how NoScript treats individual pages or Web sites manually - it is up to you to find the right balance between convenience and security.
Getting started with NoScript
- Go to the NoScript download section at http://noscript.net/getit. Click on the green "INSTALL" button.
- Confirm that you want NoScript by clicking "Install Now".
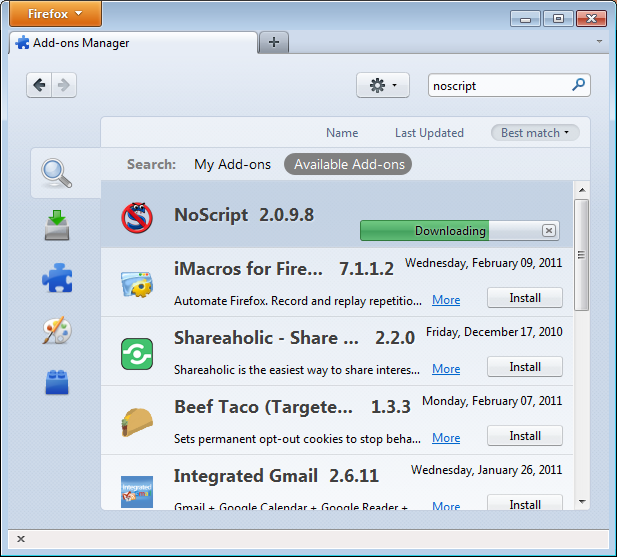
- Restart your browser when asked.
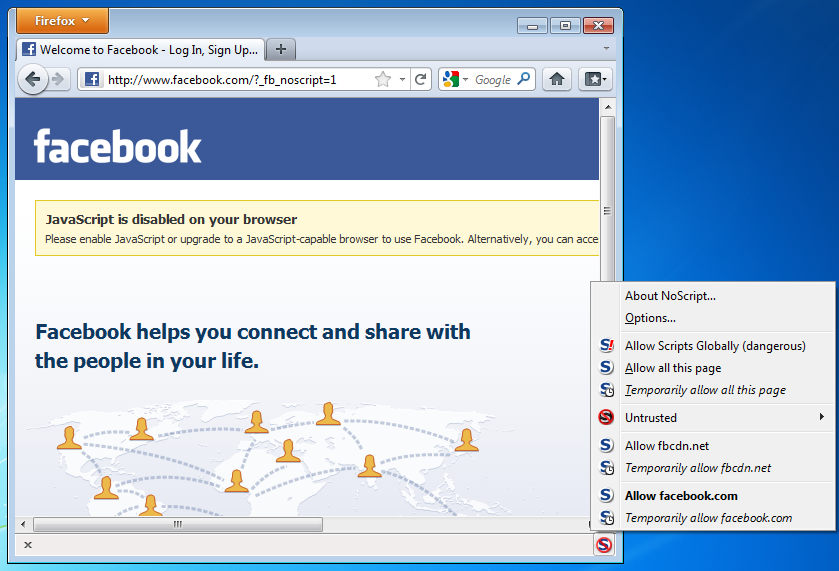
NoScript notifications and adding Web sites to your whitelist
Once restarted, your browser will have a NoScript icon at the bottom right corner, where the status bar is, indicating what level of permission the current Web site has to execute content on your PC.
 Full protection: scripts are blocked for the current site and its subframes. Even if some of the script sources imported by the page are in your whitelist, code won't run (the hosting documents are not enabled).
 Very restricted: the main site is still forbidden, but some pieces (such as frames) are allowed. In this case, some code may be running, but the page is unlikely to work correctly because its main script source is still blocked.
 Limited permissions: scripts are allowed for the main document, but other active elements, or script sources imported by the page, are not allowed. This happens when there are multiple frames on a page or script elements that link to code hosted on other platforms.
 Mostly trusted: all the script sources for the page are allowed, but some embedded content (such as frames) are blocked.
 Selective protection: scripts are allowed for some URLs. All the others are marked as untrusted.
  All scripts are allowed for the current site.
 Scripts are allowed globally, however content marked as untrusted will not be loaded.
To add a site that you trust to your whitelist, click on the NoScript icon and select:
- "Allow [domain name]" to allow all scripts that are hosted under a specific domain name, or
- "Allow all this page" to allow complete script execution - including third party scripts that may be hosted elsewhere, but are imported by the main Web site.
(You can also use the "Temporarily allow" options to allow content loading only for the current browsing session. This is useful for people who intend to visit a site just once, and who want to keep their whitelist at a manageable size.)
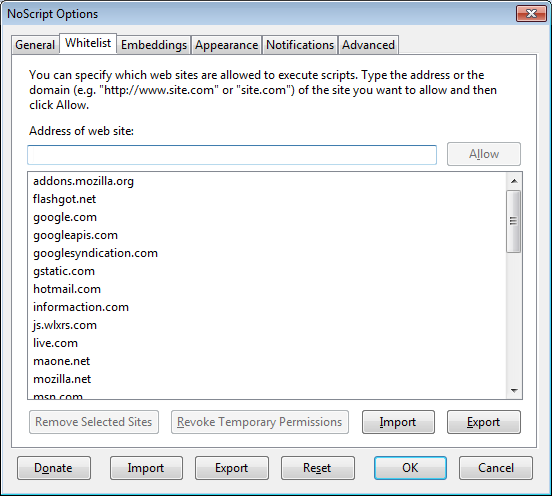
Alternatively, you can add domain names directly to the whitelist by clicking on the NoScript button, selecting Options and then clicking on the Whitelist tab.
Marking content as untrusted
If you want to permanently prevent scripts from loading on a particular Web site, you can mark it as untrusted: just click the NoScript icon, open the "Untrusted" menu and select "Mark [domain name] as Untrusted". NoScript will remember your choice, even if the "Allow Scripts Globally" option is enabled.
Other extensions that can improve your security
Below is a short list of extensions that are not covered in this book but are helpful to further protect you.
 Flagfox - puts a flag in the location bar telling you where the server you are visiting is most probably located. https://addons.mozilla.org/en-US/firefox/addon/flagfox/
 BetterPrivacy - manages "cookies" used to track you while visiting websites. Cookies are small bits of information stored in your browser. Some of them are used to track the sites you are visiting by advertisers. https://addons.mozilla.org/en-US/firefox/addon/betterprivacy/
 GoogleSharing - If you are worried that google knows your search history, this extension will help you prevent that. https://addons.mozilla.org/en-us/firefox/addon/googlesharing/
Proxy Settings and FoxyProxy
 A proxy server allows you to reach a Web site or other Internet location even when direct access is blocked in your country or by your ISP. There are many different kinds of proxies, including:
- Web proxies, which only require that you know the proxy Web site's address. A Web proxy URL may look like http://www.example.com/cgi-bin/nph-proxy.cgi
- HTTP proxies, which require that you modify your Browser settings. HTTP proxies only work for Web content. You may get the information about a HTTP proxy in the format "proxy.example.com:3128" or "192.168.0.1:8080".
- SOCKS proxies, which also require that you modify your Browser settings. SOCKS proxies work for many different Internet applications, including e-mail and instant messaging tools. The SOCKS proxy information looks just like HTTP proxy information.
You can use a Web proxy directly without any configuration by typing in the URL. The HTTP and SOCKS proxies, however, have to be configured in your Web browser.
Default Firefox proxy configuration
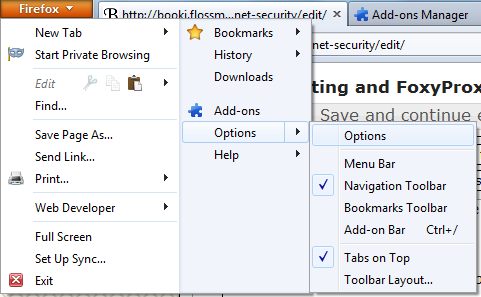
In Firefox 4 you can change the settings for using a proxy you'll have to open the Options or Preferences window of Firefox. You can find this in the menu, by clicking on the upper left corner of the Window and selecting Options > Options. See below.
Go to the Advanced section and open the Network tab.
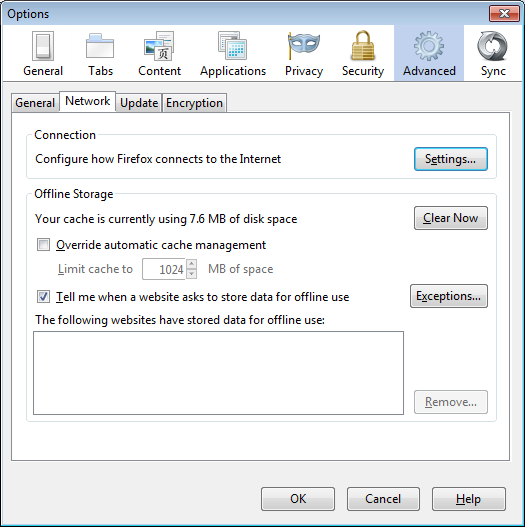
Select Settings, click on "Manual proxy configuration" and enter the information of the proxy server you want to use. Please remember that HTTP proxies and SOCKS proxies work differently and have to be entered in the corresponding fields. If there is a colon (:) in your proxy information, that is the separator between the proxy address and the port number. Your screen should look like this:
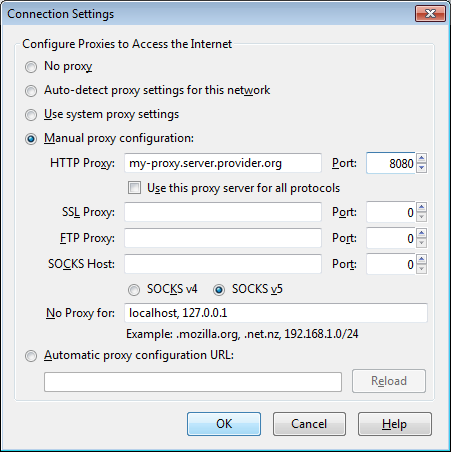
After you click OK, your configuration will be saved and your Web browser will automatically connect through that proxy on all future connections. If you get an error message such as, "The proxy server is refusing connections" or "Unable to find the proxy server", there is a problem with your proxy configuration. In that case, repeat the steps above and select "No proxy" in the last screen to deactivate the proxy.
FoxyProxy
FoxyProxy is a freeware add-on for the Firefox Web browser which makes it easy to manage many different proxy servers and change between them. For details about FoxyProxy, visit http://getfoxyproxy.org/.
Installation
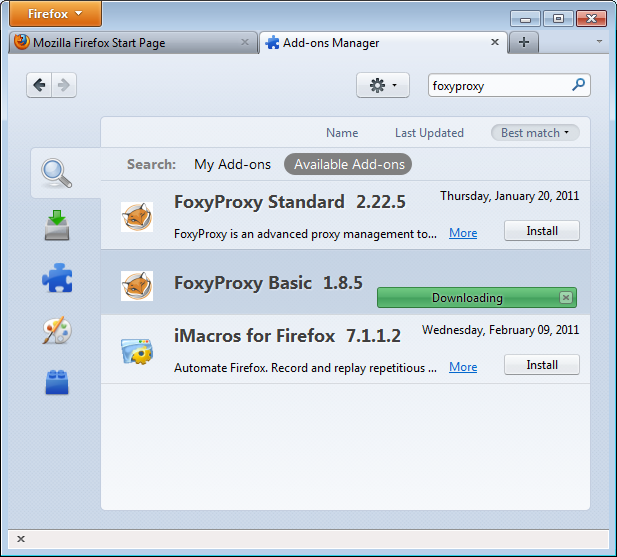
In Firefox 4 open the Add-ons window. In the pop-up window, type the name of the add-on you want to install (in this case "FoxyProxy") in the search box on the top right and click Enter. In the search results, you will see two different versions of FoxyProxy: Standard and Basic. For a full comparison of the two free editions, visit http://getfoxyproxy.org/downloads.html#editions, but the Basic edition is sufficient for basic circumvention needs. After deciding which edition you want, click Install.
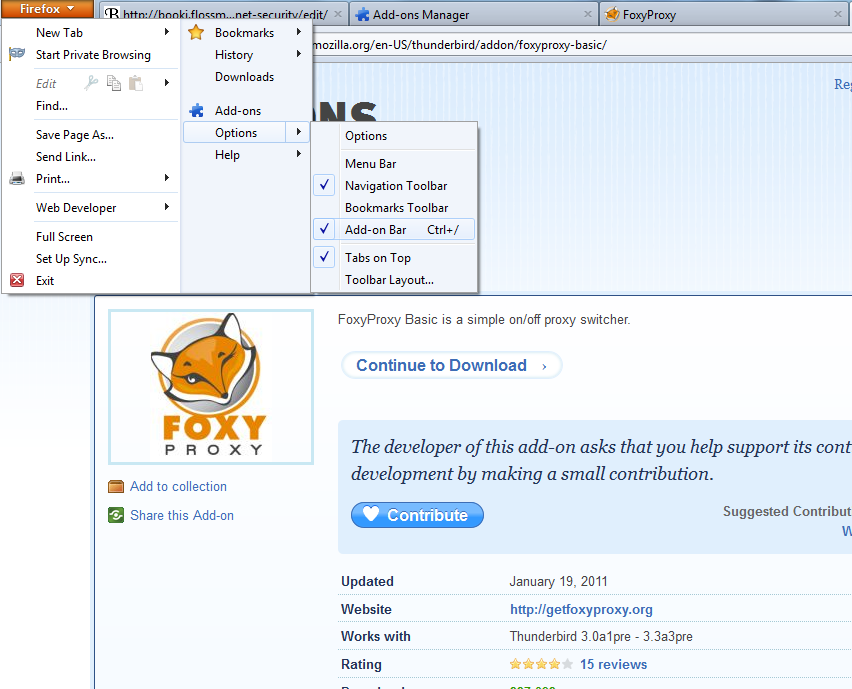
After installation, Firefox should restart and open the Help site of FoxyProxy. You want to enable the FoxyProxy quick-start button on Firefox. Head to the Firefox menu in the upperleft corner and select Options > Add-on bar. If the option is enabled you should see a marker left to the text 'Add-on bar'. Look at the example below.
Configuration
For FoxyProxy to do its job, it needs to know what proxy settings to use. Open the configuration window by clicking the icon  at the bottom right of the Firefox window. The configuration window looks like this:
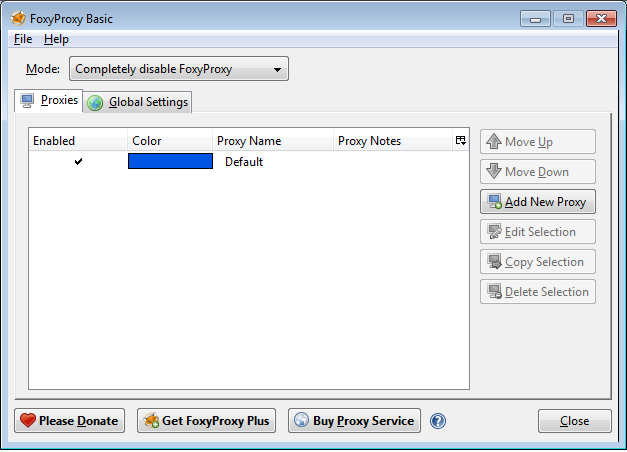
Click on 'Add New Proxy'. In the following window, enter the proxy details in a similar way to the default Firefox proxy configuration:
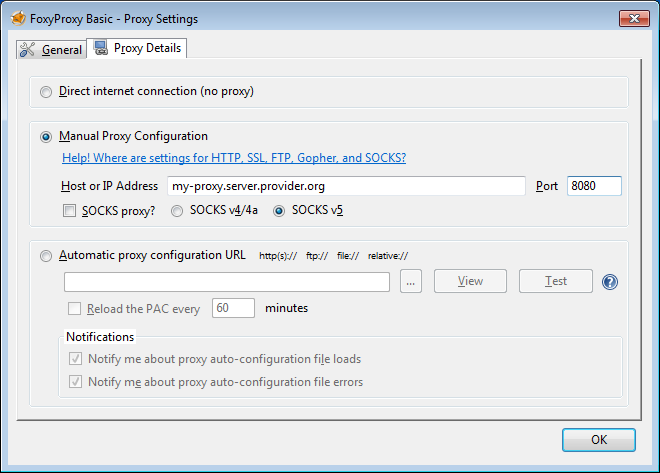
Select "Manual Proxy Configuration", enter the host or IP address and the port of your proxy in the appropriate fields. Check "SOCKS proxy?" if applicable, then click OK. You can add more proxies by repeating the steps above.
Usage
You can switch among your proxies (or choose not to use a proxy) by right-clicking on the fox icon on the bottom right of your Firefox window:
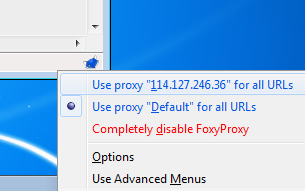
To select a proxy server, simply left-click on the proxy you want to use.
What is Tor?
Tor is a system intended to enable online anonymity, composed of client software and a network of servers which can hide information about users' locations and other factors which might identify them. Imagine a message being wrapped in several layers of protection: every server needs to take off one layer, thereby immediately deleting the sender information of the previous server.
Use of this system makes it more difficult to trace internet traffic to the user, including visits to Web sites, online posts, instant messages, and other communication forms. It is intended to protect users' personal freedom, privacy, and ability to conduct confidential business, by keeping their internet activities from being monitored. The software is open-source and the network is free of charge to use.
Like all current low latency anonymity networks, Tor cannot and does not attempt to protect against monitoring of traffic at the boundaries of the Tor network, i.e., the traffic entering and exiting the network. While Tor does provide protection against traffic analysis, it cannot prevent traffic confirmation (also called end-to-end correlation)
Caution: As Tor does not, and by design cannot, encrypt the traffic between an exit node and the target server, any exit node is in a position to capture any traffic passing through it which does not use end-to-end encryption such as TLS. (If your postman is corrupt he might still open the envelope and read the content). While this may or may not inherently violate the anonymity of the source, if users mistake Tor's anonymity for end-to-end encryption they may be subject to additional risk of data interception by third parties. So: the location of the user remains hidden; however, in some cases content is vulnerable for analysis through which also information about the user may be gained.
Using Tor Browser Bundle
The Tor Browser Bundle lets you use Tor on Windows, OSX and/or Linux without requiring you to configure a Web browser. Even better, it's also a portable application that can be run from a USB flash drive, allowing you to carry it to any PC without installing it on each computer's hard drive.
Downloading Tor Browser Bundle
You can download the Tor Browser Bundle from the torproject.org Web site (https://www.torproject.org), either as a single file (13MB) or a split version that is multiple files of 1.4 MB each which may proof easier to download on slow connections.
If the torproject.org Web site is filtered from where you are, type "tor mirrors" in your favorite Web search engine: The results probably include some alternative addresses to download the Tor Browser Bundle.
Caution: When you download Tor Bundle (plain or split versions), you should check the signatures of the files, especially if you are downloading the files from a mirror site. This step ensures that the files have not been tampered with. To learn more about signature files and how to check them, read https://wiki.torproject.org/noreply/TheOnionRouter/VerifyingSignatures
(You can also download the GnuPG software that you will need to check the signature here: http://www.gnupg.org/download/index.en.html#auto-ref-2)
The instructions below refer to installing Tor Browser on Microsoft Windows. If you are using a different operating system, refer to the torproject.org website for download links and instructions.
Installing from a single file
- In your Web browser, enter the download URL for Tor Browser:
https://www.torproject.org/torbrowser/

- Click the link for your language to download the installation file.
- On windows double-click the .EXE file you just downloaded. A "7-Zip self-extracting archive" window appears.

- Choose a folder into which you want to extract the files and click "Extract".
Note: You can choose to extract the files directly onto a USB key or memory stick if you want to use Tor Browser on different computers (for instance on public computers in Internet cafs).
- When the extraction is completed, open the folder and check that the contents match the image below:

- To clean up, delete the .EXE file you originally downloaded.
Installing from split files
- In your Web browser, enter the URL for the split version of the Tor Browser Bundle (https://www.torproject.org/torbrowser/split.html), then click the link for your language to get to a page that looks like the one for English below:

- Click each file to download it (one ending in ".exe" and nine others ending in ".rar"), one after the other, and save them all in one folder on your hard- or USB-drive.
- Double-click the first part (the file whose name ends in ".exe"). This runs a program to gather all the parts together.
- Choose a folder where you want to install the files, and click "Install". The program displays messages about its progress while it's running, and then quits.
- When the extraction is completed, open the folder and check that the contents match the image below:
- To clean up, delete all the files you originally downloaded.
Using Tor Browser
Before you start:
- Close Firefox. If Firefox is installed on your computer, make sure it is not currently running.
- Close Tor. If Tor is already installed on your computer, make sure it is not currently running.
Launch Tor Browser:
- In the "Tor Browser" folder, double-click "Start Tor Browser". The Tor control panel ("Vidalia") opens and Tor starts to connect to the Tor network.

When a connection is established, Firefox automatically connects to the TorCheck page and then confirms if you are connected to the Tor network. This may take some time, depending on the quality of your Internet connection.

If you are connected to the Tor network, a green onion icon appears in the System Tray on the lower-right-hand corner of your screen:

Browsing the Web using Tor Browser
Try viewing a few Web sites, and see whether they display. The sites are likely to load more slowly than usual because your connection is being routed through several relays.
If this does not work
If the onion in the Vidalia Control Panel never turns green or if Firefox opened, but displayed a page saying "Sorry. You are not using Tor", as in the image below, then you are not using Tor.

If you see this message, close Firefox and Tor Browser and then repeat the steps above. You can perform this check to ensure that you are using tor, at any time by clicking the bookmark button labelled "TorCheck at Xenobite..." in the Firefox toolbar.
If Firefox browser does not launch, another instance of the browser may be interfering with Tor Browser. To fix this:
- Open the Windows Task Manager. How you do this depends on how your computer is set up. On most systems, you can right-click in the Task Bar and then click "Task Manager".
- Click the "Processes" tab.
- Look for a process in the list named "firefox.exe".
- If you find one, select the entry and click "End Process".
- Repeat the steps above to launch Tor Browser.
If Tor Browser still doesn't work after two or three tries, Tor may be partly blocked by your ISP and you should try using the
bridge feature of Tor.
Alternatives
There are two other projects that bundle Tor and a browser:
Introduction to e-mail safety
 E-mail is one of the oldest forms of communication on the Internet. We often use it to communicate very personal or otherwise sensitive information. It is very important to understand why e-mail in its default configuration is not secure. In the following chapters we will describe the different methods necessary to secure your e-mail against known threats. We will also provide you with basic knowledge to assess the risks involved in sending and receiving e-mail. This section will start by describing the security considerations when using e-mail.
No sender verification: you cannot trust the 'from' address
 Most people do not realize how trivial it is for any person on the Internet to forge an e-mail by simply changing the identity profile of their own e-mail program. This makes it possibly for anyone to send you an e-mail from some known e-mail address, pretending to be someone else. This can be compared with normal mail; you can write anything on the envelope as the return address, and it will still get delivered to the recipient (given that the destination address is correct). We will describe a method for signing e-mail messages, which prevents the possibility of forgery. Signing e-mail messages will be explained in the chapter about PGP (Pretty Good Privacy).
E-mail communications can be tapped, just like telephones
An e-mail message travels across many Internet servers before it reaches its final recipient. Every one of these servers can look into the content of messages, including subject, text and attachments. Even if these servers are run by trusted infrastructure providers, they may have been compromised by hackers or by a rogue employee, or a government agency may seize equipment and retrieve your personal communication.
There are two levels of security that protect against such e-mail interception. The first one is making sure the connection to your e-mail server is secured by an encryption mechanism. The second is by encrypting the message itself, to prevent anyone other than the recipient from understanding the content. Connection security is covered extensively in this section and in the sections about VPN. E-mail encryption is also covered in detail in the chapters about using PGP.
Mail hoaxes, viruses and spam
 More than 80% of all the traffic coming through a typical e-mail server on the Internet contains either spam messages, viruses or attachments that intend to harm your computer. Protection against such hostile e-mails requires keeping your software up-to-date and having an attitude of distrust toward any e-mail that cannot be properly authenticated. In the final chapter of this section, we will describe some ways to protect against hostile e-mail.
Fraudulent mails requesting 'personal information'
Your internet service provider, your phone company, your bank or any reputable institution will never ask you to supply them with your username or password. They will also never send you an email or even telephone you and ask for confidential information regarding your account or setup. They will never require you to visit some website in order to 'fix' something with your computer. Whenever you receive such a request, you can be certain that it is a malicious attempt by a third-party to steal your account information. Such attempts are called 'Phishing attacks' in internet jargon, and are very common. Remember, reputable companies are hosting your data and should not require any such information from you.
Unverified mails from organizations or individuals offering you a 'service'
Phishing attacks can come from a wide variety of sources. You may receive mails from an organization or an individual who offers to assist you with some problem or provide you with some service. For example, you might receive an e-mail that looks like it is from the company who makes the anti-virus program you to use. The message says that there is an important update to their software. They have conveniently attached a handy executable file that will automatically fix your software.
Because the sender of the message cannot be verified, such messages should be immediately discarded, as the attached file almost certainly contains a virus or hostile program.
Mails with attachments
You may receive a message from a friend that contains an attachment. In the message, your friend might say that the attachment is a great game, or a handy utility, or anything else. Computer systems infected with viruses can "hijack" email accounts and send these kinds of messages to everyone in a person's address book. The message is not from your friend - it is from a virus that has infected your friend's computer system.
 Only open attachments when you have verified the sender's address. This applies to attachments of any type, not just executable files. Viruses can be contained in almost any type of file: videos, images, audio, office documents. Running an anti-virus program or a spam filter provides some protection against these hostile mails, as they will warn you whenever you download an infected file or a trojan. However, you should not count entirely on your anti-virus programs or spam filters, because they are only effective against threats that they know about. They cannot protect you from threats that have not yet been included in their definition files. (That is why it is important to keep your anti-virus and anti-spam definition files up to date.)
The safest approach regarding email attachments is to never open an attachment unless you are completely certain that it originates from a known, trusted source.
Compromise by malware
Even if you have verified all your email and have only opened those attachments that you have deemed safe, your computer may still be infected by a virus. For example, your friend may have inadvertently sent you a document that contains a virus. Malware detection can be difficult, although it is usually detected by anti-virus programs (assuming that the definition files are current, as described above). Signs of active malware can include:
- a sudden slowdown of your computer or internet connection
- strange pop-up messages appearing while using your computer
- complaints from your internet service provider regarding abuse of your account (for example, claiming that you have been sending spam messages)
If this happens to you, ensure your anti-virus program is up-to-date and then thoroughly scan your system.
Using Thunderbird
 In upcoming sections, we will be using Mozilla's Thunderbird e-mail program to show you how to configure your e-mail client for maximum security. Similar to Mozilla's Firefox browser, Thunderbird has many security advantages over its counterparts like Apple Mail and Outlook.
Thunderbird is a so-called "mail user agent" (MUA). This is different from web-based e-mail services like Google's Gmail. You must install the Thunderbird application on your computer. Thunderbird has a nice interface and features that enable you to manage multiple mailboxes, organize messages into folders, and search through mails easily.
Thunderbird can be configured to work with your existing e-mail account, whether that account is through your Internet Service Provider (such as Comcast) or through an web-based email provider (such as Gmail).
Using Thunderbird has many advantages over using web-based e-mail interfaces. These will be discussed in the following chapter. To summarize, though, Thunderbird enables much greater privacy and security than web-based e-mail services.
This section provides information on how to install Thunderbird on Windows, Mac OS X, and Ubuntu.
Installing Thunderbird on Windows
Installing Thunderbird involves two steps: first, download the software and then run the installation program.
- Use your web browser to visit the Thunderbird download page at http://www.mozillamessaging.com/en-US/thunderbird/. This page detects your computer's operating system and language, and recommends the best version of Thunderbird for you to use.

If you want to use Thunderbird in a different language or with a different operating system, click the Other Systems and Languages link on the right side of the page and select the version that you need.
- Click the download button to save the installation program to your computer.
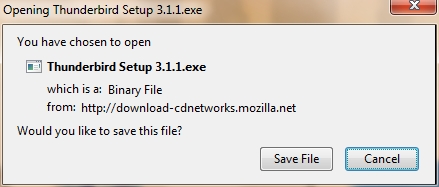
Click the Save button to save the Thunderbird Setup file to your computer.
- Close all applications running on your computer.
- Find the setup file on your computer (it's usually in the Downloads folder or on your desktop) and then double-click it to start the installation. The first thing that the installer does is display the Welcome to the Mozilla Thunderbird Setup Wizard screen.
Click the Next button to start the installation. If you want to cancel it, click the Cancel button.
- The next thing that you see is the Setup Type screen. For most users the Standard setup option is good enough for their needs. The Custom setup option is recommended for experienced users only. Note that Thunderbird installs itself as your default mail application. If you do not want this, clear the checkbox labeled Use Thunderbird as my default mail application.
Click the Next button to continue the installation.
- After Thunderbird has been installed, click the Finish button to close the setup wizard.
If the Launch Mozilla Thunderbird now checkbox is selected, Thunderbird starts after it has been installed.
Installing Thunderbird on Ubuntu
There are two different procedures for installing Thunderbird on Ubuntu: one for version 10.04 or later, and one for earlier versions of Ubuntu. We describe both below.
Thunderbird will not run without the following libraries or packages installed on your computer:
- GTK+ 2.10 or higher
- GLib 2.12 or higher
- Pango 1.14 or higher
- X.Org 1.0 or higher
Mozilla recommends that a Linux system also has the following libraries or packages installed:
- NetworkManager 0.7 or higher
- DBus 1.0 or higher
- HAL 0.5.8 or higher
- GNOME 2.16 or higher
Installing Thunderbird on Ubuntu 10.04 or newer
If you're using Ubuntu 10.04 or newer, the easiest way to install Thunderbird is through the Ubuntu Software Center.
- Click Ubuntu Software Center under the Applications menu.
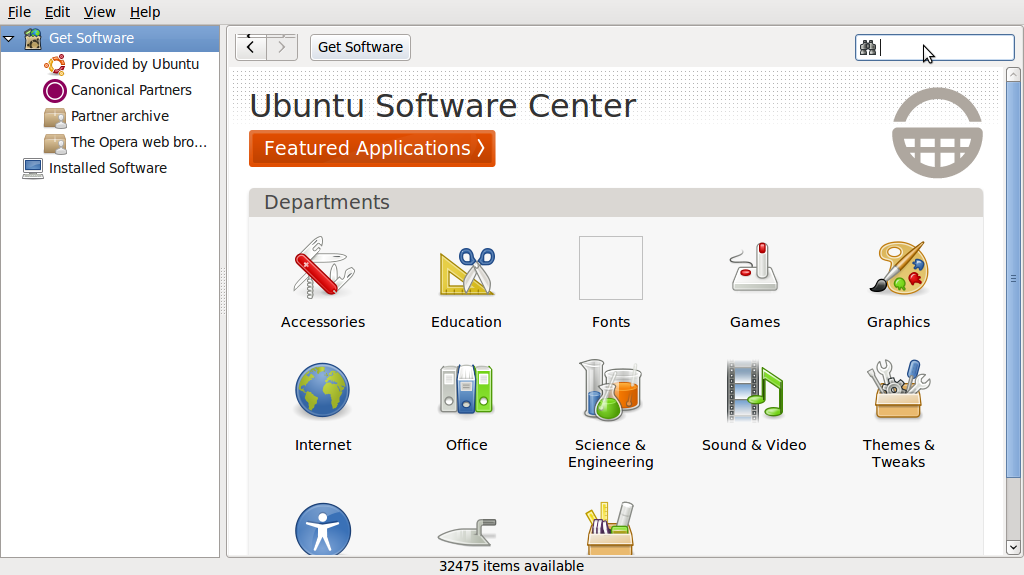
- Type "Thunderbird" in the search box and press the Enter on your keyboard. The Ubuntu Software Center finds Thunderbird in its list of available software.
- Click the Install button. If Thunderbird needs any additional libraries, the Ubuntu Software Center alerts you and installs them along with Thunderbird.
You can find the shortcut to start Thunderbird in the Internet option under the Applications menu:

Installing Thunderbird on Mac OS X
To install Thunderbird on your Mac, follow these steps:
- Use your web browser to visit the Thunderbird download page at http://www.mozillamessaging.com/en-US/thunderbird/. This page detects your computer's operating system and language, and it recommends the best version of Thunderbird for you to use.

- Download the Thunderbird disk image. When the download is complete, the disk image may automatically open and mount a new volume called Thunderbird.
If the volume did not mount automatically, open the Download folder and double-click the disk image to mount it. A Finder window appears:
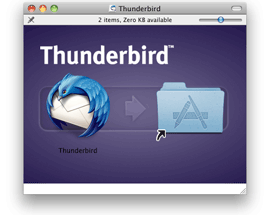
- Drag the Thunderbird icon into your Applications folder. You've installed Thunderbird!
- Optionally, drag the Thunderbird icon from the Applications folder into the Dock. Choosing the Thunderbird icon from the Dock lets you quickly open Thunderbird from there.
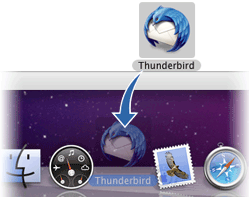
Note: When you run Thunderbird for the first time, newer versions of Mac OS X (10.5 or later) will warn you that the application Thunderbird.app was downloaded from the Internet.
If you downloaded Thunderbird from the Mozilla site, click the Open button.
Starting Thunderbird for the first time
After you have installed Thunderbird for the first time you will be guided through the configuration of your mail account. These settings are defined by your e-mail provider (your Internet Service Provider or web-based e-mail service provider). The next chapter describes how to set up your account and configure it for maximum security.
Setting up Thunderbird to use secure connections
There is a right (secure) way to configure your connection to your provider's mail servers and a wrong (insecure) way. The most fundamental aspect of e-mail security is the type of connection that you make to your e-mail provider's mail server.
Whenever possible, you should connect using the
SSL (Secure Socket Layer) and
TLS (Transport Layer Security) protocols. (
STARTTLS, which is another option available when configuring an account, is a variation of SSL / TLS.) These protocols prevent your own system (beyond Thunderbird) and any points between your system and the mail server from intercepting and obtaining your password. SSL / TLS also prevent eavesdroppers from reading the content of your messages.
These protocols, however, only secure the connection between your computer and the mail server. They do not secure the information channel all the way to the message recipient. Once the mail servers forward the message for delivery, the message may be intercepted and read by points in between the mail server and the recipient.
This is where PGP (Pretty Good Privacy) comes in, which is described in the next chapter.
The first step in establishing e-mail security is a secure connection between your system and the mail servers. This chapter describes how to set up your e-mail account the right way.
Configuration requirements
When you configure an account, Thunderbird attempts to determine (from the email account and the account details that you provide) the connection parameters to your email provider. While Thunderbird knows the connection parameters for many email providers, it does not know them all. If the parameters are not known to Thunderbird, you will need to provide the following information to configure your account:
- Your username
- Your password
- Incoming server: name (such as "imap.example.com"), protocol (POP or IMAP), port (by default, 110), and security protocol
- Outgoing server: name (such as "smtp.example.com"), port (by default, 25), and security protocol
You should have received this information from your hosting provider. Alternatively, you can usually find this information on the support pages on the website of your hosting provider. In our example we will be using the Gmail server configuration. You can use Thunderbird with your Gmail account. To do so, you must change a configuration setting in your account. If you are not using a Gmail account, skip the next section.
Preparing a Gmail account for use with Thunderbird
Log in to your Gmail account in your browser. Select Settings from options in the top right, then go to the tab Forwarding and POP/IMAP. Click Enable IMAP and then Save Changes.
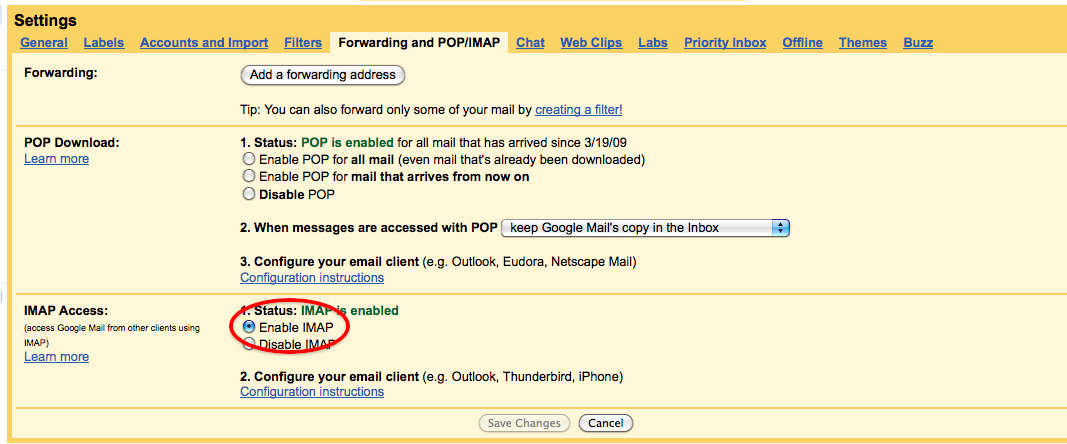
Configuring Thunderbird to use SSL/TLS
When you start up Thunderbird for the first time, you will enter a step-by-step configuration procedure for setting up your first account. (You can invoke the account setup interface any time by selecting File | New | Mail Account). On the first screen, you will be asked for your name, your email-address and your password. The value you enter for your name does not have to be your real name. It will be shown to the recipient of your messages. Enter the information and click Continue.
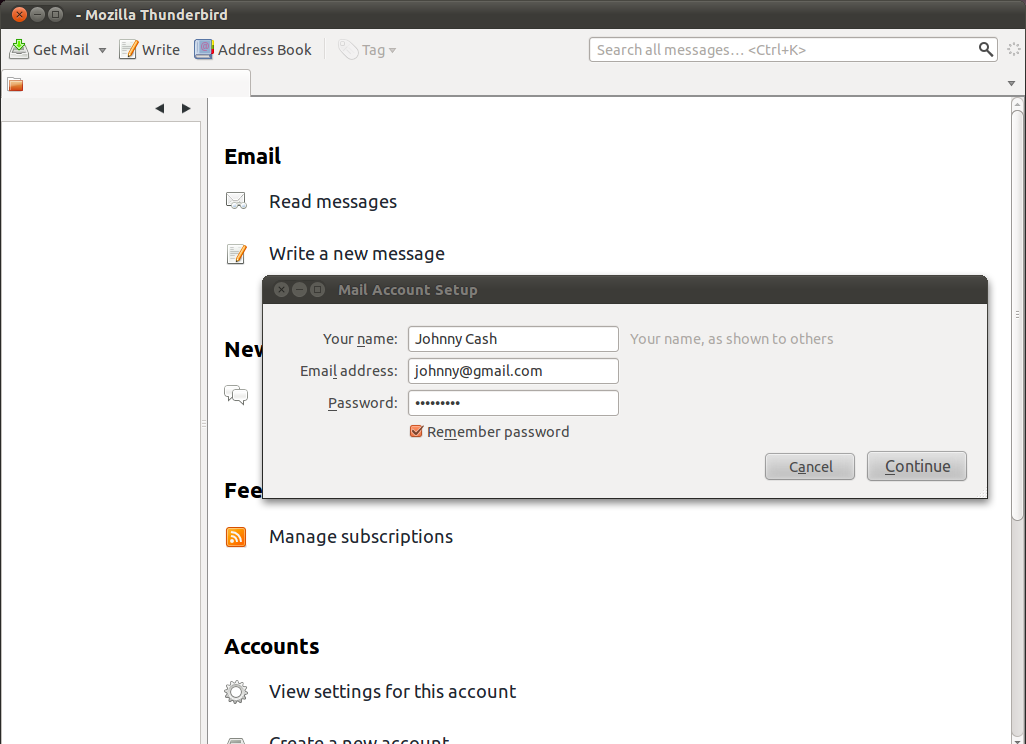
On the next screen, Thunderbird will attempt to determine the server names based on your email address. This may take some time, and will only work if Thunderbird knows the settings for the mail servers for your email provider. In either case you will be presented with a window where you can modify the settings. In the example below, Thunderbird has detected the settings automatically. You can see the protocol at the right side of the server names. This should be either SSL/TLS or STARTTLS. Otherwise your connection is insecure and you should attempt manual setup.
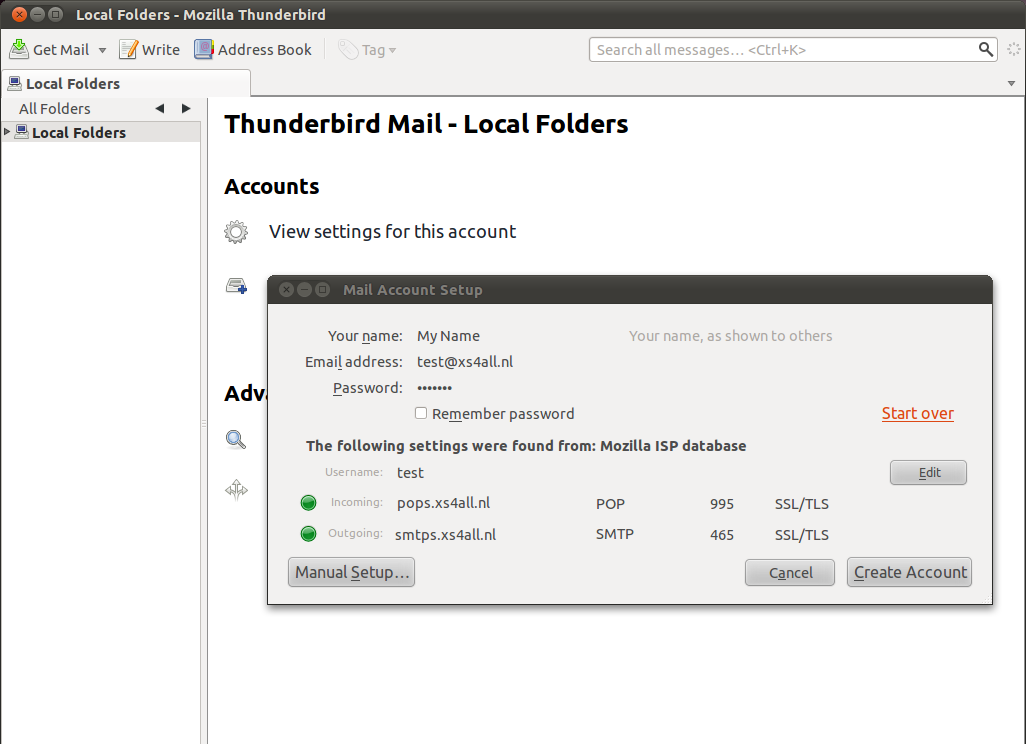
When you are finished, click Create account. If Thunderbird could not determine your server settings, click on Manual setup to configure the server names yourself.
Manual setup
Use the Account Settings interface to manually configure accounts in Thunderbird. The Account Settings dialog will automatically open if you select Manual setup in the configuration wizard. In this case we are only interested in the incoming and outgoing mail server names, and the protocol we use to connect with them. As you can see in the examples below, we enter the Gmail server names and we force them to use SSL, a secure method to connect to the servers.
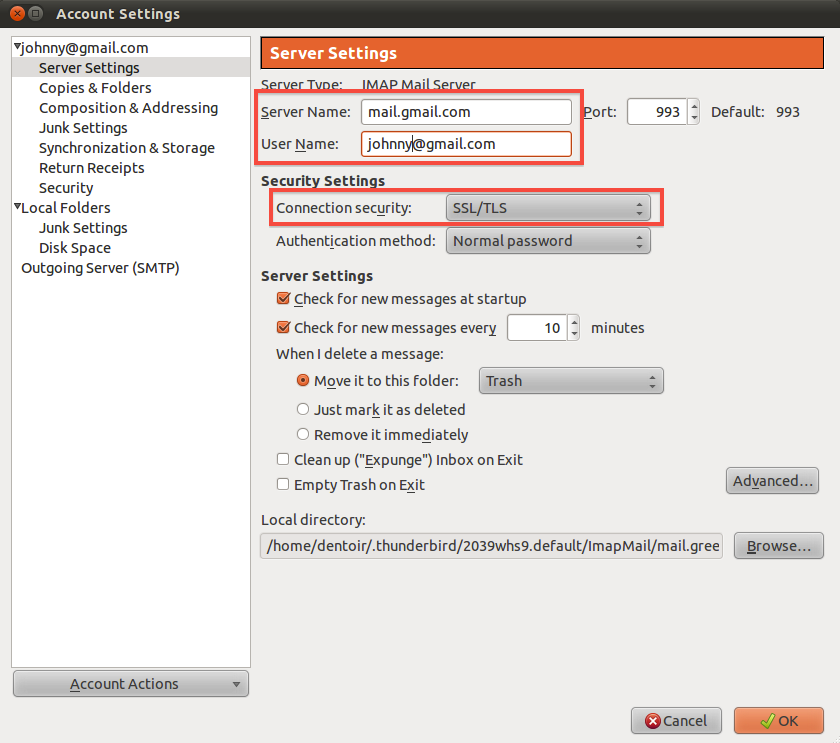
Under 'Server Settings', we will find only the incoming (IMAP) server and its settings for that specific account.
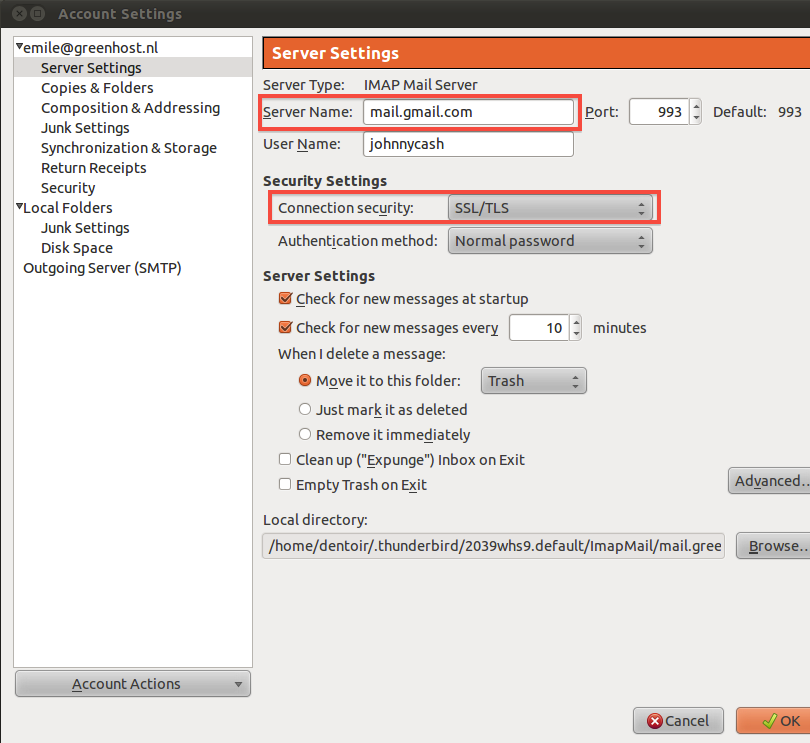
After
Server Name enter the name of the IMAP server, in this case mail.gmail.com
As you can see we have selected 'SSL/TLS' under the connection security setting. This enforces encryption. Do not be scared by the authentication method Normal password. The password will be automatically encrypted due to our secured connections to the server.
Finally, configure the outgoing server for the account. Click on Outgoing Server (SMTP) in the left panel.
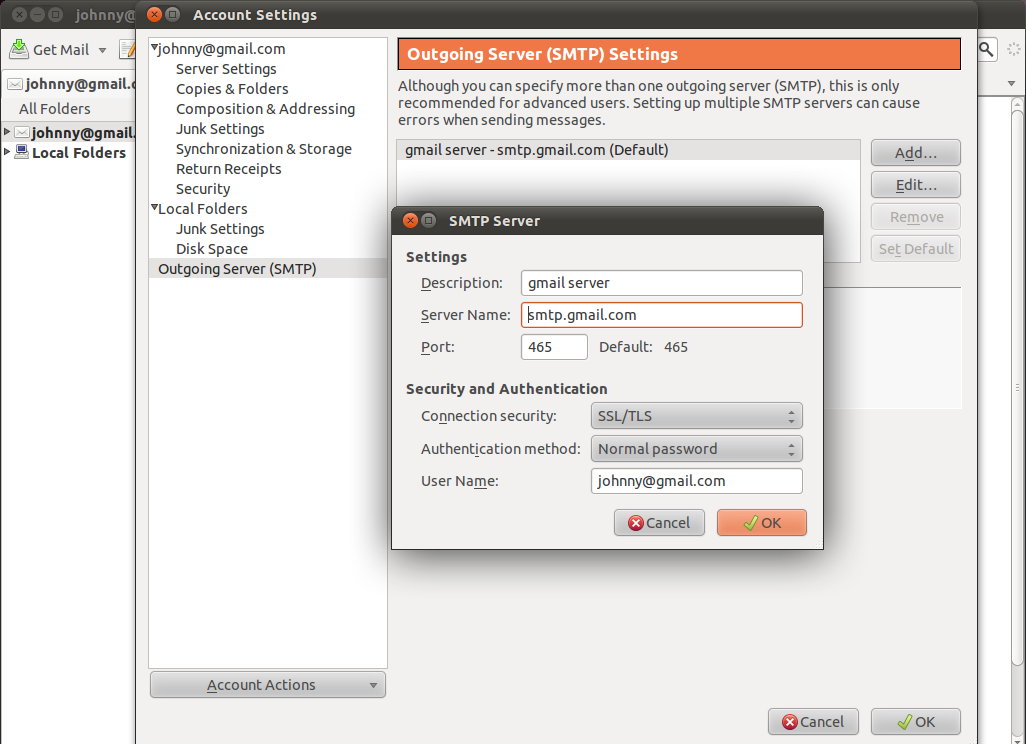
Again, we have selected SSL/TLS under Connection security. The port will default to 465 and this should generally not have to be changed.
Finishing the setup, different encryption methods
Test your Thunderbird setup by trying to send and receive mails. Some email hosting providers may not support the SSL/TLS protocol, which is the preferred choice. You will get an error message saying the authentication protocol is not supported by the server. You may then switch to using STARTTLS instead. In the above two screens, select 'STARTTLS' under 'Connection security'. If this method also fails, contact your email hosting provider and ask them if they provide another way to securely connect to their servers. If they do not allow you to securely connect to their servers, then you should complain and seriously consider switching to a different provider.
Returning to the configuration screens
At any time you can reconfigure your email accounts by going to the Thunderbird menu bar and clicking Edit | Account Settings (Linux), Tools | Account Settings (Windows and Mac OS X).
Some Additional Security Settings
Thunderbird provides additional security measures to protect you from junk mail, identity theft, viruses (with the help of your anti-virus software, of course), intellectual property theft, and malicious web sites.
We will look at the following Thunderbird security features. First a little background on why you need to consider some of these measures:
- Adaptive junk mail controls
Adaptive junk mail controls allow you to train Thunderbird to identify junk email (SPAM) and remove it from your inbox. You can also mark messages as junk mail manually if your email provider's system misses the junk mail and lets it go through.
- Integration with anti-virus software
If your anti-virus software supports Thunderbird, you can use that software to quarantine messages that contain viruses or other malicious content. If you're wondering what anti-virus software works with Thunderbird, you can find a list here: http://kb.mozillazine.org/Antivirus_software.
- Master password
For your convenience, you can have Thunderbird remember each of your individual passwords of your e-mail accounts. You can specify a master password that you enter each time you start Thunderbird. This will enable Thunderbird to open all your email accounts with your saved passwords.
- Restrictions on cookies
Some blogs and websites attempt to send cookies (a piece of text that stores information from Web sites on your computer) with their RSS feeds. These cookies are often used by content providers to provide targeted advertising. Thunderbird rejects cookies by default, but you can configure Thunderbird to accept some or all cookies.
In the Security Preferences section of Thunderbird's Options/Preferences dialog box you can set up the preferences for these features.
- In Windows and Mac OS X, go to the 'Tools' menu and click 'Options'.
- On Ubuntu or other versions of Linux, go to the 'Edit' menu and click 'Preferences'.
Junk mail settings
- In the Preferences/Options dialog box, click 'Security' and then click the 'Junk' tab.

- Do the following:
- To tell Thunderbird that it should handle messages marked as junk, select the check box labelled 'When I mark message as junk'.
- To have Thunderbird move these messages to a junk folder, select the 'Move them to account's 'Junk' folder' radio button.
- To have Thunderbird delete junk mail upon receiving it, select the 'Delete them'radio button.
- Thunderbird will mark junk message as read if you select the check box labeled 'Mark messages determined to be Junk as read'.
- If you want to keep a log of junk mail received, select the 'Enable junk filter logging' check box.
- Click the 'OK' button to close the 'Options/Preferences' dialog box.
Scam detection and warning system
- In the Preferences/Options dialog box, click 'Security' and then click the 'E-mail Scams' tab.

- To have Thunderbird warn you about possible email scams, select the check box labelled 'Tell me if the message I'm read is a suspected email scam'. To turn off this feature, deselect this check box.
- Click the 'OK' button to close the 'Options/Preferences' dialog box.
Anti-virus integration
- In the Preferences/Options dialog box, click 'Security' and then click the 'Anti-Virus' tab.

- To turn on anti-virus integration, select the check box labeled 'Allow anti-virus clients to quarantine individual incoming messages'. To turn off this feature, deselect this check box.
- Click the 'OK' button to close the 'Options/Preferences' dialog box.
Set a master password
- In the Preferences/Options dialog box, click 'Security' and then click the 'Passwords' tab.

- Select the check box labeled 'Use a master password'.
- Enter your password into the 'Enter new password' and 'Re-enter password' fields.

- Click the 'OK' button to close the Change Master Password dialog box.
- If you want to see the passwords that you have saved in Thunderbird, click the 'Saved Passwords' button. This will open the 'Saved Passwords' dialog box.

- To see the passwords, click the 'Show Passwords' button.

- Click the 'Close' button to close 'Saved Passwords' dialog box.
- Click the 'OK' button to close the 'Options/Preferences' dialog box.
Adaptive junk mail controls
You need to first open Account Settings window. Note that settings configured in the Account Settings window apply only to the account that you select in the Folders pane. You must configure local folders separately.
- In the Folders pane right-click on an account name and select 'Settings'.

- In Windows or Mac go to the 'Tools' menu and select 'Account Settings'. In Linux, go to the 'Edit menu' and select 'Account Settings'.
- To set adaptive junk mail controls for a specific account, pick an account and click 'Junk Settings'.

- To turn on the controls, select the check box labeled 'Enable adaptive junk mail controls for this account'. To turn them off, deselect this check box.
- If you want the controls to ignore mail from senders in your Address Book, select the check boxes next to any of the listed address books.
- To use a mail filter such as SpamAssassin or SpamPal, select the check box labelled 'Trust junk mail headers sent by:' and pick a filter from the menu.
- Select the check box labeled 'Move new junk messages to' if you want to move junk mail to a specified folder. Then select the destination folder to be either at your email provider or a local folder on your computer.
- Select the 'Automatically delete junk mail other 14 days' check box to have Thunderbird regularly remove junk mail. To change the time period for this process, enter a different number (in days) in the text box.
- Click 'OK' to save your changes.
Introducing mail encryption (PGP)
This chapter will introduce you to some basic concepts behind mail encryption. It is important to read to get some feeling of how mail encryption actually works and what its caveats and limitations are. PGP (Pretty Good Privacy) is the protocol we shall use for e-mail encryption. This protocol allows us to digitally sign and encrypt mail messages. It works on an end-to-end basis: messages will be encrypted on your own computer and will only be decrypted by the recipient of the message. There is no possibility for a 'man-in-the-middle' to decipher the contents of your encrypted message. This excludes the subject lines and the 'from' and 'to' addresses, which unfortunately are not encrypted in this protocol.
After having introduced these basic concepts, the next chapters will give you a hands-on guide to install the necessary tools on your operating system and get encryption up and running. We will focus on using Enigmail which is an extension for Thunderbird that helps you manage PGP encryption for your email. The installation process for Engimail / PGP is different for Mac OSX, Windows and Ubuntu so please see the appropriate chapters in this section for instructions.
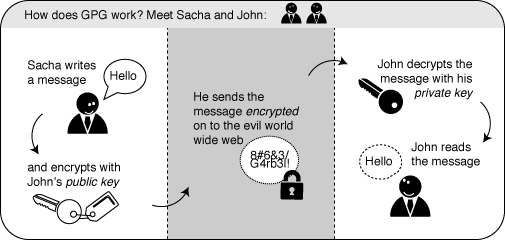
Using a key-pair to encrypt your mail
A crucial concept in mail encryption is the usage of so-called key-pairs. A key-pair is just two separate files sitting on your harddisk or USB stick. Whenever you want to encrypt mails for a certain mail-account, you will need to have these files available to yourself in some form. If they are sitting at home on your computer, you will not be able to decrypt mail at the office. Putting them on a USB stick should provide a solution to this problem.
A key-pair consists of the two different keys: a public key and a secret key.
The public key: you can give this key to other people, so they can send you encrypted mails. This file does not have to be kept secret.
The secret key: this basically is your secret file to decrypt emails people send to you. It should never be given to someone else.
Sending encrypted mails to other people: you need their public key
I have five colleagues at work and I want to send encrypted mails to them. I need to have public keys for each of their addresses. They can sent me these keys using ordinary mail, or they can give them to me in person, or put them on a USB stick, or they can have their keys on a website. It doesn't matter, as long as I can trust those keys really belong to the person I want to correspond with. My software puts the keys on my `keyring', so my mail application knows how to send them encrypted mails.
Receiving encrypted mails from other people: they need my public key
For my five (or thirty) colleagues to be able to send me encrypted mails, the process goes the other way around. I need to distribute my public key to each of them.
Conclusion: encryption requires public key distribution!
All the people in a network of friends or colleagues wanting to send each other encrypted emails, need to distribute their public keys to each other, while keeping their secret keys a closely guarded secret. The software described in this chapter will help you do this key management.
Installing PGP on Windows
To complicate matters a little - PGP is the protocol used for encrypting e-mail by various softwares. To get PGP to work with Thunderbird we need to install GPG - a free software implementation of PGP and Enigmail - an extension of Thunderbird that allows you to use GPG... Confused?! Don't worry about it, all you have to know is how to encrypt your email with PGP and you need to install both GPG and Enigmail. Here is how to do it...
Installing PGP (GPG) on Microsoft Windows
The GNU Privacy Guard (GnuPG) is software which is required to send PGP encrypted or signed emails. It is necessary to install this software before being able to do any encryption.
1. Head to the official website of the GnuPG project. Go to http://www.gnupg.org/
2. On the left side of the website, you will find a 'Download' link. Click on it.
3. You will see a lot of text. Scroll down to the section 'Binaries'. You will find there a version of GnuPG which it says is 'compiled for MS-Windows'. This version will be in the 1.4.something range. Just click on the FTP link next to the line that says 'GnuPG 1.4 compiled for Microsoft Windows.' The screen below should resemble this section of the website.
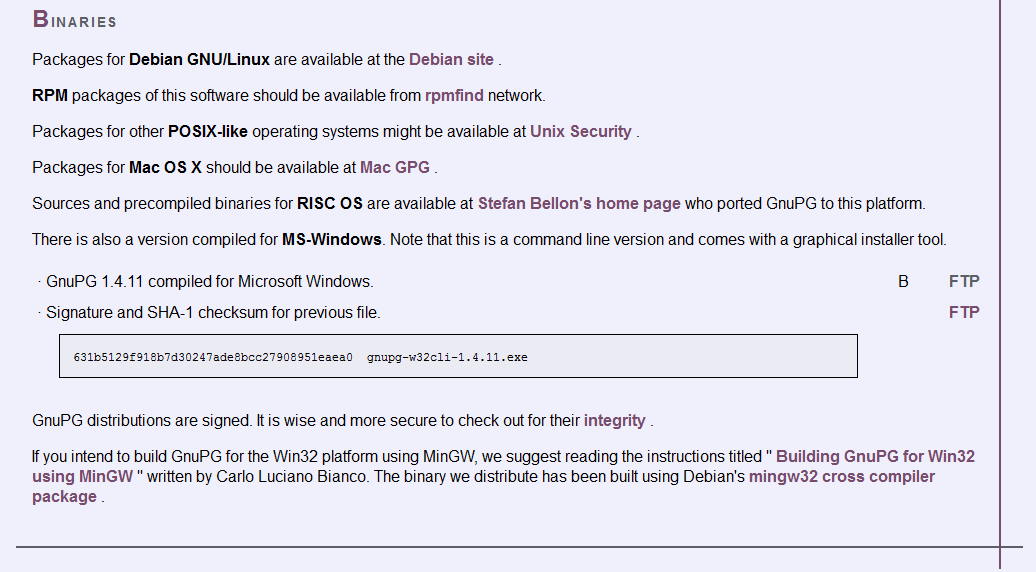
This will download you an .exe file. Depending on your browser, you may have to double-click on this downloaded file (which will be called something like gnupg-w32cli-1.4.11.exe) before something happens. Windows will ask you if you are sure you want to install this program. Answer yes.
4. The following installation window should pop-up.
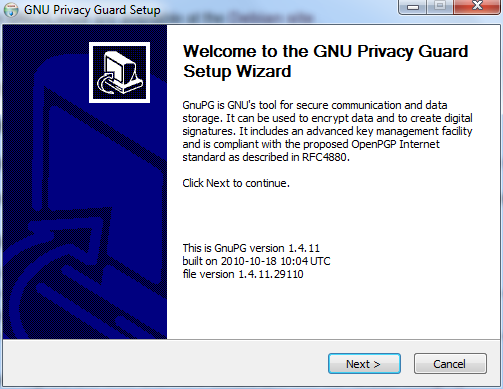
Please click on the 'Next' button.
5. The license agreement will be shown as below. Please click on the 'Next' button again.
6. The installer will ask you which components you want to install. Just keep them all selected and click on the 'Next' button again.
7. Choose an interface language. English should be fine. Click 'Next' again.
8. The installer will ask you where to put the application on your computer. The default setting should be fine in most cases. Click on 'Next' when you agree.
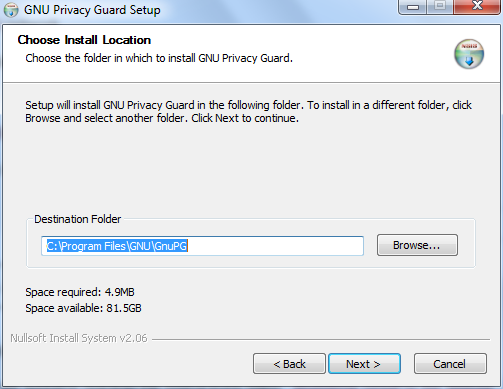
9. The installer will ask you how the GnuPG application should be called in the start menu. The default name should be fine. Click on 'Next' again.
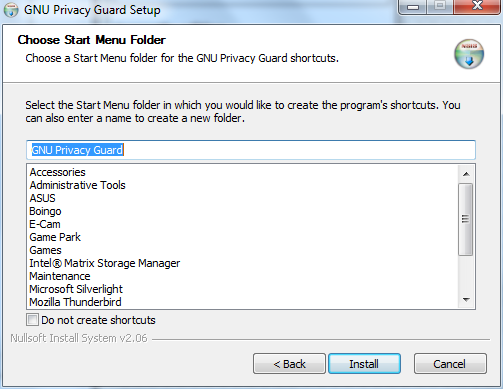
10. These are all the questions you need to answer. Click 'Install' and the installation process will begin. After installation is finished you can click 'Next' in the last windows to finish up. You now have GnuPG installed.
Installing with the Enigmail extension
After you have successfully installed the PGP software as we described above you are now ready to install the Enigmail add-on.
Enigmail is a Thunderbird add-on that lets you protect the privacy of your email conversations. Enigmail is simply an interface that lets you use PGP encryption from within Thunderbird.
Enigmail is based on public-key cryptography. In this method, each individual must generate her/his own personal key pair. The first key is known as the private key. It is protected by a password or passphrase, guarded and never shared with anyone.
The second key is known as the public key. This key can be shared with any of your correspondents. Once you have a correspondent's public key you can begin sending encrypted e-mails to this person. Only she will be able to decrypt and read your emails, because she is the only person who has access to the matching private key.
Similarly, if you send a copy of your own public key to your e-mail contacts and keep the matching private key secret, only you will be able to read encrypted messages from those contacts.
Enigmail also lets you attach digital signatures to your messages. The recipient of your message who has a genuine copy of your public key will be able to verify that the e-mail comes from you, and that its content was not tampered with on the way. Similarly, if you have a correspondent's public key, you can verify the digital signatures on her messages.
Installation steps
To begin installing Enigmail, perform the following steps:
Step 1. Open Thunderbird, then Select Tools > Add-ons to activate the Add-ons window; the Add-ons window will appear with the default Get Add-ons pane enabled.
Step 2. Enter enigmail in the search bar, like below, and click on the search icon.
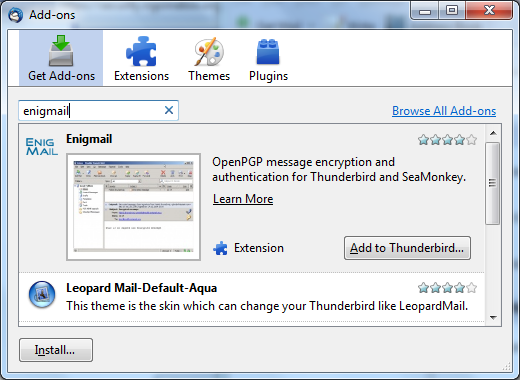
Step 3. Simply click on the 'Add to Thunderbird' button to start the installation.
Step 4. Thunderbird will ask you if you are certain you want to install this add-on. We trust this application so we should click on the 'Install now' button.
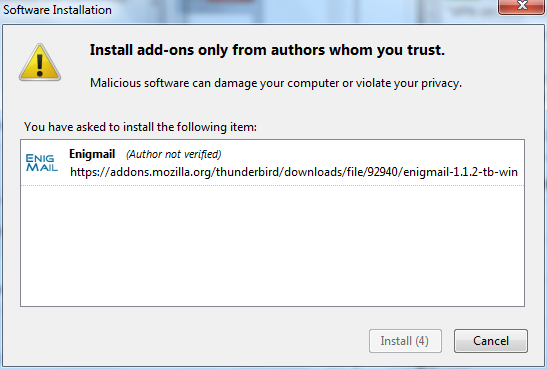
Step 5. After some time the installation should be completed and the following window should appear. Please click on the 'Restart Thunderbird' button.
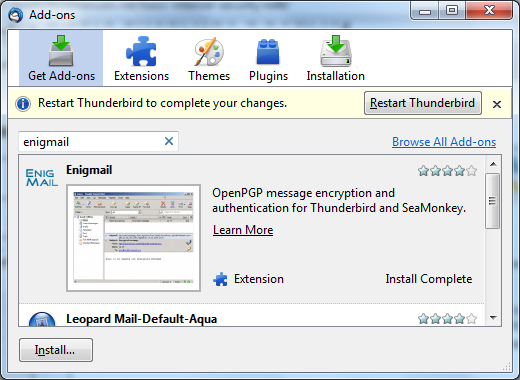
Installing PGP on OSX
The GNU Privacy Guard (GnuPG) is software which enables you to send PGP encrypted or signed emails. It is necessary to install this software before being able to do any encryption. This chapter covers the installation steps required to install GnuPG on Mac OSX.
Getting started
For this chapter we assume you have the latest version of:
- OSX installed (10.6.7)
- Thunderbird (3.1.10)
Note on OSX Mail: It is possible to use PGP with the build-in mail program of OSX. But we do not recommend this because this option relies on a hack of the program which is neither open or supported by its developer and breaks with every update of the mail program. So unless you really have no other option we advice you to switch to Mozilla Thunderbird as your default mail program if you want to use PGP.
Downloading and installing the Software
For OSX there is a bundle available which will install everything you need in one installation. You can get it by directing your browser to http://www.gpgtools.org/ and clicking on the big blue disk with "Download GPGTools Installer" written under it. It will redirect you to another page on http://www.gpgtools.org/installer/index.html where you can actually download the software.
(nb. We are using the latest version Firefox for this manual, so the screens might look a little bit different if you are using a different browser)
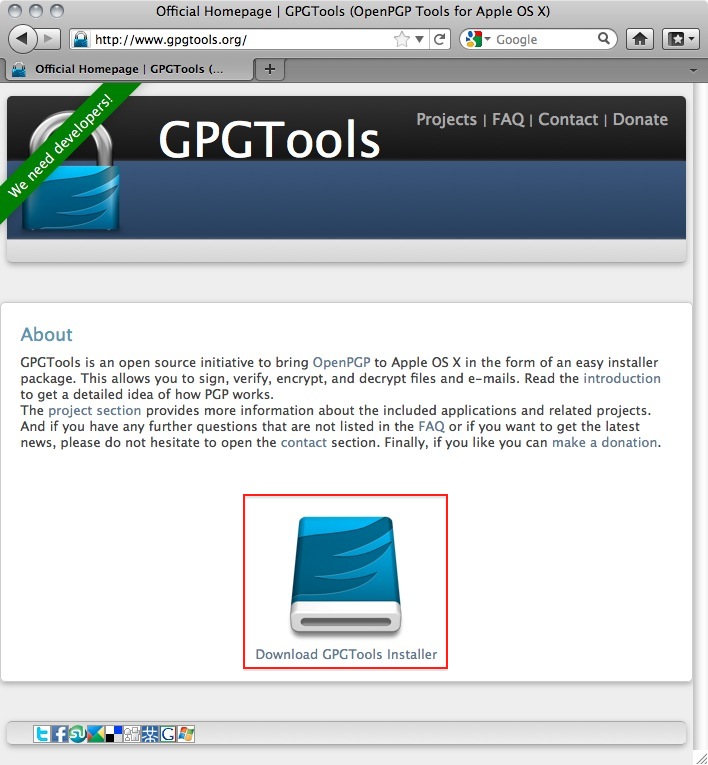
2. Download the software by choosing 'Save File' and clicking 'OK' in the dialogue.
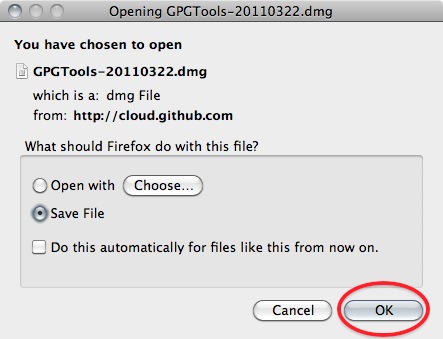
3. Navigate to the folder where you normally store your downloads (Mostly the desktop or the downloads folder surprisingly) en double click the '.DMG' file to open the virtual disk containing the installer.

4. Open the installer by double-clicking on the icon.
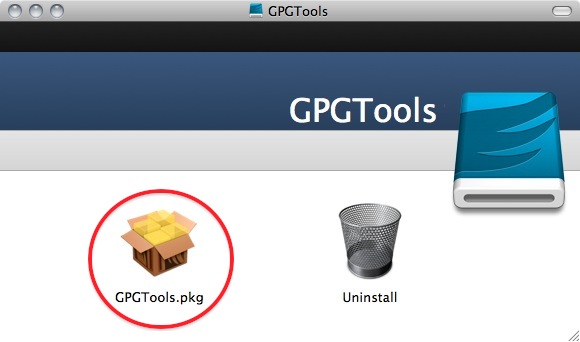
5. The program will check your computer to see if it can run on the computer.
(Note, if you're Mac is bought before 2006 it will not have an intel processor required to run this software and the installation will fail. Sadly it is beyond the scope op this manual to also take into account computers over five year old)
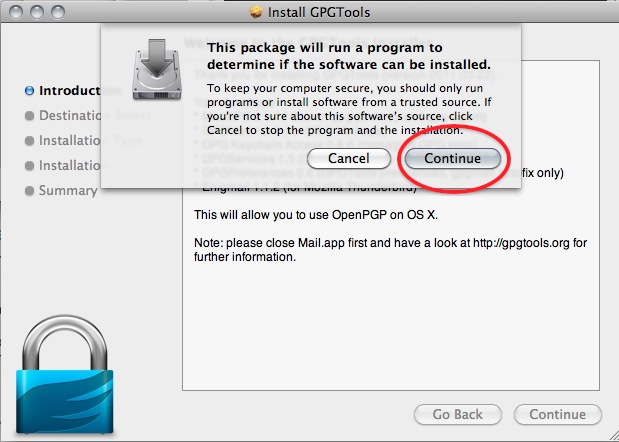
You will be guided by the program through the next steps like accepting the license agreement. But stop pressing all the OK's and Agrees as soon as you come to the 'Installation Type' screen:
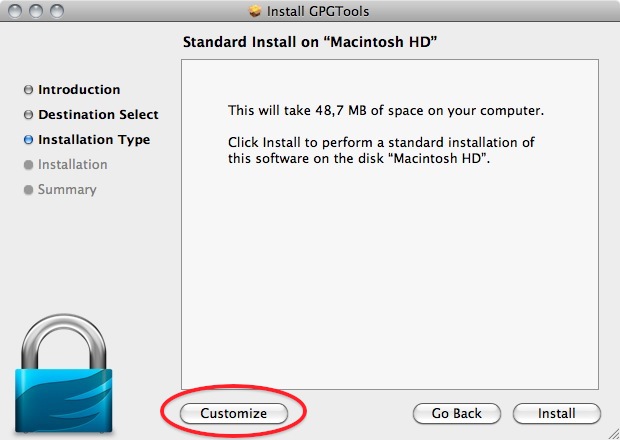
6. Clicking 'Customize' will open this screen where you several options of programs and software to install. You can click on each one of them to get a little bit of information on what is is, what it does and why you might need it.
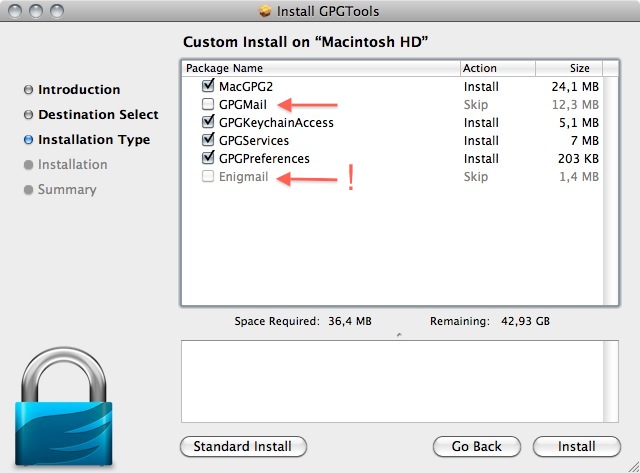
As said in the intro; we advice against using Apple Mail in combination with PGP. Therefore you won't be needing 'GPGMail', as this enables PGP on Apple Mail, and you can uncheck it.
'Enigmail' on the other hand is very important as it is the component that will enable Thunderbird to use PGP. In the screen shot here it is greyed out as the installer wasn't able to identify my installation of Thunderbird. Since this seems to be a bug. You can also install Enigmail from within Thunderbird as is explained in another chapter.
If the option is not greyed out in your installation, you should tick it.
After you checked all the components you want to install click 'Install' to proceed. The installer will ask you for your password and after you enter that the installation will run and complete; Hooray!
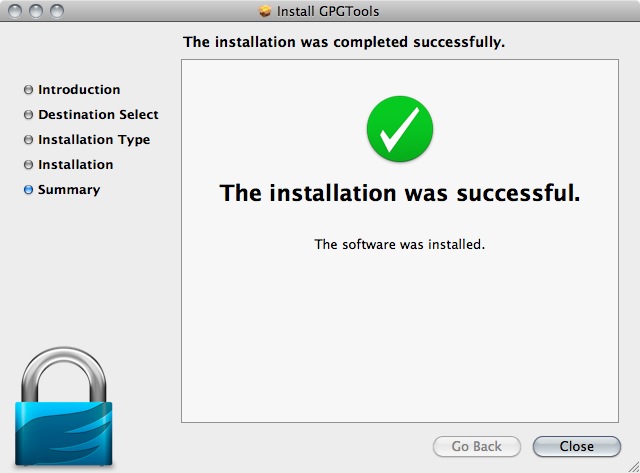
Installing up Engimail
Step 1. Open Thunderbird, then Select Tools > Add-ons to activate the Add-ons window; the Add-ons window will appear with the default Get Add-ons pane enabled.
In the Add-On window, you can search for 'Enigmail' and install the extension by clicking 'Add to Thunderbird ...'
2. After you open the Add-On window, you can search for 'Enigmail' and install the extension by clicking 'Add to Thunderbird ...'
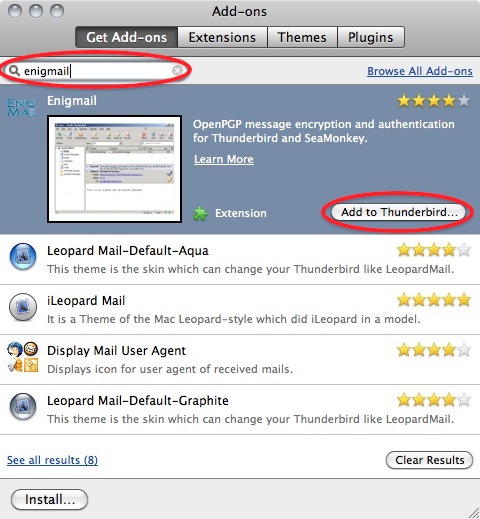
3. Click on 'Install Now' to download and install the extension.
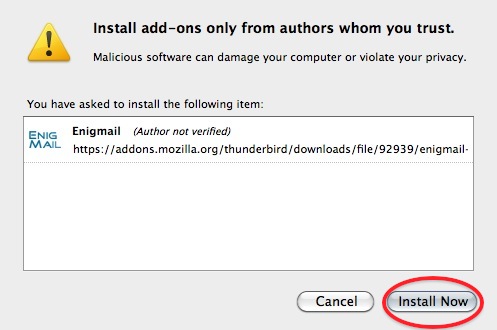
Be aware that you will have to restart Thunderbird to use the functionality of this extension!
Now that you have successfully downloaded and installed Enigmail and PGP you can go on to the Chapter that deals with setting up the software for use.
Installing PGP on Ubuntu
We will use the Ubuntu Software Centre for installing PGP (Enigmail and accessories). First open the Ubuntu Software Center through Applications -> Ubuntu Software Center:
Type into the search field 'Enigmail' and search results should be returned automatically:
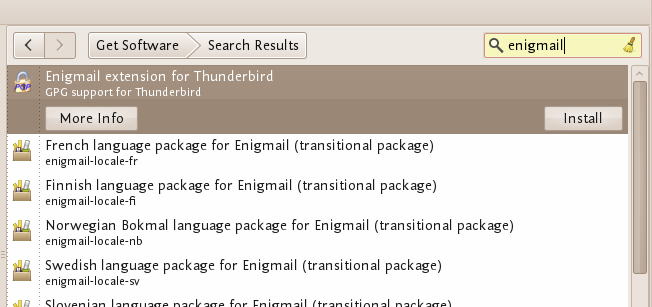
Highlight the Enigmail item (it should be highlighted by default) and click 'Install' and you will be asked to authenticate the installation process.
Enter your password and click 'Authenticate'. The installation process will begin.
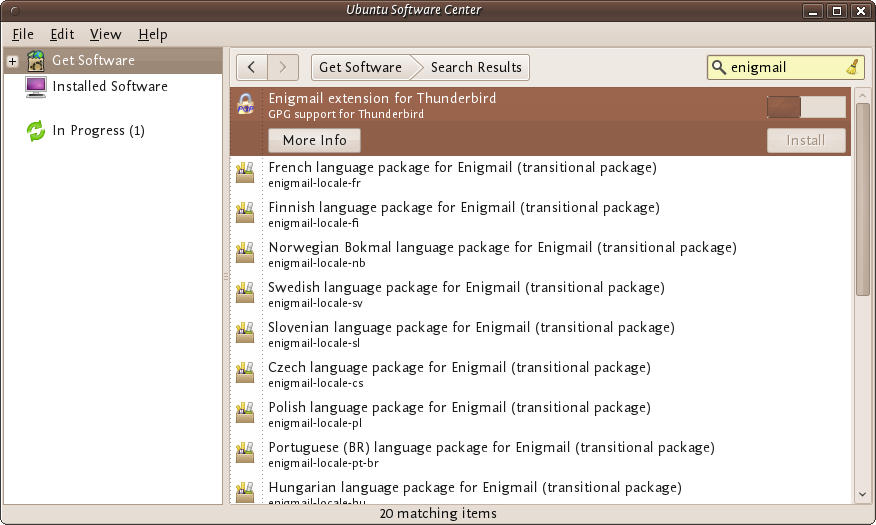
When the process is completed you get very little feedback from Ubuntu. The progress bar at the top left disappears. The 'In Progress' text on the right also disappears. Enigmail should now be installed.
Creating your PGP keys
You are now ready to start encryption your mails with PGP. You can do this by using Enigmail within Thunderbird. Enigmail comes with a nice wizard to help you with the initial setup and the important aspect of creating a public/private key pair (see the chapter introducing PGP for an explanation). You can start the wizard at any time within Thunderbird by selecting OpenPGP > Setup Wizard from the menu on top.
Step 1. This is what the wizard looks like. Please read the text on every window carefully. It provides useful information and helps you setup PGP to your personal preferences. In the first screen, click on Next to start the configuration.
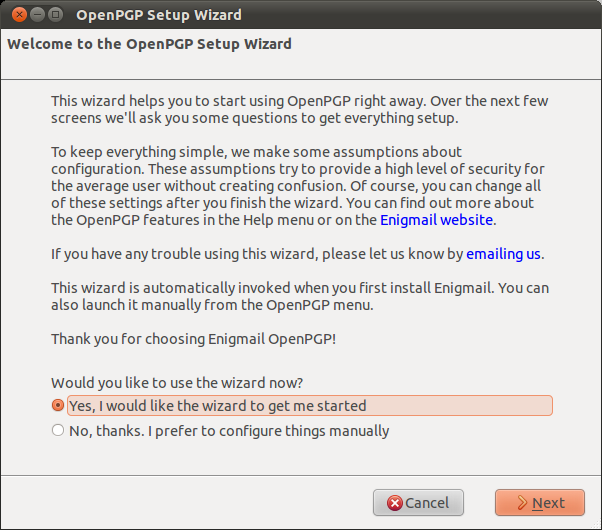
Step 2. The wizard asks you whether you want to sign all your outgoing mail messages. If you do not chose to sign all your messages, you will have to specify per recipient if you want to sign your e-mail. Signing all your messages is a good choice. Click on the 'Next' button after you have made a decision.

Step 3. On the following screen, the wizard asks you whether you want to encrypt all your outgoing mail messages. Unlike signing of mails, encryption requires the recipient to have PGP software installed. Therefore you should answer 'no' to this question, to make sure you can still send normal mails. Only answer 'yes' here if you want to prevent Thunderbird from ever sending unencrypted mails. After you have made your decision, click on the 'Next' button.
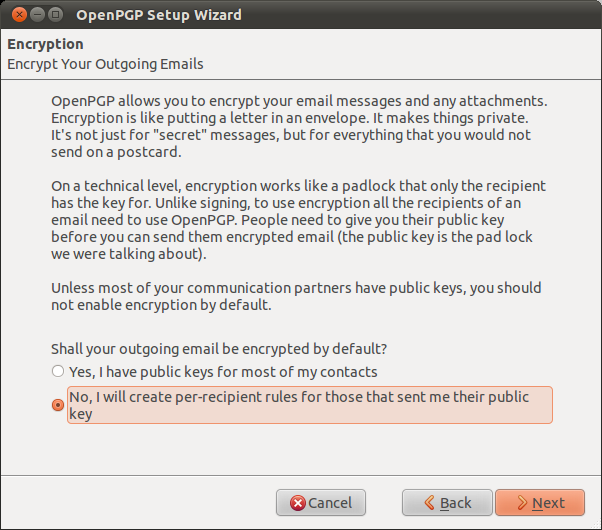
Step 4: On the following screen the wizard asks if he can change some of your mail formatting settings to better work with PGP. It is a good choice to answer 'Yes' here. The only serious thing is that it will prevent you from doing is sending HTML mail messages. Click on the 'Next' button after you have made your decision.
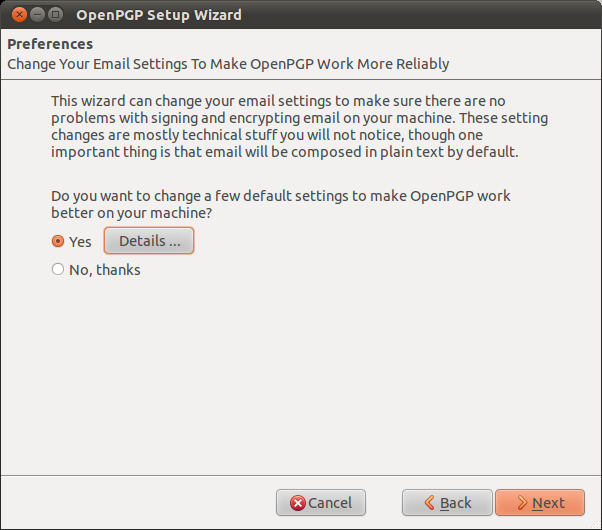
Step 5: Now it is time to start creating the keys. In the following screen you can select one of your mail accounts, or the default one is selected for you if you have only one mail account. In the 'Passphrase' text box you have to give a password. This is a new password which is used to protect your private key. It is very important both to remember this password, because you cannot read your own encrypted emails any more when you lose it, and to make it a strong password. It should be at least 8 characters long, not contain any dictionary words and it should preferably be a unique password. Using the same password for multiple purposes severely increases the chance of it being intercepted at some point. After you have selected your account and created a passphrase, click on the 'Next' button.
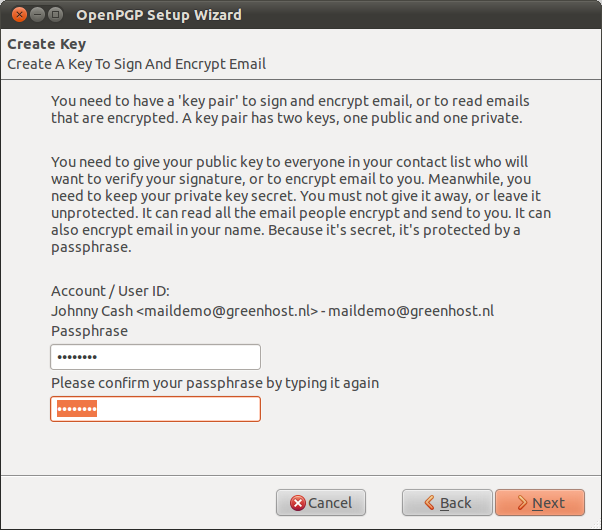
Step 6: In the following screen the wizard basically wraps up what actions it will take to enable PGP encryption for your account. If you are satisfied with the options you chose in the previous windows, click on the 'Next' button.
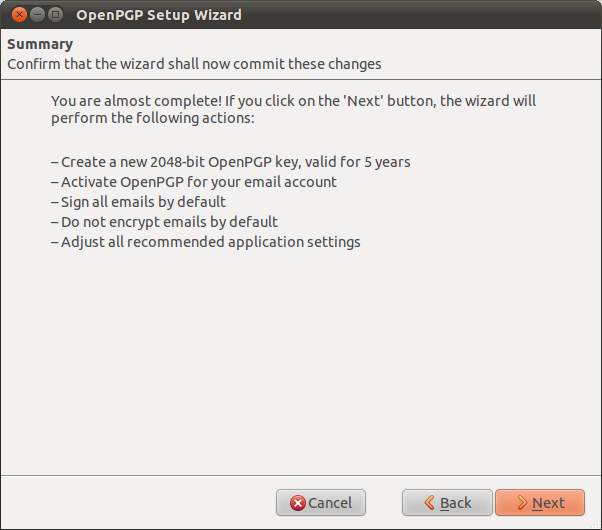
Step 7: Your keys are being created by the wizard. Have some patience. The progress bar should slowly fill up to the right. The wizard will tell you when the keys have been successfully created, then you can click on the 'Next' button again.
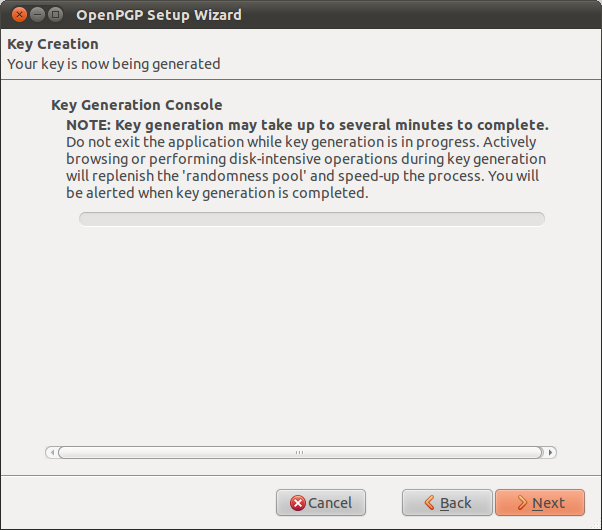
Step 8: You now have your own PGP key-pair. The wizard will ask you if you also want to create a special file, called a 'Revocation certificate'. This file allows you to inform others that your key-pair should no longer be considered valid. Think of it as a 'kill switch' for your PGP identity. You can use this certificate in case you have generated a new set of keys, or in case your old key-pair has been compromised. It is a good idea to create the file and keep it somewhere in a safe place. Click on the 'Generate Certificate' button if you want to create the file, otherwise 'Skip'.
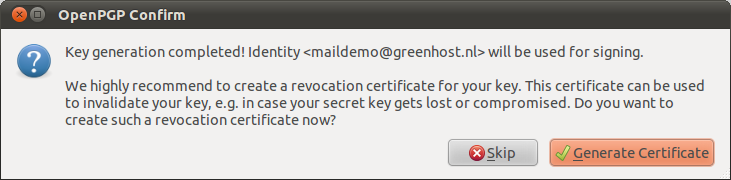
Step 9: Assuming you have decided to generate a revocation certificate, the wizard will ask you where the file should be saved. The dialog may appear a bit different on your particular operating system. It is a good idea to rename the file to something sensible like my_revocation_certificate. Click on 'Save' when you you have decided on a location.
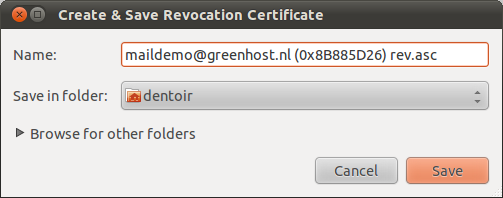
Step 10: Assuming you have decided to generate a revocation certificate, the wizard informs you it has been successfully stored.
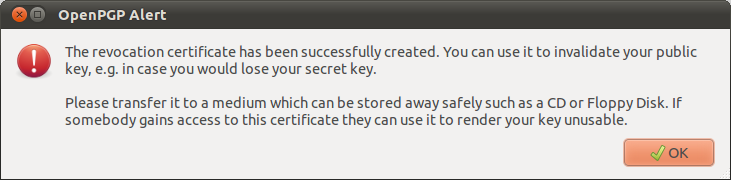
Step 11: The wizard will inform you it has completed its setup.
Congratulations, you now have a fully PGP-configured mail client. In the next chapter we will explain how to manage your keys, sign messages and do encryption. Thunderbird can help you do a lot of these things automatically.
Daily PGP usage
In the previous chapters we have have explained how to set up a secure mail environment using Thunderbird, PGP and Enigmail. We assume you have installed the software and have successfully followed the wizard instructions to generate an encryption key-pair as described in the previous chapter. This chapter will describe how to use your secured Thunderbird in daily life to protect your e-mail communication. In particular we will focus on:
- Encrypting Attachments
- Entering your pass-phrase
- Receiving Encrypted Email
- Sending and receiving public keys
- Receiving public keys and adding them to your key ring
- Using public key servers
- Signing e-mails to an individual
- Sending encrypted e-mails to an individual
- Automating encryption to certain recipients
- Verifying incoming e-mails
- Revoking your PGP key pair
- What to do when you have lost your secret key, or forgot your passphrase
- What to do when your secret key has been stolen, or compromised
- Backing up your keys
First we shall explain two dialog windows that will inevitably appear after you start using Thunderbird to encrypt your emails.
Encrypting attachments
The dialog window below will pop-up whenever you are sending an encrypted email with attachments for the first time. Thunderbird asks a technical question on how to encrypt attachments to your mail. The second (default) option is the best choice, because it combines security with the highest compatibility. You should also select the 'Use the selected method for all future attachments' option. Then click 'OK' and your mail should be sent with no further delay.
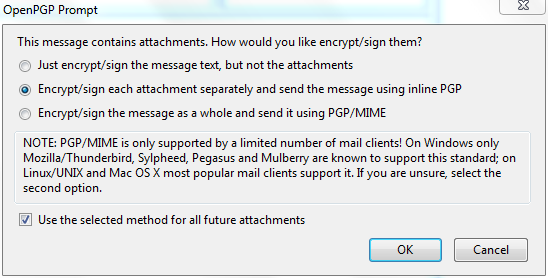
Entering your pass-phrase
For security reasons, the pass-phrase to your secret key is stored temporarily in memory. Every now and then the dialog window below will pop-up. Thunderbird asks you for the pass-phrase to your secret key. This should be different from your normal email password. It was the pass-phrase you have entered when creating your key-pair in the previous chapter. Enter the pass-phrase in the text-box and click on 'OK'
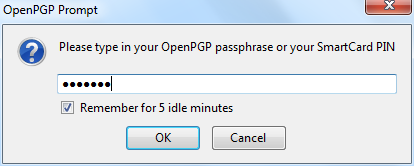
Receiving encrypted mails
The decryption of emails is handled automatically by Enigmail, the only action that may be needed on your behalf is to enter the pass-phrase to your secret key. However, in order to have any kind of encrypted correspondence with somebody, you will first need to exchange public keys.
Sending and receiving public keys
There are multiple ways to distribute your public key to friends or colleagues. By far the simplest way is to attach the key to a mail. In order for your friend to be able to trust that the message actually came from you, you should inform them in person (if possible) and also require them to reply to your mail. This should at least prevent easy forgeries. You have to decide for yourself what level of validation is necessary. This is also true when receiving emails from third-parties containing public keys. Contact your correspondent through some means of communication other than e-mail. You can use a telephone, text messages, Voice over Internet Protocol (VoIP) or any other method, but you must be absolutely certain that you are really talking to the right person. As a result, telephone conversations and face-to-face meetings work best, if they are convenient and if they can be arranged safely.
Sending your public key is easy.
1. In Thunderbird, click on the  icon.
icon.
2. Compose a mail to your friend or colleague and tell them you are sending them your PGP public key. If your friend does not know what that means, you may have to explain them and point them to this documentation.
3. Before actually sending the mail, click to OpenPGP > Attach My Public Key option on the menu bar of the mail compose window. Next to this option a marked sign  will appear. See the example below.
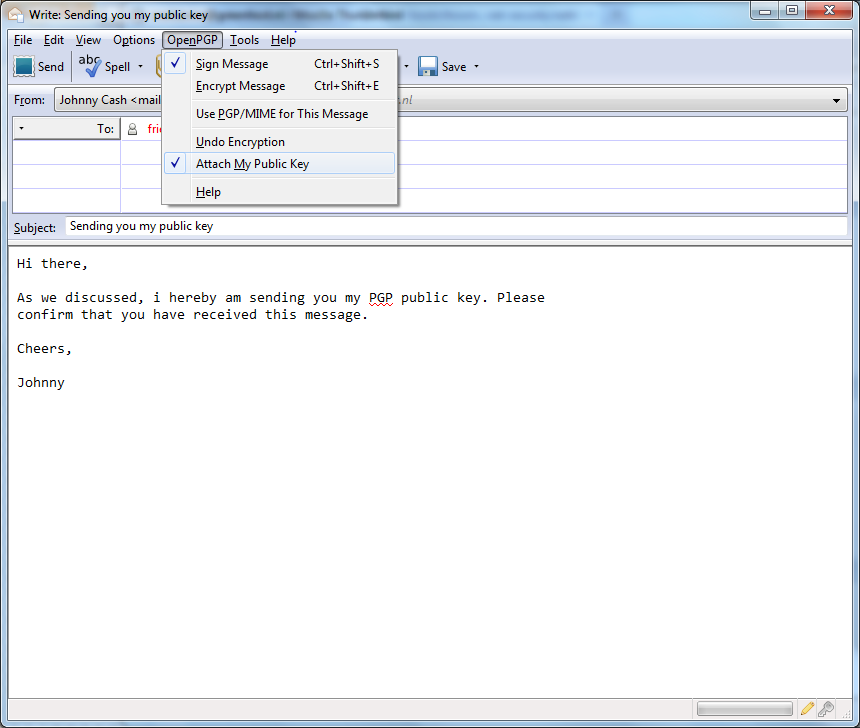
4. Send your mail by clicking on the  button.
Receiving public keys and adding them to your keyring
Lets say we receive a public key from a friend by mail. The key will show up in Thunderbird as an attached file. Scroll down the message and below you will find tabs with one or two file names. The extension of this public key file will be .asc, different from the extension of an attached PGP signature, which ends with .asc.sig
Look at the example email in the next image, which is a received, signed PGP message containing an attached public key. We notice a yellow bar with a warning message: 'OpenPGP: Unverified signature, click on 'Details' button for more information'.Thunderbird warns us that the sender is not known yet, which is correct. This will change once we have accepted the public key.
What are all those strange characters doing in the mail message? Because Thunderbird does not recognize the signature as valid, it prints out the entire raw signature, just as it has received it. This is how digitally signed PGP messages will appear to those recipients who do not have your public key.
The most important thing in this example is to find the attached PGP public key. We mentioned it is a file that ends with an .asc. In this example it's the first attachment on the left, which is in the red circle. Double-clicking on this attachment would make Thunderbird recognize the key.
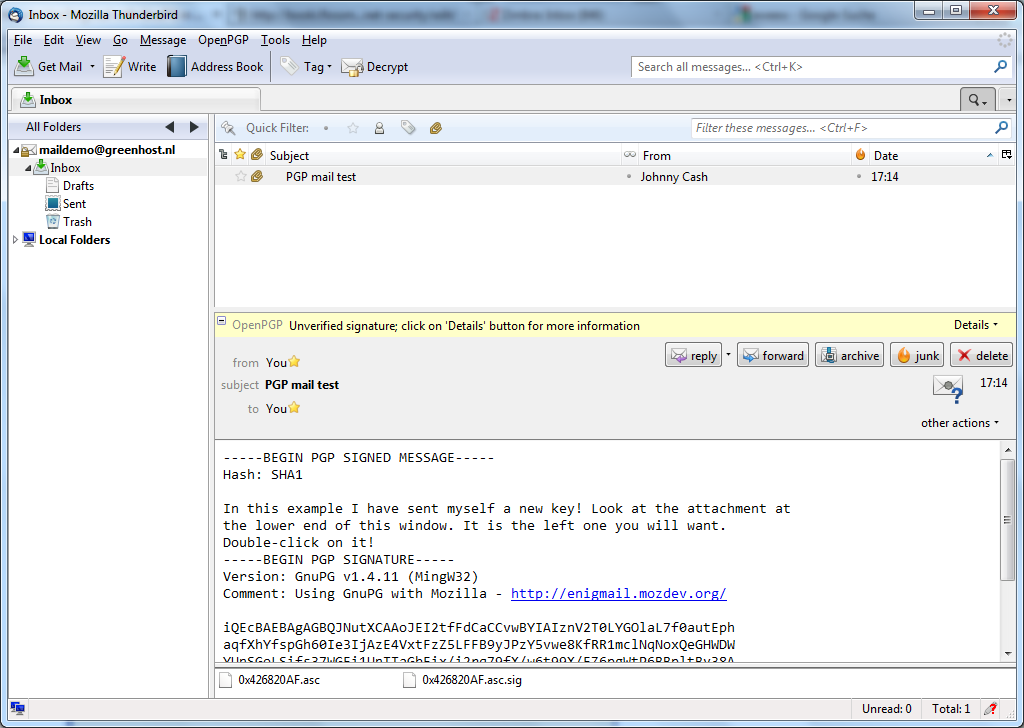
In the example image above, we should double-click on the attached .asc file to import the PGP public key.
After we have clicked on the attachment, the following pop-up will appear.
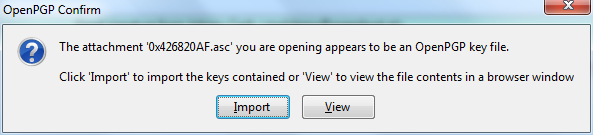
Thunderbird has recognized the PGP public key file. Click on 'Import' to add this key to your keyring. The following pop-up should appear. Thunderbird says the operation was successful. Click on 'OK' and you are done. You now have the ability to send this friend encrypted messages.
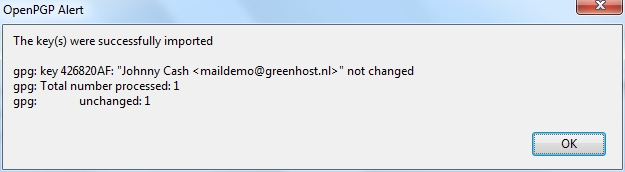
We are back in the main Thunderbird screen and we refresh the view on this particular example message, by clicking on some other message and back for example. Now the body of the message looks different (see below). This time Thunderbird does recognize the signature, because we have added the public key of the sender.
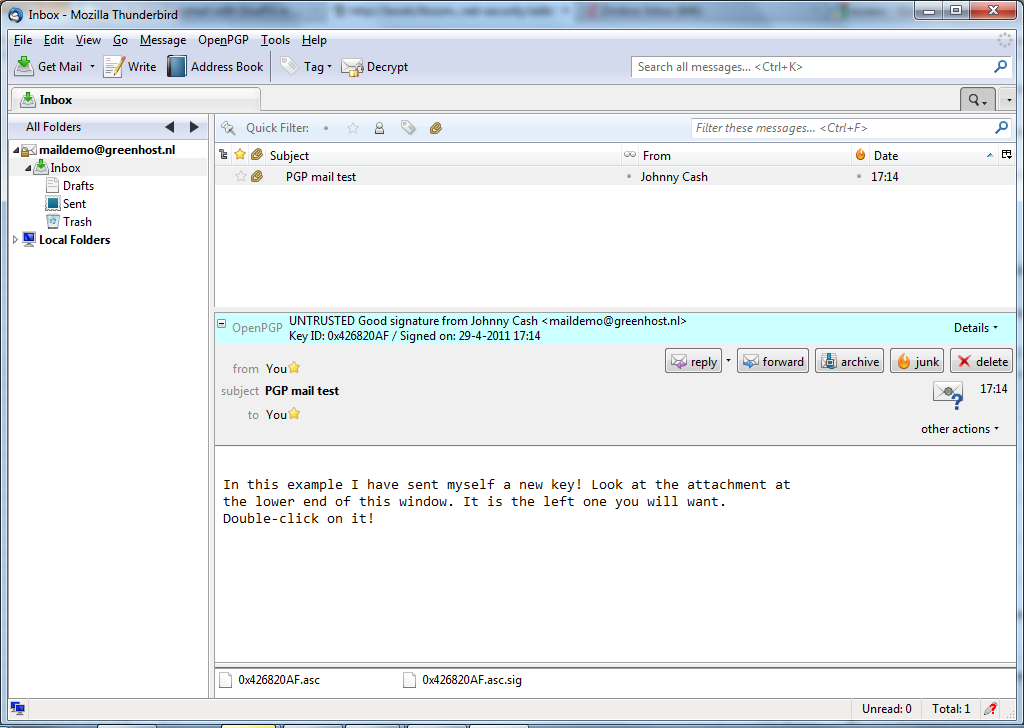
There is still one that remains. While Thunderbird now recognizes the signature, we should explicitly trust that the public key really belongs to the sender in real life. We realise this when we take a closer look at the green bar (see below). While the signature is good, it is still UNTRUSTED.

We will now decide to trust this particular public key and the signatures made by it. We can do this immediately by clicking on 'Details'. A small menu will appear (see below). From this menu we should click on the option 'Sign Sender's Key ...'.
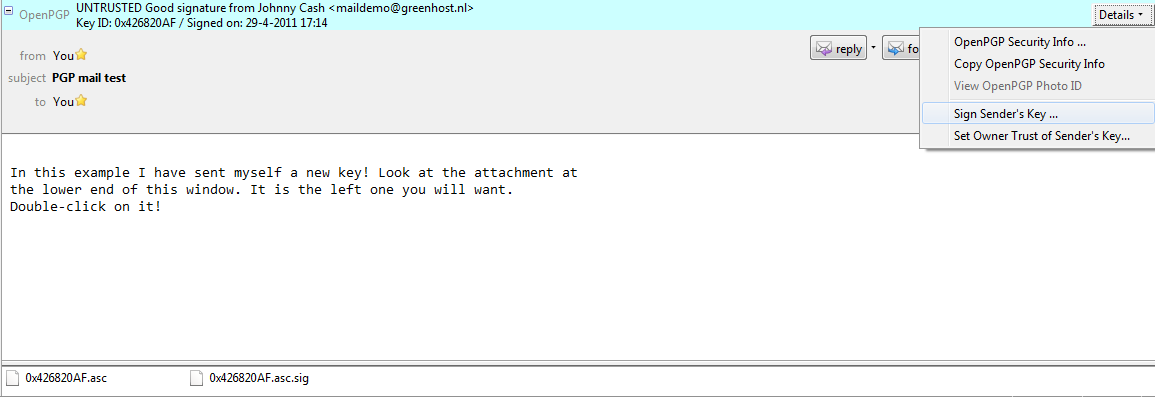
After we have selected 'Sign Sender's Key ...' we will get another selection window (see below). We are requested to state how carefully we have checked this key. The explanation of levels of trust and trust networks in PGP falls outside the scope of this document. We will not use this information, therefore we will just select the option 'I will not answer'. Also select the option 'Local signature (cannot be exported)'. Click on the 'OK' button to finishing signing this key. This finishes accepting the public key.

Using public key servers
Another method of distributing public keys is by putting them on a public key server. This allows anyone to check whether your email address has PGP support, and then download your public key.
To put your own key on a keyserver, take the following steps.
1. Head to the key manager by using the Thunderbird menu and click on OpenPGP > Key Management
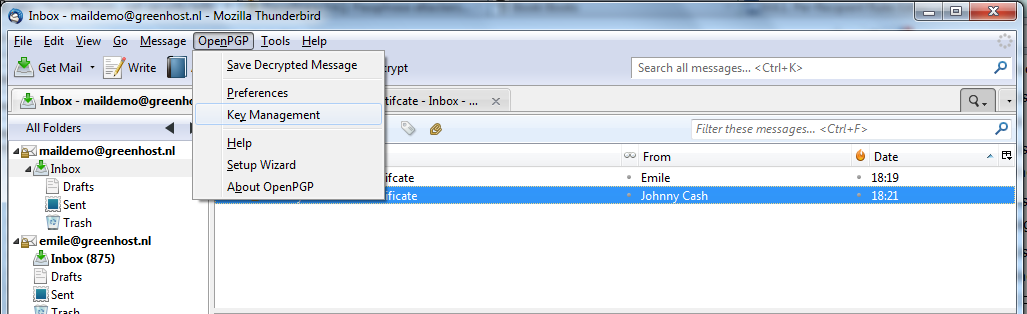
2. The key management window will be displayed and looks like this:
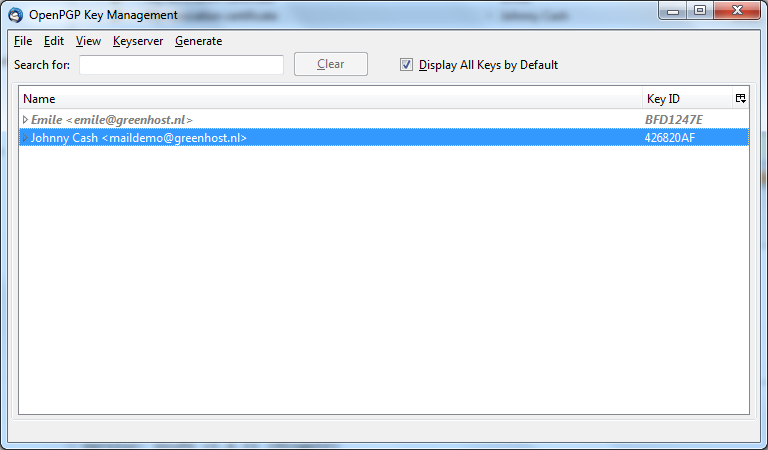
3. You need to have selected the 'Display All Keys by Default' option to get a list of all your keys. Lookup your own email address in the list and right click on the address. A selection window will appear with some options. Select the option 'Upload Public Keys to Keyserver'.
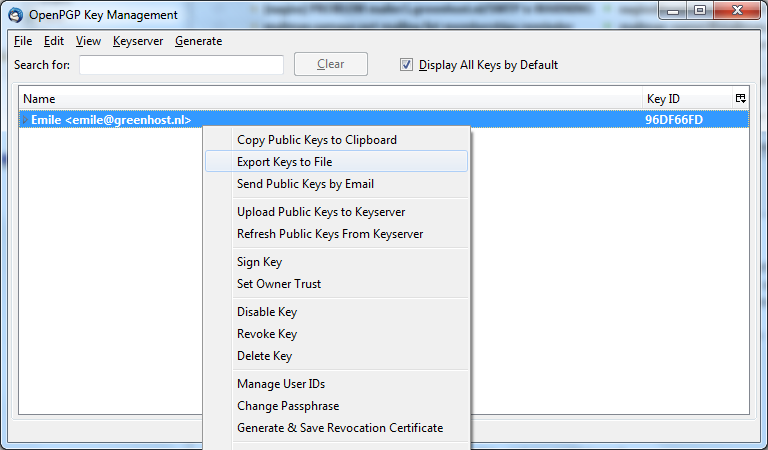
4. You will see a small dialog window like below. The default server to distribute your keys to is good. Press 'OK" and distribute your public key to the world.
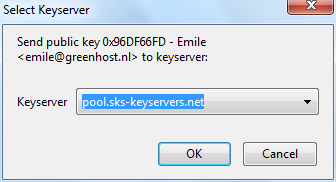
To look up whether some email address has a public key available on a server, take the following steps.
1. Head to the key manager by using the Thunderbird menu and click on OpenPGP > Key Management
2. In the key manager window menu bar, select Keyserver > Search for Keys
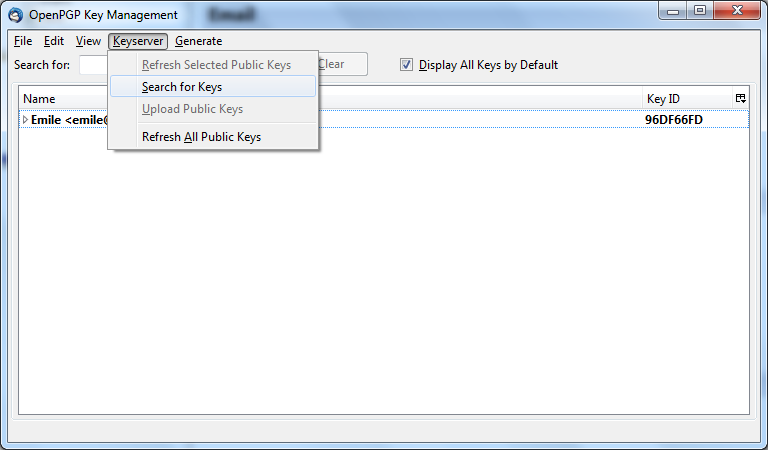
3. In this example we will look-up up the key for the creator of PGP software, Philip Zimmermann. After we have entered the email address, we click on 'OK'.
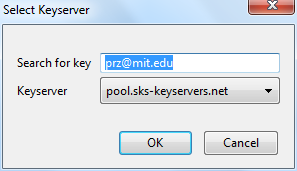
4, The next window displays the result of our search. We have found the public key. It is automatically selected. Just click on 'OK' to import the key.
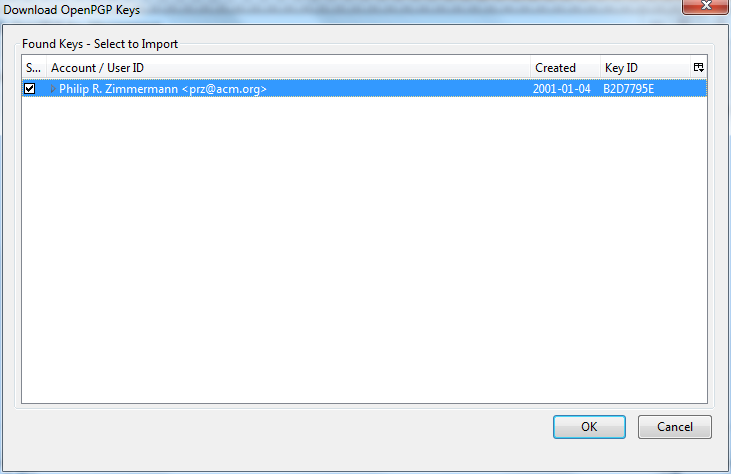
5. Importing the key will take some time. On completion you should see a pop-up window like below.
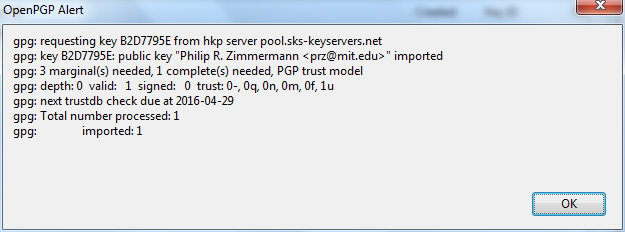
6. The final step is to locally sign this key, to indicate that we trust it. When you are back in the key manager, make sure you have selected the 'Display All Keys by Default' option. You should now see the newly imported key in the list. Right-click on the address and select the option 'Sign Key' from the list.

7. Select the options 'I will not answer' and 'Local signature (cannot be exported)', then click on 'OK'. You are now finished and can send Philip Zimmermann encrypted mail.
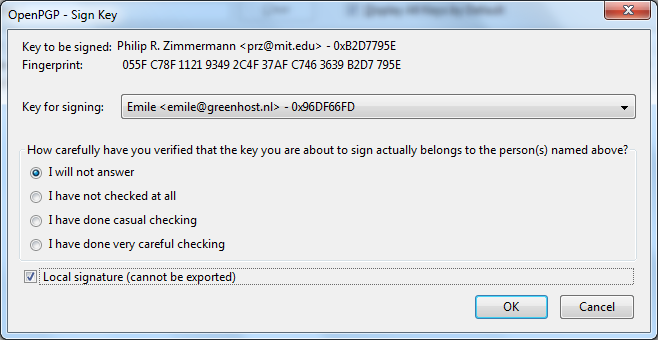
Signing emails to an individual
Digitally signing email messages is a way to prove to recipients that you are the actual sender of a mail message. Those recipients who have received your public key will be able to verify that your message is authentic.
1. Offer your friend your public key, using the method described earlier in this chapter.
2. In Thunderbird, click on the icon.
3. Before actually sending the mail, enable the OpenPGP > Sign Message option via the menu bar of the mail compose window, if it is not enable already. Once you have enabled this option, by clicking on it, a marked sign will appear. Clicking again should disable encryption again. See the example below.
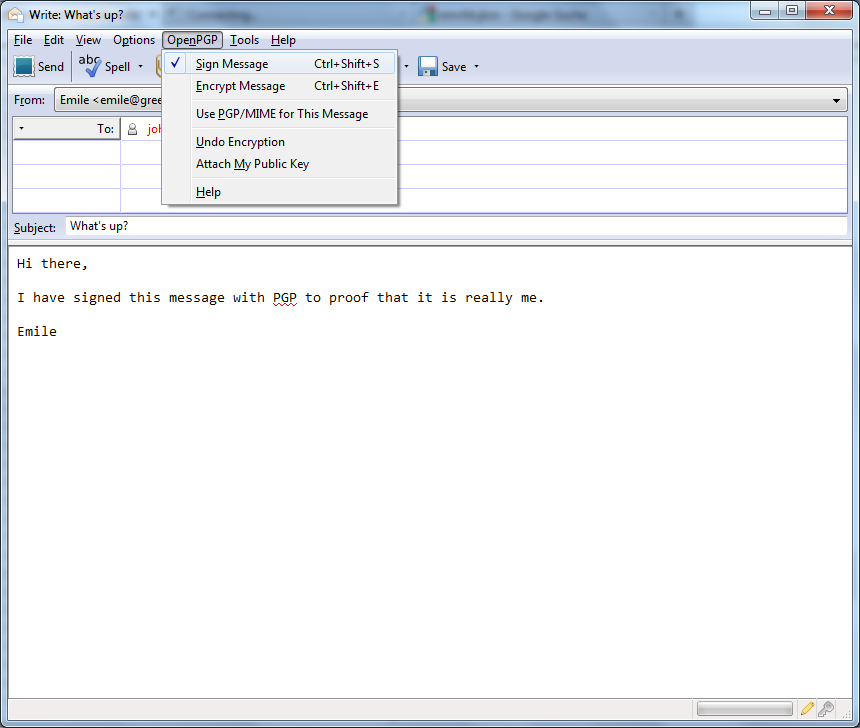 5.
5.
Click on the button and your signed mail will be sent.
Sending encrypted mails to an individual
1. You should have received the public key from the friend or colleague you want to email and you should have accepted their public key, using the method describe earlier in this chapter.
2. In Thunderbird, click on the icon.
3. Compose a mail to the friend or colleague, from who you have previously received their public key. Remember the subject line of the message will not be encrypted, only the message body itself, and any attachments.
4. Before actually sending the mail, enable the OpenPGP > Encrypt Message option via the menu bar of the mail compose window, if it is not enabled already. Once you have enabled this option, by clicking on it, a marked sign will appear. Clicking again should disable encryption again. See the example below.
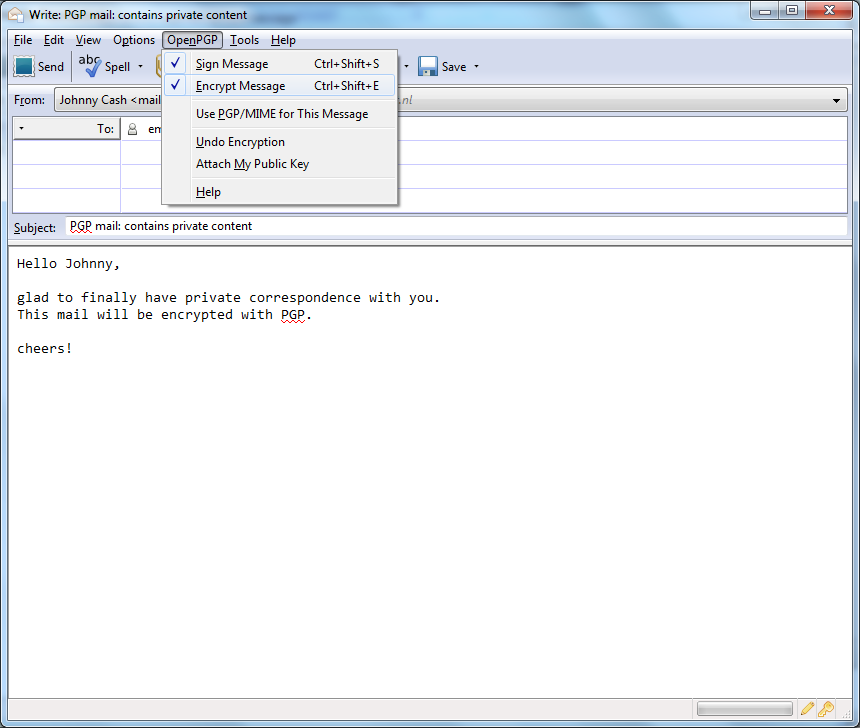 5.
5.
Click on the button and your encrypted mail will be sent.
Automating encryption to certain recipients
You will often want to make sure all your messages to a certain colleague or friend are signed and encrypted. This is good practice, because you may forget to enable the encryption manually. You can do this by editing the per-recipient rules. To do this we access the OpenPGP per-recipient rule editor.
Select OpenPGP > Preferences from the Thunderbird menu bar.
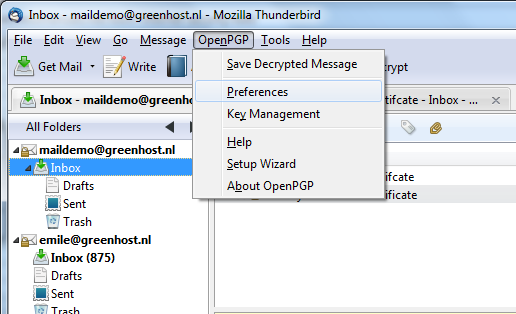
The preferences window will appear like below. We need to click on 'Display Expert Settings'.
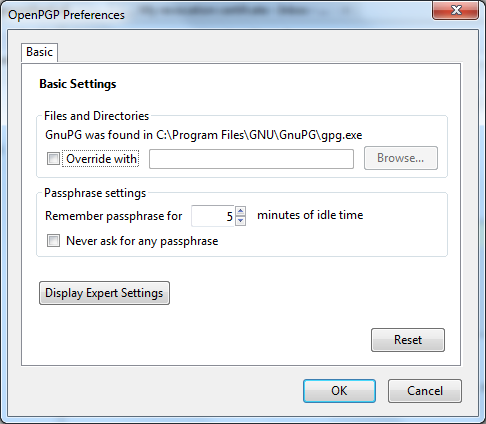
New menu tabs will appear in the window. Go to the tab 'Key Selection' and then click on the button labeled 'Edit Rules ...'
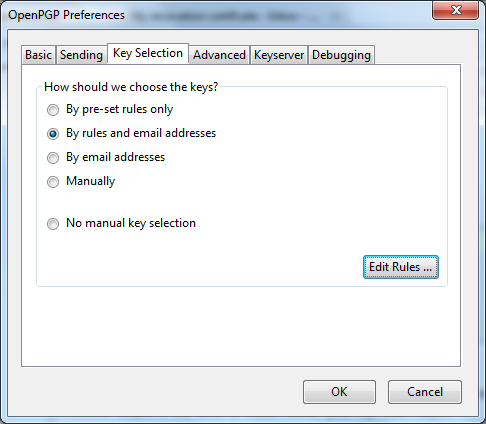
We are now shown the per-recipient rules editor (see below). This editor can be used to specify the way how messages to certain recipients are sent. We will now add a rule saying we want to encrypt and sign all mail messages to maildemo@greenhost.nl
First click on the 'Add' button.
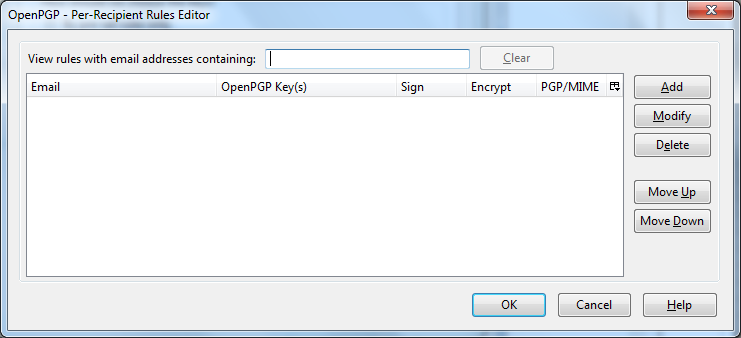
Now the window to add a new rule will be shown.
The first thing we should enter is the email address of the recipient. In the example below we have entered maildemo@greenhost.nl
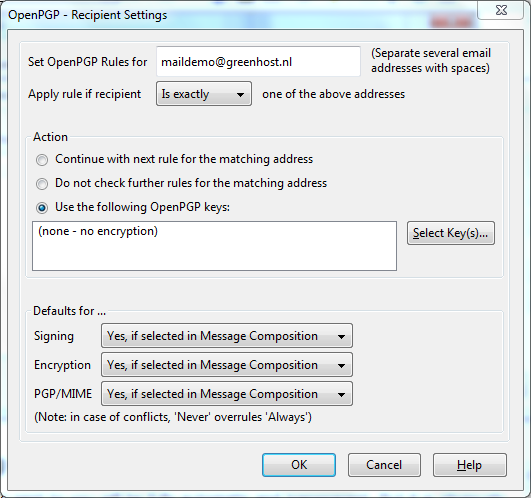
Now we will set the encryption defaults by using the drop-downs below. For Signing select 'Always'. For Encryption also select 'Always'.
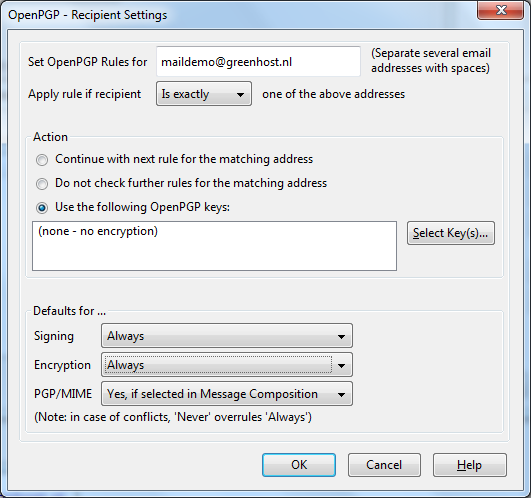
Finally we have to select our secret key, with which to encrypt our messages. Do not forget this important step. Click on the button labeled 'Select Key(s)...'. The key selection window shows up. In this example below, we only have one secret key. We select this key by clicking on the small box next to the address. Then we click 'OK' and all relevant windows and we are finished.
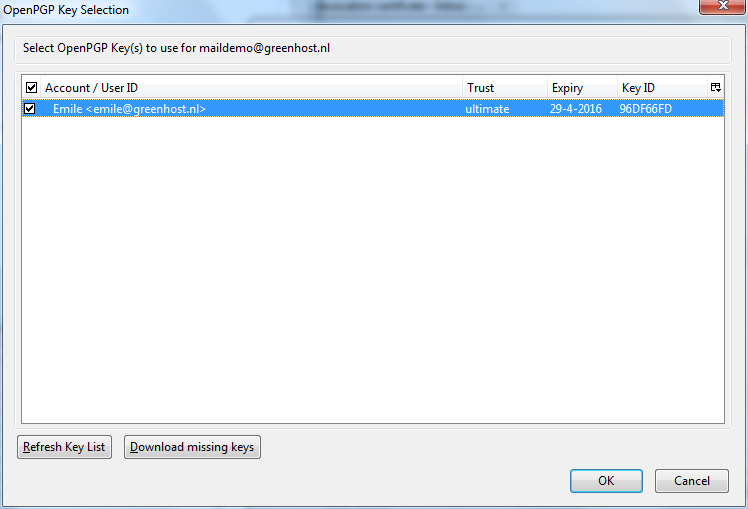
Verifying incoming emails
Decrypting email messages sent to you will be fully automatic and transparent. But it is obviously important to see whether or not a message to you has in fact been encrypted or signed. This information is available by looking at the special bar above the message body.
A valid signature will be recognized by a green bar above the mail message like the example image below.

The last example message was signed but not encrypted. If the message had been encrypted, it would show like this:

When a message which has been encrypted, but not signed, it could have been a forgery by someone. The status bar will become gray like in the image below and tells you that while the message was sent securely (encrypted), the sender could have been someone else than the person behind the email address you will see in the 'From' header. The signature is neccessaty to verify the real sender of the message. Ofcourse it is perfectly possible that you have published your public key on the Internet and you allow people to send you emails anonymously. But is it also possible that someone is trying to impersonate one of your friends.

Similarly if you receive a signed email from somebody you know, and you have this persons public key, but still the status bar becomes yellow and displays a warning message, it is likely that someone is attempting to send you forged emails!

Sometimes secret keys get stolen or lost. The owner of the key will inform his friends and send them a so-called revocation certificate (more explanation of this in the next paragraph). Revocation means that we no longer trust the old key. The thief may afterwards still try his luck and send you a falsely signed mail message. The status bar will now look like this:

Strangely enough Thunderbird in this situation will still display a green status bar! It is important to look at the contents of the status bar in order to understand the encryption aspects of a message. PGP allows for strong security and privacy, but only if you are familiar with its use and concepts. Pay attention to warnings in the status bar.
Revoking your PGP key-pair
Your secret key has been stolen by somebody. Your harddisk crashed and you have lost all your data. If your key is lost, you can no longer decrypt messages. If your key has been stolen, somebody else can decrypt your communication. You need to make a new set of keys. The process of creating keys, using the OpenPGP wizard in Thunderbird, has been described in this manual. But first you want to tell the world that your old public key is now worthless, or even dangerous to use.
What to do when you have lost your secret key, or forgot your passphrase
During the creation of your key-pair, the OpenPGP wizard offered you the possibility to create a so-called revocation certificate. This is a special file you send to others in the advent you have to disable your key. If you have a copy of this file, sending the revocation key is simply sending the file as an attachment to all your friends. You can no longer send signed mails (obviously, because you have lost your secret key). That doesn't matter. Send it as a normal mail. The revocation certificate file could only have been created by the owner of the secret key and proofs he or she wants to revoke it. That's why it should normally be kept hidden from others.
If you do not have the revocation certificate, there exists no other option than for you to contact your friends personally and convince them your key is lost and that they should no longer trust it.
What to do when your secret key has been stolen, or compromised
If you have reason to believe your secret key has been compromised, or worse your secret key and passphrase, it is very important to contact others that they should stop sending you encrypted messages. With your secret key, other persons will be able to break the encryption of your e-mail messages if they also have your passphrase. This is also true for those messages you have send in the past. Cracking the passphrase is not trivial, but it may be possible if the party has lots of resources, like a state or a big organization for example, or if your passphrase is too weak. In any case you should assume the worst and assume your passphrase may have been compromised. Send a revocation certificate file to all your friends or contact them personally and inform them of the situation.
Even after you have revoked your old key pair, the stolen key may still be used to decrypt your previous correspondence. You should consider other ways to protect that old correspondence, for instance by re-encrypting it with a new key. The latter operation will not be discussed in this manual. The chapter on 'Securing personal data' may be of some help. If you are uncertain you should seek assistance from experts or lookup more information on the web.
Receiving a revocation certificate
If one of your friends sends you a revocation certificate, he asks you to distrust his public key from now on. You should always accept such a request and 'import' the certificate to disable his key. The process of accepting a revocation certificate is exactly the same as accepting a public key, as has already been described in the chapter. Thunderbird will ask you if you want to import the 'OpenPGP key file'. Once you have done so, a confirmation pop-up should be displayed like below.
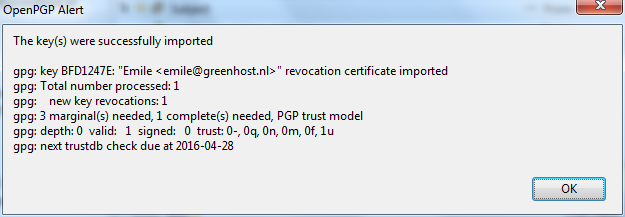
Preparing for the worst: backup your keys
Your keys are usually stored on your harddisk as normal files. They may get lost if your computer gets damaged. It is strongly advised to keep a backup of your keys in a safe place, like a vault. Making a a backup of your secret key has another security advantage as well. Whenever you fear your laptop or computer is in immediate danger of being confiscated, you can safely delete your key-pair. Your email will be rendered unreadable immediately. At a later stage, you can retrieve your keys from the vault and re-import them in Thunderbird.
To make a backup of your key-pair, first head to the key manager by using the Thunderbird menu and click on
OpenPGP > Key Management.
You need to have selected the 'Display All Keys by Default' option to get a list of all your keys. Lookup your own email address in the list and right click on the address. A selection window will appear with some options. Select the option 'Export Keys to File'.
Now we will save the key-pair to a file. Thunderbird asks us if we want to include the secret key as well. We do want to include the secret key, therefore we select 'Export Secret Keys'.

Finally Thunderbird asks us for the location of the key file. You can store the file anywhere you like, network disk, USB-stick. Just remember to hide it away from other people.
Further reading
More documentation on using PGP with Thunderbird can be found on the website of the Enigmail plugin. The Enigmail handbook is the guide you will want to use.
http://enigmail.mozdev.org/documentation/handbook.php.html
Webmail and PGP
The current browsers on the market unfortunately do not come bundled with PGP support. When you are using PGP to send e-mail, your encrypted e-mail messages cannot automatically be decyphered by your browser. You will see garbled text instead of messages. Nevertheless there exists a Firefox plugin called FireGPG which does add PGP support to the browser.
In this chapter we will describe how to use FireGPG to be able to combine the use of PGP with webmail. We will use a gmail account as an example. FireGPG has extra uses as well. In fact, using FireGPG you can encrypt just about any plain text communication one the web (like forum post, blog messages etc.) with PGP.
Caveats with using webmail
In general it is best to use a mail program like Thunderbird in stead of using Webmail. Accessing your webmail from an untrusted environment like an Internet café is discouraged, because you cannot guarantee your password or traffic will not be intercepted. Using PGP in that situation may even make matters worse. Your secret key and passphrase, which you carry around on an USB-stick, may be read by a malicious program on the computer. In short, only use FireGPG to access your webmail in an environment you trust.
Installing FireGPG
NOTE: The latest official version of FireGPG supports only Firefox 3.6. During the creation of this manual we also worked on making an updated version of the plugin for Firefox 4.0. It should hopefully become available on the website of the developer soon. If you are keen on using FireGPG now, you will have to stick to Firefox 3.6
Please also note that using gmail with FireGPG is problematic at best. There used to be special support for gmail in FireGPG, but it is no longer up-to-date.
These are the steps necessary to install FireGPG.
1. Go to the website http://getfiregpg.org
2. On the upper side of the website, click on Install > Install FireGPG.
3. Download the extension by clicking on

4. Firefox will ask you whether you want to allow to install the extension. Click on Allow.
5. Firefox will ask you whether you want to begin installing the extension. Click on Install now.
5. The installation window should appear like below. Click on Next to begin.
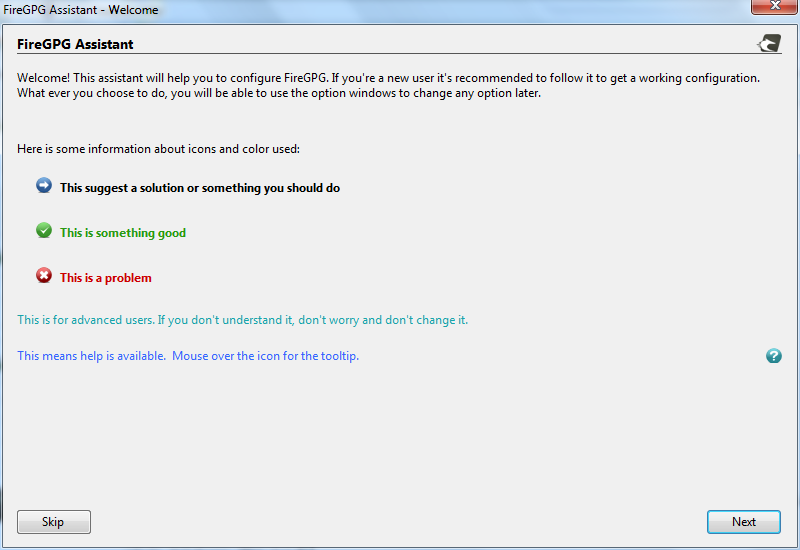
6. You should have GnuPG installed, as has been described in the chapters about Installing PGP. In the next window of the FireGPG installer, it tells us it has found GnuGPG. Click on Next.
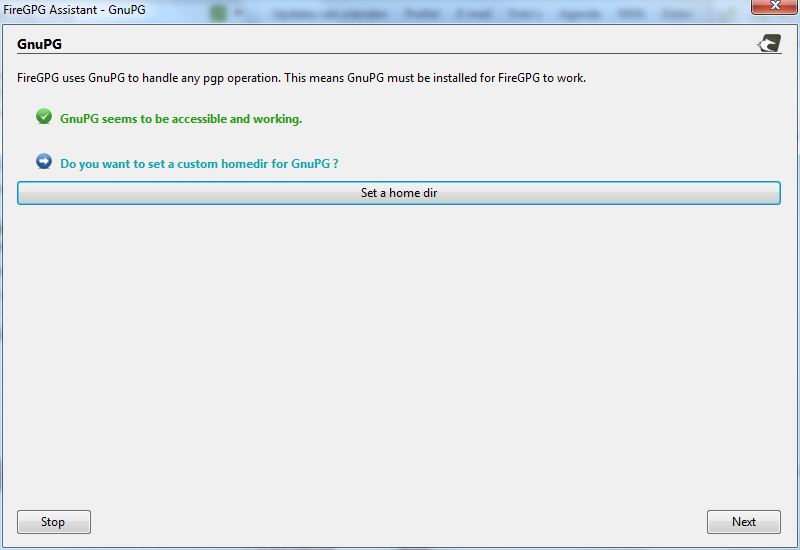
7. In the next window FireGPG asks you whether you want to enable special gmail functions. Alas, those functions are broken. Click on 'Enable gmail support' to disable the option. Click Next.
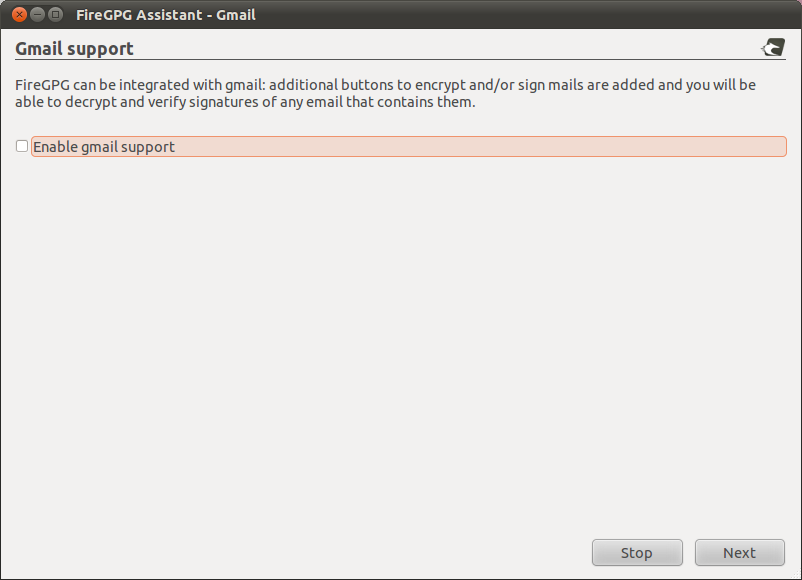
8. In the next window FireGPG asks you for your default secret key to decrypt messages with. If you have more than one e-mail address with PGP, you can select the preferred one. If you select 'Ask for private key' FireGPG will ask you for the key every time you sign a message. In the example below we have selected the single secret PGP key we will use. After you have made a decision, click Next.
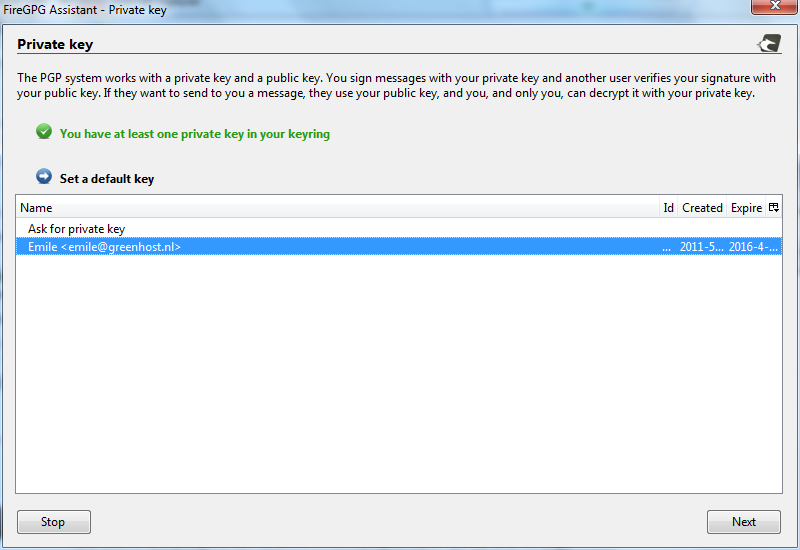
9. FireGPG asks you for installation components. The default components are fine. Click on Next.
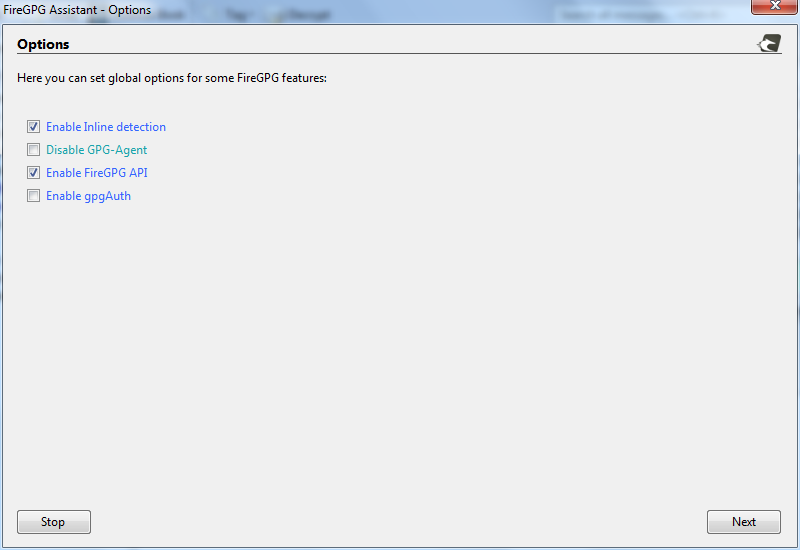
10. The installation should now be finished. Click on Close.
Working with FireGPG
FireGPG works by selecting blocks of plain text in text boxes and doing actions on the them, like decryption, encryption, signing, etc. You can actually also use FireGPG to do basic key management like importing a public key.
The keyring FireGPG works with is the same one that you use with Thunderbird, so your PGP actions will be compatible and synchronized.
Example of decrypting an e-mail or text
A PGP encrypted message directed to yourself should automatically be detected by FireGPG. You can recognize a decrypted message by the following icon.
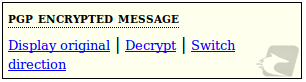
Click on 'Decrypt' to display the message.
Example of encrypting an e-mail or text
When you have the public key of the recipient on your keyring, select the piece of text you want to encrypt by mouse, then right-click on it. You will a sub-menu called FirePGP. Select FirePGP > Encrypt. See the example below.
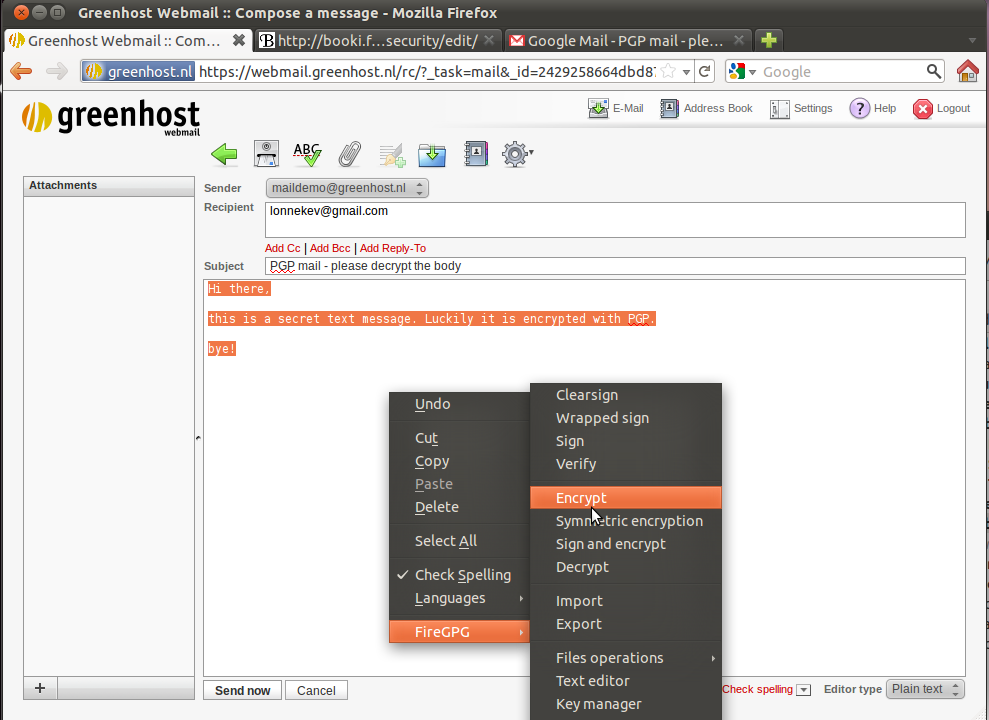
A window will appear. Select the recipient from the list of available public keys. Then press 'Ok.'
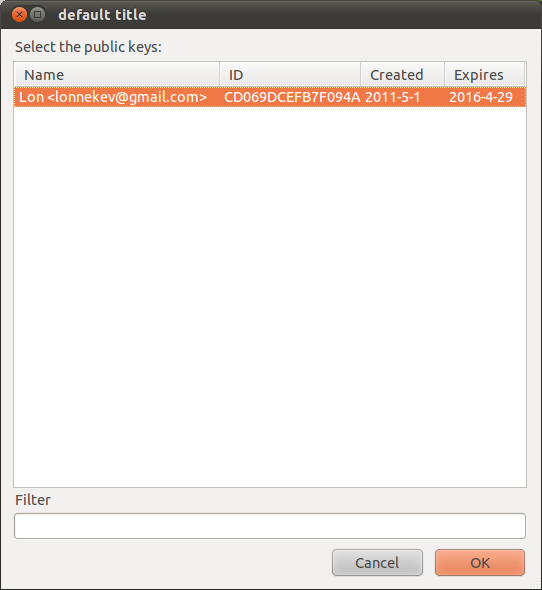
You will now see the encrypted message in the mail window. A PGP encrypted message is nothing but a bunch of characters delimited by special lines with dashes. Selecting the entire body of the PGP message, including the lines with BEGIN and END, and then going to the FireGPG menu, will allow you to manually decrypt, or do other actions.
Introduction to securing personal data
You may find it necessary or perhaps re-assuring to encrypt some data on your computer. Hard drives are not very well protected by the Operating Systems password mechanism - it is pretty easy to remove a hard disk from a laptop and access it from another computer, similar to how you would access any hard disk you use for back-up or storage. So if you want to avoid this possibility you should encrypt the data on your hard disk or, better still, encrypt your entire hard disk.
You can also take this protection another level and encrypt the data and store it on another device like a USB stick or small hard disk. This means the data can also be very easily physically hidden and its also very portable. If you want to be really really sneaky you can also create hidden encrypted volumes which means if someone accesses your hard disk they must know quite a bit about computers to know how to find it - of course if you have the software installed to do this kind of thing that might not look so friendly to someone prepared to go to these measures.
'Encrypting your data' like this means locking away your data in a very secure 'container'. If you do not know the passwords then that data will look like a mess of letters, numbers and other characters. If you know the password you can easily open and access the files.
We will look mainly at TrueCrypt - a free/open source solution to this issue. TrueCrypt is a very nice software that can be used on MaxOSX, Linux or Windows for establishing and maintaining an on-the-fly-encrypted container ('volume'). On-the-fly encryption means that your data is encrypted when you save it and then also de-crypted when you open (access) it without you needing to do anything. You can continue to use your computer like you normally would - you can drag and drop files to an encrypting data etc. When you turn off the computer the data is encrypted automatically - the same thing happens if your computer's power supply is interrupted or if the disk is removed from your computer. The only way to access the data is to start your computer in the normal fashion and entering the necessary passwords. It's actually pretty easy to use and in a sensible world all data would be stored in this fashion. The only issue you really need to consider is that the data is not encrypted automatically if you put your machine 'to sleep'. If you want this type of security you need to get used to waiting a while and do a real shutdown of your computer and a real start-up each time you you use it. This is not the way people are usually working with laptops but this little extra attention and pause for a few moments is a small price to pay for good data security.
Installing TrueCrypt
TrueCrypt can be installed on Windows, Linux, or MacOSX. The installation files are available here: http://www.truecrypt.org/downloads
The following gives complete detail on how to install TrueCrypt on your computer for each of these Operating Systems, starting with Ubuntu.
Installing on Ubuntu
TrueCrypt is not available in the standard Ubuntu repositories. This means you cannot use the Ubuntu Software Center or apt-get (a command line method for installing software on Ubuntu) to install it. Instead you must first visit the TrueCrypt downloads page (http://www.truecrypt.org/downloads).
You will see a drop-down menu under the heading Linux.
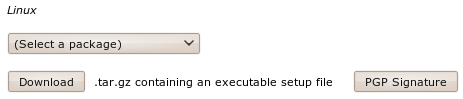
From the '(Select a package)' drop down menu you can choose from four options:
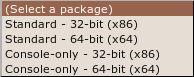
This is a little technical - the console version is the one you choose if you are either very technical and don't like Graphical User Interfaces or you wish to run this on a machine that you have only a terminal (command line or 'shell') access to (like a remote server for example).
Assuming you are running this in your laptop its best to choose the easy 'standard' option - this will give you a nice user interface to use. From these two options you need to choose the one most suitable for the architecture of your machine. Don't know what this means? Well, it basically comes down to the type of hardware (processor) running on your computer, the options are 32-bit or 64-bit. Unfortunately Ubuntu does not make it easy for you to find this information if you don't already know it. You need to open a 'terminal' from the Applications->Accessories menu and type the following, followed by the [enter] key
uname -a
The output will be something like 'Linux bigsy 2.6.32-30-generic #59-Ubuntu SMP Tue Mar 1 21:30:46 UTC 2011 x86_64 GNU/Linux'. In this instance you can see the architecture is 64-bit ('x86_64'). In this example I would choose the 'Standard - 64-bit (x64)' option. If you see 'i686' somewhere in the output of the uname command then you would choose the other standard option to download.
Once selected press the 'download' button and save the file to somewhere on your computer.
So the installation process is still not over. The file you downloaded is a compressed file (to make downloading it is faster) and you need to first de-compress the file before you install it. Fortunately Ubuntu makes this easy - simply browse to the file on your computer and right click on it and choose 'Extract Here'.

You will see a new file appear next to the compressed file:
Nearly done! Now right click on the new file and choose 'open' :
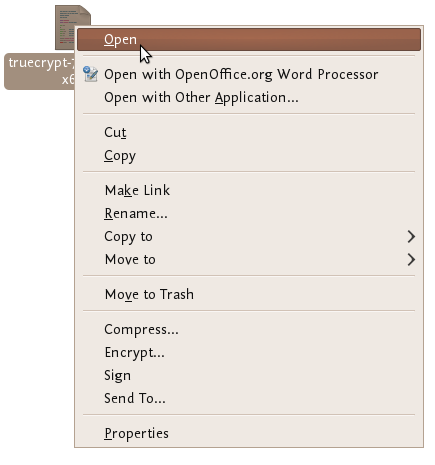
If all is well you will see a window open like this:
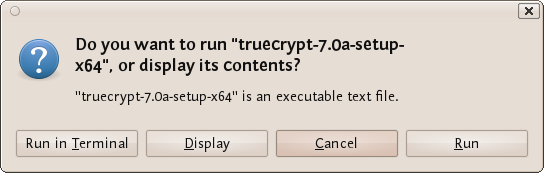
Choose 'run' and you see the following:

Now we are getting somewhere...press 'Install TrueCrypt'. You will be displayed a user agreement. At the bottom press 'I accept and agree to be bound by the license terms' (sounds serious). You will then be shown another info screen telling you you can uninstall TrueCrypt. Press 'OK' then you will be asked for your password to install software on your computer. Enter your password and then you will finally see a screen like this:
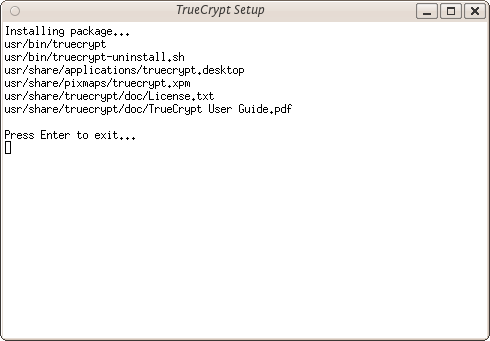
Believe it or now your are done...TrueCrypt is installed and you can access it from the Applications->accessories menu...close the setup window. Now proceed to the chapter on Using TrueCrypt.
Installing on OSX
1. To install TrueCrypt on OSX first visit the download page (http://www.truecrypt.org/downloads) and press the download button under the OSX section.

2. Download this to your computer find the .dmg file and open it to acces the installation package.
3. Open the installation package, and click away through the dialogues.
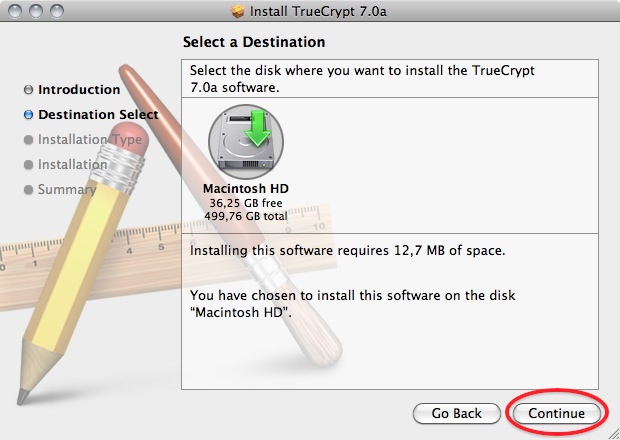
4. Choose the standard installation. (you can choose to do a customized installation and deselect FUSE, but why would you? You need it!)
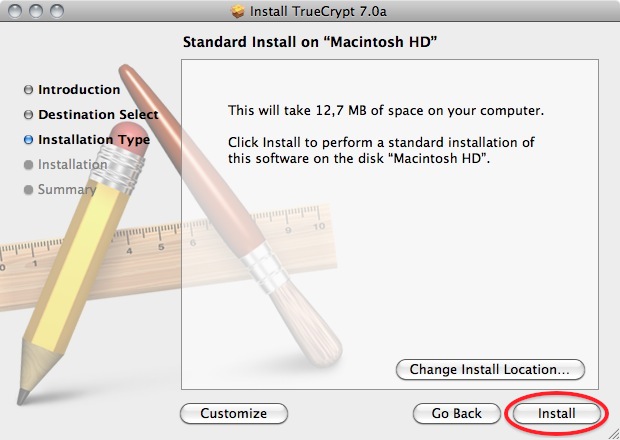
6. After the installation finishes you can find the program in your Applications folder
Installing on Windows
To install TrueCrypt on Windows first visit the download page (http://www.truecrypt.org/downloads) and press the download button under the Windows section.

Download this to your computer and then double click on the file. You will see a license agreement.
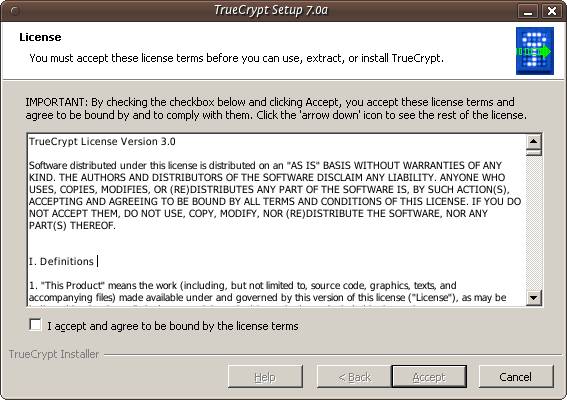
Click on 'I accept and agree to be bound by the license terms' and then click 'Accept'.
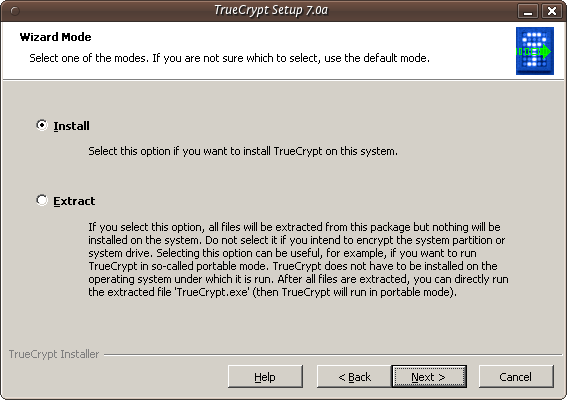
Leave the above screen with the defaults and press 'Next >' and you will be taken to the Setup Options window:
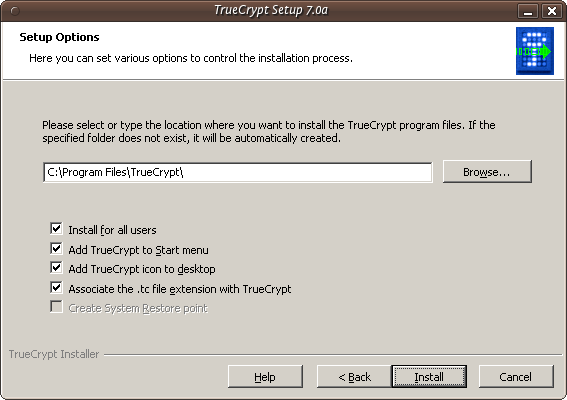
You can leave this with the defaults. If you want to set up TrueCrypt just for yourself then consider not selecting the 'Install for all users'. However if you are installing this on your own machine and no one else uses the computer then this is not necessary. You may also wish to consider installing TrueCrypt in a folder other than the default. In which case click 'Browse' and choose another location. When you are done click 'Install' and the process will proceed:

When the installation is complete you will get a verification popup that it was successful. Close this window and click 'Finish' and all is done. Now proceed to the chapter on Using TrueCrypt.
Using TrueCrypt
The following are step-by-step instructions on how to create, mount, and use a TrueCrypt volume.
Creating a TrueCrypt Container
Step 1:
Install TrueCrypt. Then launch TrueCrypt by
- double-clicking the file TrueCrypt.exe in Windows
- opening Applications->Accessories->TrueCrypt in Ubuntu
- on MacOSX open it by clicking Go > Applications. Find TrueCrypt in the Applications folder and double click on it.
Step 2:
When the main TrueCrypt window appears. Click Create Volume.
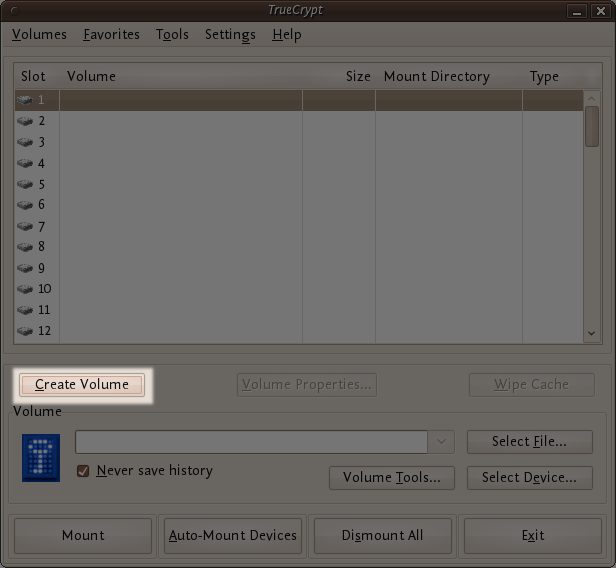
Step 3:
You should see the TrueCrypt Volume Creation Wizard window appear on screen.
 Where do you want to create the TrueCrypt volume? You need to choose now. This can be in a file, which is also called a container, in a partition or drive. The following steps will take you through the first option creating a TrueCrypt volume within a file.
You can just click Next, as the option is selected by default,
Step 4:
Next you need to choose whether to create a standard or hidden TrueCrypt volume. We will walk you through the former option and create a standard TrueCrypt volume.
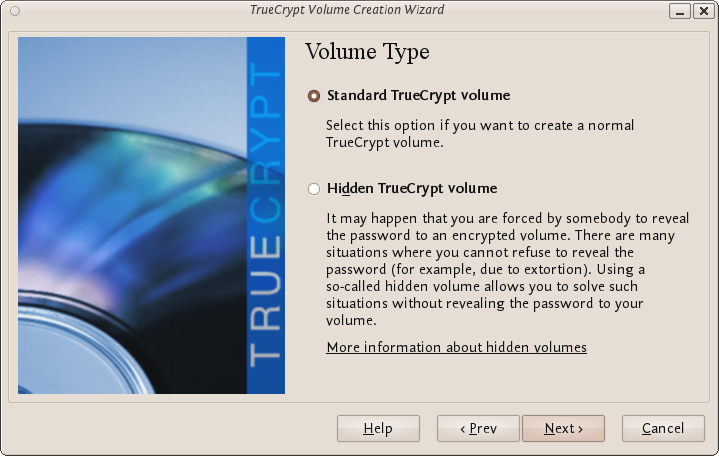
You can just click Next, as the option is selected by default.
Step 5:
Now you have to specify where to have the TrueCrypt volume (file container) created. Note that a TrueCrypt container behaves like any normal file. It can be moved or deleted as any normal file.
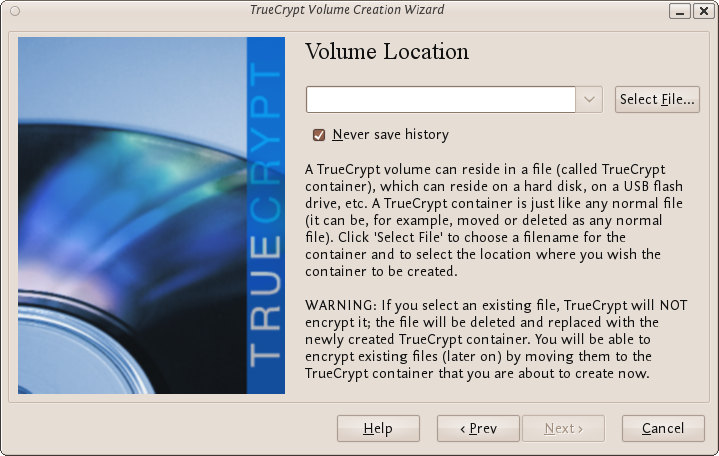
Click Select File.
The standard file selector will now appear on screen (the TrueCrypt Volume Creation Wizard remains open in the background). You need to browse to the folder that the file should be created in and then type into the 'name' field the name for the file you wish to create.
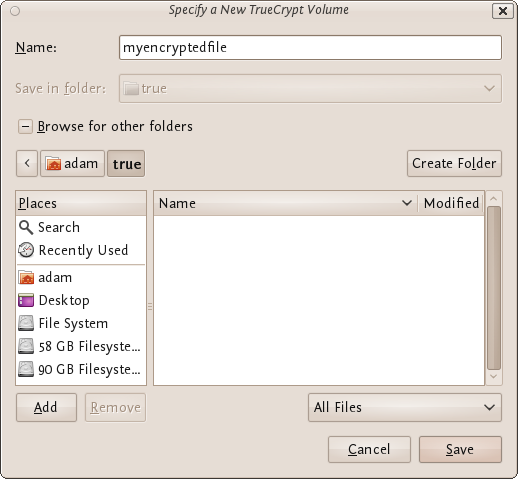
We will create our TrueCrypt volume in the folder 'adam/true' and the filename of the volume (container) will be 'myencryptedfile'. You may, of course, choose any other filename and location you like (for example, on a USB stick). Note that the file 'myencryptedfile' does not exist yet - TrueCrypt will create it. Press 'Save' when you are ready. The file selector window should close.
IMPORTANT: Note that TrueCrypt will not encrypt any existing files. If an existing file is selected in this step, it will be overwritten and replaced by the newly created volume (the contents of the existing file will be lost). You will be able to encrypt existing files later on by moving them to the TrueCrypt volume that we are creating now.
Step 6:
In the Volume Creation Wizard window (which was previously running in the background), click Next.
Step 7:
Here you can choose an encryption algorithm and a hash algorithm for the volume.

The TrueCrypt manual suggests that if you are not sure what to select here, you can use the default settings and click Next (for more information about each setting have a look at the TrueCrypt documentation website).
Step 8:
Now choose the size of your container. You should be fine with 1 megabyte but for this example we will enter '20' into the available field.
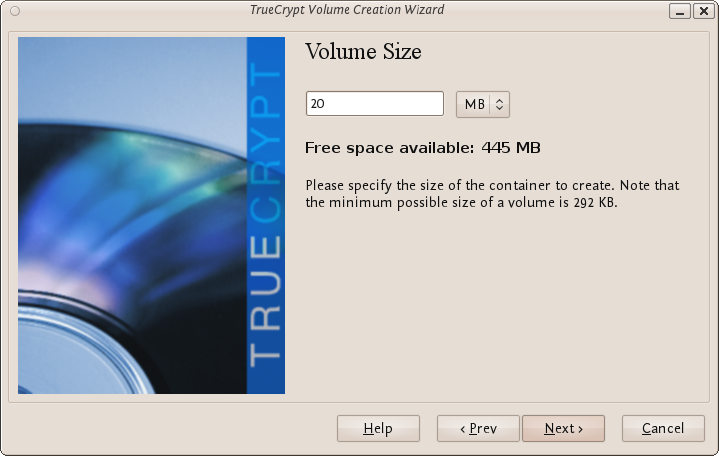
You may, of course, specify a different size. After you type the desired size in the input field, click Next.
Step 9:
This step is really important, choosing a password.
The information displayed in the Wizard window about what is considered a good password, should be read carefully.
Choose a strong password, type it in the first input field. Then re-type it in the input field below the first one.
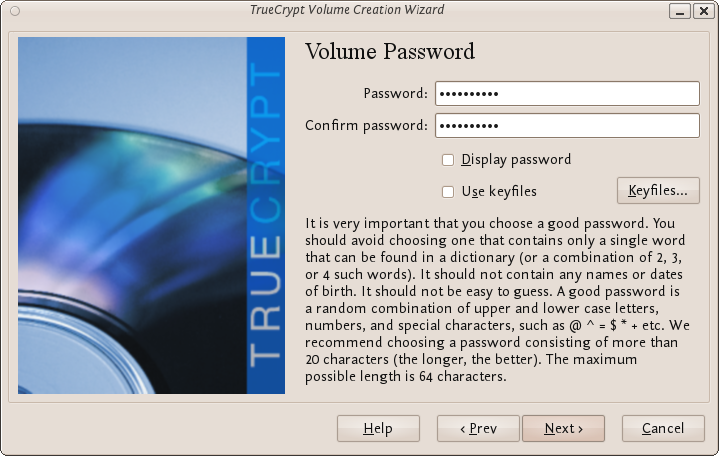
When you are done click Next.
Step 10:
Now you must choose the format of your partition (this step may not be available for you under windows or OSX). If using Ubuntu you can choose a Linux file type or FAT (Windows) for simplicity leave it at the default.

Then press Next.
Step 11:
Next TrueCrypt tries to generate random information to help encrypt your container. For 30 seconds move your mouse as randomly as possible within the Volume Creation Wizard window. Move the mouse as much as possible for up to a minute. This significantly increases security by increasing the cryptographic strength of the encryption keys. security). Move your mouse around until you are bored.

Then Click Format.
TrueCrypt will now create a file in the folder you selected with the name you chose. This file will be a TrueCrypt container, containing the encrypted TrueCrypt volume. This may take some time depending on the size of the volume. When it finishes this should appear:
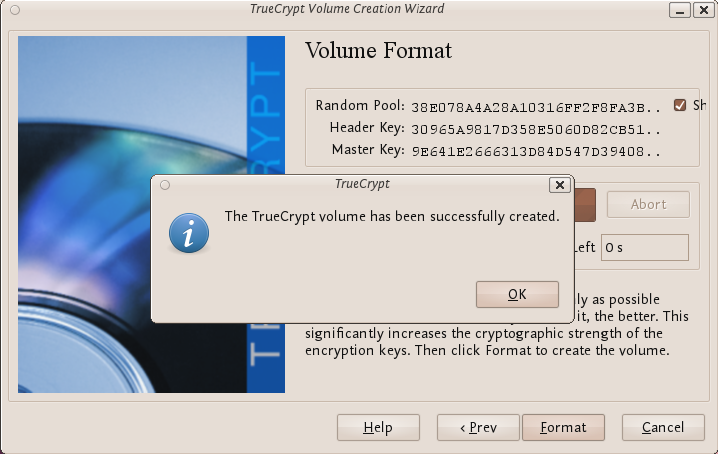
Click OK to close the dialog box.
Step 11:
Well done! You've just successfully created a TrueCrypt volume (file container).
In the TrueCrypt Volume Creation Wizard window, click Exit.
Mounting the Encrypted Volume
Step 1:
Open up TrueCrypt again.
Step 2:
Make sure one of the 'Slots' is chosen (it doesn't matter which - you can leave at the default first item in the list). Click Select File.
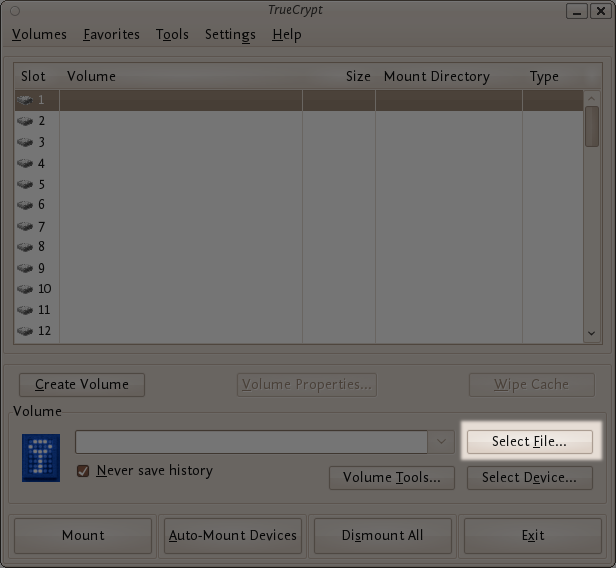
The standard file selector window should appear.
Step 3:
In the file selector, browse to the container file (which we created earlier) and select it.
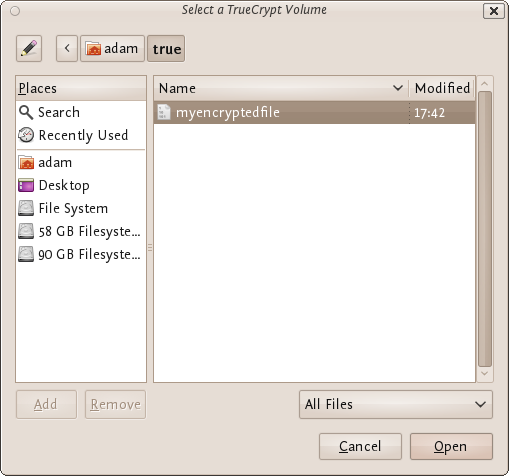
Click Open (in the file selector window).
The file selector window should disappear.
Step 4:
In the main TrueCrypt window, click Mount.
Password prompt dialog window should appear.
Step 5:
Type the password in the password input field.

Step 6:
Click OK in the password prompt window.
TrueCrypt will now attempt to mount the volume. If the password is correct, the volume will be mounted.
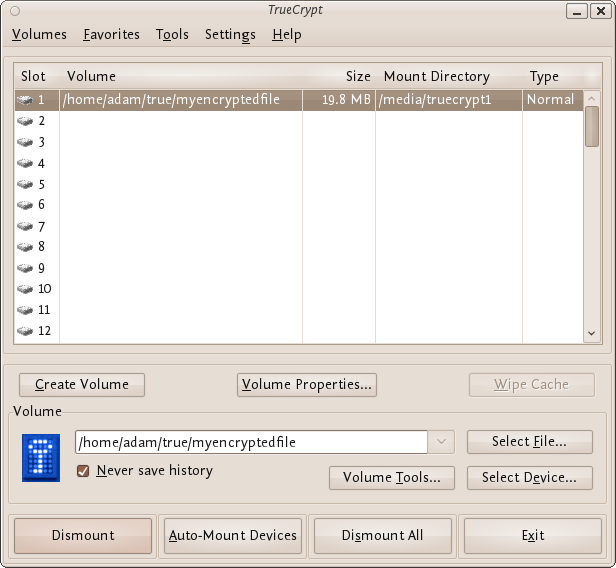
If the password is incorrect (for example, if you typed it incorrectly), TrueCrypt will notify you and you will need to repeat the previous step (type the password again and click OK).
Step 7:
We have just successfully mounted the container as a virtual disk 1. The container will appear on your Desktop or you will see it in your file browser.

What does this mean?
The disk that you have just created is completely encrypted and behaves like a real disk. Saving (moving, copying, etc) files to this disk will allow you to encrypt files on the fly.
You'll be able to open a file which is stored on a TrueCrypt volume, which will automatically be decrypted to RAM while it is being read, and you won't need to enter your password each time. You'll only need to enter this when your mounting the volume.
Remember to dismount!
To do this right click on the drive and select unmount. This will automatically happen when you turn off your computer but will not happen if you just put the computer on sleep.
Setting up a hidden volume
A TrueCrypt hidden volume exists within the free space of a typical TrueCrypt volume. Given then the 'outer volume' is accessed it is (almost) impossible to determine if there is a hidden volume within it. This is because TrueCrypt always fills the empty space of an encrypted volume with random data. So a hidden volume looks the same as an empty TrueCrypt volume.
To create and use a hidden volume you need two passwords - one each for the outer and inner (hidden) volumes. When you mount (open) the volume you can use either password and that will determine which of the two is opened. If you want to open just the hidden volume you use one password, and if you want to access just the non-hidden encrypted volume you use the other password.
To create a hidden volume open TrueCrypt and press the 'Create Volume' button:
The options for half of this process are almost the same as for setting up a standard TrueCrypt volume and then the process continues for setting up the hidden volume but lets go through the entire process step by step anyway. In the screen shown below you just want to stay with the default setting 'Create an encrypted file container':
Press 'Next >' and continue to the next screen.
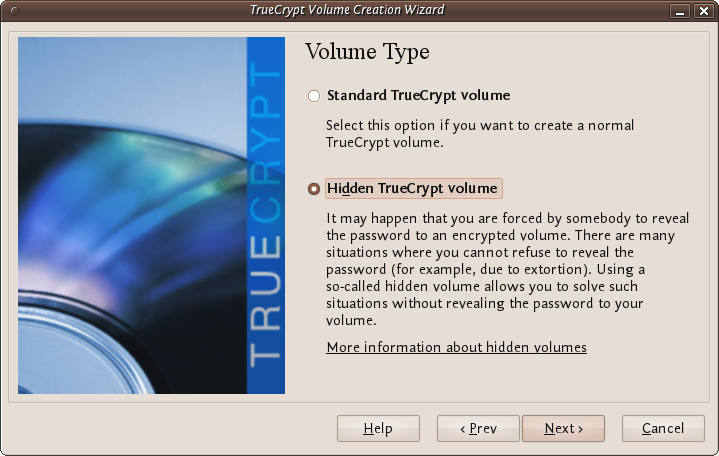
In the above screen you want to be sure that you choose the second option 'Hidden TrueCrypt Volume'. Select this and click on 'Next >' you will then be asked to choose the location and name of the TrueCrypt outer volume.
Click 'Select File...' and browse to a location for a new TrueCrypt volume. We will use the name 'myencryptedfile' in this example. Its the same name as we used in the last example so be aware that if you have just followed those instructions you must now create a new volume with a new name.
Browse to the directory where you want to put the outer volume and enter the name of the volume in the field named 'Name' as in the example above. When you are satisfied all is well click on 'Save'. The file browser will close and you return to the Wizard. Click 'Next >'. Here you are presented with some very technical choices. Don't worry about them. Leave them at the defaults and click 'Next >'. The next screen asks you to determine the size of the outer volume. Note that when you do this the maximum inner 'hidden' volume size is determined by TrueCrypt. This maximum size will of course be smaller that the size you are setting on this screen. If you are not sure what the ratio of outer volume size to inner (hidden) volume size is then go through the process now as a 'dummy' run - you can always trash the encrypted volume and start again (no harm done).
So choose the size of the outer volume, I will choose 20MB as shown below:
You cannot set the outer volume size to be larger than the amount of free space you have available on your disk. TrueCrypt tells you the maximum possible size in bold letters so create a volume size saller than that. Then click 'Next >' and you will be taken to a screen asking you to set a password for the outer (not the hidden, this comes later) volume.
Enter a password that is strong (see the chapter on creating good passwords) and press 'Next >'. Next TrueCrypt wants you to help it create the random data it will fill the volume up with. So wave your mouse around, browse the web, and do whatever you want for as long as you can. When you feel TrueCrypt should be happy then press 'Format'. You will see a progress bar zip by and then you will be presented with the next screen:
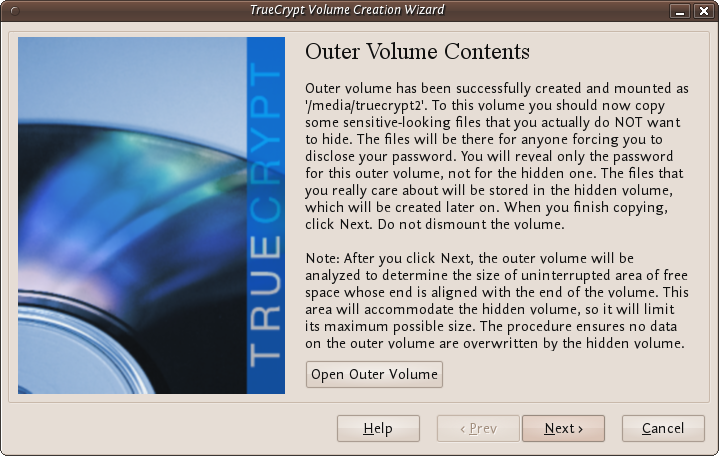
You can open the outer volume if you like but for this chapter we will skip that and go ahead to create the hidden volume. Press 'Next >' and TrueCrypt will work out how the maximum possible size of the hidden volume.

When you see the above screen just press 'Next >'. Now you must choose the encryption type for the hidden volume. Leave it at the defaults and press 'Next >'.
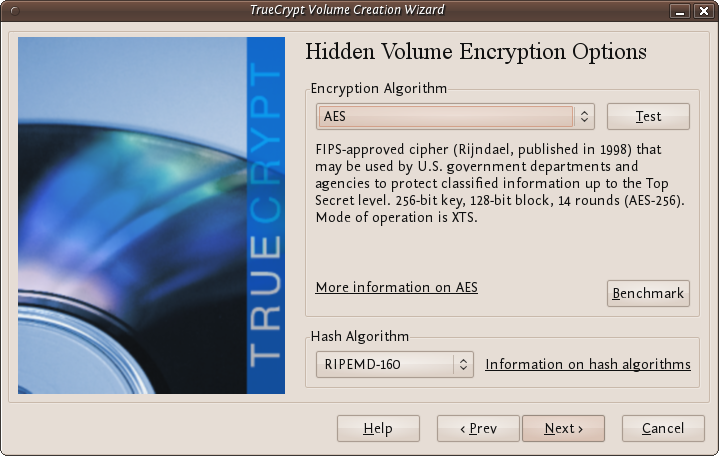
Now you will be asked to choose the size of the hidden volume.

I have set (as you see above) the maximum size as 10MB. When you have set your maximum size press 'Next >' and you will be promoted to create a password for the hidden volume.
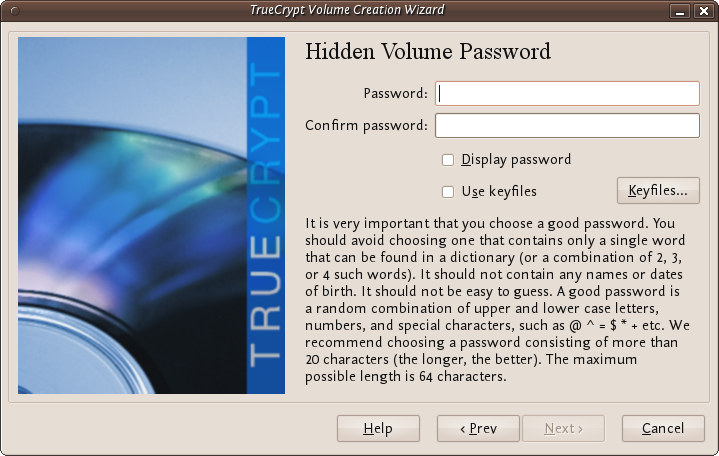
When creating the password for the hidden volume make sure you make it substantially different fro the password for the outer volume. If someone really does access your drive and finds out the password for the outer volume they might try variations on this password to see if there is also a hidden volume. So make sure the two passwords are not alike.
Enter your password in the two fields and press 'Next >'.
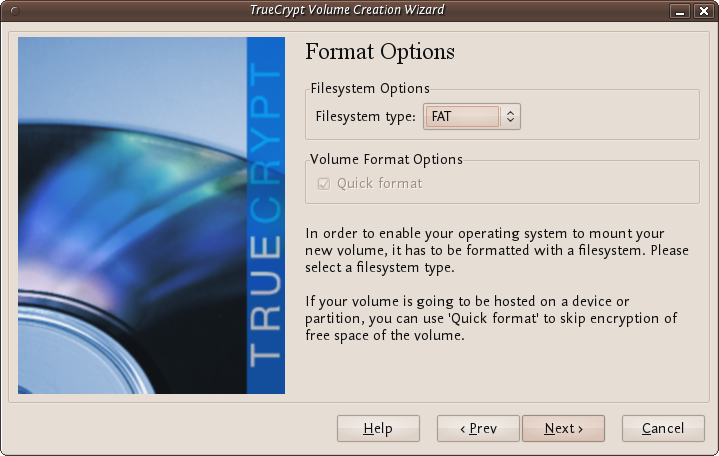
Leave this window at the defaults and press 'Next >' and you will be presented with the same screen you have seen before to generate random data for TrueCrypt. When you are happy click 'Format' and you should see the following :
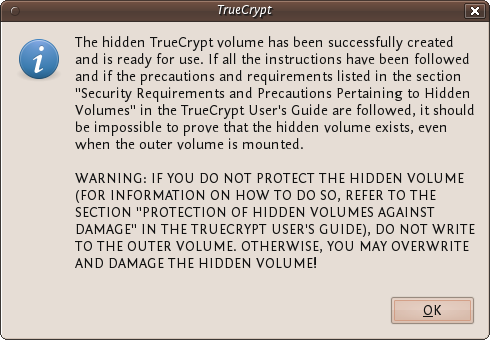
The TrueCrypt manual it is referring to is not this manual. They mean this manual : http://www.truecrypt.org/docs/
Click 'OK' and keep and exit TrueCrypt. You can now mount the volume as noted in the previous chapter.
Securely destroying data
Just hit the delete button and you are done! No it's not that easy. To understand how to securely delete data, we have to understand how data is stored. In an analogy to the real world, an explanation of how data is stored follows:
Assume you have a small notebook with 10 pages and you want to write some data in this notebook. You just start writing on the first page up to the end of the notebook. Maybe you decide the information on page 5 must be destroyed. Probably you will just take out the page and burn it.
Unfortunately data on a harddisk doesn't work this way. A harddisk contains not ten but thousands or maybe even millions of pages. Also it's impossible to take out a "page" of a harddisk and destroy it. To explain how a harddisk work, we will continue with our 10-page notebook example. But now we will work a little bit different with it. We will work in a way similar to how a harddisk works.
This time we use the first page of our notebook as an index. Assume we write a piece about "WikiLeaks", then on the first page we write a line "piece about WikiLeaks: see page 2". The actual piece is then written on page 2.
For the next document, a piece about "Goldman Sachs" we add a line on page 1, "Goldman Sachs: see page 3". We can continue this way till our notebook is full. Let's assume the first page will look like this:
- WikiLeaks -> see page 2
- Goldman Sachs -> see page 3
- Monstanto scandal -> see page 4
- Holiday pictures -> see page 5
- KGB Investigation -> see page 6
- Al Jazeeraa contacts -> see page 7
- Iran nuclear program -> see page 8
- Sudan investigation -> see page 9
- Infiltration in EU-politics -> see page 10
Now, let's decide you want to wipe the "Goldman Sachs" piece, what a harddisk will do, it will only remove the entry on the first page, but not the actual data, your index will be:
- WikiLeaks -> see page 2
- Monstanto scandal -> see page 4
- Holiday pictures -> see page 5
- KGB Investigation -> see page 6
- Al Jazeeraa contacts -> see page 7
- Iran nuclear program -> see page 8
- Sudan investigation -> see page 9
- Infiltration in EU-politics -> see page 10
What we did, we removed only the reference to the article, but if we open page 3, we will still able to read the Goldman Sachs piece. This is exactly the way what a harddisk does when your "delete" a file. With specialized software it still able to "recover" page 3.
To securely delete data, we should do the following:
- Open the "Goldman Sachs" page (page 3)
- Use an eraser to remove the article there, if done return to page 1
- Delete the reference in the index on page 1
Well you will be surprised by the similarity between this example and the real world. You know when you removed the article on page 3 with an eraser, it is still possible to read the article slightly. The pencil leaves a track on the paper because of the pressure of the pencil on the paper and also you will be unable to erase all of the graphite. Small traces are left behind on the paper. If you really need this article, you can reconstruct (parts) of it, even if it's erased.
With a harddisk this is very similar. Even if you erased every piece of data, it is sometimes possible with (very) specialized hardware to recover pieces of the data. If the data is very confidential and must be erased with the greatest care, you can use software to "overwrite" all pieces of data with random data. When this is done multiple times, this will make the data untraceable.
Securely delete data under Windows
For Windows there is a good open source tool called "File Shredder". This tool can be downloaded from http://www.fileshredder.org
The installation is very straightforward, just download the application and install it by hitting the next button. After installation this application will automatically start. You can then start using it for shredding files. However the best part of the program is that you can use it from within windows itself by right clicking on a file.
- Click right on the file you want to shred, and choose File Shredder -> Secure delete files
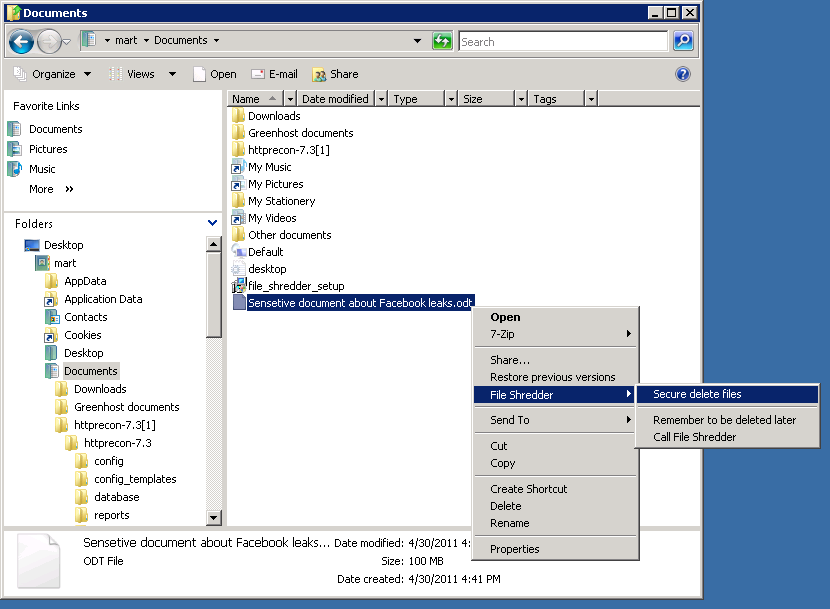
- A pop-up asks if you really want to shred this file
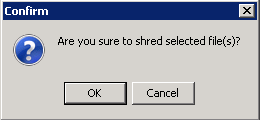
- After confirming, there your file goes. Depending on the size of the file this can take a while
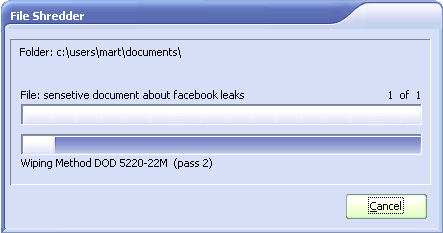
Securely delete data under MacOSX
There are basically to build-in steps to make to securely delete your data on Mac OSX.
1. Erase the free-space on your hard-drive containing all the data of items which are deleted in an unsecure way.
2. Make sure that every file from then on is always securely deleted.
We start with the first one:
Erasing Free Space
1. Open Disk-Utility which resides in the Utilities folder inside the Applications folder.

2. Select your hard drive and click on 'Erase Free Space'.
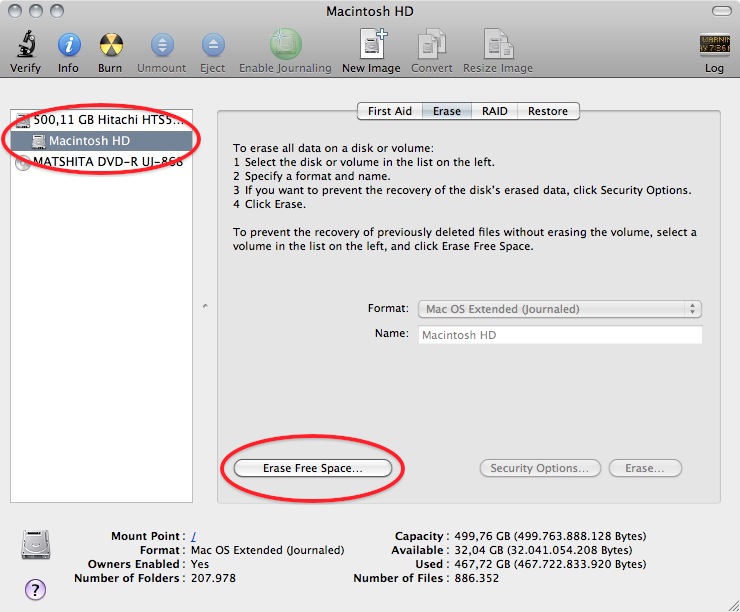
3. Three options will appear, from top to bottom more secure, but also they take much more time to complete. Read the descriptions on each one of them to get an idea from what will happen if you use them and then choose which one might suite your needs the best and click 'Erase free Space'.
If time is no issue, then use the most secure method and enjoy your free time to get a good coffee while you Mac crunches away on this task. If the crooks are already knocking on your front-door you might want to use the fastest way.
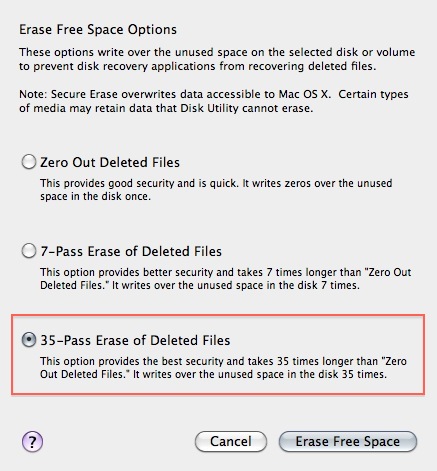
Securely Erasing Files
Now that your previously deleted data is once and for ever securely erased you should make sure that you don't create any new data that might be recovered at a later date.
1. To do this open the finder preferences under the Finder Menu.
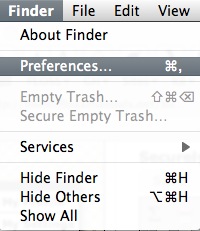
2. Go to the advanced tab and tick 'Empty trash securely'. This will make sure that every time you empty your trash all the items in it will be securely deleted and are really gone!
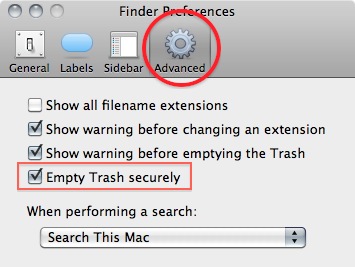
Note 1: Deleting your files securely will take longer then just deleting them. If you have to erase big portions of unimportant data (say your movie and mp3 collection) you may wanna untick this option before doing so.
Securely delete data under Ubuntu/Linux
Unfortunately currently there is no graphical user interface available for Ubuntu to delete files secure. There are two command-line programs available though.
Shred is installed in Ubuntu by default and can delete single files. Wipe is not installed by default but can easily be installed with using Ubuntu Software Center or if you understand the command line you can install it with apt-get install wipe. Wipe is a little more secure and has nicer options.
It is possible make access to these program's easy by adding it as an extra menu option
- We assume you are familiar with the Ubuntu Software Center. To add the securely wipe option, it's required to install these two programs wipe and nautilus-actions
If the two programs are installed follow the following steps. If they are not installed use the Ubuntu Software Center to install them or on the command line simply type apt-get install nautilus-actions wipe
- Open the "Nautilus Actions Configuration" from the System -> Preferences menu
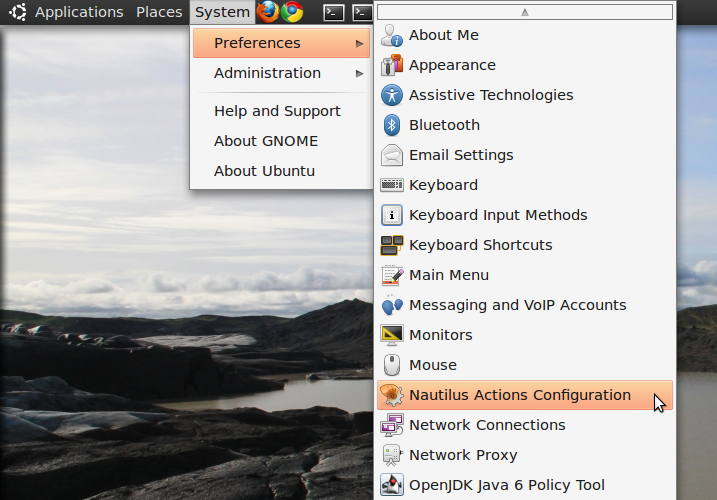
- We have to add a new action. To do this, start clicking on the "create new action button", the first option in the toolbar
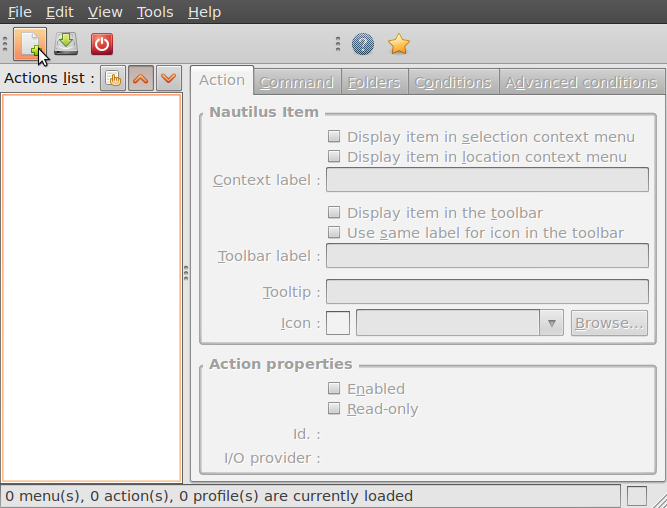
- Next is describing the new action. You can give the action every name you wish. Fill out this title in the "Context label" field. In this example we used "Delete file securely"
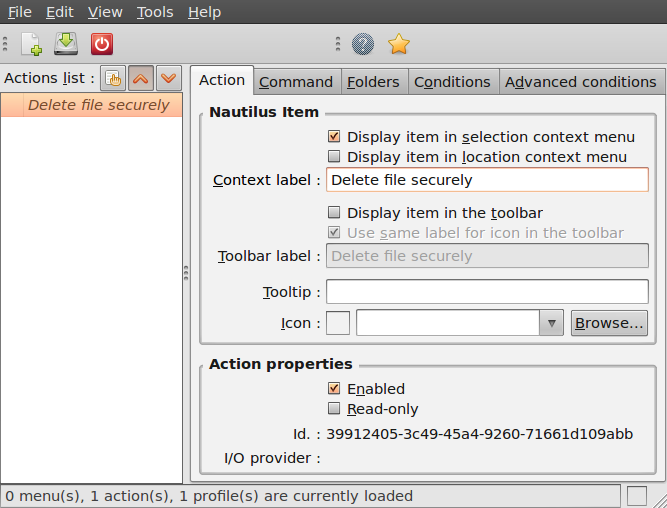
- Click on the second tab ("Command"), here is how we specify the action we want. In the field "Path", type "wipe", in the field parameters type "-rf %M", please be sure about the capitalisation of all characters here, this is very important.
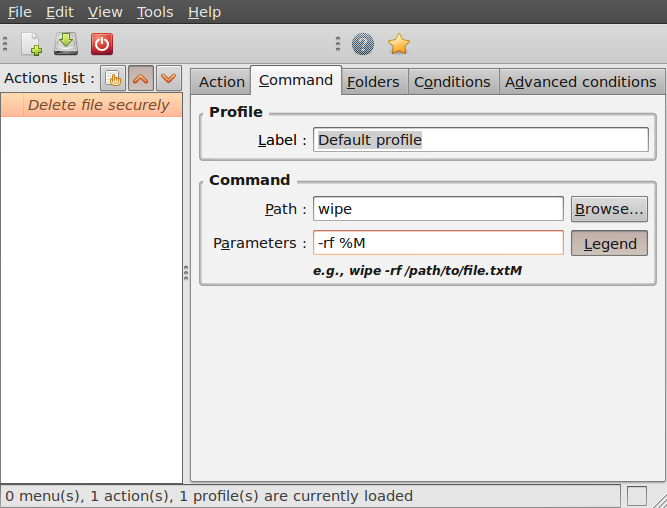
- Next is specifying the conditions, click on the conditions tab and choose the option "Both" in the "Appears if selection contains..." box. With this option you can wipe both files and folders securely. If done, click the save button (second item on the icon bottom toolbar) or use the menu File->Save
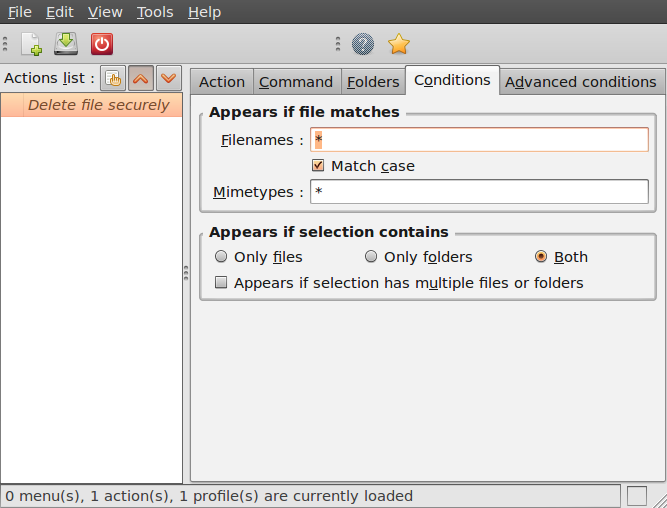
- Now close the Nautilus Actions Configuration tool. Unfortunately, after this, you have to re-login into your system, so ether reboot or logout/login.
- Now browse to the file you want to securely delete and right click:
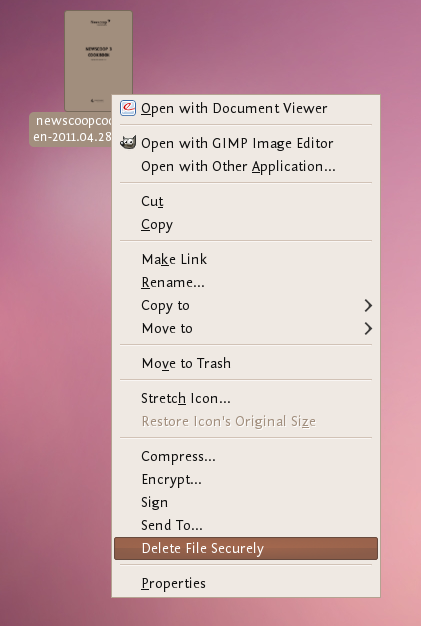
Choose 'Delete File Securely'. The file will then be wiped 'quietly' - you do not get any feedback or notice that the process has started or stopped. However the process is underway. It takes some time to securely delete data and the bigger the file the longer it takes. When it is complete the icon for the file to be wiped will disappear. If you would like to add some feedback you can change the parameters field in Nautilius Actions Configuration tool to this:
-rf %M | zenity --info --text "your wipe is underway please be patient. The icon of the file to be wiped will disappear shortly."
The above line will tell you the process is underway but you will not know the file is deleted until the icon disappears.
Introduction securing remote connection: VPN
Everybody wants to get connected to the internet, everywhere at every moment. People use whatever method is available, ranging from WiFi networks to rolling out cables on the street. It is even possible to make an internet connection using satellites or mobile networks. The urge to get connected is more important than making sure the connection is safe. Even though many people know connecting to a open wireless network is unsafe, people still act as if there is no alternative.
Although you can encrypt your web and email communication, this is unfortunately not true for all applications. There is no such encryption for MSN and nobody knows what kind of encryption Skype uses and whether it is easily to be tapped. Therefore it would be nice if you can protect your connection in a more general way. This is possible with a VPN, which stands for "Virtual Private Network".
Understanding the communication path
To get more security it's important to know what a VPN can and can't do for you. Therefore it's important to have a basic understanding of the way the internet works.
When connecting to the internet every request is going through multiple 'hops' (often called routers). At every hop a system administrator (or government institution) can spy ('sniff') on your connection. Often at least 5 to 10 hops are required before your request reaches the server. This means there are at least as many places where your information can be sniffed and leaked without your knowledge
In general (but not always!), the networks get more secure down the road. For example, if you are in China at a cafe with an unencrypted wireless connection, requesting information about Liu Xiaobo on the site http://en.wikipedia.org/wiki/Liu_Xiaobo it's very possible that this piece of information is located on a server in Amsterdam. If so, your request will travel through multiple places and each hop is vulnerable:
- the wireless network at the bar - everybody in and around the bar will be able to see your request;
- the wireless modem/router of the bar - the bar owner, or somebody with physical access to this modem/router, will be able to see your request;
- the (multiple) routers of the connection provider - in China these are controlled by the government (and probably blocked in this case), so the system administrator(s) of these networks will be able to see the request. Maybe some hundreds of system administrators have the access to 'sniff' your request.
- some routers in Europe - for example routers at the German Internet Exchange Denic in Frankfurt. Most of these systems are very well maintained and secured, but the request is still viewable by the involved system administrators;
- and finally your request will arrive at the server of Wikipedia in Amsterdam and of course the system administrator of this system will be able to see your request.
Securing the weak points
It's very important to understand that the weakest points on this path - the bar and in the country where you are - are also controlled by the people who are most interested in your requests. Therefore it's very interesting to secure this part of the path. It would be great if you can somehow change the path so it appears like your request originated in (for example) Germany instead of China. This is possible with VPN technology.
Get more security by default (with a VPN)
A VPN (Virtual Private Network) encrypts and tunnels all Internet traffic between yourself and another computer (VPN server). This computer might belong to a commercial VPN service, your organization, or a trusted contact.
Because VPN services tunnel all Internet traffic, they can be used for e-mail, instant messaging, Voice over IP (VoIP) and any other Internet service in addition to Web browsing, making everything that travels through the tunnel unreadable to anyone along the way. This makes your connection more secure by default.
If the tunnel starts at your laptop in China and ends at your VPN-provider in Germany, this can be an effective method of circumvention, since all the hops in China will only see encrypted data and have no way of knowing what data is passing through the tunnel. It has the additional effect of making all your different kinds of traffic look similar to an eavesdropper.
It is important to note that the data is only encrypted until the end of the tunnel, and then the data travels unencrypted to its final destination.
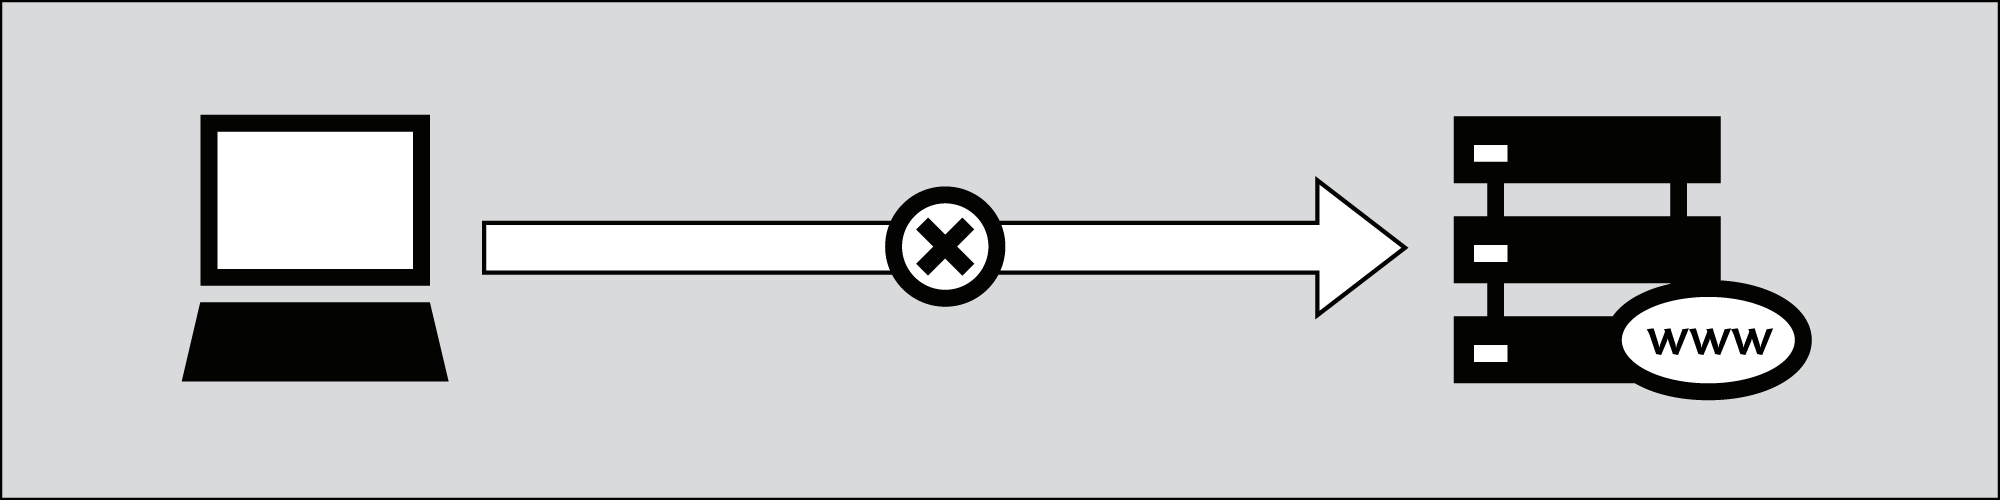
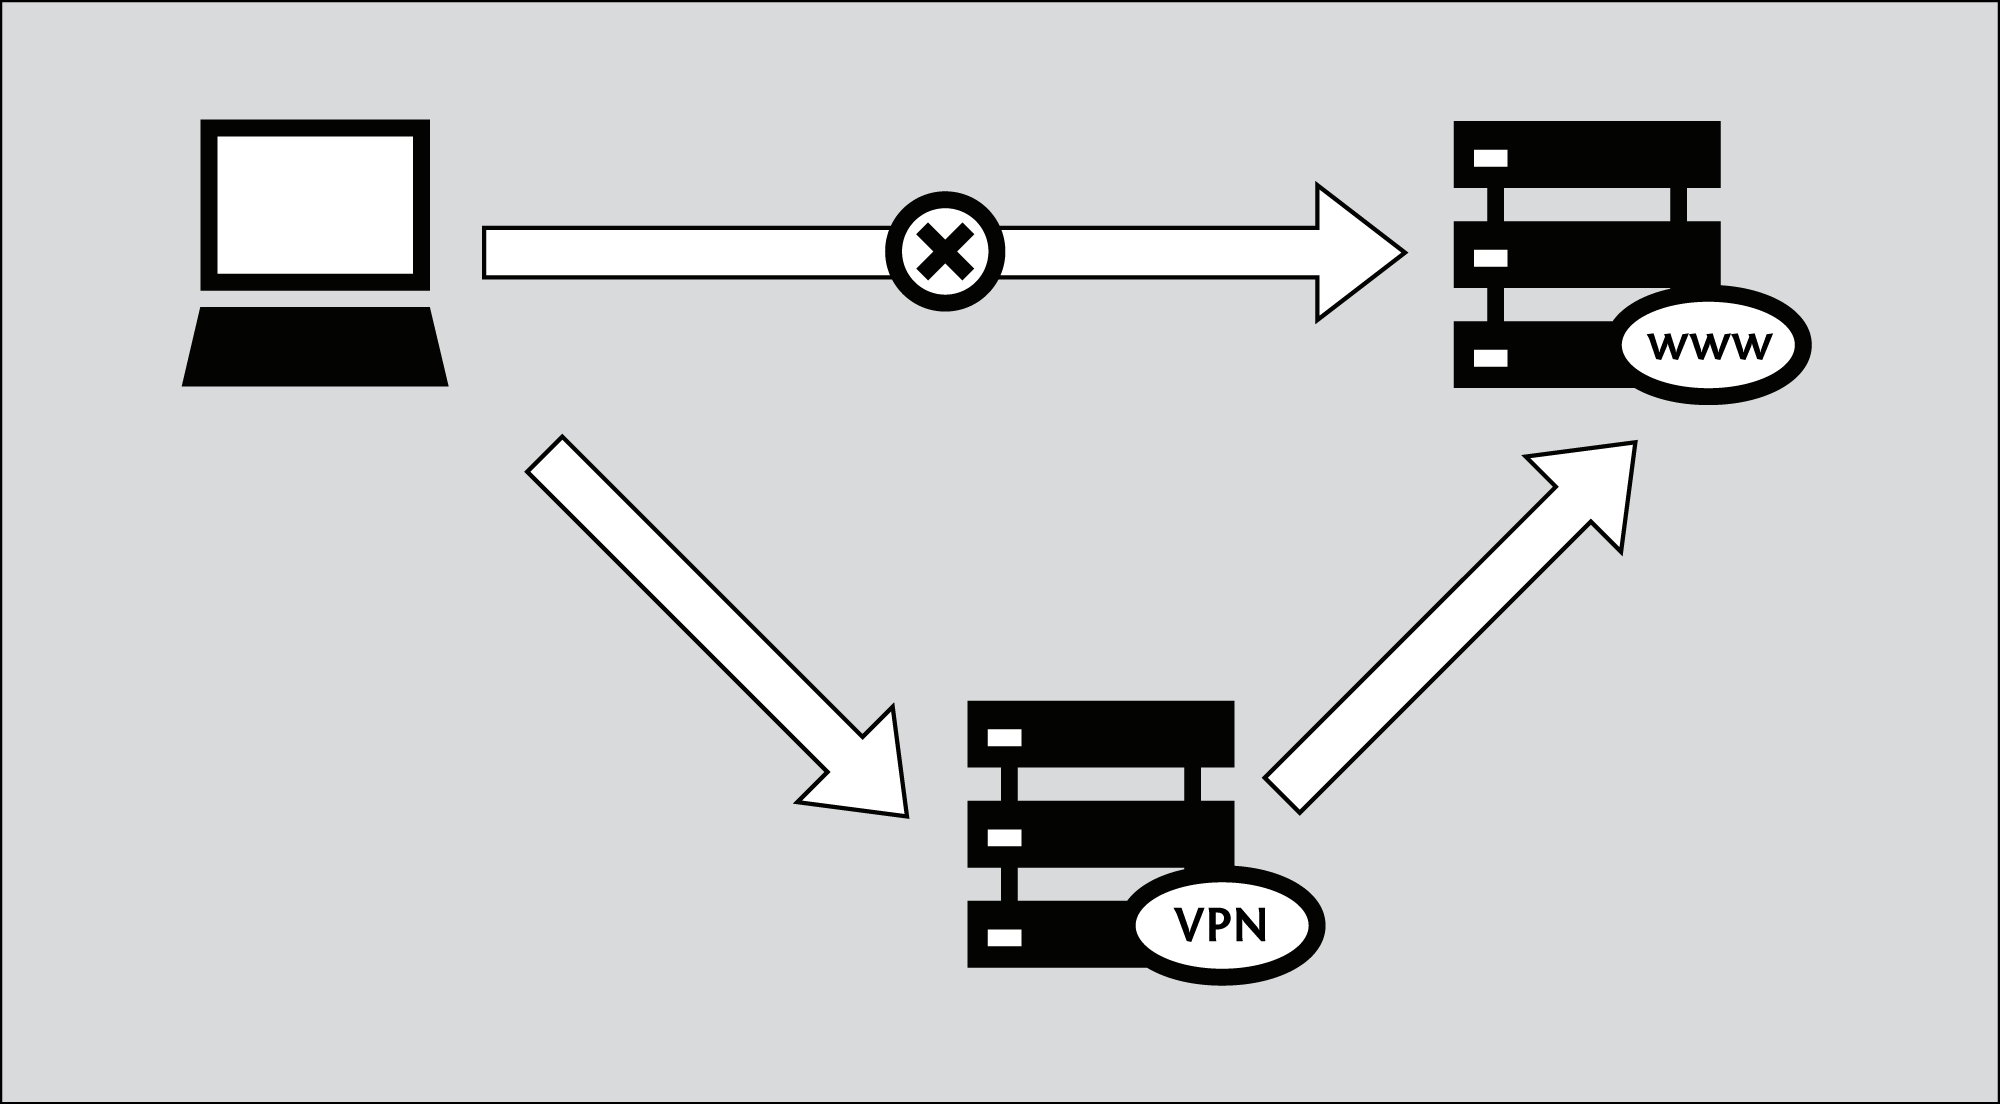
To explain the whole journey in more detail:
By using a VPN provider in Germany your request will once again be forwarded through multiple places. This time however your computer will build a VPN connection (a "tunnel") to a server in Germany, so the traffic will be as follows:
- All the hops to the VPN server in Germany will only see some unreadable encoded data - this includes the network from the bar and the Chinese firewall;
- The VPN server in Germany will receive the encrypted traffic and will decrypt it, so it can send it to some router at Denic - the request will be viewable here by the system administrator;
- Finally your request will arrive at the server of Wikipedia in Amsterdam and once again the system administrator of this system will be able to see your request.
So while not securing all parts of the data path the points where you might be most vulnerable are pretty well obscured.
Since many international companies use VPN technology to allow employees who need access to sensitive financial or other information to access the companies' computer systems from home or other remote locations over the Internet, VPN technology is less likely to be blocked than the technologies used only for circumvention purposes.
Note: The communication is only safe on one part of the path
Keep in mind that if you are communicating with a local website or person in China, your connection will be encrypted from China to Germany, but from Germany back to China (to this website or person) is unencrypted if this person is not using the proper security measures! This is important to keep in mind when communicating with local people. You may bring them and yourself in danger.
Getting and testing a VPN account
In all the VPN systems, there is one computer set up as a server (in an unrestricted location), where one or more clients connect to. The set up of the server is out of the scope of this manual and the set up of this system is in general covered by your company or VPN provider. This server is one of the two ends of the tunnel. It is that important the company running this server can be trusted and is located in an area you trust. So to run a VPN, an account is needed at such a trusted server.
Please keep in mind that an account can often only be used on one device concurrently. If you want to login on a VPN with both your mobile and laptop, it is very well possible you need two accounts.
An account from your company
A lot of companies are running local VPN servers. It is very well possible you can get an account there easily. Check with your system administrator if this is possible and ask for the technical possibilities.
An account from a free or commercial VPN-provider
If you don't have the possibility to get an account from your company, you can register for an account on the Internet, there are dozens of providers. Although some companies offer free accounts, they seem to be disappearing fast. For a stable account it seems the best to go for a paid option. For a few euro's a month it is possible to get an account. Always choose for a provider that offers a standard protocol like L2TP/IPsec, PPTP or OpenVPN. Explanation of the differences between these standards is up next.
A (semi up-to-date) overview of free en commercial providers can be found at cship.org's wiki (http://en.cship.org/wiki/VPN).
VPN standards
There are a number of different standards for setting up VPN networks, including PPTP, LL2P/IPSec and OpenVPN that vary in terms of complexity, the level of security they provide, and which operating systems they are available for. Naturally, there are also many different implementations of each standard within software that have various other features.
PPTP
PPTP is one of the older VPN technologies. While PPTP is known to use weaker encryption than either L2TP/IPSec or OpenVPN, it may still be useful for bypassing Internet blocking and give some level of encryption. The client software is conveniently built into most versions of Microsoft Windows, Apple, Linux computers and even mobile phones. It is very easy to setup.
L2TP / IPSec
L2TP (in combination with IPSec) is a very well-known VPN solution. A lot of devices support these VPN connections out of the box. This includes all mainstream Operating Systems like Windows, MacOSX and Linux, but also support is standard in both Android and iPhone phones. Unfortunately to set-up a good L2TP/IPSec server is complicated. Because the wide-spread implementations of the (complex) protocol, there are some differences between disparate versions. Therefore, the protocol is not always working flawless, so check if it works. If it is running, this is one of the best and safest options.
OpenVPN
OpenVPN is a well-respected, free, open source VPN solution. It works on most versions of Windows, MacOSX and Linux. OpenVPN is SSL-based, which means it uses the same type of encryption that is used when visiting secure Web sites where the URL starts with https. Despite the open character of the product it is currently not very well supported by mobile phones. Also the configuration of this protocol under Windows en MacOSX requires additional software, while PPTP and L2TP/IPSec are both available by default.
Other
There are dozens of other implementations. We advise to stick to one of these three methods as these are very common en well supported. But maybe there is a good reason to use other methods under some circumstances.
Testing before and after account set up
If you decide to set up a VPN, it is important to check if it is working at all. The best way to do that is to check before and after the set up. Before setting up the connection, the "world" will see you from the location where you really are. This can be simply checked on:
http://whatismyipaddress.com/ (Make sure you spell this correctly)
Although this page is a little commercial, it does do a nice job in displaying your external IP address and the location where you are. Please note, this location is not necessarily your exact location, but in most cases at least the country should be correct.
After you have set up your connection, you can visit this page again. Then it should display a different location: the location where your VPN-provider is located.
- Before setting up a VPN, this site returns that we are in Berlin (Germany), which is correct: we are in Berlin.

- After have set up the VPN, the site tells us that we moved to the Netherlands, which is correct: that is where our VPN-provider is located. People in Berlin won't be able to sniff our connection.

Setting up your account
In the following chapters some examples are given for setting up an account. These manuals mostly cover LT2P/PPTP like connections. If you want to use OpenVPN on Windows or MacOSX, have look at:
http://openvpn.se (Windows interface)
http://code.google.com/p/tunnelblick/ (MacOSX interface)
VPN on Ubuntu
If you use Ubuntu as your operating system, you can connect to a VPN by using the built-in NetworkManager. This application is able to set up networks with OpenVPN and PPTP. Unfortunately at the time of writing a L2TP interface is not available in Ubuntu. (It can be done manually, but it goes beyond the scope of this document).
The following example will explain how to connect with a PPTP-server and an OpenVPN-server.
This document is divided in three parts. The first part covers the general installation of required elements and is necessary for both types of VPN-tunnels. The second and third part describe the configuration for PPTP and OpenVPN parts.
Under all situations we assume you already have a VPN account as described earlier in this section.
1. Preparing Network Manager for VPN networks
For Ubuntu there is an excellent network utility: Network Manager. This is the same utility you use to set up your Wireless (or wired) network and is normally in the upper right corner of your screen (next to the clock). This tools is also capable of managing your VPNs, but before it can do so, it's necessary to install some extensions.
Installing PPTP and OpenVPN extension for Network Manager
To install the plugins for Network Manager we will use the Ubuntu Software Center.
- Open the Ubuntu Software Center from the Applications menu located at the top left of your screen
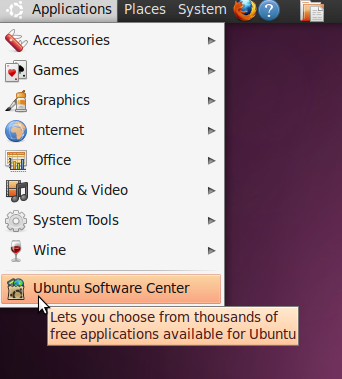
- The Ubuntu Software Center enables you to search, install and remove software on your computer. Click on the search box at the top right of the window.
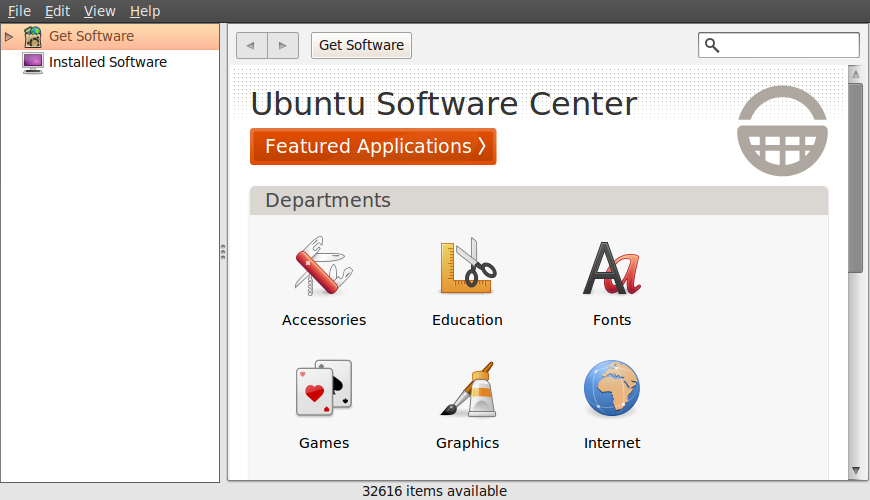
- In the search box, type in "network-manager-openvpn-gnome" (which is the extension that will enable OpenVPN) and/or "network-manager-pptp-gnome" (which is the extension for PPTP). It's necessary to type the full names because the packages are classified as "technical" and don't pop-up earlier.
These packages include all the files you need to establish a VPN connection successfully. You can decide to install both extensions or only the one you need.
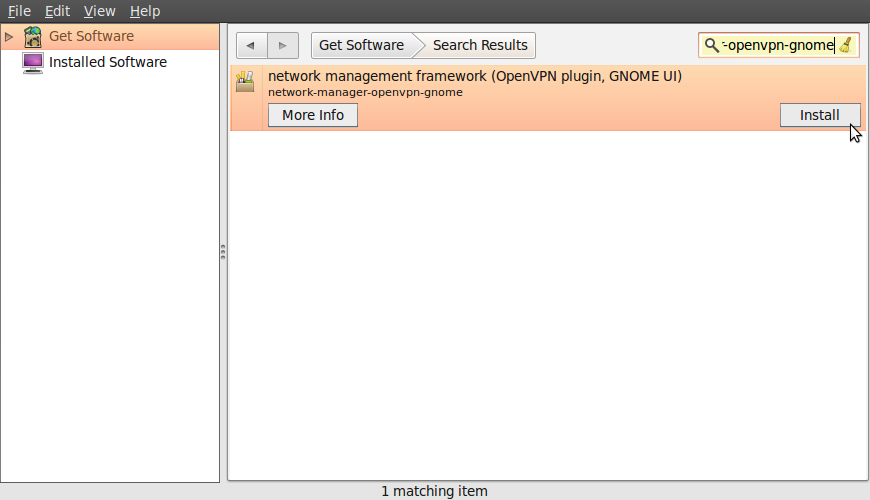
- Ubuntu may ask you for additional permissions to install the program. If that is the case, type in your password and click Authenticate. Once the package is installed, you can close the Software Center window.
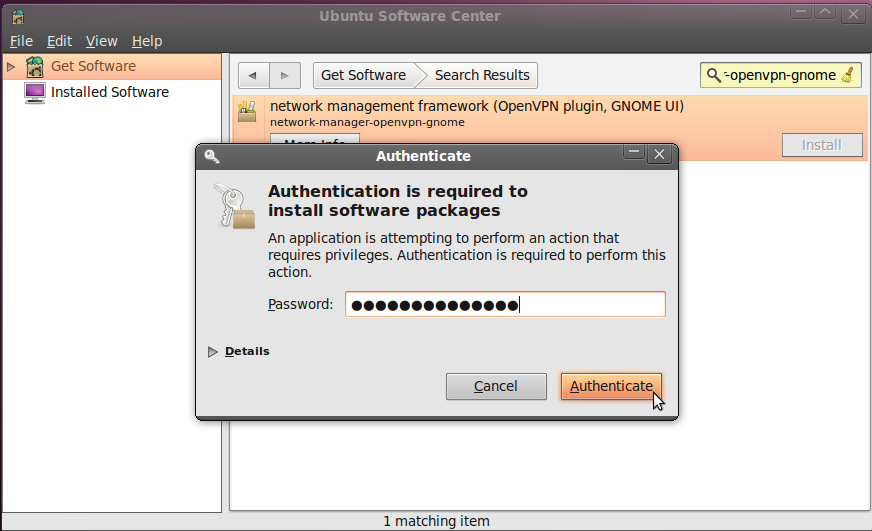
- To check if the extensions are correctly installed, click on the NetworkManager (the icon at the left of your system clock) and select VPN Connections > Configure VPN.

- Click Add under the VPN tab.
- If you see a pop-up asking for the type of VPN and the tunnel technology (OpenVPN or PPTP) option is available, this means that you have installed the VPN extension in Ubuntu correctly. If you have your VPN login information ready, you can continue right away, else you first have to get a VPN account from a VPN-provider. If this is the case, click cancel to close the Network Manager.
2. Configuring a PPTP network on Ubuntu
If you want to set up OpenVPN, you skip this section and jump to "3. Set up OpenVPN on Ubuntu"
Let's assume have your credentials from your VPN provider for PPTP ready. This information should contain the following:
- Username, ex. bill
- Password, ex. verysecretpassword
- VPN server, ex. tunnel.greenhost.nl
- Before getting started, please be sure you have read the paragraph "testing before and after account set up". In this way you will be able to validate if your connection is actually working after set up.
- If you have installed all software in the previous chapter, we are now ready to go. Setting up PPTP is very simple in Ubuntu: first we open the VPN network setting, by using the NetworkManager Utility. Just next to your system clock (were you also set your WiFi setting), just click on it and the following menu pops up. Choose Configure VPN (under VPN Connections).
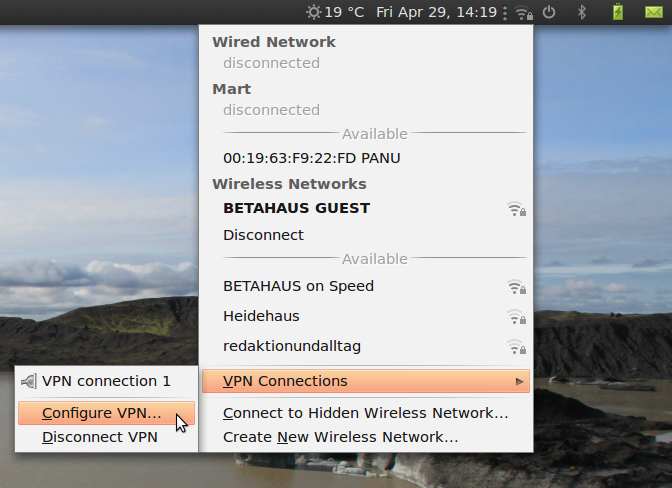
- A new window will pop-up, showing your VPN connection. This list is empty if you have not configured a VPN before. Simple choose: Add
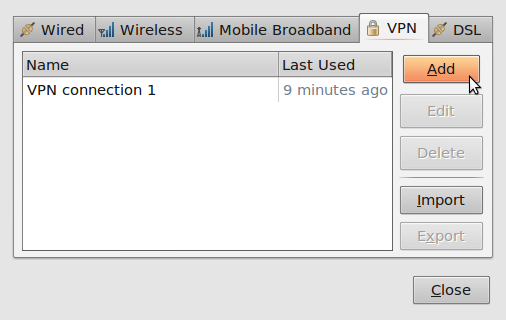
- The next window will show you the available options. In This case make sure you choose Point-to_point Tunneling Protocol (PPTP). If you have selected this protocol choose "Create ..."
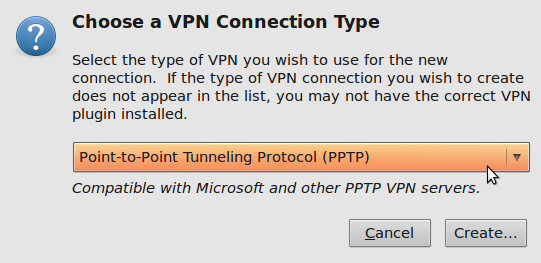
- In the next pop-up fill out the required information. The connectname is just the name to identify this connection with. The gateway is the server address of the VPN provider, in this case "tunnel.greenhost.nl" are self explanatory., the fields "User name" and "Password"
Please pay special attention to the "Connect Automatically" option. If enabled, the VPN will be always online (if available). This setting is recommended if you have an unlimited dataplan with you VPN provider.
Also it's needed to enable encryption. This can be done with the advanced options, so choose "Advanced..."
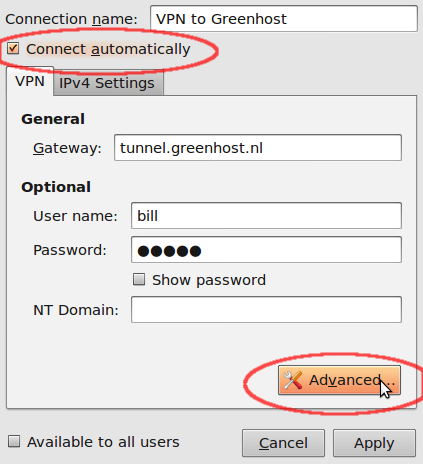
- In the advanced options screen enable: "Use Point-to-Point encryption (MPPE)". The utility will give you a warning that some authentication methods are not possible with MPPE. This is the expected behaviour. You can confirm the settings with "OK" to return to the previous window. Please "Apply" this window, and we nearly ready to go.
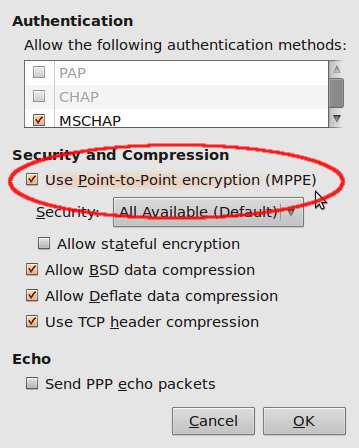
- Now you will return to the overview. If everything went fine, you will have a new connection now. Here it's called "VPN to Greenhost". You can close this window now, your settings are complete.
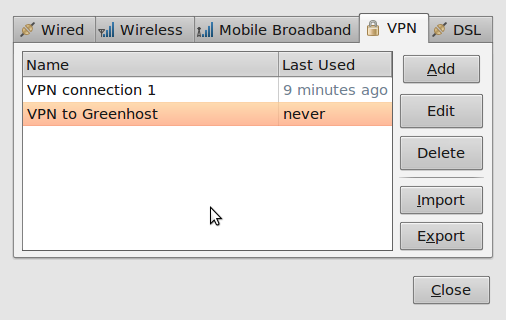
- Now, let's activate the VPN. Hit the Network Utility Tool again, browse to "VPN Connections" and next "Click on VPN to Greenhost"
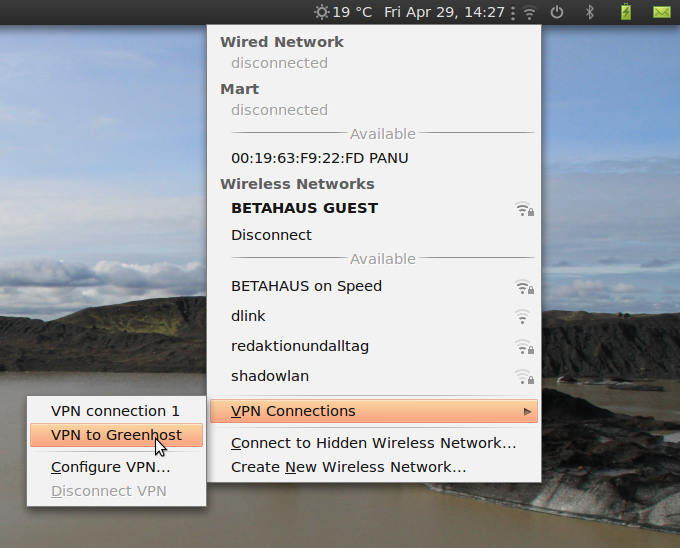
- If everything went fine, look at the small change in the notification icon: this should now give you a "lock" icon next to the WiFi signal.
3. Configuring an OpenVPN network
Let's assume you received your configuration files and credentials from your VPN provider. This information should contain the following
- an *.ovpn file, ex. air.ovpn
- The file: ca.crt (this file is specific for every OpenVPN provider)
- The file: user.crt (this file is your personal certificate, used for encryption of data)
- The file: user.key (this file contains your private key. It should be protected in a good manner. Loosing this file will make your connection insecure)
In most cases your provider will send these files to you in a zip file.
- Before getting started, please be sure you've read the paragraph "testing before and after account set up", this way you will be able to validate if your connection is actually working after set up.
- Unzip the file you have downloaded to a folder on your hard drive (e.g.: "/home/[yourusername]/.vpn"). You should now have four files. The file "air.ovpn" is the configuration file that you need to import into NetworkManager.
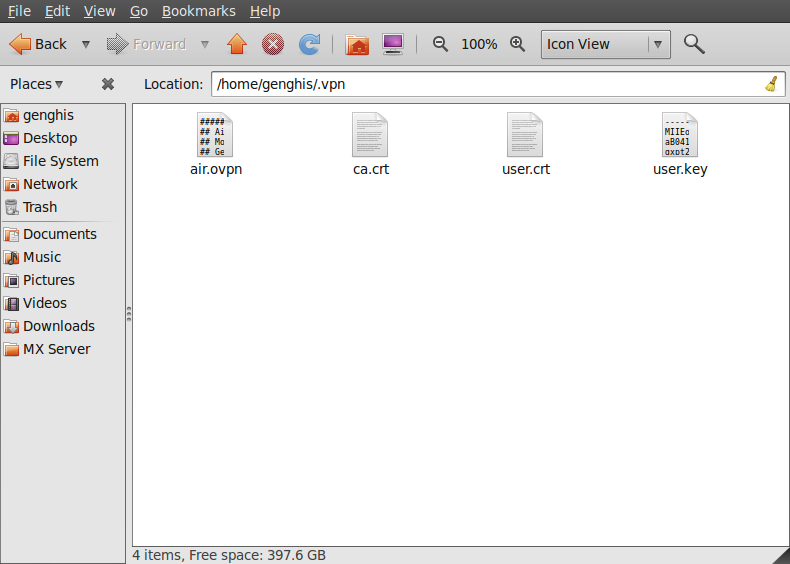
- To import the configuration file, open NetworkManager and go to VPN Connections > Configure VPN.
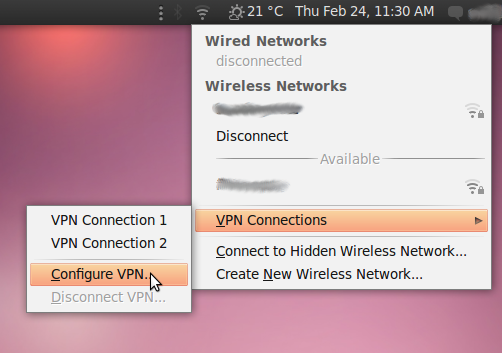
- Under the VPN tab, click Import.

- Locate the file air.ovpn that you have just unzipped. Click Open.
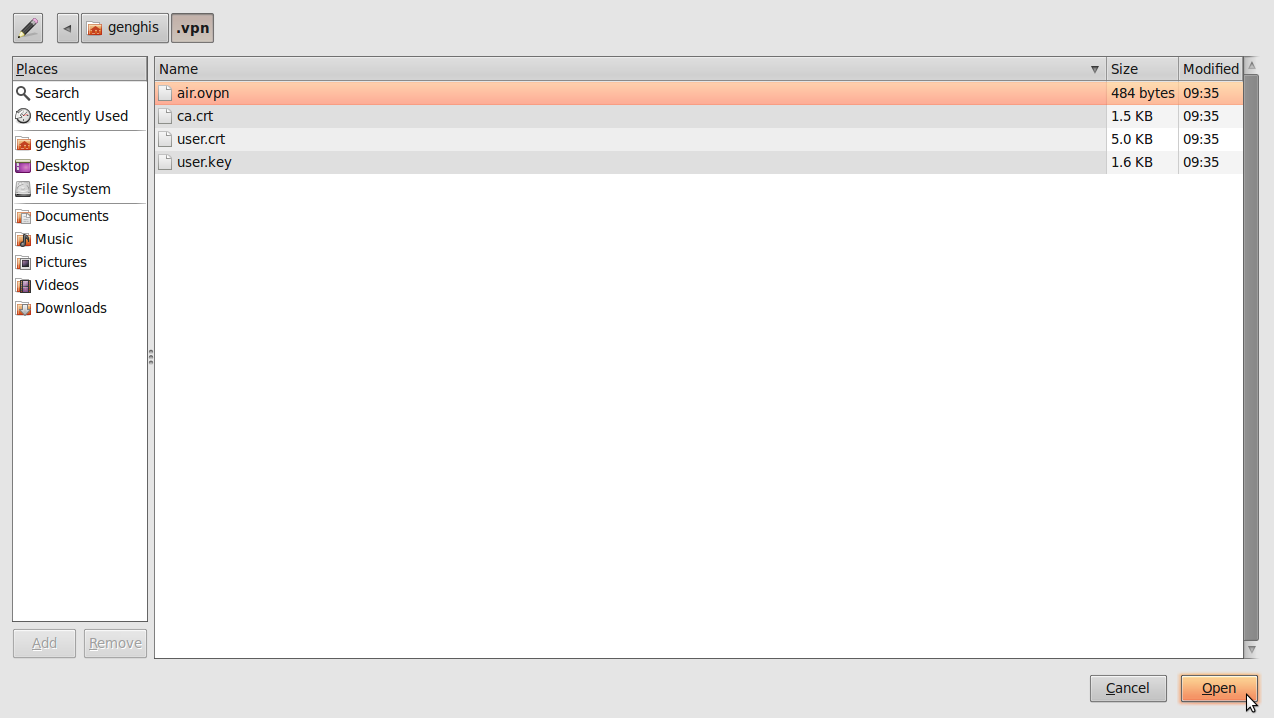
- A new window will open. Leave everything as it is and click Apply.
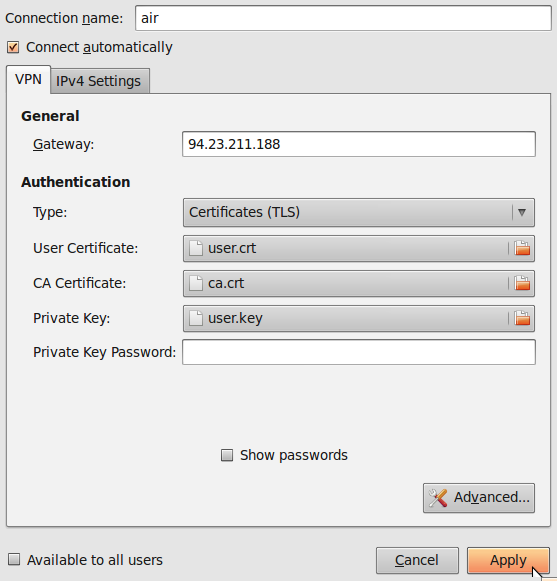
- Congratulations! Your VPN connection is ready to be used and should appear on the list of connections under the VPN tab. You can now close NetworkManager.
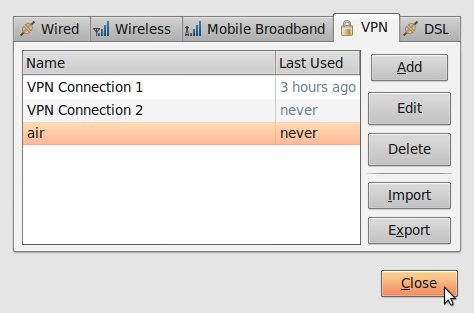
Using your new VPN connection
Now that you configured NetworkManager to connect to a VPN service using the OpenVPN client, you can use your new VPN connection to circumvent Internet censorship. To get started, follow these steps:
- In the NetworkManager menu, select your new connection from VPN Connections.
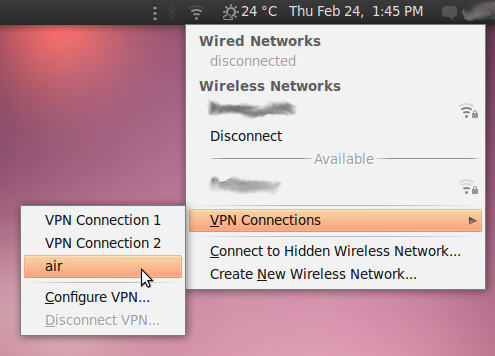
- Wait for the VPN connection to be established. When connected, a small padlock should appear right next to your NetworkManager icon, indicating that you are now using a secure connection. Move your cursor over the icon to confirm that the VPN connection is active.
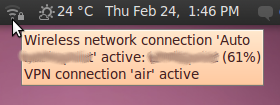
- Test your connection, using the described method earlier.
- To disconnect from your VPN, select VPN Connections > Disconnect VPN in the NetworkManager menu. You are now using your normal (filtered) connection again.
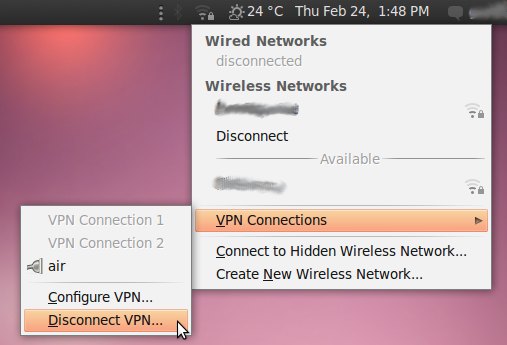
VPN on MacOSX
Setting up a VPN on MacOSX is very easy once you have your account details ready, Let's assume have your credentials from your VPN provider for L2TP/IpSec connection ready. This information should contain the following:
- Username, ex. bill2
- Password, ex. verysecretpassword
- VPN server, ex. tunnel.greenhost.nl
- A Pre-Shared-Key or Machine-certificate
- Before getting started, please be sure you've read the paragraph "testing before and after account set up", this way you will be able to validate if your connection is actually working after set up.
- A VPN is configured in the network settings, that are accessible via "System Preferences.." in the Apple menu.
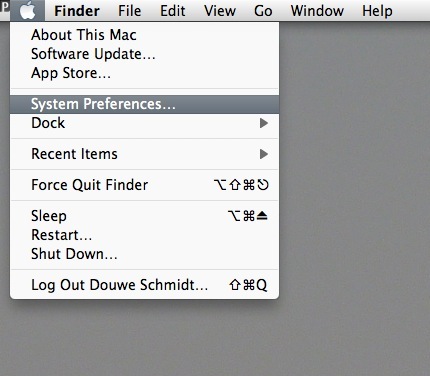
- Next, open the Network preferences .
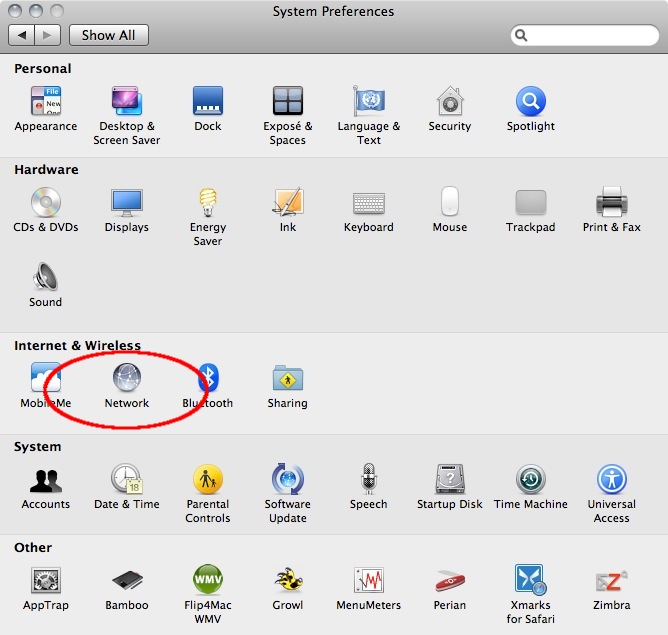
- OSX uses this nifty system to lock windows. To add a VPN it is necessary to unlock the screen: you can do this by clicking on the lock on the left bottom of the screen.
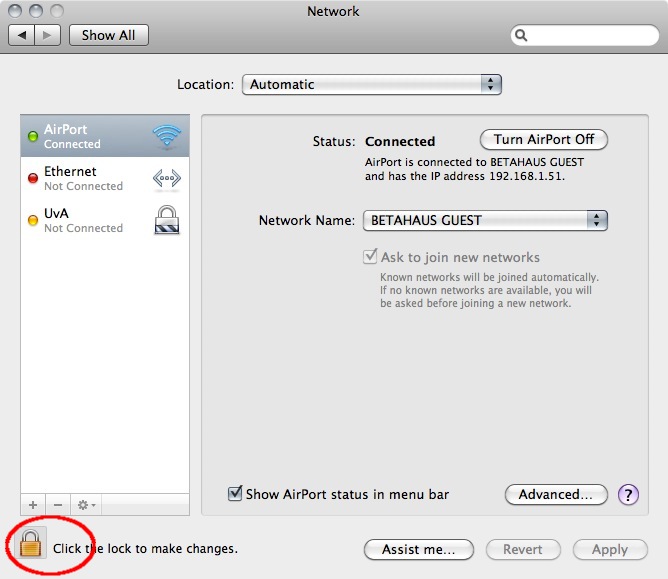
- Enter our user credentials
- Now we can add a new network. Do this by clicking on the "+" sign
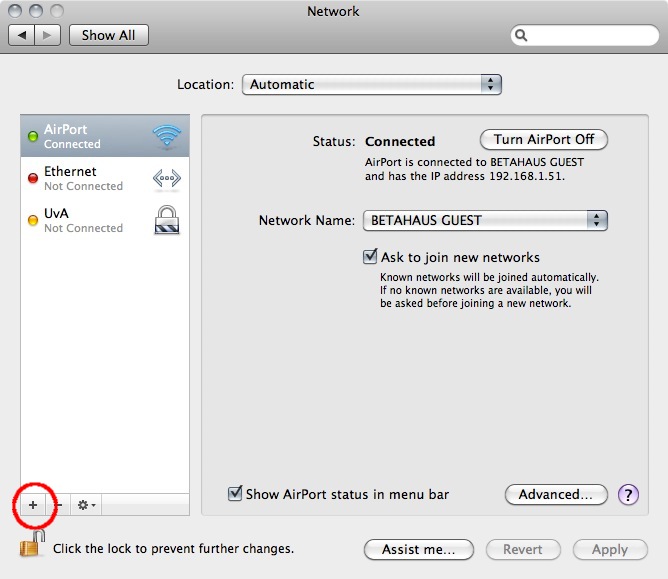
- In the pop-up you need to specify the type of connection. In this case choose an VPN interface with L2TP over IPSec. This is the most common system. Also don't forget to give the connection a nice name.
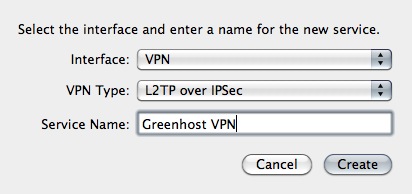
- Next comes the connection data. Please fill in the provided server name and user name (called 'Account Name'). If this is done, click on the "Authentication Settings..." button
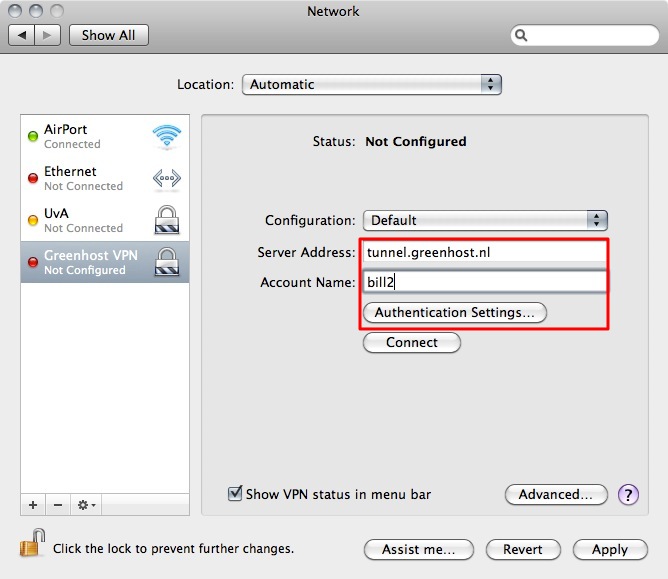
- In the new pop-up you can specify connection specific information. This is the way the user is authenticated and how the machine is authenticated. The user is very commonly authenticated by using a password, although other methods are possible. Machine authentication is often done by a Shared Secret (Pre-Shared-Key/PSK), but also quite often by using a certficate. In this case we use the Shared Secret method. When this is done click OK.
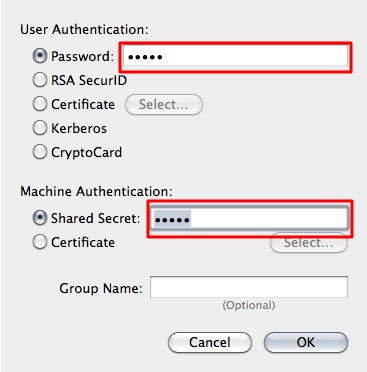
- Now you return back to the network screen. The next step is very important, so click on "Advanced..."
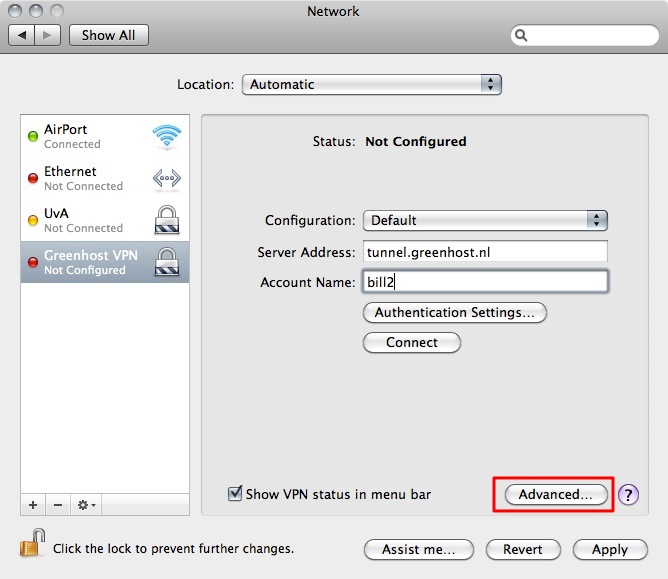
- In the new pop up you will see an option to route all traffic through the VPN connection. We want to enable this, so all our traffic is encrypted.
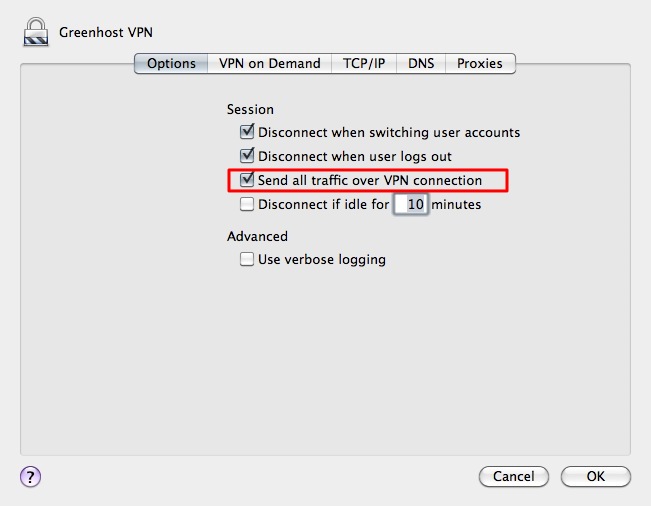
- Well, all is done. Now hit the Connect button!
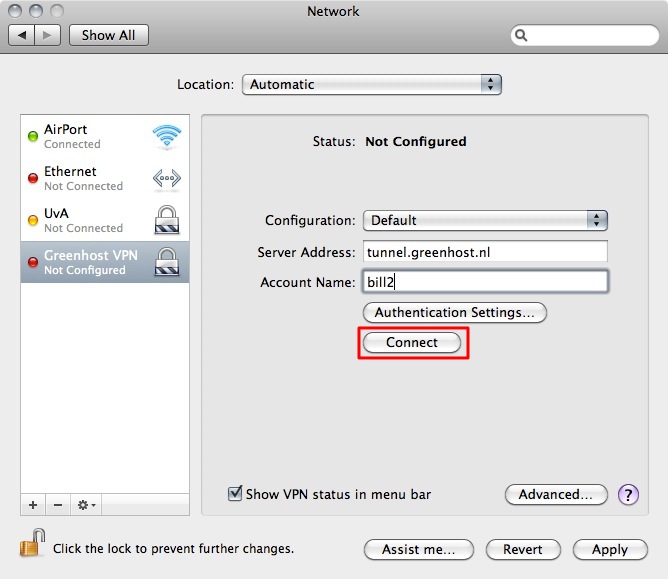
- A pop-up appears. You need to confirm your changes, just hit "Apply"
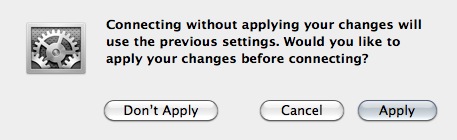
- After a few seconds, on the left side the connection should turn green. If so, you are connected!
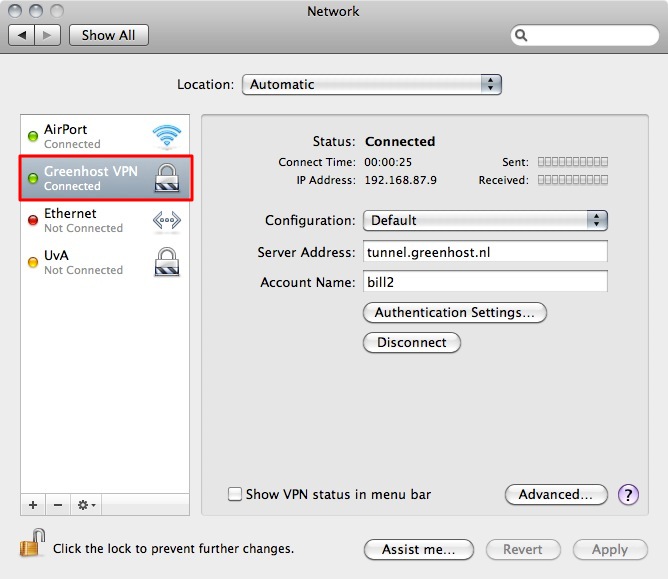
- Ok, now test your connection!
VPN on Windows
Setting up a VPN on Windows is very easy once you have your account details ready. Let's assume have your credentials from your VPN provider for L2TP/IpSec connection ready. This information should contain the following:
- Username, ex. bill2
- Password, ex. verysecretpassword
- VPN server, ex. tunnel.greenhost.nl
- A Pre-Shared-Key or Machine-certificate
- Before getting started, please be sure you've read the paragraph "testing before and after account set up", this way you will be able to validate if your connection is actually working after set up.
- We need to go to the "Network and Sharing Center" of Windows to create a new VPN connection. We can access this center easily by clicking on the network icon next to the systemclock en click on "open Network and Sharing Center"
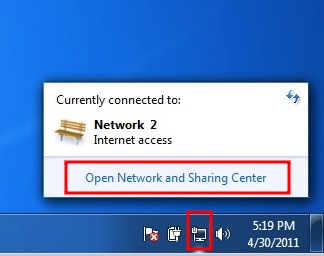
- The "Network and Sharing Center" will popup. You will see some information about your current network. Click on "Connect to a network" to add a VPN connection.
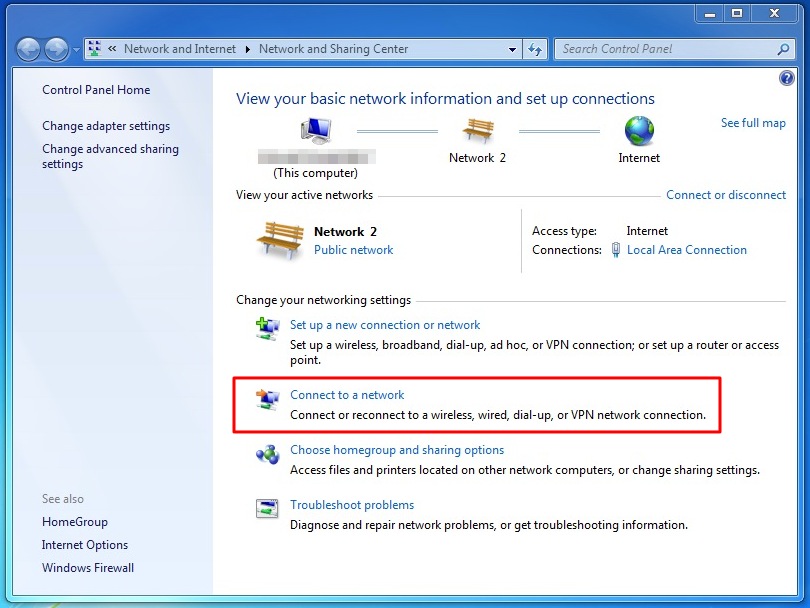
- The wizard to setup a connection will popup. Choose the option to "connect to a workplace", which is Microsoft's way of naming a VPN connection.
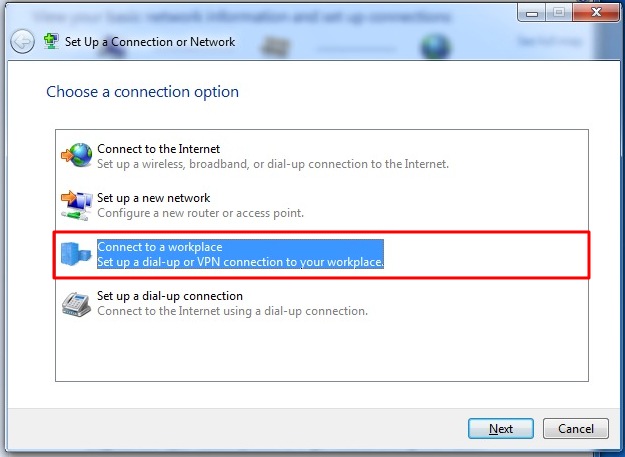
- The next screen asks us if we want to use our Internet connection or an old-skool phone line to connect to the VPN. Just choose the first option then.
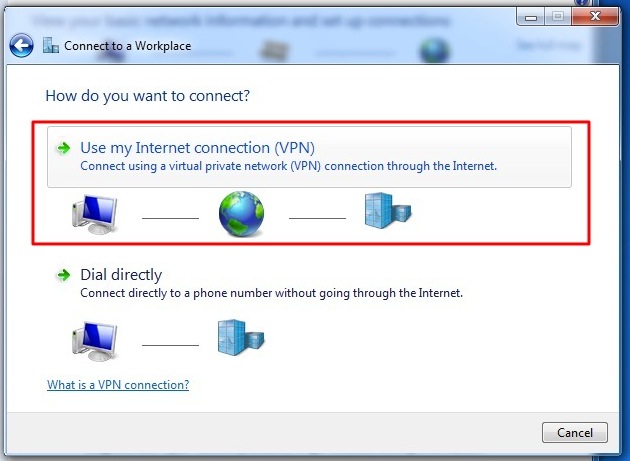
- The next screen asks for the connection details. Enter here the server of your VPN-provider (called "Internet address" in this dialog). On the bottom please check the box "Don't connect now; just set it up". Using this option the connection will be automatially saved and it's easier to control extra settings. If this is all done, hit the "next" button

- Next up are your username and password. Just give them like you received them from your VPN-provider. If the connection fails, windows forget's them. So keep them with you, you maybe need them later. If this is done. Click "create".

- Your connection is now available, if you click the the network icon again, you will see a new option in the network menu, the name of your VPN connection, just click it to connect.
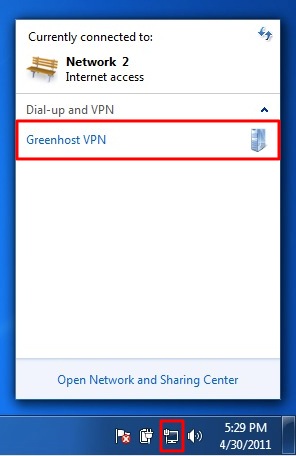
- And click "connect"
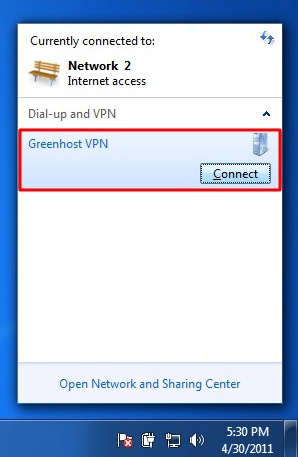
- A VPN connection dialog appears. This give us the opportunity to review our settings and to connect. You can try to connect, Windows will try to discover all other settings automatically. Unfortunately, this does not always work, so if this is not working for you, hit the "properties" button.
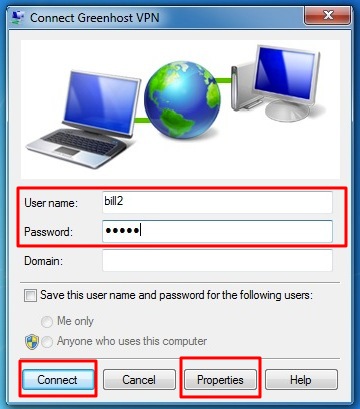
- The properties windows appear. The most important page is the "Security" page, click on the Security tab to open it.
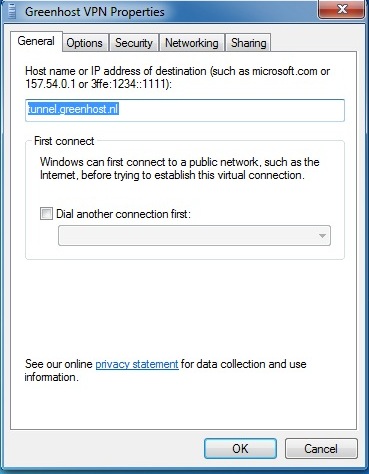
- In the security tab you can specify VPN type, normally L2TP/IPSec or PPTP. For L2TP/IPSec also have a look at the Advanced settings.
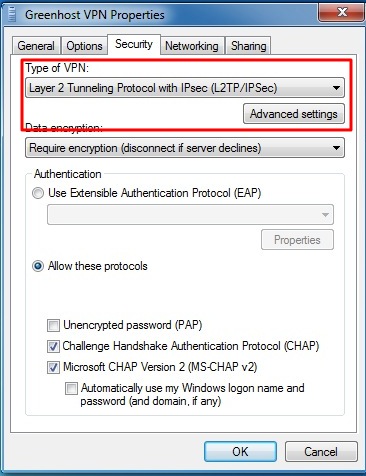
- In the Advanced Settings window, you can specify if you are using a preshared key or a certificate. This depends on your VPN-provider. If you have received a pre-shared-key, Select this option and fill in this key. Hit ok afterwards. You will return to the previous window, click ok there also
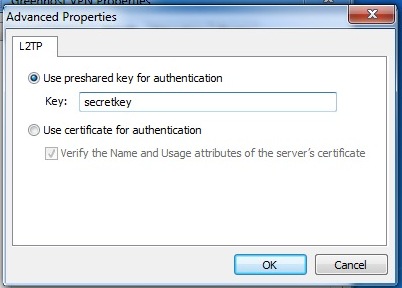
- Back in to connection window try to connect now. Please be sure your username and password are filled out.
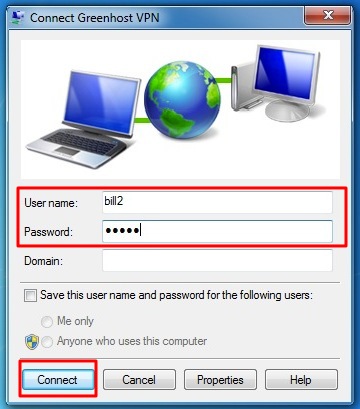
- A connection popup will appear
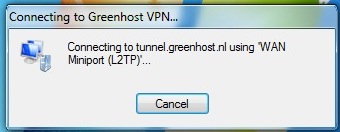
- Online! Don't forget to check if your VPN is working properly.
Introduction to Mobile Phone Security
Most people have mobile phones today. In the past these devices were primarily used to call and send text messages. In addition, all mobiles have at least an ability to keep an address book. There is a new generation of mobile devices that come with Internet access, built-in video cameras and the ability to install additional software. These smart phones can be very convenient and provide you with very powerful and useful tools. These phones contain a lot of private data and, unfortunately, a phone can be lost easily. The following chapter deals with some methods to use them more secure.
Security issues with mobile phones
Physical security - A phone can be confiscated or stolen. If you are a journalist, your address book might be of special interest: it can be used just to gain knowledge of your network or for further social engineering. As a minimum safety measure you should always enable some kind of password protection on your phone (not just on your SIM card).
Voice - Although the voice on a GSM (mobile phone) channel is encrypted, this encryption was hacked some time ago and is not considered safe any more. Furthermore, if you do not trust the network(s) you are using it has never been safe. Normal VoIP communications are very insecure as they are not encrypted. Some other VoIP services use some kind of encryption.
SMS - Text messages are sent in plain text over the network, so they are also not considered secure, additionally they are not securely stored at your device, so anyone with access to it will be able to read them. If you are using an Android based phone read the chapter on 'Secure Text Messaging'
Smartphones - Smartphones are quite new, and unfortunately most advanced (and even some basic) ways of securing that are available on normal computers are not available on smartphones. They pose additional risk since you are also using them for things like agendas, and personal note taking. Also not all applications in an appstore or market are safe to use, because there are a considerable number of malware apps on the market which are passing your personal data to other companies. You should always check if the app's you want to use can be trusted. Internet on your mobile device is subject to the same problems as all wireless communications. Read the chapter on VPN for mobile devices to improve this.
Prepaid sim cards - In some countries you are still able to use prepaid locally bought SIMcards without identifying yourself. Beware that your phone also has a unique identifier (known as the IMEI number) so switching SIM cards will will not guarantee to protect your privacy.
The following chapters will deal with different methods that are available today to secure your mobile communications. Note that mobile phone security in particular is developing very fast and users should check out the current status of premier open source efforts like the Guardian Project (guardianproject.info).
Secure Text messaging
Sending SMS (text) messages is considered insecure, not only do they travel unencrypted through the phone network, they are also saved on your phone where someone might see them.
If you are using an Android based smart phone there is a neat free tool to fix both issues; TextSecure. TextSecure uses a password to save all your messages (sent and received) encrypted to your phone, and it also enables you to securely SMS with other people using TextSecure. Remember that if you have sent an SMS to someone that is not using TextSecure it will still be unencrypted on their phone and over the network.
Geek info on how TextSecure works
SMS communication using TextSecure is encrypted using the Off The Record (OTR) encryption protocol. OTR is specifically designed for chat messaging, it provides session based encryption and authentication, but on top of that it provides deniability, something protocols like PGP do not provide.
Installing TextSecure
TextSecure can be installed using the Market App on your phone. either search for 'TextSecure' in the market, or use the QR code on this page with the Barcode Scanner.

After you have acknowledged the permissions and installed the app, you are ready to start it, as soon as you do so you are confronted with the "End User License Agreement", press accept to continue. A new pop-up telling you this is beta software will appear which you have to acknowledge too.

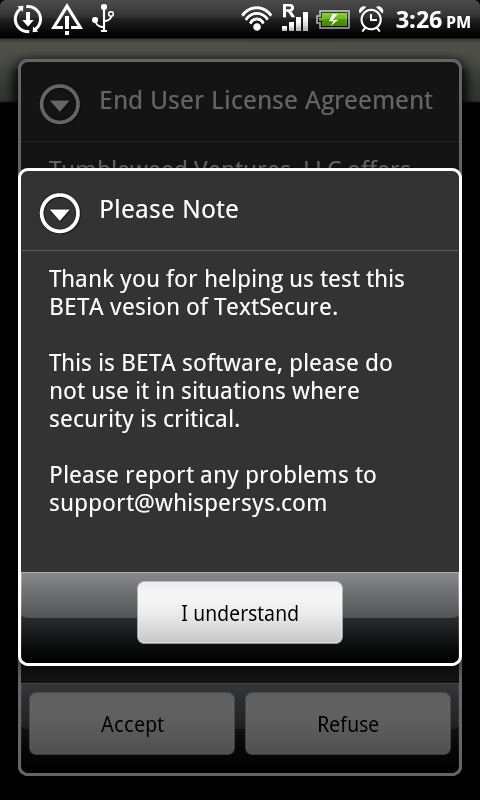
TextSecure uses a password to encrypt the text messages on your phone. Be careful to choose a strong password you can easily remember (for more information look at the section on using secure passwords), if you lose it you will not be able to read any of your old messages. To be sure you entered it correctly you have to enter the password twice.
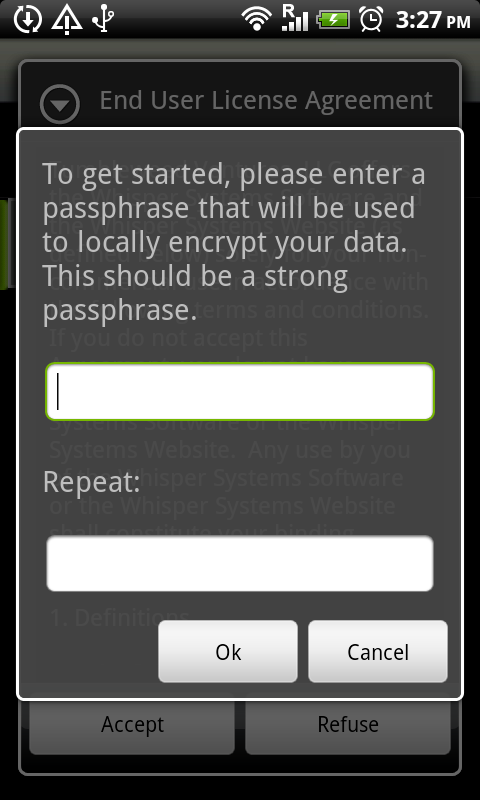
The next step is to tell if you want the messages already stored on the phone to be copied to the TextSecure database, if you choose "Copy" here you will be able to secure your old messages by deleting them from the system database later.
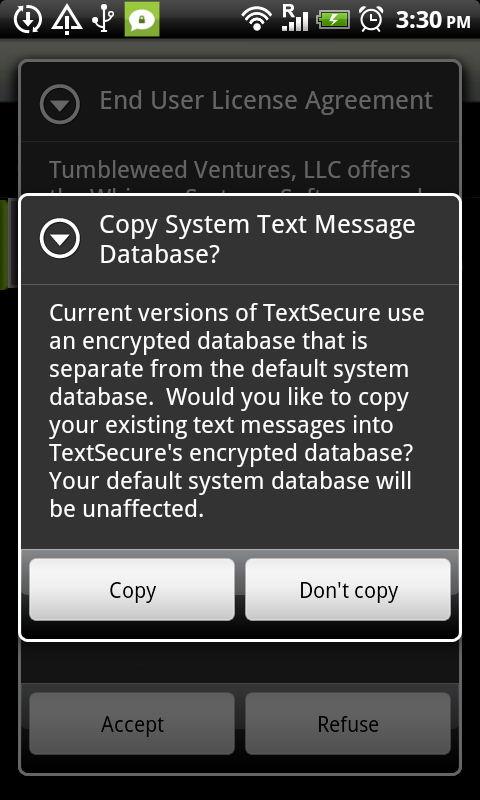
After this step you are ready to use TextSecure to send unencrypted messages. If other people also use TextSecure this is automatically detected, it will then present you with the option to send them your key. Exchange keys is needed to get full end-to-end encryption. This process is described in the next steps. It is also possible to manually start this process by clicking the menu button and choosing the option "secure session".
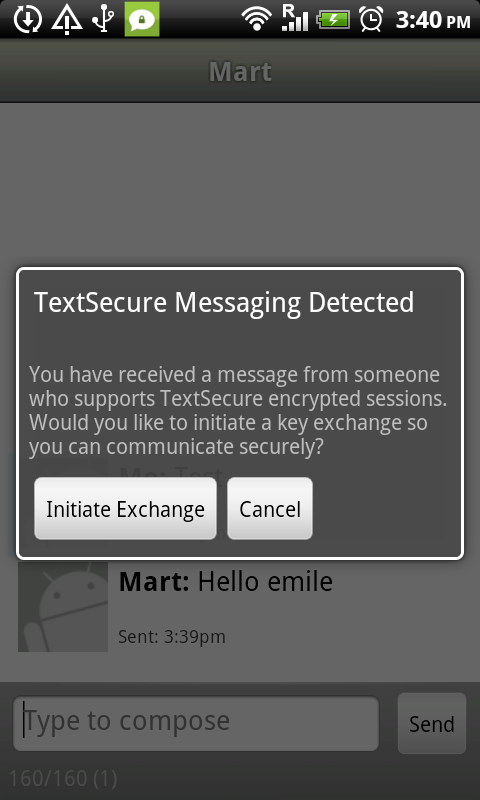
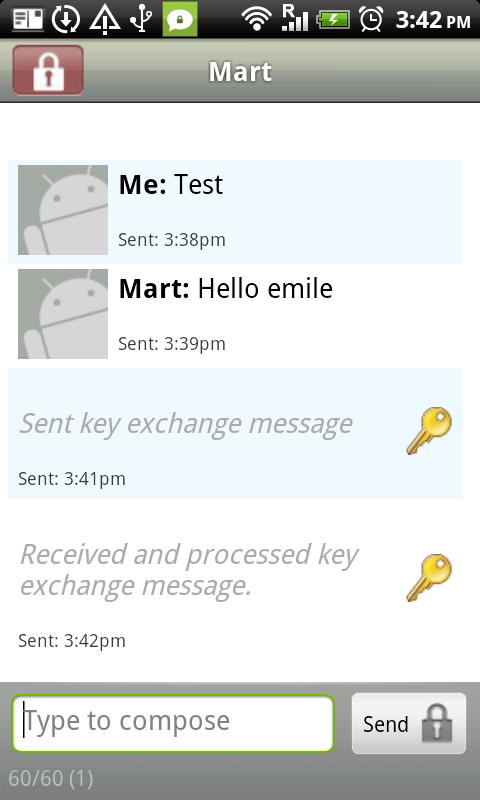
after these steps your communications are secure, but you have not acquired a trust relation, put in other words, the channel is secure but you are not entirely sure who you're talking to. So keeping that in mind, the next thing to do is to verify that you are indeed talking to the right person (a sender's phone number can be easily forged, so you need a more secure way to check the identity). In the conversation window press the menu button and select "Secure Session Options". In the window that appears select "Verify Recipient Identity".
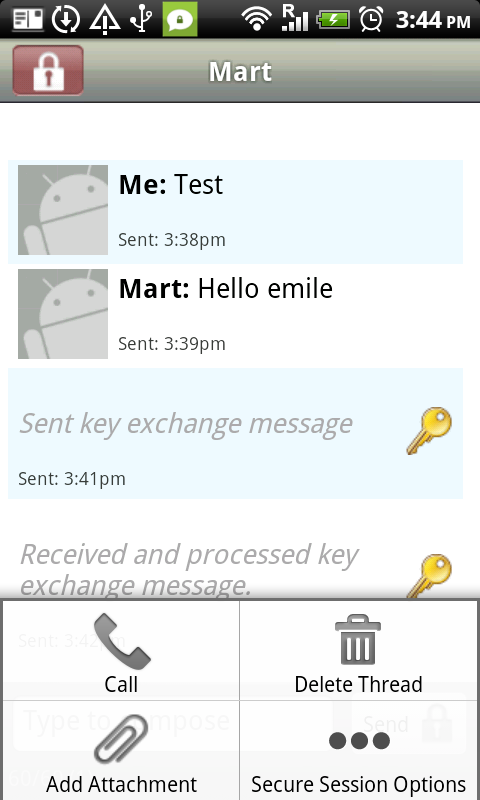
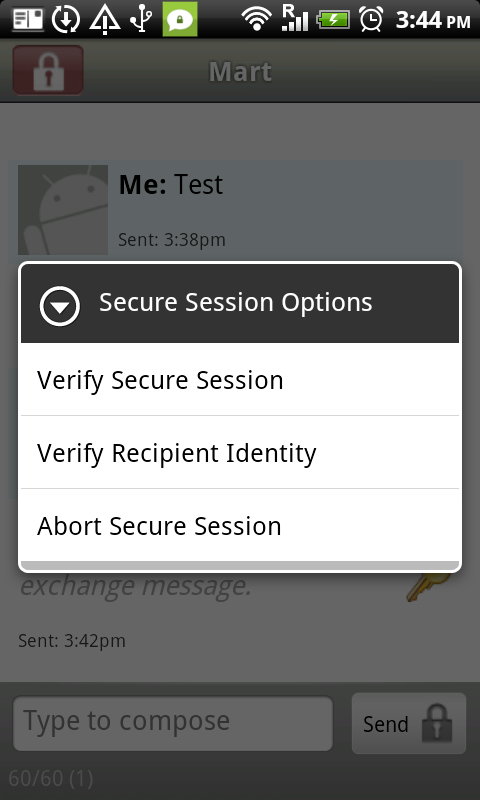
The following window shows your and theirs identity fingerprint. You can for instance call them and check if the keys are correct. If you happen to be close together to set this up, TextSecure also allows you to use your Barcode scanner to check the keys. To start this, select compare and follow the instructions. If you are done verifying using any of the other methods, select "Verified!" and select OK in the next screen. A Save Identity popup appears, usually the name is already filled in correctly and you can just push the "Ok" button twice to start your authenticated messaging.

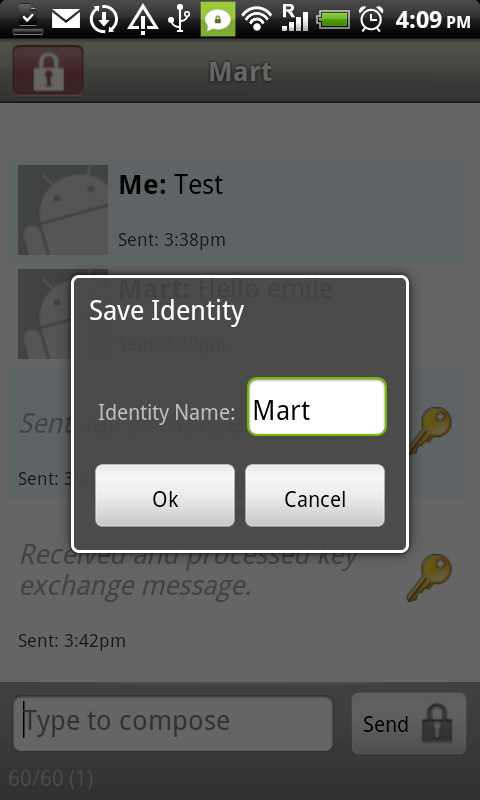
You can see that this messaging has been verified because the lock icons in the left corner and next to the messages are not red colored. These messages are encrypted and authenticated.
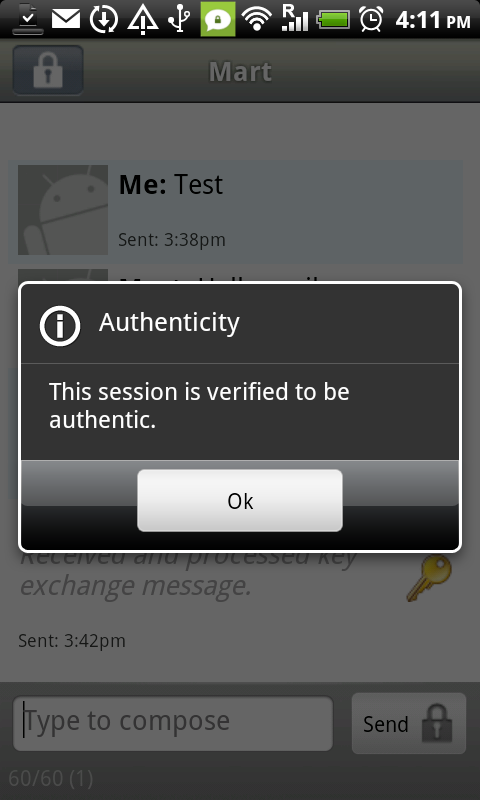
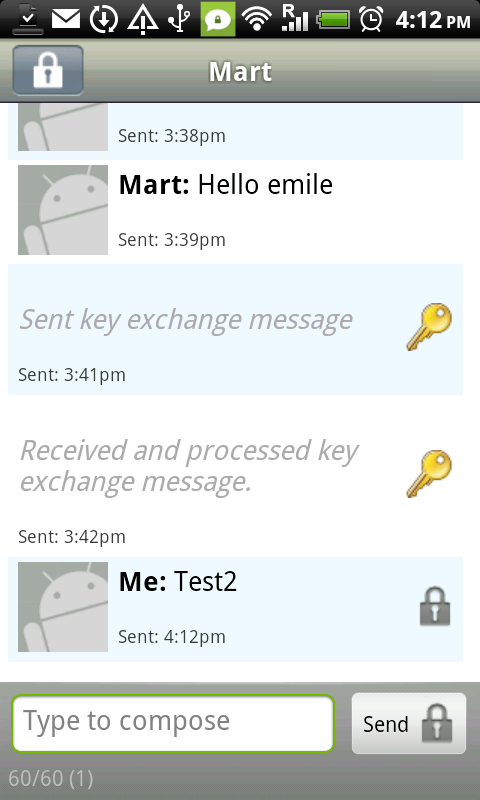
This is the right moment to look at the various configuration options that TextSecure comes with. Most of them are self-explanatory. Securitywise it might be a good idea to look at the setting for the Passphrase timeout interval, and set it to a lower value according to your situation. If the timeout interval expires, and you want to few your messages again, TextSecure will ask for your password.
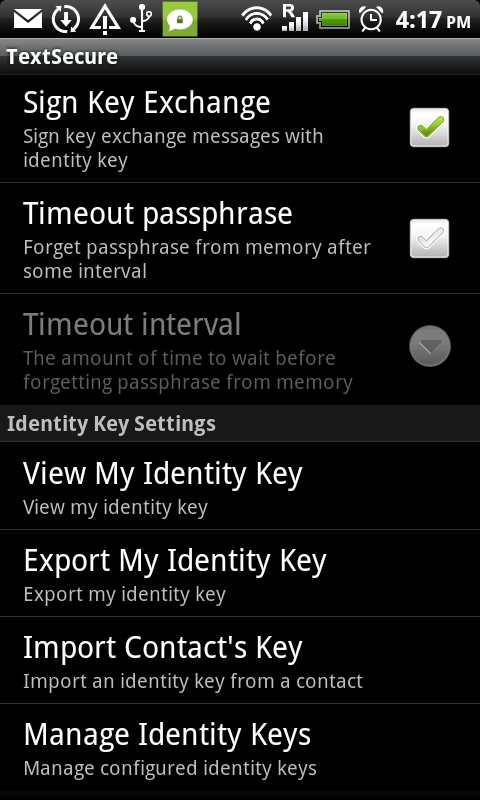
These are the basics of TextSecure. If you like the application we advice you to replace the messages application link on your phone's homescreen. This way you won't mix the TextSecure and normal Messages application
Secure voice communication
When calling another person with your mobile phone, your communication can be monitored on multiple places. Governments all over the world have regulations which allows tapping of phone lines, this includes mobile phones. If you think your phone is tapped and your need a secure phone communication, it is worth looking into voice encryption.
There a vendors who offer mobile phones with voice encryption, but if you phone's hardware or firmware does not allow you to encrypt the normal voice calls, you can still use your data connection to send and receive encrypted voice data. The standard method for this is called the "SIP"-protocol. SIP is built-in in business Symbian-Phones and the N900 and available for Android Phones. SIP calls might be encrypted, but generally are not; this is a decision mostly of your SIP provider who has to support it.
Currently there are two convenient solutions for secure calling (one of them only on Android Phones). Both use the data connection of your (smart) phone, which means that you either need to be connected to a WiFi network or have a payable and reliable 3G connection ready.
Skype
Skype is a very well-known voice application. Skype uses encryption for the whole path of the voice communication.
Although the encryption seems to be resonably good1 , Skype is not open about the technology they use for this. It's unknown if (some) governments have access to it or not. It seems to be safe for most countries and at least safer then using normal phone communication.
Because of the popularity of Skype and the fact mobile phone operators are loosing call-minutes, unfortunately some operators are blocking the use of Skype.
Depending on the phone you use, Skype might consume a lot of battery power. Keep this in mind when using Skype and are low on energy.
RedPhone
RedPhone is an application available only on the Android platform. It establishes a voice connection by a mediation through the RedPhone vendor's servers, so the are able to log every call you make with the RedPhone software.
RedPhone is very convenient to install on Android Phones. It's available from the Android Market. After installing it will use your normal phone contacts. It also has the ability to upgrade a phone call to an encrypted one while calling.
The main advantage of RedPhone over Skype is the way how it's integrated in your normal phone behaviour and the way it setups communication. It does not use a lot of battery power in standby. A big disadvantage is it's sound quality, which is not so very good, another big disadvantages that really limits its use is that the software is only available for android.
RedPhone needs a data-connection (WiFi or 3G) to operate.
Other methods
There are some other methods using VoIP encryption. Most of these application need a proper setup by a VOIP provider and are therefore not covered by this manual. Mostly VOIP connections are insecure if not explicitly stated otherwise.
- Skype uses variable bit encoding which might leak information about the phrases spoken. See explanation and alternative encryption at http://zfoneproject.com/faq.html#vbr^
VPN on Android phones
Setting up VPN with L2TP or PPTP is very simple in Android, although there are some ceaveats. Before starting, you need server and login information from your VPN provider. Normally you need at least these items:
- username
- password
- vpn servername, eg. tunnel.greenhost.nl
optional:
- pre-shared-key (PSK), this is general password. Most providers will use a certificate instead
- type of the VPN service, PPTP or L2TP/Ipsec
In this example we explain L2TP with a Pre-Shared-Key (PSK). This is one of the most complicated versions. All other configurations are less complicated.
1. If you go to "whatismyipaddress.com" with a browser, you will see your current external IP address, and the location where this IP is registered. This is mostly not exactly on your current location, but often at least in the country where you are. In the example the IP is in Germany
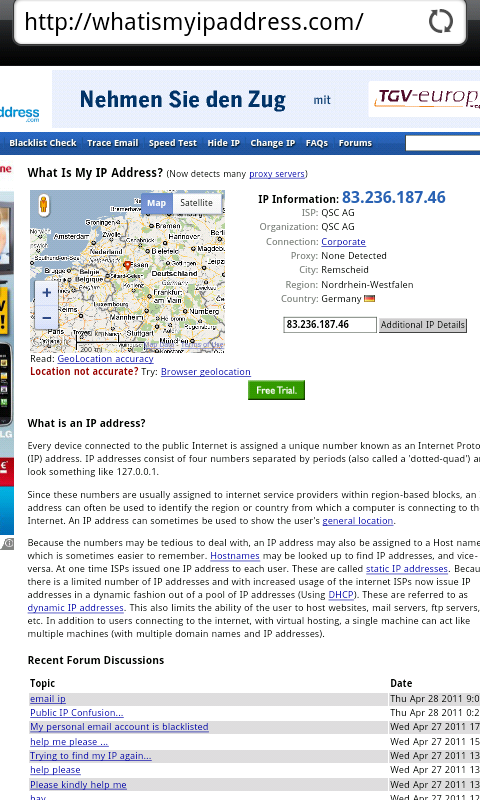
2. To setup your VPN, open the android menu and choose 'Settings'

3. In the settings menu choose 'Wireless & networks'
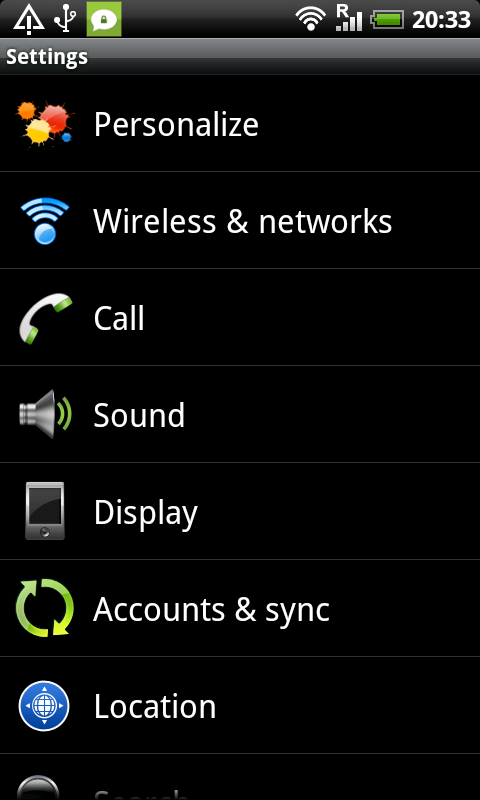
4. Scroll down a bit, here you will found a VPN settings option, choose this option

5. On the top you will be able to choose to add an VPN
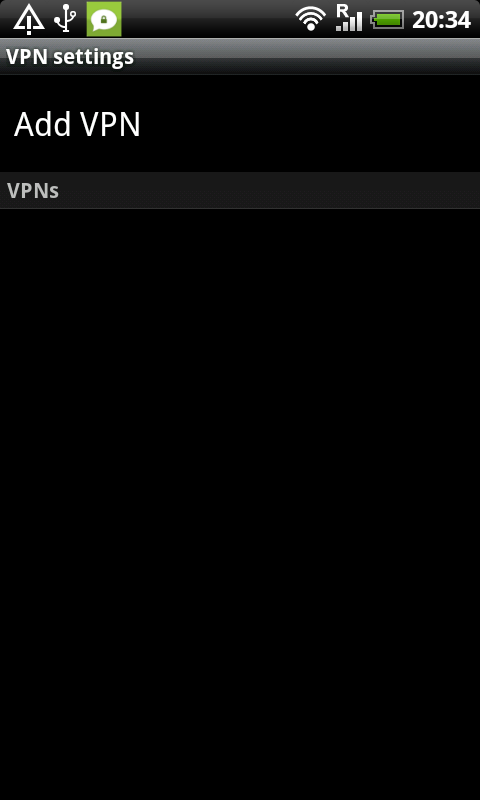
6. Next you need to choose the correct type of VPN. This is a vital step as VPN types are not interchangeable. Most common types are PPTP of L2TP/IpSsec. The L2TP/IpSec can be combined with a PSK or CRT option. The first is "Pre-Shared-Key", the option common in smaller company VPN networks. The other options is used with some large networks. In this example we will use the "L2TP/IPSec PSK VPN", choose this option

7. Next is setting up the parameters for your network. Choose 'VPN name' to setup a name for this connection
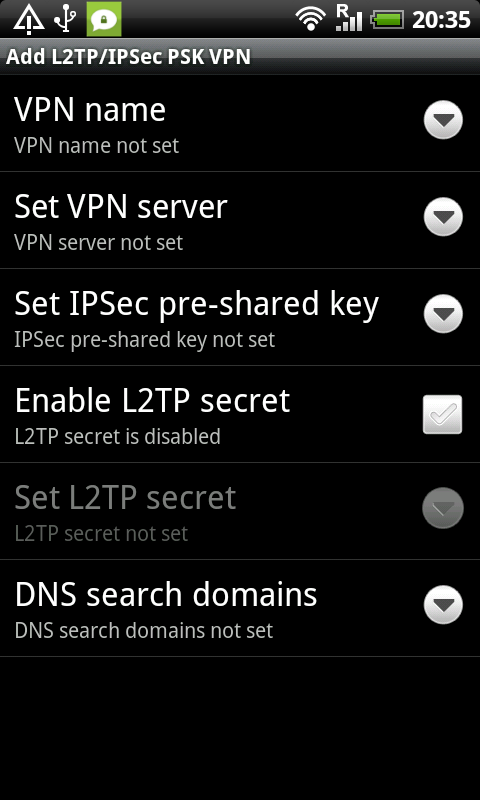
8. Type a name for your connection. This can be whatever you like to identify this connection with. Confirm with OK.
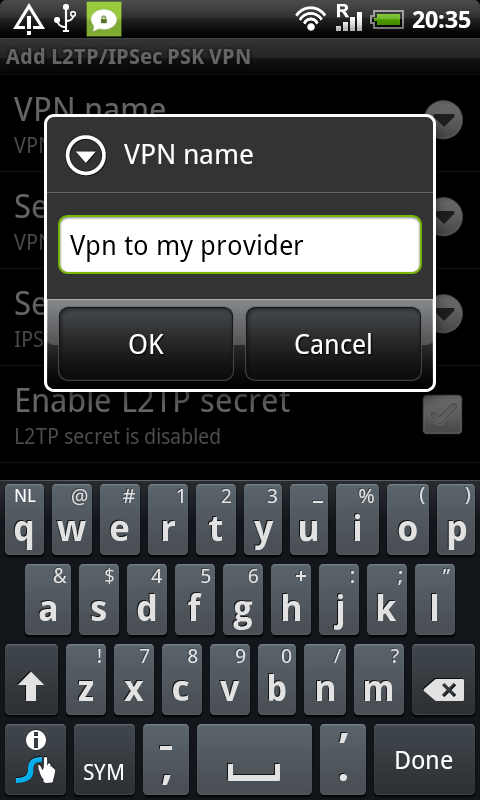
9. Next choose "VPN Server", and fill in the server name. This name is provided when your received your connection and login information. We use the tunnel server of Greenhost in this example "tunnel.greenhost.nl". Once again confirm with "OK"
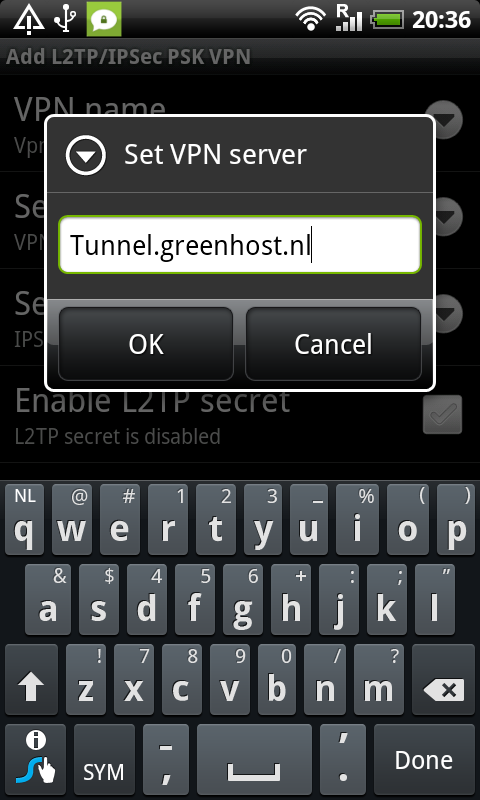
10. Next is the pre-shared-key. If you use a certificated based connection, this option does not exists. You should have received your pre-shared key from your VPN provider
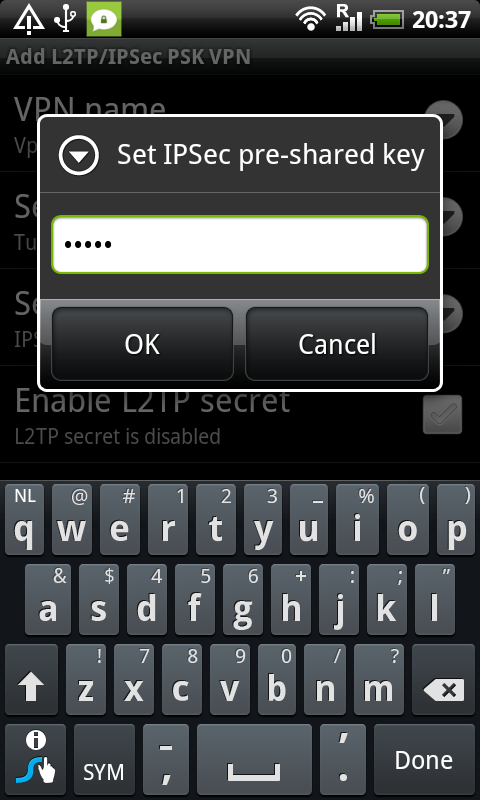
11. The rest of the options are normally not used. Hit the menu & save button of your phone to confirm the settings.
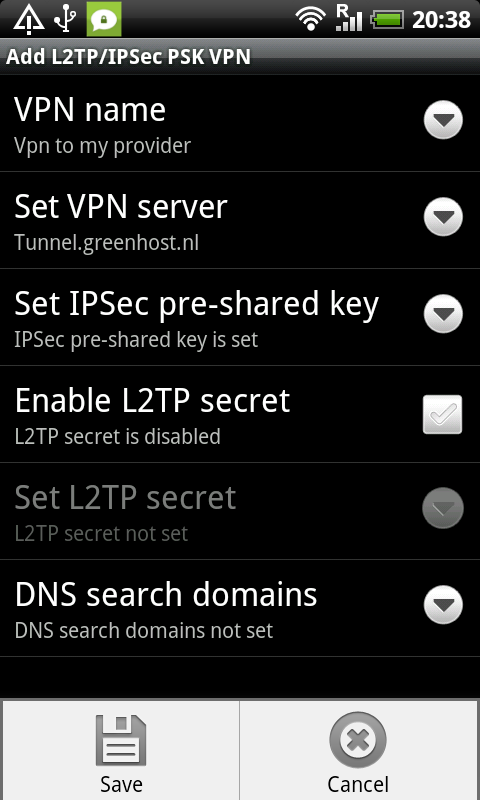
12. After saving you will return to the VPN overview. Now just click on the newly created connection.
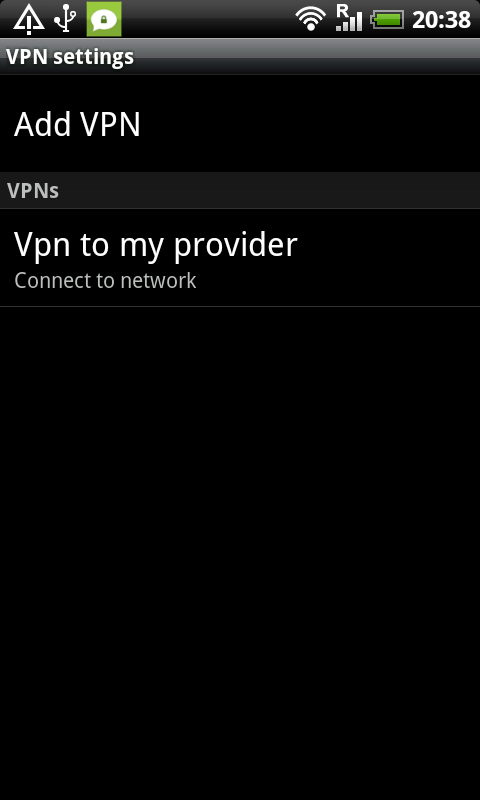
13. The system will ask for your credentials, type them as you received them from your provider.
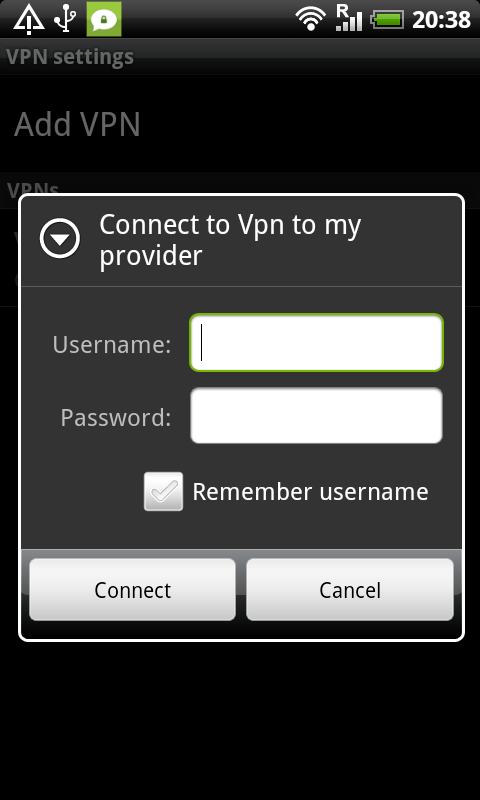
14. We use Bill and a password in our example. Press 'Connect' to connect.
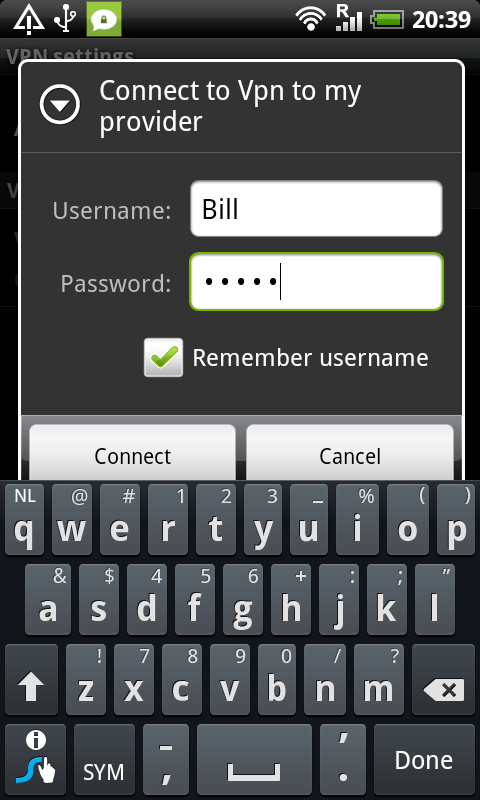
15. If everything goes smoothly, you will get a "connected" status after a few seconds. Notice also the new "key" icon in the top bar. Here you will see if your VPN connection is active.
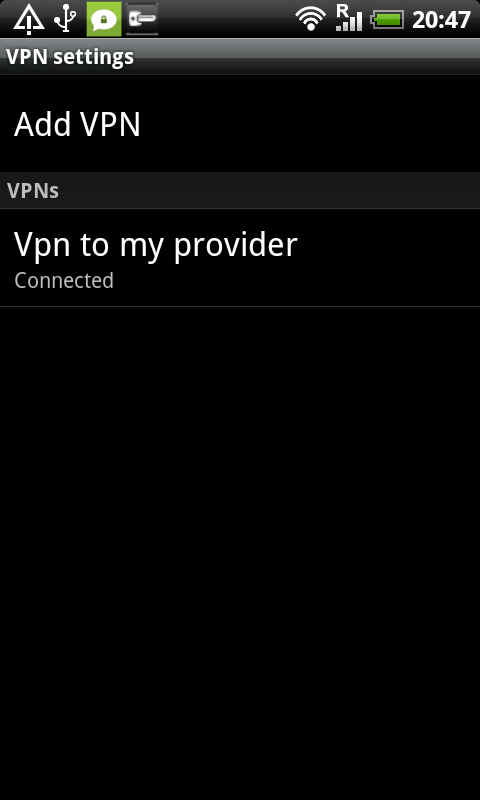
16. Now, lets return to whatismyipaddress.com: Yeah, we moved, we are located in the Netherlands now. Wow! That's fast travelling ;)
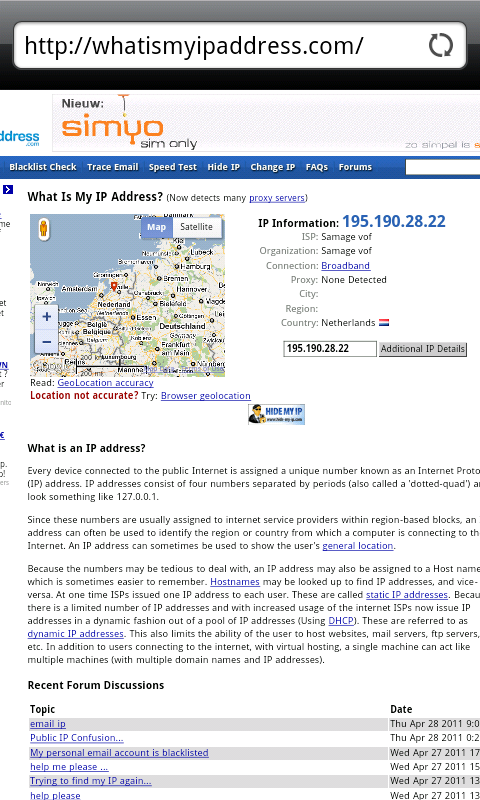
Warning: Losing connectivity
When you lose connectivity your VPN will get disconnected automatically. If you have internet connectivity again, your VPN connection will not be enabled automatically. This means you internet connection is unsafe and you will have to reactivate the VPN manually.
It's currently not possible to force the VPN and disallow normal traffic if now VPN is active.
Email security on Android
With the growing usage of mobile phones for e-mail, it's interesting to be able to use PGP also on your mobile. This way your can still read the messages send to you in PGP on your phone and not only on your computer.
PGP on Android: APG
PGP on mobile phones is very new - currently there are not many tools available for Android phones to use PGP. Its a pity there are not more options and easier softwares to configure and install, however if you do set it up then the same rules apply for using PGP on Android as normal PGP usage as described in the PGP/Secure emailing chapter.
For Android you need at least the APG application. This is a small tool which makes PGP encryption possible on the phone. You can use APG to manage your private and public. The options in the application are quite straightforward if you are a little convenient with PGP in general.
Management of keys is not very well implement yet. The best way is to manually copy all your public keys to the SD card in the APG folder. Then it's easy to import your keys. After you've imported your public and private keys, PGP encrypting, signing and decrypting will be available for other applications as long as these applications have integrated encryption/PGP.
PGP enabled e-mail on Android: K-9 Mail
The default mail application does not support PGP. Luckily there is an excellent alternative: K-9 Mail. This application is based on the original Android mail application but with some improvements. The application can use APG as it's PGP provider. Setting up K-9 Mail is straightforward and similar to setting up mail in the Android Default mail application. In the settings menu there is an option to enable "Cryptography" for PGP mail signing.
If you want to access your PGP mails on your phone this application is a must have.
Please note, due some small bugs in K-9 Mail and/or APG, it's very advisable to disable HTML mail and only Plain text. As HTML mails are not encrypted nicely and are often not readable.
FAQ
 Suggestion: let's go through these questions when we are finished, to see which ones we address in the manual so we can refer to chapters, and which we can answer by referring to others.
General
1 How to assess the risks of online communication, and how to counter them?
This is a good question. This is always a factor between social and technological factors. Read the introduction/explanation about the manual, make an estimation of the risks and choose between basic or more complex safety measures. If you are experiencing suspicious behaviour in your computer at suspicious times, (pop-ups, loads of traffic when you are not even browsing, fans that are always on because you're processor is working very hard all the time etc.) please have a good look into your stuff and take appropriate action.
2 How to keep updated about safety risks online?
The Electronic Frontier Foundation (EFF, http://www.eff.org) and European Digital Rights (http://www.edri.org/) keep you updated about online defence strategies and of course we hope you and others will update this book frequently online!
3 What can others find out about me online?
Depends on what traces you leave.
(a) in public for normal users: This is very simple, just type in your names and aliases in google.
(b) semi-public for the technologically educated: Not all pages are indexed in Google. Have a good look into your social networks. Also remember entering your private data into some websites is sometimes stored in places where you cannot find this.
(c) non-public for sophisticated intelligence services: This is difficult to know. Remember phone lines and internet connections can be tapped by government institutions, especially when you are not using security measures, which can be found in this book in the chapter about securing your connection or using TOR.
4 Which data can companies give to governments or other parties?
Basically all data you give them, although in some countries there some legals limitations to what they are allowed to give. Most companies only care about their profit and not about your privacy. Or, like Mark Zuckerberg from Facebook said: "Privacy is so 1984".
The Electronic Frontier Foundation (EFF) has a section on the legal rules (https://ssd.eff.org/3rdparties) that govern when and how law enforcement agents can obtain this kind of information stored by and with third parties, but this is focussed on the US. Check with your local Digital Rights Group (like Bits of Freedom in the Netherlands) for details about the country you are residing.
 Social Media
5 How long does my Facebook profile stay online? Does Facebook keep my data forever?
Facebook makes money with your private data. Although you are never sure, the chances are very big Facebook will keep your data forever. To be sure, ask Mark Zuckerberg, but don't expect a truthful answer.
There are several websites on 'how to delete my Facebook account', but Facebook also regularly changes its settings. Possible sources: http://www.facebook.com/group.php?gid=16929680703 or Maximizing privacy on Facebook: http://www.eff.org/deeplinks/2010/05/more-privacy-facebook-new-privacy-controls
You can prevent interaction with Facebook from other Web sites by installing Ad-ons to Firefox. Check the Ad-on database of Firefox to look for this.
6 What are the do's and don'ts with Social Media?
do's: keep away from them.
don't: create an account.
 Telecommunication
7 Can we use local SIM cards and if so, how?
Yes, you can use them, but please remember, in most countries your are required to give a copy of your ID. There is always a connection between your SIM card and the Telephone network. If you think you are under direct threat, please keep a close attention about what you do with your identity regarding phone networks. Even when your are not calling, but your phone is online, the network can track the location of your phone (and you). Also have a look on de IMEI chapter.
8 How to safely use smart phones, in my own country and during travels?
If you are not brave enough to throw your iPhone or Blackberry away, make sure you have read the chapter on how to secure them through at least a VPN. A better option is to buy an Android, that allow better encryptions.
Email
9 How to safely use webmail? (Hotmail, gmail etc.)
Safe webmail = safe provider + safe technology + safe connection + nobody looking over your shoulder.
It also depends on who you are, who is threatening you, the country of your webmail provider, where is the data resides and how your provider relates to others (commercially or politically). If you use Gmail, you don't always know where the server is, but the (business) customers can choose to take a server in the US
Generally, you might consider to use Thunderbird, which is much safer than webmail.
10 What is mail encryption and how to do it? PGP?
Depends what you want to encrypt. There is a difference between securely connecting to your mail and actually encrypting the mail data. PGP stand for Pretty good Privacy and does indeed a pretty good job at keeping your data secure on your computer and while being send through the net.
11 How to send or receive e-mails without giving away my location?
This can be done by using Tor or a VPN. Tor is the most secure way, but is slower then a VPN solution. Be aware however that both solutions come with some small security issues. Please read the chapters about these issues.
12 How are passwords for webmail, external websites and CMS systems hacked?
This really depends. There are many risks if you do not connect safely to your e-mail and internet in general. Many people 'loose' their password by giving it away voluntarily because they are subject to social engineering; i.e.. they are made believe they are communicating with a trustworthy source (a friend in a chat) while actually it is a crook. It is difficult to protect yourself against this, but a good rule of thumb is: NEVER GIVE YOUR PASSWORDS TO ANYBODY.
More information about other threats and risks can be found in the chapters VPN, Setting up email and HTTPS-Everywhere. Also it is important to use safe passwords. Please have a close look to password security.
13 What to do with e-mails that seem to be coming from you 'know' but look strange.
The sender's address can be easily forged. Reply to the mail asking confirmation, or if you suspect that the mailbox of the sender was actually hacked; call the owner of the mailbox and warn her. And check our chapter on safe e-mail about how to sign e-mails.
 Personal safety and privacy:
15 We are activists that work in an undemocratic country. Do we need to take our pictures offline?
What do you think yourself? Everything on social networking sites, for instance Facebook, is online and will remain available to Facebook and possibly also to others. So if you fear that your friendship with Iranian bloggers will endanger their future, unfriend them and take your Facebook account offline. Hopefully the data get's deleted at some point soon by the corporation running the social media network you were using...
There is currently no safe way of using Social Media. Period.
16 My private and business communication seem to become fused.
Start seeing your online profile as something you need to "manage". Just as you take care of how you look when going outside on the streets, make sure your online self appears the way you want it for the appropriated public.
17 How to delete online information about myself?
Depends on what kind of information. Is your concern your profile on social networking sites? See our answers under 'Social Media'. Don't you like the way you appear in the Google search results? That is really beyond the scope of our possibilities. Ask Google.
 Internet while travelling
19 Can I use wireless internet in bars?
You can only if you do it with care. Read our chapter on using VPN and secure email.
20 What are the dangers of internet café's?
We have a special chapter on internet cafés.
It is possible to install Firefox on a CD-ROM or USB-drive. This will also enable you to bring you're own bookmarks, setting, add-ons etc. etc. and it will limit the amount of data and traces you'll leave on the computer your using. So it could prove to be exceptionally useful when you have to use untrusted computers or internet cafés.
It is also recommended to read the chapter on safe browsing.
21 How to secure my laptop when travelling?
It depends: install the right passwords, encrypt your mail on securing your computer.
22 How safe is Skype?
Skype is safer than using a mobile phone, but we don't know exactly the specifics because Skype uses a closed protocol. From time to time intelligent services complain about their inability to listen in on Skype. Them being so open about this could also been seen as an way to lure people into using Skype because they secretly do have access to it. Bottem line; we think it is safe, but we have no way of knowing for sure.
23 What are alternatives for e-mail when travelling?
Depends on the form of data you want to send and which other possibilities are open to you. End to end encryption is always the safest option be it VPN, a tunnel or encrypted SMS. Make sure that if you know on forehand you won;t be able to use email that other trustworthy options are open so that you are not tempted to use an insecure connection.
24 What is a proxy and what to do with it?
Read the chapter on proxies.
25 Should we avoid public proxies?
There are very good open and public proxies. But you should always know who owns and operates it and decide for yourself if you trust these people.
Sharing information versus security
26 I work in a dangerous country but I need to get my message through. What to do?
As all are questions hopefully make clear: it is always a trade off. Read this book, know the dangers and the possibilities, talk about it with professionals and then make a risk assessment.
How the Net Works
This chapter is included should you wish to understand a little more about how the internet works.
Imagine a group of individuals who decide to share information on their computers by connecting them, and by sending information between these computers. Their efforts result in a set of devices able to communicate with each other via a computer network. Of course, the network can be even more valuable and useful if it is connected to other networks and hence to other computers and network users. This simple desire to connect and share information electronically is manifested today in the global Internet. As the Internet has grown rapidly, the complexity of its interconnections has also increased, and the Internet is literally built up from the interconnection of a tremendous number of networks.
The fundamental task of the Internet can be described as facilitating the journey of digital information from its origin to its destination, using a suitable path and an appropriate mode of transportation.
Local computer networks, called Local Area Networks, or LANs, physically connect a number of computers and other devices at the same physical location to one another. They can also connect to other networks via devices called routers that manage the information flow between networks. Computers in a LAN can communicate with each other directly for purposes like sharing files and printers, or playing multi-player networked video games. A LAN could be useful even if it were not connected to the outside world, but it clearly becomes more useful when it is.
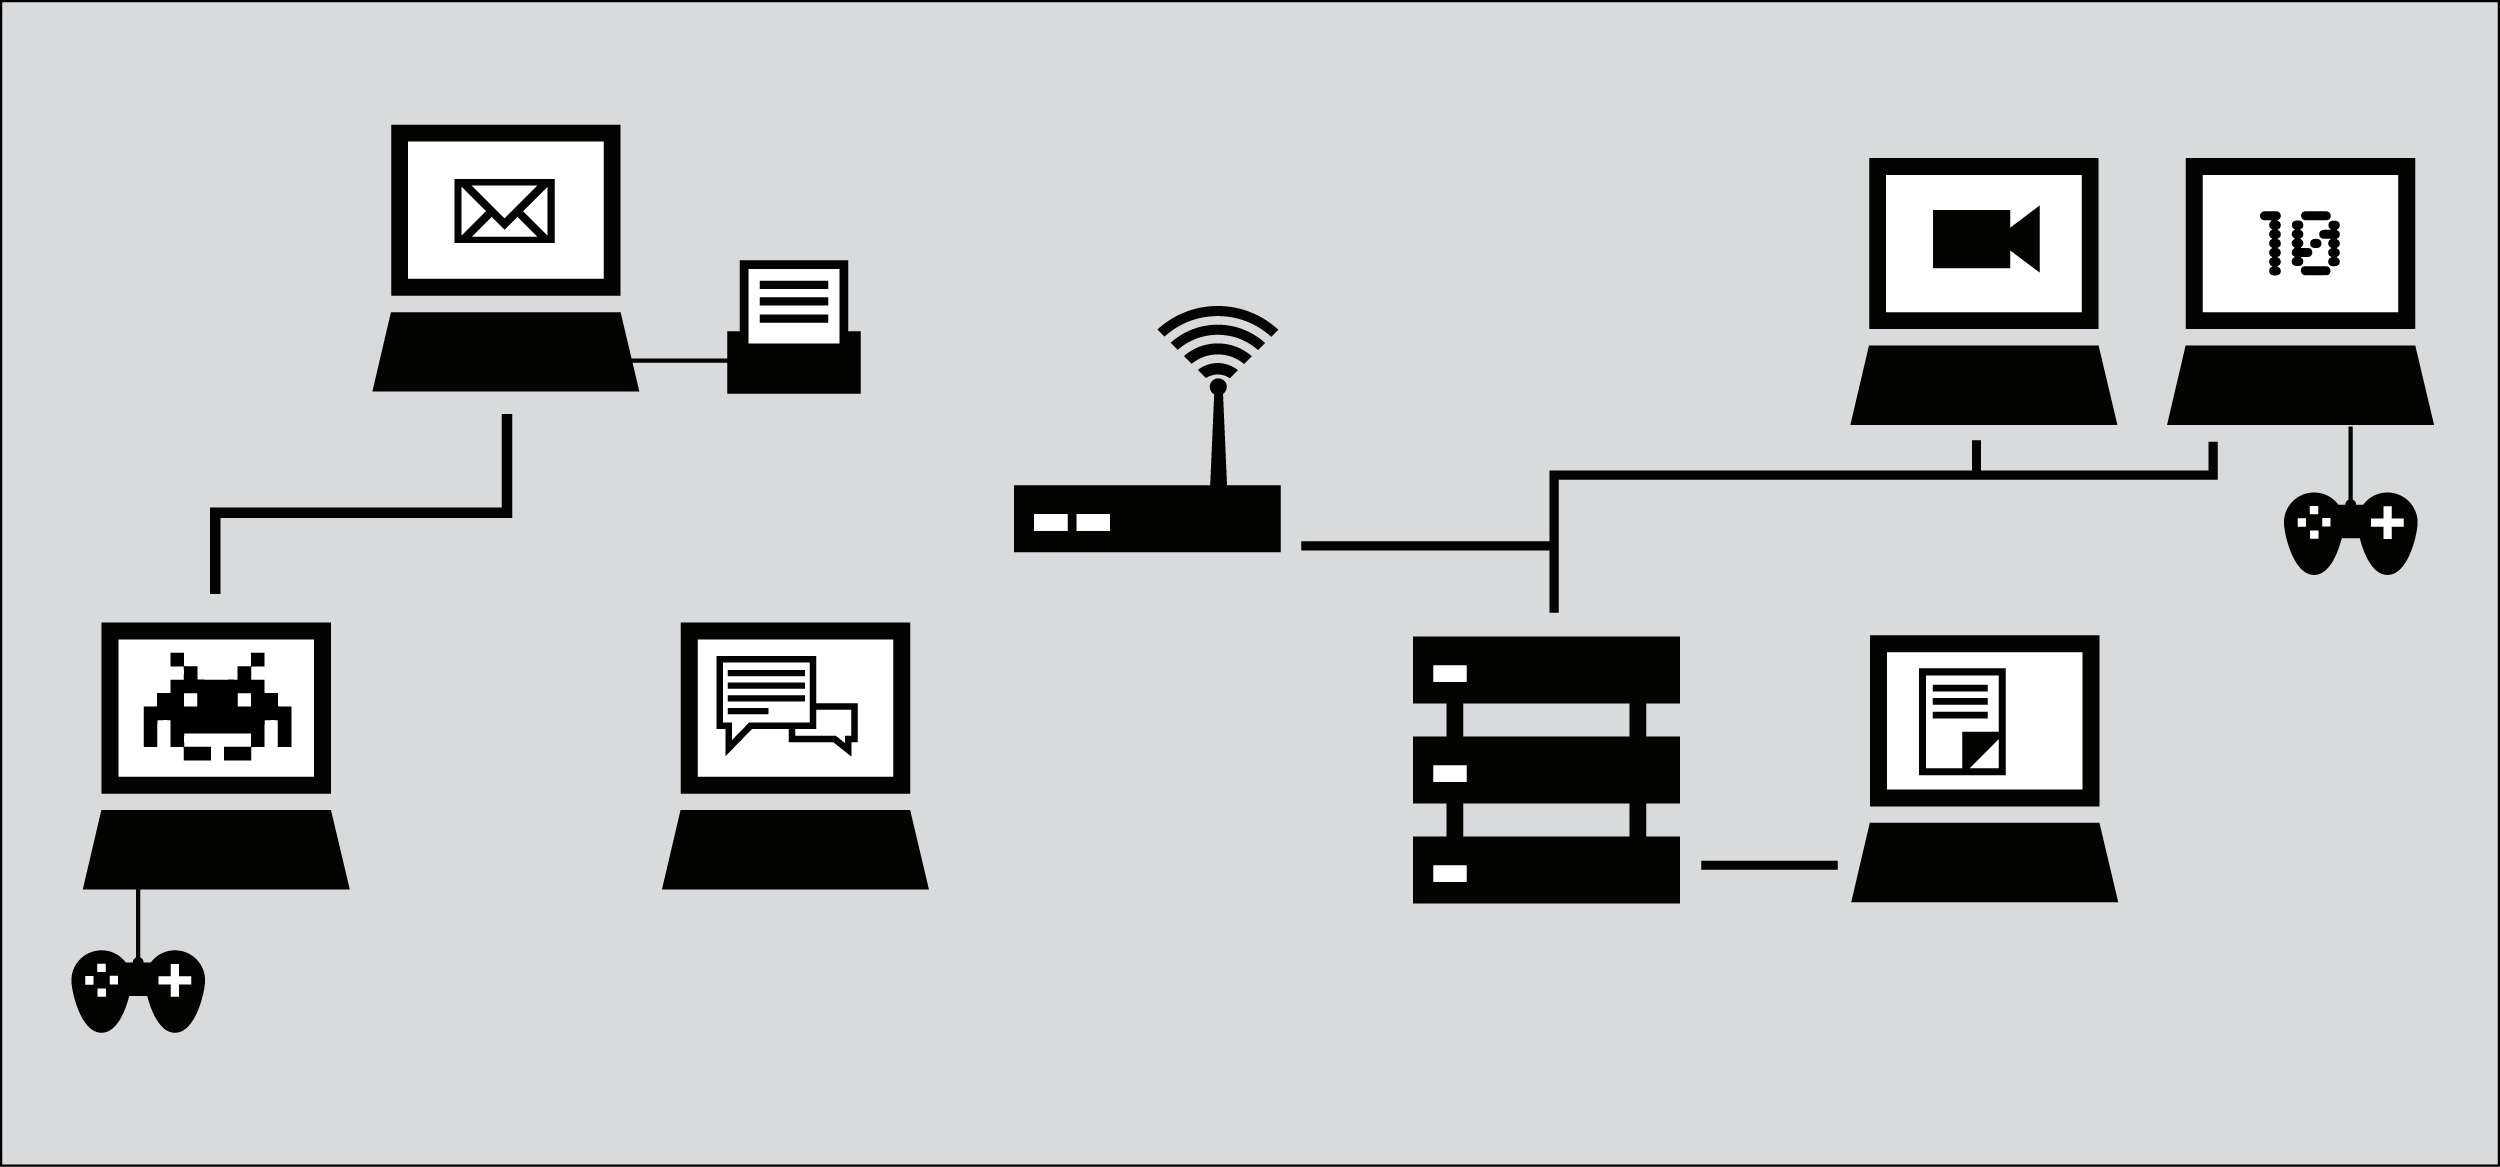
The Internet today is a decentralized world-wide network of such local computer networks, as well as larger networks such as university and corporate networks, and the networks of hosting providers.
The organizations that arrange these interconnections between networks are called Internet Service Providers or ISPs. An ISP's responsibility is to deliver data to the appropriate place, usually by forwarding the data to another router (called "the next hop") closer to the data's final destination. Often, the next hop actually belongs to a different ISP.
In order to do this, the ISP may purchase its own Internet access from a larger ISP, such as a national provider. (Some countries have only a single national-level provider, perhaps government-operated or government-affiliated, while others have several, which might be competing private telecommunications firms.) National providers may similarly receive their connections from one of the multinational companies that maintain and operate the servers and connections that are often mentioned as the backbone of the Internet.
The backbone is made up of major network equipment installations and global connections between them via fiber-optic cables and satellites. These connections enable communications between Internet users in different countries and continents. National and international providers connect to this backbone through routers sometimes known as gateways, which are connections that allow disparate networks to communicate with each other. These gateways, just like other routers, may be a point at which Internet traffic is monitored or controlled.
Building the Internet
The originators of the Internet generally believed that there is only one Internet, that it is global, and that it should allow any two computers anywhere in the world to communicate directly with one another, assuming the owners of both computers want this to happen.
In a 1996 memo, Brian Carpenter, then chairman of the Internet Architecture Board, wrote:
 in very general terms, the [Internet engineering] community believes that the goal is connectivity ... [the] growth of the network seems to show that connectivity is its own reward, and is more valuable than any individual application.
The originators of the Internet created and continue to create standards aimed to make it easier for others to also create their own networks, and to join them to each other. Understanding Internet standards helps make clear how the Internet works and how network sites and services become accessible or inaccessible.
The most basic standard that unites all of the devices on the global Internet is called the Internet Protocol (IP).
Standards for identifying devices on the network
When your computer connects to the Internet, it is normally assigned a numeric IP address. Like a postal address, the IP address uniquely identifies a single computer on the Internet. Unlike the postal address, however, an IP address (particularly for a personal computing device) is not necessarily permanently associated with a specific computer. So, when your computer disconnects from the Internet and reconnects at a later time, it may receive a different (unique) IP address. The IP protocol version currently in predominant use is IPv4. In the IPv4 protocol, an IP address is written as four numbers in the range 0-255, separated by dots (e.g. 207.123.209.9).
Domain names and IP addresses
All Internet servers, such as those which host Web sites, also have IP addresses. For example, the IP address of www.freepressunlimited.org is 195.190.28.213. Since remembering IP addresses is cumbersome and IP addresses might change over time, specific systems are in place to make it easier for you to reach your destination on the Internet. This system is the Domain Name System (DNS), where a set of computers are dedicated to serving your computer with the IP addresses associated with the human-memorable "names".
For example, to access the Free Press Unlimited website you would type in the www.freepressunlimited.org address, also known as a domain name, instead of 195.190.28.213. Your computer then sends a message with this name to a DNS server. After the DNS server translates the domain name into an IP address, it shares that information with your computer. This system makes Web browsing and other Internet applications more human-friendly for humans, and computer-friendly for computers.
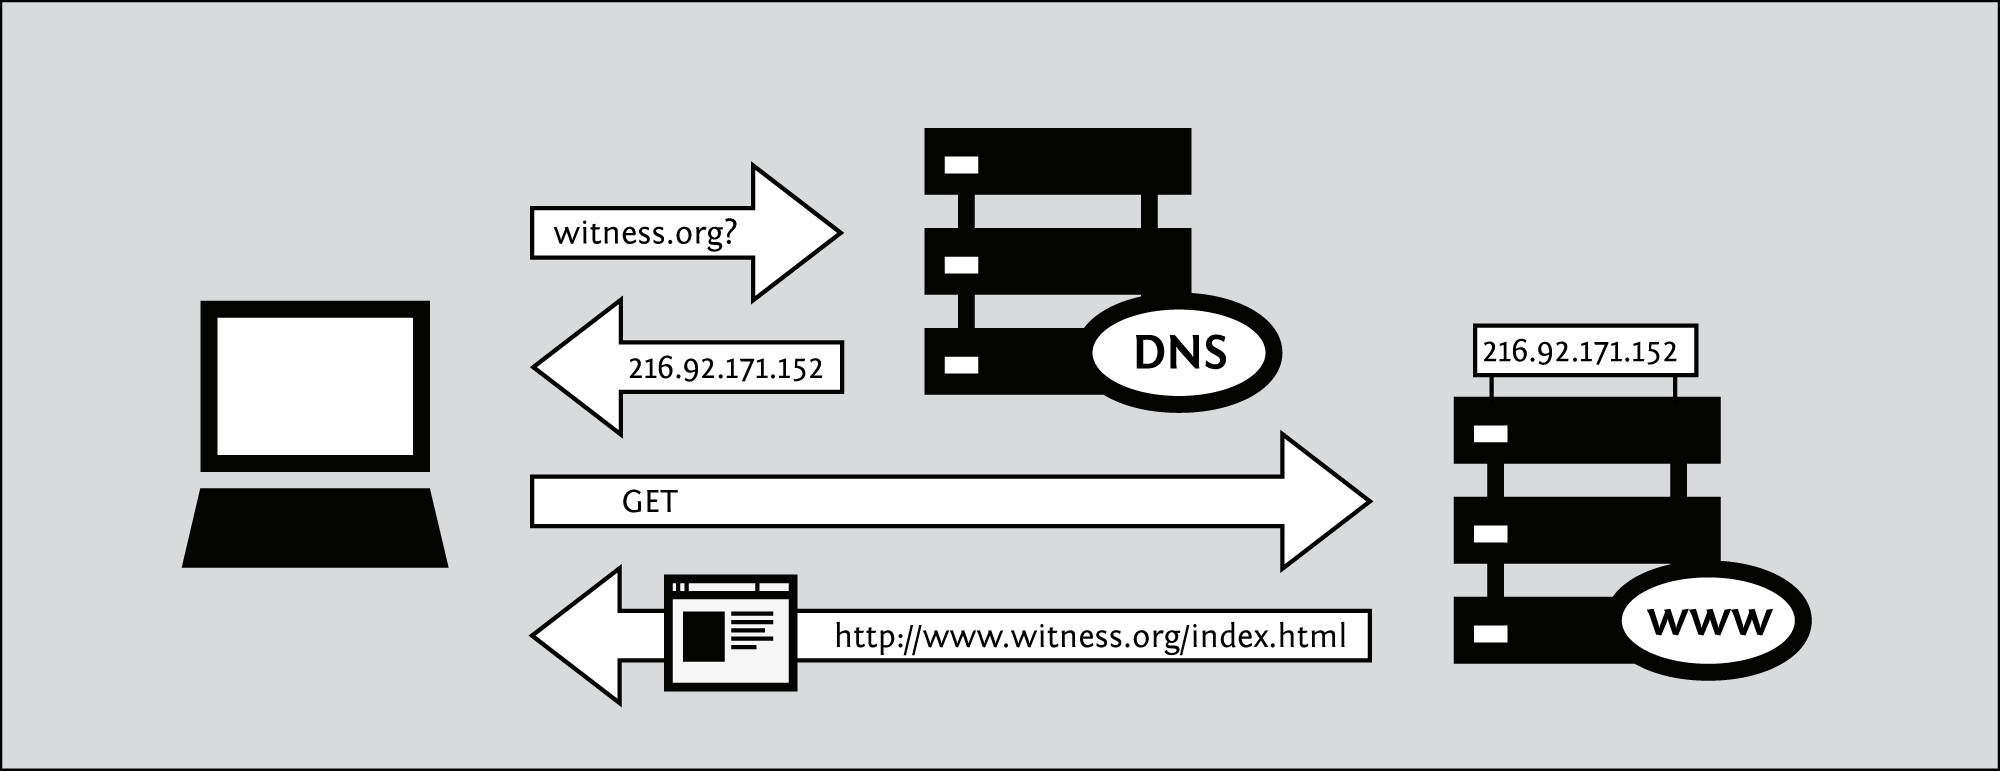
Mathematically speaking, IPv4 allows for a pool of about 4.2 billion different computers to be connected to the Internet. There is also technology that lets multiple computers share a single IP address. Despite this, the pool of available addresses was more or less exhausted at the beginning of 2011. As a result, the IPv6 protocol has been devised, with a much larger repository of possible unique addresses. IPv6 addresses are much longer, and even harder to remember, than traditional IPv4 addresses. An example of an IPv6 address is:
2001:0db8:85a3:0000:0000:8a2e:0370:7334
Although as of 2011 less than 1% of the Internet uses the IPv6 protocol, this will probably change dramatically in the near future.
Protocols for sending information through the network
The information you exchange as you use the Internet could take many forms:
- an e-mail to your embassy
- a picture or video of an event
- a database of contact information
- a file containing a set of instructions
- a document containing a report on a sensitive topic
- a computer program that teaches a skill.
There is a wide variety of Internet software to accommodate proper handling of the various forms of information according to specific protocols, such as:
- e-mail via Simple Mail Transport Protocol (SMTP)
- instant messaging via Extensible Messaging and Presence Protocol (XMPP)
- file sharing via File Transfer Protocol (FTP),
- peer-to-peer file sharing via BitTorrent protocol
- Usenet news via Network News Transfer Protocol (NNTP)
- a combination of protocols: voice communication using Voice Over Internet Protocol (VoIP), Session Initiation Protocol (SIP) and Real-time Transport Protocol (RTP)
The Web
Although many people use the terms "the Internet" and "the Web" interchangeably, actually the Web refers to just one way of communicating using the Internet. When you access the Web, you do so using software called a Web browser, such as Mozilla Firefox, Google Chrome, Opera, or Microsoft Internet Explorer. The protocol that the Web operates on is called the Hyper-Text Transfer Protocol or HTTP. You might also have heard of HTTPS, which is the secure version of HTTP that uses Transport Layer Security (TLS) encryption to protect your communications.
Following your information on the Internet - the journey
Let's follow the example of visiting a Web site from your home computer.
Browse to the Web site
- You type in http://freepressunlimited.org/. The computer sends the domain name "freepressunlimited.org" to a selected DNS server, which returns a message containing the IP address for the Free Press Unlimited server (currently, 195.190.28.213).
- The browser then sends a request for a connection to that IP address.
- The request goes through a series of routers, each one forwarding a copy of the request to a router closer to the destination, until it reaches a router that finds the specific computer needed.
- This computer sends information back to you, allowing your browser to send the full URL and receive the data to display the page.
The message from the Web site to you travels through other devices (computers or routers). Each such device along a path can be referred to as a "hop"; the number of hops is the number of computers or routers your message comes in contact with along its way and is often between 5 and 30.
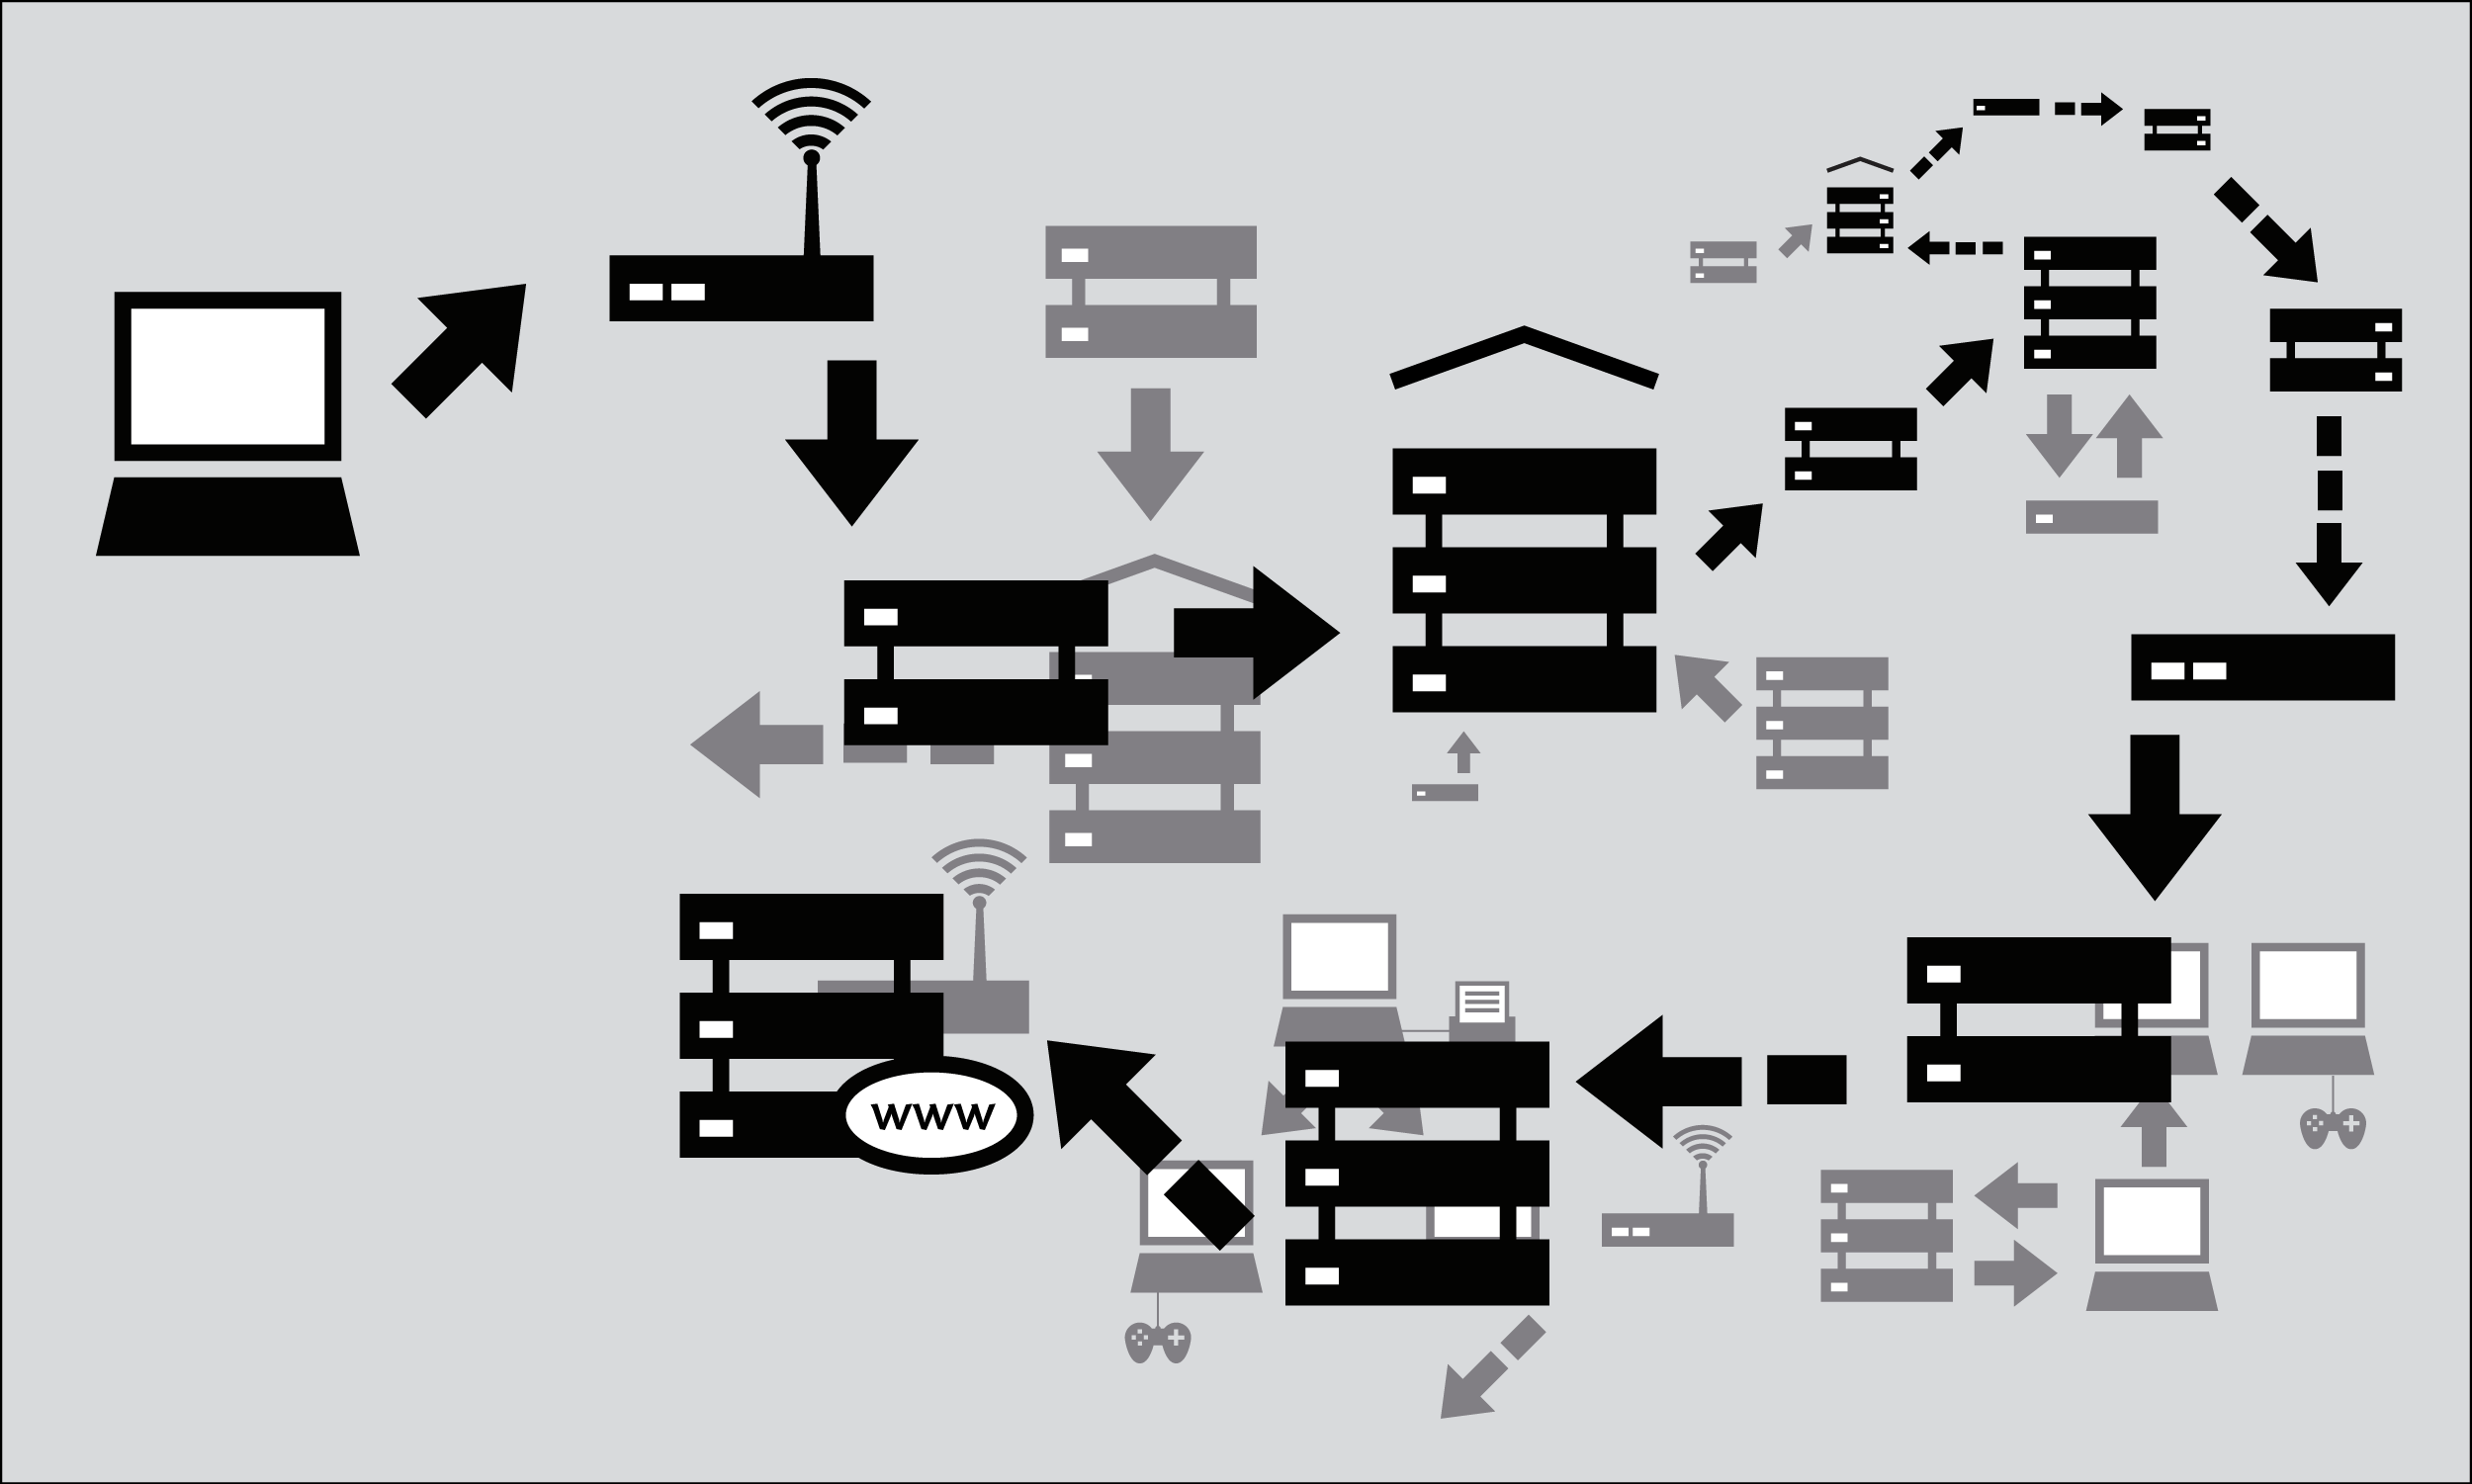
Why This Matters
Normally all of these complex processes are hidden and you don't need to understand them in order to find the information you need. However, when people or organizations attempting to limit your access to information interfere with the operation of the system, your ability to use the Internet may be restricted. In that case, understanding just what they have done to interfere with your access can become extremely relevant.
Consider firewalls, which are devices that intentionally prevent certain kinds of communication between one computer and another. Firewalls help a network owner enforce policies about what kinds of communication and use of a network are allowed. Initially, the use of firewalls was conceived as a computer security measure, because they can help repel electronic attacks against inadvertently misconfigured and vulnerable computers. But firewalls have come to be used for a much wider range of purposes and for enforcing policies far beyond the purview of computer security, including content controls.
Another example is DNS servers, which were described as helping provide IP addresses corresponding to requested domain names. However, in some cases, these servers can be used as censoring mechanisms by preventing the proper IP address from being returned, and effectively blocking access to the requested information from that domain.
Censorship can occur at different points in the Internet infrastructure, covering whole networks, domains or subdomains, individual protocols, or specific content identified by filtering software. The best method to avoid censorship will depend on the specific censorship technique used. Understanding these differences will help you to choose appropriate measures for you to use the Internet effectively and safely.
Ports and Protocols
In order to share data and resources, computers need to agree on conventions about how to format and communicate information. These conventions, which we call protocols, are sometimes compared to the grammar of human languages. The Internet is based on a series of such protocols.
The layered networking model
Internet protocols rely on other protocols. For example, when you use a Web browser to access a Web site, the browser relies on the HTTP or HTTPS protocol to communicate with the Web server. This communication, in turn, relies on other protocols. Suppose we are using HTTPS for a particular Web site to ensure that we access it securely.
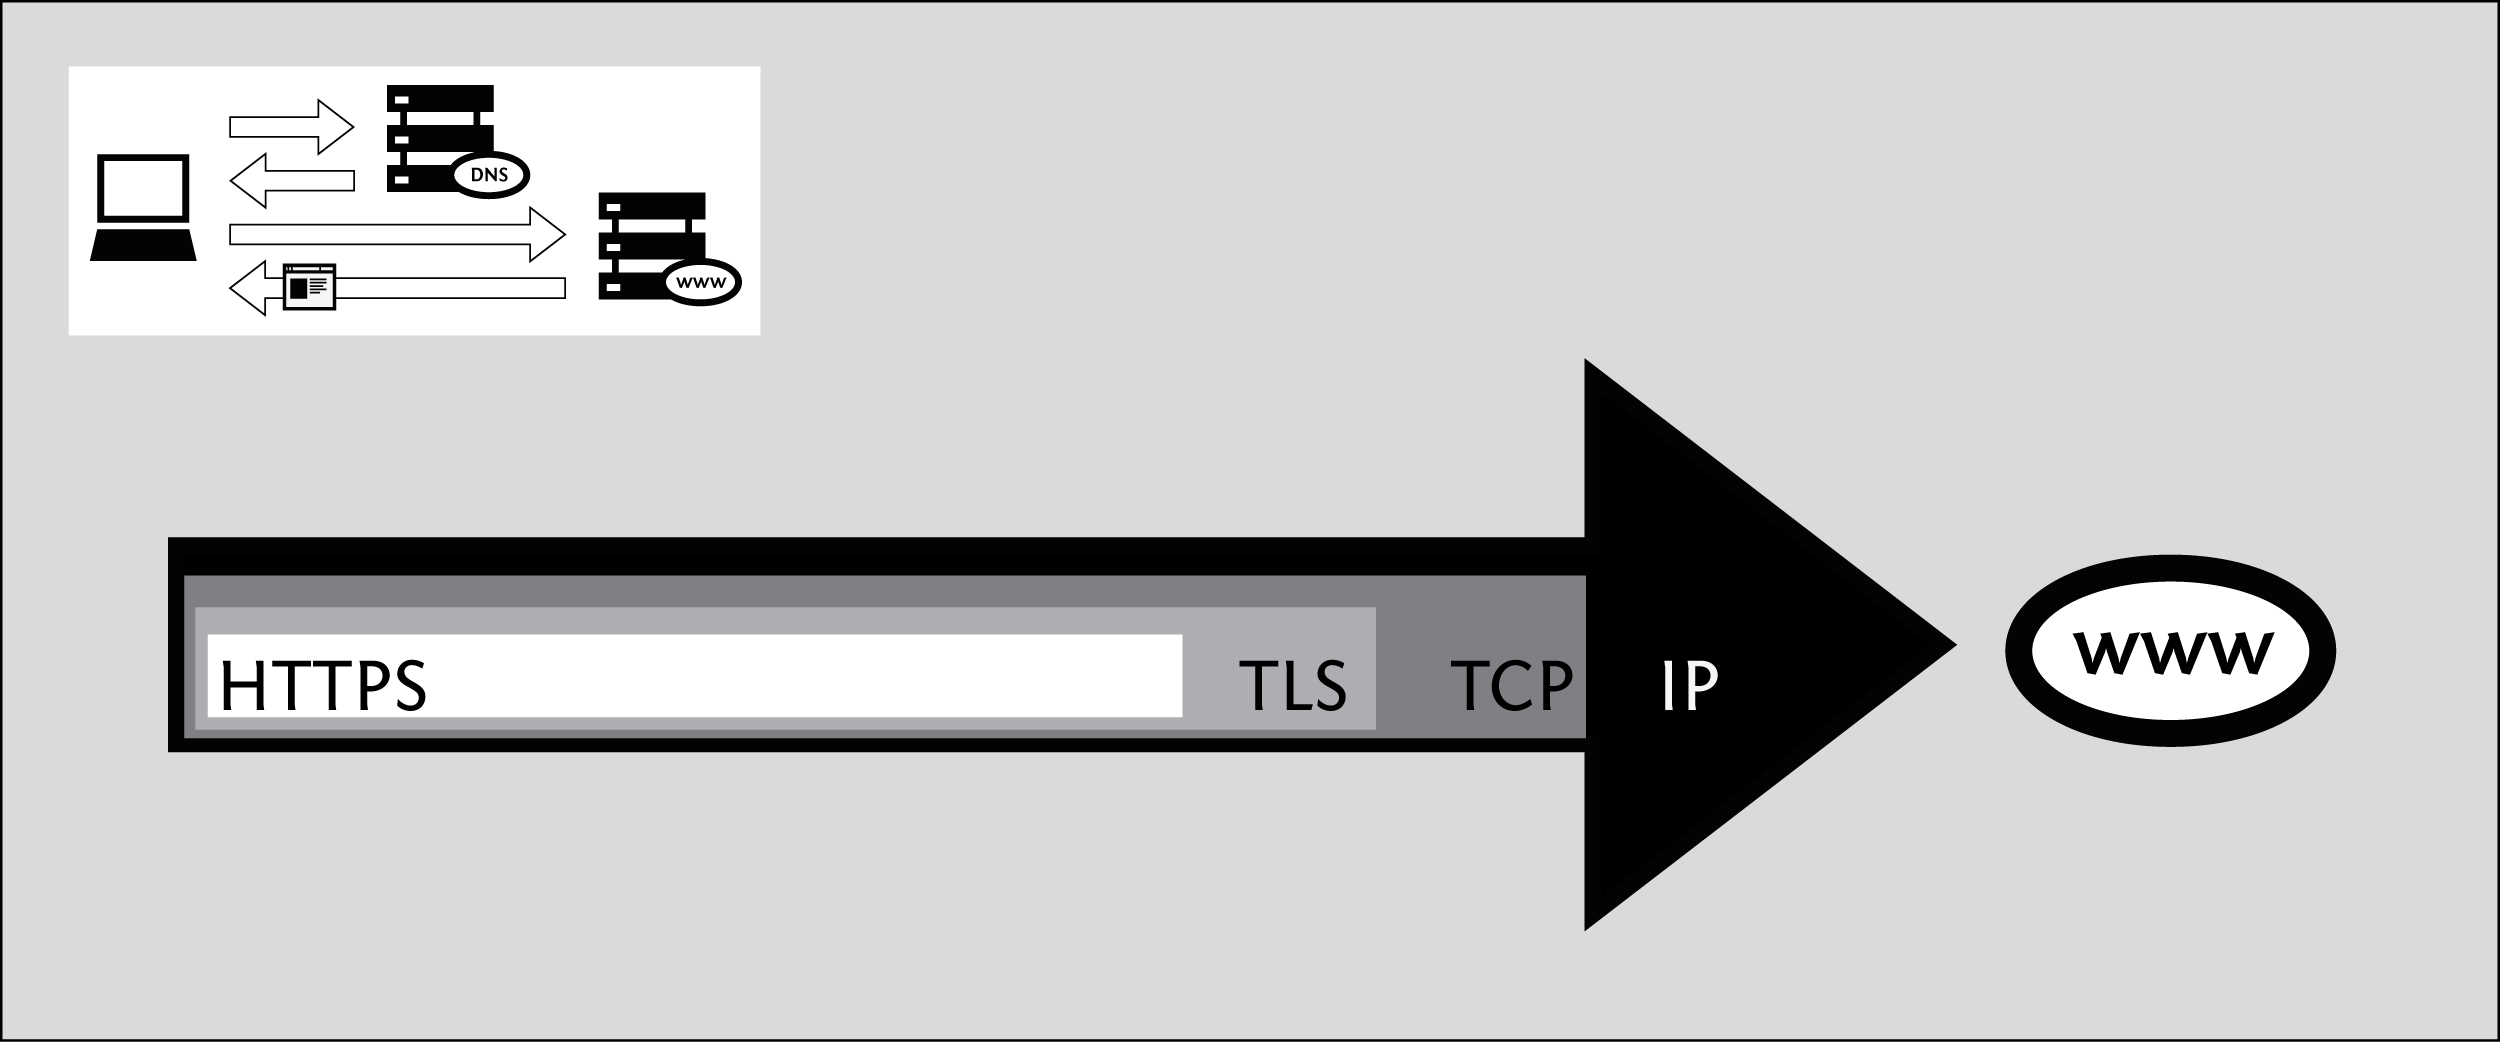
In the above example, the HTTPS protocol relies on the TLS protocol to perform encryption of the communications so that they are private and unmodified as they travel across the network. The TLS protocol, in turn, relies on the TCP protocol to ensure that information is not accidentally lost or corrupted in transmission. Finally, TCP relies on the IP protocol to ensure that data is delivered to the intended destination.
While using the encrypted HTTPS protocol, your computer still uses the unencrypted DNS protocol for retrieving an IP address for the domain name. The DNS protocol uses the UDPprotocol to mark the request for proper routing to a DNS server, and UDP relies on IP for actual transmission of data to the intended destination.
Because of this hierarchical protocol relationship, we often refer to network protocols as existing in a set of layers. A protocol at each layer is responsible for a particular aspect of the communications functionality.
Using Ports
Computers connect to each other via the TCP protocol mentioned above and stay connected for a period of time to allow higher-level protocols to carry out their tasks. TCP uses a concept of numbered ports to manage these connections and distinguish connections from one another. The use of numbered ports also allows the computer to decide which particular software should handle a specific request or piece of data. (UDP also uses port numbers for this purpose.)
The IANA (Internet Assigned Names Authority) assigns port numbers for various higher-level protocols used by application services. A few common examples of the standard assigned port numbers are:
- 20 and 21 - FTP (file transfer)
- 22 - SSH (secure shell remote access)
- 23 - Telnet (insecure remote access)
- 25 - SMTP (send e-mail)
- 53 - DNS (resolves a computer's name to an IP address)
- 80 - HTTP (normal Web browsing; also sometimes used for a proxy)
- 110 - POP3 (receive e-mail)
- 143 - IMAP (send/receive e-mail)
- 443 - HTTPS (secure Web connections)
- 993 - secure IMAP
- 995 - secure POP3
- 1080 - SOCKS proxy
- 1194 - OpenVPN
- 3128 - Squid proxy
- 8080 - Standard HTTP-style proxy
Using these particular numbers is not generally a technical requirement of the protocols; in fact, any sort of data could be sent over any port (and using non standard ports can be a useful circumvention technique). However, these assignments are used by default, for convenience. For example, your Web browser knows that if you access a Web site without specifying any port number, it should automatically try using port 80. Other kinds of software have similar defaults so that you can normally use Internet services without knowing or remembering the port numbers associated with the services you use.
Glossary
Much of this content is based on http://en.cship.org/wiki/Special:Allpages
aggregator
An aggregator is a service that gathers syndicated information from one or many sites and makes it available at a different address. Sometimes called an RSS aggregator, a feed aggregator, a feed reader, or a news reader. (Not to be confused with a Usenet News reader.)
anonymity
(Not be confused with privacy, pseudonymity, security, or confidentiality.)
Anonymity on the Internet is the ability to use services without leaving clues to one's identity. The level of protection depends on the anonymity techniques used and the extent of monitoring. The strongest techniques in use to protect anonymity involve creating a chain of communication using a random process to select some of the links, in which each link has access to only partial information about the process. The first knows the user's IP address but not the content, destination, or purpose of the communication, because the message contents and destination information are encrypted. The last knows the identity of the site being contacted, but not the source of the session. One or more steps in between prevents the first and last links from sharing their partial knowledge in order to connect the user and the target site.
anonymous remailer
An anonymous remailer is a service that accepts e-mail messages containing instructions for delivery, and sends them out without revealing their sources. Since the remailer has access to the user's address, the content of the message, and the destination of the message, remailers should be used as part of a chain of multiple remailers so that no one remailer knows all this information.
ASP (application service provider)
An ASP is an organization that offers software services over the Internet, allowing the software to be upgraded and maintained centrally.
backbone
A backbone is one of the high-bandwidth communications links that tie together networks in different countries and organizations around the world to form the Internet.
badware
See malware.
bandwidth
The bandwidth of a connection is the maximum rate of data transfer on that connection, limited by its capacity and the capabilities of the computers at both ends of the connection.
bash (Bourne-again shell)
The bash shell is a command-line interface for Linux/Unix operating systems, based on the Bourne shell.
BitTorrent
BitTorrent is a peer-to-peer file-sharing protocol invented by Bram Cohen in 2001. It allows individuals to cheaply and effectively distribute large files, such as CD images, video, or music files.
blacklist
A blacklist is a list of forbidden persons or things. In Internet censorship, lists of forbidden Web sites may be used as blacklists; censorware may allow access to all sites except for those specifically listed on its blacklist. An alternative to a blacklist is a whitelist, or a list of permitted things. A whitelist system blocks access to all sites except for those specifically listed on the whitelist. This is a less common approach to Internet censorship. It is possible to combine both approaches, using string matching or other conditional techniques on URLs that do not match either list.
bluebar
The blue URL bar (called the Bluebar in Psiphon lingo) is the form at the top of your Psiphon node browser window, which allows you to access blocked site by typing its URL inside.
See also Psiphon node
block
To block is to prevent access to an Internet resource, using any number of methods.
bookmark
A bookmark is a placeholder within software that contains a reference to an external resource. In a browser, a bookmark is a reference to a Web page – by choosing the bookmark you can quickly load the Web site without needing to type in the full URL.
bridge
See Tor bridge.
brute-force attack
A brute force attack consists of trying every possible code, combination, or password until you find the right one. These are some of the most trivial hacking attacks.
cache
A cache is a part of an information-processing system used to store recently used or frequently used data to speed up repeated access to it. A Web cache holds copies of Web page files.
censor
To censor is to prevent publication or retrieval of information, or take action, legal or otherwise, against publishers and readers.
censorware
Censorware is software used to filter or block access to the Internet. This term is most often used to refer to Internet filtering or blocking software installed on the client machine (the PC which is used to access the Internet). Most such client-side censorware is used for parental control purposes.
Sometimes the term censorware is also used to refer to software used for the same purpose installed on a network server or router.
CGI (Common Gateway Interface)
CGI is a common standard used to let programs on a Web server run as Web applications. Many Web-based proxies use CGI and thus are also called "CGI proxies". (One popular CGI proxy application written by James Marshall using the Perl programming language is called CGIProxy.)
chat
Chat, also called instant messaging, is a common method of communication among two or more people in which each line typed by a participant in a session is echoed to all of the others. There are numerous chat protocols, including those created by specific companies (AOL, Yahoo!, Microsoft, Google, and others) and publicly defined protocols. Some chat client software uses only one of these protocols, while others use a range of popular protocols.
circumvention
Circumvention is publishing or accessing content in spite of attempts at censorship.
Common Gateway Interface
See CGI.
command-line interface
A method of controlling the execution of software using commands entered on a keyboard, such as a Unix shell or the Windows command line.
cookie
A cookie is a text string sent by a Web server to the user's browser to store on the user's computer, containing information needed to maintain continuity in sessions across multiple Web pages, or across multiple sessions. Some Web sites cannot be used without accepting and storing a cookie. Some people consider this an invasion of privacy or a security risk.
country code top-level domain (ccTLD)
Each country has a two-letter country code, and a TLD (top-level domain) based on it, such as .ca for Canada; this domain is called a country code top-level domain. Each such ccTLD has a DNS server that lists all second-level domains within the TLD. The Internet root servers point to all TLDs, and cache frequently-used information on lower-level domains.
DARPA (Defense Advanced Projects Research Agency)
DARPA is the successor to ARPA, which funded the Internet and its predecessor, the ARPAnet.
decryption
Decryption is recovering plain text or other messages from encrypted data with the use of a key.
See also encryption.
domain
A domain can be a Top-Level Domain (TLD) or secondary domain on the Internet.
See also Top-Level Domain, country code Top-Level Domain and secondary domain.
DNS (Domain Name System)
The Domain Name System (DNS) converts domain names, made up of easy-to-remember combinations of letters, to IP addresses, which are hard-to-remember strings of numbers. Every computer on the Internet has a unique address (a little bit like an area code+telephone number).
DNS leak
A DNS leak occurs when a computer configured to use a proxy for its Internet connection nonetheless makes DNS queries without using the proxy, thus exposing the user's attempts to connect with blocked sites. Some Web browsers have configuration options to force the use of the proxy.
DNS server
A DNS server, or name server, is a server that provides the look-up function of the Domain Name System. It does this either by accessing an existing cached record of the IP address of a specific domain, or by sending a request for information to another name server.
DNS tunnel
A DNS tunnel is a way to tunnel almost everything over DNS/Nameservers.
Because you "abuse" the DNS system for an unintended purpose, it only allows a very slow connection of about 3 kb/s which is even less than the speed of an analog modem. That is not enough for YouTube or file sharing, but should be sufficient for instant messengers like ICQ or MSN Messenger and also for plain text e-mail.
On the connection you want to use a DNS tunnel, you only need port 53 to be open; therefore it even works on many commercial Wi-Fi providers without the need to pay.
The main problem is that there are no public modified nameservers that you can use. You have to set up your own. You need a server with a permanent connection to the Internet running Linux. There you can install the free software OzymanDNS and in combination with SSH and a proxy like Squid you can use the tunnel. More Information on this on http://www.dnstunnel.de.
eavesdropping
Eavesdropping is listening to voice traffic or reading or filtering data traffic on a telephone line or digital data connection, usually to detect or prevent illegal or unwanted activities or to control or monitor what people are talking about.
e-mail
E-mail, short for electronic mail, is a method to send and receive messages over the Internet. It is possible to use a Web mail service or to send e-mails with the SMTP protocol and receive them with the POP3 protocol by using an e-mail client such as Outlook Express or Thunderbird. It is comparatively rare for a government to block e-mail, but e-mail surveillance is common. If e-mail is not encrypted, it could be read easily by a network operator or government.
embedded script
An embedded script is a piece of software code.
encryption
Encryption is any method for recoding and scrambling data or transforming it mathematically to make it unreadable to a third party who doesn't know the secret key to decrypt it. It is possible to encrypt data on your local hard drive using software like TrueCrypt (http://www.truecrypt.org) or to encrypt Internet traffic with SSL or SSH.
See also decryption.
exit node
An exit node is a Tor node that forwards data outside the Tor network.
See also middleman node.
file sharing
File sharing refers to any computer system where multiple people can use the same information, but often refers to making music, films or other materials available to others free of charge over the Internet.
file spreading engine
A file spreading engine is a Web site a publisher can use to get around censorship. A user only has to upload a file to publish once and the file spreading engine uploads that file to some set of sharehosting services (like Rapidshare or Megaupload).
filter
To filter is to search in various ways for specific data patterns to block or permit communications.
Firefox
Firefox is the most popular free and open source Web browser, developed by the Mozilla Foundation.
forum
On a Web site, a forum is a place for discussion, where users can post messages and comment on previously posted messages. It is distinguished from a mailing list or a Usenet newsgroup by the persistence of the pages containing the message threads. Newsgroup and mailing list archives, in contrast, typically display messages one per page, with navigation pages listing only the headers of the messages in a thread.
frame
A frame is a portion of a Web page with its own separate URL. For example, frames are frequently used to place a static menu next to a scrolling text window.
FTP (File Transfer Protocol)
The FTP protocol is used for file transfers. Many people use it mostly for downloads; it can also be used to upload Web pages and scripts to some Web servers. It normally uses ports 20 and 21, which are sometimes blocked. Some FTP servers listen to an uncommon port, which can evade port-based blocking.
A popular free and open source FTP client for Windows and Mac OS is FileZilla. There are also some Web-based FTP clients that you can use with a normal Web browser like Firefox.
gateway
A gateway is a node connecting two networks on the Internet. An important example is a national gateway that requires all incoming or outgoing traffic to go through it.
honeypot
A honeypot is a site that pretends to offer a service in order to entice potential users to use it, and to capture information about them or their activities.
hop
A hop is a link in a chain of packet transfers from one computer to another, or any computer along the route. The number of hops between computers can give a rough measure of the delay (latency) in communications between them. Each individual hop is also an entity that has the ability to eavesdrop on, block, or tamper with communications.
HTTP (Hypertext Transfer Protocol)
HTTP is the fundamental protocol of the World Wide Web, providing methods for requesting and serving Web pages, querying and generating answers to queries, and accessing a wide range of services.
HTTPS (Secure HTTP)
Secure HTTP is a protocol for secure communication using encrypted HTTP messages. Messages between client and server are encrypted in both directions, using keys generated when the connection is requested and exchanged securely. Source and destination IP addresses are in the headers of every packet, so HTTPS cannot hide the fact of the communication, just the contents of the data transmitted and received.
IANA (Internet Assigned Numbers Authority)
IANA is the organization responsible for technical work in managing the infrastructure of the Internet, including assigning blocks of IP addresses for top-level domains and licensing domain registrars for ccTLDs and for the generic TLDs, running the root name servers of the Internet, and other duties.
ICANN (Internet Corporation for Assigned Names and Numbers)
ICANN is a corporation created by the US Department of Commerce to manage the highest levels of the Internet. Its technical work is performed by IANA.
Instant Messaging (IM)
Instant messaging is either certain proprietary forms of chat using proprietary protocols, or chat in general. Common instant messaging clients include MSN Messenger, ICQ, AIM or Yahoo! Messenger.
intermediary
See man in the middle.
Internet
The Internet is a network of networks interconnected using TCP/IP and other communication protocols.
IP (Internet Protocol) Address
An IP address is a number identifying a particular computer on the Internet. In the previous version 4 of the Internet Protocol an IP address consisted of four bytes (32 bits), often represented as four integers in the range 0-255 separated by dots, such as 74.54.30.85. In IPv6, which the Net is currently switching to, an IP address is four times longer, and consists of 16 bytes (128 bits). It can be written as 8 groups of 4 hex digits separated by colons, such as 2001:0db8:85a3:0000:0000:8a2e:0370:7334.
IRC (Internet relay chat)
IRC is a more than 20-year-old Internet protocol used for real-time text conversations (chat or instant messaging). There exist several IRC networks -- the largest have more than 50 000 users.
ISP (Internet Service Provider)
An ISP (Internet service provider) is a business or organization that provides access to the Internet for its customers.
JavaScript
JavaScript is a scripting language, commonly used in Web pages to provide interactive functions.
keyword filter
A keyword filter scans all Internet traffic going through a server for forbidden words or terms to block.
latency
Latency is a measure of time delay experienced in a system, here in a computer network. It is measured by the time between the start of packet transmission to the start of packet reception, between one network end (e.g. you) to the other end (e.g. the Web server). One very powerful way of Web filtering is maintaining a very high latency, which makes lots of circumvention tools very difficult to use.
log file
A log file is a file that records a sequence of messages from a software process, which can be an application or a component of the operating system. For example, Web servers or proxies may keep log files containing records about which IP addresses used these services when and what pages were accessed.
low-bandwidth filter
A low-bandwidth filter is a Web service that removes extraneous elements such as advertising and images from a Web page and otherwise compresses it, making page download much quicker.
malware
Malware is a general term for malicious software, including viruses, that may be installed or executed without your knowledge. Malware may take control of your computer for purposes such as sending spam. (Malware is also sometimes called badware.)
man in the middle
A man in the middle or man-in-the-middle is a person or computer capturing traffic on a communication channel, especially to selectively change or block content in a way that undermines cryptographic security. Generally the man-in-the-middle attack involves impersonating a Web site, service, or individual in order to record or alter communications. Governments can run man-in-the-middle attacks at country gateways where all traffic entering or leaving the country must pass.
middleman node
A middleman node is a Tor node that is not an exit node. Running a middleman node can be safer than running an exit node because a middleman node will not show up in third parties' log files. (A middleman node is sometimes called a non-exit node.)
monitor
To monitor is to check a data stream continuously for unwanted activity.
network address translation (NAT)
NAT is a router function for hiding an address space by remapping. All traffic going out from the router then uses the router's IP address, and the router knows how to route incoming traffic to the requestor. NAT is frequently implemented by firewalls. Because incoming connections are normally forbidden by NAT, NAT makes it difficult to offer a service to the general public, such as a Web site or public proxy. On a network where NAT is in use, offering such a service requires some kind of firewall configuration or NAT traversal method.
network operator
A network operator is a person or organization who runs or controls a network and thus is in a position to monitor, block, or alter communications passing through that network.
node
A node is an active device on a network. A router is an example of a node. In the Psiphon and Tor networks, a server is referred to as a node.
non-exit node
See middleman node.
obfuscation
Obfuscation means obscuring text using easily-understood and easily-reversed transformation techniques that will withstand casual inspection but not cryptanalysis, or making minor changes in text strings to prevent simple matches. Web proxies often use obfuscation to hide certain names and addresses from simple text filters that might be fooled by the obfuscation. As another example, any domain name can optionally contain a final dot, as in "somewhere.com.", but some filters might search only for "somewhere.com" (without the final dot).
open node
An open node is a specific Psiphon node which can be used without logging in. It automatically loads a particular homepage, and presents itself in a particular language, but can then be used to browse elsewhere.
See also Psiphon node.
packet
A packet is a data structure defined by a communication protocol to contain specific information in specific forms, together with arbitrary data to be communicated from one point to another. Messages are broken into pieces that will fit in a packet for transmission, and reassembled at the other end of the link.
peer-to-peer
A peer-to-peer (or P2P) network is a computer network between equal peers. Unlike client-server networks there is no central server and so the traffic is distributed only among the clients.This technology is mostly applied to file sharing programs like BitTorrent, eMule and Gnutella. But also the very old Usenet technology or the VoIP program Skype can be categorized as peer-to-peer systems.
See also file sharing.
PHP
PHP is a scripting language designed to create dynamic Web sites and web applications. It is installed on a Web server. For example, the popular Web proxy PHProxy uses this technology.
plain text
Plain text is unformatted text consisting of a sequence of character codes, as in ASCII plain text or Unicode plain text.
plaintext
Plaintext is unencrypted text, or decrypted text.
See also encryption, SSL, SSH.
privacy
Protection of personal privacy means preventing disclosure of personal information without the permission of the person concerned. In the context of circumvention, it means preventing observers from finding out that a person has sought or received information that has been blocked or is illegal in the country where that person is at the time.
POP3
Post Office Protocol version 3 is used to receive mail from a server, by default on port 110 with an e-mail program such as Outlook Express or Thunderbird.
port
A hardware port on a computer is a physical connector for a specific purpose, using a particular hardware protocol. Examples are a VGA display port or a USB connector.
Software ports also connect computers and other devices over networks using various protocols, but they exist in software only as numbers. Ports are somewhat like numbered doors into different rooms, each for a special service on a server or PC. They are identified by numbers from 0 to 65535.
protocol
A formal definition of a method of communication, and the form of data to be transmitted to accomplish it. Also, the purpose of such a method of communication. For example, Internet Protocol (IP) for transmitting data packets on the Internet, or Hypertext Transfer Protocol for interactions on the World Wide Web.
proxy server
A proxy server is a server, a computer system or an application program which acts as a gateway between a client and a Web server. A client connects to the proxy server to request a Web page from a different server. Then the proxy server accesses the resource by connecting to the specified server, and returns the information to the requesting site. Proxy servers can serve many different purposes, including restricting Web access or helping users route around obstacles.
Psiphon node
A Psiphon node is a secured web proxy designed to evade Internet censorship. It is developed by Psiphon inc. Psiphon nodes can be open or private.
private node
A private node is a Psiphon node working with authentication, which means that you have to register before you can use it. Once registered, you will be able to send invitations to your friends and relatives to use this specific node.
See also Psiphon node.
publicly routable IP address
Publicly routable IP addresses (sometimes called public IP addresses) are those reachable in the normal way on the Internet, through a chain of routers. Some IP addresses are private, such as the 192.168.x.x block, and many are unassigned.
regular expression
A regular expression (also called a regexp or RE) is a text pattern that specifies a set of text strings in a particular regular expression implementation such as the UNIX grep utility. A text string "matches" a regular expression if the string conforms to the pattern, as defined by the regular expression syntax. In each RE syntax, some characters have special meanings, to allow one pattern to match multiple other strings. For example, the regular expression lo+se matches lose, loose,looose.
remailer
An anonymous remailer is a service which allows users to send e-mails anonymously. The remailer receives messages via e-mail and forwards them to their intended recipient after removing information that would identify the original sender. Some also provide an anonymous return address that can be used to reply to the original sender without disclosing her identity. Well-known Remailer services include Cypherpunk, Mixmaster and Nym.
router
A router is a computer that determines the route for forwarding packets. It uses address information in the packet header and cached information on the server to match address numbers with hardware connections.
root name server
A root name server or root server is any of thirteen server clusters run by IANA to direct traffic to all of the TLDs, as the core of the DNS system.
RSS (Real Simple Syndication)
RSS is a method and protocol for allowing Internet users to subscribe to content from a Web page, and receive updates as soon as they are posted.
scheme
On the Web, a scheme is a mapping from a name to a protocol. Thus the HTTP scheme maps URLs that begin with HTTP: to the Hypertext Transfer Protocol. The protocol determines the interpretation of the rest of the URL, so that http://www.example.com/dir/content.html identifies a Web site and a specific file in a specific directory, and mailto:user@somewhere.com is an e-mail address of a specific person or group at a specific domain.
shell
A UNIX shell is the traditional command line user interface for the UNIX/Linux operating systems. The most common shells are sh and bash.
SOCKS
A SOCKS proxy is a special kind of proxy server. In the ISO/OSI model it operates between the application layer and the transport layer. The standard port for SOCKS proxies is 1080, but they can also run on different ports. Many programs support a connection through a SOCKS proxy. If not you can install a SOCKS client like FreeCap, ProxyCap or SocksCap which can force programs to run through the Socks proxy using dynamic port forwarding. It is also possible to use SSH tools such as OpenSSH as a SOCKS proxy server.
screenlogger
A screenlogger is software able to record everything your computer displays on the screen. The main feature of a screenlogger is to capture the screen and log it into files to view at any time in the future. Screen loggers can be used as powerful monitoring tool. You should be aware of any screen logger running on any computer you are using, anytime.
script
A script is a program, usually written in an interpreted, non-compiled language such as JavaScript, Java, or a command interpreter language such as bash. Many Web pages include scripts to manage user interaction with a Web page, so that the server does not have to send a new page for each change.
smartphone
A smartphone is a mobile phone that offers more advanced computing ability and connectivity than a contemporary feature phone, such as Web access, ability to run elaborated operating systems and run built-in applications.
spam
Spam is messages that overwhelm a communications channel used by people, most notably commercial advertising sent to large numbers of individuals or discussion groups. Most spam advertises products or services that are illegal in one or more ways, almost always including fraud. Content filtering of e-mail to block spam, with the permission of the recipient, is almost universally approved of.
SSH (Secure Shell)
SSH or Secure Shell is a network protocol that allows encrypted communication between computers. It was invented as a successor of the unencrypted Telnet protocol and is also used to access a shell on a remote server.
The standard SSH port is 22. It can be used to bypass Internet censorship with port forwarding or it can be used to tunnel other programs like VNC.
SSL (Secure Sockets Layer)
SSL (or Secure Sockets Layer), is one of several cryptographic standards used to make Internet transactions secure. It is was used as the basis for the creation of the related Transport Layer Security (TLS). You can easily see if you are using SSL/TLS by looking at the URL in your Browser (like Firefox or Internet Explorer): If it starts with https instead of http, your connection is encrypted.
steganography
Steganography, from the Greek for hidden writing, refers to a variety of methods of sending hidden messages where not only the content of the message is hidden but the very fact that something covert is being sent is also concealed. Usually this is done by concealing something within something else, like a picture or a text about something innocent or completely unrelated. Unlike cryptography, where it is clear that a secret message is being transmitted, steganography does not attract attention to the fact that someone is trying to conceal or encrypt a message.
subdomain
A subdomain is part of a larger domain. If for example "wikipedia.org" is the domain for the Wikipedia, "en.wikipedia.org" is the subdomain for the English version of the Wikipedia.
threat analysis
A security threat analysis is properly a detailed, formal study of all known ways of attacking the security of servers or protocols, or of methods for using them for a particular purpose such as circumvention. Threats can be technical, such as code-breaking or exploiting software bugs, or social, such as stealing passwords or bribing someone who has special knowledge. Few companies or individuals have the knowledge and skill to do a comprehensive threat analysis, but everybody involved in circumvention has to make some estimate of the issues.
Top-Level Domain (TLD)
In Internet names, the TLD is the last component of the domain name. There are several generic TLDs, most notably .com, .org, .edu, .net, .gov, .mil, .int, and one two-letter country code (ccTLD) for each country in the system, such as .ca for Canada. The European Union also has the two-letter code .eu.
TLS (Transport Layer Security)
TLS or Transport Layer Security is a cryptographic standard based on SSL, used to make Internet transactions secure.
TCP/IP (Transmission Control Protocol over Internet Protocol)
TCP and IP are the fundamental protocols of the Internet, handling packet transmission and routing. There are a few alternative protocols that are used at this level of Internet structure, such as UDP.
Tor bridge
A bridge is a middleman Tor node that is not listed in the main public Tor directory, and so is possibly useful in countries where the public relays are blocked. Unlike the case of exit nodes, IP addresses of bridge nodes never appear in server log files and never pass through monitoring nodes in a way that can be connected with circumvention.
traffic analysis
Traffic analysis is statistical analysis of encrypted communications. In some circumstances traffic analysis can reveal information about the people communicating and the information being communicated.
tunnel
A tunnel is an alternate route from one computer to another, usually including a protocol that specifies encryption of messages.
UDP (User Datagram Packet)
UDP is an alternate protocol used with IP. Most Internet services can be accessed using either TCP or UDP, but there are some that are defined to use only one of these alternatives. UDP is especially useful for real-time multimedia applications like Internet phone calls (VoIP).
URL (Uniform Resource Locator)
The URL (Uniform Resource Locator) is the address of a Web site. For example, the URL for the World News section of the NY Times is http://www.nytimes.com/pages/world/index.html. Many censoring systems can block a single URL. Sometimes an easy way to bypass the block is to obscure the URL. It is for example possible to add a dot after the site name, so the URL http://en.cship.org/wiki/URL becomes http://en.cship.org./wiki/URL. If you are lucky with this little trick you can access blocked Web sites.
Usenet
Usenet is a more than 20-year-old discussion forum system accessed using the NNTP protocol. The messages are not stored on one server but on many servers which distribute their content constantly. Because of that it is impossible to censor Usenet as a whole, however access to Usenet can and is often blocked, and any particular server is likely to carry only a subset of locally-acceptable Usenet newsgroups. Google archives the entire available history of Usenet messages for searching.
VoIP (Voice over Internet Protocol)
VoIP refers to any of several protocols for real-time two-way voice communication on the Internet, which is usually much less expensive than calling over telephone company voice networks. It is not subject to the kinds of wiretapping practiced on telephone networks, but can be monitored using digital technology. Many companies produce software and equipment to eavesdrop on VoIP calls; securely encrypted VoIP technologies have only recently begun to emerge.
VPN (virtual private network)
A VPN (virtual private network) is a private communication network used by many companies and organizations to connect securely over a public network. Usually on the Internet it is encrypted and so nobody except the endpoints of the communication can look at the data traffic. There are various standards like IPSec, SSL, TLS or PPTP. The use of a VPN provider is a very fast secure and convenient method to bypass Internet censorship with little risks but it generally costs money every month.
whitelist
A whitelist is a list of sites specifically authorized for a particular form of communication. Filtering traffic can be done either by a whitelist (block everything but the sites on the list), a blacklist (allow everything but the sites on the list), a combination of the two, or by other policies based on specific rules and conditions.
World Wide Web (WWW)
The World Wide Web is the network of hyperlinked domains and content pages accessible using the Hypertext Transfer Protocol and its numerous extensions. The World Wide Web is the most famous part of the Internet.
Webmail
Webmail is e-mail service through a Web site. The service sends and receives mail messages for users in the usual way, but provides a Web interface for reading and managing messages, as an alternative to running a mail client such as Outlook Express or Thunderbird on the user's computer. For example a popular and free webmail service is https://mail.google.com/
Web proxy
A Web proxy is a script running on a Web server which acts as a proxy/gateway. Users can access such a Web proxy with their normal Web browser (like Firefox) and enter any URL in the form located on that Web site. Then the Web proxy program on the server receives that Web content and displays it to the user. This way the ISP only sees a connection to the server with the Web proxy since there is no direct connection.
WHOIS
WHOIS (who is) is the aptly named Internet function that allows one to query remote WHOIS databases for domain registration information. By performing a simple WHOIS search you can discover when and by whom a domain was registered, contact information, and more.
A WHOIS search can also reveal the name or network mapped to a numerical IP address