


Adding an Image to a Page
Most web pages have at least some visual (non-textual) content, so let's begin to see how BlueGriffon can be used to place an image on the page. Just as there are benefits to grouping all files for a website within one folder, there are benefits to having a nested folder dedicated for the purpose of containing all images used on the website. As you'll soon see keeping things categorized in this way will make expansion and revision of the site relatively painless.
Do you already have a digital image saved in your computer's storage system that you would like to add to the tiny web page we are constructing? Is it an appropriate size for viewing on the web? Keep in mind that large files take longer to download than small files do. Further, there is seldom any advantage in sending more pixels to a web browser than it can display on your screen (e.g. an 8 megapixel image will be scaled to a small fraction of its native size in order to be fully displayed on a 1280 x 1024 pixel screen or monitor). If you have a suitable image, make a copy of that image and save it in a new folder named "images" within the "Tutorial_Site" folder.
Alternatively, you may choose to copy the image displayed immediately below on this page.
You could use your image editing program (e.g. the GNU Image Manipulation Program) to create a new image from taking a screenshot of the area of the image above. But you will probably find it simpler and quicker from within your web browser to select the image with the secondary mouse button, then select "Save Image As..." from the resulting context menu. Remember to create a new folder named "images" within the "Tutorial_Site" folder, and then save cheese.jpg within the images folder.
Now you are ready to use this saved image on the web page you are constructing. From the menu bar at the top of the BlueGriffon window, select Insert, then select Image from the resulting context menu.
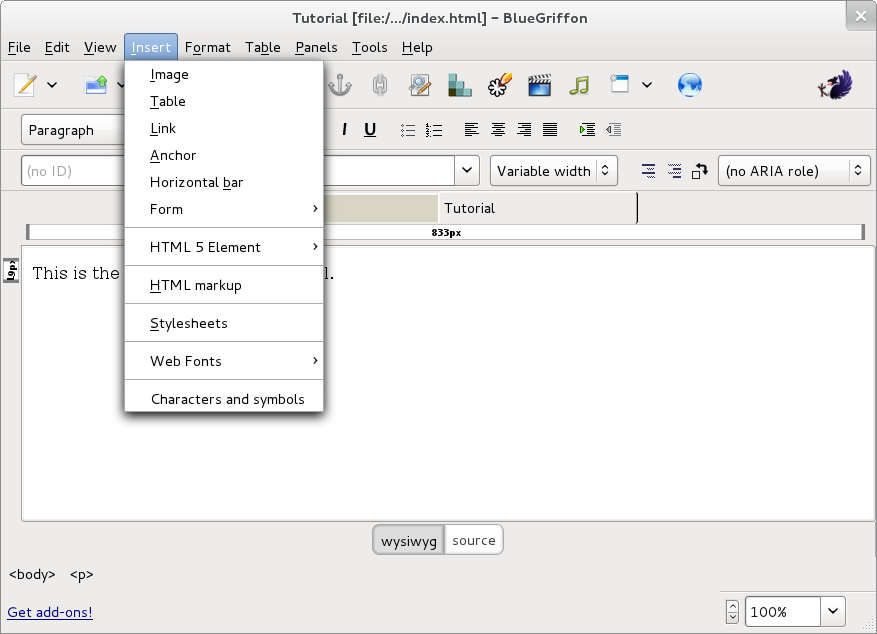
Alternatively you may prefer to use the keyboard shortcuts of Alt+i then Alt+i to achieve the same effect. Or if you prefer to use your pointing device and make only one selection, select the "Insert or edit an image" icon slightly to the left of the middle of the icon bar.
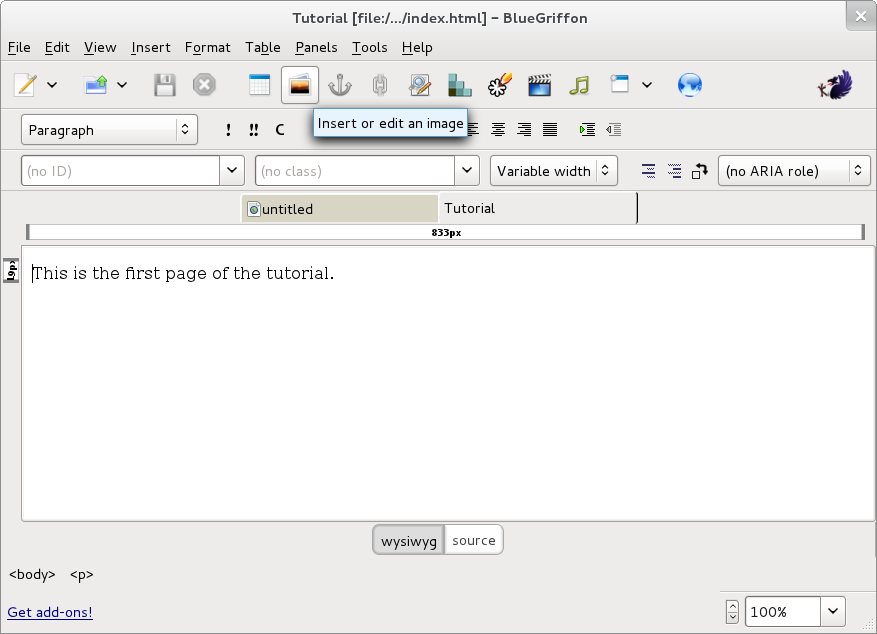
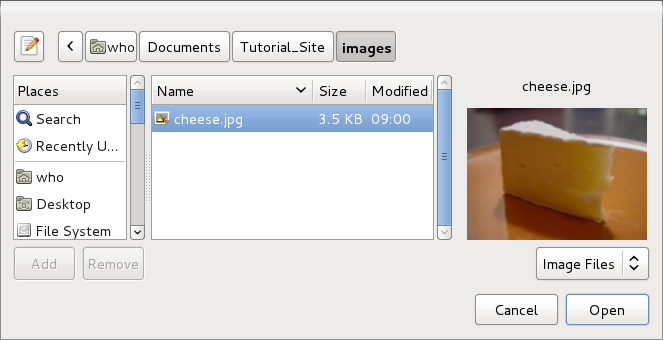
This tutorial will seldom show all of the different techniques that you could use to accomplish a given goal, but this example might reduce your surprise as you discover alternate methods as you use BlueGriffon. In any case, a dialogue box will appear. Select the "Select image" icon, navigate to the file that you saved inside the "Images" directory for your site, then select the "Open" command button.
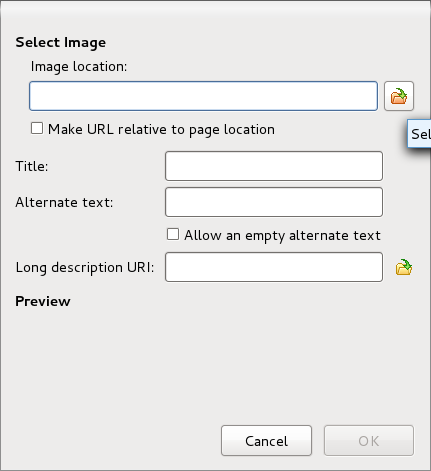
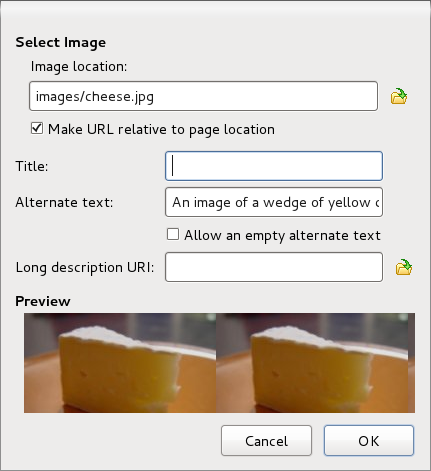
Back in the "Select Image" dialog you will notice that your choice has automatically filled in the path to your selected image, and selected the checkbox "Make URL relative to page location". You may also notice that the "OK" command button is not yet available. BlueGriffon is encouraging you to supply some useful information in the "Alternate text:" textbox. These words will be:
- used for those who use a screen reader program to hear what is on your web page,
- displayed to you when you are proofreading your website and somehow failed to upload this image file to its correct location, and
- other possibly infrequent but useful occasions.
- no need to delete the image,
- no need to more carefully select the cursor position, and
- no need to insert it again.
Now would be a good time to save the page with the image inserted. Merely select "File" on the menu bar, then select "Save", or as before by selecting the "Save" icon button near the upper left corner of the BlueGriffon window. In either case, you will notice this is completed promptly (without you having to supply a Name and Title, etc. as you did the first time).
If you left the preview of your page open in your web browser, just return to that tab or window and Reload or Refresh the page to view the changed contents. Otherwise, you can select the "Preview" icon in BlueGriffon again.
If you have insatiable curiousity for trying to understand the inner workings of things, or already know some HTML, you may wish to select the "source" command button at the bottom center of the BlueGriffon window. This will reveal the instructions for the browser on where to find the image file, etc. that BlueGriffon has constructed for you. Yes, you could choose to alter the content of or the markup for the page in this view, but it may be infrequently or even never that this would be an attractive option for you. Selecting the adjacent "wysiwyg" command button will revert to the more familiar view of your web page.
As you may have noticed if you peeked at the HTML source for this page, the technique that is used to tell a web browser where to find an image file is by using a URL (an acronym for Universal Resource Locater). Forming links via URLs can be used for other purposes, and that is the fundamental innovation which makes presenting information on the web so productive and attractive. Next we will learn more about these hyperlinks.