


Setting Up A New Contest
A new contest as defined in this section is a new year of Google Code-in. The first step to setting up a new contest in Melange is to become a Contest Administrator.
How to Become A Contest Administrator
Ask a Melange developer to create a new user and then to designate the given individual as a Contest Administrator.
How to Create a New Contest
Ask a Melange developer to create a new contest.
How to Edit the Contest
Once the Melange developer has created the new contest, the Contest Administrator has many options available. Most of a contest’s data can be edited via the links in the Program Settings section of the contest's Admin Dashboard. The majority of the text that will need to be updated is stored in the Edit program settings, Edit messages and List of documents links.
There are two types of data on the Edit program settings page, documents and non-document data. Documents, as explained in this section, is a list of webpages that exist on Melange for a specific contest and are created before the contest begins outside of Melange in a text editor. A contest’s non-text data (for instance, minimum age of Students, number of accepted Organizations, etc.) can be updated directly on the Edit program settings page.
How to edit/view documents for the contest
New documents will need to be created for each new contest year. Create the following documents in a text editor (outside of Melange) before going into Edit Program:
- Organization Admin Agreement (same as Mentor Agreement)
- Mentor Agreement
- Student Agreement
- About page
- Events page (timeline)
- Help document
- Privacy policy
- Terms and conditions (contest rules)
- Example tasks
- Form translation url (link to wiki)
Once all of your documents have been created in a text editor go to:
Admin Dashboard -> Program Settings -> Edit program settings
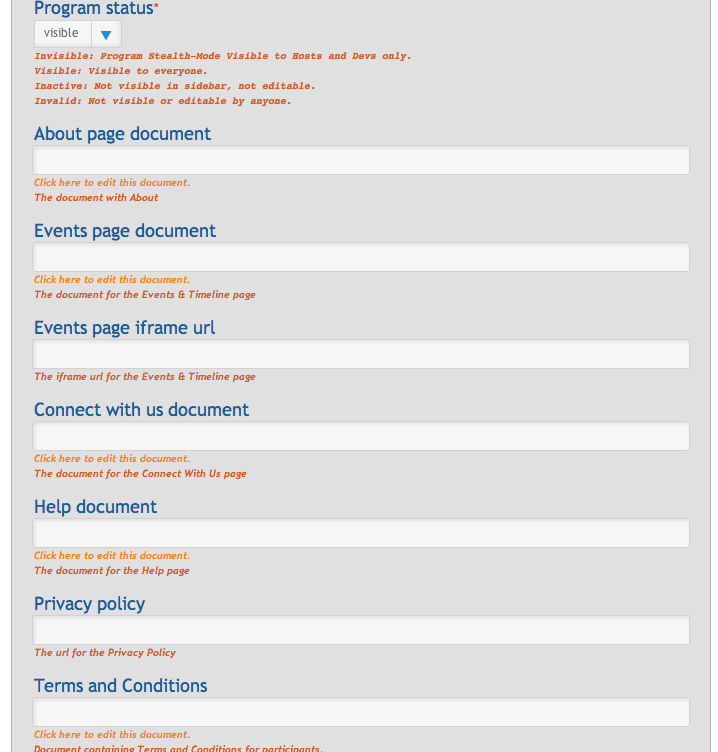
Scroll down to the documents that need to be updated (starting with Organization Admin Agreement). All the documents that are needed to run the contest are listed on this page. Click on Click here to edit this document under each corresponding text field. Cut and paste your document text into the "Title" and "Content" Fields. Press Submit. If you'd like to preview your documents before they go live, you can do so by changing the word "edit" on your web browser's URL to "show". For example http://www.goog
If everything looks accurate, go back to Admin Dashboard-> Program Settings -> Edit program settings. Click on the field where the URL should be for each of the edited documents. Type the name of each document (for example, "Mentor Agreement"). A drop-down will appear of all Documents starting with that letter. Choose the appropriate document and the field will then be populated with the document URL. Success!
Note: When the contest has started you can easily review the documents in a list view:
Admin Dashboard -> Program settings -> List of documents. Click on the Name of the document you wish to view under 'Title'.
Once you have added the URL's for each of the new documents continue to fill out the rest of the Edit Program settings (Student minimum age, Number of winners, etc.).
How to add new documents for the contest
In the event that a Contest Administrator wants to create a document that is not linked from the Edit program setting" page, she would visit the following URL:
Example:
http://www.google-melange.com/gci/document/edit/gci_program/google/gci2015/partyhats
This will automatically create the document "party hats". Pressing Submit will save the document. It will thereafter appear in the List of documents from the Admin Dashboard -> Program Settings.
How to Change the Contest Timeline
The Contest Timeline defines when a specific contest begins and ends, student work periods, etc.
- Go to Admin Dashboard
- Program Settings -> Edit Timeline
- Update the fields and Submit. Times are all in UTC. (Note: It is best to use 17:00, 19:00 UTC, etc.)
How to edit the messages for the contest
After you have set up the documents and settings for the contest you should edit the messages for the contest. Go to the Admin Dashboard -> Program settings -> Edit messages section. You will find text editing fields for the emails that will be sent to accepted organizations, rejected organizations, accepted Mentors.
Use the formatting below to send a custom email message to each accepted organization (text can be edited as necessary):
Accepted organizations message
Congratulations!
We are pleased to let you know that your Organization Application for "{{ org }}" has been accepted for Google Code-in 2012. Please go to {{ url }} to fill out the information for your Organization.
Additional text as desired.
Best regards,
Google Open Source Programs
"org" is the name that was filled in by the Organization Administrator in the "Organization Name" field of the organization application.
"url" is the direct URL for the organization to fill in its organization profile. The link is specific to each organization.
The fields within the curly brackets are customizable and will be filled in as appropriate by Melange depending on the recipient. You can add more welcome text to this message if you choose.
Rejected organizations message
Thank you for submitting the "{{ org }}" organization application to Google Code-in 2012. Unfortunately, we were unable to accept your organization's application at this time.
We received many more applications for the contest than we are able to accommodate, and we would encourage you to reapply for future instances of the contest.
Best regards,
{{ sender_name }}
The fields within the curly brackets are customizable and will be filled in as appropriate by Melange depending on the recipient. Please see the notes above for definitions of each of the types of fields. You can add more rejection text to this message if you choose.
Mentor welcome message
This message will be sent to Mentors when they are accepted by their respective Organization Administrators into the contest. You can include information about participating as a Mentor generally to help Mentors get started with the contest.
Insert text as desired.
How do I switch the main page from one contest to another?
The main page will need to be updated when you are ready for users to access the new contest (i.e. when you announce your new contest publicly). Go to the site edit page: http://www.google-melange.com/site/edit. Find the drop-down titled Active Program, and click on the site you'd like to switch to. You must also change the "Latest gci" text field to appropriate year. Please also make sure the contest is marked "visible" on the Program Profile (Admin Dashboard -> Program settings -> Edit program settings) on the drop-down for Program Status. The user will receive an "Access Denied" error if the contest is invisible at the time the site is switched over to be the main site.
How to Change Logos and Contest Graphics
Ask a Melange developer. Why? Contest graphics and layout within Melange are not parameterized and generally require code and behavioral changes to update. Banners are the easiest to update (ask a developer to check in a new PNG at /app/soc/content/images/gci/logo/banner-<program link id>.png).