Installing Alchemy on OS X
Software name : Alchemy
Homepage : http://al.chemy.org
Software version used for this installation : BETA 008
Operating System use for this installation : OS X (10.5.8)
Recommended Hardware :
Required Software : Java Runtime Environment Version 1.5 or above
Downloading Alchemy
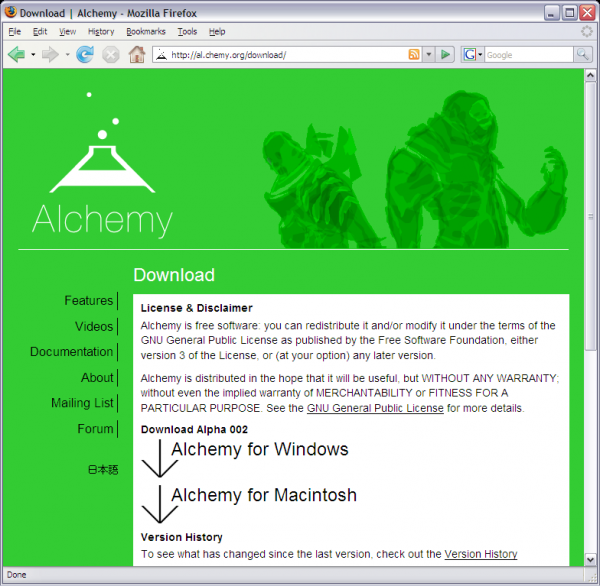
The latest version of Alchemy for OS X can be downloaded from:
http://al.chemy.org/download/
The latest version at the time of writing this document is Alchemy BETA 008.
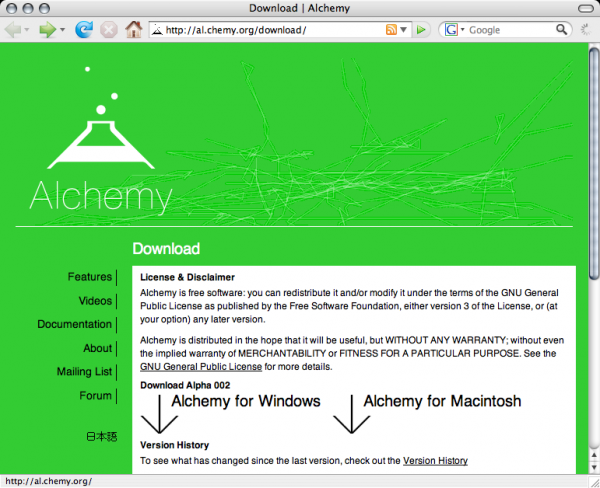
Click on the link labeled 'Alchemy for Macintosh' to download. Once the download is complete, check your default download directory for the Alchemy file. Next, double-click the .dmg file to mount the disk image, then open the disk image from your desktop like so:
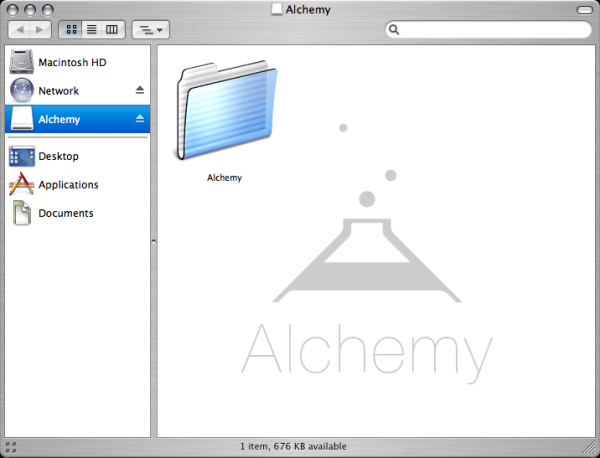
To install Alchemy, copy the "Alchemy" folder into your Applications folder simply by dragging the folder icon from in the Disk Image to your Applications folder. That completes the installation of Alchemy and you should now be able to see the Alchemy folder inside your Applications folder.

To open Alchemy simply double-click on the Alchemy icon inside the Alchemy folder.
Installing Alchemy on Linux
Software name : Alchemy
Homepage : http://al.chemy.org
Software version used for this installation : BETA 008
Operating System use for this installation : Ubuntu 9.10
Recommended Hardware :
Required Software : Java Runtime Environment Version 1.5 or above (OpenJDK will also work, however it has a bunch of display bugs)
Downloading Alchemy
The latest version of Alchemy for LINUX can be downloaded from:
http://al.chemy.org/download/
The latest version at the time of writing this document is Alchemy BETA 008.
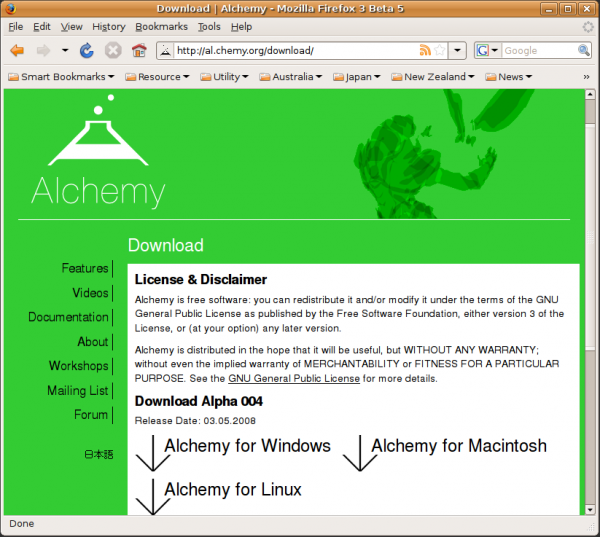
Click on the link labeled 'Alchemy for Linux' to download.
Once the download is complete, check your default download directory for the Alchemy file. This is a compressed zip file and inside is the Alchemy application itself. Extract the files, use your favourite unzipping utility and inside will be a folder called 'Alchemy'. Copy this folder to wherever you keep your applications. That completes the installation of Alchemy and you should now be able to see the Alchemy folder inside your applications folder:
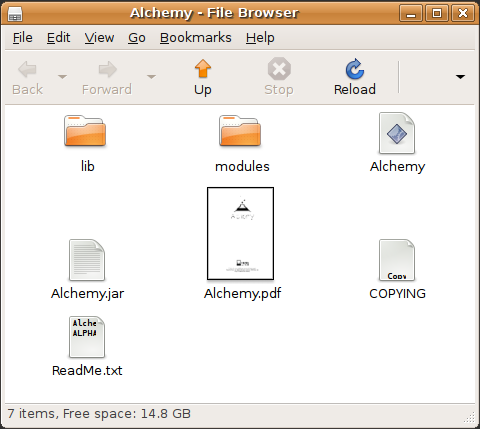
To open Alchemy simply double-click on the 'Alchemy' file inside the Alchemy folder to launch the .jar file.
Installing Alchemy on Windows
Software name : Alchemy
Homepage : http://al.chemy.org
Software version used for this installation : BETA 008
Operating System use for this installation : XP Service Pack 2
Recommended Hardware :
Required Software : Java Runtime Environment Version 1.5 or above
Downloading Alchemy
The latest version of Alchemy for Windows can be downloaded from:
http://al.chemy.org/download/
The latest version at the time of writing this document is Alchemy BETA 008.
Click on the link labeled 'Alchemy for Windows' to download.
Once the download is complete, check your default download directory for the Alchemy file. This is a compressed zip file and inside is the Alchemy application itself. Extract the files, use your favourite unzipping utility and inside will be a folder called 'Alchemy'. Copy this folder into your 'Program Files' folder to install Alchemy.
That completes the installation of Alchemy and you should now be able to see the Alchemy folder inside your Program Files folder.

To open Alchemy simply double-click on the Alchemy icon inside the Alchemy folder.
If you see a warning message telling you 'Java Install Required', be sure to follow the download link and install Java before using Alchemy.
Interface Basics
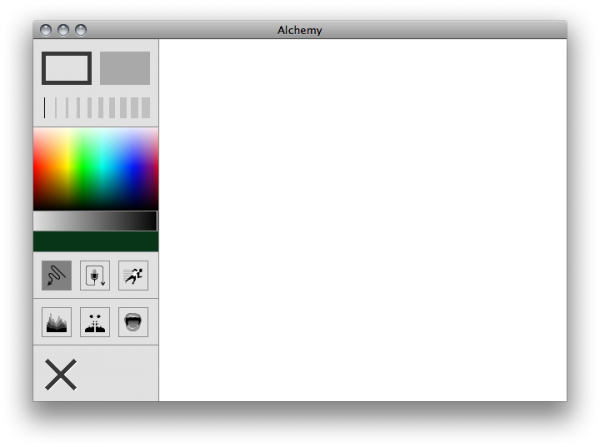
When you open Alchemy you will see the main window and little else. Why, you ask? The Alchemy interface is designed to stay out of the way, letting you concentrate all your creative energies on just doing the drawing.
To reveal the interface, roll your mouse into the top part of the main window. It will magically appear like this:

When you leave the interface area it will automatically disappear back where it came from. You can also toggle the tool bar on and off by pressing the space bar.
The Alchemy interface has two main elements: the menu bar and the tool bar. On OS X, the menu bar is located in the main Apple Menu area.

On Windows/Linux the menu bar and the tool bar are by default grouped together and show/hide automatically.
On all systems it is possible to detach the tool bar into a separate floating window, by clicking on the detach button on the top right of the tool bar. This removes the tool bar from the main window and on Windows/Linux make the menu bar behave a bit more normally, i.e. be visible all the time.

To re-attach the tool bar to the main window, simply click the close button in the top left corner.
Simple Interface
Since version Alpha 005, Alchemy has an alternate simple interface that is ideal for kids.
Using the simple interface is well... simple, it can be turned on in the Preferences/Options and will kick in as soon as you restart Alchemy.
Menu Bar
The Alchemy menu bar provides access to basic functions such as printing, entering fullscreen mode, and accessing the Alchemy help. More advanced features such as automatic saving and 'switching' to another application can also be accessed from the menu bar.
Lets go through the menu bar one item at a time. Keep in mind that the menu bar looks different on each operating system, but the basic functionality is very much the same.
-
File

-
New
Clear the canvas.
-
Export
Export the canvas as a PNG, JPG, or single page PDF file.
-
Page Setup
Define the page settings for printing.
-
Print
Print the canvas.
-
Exit
Exit Alchemy (Windows only).
-
Edit

-
Copy
Copy the canvas to the clipboard as a bitmap.
-
Flip Horizontal
Flip the canvas horizontally.
-
Flip Vertical
Flip the canvas vertically.
-
View

-
Fullscreen
Enter fullscreen mode. To exit fullscreen mode, hit the ESCAPE key.
-
Transparent Fullscreen
Toggle transparent fullscreen mode. If selected, when entering fullscreen mode the Alchemy canvas window will disappear and you can draw directly on top of the desktop. Please note that this view does not show a live image of the desktop, so it is not possible to draw on top of moving video etc...
- Load Background Image...
Load a background image to draw on top of.
- Unload Background Image...
Unload the background image.
-
Session

The session menu controls how a Alchemy 'session' is recorded. When using the session menu a multi-page PDF file is created, with pages saved either manually or at timed intervals. The file is saved to the session directory with an automatically date-stamped filename.
-
Save Page
Manually save a page to the session PDF file.
-
Save Page & Clear
Manually save a page to the session PDF file, then clear the canvas.
-
Auto Record
Start/stop timed recording.
-
Record Interval

Set a timed interval to automatically save pages into the session PDF file.
-
Auto Clear Canvas
Automatically erase the canvas when 'Auto record' is turned on.
-
Load Session PDF...
Load an previous Alchemy session to draw on top of. Please note that PDF files not created in Alchemy, in particular those containing text, can cause errors. It is also not possible to load the existing Alchemy session onto itself. Once a session has been loaded, the four menu items below will also become available.
-
Next Page
Go to the next page of the loaded session PDF.
-
Previous Page
Go to the previous page of the loaded session PDF.
-
Unload Session PDF
Unload the session PDF - removing it from the canvas.
-
Link to Current Session
When this option selected, using the save settings of the current session (Save/Save & Clear/Auto Record) will automatically advance the the loaded session PDF to the next page. This is useful for adding to a each page of a previous session one by one to create a new PDF session file.
-
Restart Session
Begin a new session. Creates a new session file when saved next.
-
Switch

The switch menu allows you to quickly open the current Alchemy canvas in another user-defined application. The idea is to be able to quickly continue working in a more 'conventional' software application without losing the creative 'flow'.
-
Switch Vector
Open the current Alchemy canvas as a vector graphic in an external application.
-
Switch Bitmap
Open the current Alchemy canvas as a bitmap graphic in an external application.
-
Set Vector Application...
Choose an external application to open the Alchemy canvas in vector format.
-
Set Vector Format
Choose a format for the Vector Switch, either SVG or PDF
-
Set Bitmap Application...
Choose an external application to open the Alchemy canvas in bitmap format.
-
Settings

-
Smoothing
Turn smoothing on/off. With smoothing off, lines will have hard edges, i.e. no anti-aliasing. Depending on the system this can result in better performance.
-
Line Smoothing
Turn line smoothing on/off. Line smoothing is the process of curving lines to make them look smoother. With line smoothing off you may notice kinks or hard angles in the line when drawing with fast movements. This is usually more noticeable when drawing with a mouse, rather than a pen tablet. Turning line smoothing off can result in better performance.
-
Keyboard Shortcuts...
Launch the keyboard shortcuts window and customise the various Alchemy keyboard shortcuts.
- Options (Windows/Linux)
Launch the Preferences/Options window to change the interface and module loading settings.
-
Help

-
Alchemy Help
Open the Alchemy help
-
Alchemy Website
Open the Alchemy website in the default browser.
-
Alchemy Forum
Open the Alchemy forum in the default browser.
-
About Alchemy
Open the 'about' window (Windows only).
Tool Bar
The Alchemy tool bar is used to control how shapes look when they are created. For example, you can change the style of the shape, the transparency, the line width and so on. When it is attached to the main window, the tool bar can be toggled on and off by pressing the space bar.
Let's go through the controls on the tool bar one by one.
Style
Toggle between drawing with a line or solid fill.
Keyboard Shortcut: S
Over/Under
Toggle between drawing over other shapes on the canvas or under them.
Keyboard Shortcut: D
Line Weight
Increase/Decrease the line weight.
Keyboard Shortcut: [ ]
Colour
The colour button is used to control colours. Click on the arrows in the top right to change between foreground and background colour or use the keyboard shortcut X.
Click on either the foreground or background colour swatch to bring up the colour picker and select a colour:

Click on an area inside the colour picker to choose a colour. The area at the top of the colour has black, grey (50%), and white.
In addition you can click on the eye dropper icon to select a colour from the desktop. Use the button with three dots (...) to open a more precise colour selection window as shown below.

Transparency
Adjust the transparency of the active colour. When the foreground colour is active, the transparency is applied to the foreground, and when the background colour is active, the transparency is applied to the background.
Create & Affect
These two buttons control the currently selected Alchemy 'module', and also the controls that appear in the bottom part of the tool bar.
Clear
Clear the entire Alchemy canvas.
Keyboard Shortcut OS X:
Command + Backspace
Keyboard Shortcut Windows:
Ctrl + Backspace
Keyboard Shortcuts
Alchemy has a range of keyboard shortcuts which you can use. Starting from version Alpha 003 you can also customise which keys to use for which function. To set your own keyboard shortcuts, from the Settings menu choose Keyboard Shortcuts... to open the following window:
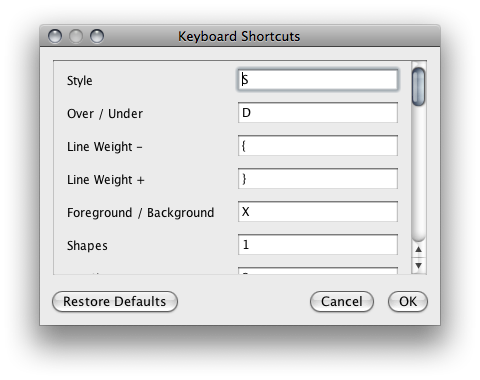
Listed below are the default keyboard shortcuts. These can be changed by clicking on the textfield and
entering a unique key sequence. Modifier keys such as Ctrl, Shift, Alt and so on, can not be used on their own.
Click the OK button to save the new set of shortcuts.
Use the Restore Defaults button to revert back to the default set of shortcuts.
Alchemy uses a different modifier key based on the platform and keyboard. When 'MODIFIER' is listed below, this refers to the Ctrl key on Windows/Linux and the COMMAND (Apple) key on Mac. For example 'MODIFIER+1' on Windows refers to pressing the Ctrl key and the number 1 key.
General Shortcuts
Toggle Tool Bar: SPACE
Show/Hide Cursor: H
Start Eye Dropper: I
Tool Bar Shortcuts
Style: S
Over/Under: D
Line Weight -: OPEN BRACKET
Line Weight +: CLOSE BRACKET
Foreground / Background: X
Clear: MODIFIER+BACKSPACE
Flip Horizontal: MODIFIER+;
Flip Vertical: MODIFIER+'
Transparent Fullscreen: MODIFIER+T
Load Background Image: MODIFIER+L
Menu Bar Shortcuts
New: MODIFIER+N
Export...: MODIFIER+E
Print...: MODIFIER+P
Copy: MODIFIER+C
Fullscreen: MODIFIER+F
Load Background Image: MODIFIER+L
Save Page: MODIFIER+S
Save Page & Clear: MODIFIER+D
Auto Record: MODIFIER+R
Next Page: MODIFIER+RIGHT
Previous Page: MODIFIER+LEFT
Switch Vector: MODIFIER+V
Switch Bitmap: MODIFIER+B
Create Module Shortcuts
Create Module shortcuts use the number keys across the top of the keyboard. Which shortcut key will depend on which modules you have installed and activated.
Affect Module Shortcuts
Affect Module shortcuts use the number keys across the top of the keyboard with the modifier key. Which shortcut key will depend on which modules you have installed and activated.
Preferences / Options
Alchemy has several options that can be set in the Preferences/Options window. This can be accessed on Windows/Linux under the Menu bar > Settings > Options... or on OS X using the Menu bar > Alchemy > Preferences...
General

Here you can switch between the Simple and Standard interface and also select which modules to activate. Using the Restore Defaults button will revert to the default set of modules. Changes here take effect once you have restarted the application.
Session

Here you can define the settings for saving of session PDF files. 'Record on Startup' lets you begin recording a new session when Alchemy is started. The session directory where PDF files are saved, is also defined here.
Finally the name format for the session files created can be set here. In the first text box, set to 'Alchemy-' by default, you can set the prefix name for the file. This can be anything you like. The second text box contains the format for date stamping the file, by default 'yyyy-MM-dd-HH-mm-ss', this stands for the year, month, day, hour, minute, and seconds each separated by a hyphen.
A full list of date format codes can be found here, or you can refer to these examples:
yyyy.MM.dd G 'at' HH:mm:ss z -------> 2001.07.04 AD at 12:08:56 PDT
EEE, MMM d, ''yy -------> Wed, Jul 4, '01
h:mm a -------> 12:08 PM
yyyyy.MMMMM.dd GGG hh:mm aaa -------> 02001.July.04 AD 12:08 PM
EEE, d MMM yyyy HH:mm:ss Z -------> Wed, 4 Jul 2001 12:08:56 -0700
To test out a code, type it in, hit the enter key, and then watch the example box change to preview the format.
What is a Module?
Alchemy consists of the main or core application, and then a series of independent plugin modules that are loaded at startup. Alchemy modules each perform a specific and different function and they represent the main functionality of Alchemy itself. Modules determine the type of shape that is created and how that shape is affected (changed) when you draw. Modules are divided into two categories:
- Create modules produce shapes, and can be used one at a time.
- Affect modules affect or change existing shapes, and can have more than one used at a time.
Modules can be selected using the Create and Affect buttons in the tool bar. When you click on one of these buttons, a menu pops up like this:
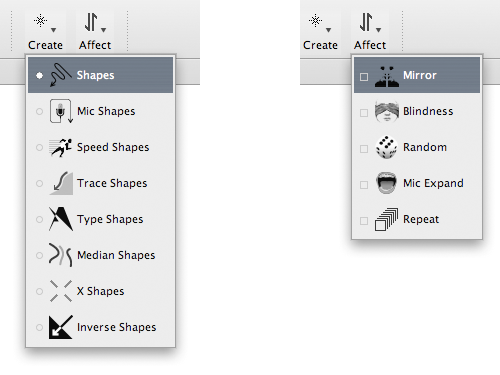
Listed here are all the currently installed Create modules on the left and Affect modules on the right.
Create Modules
Alchemy comes with a range of different modules that do quite varying things.
Create modules are for creating shapes, and can be selected one at a time using the Create popup menu in the tool bar. Let's go through the Create modules one by one:
Shapes
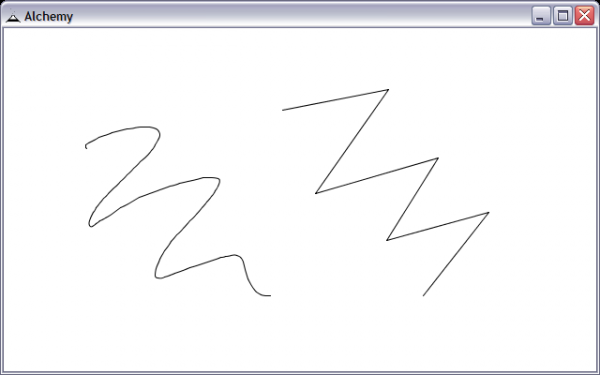
The Shapes module draws like a regular pen in Freeform mode or straight lines in Straight mode. When drawing straight lines, a double click will allow you to start a new shape. The Outline button allows you to temporarily draw with just the outline while in solid shape mode. When the shape is finished, the shape will automatically be filled.
Mic Shapes

The Mic Shapes module uses the sound level from your computers microphone to change how shapes are created.
In Fatten mode the thickness of the line is determined by the microphone sound level. More noise creates a fatter line and vice versa.
In Shake mode the location of the line is changed according to the microphone sound level. More noise creates a more 'shaken up' line.
The Volume slider can be used to control the level of noise required to fatten or shake the shape.
Speed Shapes

The Speed Shapes module accentuates the pen speed to create shapes that throw the line beyond the actual pen position. Faster movement of the pen will result in shapes extending well beyond the pen position and possibly off the screen itself.
The Speed slider can be used to control how much speed is applied.
The Line Type can also be toggled between drawing straight lines and curved lines.
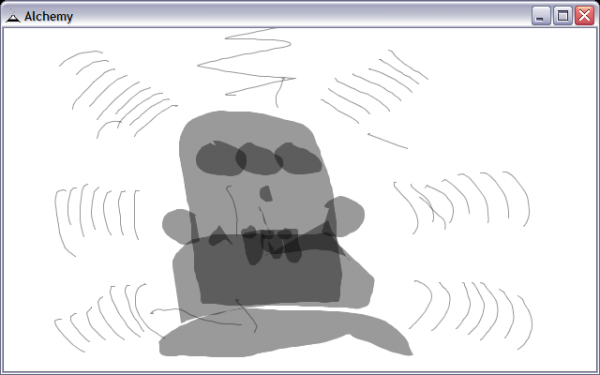
Trace Shapes

The Trace Shapes module downloads a random image using Flickr and loads it hidden behind the canvas. The pen then snaps to the edges of the hidden picture, creating unknown forms.
Display of the image can be turned on and off using the Display Image button.
A new image can be loaded by clicking on the Load Image button.
The Snap Distance slider allows you to set the maximum distance at which snapping occurs.
The Tolerance slider determines how 'hard' the edge must be for the line to snap.
Pressure Shapes

The Pressure Shapes module uses the pressure from a pen tablet to control line thickness.
Type Shapes

The Type Shapes module creates random shapes from type forms. It looks for fonts on your computer then layers and distorts them to create abstract shapes. These shapes that can be used as a starting point for characters, spaceships, or whatever shape you see in the 'clouds'.
The Distortion slider determines how much distortion is applied to the shapes.
The Auto-generate button creates more complex shapes by layering and joining multiple type-forms together, then placing them on the canvas.
The Size slider changes the size of the shapes created.
The Key Drawing button lets you draw with the keys of your keyboard, placing shapes on the canvas according to the keys pressed.
Median Shapes
The Median Shapes module draws a 'median' line between the last line and current line.
X Shapes
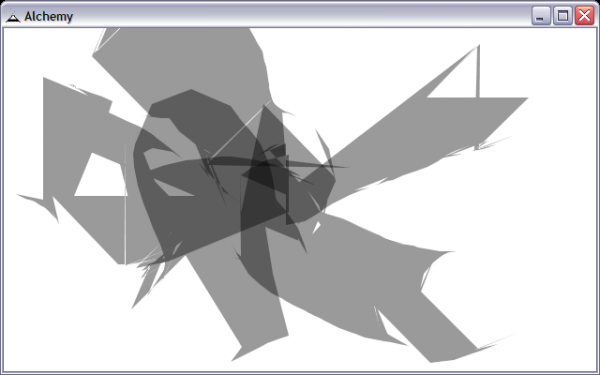
The X Shapes module creates hard and sharp edged shapes that move erratically according to the line duration and pen speed.
The Distance slider controls the maximum distance from the pen where shapes are created.
Inverse Shapes
The Inverse Shapes module draws like a regular pen except inverted. When the pen is up it draws, and when down it does not.
Detach Shapes

The Detach Shapes module creates shapes by moving independently in a separate location from the pen. use the Distance slider to set how far detached from the pen the drawing point is.
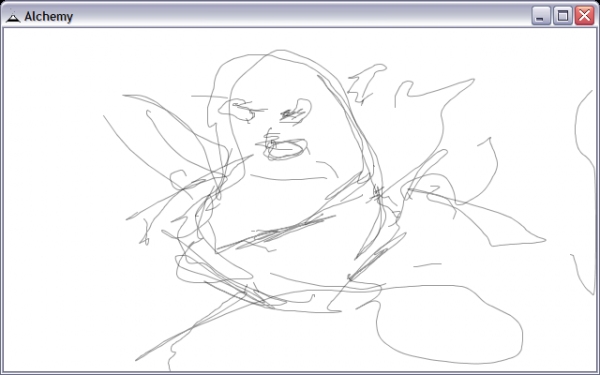
Scrawl Shapes
The Scrawl Shapes module creates shapes that form randomly scrawled lines. Use the Flow slider to set how quickly shapes flow from the pen. Use the Detail slider to control how much detail you would like, less detail makes smoother shapes and vice versa. The Noise slider controls how widely the shapes spread out from the original location.
Pull Shapes

The Pull Shapes module draws shapes to the canvas extracted from predefined pdf files stored in the shapes folder of your Alchemy install directory. You have full control of the contents of these files and may add / remove elements as you choose. Files must be in the PDF format (up to version 1.4) and can have multiple pages - you can even load in Alchemy session files.
You can decide to have shapes pulled from all available files, or manually select specific folders of shapes to be used from the drop box. The Reload button can be used to scan the shapes folder and update with any new files added. The Spacing slider determines how quickly shapes are added. The Size slider controls the size of shapes and the Rotate button randomly rotates shapes.
Ribbon Shapes

The Ribbon Shapes module leaves a trail of ribbon like shapes. The Size of the ribbons can be set, as well as the Spacing of the ribbons, the frequency at which they are added to the canvas. Qualities of the ribbon such as Friction and Gravity can also be set.
Splatter Shapes

The Splatter Shapes module creates paint like splatters on the canvas. The Size of the splatter and the number of Drips can be controlled.
Affect Modules
Affect modules are for affecting (changing) existing shapes. You can have more than one selected at a time by using the Affect popup menu in the tool bar. Having several selected at once can lead to quite strange behaviour! Thats a good thing! Lets go through the Affect modules one by one.
Displace

The Displace module changes shape geometry by contracting or expanding the shape based on the movement of the pen. Faster movement causes the shape to contract closer towards the current pen location. Likewise, slower movements push points away from the current pen location.
Use the Displacement slider to change the amount shapes are contracted or expanded.
Gradient

The Gradient module adds automatic colour gradation to shapes, fading between the foreground colour and a transparent colour.
Mirror
The Mirror module reflects shapes along a vertical and/or horizontal axis in real time.
Use the Horizontal and Vertical buttons to turn mirroring on and off.
Use the Move button to set the location of mirroring.
Use the Reset button to reset the location of mirroring to the middle of the canvas.
Blindness

Drawing blind is an exercise used in conventional drawing, and is implemented here in the Blindness module by stopping the canvas display being updated.
Update the canvas display using the Redraw button.
Allow the automatic redrawing of shapes each time the pen is lifted by toggling the Autoredraw button.
Random
The Random module allows you to distort and change shapes. When rolling over a shape, the area around the mouse will have its points randomised.
Mic Expand

The Mic Expand module uses sounds from the microphone to expand, contort, and change shapes. When rolling over a shape, the microphone is opened and the shape is changed according to the incoming sound.
Use the Volume slider to control the level of distortion.
Use the Mode button to toggle between the two different modes. In wave mode shapes are distorted according to the sound wave captured from the microphone. In level mode, the size of the shape is changed according to the microphone volume.
Repeat

The Repeat module duplicates shapes on rollover. This module can be used in combination with other affect modules such as Random and Mic Expand to create slightly different shapes in multiple.
Use the Repeat Interval slider to change the rate at which shapes are duplicated. A smaller interval produces more shapes.
Colour Switcher

The Colour Switcher module can be used to change colours randomly. When the Transparency button is on, the transparency will change with each pen stroke. Likewise when the Colour button is on, the colour will change. Additionally a 'base colour' can be set and a range defined so as to produce very similar colours with a low range, and very different colours with a high range.
Smooth

The Smooth module will smooth out the jagged and hard edges of shapes on rollover. The Repeat button, when activated adds each step of the smoothing process to the canvas as a new shape.
Limit
The Limit module, limits the total number of shapes that can be on the canvas at any one time. It works in a 'first in, first out' style so that older shapes are removed first. This module is useful if you want to keep the sketch minimal, or work with live visuals that appear to fade and animate over time.
Additional Help
For more help with Alchemy you can try these avenues:
Alchemy Website
On the Alchemy site are a range of demonstration videos that can give you a good picture of how Alchemy works:
http://al.chemy.org/videos
Online Forums
You can also try searching through the forums for information.
http://al.chemy.org/forum
The forums contain a lot of postings from users on many topics. You can use the search system to locate topics or just browse the categories. If you don't find what you want then try subscribing to the forums and posting your question to the relevant category. There are a few things to keep in mind when asking a question in a forum or to a mailing list. First, be as clear as you can with your question and provide any information that you might think would help some to try to help you. You might, for example, include information about the operating system you are using, or various specifics that relate to what you are trying to achieve. Additionally, it is always good practice to also post back to any forum or mailing list if you manage to solve your query and include clear information on how you solved the puzzle. This is so that someone else that may have the same issue can resolve it using what you have found out. If possible post back to the same thread (discussion topic) so that anyone searching through the forum can follow the discussion including the solution.
Web Search
Searching the web is always useful. If you are looking for problems arising from errors reported by the software then try entering the error text into the search engine. Be sure to edit out any information that doesn't look generic when doing this. Some search engines also enable you to try searches of mailing lists, online groups etc, this can also provide good results.