


Getting Started
When you first get started with K9 you will need to do two main things. First you will want to install K9 on your phone or tablet. Then, you will need to configure K9 to use one or more email accounts.
Installing K-9 Mail
Most Apps on Android phones and tablets are installed through the Google Play app store. However, you may want to be able to install K9 without leaving your details with google. This is also possible using F-droid project
You will need to be connected to the internet with wifi or your phone's data connection to complete these steps. Some of the steps may look different depending on your version of Android and the size of your device.
Installing K-9 Mail from Google Play
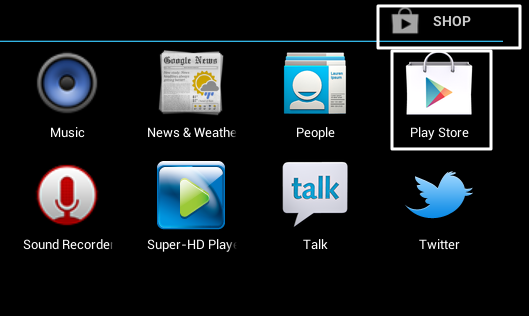
Start Google Play by clicking on the Play Store icon or the Shop icon on your android device.
In the top bar, you should then be able to see a search icon that looks like a magnifying glass.
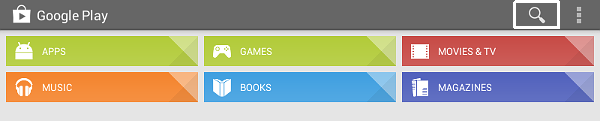
In the top left corner of the screen you should see a flashing cursor allowing you to type a search term to search the Google Play store.
Type in "K9".

To search click on the search icon.

The application you want is called "K-9 Mail". Click on the panel to see information on the application. You will also see the option to INSTALL.
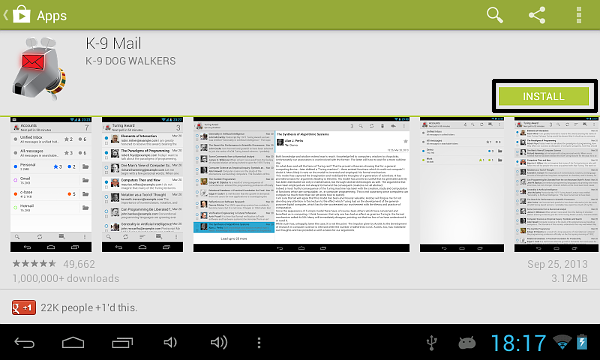
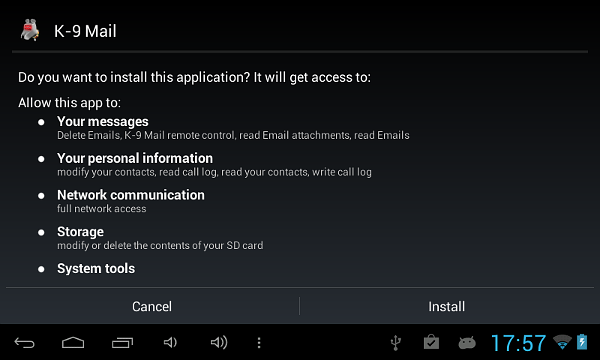
Click on the INSTALL option and follow the instructions. You will need to agree to allow K9 access to your messages, personal information (in order to add contacts), network communications etc. This is normal and you should accept to be able to use the application.
When you start K-9 you will be shown a summary of its features. You should click Next to continue. You can skip forward to the section on setting up your email accounts.
Installing K-9 Mail from F-Droid
Some Android apps can be downloaded and installed without having to give your details to Google Play store. You can find a recent version of K9 on a website called F-Droid. Installing through the F-Droid repository also allows you to get K9 updates automatically. F-Droid is an alternative to the Google Play market. If you like what you see then you can install the F-Droid repository app which allows you to easily browse and install other FOSS applications.
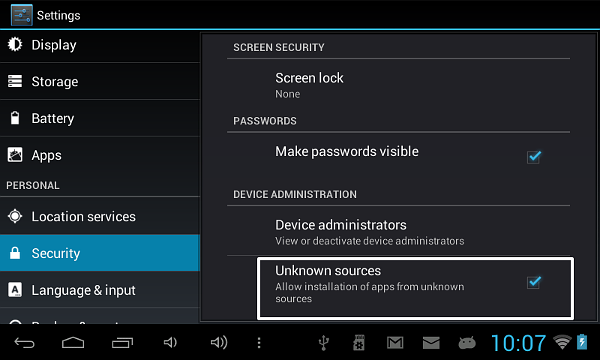
Before you can install an app in the following way you will need to adjust the security settings on your device to Allow installation of apps from unknown sources.
While it is great to have an alternative to Google Play and to be able to install apps directly to our devices, it is important to know that there are risks to installing apps from untrusted sources. Make sure you either use Google Play, a trusted source like f-droid OR the website of the developers. Don't download apps (apk files) from just anywhere on the web.
On your android device, point your web browser to http://f-droid.org. Select the Search navigation link. Search for K9 and then touch the K-9 email client from the results.
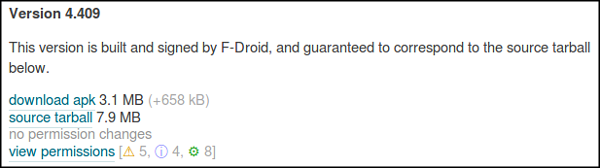
Scroll down the page and select the the link which says download apk to download a file of the latest version of K9 listed. At the time of writing this is Version 4.409 as shown in the screenshot.
When you have selected the the link you should get a notification on your navigation bar that you are downloading a file.
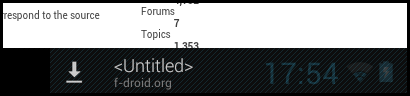
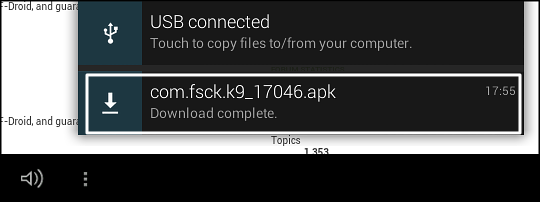
When this disappears your download should have completed and you can touch this area of the screen to see your downloaded file.
If the above technique doesn't work for you then you should be able to find the file in your Download file by using the file manager on your Android device.
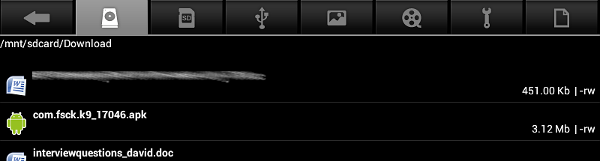
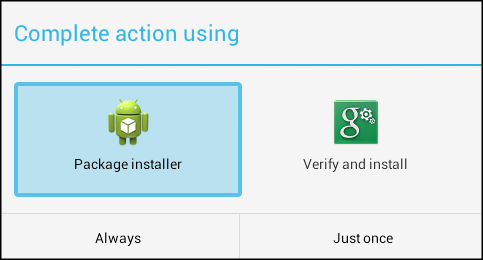
Using either of the ways above, select the name of the downloaded .apk file - in this case com.fsck.k9_17046.apk - to start the installation process. You will be given a choice on how to install the application. Select Package installer and click on Just once.
The installation process asks you to confirm how much control of your device you want to give over to the K-9 application.
Once you have installed your K-9 application you are ready to add one or more email account to it.
Setting up your email accounts
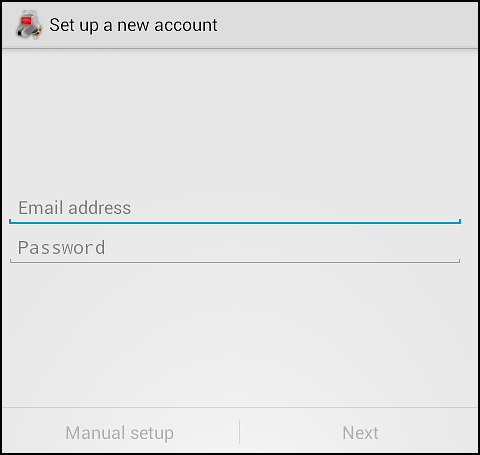
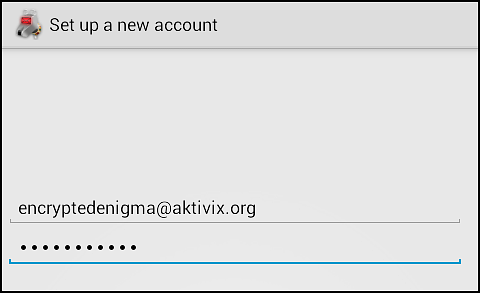
On setting up a new account you are presented with a screen asking you to enter the Email address and password.
We will guide you through the process of setting up an email with both a major email provider and an independent email provider. In both cases you will already need to have signed up for an email account and have your email address and password ready.
Setting up a Google mail account
Enter your email and password in the box provided.
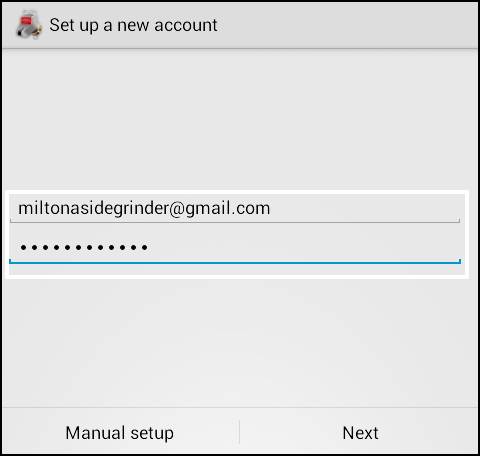
Click on the Next option.
K-9 will now search its resources to see if there are details of the configuration of gmail.
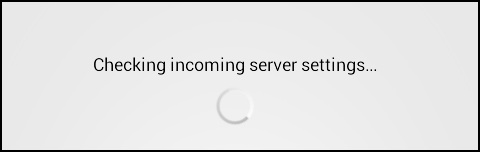
Because it is a well known resource, the settings are found and you should then see screens which say Checking incoming server settings... and Checking outgoing server settings...
If there are no problems with your password then K-9 should connect to google mail and start to download any existing email you have.
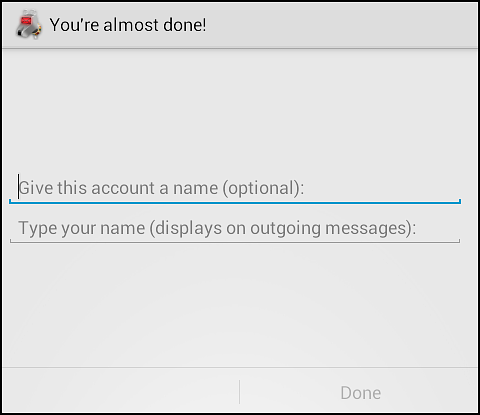
The following screen tells us that we are almost done and asks for two more pieces of information, account name and display name.
Giving the account a name is helpful when organising your email if you add more that one account. Make sure to enter a name to show on your outgoing emails so people know who you are when you send them a message.
The next window you see is a Change log message. Click OK.
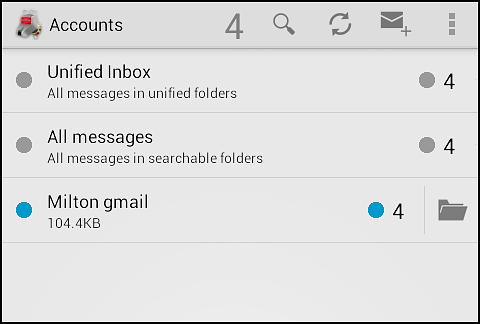
When this is done you should be shown the Accounts window. You are ready to skip forward to learn about everyday use of K-9 or learn how to set up an account manually.
Setting up an email account manually
It may be that your email server account isn't recognised by K-9. If this is true then the process above will not work and you will have to set up your email account manually.
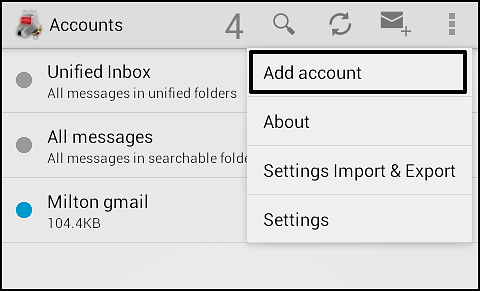
If you have already installed an account and want to install another then click on the More Actions icon ![]() or the menu key on your device.
or the menu key on your device.
Now select the Add account option.
Enter your email and password in the dialogue boxes shown.
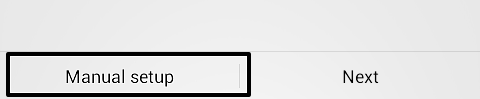
Select the option Manual Setup.
This gives you three options IMAP, POP3, or Exchange (WebDAV).
At this stage what you choose depends on the options offered by your email provider. If they offer both IMAP and POP3. Some advantages of IMAP are that it normally takes up less storage space on your device and allows easier syncing of email if you check from more thane one device.
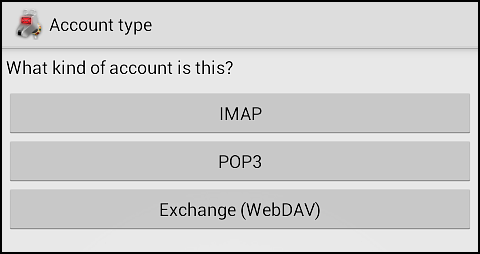
We will document how to set up your email with IMAP as this is now the most common method of checking email. If you want to choose POP3 the following instructions should be understandable.
If you want help on setting up K-9 with Exchange(WebDAV) there is help here on the K-9 support pages. https://github.com/k9mail/k-9/wiki/K9MailAndExchange
Configuring your email with IMAP
Choose IMAP after Fill in the server settings that your email provider sent you or those listed on their help page. An example of some incoming email settings follow.
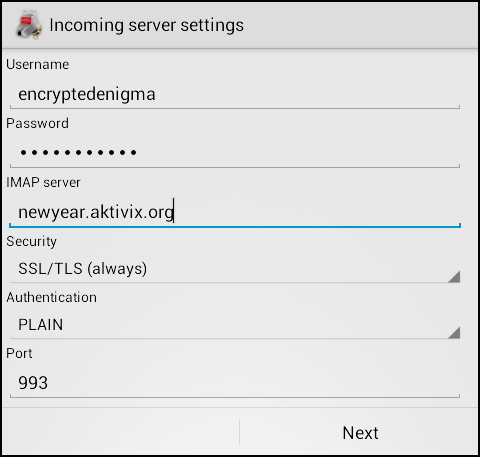
For security select either SSL/ TLS(always) or STARTTLS(always) don't select None.
Click on Next when you have filled out the settings. If there is an error go back to the details given to you by your email provider and check them.
If these setting don't work some experimenting with different settings is sometimes helpful. Their documentation could possibly be out of date.
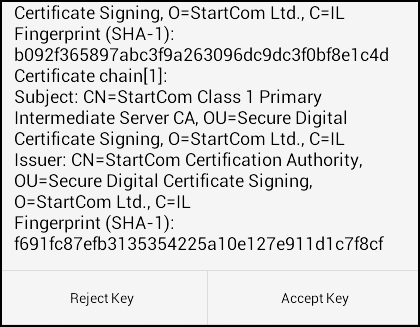
If you get the option to accept a certificate click Accept Key. You can normally check that the detail of this key are correct on the website of your email provider.
Outgoing mail is called SMTP, you need to fill in different set of settings for this which you should have been sent by your email provider.
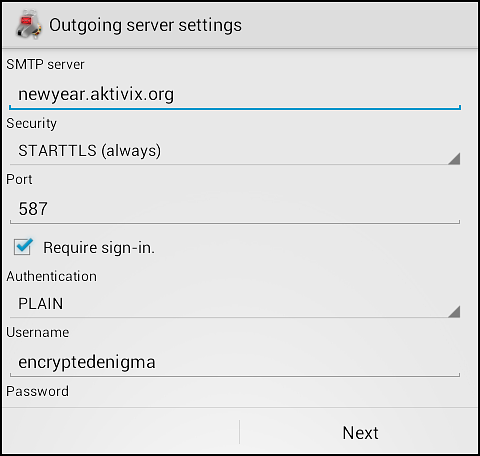
Fill in your Outgoing server settings and click Next.
This should return you to the Accounts window where you should see your new account listed.
You are now ready to move on to learn about the every day use of K-9 to read, write and manage your emails.