


Texturing
Texturing is a part of the local material state, but is a complex topic worthy of a chapter in it's own right.
Loading textures
 Getting a texture loaded and applied to a primitive is pretty simple:
(with-state
	(texture (load-texture "test.png"))
	(build-cube))
Which applies the standard fluxus test texture to a cube. Fluxus reads png files to use as its textures, and they can be with or without an alpha channel.
The texture loading is memory cached. This means that you can call (load-texture) with the same textures as much as you want, Fluxus will only actually load them from disk the first time. This is great until you change the texture yourself, i.e. if you save over the file from the Gimp and re-run the script, the texture won't change in your scene. To get around this, use:
(clear-texture-cache)
Which will force a reload when (load-texture) is next called on any texture. It's sometimes useful to put this at the top of your script when you are going through the process of changing textures - hitting F5 will cause them to be reloaded.
Texture coordinates
In order to apply a texture to the surface of a primitive, texture coordinates are needed - which tell the renderer what parts of the shape are covered with what parts of the texture. Texture coordinates consist of two values, which range from 0 to 1 as they cross the texture pixels in the x or y direction (by convention these are called "s" and "t" coordinates). What happens when texture coordinates go outside of this range can be changed by you, using (texture-params) but by default the texture is repeated.
The polygon and NURBS shapes fluxus provides you with are all given a default set of coordinates. These coordinates are part of the pdata for the primitive, which are covered in more detail later on. The texture coordinate pdata array is called "t", a simple example which will magnify the texture by a factor of two:
(pdata-map!
	(lambda (t)
		(vmul t 0.5)) ; shrinking the texture coordinates zooms into the texture
	"t")
Texture parameters
There are plenty of extra parameters you can use to change the way a texture is applied.
(texture-params texture-unit-number param-list)
We'll cover the texture unit number in multitexturing below, but the param list can look something like this:
(texture-params 0 '(min nearest mag nearest)) ; super aliased & blocky texture :)
The best approach is to have a play and see what these do for yourself, but here are the parameters in full:
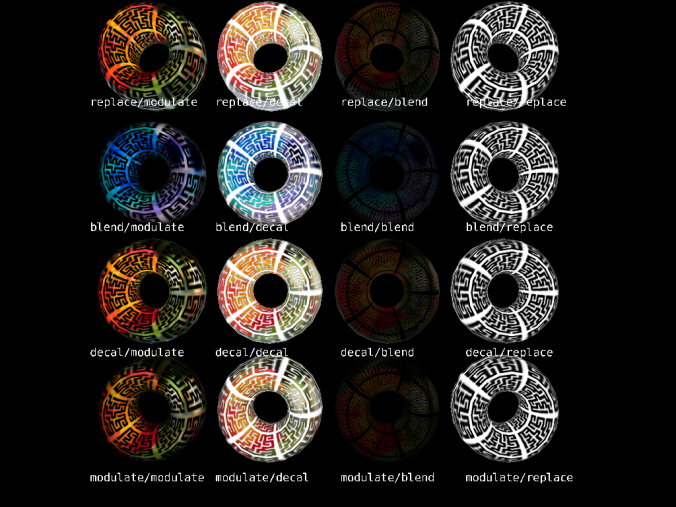
tex-env: one of [modulate decal blend replace] 
Changes the way a texture is applied to the colour of the existing surface
min: [nearest linear nearest-mipmap-nearest linear-mipmap-nearest linear-mipmap-linear]
mag: [nearest linear]
These set the filter types which deal with "minification" when the texture's pixels (called texels) are smaller than the screen pixels being rendered to. This defaults to linear-mipmap-linear. Also "magnification", when texels are larger than the screen pixels. This defaults to linear which blends the colour of the texels. Setting this to nearest means you can clearly see the pixels making up the texture when it's large in screen space.
wrap-s: [clamp repeat]
wrap-t: [clamp repeat]
wrap-r: [clamp repeat] (for cube maps)
What to do when texture coordinates are out of the range 0-1, set to repeat by default, clamp "smears" the edge pixels of the texture.
border-colour: (vector of length 4) If the texture is set to have a border (see load-texture) this is the colour it should have.
priority: 0 -> 1
I think this controls how likely a texture is to be removed from the graphics card when memory is low. I've never used this myself though.
env-colour: (vector of length 4)
The base colour to blend the texture with.
min-lod: real number (for mipmap blending - default -1000)
max-lod: real number (for mipmap blending - default 1000)
These set how the mipmapping happens. I haven't had much luck setting this on most graphics cards however.
This is the code which generated the clamp picture above:
(clear)
(texture-params 0 '(wrap-s clamp wrap-t clamp))
(texture (load-texture "refmap.png"))
(with-primitive (build-cube)
    (pdata-map!
        (lambda (t)
            (vadd (vector -0.5 -0.5 0) (vmul t 2)))
    "t"))
Multitexturing
 Fluxus allows you to apply more than one texture to a primitive at once. You can combine textures together and set them to multiply, add or alpha blend together in different ways. This is used in games mainly as a way of using texture memory more efficiently, by separating light maps from diffuse colour maps, or applying detail maps which repeat over the top of lower resolution colour maps.
You have 8 slots to put textures in, and set them with:
(multitexture texture-unit-number texture)
The default texture unit is 0, so:
(multitexture 0 (load-texture "test.png"))
Is exactly the same as
(texture (load-texture "test.png"))
This is a simple multitexturing example:
(clear)
(with-primitive (build-torus 1 2 20 20)
    (multitexture 0 (load-texture "test.png"))
    (multitexture 1 (load-texture "refmap.png")))
By default, all the textures share the "t" pdata as their texture coordinates, but each texture also looks for it's own coordinates to use in preference. These are named "t1", "t2", "t3" and so on up to "t7".
(clear)
(with-primitive (build-torus 1 2 20 20)
    (multitexture 0 (load-texture "test.png"))
    (multitexture 1 (load-texture "refmap.png")))
    (pdata-copy "t" "t1") ; make a copy of the existing texture coords
    (pdata-map!
        (lambda (t1)
            (vmul t1 2)) ; make the refmap.png texture smaller than test.png
        "t1"))
This is where multitexturing really comes into it's own, as you can move and deform textures individually over the surface of a primitive. One use for this is applying textures like stickers over the top of a background texture, another is to use a separate alpha cut out texture from a colour texture, and have the colour texture "swimming" while the cut out stays still.
Mipmapping
There is more to (load-texture) than we have explained so far. It can also take a list of parameters to change how a texture is generated. By default when a texture is loaded, a set of mipmaps are generated for it - mipmaps are smaller versions of the texture to use when the object is further away from the camera, and are precalculated in order to speed up rendering.
One of the common things you may want to do is turn off mipmapping, as the blurriness can be a problem sometimes.
(texture (load-texture "refmap.png"
	'(generate-mipmaps 0 mip-level 0))) ; don't make mipmaps, and send to the top mip level
(texture-params 0 '(min linear)) ; turn off mipmap blending
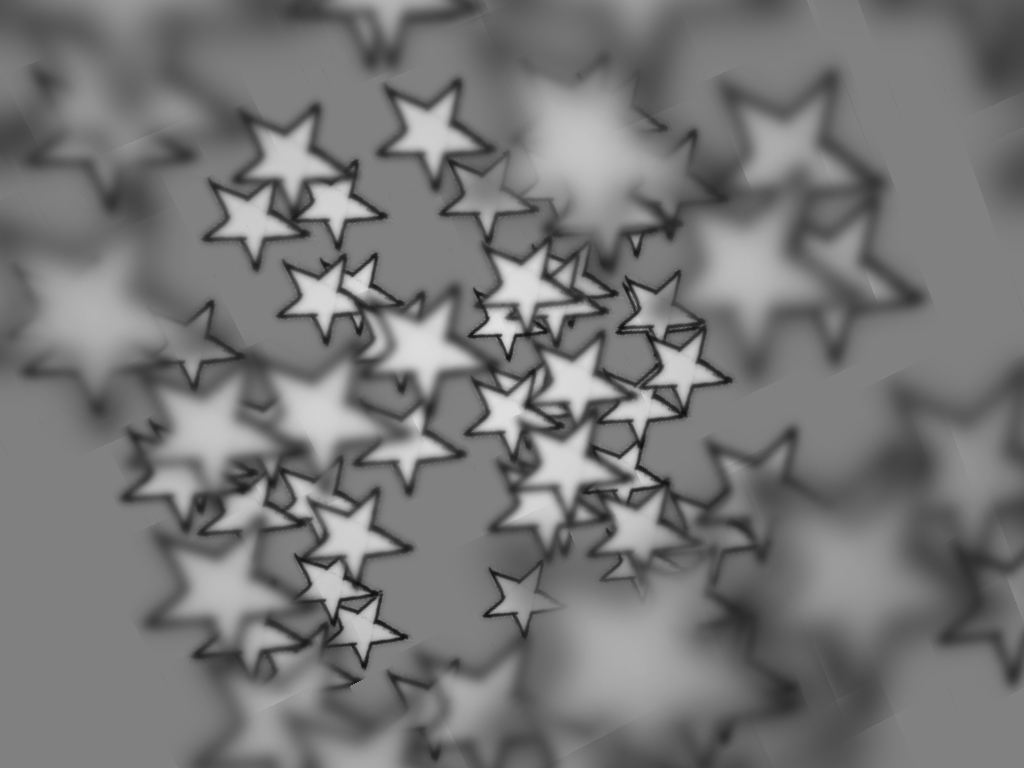
Another interesting texture trick is to supply your own mipmap levels:
; setup a mipmapped texture with our own images
 ; you need as many levels as it takes you to get to 1X1 pixels from your
 ; level 0 texture size
 (define t2 (load-texture "m0.png" (list 'generate-mipmaps 0 'mip-level 0)))
 (load-texture "m1.png" (list 'id t2 'generate-mipmaps 0 'mip-level 1))
 (load-texture "m2.png" (list 'id t2 'generate-mipmaps 0 'mip-level 2))
 (load-texture "m3.png" (list 'id t2 'generate-mipmaps 0 'mip-level 3))
This shows how you can load multiple images into one texture, and is how the depth of field effect was achieved in the image above. You can also use a GLSL shader to select mip levels according to some other source.
Cubemapping
Cubemapping is set up in a similar way to mipmapping, but is used for somewhat different reasons. Cubemapping is an approximation of an effect where a surface reflects the environment around it, which in this case is described by six textures representing the 6 sides of a cube around the object.
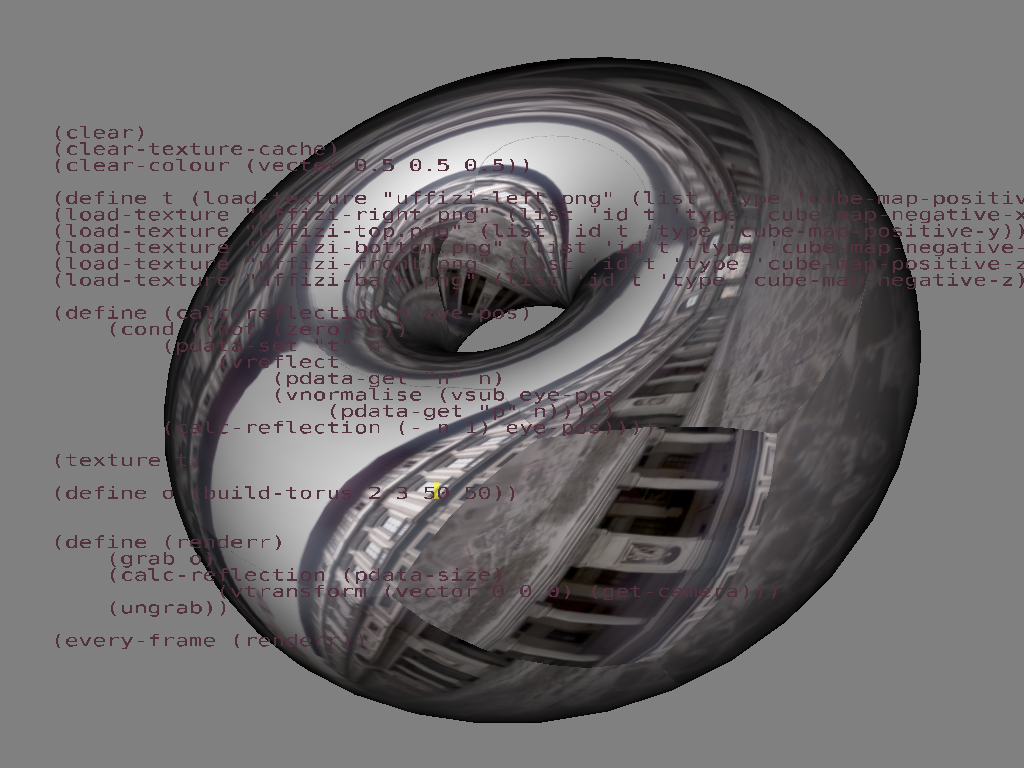
 (define t (load-texture "cube-left.png" (list 'type 'cube-map-positive-x)))
 (load-texture "cube-right.png" (list 'id t 'type 'cube-map-negative-x))
 (load-texture "cube-top.png" (list 'id t 'type 'cube-map-positive-y))
 (load-texture "cube-bottom.png" (list 'id t 'type 'cube-map-negative-y))
 (load-texture "cube-front.png" (list 'id t 'type 'cube-map-positive-z))
 (load-texture "cube-back.png" (list 'id t 'type 'cube-map-negative-z))
 (texture t)
Compressed textures
Compressed textures allow you to load more textures into less memory and can also improve texturing performance due to fewer memory accesses during texture filtering. (load-texture) reads DXT compressed texture files. To compress your textures there are a couple of options, for example nvcompress from
(clear)
(texture (load-texture "test.dds"))
(build-cube)