


Lighting
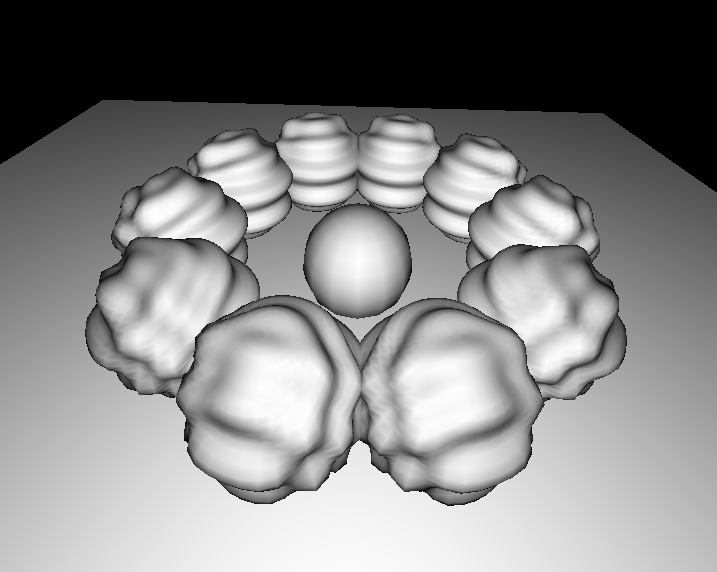
We have got away so far with ignoring the important topic of lighting. This is because there is a default light provided in fluxus, which is pure white and is attached to the camera, so it always allows you to see primitives clearly. However, this is a very boring setup, and if you configure your lighting yourself, you can use lights in very interesting and creative ways, so it's good to experiment with what is possible.
The standard approach in computer graphics comes from photography, and is referred to as 3 point lighting. The three lights you need are:
- Key – the key light is the main light for illuminating the subject. Put this on the same side of the subject as the camera, but off to one side.
- Fill – the fill light removes hard shadows from the fill light and provides some diffuse lighting. Put this on the same side as the camera, but to the opposite side to the key light.
- Rim or Back light, to separate the subject from the background. Put this behind the subject, to one side to illuminate the edges of the subject.
Here is an example fluxus script to set up such a light arrangement:
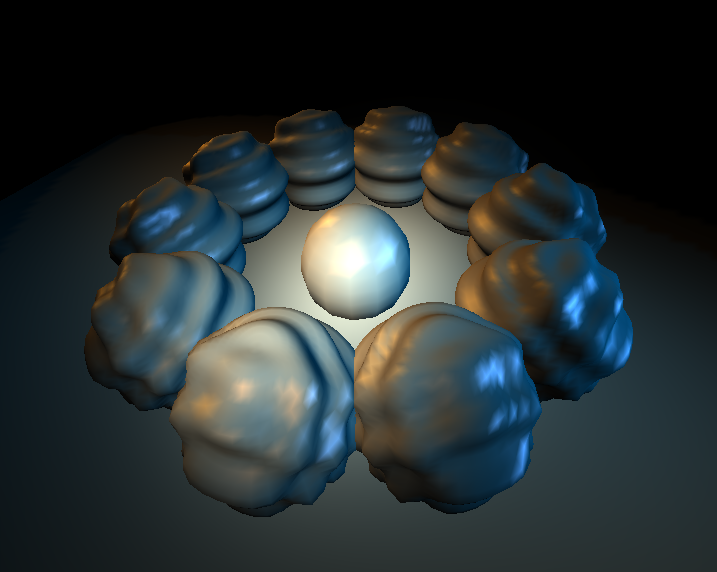
; light zero is the default camera light
; set to a low level
(light-diffuse 0 (vector 0 0 0))
(light-specular 0 (vector 0 0 0))

; make a big fat key light
(define key (make-light 'spot 'free))
(light-position key (vector 5 5 0))
(light-diffuse key (vector 1 0.95 0.8))
(light-specular key (vector 0.6 0.3 0.1))
(light-spot-angle key 22)
(light-spot-exponent key 100)
(light-direction key (vector -1 -1 0))

; make a fill light
(define fill (make-light 'spot 'free))
(light-position fill (vector -7 7 12))
(light-diffuse fill (vector 0.5 0.3 0.1))
(light-specular fill (vector 0.5 0.3 0.05))
(light-spot-angle fill 12)
(light-spot-exponent fill 100)
(light-direction fill (vector 0.6 -0.6 -1))

; make a rim light
(define rim (make-light 'spot 'free))
(light-position rim (vector 0.5 7 -12))
(light-diffuse rim (vector 0 0.3 0.5))
(light-specular rim (vector 0.4 0.6 1))
(light-spot-angle rim 12)
(light-spot-exponent rim 100)
(light-direction rim (vector 0 -0.6 1))
Shadows
The lack of shadows is a big problem with computer graphics. They are complex and time consuming to generate, but add so much to a feeling of depth and form.
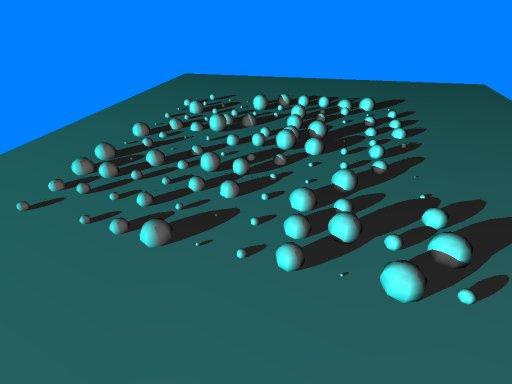
However, they are quite easy to add to a fluxus scene:
(clear)
(light-diffuse 0 (vector 0 0 0)) ; turn the main light off
(define l (make-light 'point 'free)) ; make a new light
(light-position l (vector 10 50 50)) ; move it away
(light-diffuse l (vector 1 1 1))
(shadow-light l) ; register it as the shadow light

(with-state
    (translate (vector 0 2 0))
    (hint-cast-shadow) ; tell this primitive to cast shadows
    (build-torus 0.1 1 10 10))

(with-state ; make something for the shadow to fall onto.
    (rotate (vector 90 0 0))
    (scale 10)
    (build-plane))
Problems with shadows
There are some catches with the use of shadows in fluxus. Firstly they require some extra data to be generated for the primitives that cast shadows. This can be time consuming to calculate for complex meshes - although it will only be calculated the first time a primitive is rendered (usually the first frame).
A more problematic issue is a side effect of the shadowing method fluxus uses, which is fast and accurate, but won't work if the camera itself is inside a shadow volume. You'll see shadows disappearing or inverting. It can take some careful scene set up to avoid this happening.
A common alternatives to calculated shadows (or lighting in general) is to paint them into textures, this is a much better approach if the light and objects are to remain fixed.