Cropping an Image
Software name : GIMP
Software version : 2.2
Sometimes you might have an image that needs a little bit 'cut off' or trimming. This is called 'cropping' an image. The term comes from the photographic crafts. Photographers used to choose which part of an image would show when they exposed the image on photographic paper. They would do this using a number of techniques and some of them were quite tricky. Thankfully with digital images it is now all a whole lot easier.
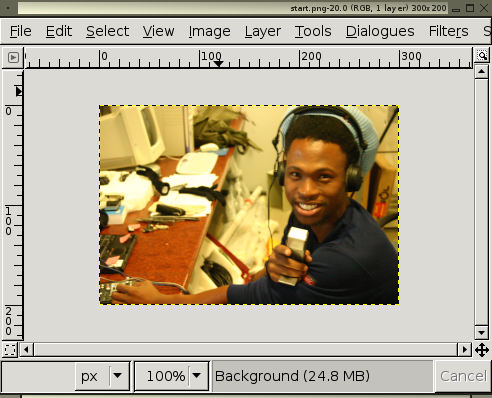
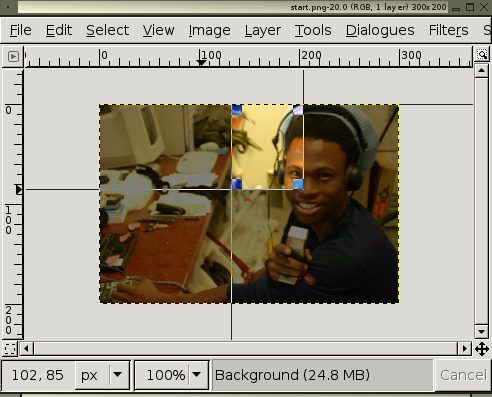
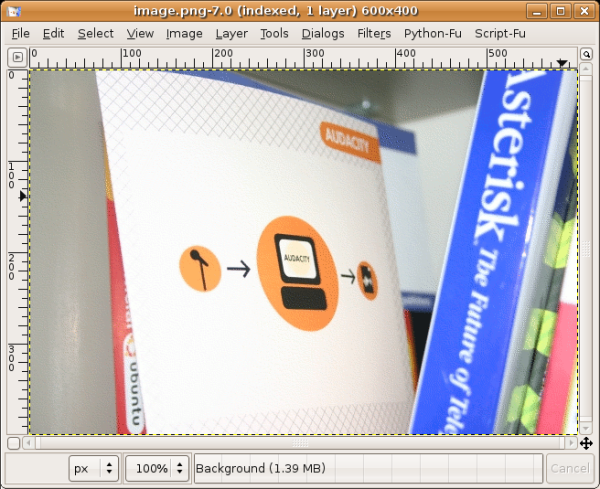
So, lets assume you have an image open in front of you. Mine looks like this:

Decide on your crop area
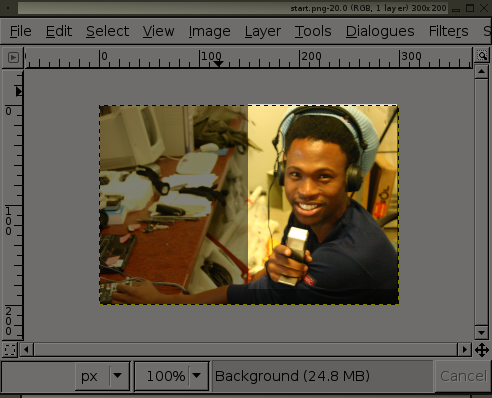
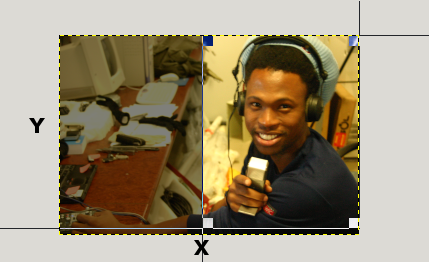
Lets say we want to have a close up of Ntsikelelo without all the messy desk to the right, in other words we want to cut out the greyed areas you see here:

Choose the crop tool
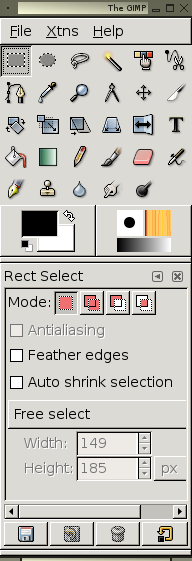
So, the first thing you want to do is look to the GIMP 'ToolBar':

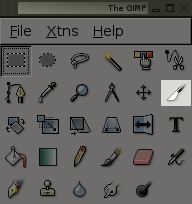
We want to focus on just one tool, not surprisingly called the 'cropping tool' :

Click on this tool and you will see the mouse pointer change to look like the 'knife' icon displayed in the ToolBar.
Drag the crop tool
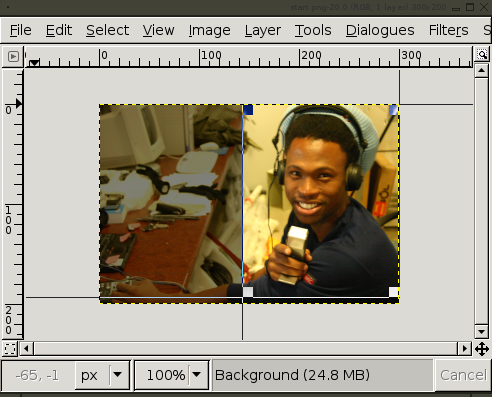
Now we can simply drag the cropping tool over the image. First click on the image where you wish the cut to start and drag it to where you wish it to stop. In the process you will see a box appear and move as you move the mouse:


The Crop Window
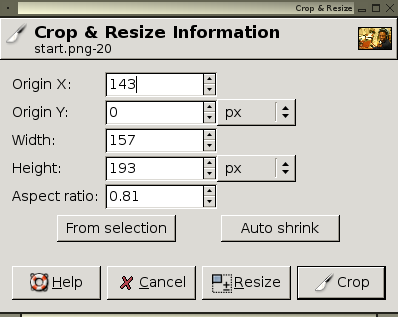
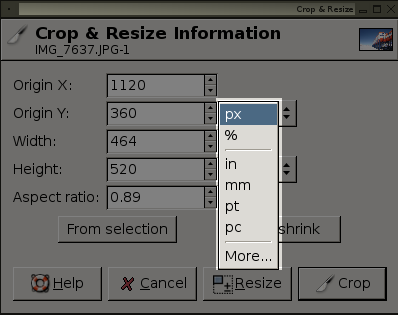
Now, in the process you would have seen this window pop up:

This window displays all the cropping information.
Origin X and Origin Y
The crop window tells you where the crop points start on the X and Y axis. Origin X is the point on the X axis where the crop will start and Origin Y is the point on the Y axis where the crop will start :

Except that the details shown in the crop box aren't very intuitive. Essentially the number in the Origin Y relates to the crop point closest to the top and the Origin X relates to the point of the crop closest to the left of the image.
Height and Width
The Height and Width boxes tell you the height and width of the crop. This information isn't really that useful unless you need to cut the image to a specific size. Usually you judge the starting point and size of the crop by eye.
You will also see that in the above example there is a 'px' box:

This relates to the unit of measurement for the Height and Width. You can click on this box and see a variety of options :

These units are related as follows :
- px - pixels
- % - height and width will be displayed in a percentage of the original size
- in - inches
- mm - millimeters
- pt - points (in typography, a point is the smallest unit and is equivalent to 0.3527 mm )
- pc - pica (this a unit of measure in typography - there are 12 points in a pica, and a pica is 4.233 mm)
Aspect Ratio
Aspect Ratio relates to the ratio (mathematical comparison) of the height and width. Most digital cameras use the Aspect Ratio of 4:3. The first number (in this case '4') relates to the Width and the second number relates to the Height. In the case of a 4:3 Aspect Ratio the Height is 75% of the Width.
From Selection
This button doesn't do much unless you already have selected an area of the image before you start dragging the crop tool around. If you had already selected an area using one of the select tools:

If you had an area selected with one of these tools and then chose the Crop tool, and then clicked the crop tool on the image, and then clicked on 'From Selection' then the crop tool would choose the pre-selected area.
Auto shrink
If you use this tool GIMP will try and 'find the edges' of an object within the image or selected area. It doesn't always do such a good job.
Make the crop
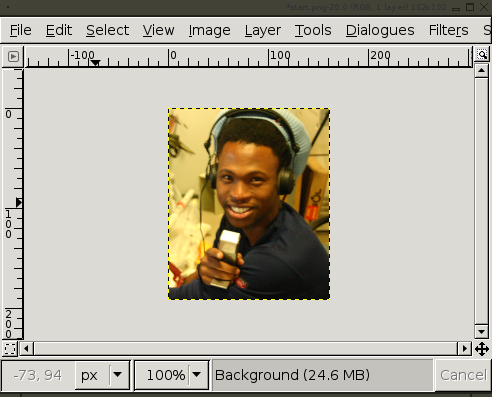
Then you click 'crop' :

Now you will need to save the image otherwise the changes will not take effect next time you open the image.
More Help
For more help with GIMP you can try these avenues:
GIMP Documentation
should first look at the very good documentation at the developers site:
link
GIMP Tutorials
http://www.gimpguru.org/Tutorials/
http://gug.sunsite.dk/
http://www.gimp-tutorials.com/
http://gimpology.com/
http://gimp-savvy.com/
Online Forums
You can also try searching through the forums for information.
link
The forums contain a lot of postings from users on many topics. You can use the search system to locate topics or just browse the categories. If you don't find what you want then try subscribing to the forums and posting your question to the relevant category. There are a few things to keep in mind when asking a question in a forum or to a mailing list. First, be as clear as you can with your question and provide any information that you might think would help some to try to help you. You might, for example, include information about the operating system you are using, or various specifics that relate to what you are trying to achieve. Additionally, it is always good practice to also post back to any forum or mailing list if you manage to solve your query and include clear information on how you solved the puzzle. This is so that someone else that may have the same issue can resolve it using what you have found out. If possible post back to the same thread (discussion topic) so that anyone searching through the forum can follow the discussion including the solution.
Web Search
Searching the web is always useful. If you are looking for problems arising from errors reported by the software then try entering the error text into the search engine. Be sure to edit out any information that doesn't look generic when doing this. Some search engines also enable you to try searches of mailing lists, online groups etc, this can also provide good results.
Mailing Lists
Mailing lists are good places to look through for answers to questions. The archives are located here :
link
You can browse the archives (although this can take a while). You can also subscribe to the mailing lists and ask a question:
link
Please note the suggestions about posting to forums and mailing lists in the above section.
IRC
IRC is a type of online chat. it is not the easiest to use if you are not familiar with it but it is a very good system. There are a variety of softwares for all operating systems that enable you to use IRC. The IRC channel is where a number of the developers are online and some 'superusers'. So logging into this channel can be useful but it is very important that you know exactly what you are trying to find out before trying this route. The protocol for using the channel is jus tot log in, and ask the question immediately. Don't try and be too chatty as you are probably going to be ignored. It is also preferable if you have done some research using the other methods above before trying the channel. The details for the IRC channel are:
- IRC network:
detail
- Channel:
#detail
Interface Basics
Software name : GIMP
Software version : 2.6.11
At the heart of GIMP is the user interface, the set of elements a user interacts with to carry out image manipulation and other tasks. If you've worked with earlier releases of GIMP, you may notice some slight improvements with this interface.
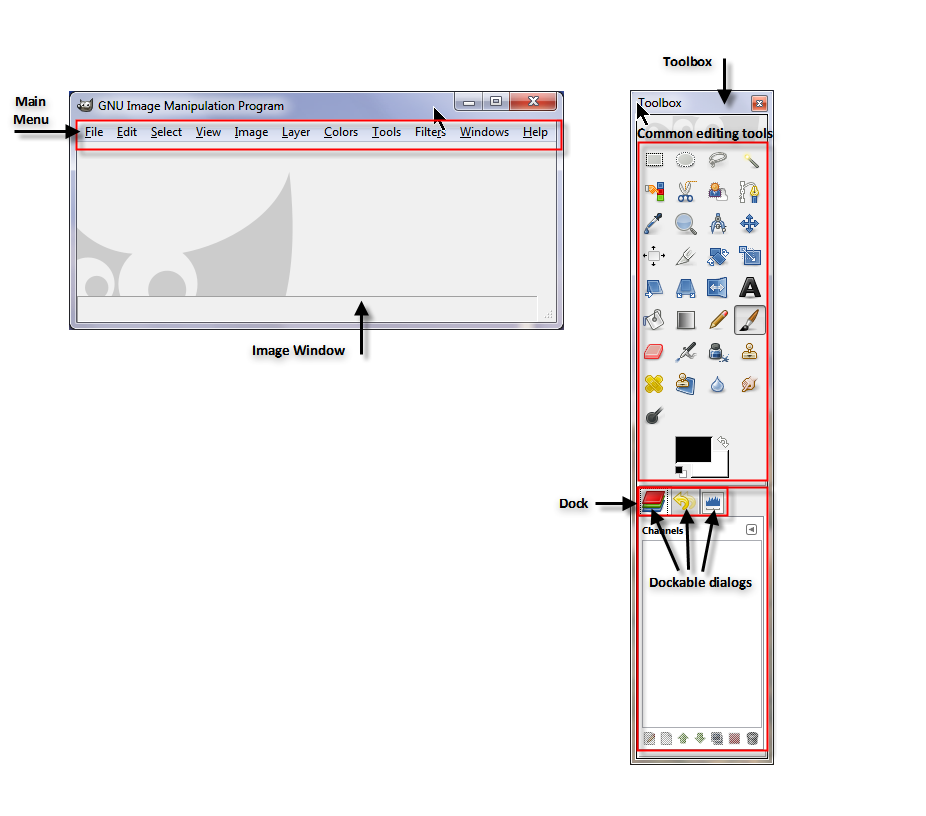
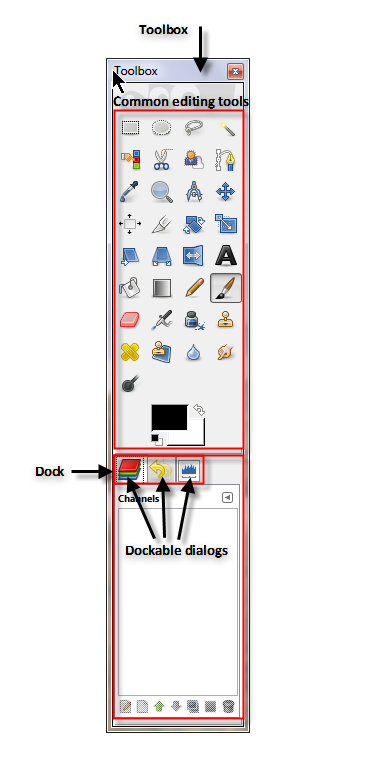
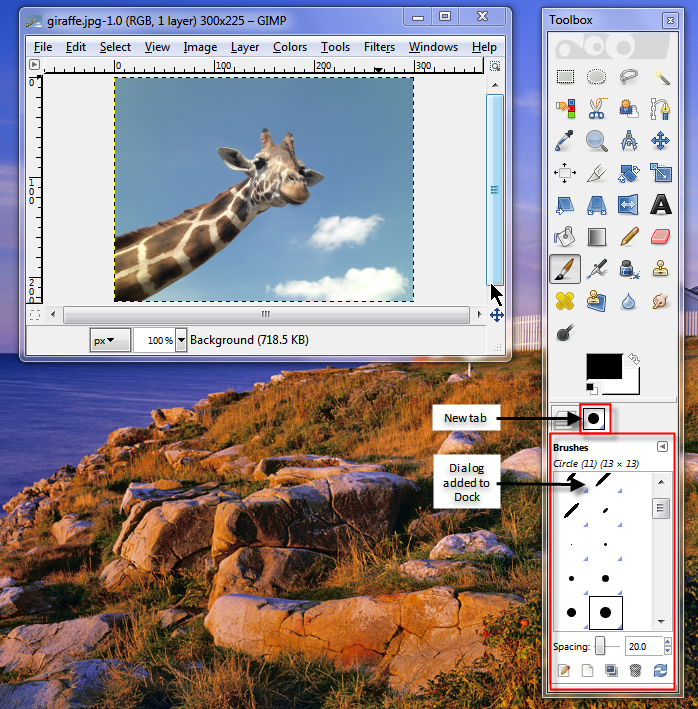
The GIMP interface consists of two main elements: the Image window and the Toolbox.
The Image window is similar to a painter's canvas. This is where images are opened up and contained during the editing process. At top of the Image window is the Main menu, which includes a row of sub-menus. These sub-menus access nearly all functionality of GIMP. Options from saving a file, to selecting specific tools and filters, to working with layers are controlled here. The nice thing about GIMP is that it allows the use of multiple Image windows within the same session. This is especially helpful when working with layered images or creating animated GIFs.
The Toolbox is a sidebar that contains both image editing tools and the Dock. The Dock is a container window where Dockable Dialogs can be stored for easy access. Dockable Dialogs are additional features not included by default on the Toolbox. Think of the Dock as your own customizable Toolbox.
The GIMP interface at a glance:

Let's take a closer look at the Image window and Toolbox:
The Image Window

An open image file
Aside from displaying the image you're editing, the Image window also provides basic file information including: file name, file size, dimensions, and number of layers. There's also an option to adjust the zoom level, which refers to the view an image is scaled to. When images are first opened, GIMP automatically adjusts this view so the entire image is visible.
The File Menu
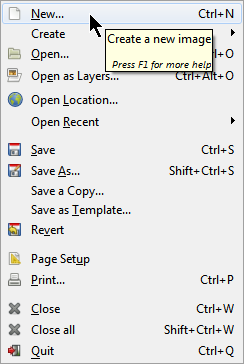
The File menu contains common file options such as creating a new image, Open, Close, Save, and Print. You can also open images as layers, for creating multi-layered images or animated GIFs.

The Toolbox

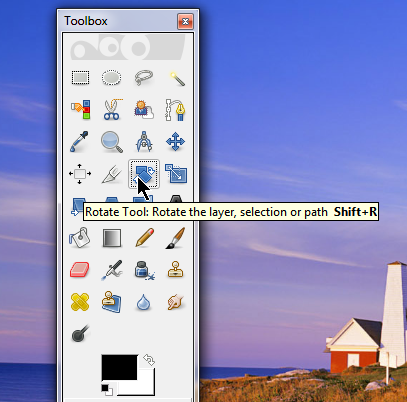
The Toolbox is an icon-based menu containing 33 common image editing tools. If you are unsure of what a particular tool does, hover the pointer over any tool icon and a short description appears.

To select a tool:
- Click once on a tool icon.
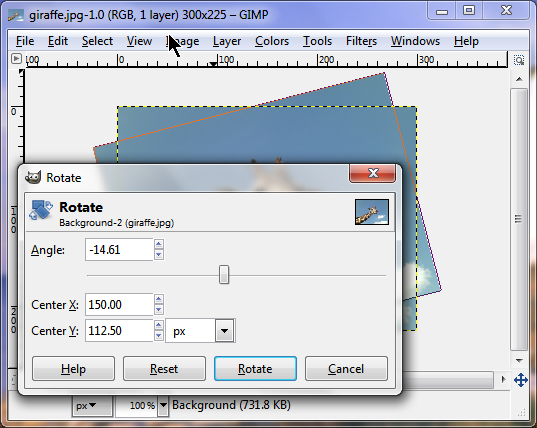
For certain tools, a prompt related to the action of that tool appears. For instance, the Rotate Tool displays options such as specific angle selection.

The Rotate tool prompt
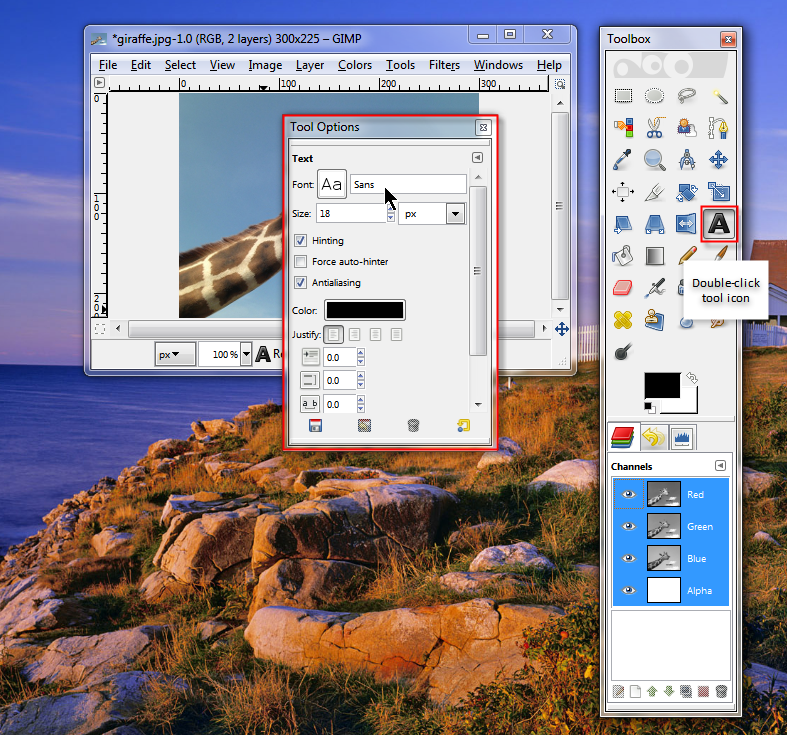
Each tool on the Toolbox also has its own Tool Options. For instance, the Text Tool contains options such as Font, Size, Color, and paragraph alignment.
To access Tool Options:
- Double-click a tool icon.

Using the Dock and Dockable Dialogs
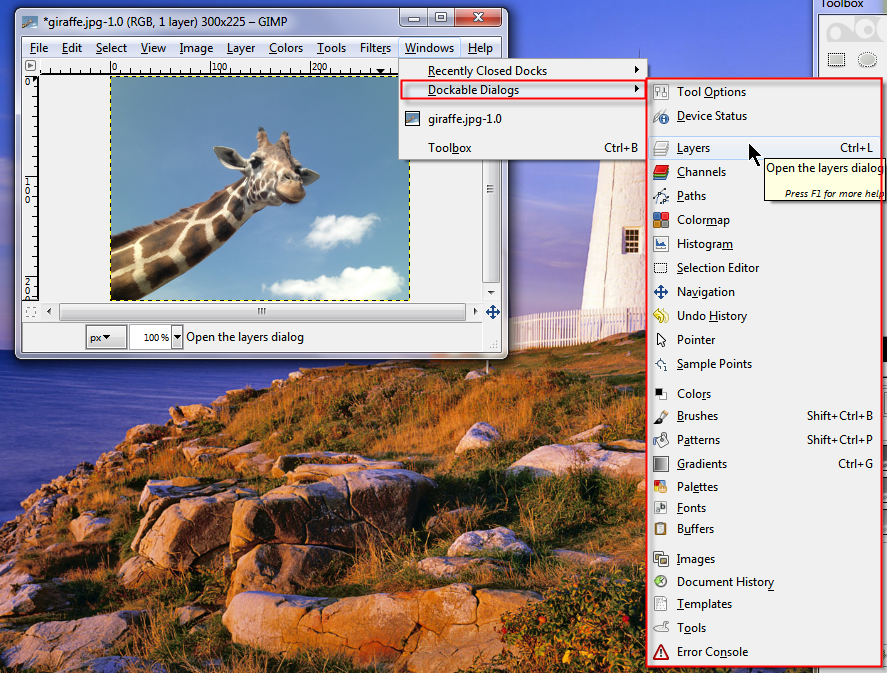
Dockable Dialogs are additional options that can be added to the Dock, depending on your needs. These options are listed within the Dockable Dialogs menu.
To access the Dockable Dialogs menu:
- On the Main menu, select Windows > Dockable Dialogs.

When a Dockable Dialog is selected, it first opens in an external window. This window can be added to the Dock using drag-and-drop.

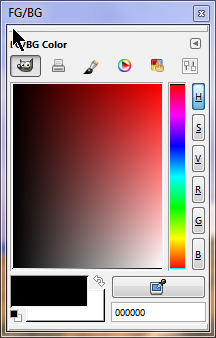
The Colors dialog window
To add a Dockable Dialog to the Dock:
1. On the Main Menu, select Windows > Dockable Dialogs.
2. Select your desired Dockable Dialog.
The Dockable Dialog opens as a window.
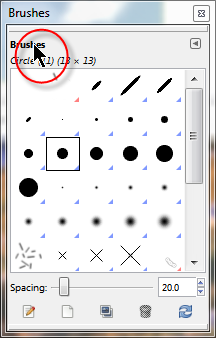
3. Hover the pointer over the inner dialog title.

A Dockable Dialog window
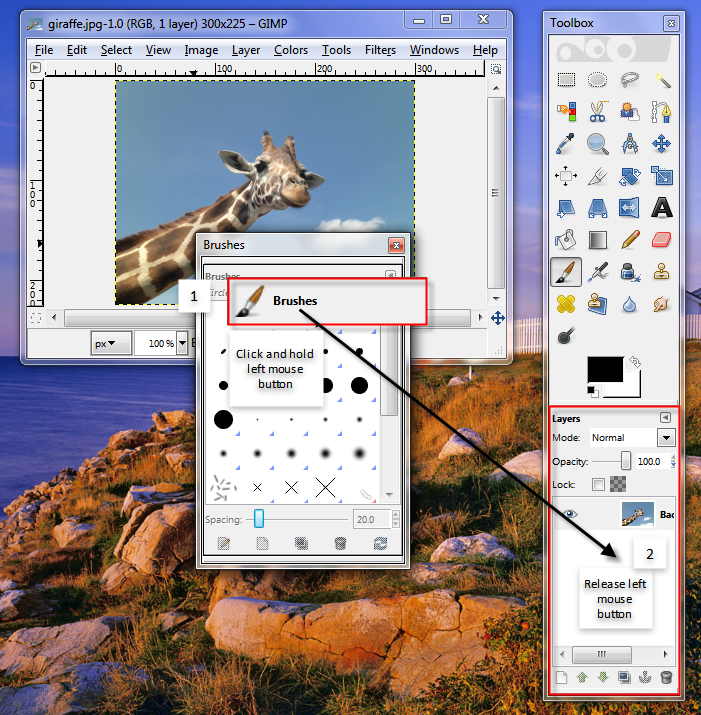
4. As you click and hold the left mouse button, move the pointer to the Dock, then release the left mouse button.

The Dockable Dialog is added to the Dock.

Each new Dockable Dialog appears as a tab on the Dock.
Opening a File with GIMP
GIMP can open a wide variety of image file formats. If you are using GIMP to open images from a digital camera then all is fine, it will deal with whatever you throw at it. However GIMP is more powerful than this and can open many different types of files including:
| BMP |
.bmp |
bitmap
|
| GIF |
.gif |
Graphics Interchange Format |
| JPEG |
.jpg, .jpeg |
Joint Photographics Expert Group |
| PNG |
.png |
Portable Network Graphics |
| PSD |
.psd |
Photoshop Document |
| PS |
.ps |
PostScript |
| TIFF |
.tiff, .tif |
Tagged Image File Format |
The above is not the complete list of what sort of files you can open with GIMP but it covers most cases.
Opening the File
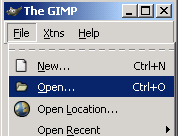
To open a file you first click on the 'File' menu on the left of the Toolbox menu:

You can then choose 'Open' :

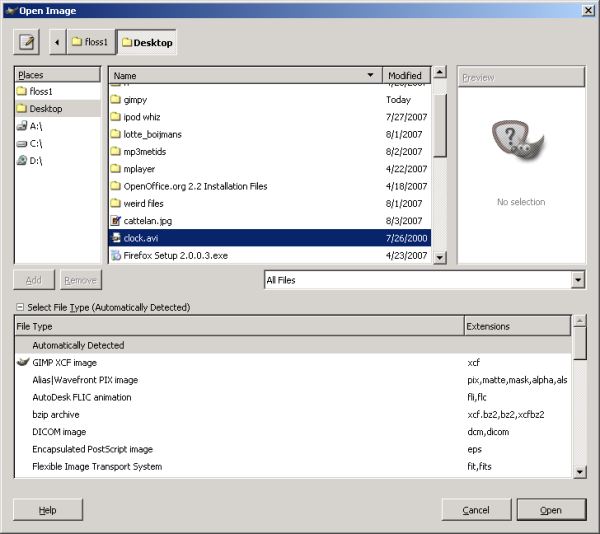
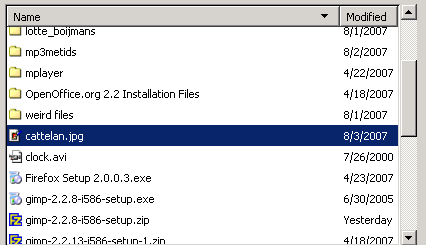
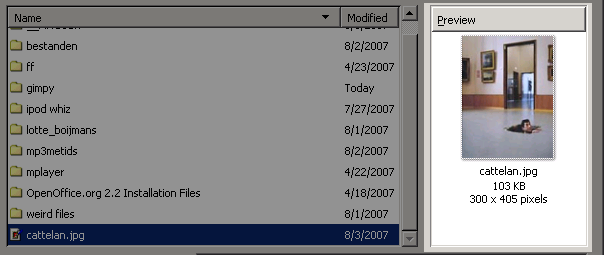
Now you will see a 'dialog box', which should look something like this:

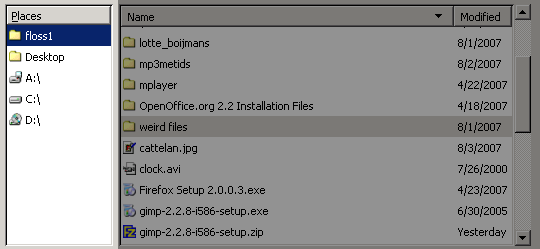
Now you can browse the contents of your folders on your computer until you find the image you want to open. To browse through your files and folders you can wither click on the icons displayed on the left box :

Clicking on any of the icons will change the view of the file browser. The above example is for a Windows machine (however it looks almost identical on Linux or MacOSX). In a Windows computer you see displayed the A, C and D drives. You also see some shortcuts to the Desktop and the users folder. Clicking on any of these items will display the contents in the panel on the right :

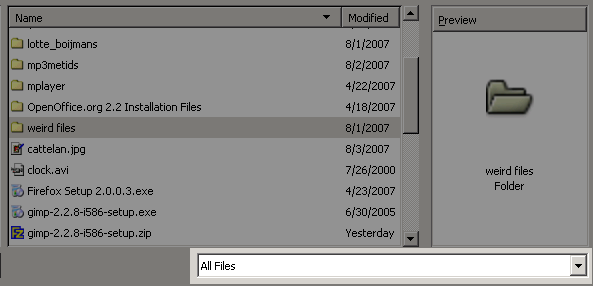
In the above example I can see a list of folders and files. In this case I see every file in the chosen directory because I have the 'All Files' option chosen in the drop down menu displayed :

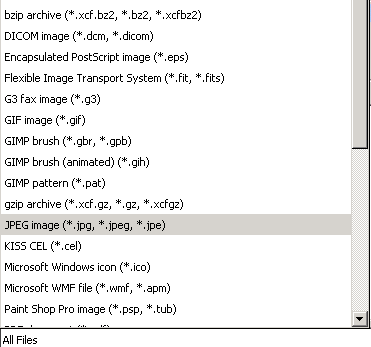
If you change the choice here you can refine what is and isn't displayed. If, for example, I had a lot files ion a directory I could ask GIMP to only display the JPEG (for example) files by choosing this option in the drop down menu :

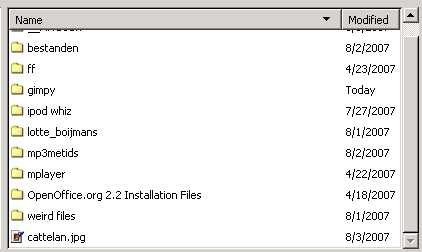
Now the file browser shows only JPEG files:

The folders are still displayed so I can double click on them to display their contents. However I want to open only the 'cattelan.jpg' file, so I highlight this file by clicking on it:

I know see a preview of the image on the right so I can check if it is indeed the file I want to open:

If I now click the 'Open' button at the bottom right, then the image will open in GIMP.
Scaling Images with GIMP
'Scaling' an image means you change the height and width of the image. When you scale an image you can change either the height or the width or both.
You might want to scale an image in GIMP for a variety of reasons:
- Because you want to use an image in a different format. This might be an image you've originally used in Print format being re-used on the web
- Because you need an image to fit into an exact space you have available such as in a newsletter or on a website
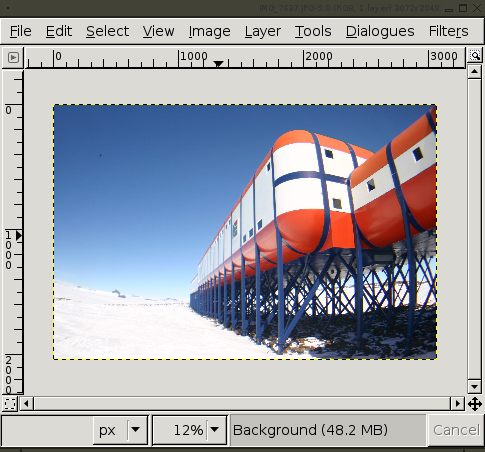
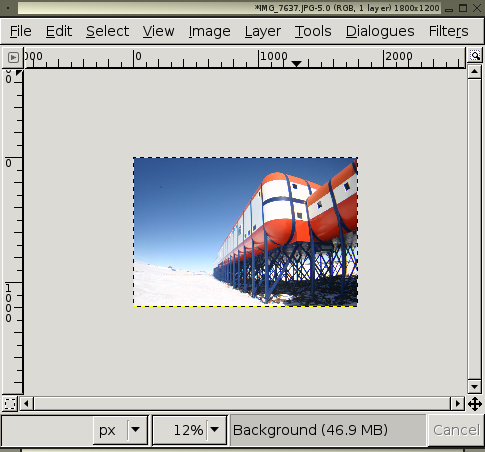
First you will need to have an image open in GIMP.

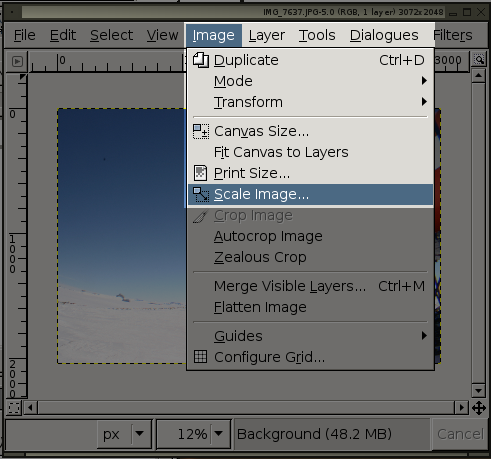
Then click on 'Image' and slide down to 'Scale Image':

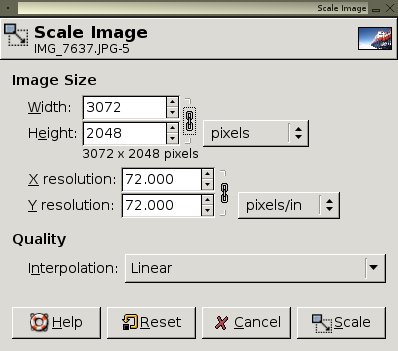
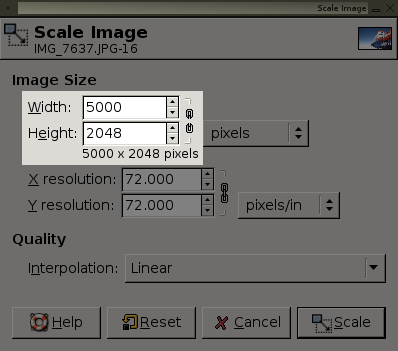
Now you will see a pop up that looks something like this:

This window allows you to change the height and width by changing the numbers in the Width and Height boxes.
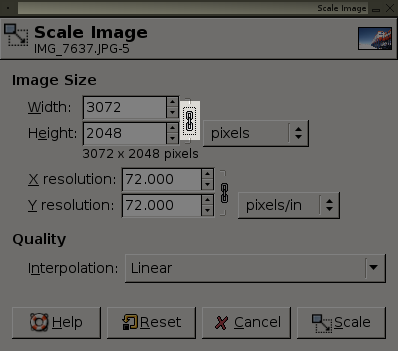
There are a few things that you need to know. The first is the role of the 'chain' icon you see to the right of the Width and Height boxes:

This 'chain link' or 'link' symbol means that the Width and Height are 'linked' and will be changed together proportionately. So if you change the numbers in one of these boxes the number in the other will change automatically. This means that if you scale the image by changing the height (for example) GIMP automatically changes the width so that the image retains the same proportions as the original.
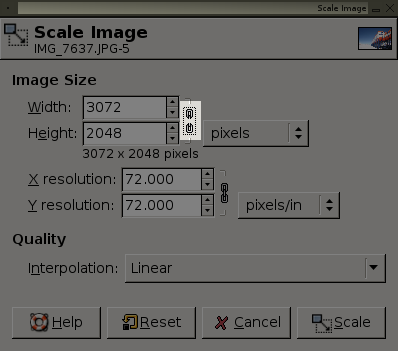
If you click on the 'link' symbol the link becomes broken:

This means that the automatic changing of height and width is turned off. Now if you change the height (for example) the width does not change. Hence if you do this the image will get 'skewed' or stretched.
So, lets try changing the Height of the image so that the Width remains in proportion. First, ensure the 'link' icon is not broken:

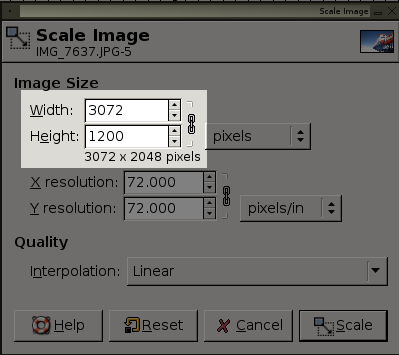
In this example we will change the height to '1200'. So we type '1200' into the 'Height' box:

Now you might notice the width doesn't change. You will need to click somewhere outside of the Height box or press 'return' to make the Width change automatically:

Now you need to click 'Scale' and your image will be resized and everything will be kept in proportion:

Now lets change the width to make the image longer, but keep the height the same as it is now. So, we open the 'Scale' window again and this time we make sure the 'chain link' symbol displays as broken (click on it):

Now we will change the width to '5000' :

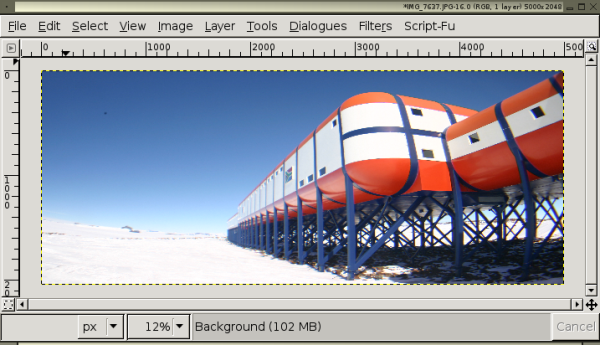
Now press 'Scale' :

You can see the image now looks a little stretched.
Optimising Images for the Web
Preparing images for display on the web is a handy trick. Unfortunately GIMP has no 'save for the web' feature similar to this very nice function in Adobe Photoshop. However, if you know a little about your image and what you want to do with it, then its easy to optimise images for the web using GIMP. The magic in this process is really knowing what format to use and what settings for that format will give you the best results.
There are a few questions you must first ask yourself.
Is file size important?
If your audience has access to fast internet connections then you don't really need to optimise images. This might be the case, for example, if you are putting images on an internal network (eg. an intranet). In this case you just want a high quality image that will be displayed in a browser, but you don't really care about file size as the internal network is faster than any internet connection you will ever have. So save the images in PNG.
If this is the case you don't need to read any further, just use PNG.
If however, you know who your audience is, and they have fast internet connections, or you don't know who your audience is (ie. they are just 'anyone online') then you need to be careful about file size. If you are in this position then you need to read on to determine which is the best format and process to use to optimise your images.
Is the image the right height and width?
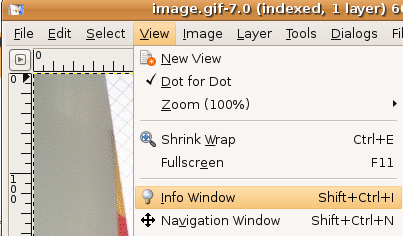
The first thing you must ask yourself is 'is the image the right height and width?'. This is the main factor in determining file size. The bigger your image is the bigger the file size. So, make sure your image is the same dimensions as will be used on your webpage. If, for example, you are to display an image in a webpage which is (for example) 400 pixels x 267 pixels, then you should make sure your image is exactly that size. How do you know the dimensions? Easy...GIMP tells you...with the image open in front of you choose 'View' and then click on 'Info Window' :

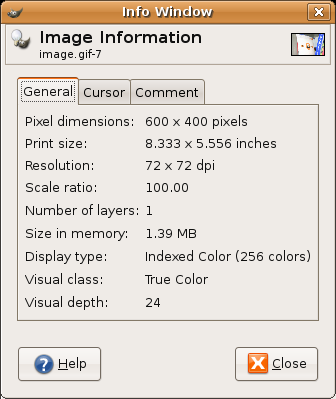
You should see a window appear like so:

You can see here that the image is 600 pixels x 400 pixels.
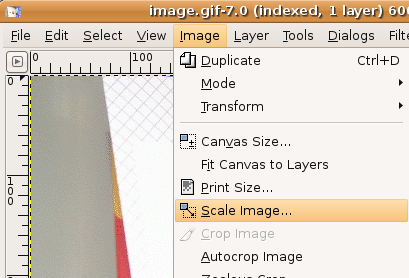
In this example I want the image to be 400 x 267 pixels so I need to scale the image to the smaller size. To do this I click on 'Image' and then on 'Scale Image':

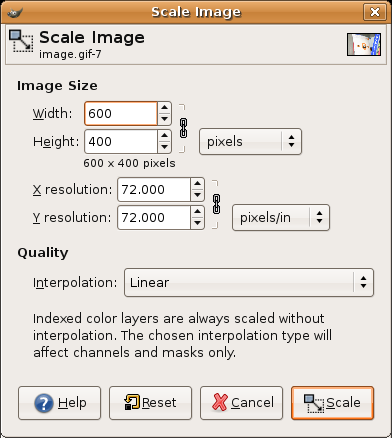
I will now see a window like this:

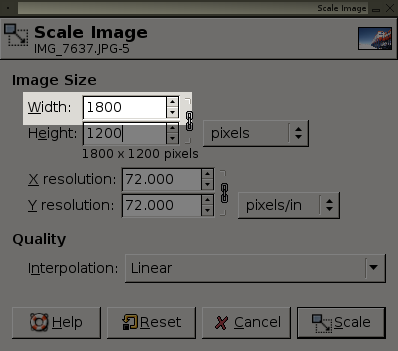
Now we can re-scale the image by typing the dimensions we want directly into the 'Width' box:

In the above example I have typed in '400' in the 'Width' box. The 'Height' has remained unchanged, however GIMP will keep the proportions the same. If you see the 'chain' icon :

this means that if you change one value in either the Height or Width boxes, the other value will change automatically to retain the same image proportions. However, in the above example this did not happen. Why? Because you need to press the 'Enter' key on your keyboard or click somewhere else on the window so GIMP knows you have finished, and it will automatically set the other value proportionally. So if I press 'Enter' I will get this:

How many colours does your image have?
If you need to optimise the file size for better delivery over the internet (see the point above), then your choice of format comes down to what type of image you wish to display. Lets start with the simplest decision. If your image has less than 256 colours, use GIF. This is because GIF does a very good job of reducing file sizes for images with 256 colours or less. The question you might be asking yourself is 'how do I know how many colours my image has?'. With GIMP this is easy, you must first have the image open like so:

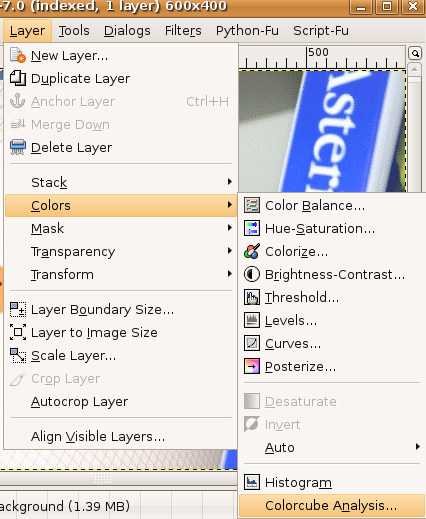
Now click on 'Layer' in the top menu, slide down to 'colors' and click on the 'Color Cube Analysis' :

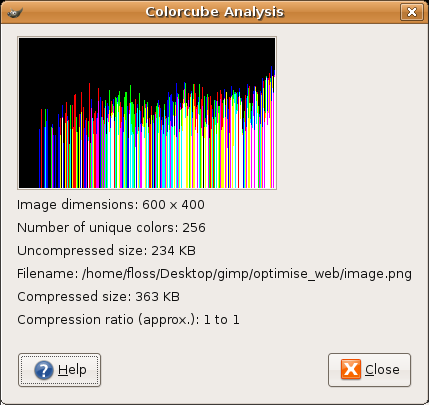
You will see a info window appear that will look something like this:

You can see the above information says 'Number of unique colors: 256'. Great, this image is ideal for saving as a GIF. There might be an exception to this: if your image contains a lot of gradients (colors that change gradually) then you might be better using JPEG. Photos, for example, are probably better saved as a JPEG. This is because 256 colors can give a photo a 'coarse' or 'grainy' look. Images with simple colours are better suited for GIF. It is best to try both and compare the quality and file size.
If your image has more than 256 colours do not use GIF. Try JPEG or PNG and compare quality and file size.
Saving an image as a GIF
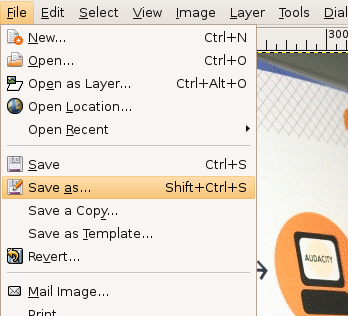
Saving an image as a GIF is pretty simple in GIMP. First click on 'File' and 'Save As...':

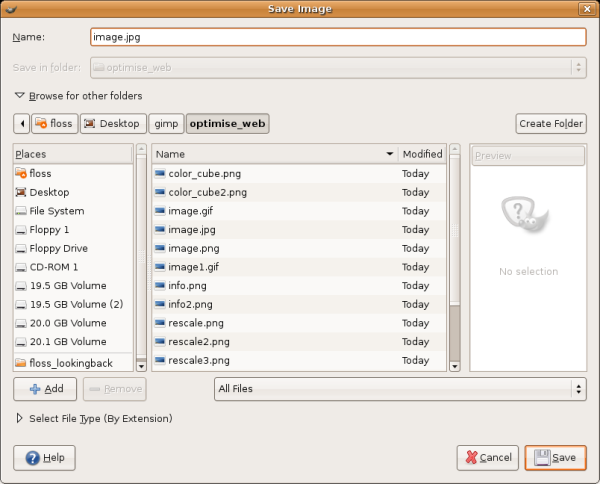
Now you will see something similar to this:

We will not go through where you save the file. Right now we wish to just demonstrate how you save the file to the GIF format. This is very simple: in the field called 'Name:' simply change the suffix to '.gif'. In this example I change this:

to this:

Gimp automatically detects the suffix and prepares to save the file as a GIF. Now press 'Save' and you should see this:

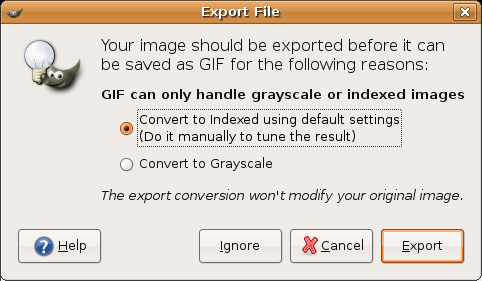
Here you are just being informed that the image will change formats when you save it. Press 'Export' and you should see this:

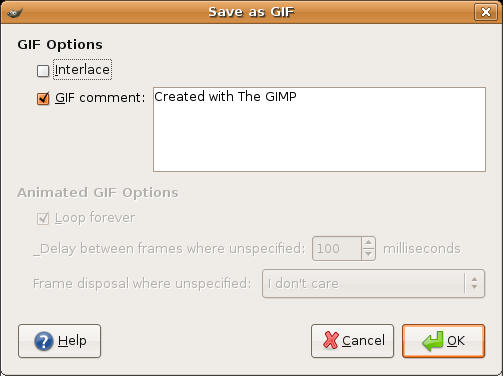
Here there are two options you can choose from both can be ignored. If you want to use them this is what they mean:
Interlace
If you know your audience has a really slow connection to the internet an interlaced image will progressively show as it is being loaded into the browser.
GIF Comment
This is somewhere where you can store any textual information you like about the image.
Saving an image as a JPEG
First click on 'File' and 'Save As...':

Now you will see something similar to this:

We wish to save as a JPEG so we just need to make sure the file name ends with '.jpg'. You can use any name for the file, just make sure it ends in '.jpg' :

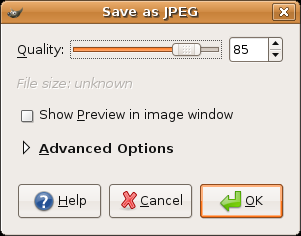
Now click the 'Save' button at the bottom right and you will get this :

This is where you determine the quality of the image. The simple facts are :
- the higher the quality, the larger the file size
- the lower the quality, the lower the file size
The default is 85% which is pretty good for most web uses. The only way to really now if this is the quality setting you need is to try it, and then look at the file size and the quality of the image. Then try saving the same image at different settings, then you will see the differences caused by the higher and lower quality settings.
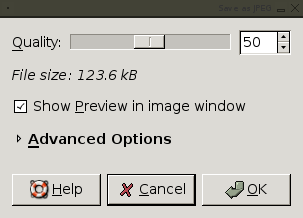
You can also choose to see the difference in the compression settings by choosing 'Preview in Image Window' :

When you have selected this you can slide the Quality slider and the quality of your original image will be effected instantly. This is very useful for seeing how much compression you feel is acceptable before you actually save the file.
We will leave the setting at 85% but if you wished to change the setting you would move the 'slider' left or right (you will see the number in the quality box change accordingly).
To accept the quality settings click on 'OK' and the file will be saved with the settings you chose.
Saving an image as a PNG
First click on 'File' and 'Save As...':

Now you will see something similar to this:

Now we will change the suffix of the file name (in this example) from 'image.jpg' to 'image.png' :

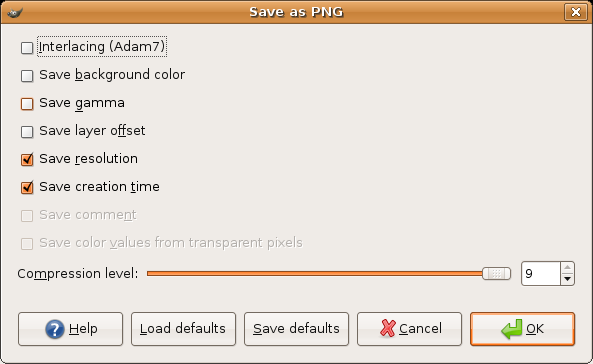
When you have done that (you can use any file name you like, just make sure it ends in '.png') we press 'Save' and you should see this:

The options above are as follows:
Interlacing
This means the image will be progressively displayed in the browser as it is downloaded.
Save background color
If a browser can display less transparency levels than in the image, then the background color of the image will be displayed where transparency occurs. Generally you will have no need for this setting.
Save gamma
This setting means information about your monitors 'gamma' settings will be saved in the image. This helps in displaying the image correctly in softwares that support this feature. Generally you will have no need for this setting.
Save layer offset
This is actually a defunct option, ignore it.
Save resolution
This means the image resolution will be saved. It is necessary to chose this option.
Save creation time
The image will save the date and time you have saved the file in the file itself. This information is not displayed in the image but some software can access this information.
Compression
Now we move to the compression settings. PNG is a lossless format which means the compression setting only effects the file size. In general it doesn't matter what setting you choose here, it will make no difference to the quality of the image but you may wish to tweak the file size using this setting. On slower machines the higher setting make take longer to process ('save'). Now click 'OK' and your new PNG is saved!
What is an Image?
You will most likely be familiar with digital images through webpages or the pictures on your computer. Digital images are produced by scanners, digital cameras, image software (eg. Paintshop, GIMP, Adobe Photoshop) or other devices and software.
A Digital Image File is a file that contains the information that describes the image. This file describes columns and rows which make up the image. Each unit of these columns and rows is known as a pixel (short for picture element). A pixel is the smallest unit that makes up an image.
Formats
There are many methods for describing how the pixels and columns and rows make up an image. The way you describe how these components work together is known as the format. For example, a digital picture of a house can be described in many ways. You may decide to use the method for describing the picture known as JPEG - so you save the picture as a JPEG. This means that the image file describes the image of the house using the rules of the JPEG format. If you saved the picture as a GIF then the rules describing the picture of the house conform to the GIF format. Each of these formats has its strengths and weaknesses depending on the purpose. The most used formats are TIFF, PNG, GIF, and JPEG. It is good to know a little about image formats so you can know which is the best format for your purpose.
File Compression
File size is an important function of a format. Some formats reduce the size of the file dramatically, this can aid the delivery of images over the internet where file size is a factor in determining how fast an image loads in a browser. The process of making a file smaller is referred to "as compressing the file".
When you want to make a file smaller you can compress it in one of two ways, to visualize this you can imagine placing a object into a plastic bag. How do you make the volume of the plastic bag smaller? You can either throw stuff away, or you can make the bag fit better around its contents (by sucking the air out for example).
If you throw stuff away you are losing some of the original contents. You can keep doing this until there is nothing left, reducing the bag volume more and more until nothing is left.
If you suck the air out of the bag you have the same contents but the total size of the bag is smaller. However you can only do this to a certain point - if you had an apple in the bag, for example, you could not get the bag to be smaller than the apple.
These strategies apply to image files too. If you throw data out of the image file you reduce the size but you also are losing data which means the quality will be reduced. This is known as lossy compression. If you optimize the file size by 'compacting' the data without throwing data away, you reduce the file size but only to a certain point. This is known as lossless compression.
Different file formats approach compression in their own way. PNG and TIFF use lossless compression so are called lossless formats, while JPEG and GIF are lossy formats.
PNG
PNG (short for Portable Network Graphics) was created as a royalty-free replacement for GIF. PNG uses lossless compression, relying heavily on using smart mathematical ways of finding and describing patterns in an image file. Hence if you have an image with a large area of the same color then PNG is very effective in reducing the file size. PNG is also the only lossless format supported by browsers so if you wish to display images online without losing quality then PNG is the format for you.
PNG supports transparency which is good for creating fades, placing images nicely on a webpage regardless of what the background color is etc. However while this will look good in Firefox (for example) Internet Explorer 6 (and earlier) does not support transparency in PNG so transparent parts of a PNG image will display as grey in Internet Explorer in these browsers. Internet Explorer 7 displays PNG transparency correctly.
PNG does not support animation so you cannot make moving images similar to what you may have seen with Animated GIF.
When saving an image in the PNG format you can use the suffix '.PNG' or '.png'.
TIFF
Once known as Tag Image File Format, TIFF has been around for a long time, and the format is now owned by Adobe Systems Incorporated (the manufacturers of Adobe Illustrator, Adobe Photoshop etc). TIFF uses lossless compression and is often the highest quality format produced by digital cameras. However the file size of the resulting image is huge compared to JPEG and the quality difference is not always noticable to most people.
TIFF is suitable for image storage or manipulation where quality is important. You can edit a TIFF file with a software like GIMP and lose no quality when you save it as a TIFF. Excellent for storage of original image material or for print production. TIFF is not suitable for web browsers as the file size is huge and most browsers do not support displaying TIFF.
If you save a TIFF file you can use the suffix '.tif' or '.tiff' (or '.TIF and '.TIFF').
GIF
The Graphics Interchange Format (GIF) is owned by ... well there's a story in itself. It used to be owned by UNISYS and it still is in some countries but in others the patent has expired. In 2003 and 2004 the patent expired in the USA, United Kingdom, France, Germany and Italy, Japan and Canada - hence in these areas GIF is a patentless format and belongs to the public domain. The history of the ownership of GIF is interesting and worthwhile reading about if you have nothing better to do than read about histories of file formats!
GIF is a lossy format, however this is not quite true...GIF actually only uses lossy compression if the original image uses more than 256 colors. If you know how many colors your image contains and it is less than 256 then GIF will compress the file size a lot while keeping the image exactly the same. This makes it very effective for web graphics where small file sizes are important.
However, if you have more 'color rich' images (eg. most images from a digital camera) then converting them to GIF will reduce the file size but also the lossy compression will dramatically reduce the colors used and hence the quality will be reduced.
Hence GIF is ideal for creating simple images of text (for example) which might be used in a navigation bar on a web page. However your holiday snaps put online in GIF format will look pretty surreal.
GIF supports transparency which makes it nice for webpages where the background of an image needs to blend into the webpage background color. GIF transparency is supported in all browsers.
GIF also supports animation and there are several tools that enable you to make animations using GIF. These animations can be displayed in any browser.
When saving a file as GIF use the '.gif' or '.GIF' suffix.
JPEG
JPEG stands for Joint Photographic Experts Group. Huh? you might think..."I thought it was a file format not a committee"...well....the Joint Photographic Experts Group is the name of the committee that created the JPEG format. However there was a battle over who actually owns the format but it is now settled (phew). The JPEG committee believe the format should be used without enforceable license fees, so while the format is patented you can use it for free.
JPEG is the most commonly used format for images on the web. It is usually a lossy format but there are variations of JPEG that use lossless compression. It is likely that any form of JPEG you use reduces file size by lossy compression.
Where GIF will kill the quality of images with many colors, this is where JPEG excels. A photo from your digital camera will look good when compressed with JPEG while reducing the file size dramatically. Most digital cameras store images in JPEG for this reason.
The amount of data thrown away when saving to JPEG is determined by the software. Good softwares give you the choice of the compression level JPEG will use on your image. Generally speaking a compression ration of 85% will dramatically reduce file size while not creating any noticable quality deterioration. However the level of compression needed depends on your needs and your eye. Experiment with it.
JPEG is great for putting images with many colors online, and it is also great for reducing the storage space needed for your collection of digital images.
JPEG does not support animation or transparency.
You usually use .jpg, as a suffix for JPEG files although .jpeg, .jpe, .jfif and .jif are all used (or the capitalised equivalents : .JPG,.JPEG etc)
Installing GIMP on Windows
Software name : GIMP
Homepage : http://gimp-win.sourceforge.net/
Software version used for this installation : 2.2.17
Operating System use for this installation : Windows 2000
Recommended Hardware : 300Mhz CPU, internet connection, 70MB free harddisk space
Additional software required : any software to open zip files
Installing GIMP for Windows isn't as easy as it could be because you need to install some additional software first. Thankfully all the links to what is needed are provided on the http://gimp-win.sourceforge.net/ site (note : this is not the official GIMP page but a 'GIMP for Windows' site, if you want to read all about GIMP best to go direct to the source - http://www.gimp.org).
Visit the GIMP-win page
First thing you want to do is open the following url in your browser : http://gimp-win.sourceforge.net/
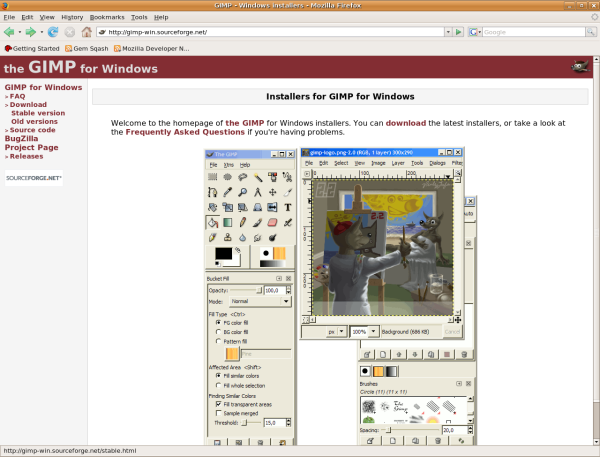
Depending on your browser (I am using Firefox for this example) you should get something that looks like this :

We want to cut straight to the download page so lets jump to the 'Download' link listed on the left (below 'FAQ'). The url is http://gimp-win.sourceforge.net/stable.html
You should see a web page looking something like this:

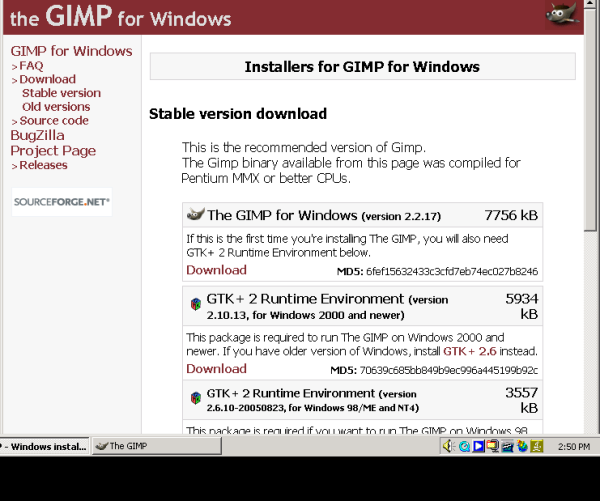
This is the correct page for accessing all the installers, in total there are two items you must install. Which ones you need to install depends on your version of the Windows operating system. You will always need to install 'The GIMP for Windows' but first you must install the right version of GTK according to what version of Windows you are running.
Download the Installers
When you have worked out what version of Windows you have you can choose the appropriate installer for GTK. I am using Windows 2000 so I choose the first version : GTK+ 2 Runtime Environment (version 2.10.13, for Windows 2000 and newer). I click on the 'Download' red link under that title. Unfortunately the download doesn't start straight away. Instead I am redirected to the site where downloads are stored and at the same time a download is started. Its a bit messy because when I have finished the download I have to go back in the browser to the GIMP-win page to download the GIMP installer.
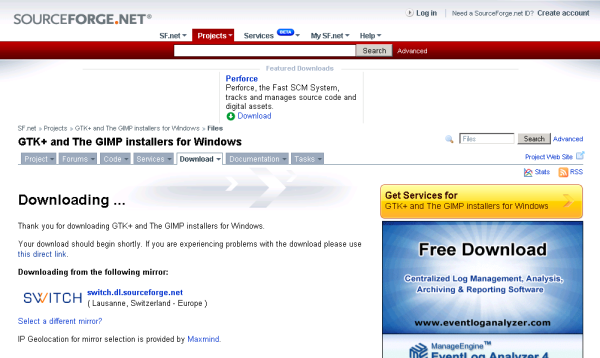
When you have clicked 'Download' you will see the download page in your browser:

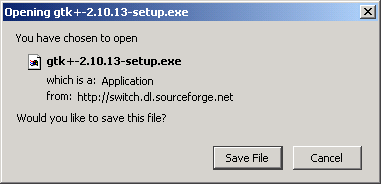
And you should see the download dialog floating above it somewhere:

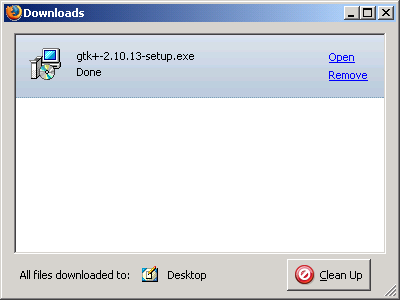
Press 'Save File' on the above dialog. The download will begin, and depending on what browser you use you will see the progress displayed. In Firefox a small window appears and when the download has finished I see this:

Now, lets download the GIMP installer as well. You will have to press 'back' on the browser to leave the downloads page and return to the list of software to be installed. In other words you want your browser to get back to this:

Now click on the red 'Download' link under The GIMP for Windows (version 2.2.17). You will again be directed to a download page looking like this:

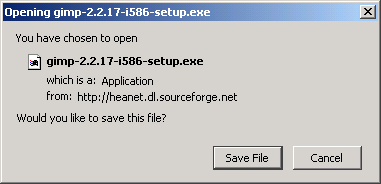
And again a dialog like this:

Press 'Save File' and the file will download and, depending on your browser, you should get some feedback to tell you the download is finished.
Installing
You will have to know where the browser has downloaded the files. By default I have told my browser to download everything to the Desktop however it may be different on your computer depending on the settings. If you do not know where it has downloaded to then try the 'Search' function in the 'Start Menu' and enter the full name of the downloaded file.
On my Desktop I see the files:

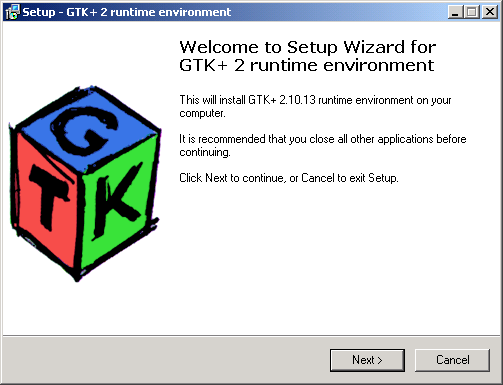
We want to install the GTK files before the GIMP application. So, lets start by double clicking on the GTK installer. You will see this:

The installation is pretty quick and clean. There is nothing tricky to it so lets race through the screens. Press 'Next >' :

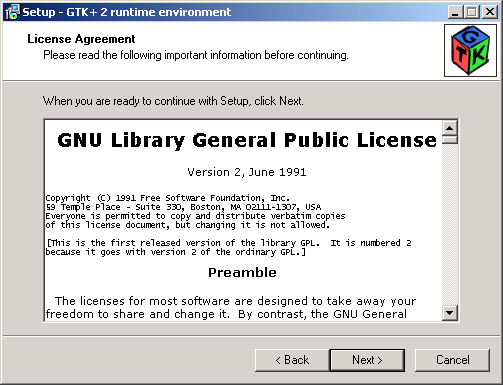
This is a little text about the software license. Unless you are super nerdy and want to know everything about the wonderful world of software licenses click 'Next >' :

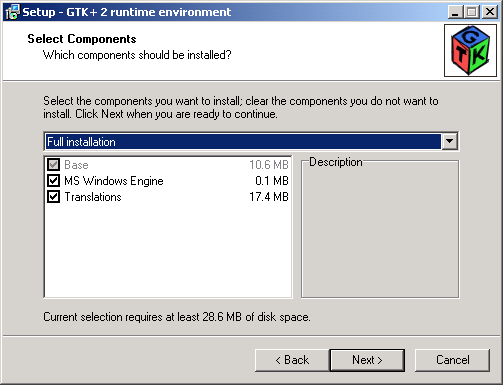
Unless you have space issues on your harddisk press 'Next>'. If you really need to save some harddisk space you could try unclicking 'Transalations', it will save you 17MB of space. In any case, press 'Next >' when you have finished :

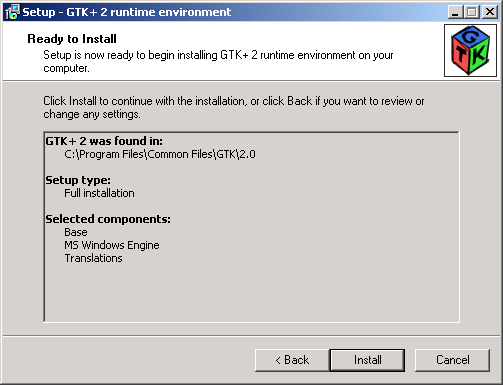
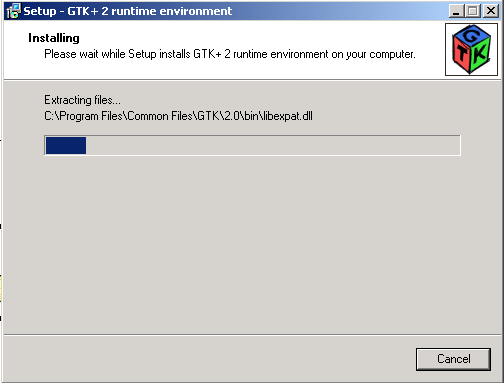
The above page is a summary page. Click 'Install' and GTK should start installing, showing you first some progress information:

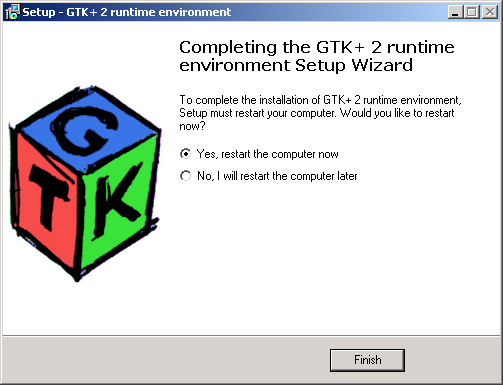
and then when it is complete you will see the following:

We don't want to restart the computer, we wish instead to install GIMP and then restart. So, click 'No, I will restart the computer later' and then click on 'Finish' and the window will quietly disappear.
Now we will double click on the GIMP icon:

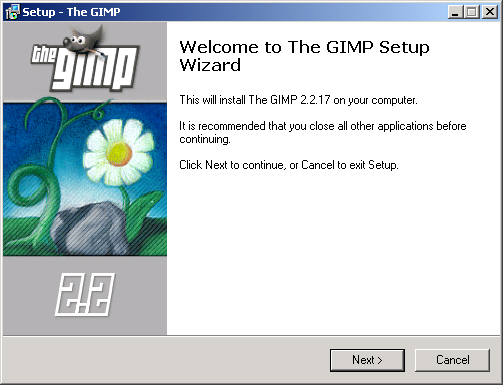
and a new installation process will beginm the first window looking like this:

Just press 'Next >' :

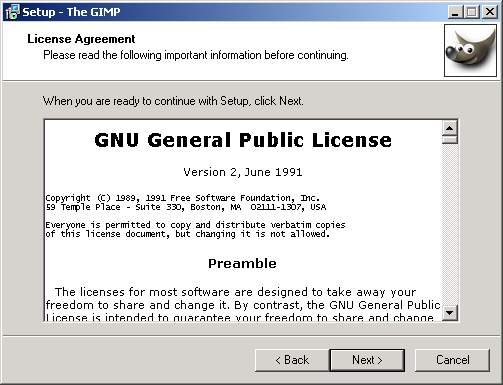
This is exactly the same license stuff...so press 'Next >' and you see the following:

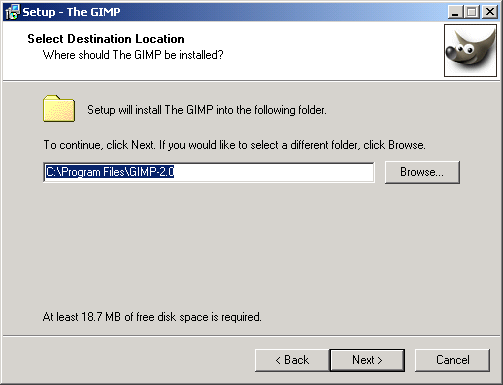
The above screen determines where you will install the software. Unless you have some specific reason for installing GIMP elsewhere, leave it with the defaults and press 'Next >':

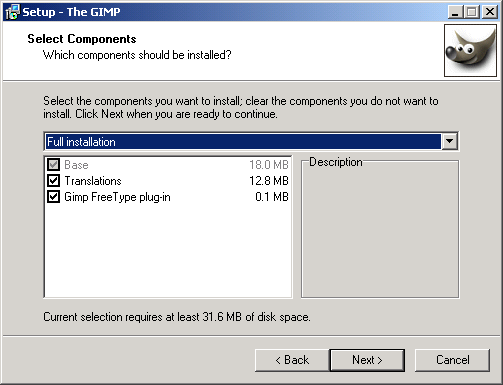
If you have problems with hard disk space you may wish to unclick the 'Translations' option. However, if possible leave it as it is and click 'Next > ':

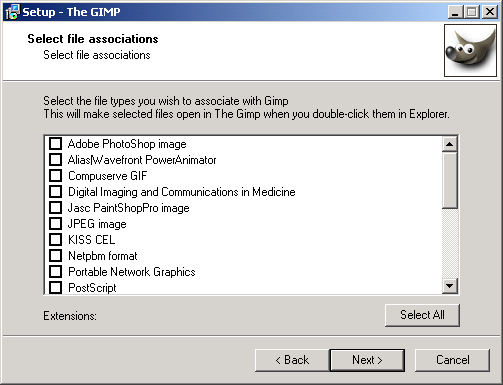
The above screen is where you tell your operating system which files should be automatically opened with GIMP if you double click on them.
If, however, you work with image manipulation a lot you may wish to click some of the items on the list. For now I am going to leave it blank and press 'Next >':

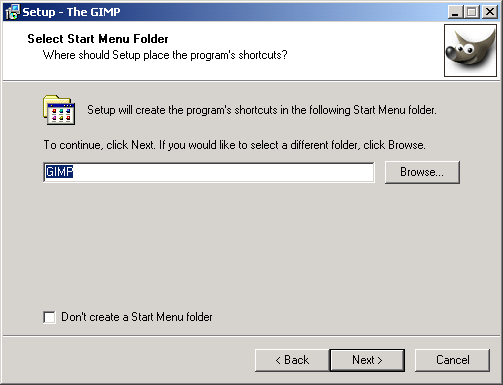
Now you get the chance to decide what folder name you use to open GIMP from the start menu. When you have called it what you wish press 'Next >' :

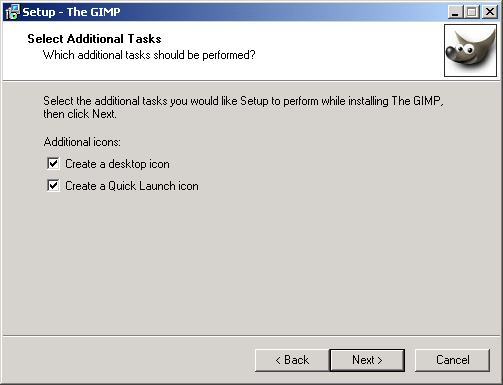
In my mind the last screen and the above one should be the same as they deal with very similar issues. Do you want to create an icon on your Desktop from which you can start GIMP? I find this useful so I will keep this item checked. Do you want a 'Quick Launch' icon? Don't know what one is? Its the little icons on the bottom of your screen from which you can start applications. It might look like this:

If you want a little GIMP icon there so you can quickly start it from the 'Quick Launch' bar, then by all means go for it. Which ever you choose, when you are done click 'Next >':

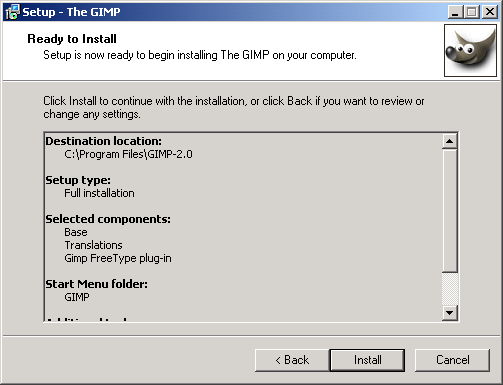
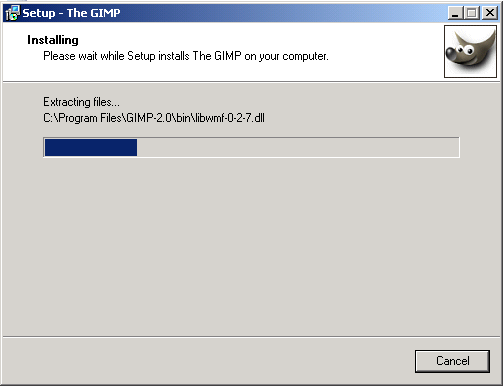
Now we are about to install GIMP! Hit the 'Install' button and stand back! First you will see a progress screen :

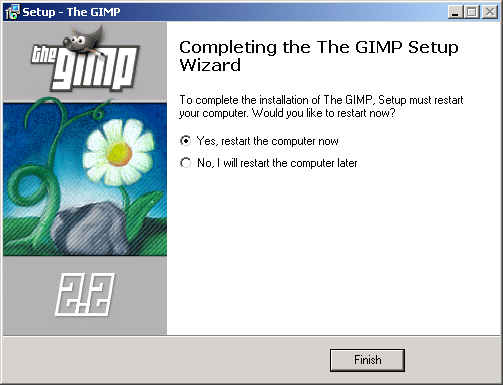
Then, when the installation is complete, you will see the following:

Now we want to restart the computer. Just click 'Finish' and the computer will restart.
Start GIMP
To launch GIMP you can do it one of three ways depending on what you chose in the installation phase. The three ways include:
1. start from the Desktop shortcut icon
2. start from the Quick Launch bar
3. start from the 'Start menu'
Additionally you can browse through your directories in the 'Programs Folder' and double click the GIMP application in the GIMP folder. I will start GIMP by clicking on the Desktop icon:

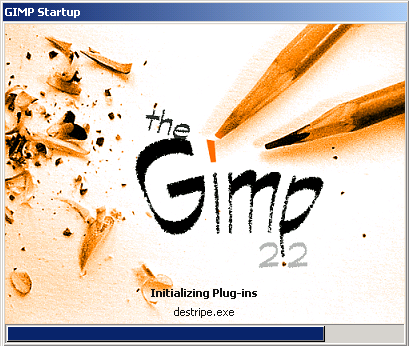
GIMP will start a 'splash screen' (a window that shows a nice graphic while the program is starting up) which should look something like this:

When this process is complete you should see GIMP open!

