Optimising Images for the Web
Preparing images for display on the web is a handy trick. Unfortunately GIMP has no 'save for the web' feature similar to this very nice function in Adobe Photoshop. However, if you know a little about your image and what you want to do with it, then its easy to optimise images for the web using GIMP. The magic in this process is really knowing what format to use and what settings for that format will give you the best results.
There are a few questions you must first ask yourself.
Is file size important?
If your audience has access to fast internet connections then you don't really need to optimise images. This might be the case, for example, if you are putting images on an internal network (eg. an intranet). In this case you just want a high quality image that will be displayed in a browser, but you don't really care about file size as the internal network is faster than any internet connection you will ever have. So save the images in PNG.
If this is the case you don't need to read any further, just use PNG.
If however, you know who your audience is, and they have fast internet connections, or you don't know who your audience is (ie. they are just 'anyone online') then you need to be careful about file size. If you are in this position then you need to read on to determine which is the best format and process to use to optimise your images.
Is the image the right height and width?
The first thing you must ask yourself is 'is the image the right height and width?'. This is the main factor in determining file size. The bigger your image is the bigger the file size. So, make sure your image is the same dimensions as will be used on your webpage. If, for example, you are to display an image in a webpage which is (for example) 400 pixels x 267 pixels, then you should make sure your image is exactly that size. How do you know the dimensions? Easy...GIMP tells you...with the image open in front of you choose 'View' and then click on 'Info Window' :
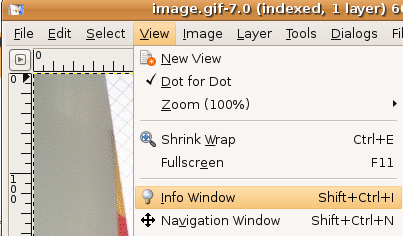
You should see a window appear like so:
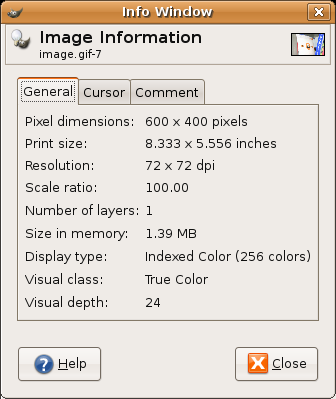
You can see here that the image is 600 pixels x 400 pixels.
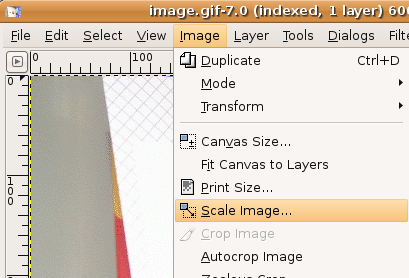
In this example I want the image to be 400 x 267 pixels so I need to scale the image to the smaller size. To do this I click on 'Image' and then on 'Scale Image':
I will now see a window like this:
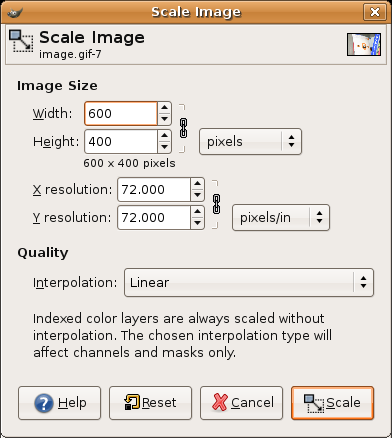
Now we can re-scale the image by typing the dimensions we want directly into the 'Width' box:

In the above example I have typed in '400' in the 'Width' box. The 'Height' has remained unchanged, however GIMP will keep the proportions the same. If you see the 'chain' icon :

this means that if you change one value in either the Height or Width boxes, the other value will change automatically to retain the same image proportions. However, in the above example this did not happen. Why? Because you need to press the 'Enter' key on your keyboard or click somewhere else on the window so GIMP knows you have finished, and it will automatically set the other value proportionally. So if I press 'Enter' I will get this:

How many colours does your image have?
If you need to optimise the file size for better delivery over the internet (see the point above), then your choice of format comes down to what type of image you wish to display. Lets start with the simplest decision. If your image has less than 256 colours, use GIF. This is because GIF does a very good job of reducing file sizes for images with 256 colours or less. The question you might be asking yourself is 'how do I know how many colours my image has?'. With GIMP this is easy, you must first have the image open like so:
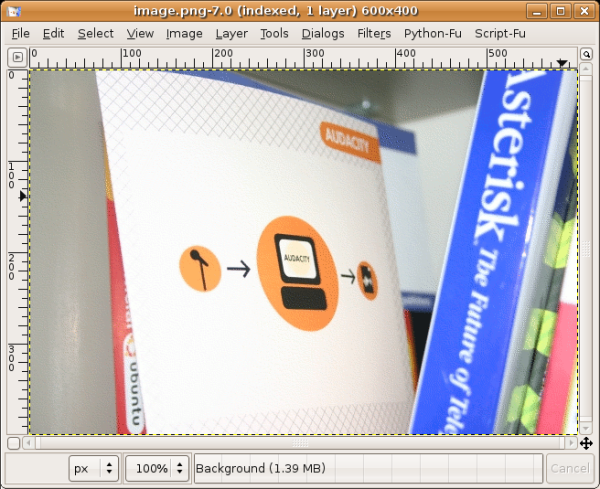
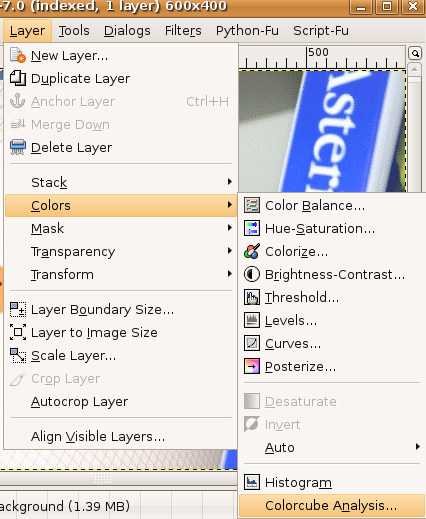
Now click on 'Layer' in the top menu, slide down to 'colors' and click on the 'Color Cube Analysis' :
You will see a info window appear that will look something like this:
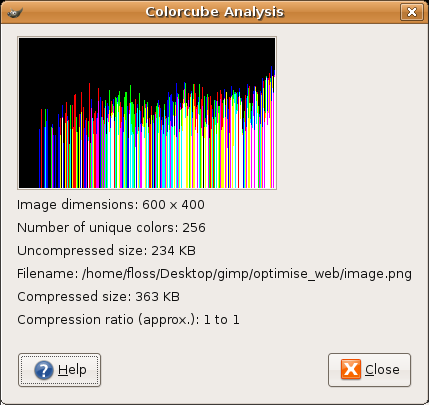
You can see the above information says 'Number of unique colors: 256'. Great, this image is ideal for saving as a GIF. There might be an exception to this: if your image contains a lot of gradients (colors that change gradually) then you might be better using JPEG. Photos, for example, are probably better saved as a JPEG. This is because 256 colors can give a photo a 'coarse' or 'grainy' look. Images with simple colours are better suited for GIF. It is best to try both and compare the quality and file size.
If your image has more than 256 colours do not use GIF. Try JPEG or PNG and compare quality and file size.
Saving an image as a GIF
Saving an image as a GIF is pretty simple in GIMP. First click on 'File' and 'Save As...':
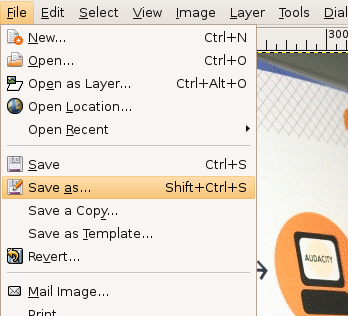
Now you will see something similar to this:
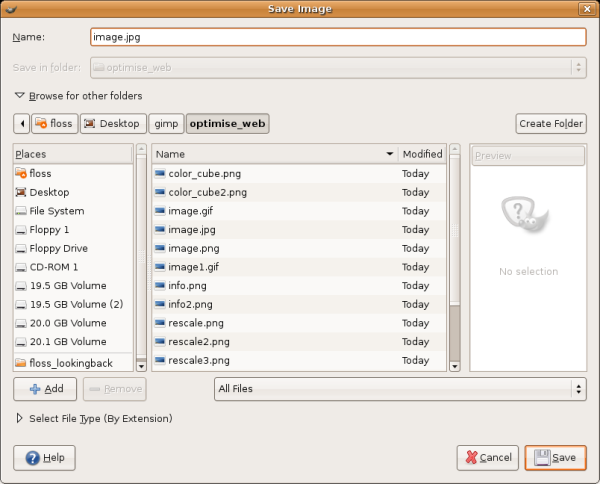
We will not go through where you save the file. Right now we wish to just demonstrate how you save the file to the GIF format. This is very simple: in the field called 'Name:' simply change the suffix to '.gif'. In this example I change this:
![]()
to this:
![]()
Gimp automatically detects the suffix and prepares to save the file as a GIF. Now press 'Save' and you should see this:
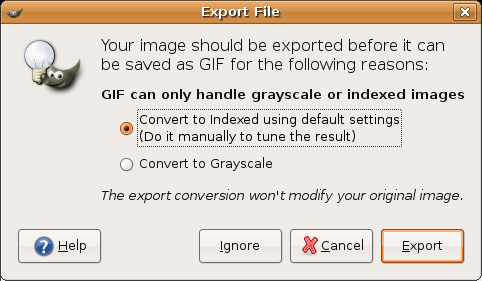
Here you are just being informed that the image will change formats when you save it. Press 'Export' and you should see this:
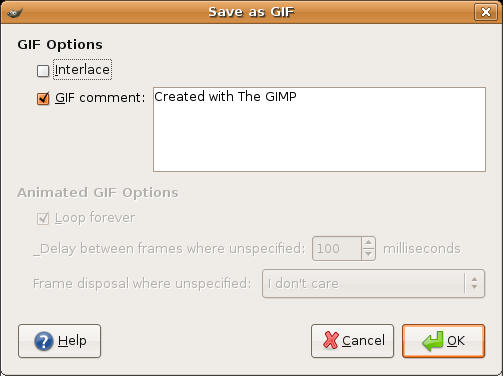
Here there are two options you can choose from both can be ignored. If you want to use them this is what they mean:
Interlace
If you know your audience has a really slow connection to the internet an interlaced image will progressively show as it is being loaded into the browser.
GIF Comment
This is somewhere where you can store any textual information you like about the image.
Saving an image as a JPEG
First click on 'File' and 'Save As...':

Now you will see something similar to this:

We wish to save as a JPEG so we just need to make sure the file name ends with '.jpg'. You can use any name for the file, just make sure it ends in '.jpg' :
![]()
Now click the 'Save' button at the bottom right and you will get this :
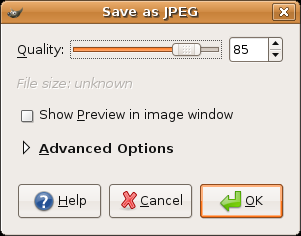
This is where you determine the quality of the image. The simple facts are :
- the higher the quality, the larger the file size
- the lower the quality, the lower the file size
The default is 85% which is pretty good for most web uses. The only way to really now if this is the quality setting you need is to try it, and then look at the file size and the quality of the image. Then try saving the same image at different settings, then you will see the differences caused by the higher and lower quality settings.
You can also choose to see the difference in the compression settings by choosing 'Preview in Image Window' :
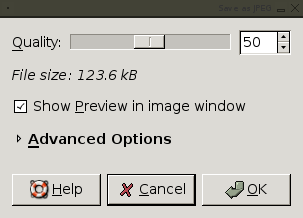
When you have selected this you can slide the Quality slider and the quality of your original image will be effected instantly. This is very useful for seeing how much compression you feel is acceptable before you actually save the file.
We will leave the setting at 85% but if you wished to change the setting you would move the 'slider' left or right (you will see the number in the quality box change accordingly).
To accept the quality settings click on 'OK' and the file will be saved with the settings you chose.
Saving an image as a PNG
First click on 'File' and 'Save As...':

Now you will see something similar to this:

Now we will change the suffix of the file name (in this example) from 'image.jpg' to 'image.png' :
![]()
When you have done that (you can use any file name you like, just make sure it ends in '.png') we press 'Save' and you should see this:
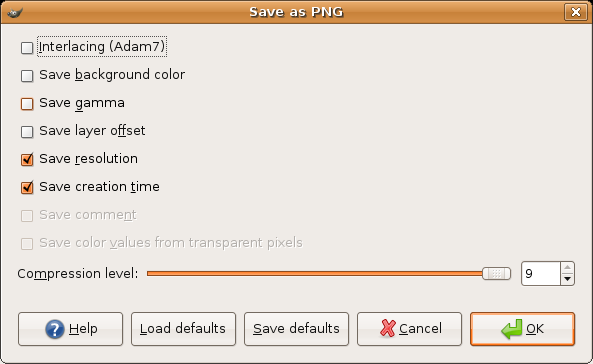
The options above are as follows:
Interlacing
This means the image will be progressively displayed in the browser as it is downloaded.
Save background color
If a browser can display less transparency levels than in the image, then the background color of the image will be displayed where transparency occurs. Generally you will have no need for this setting.
Save gamma
This setting means information about your monitors 'gamma' settings will be saved in the image. This helps in displaying the image correctly in softwares that support this feature. Generally you will have no need for this setting.
Save layer offset
This is actually a defunct option, ignore it.
Save resolution
This means the image resolution will be saved. It is necessary to chose this option.
Save creation time
The image will save the date and time you have saved the file in the file itself. This information is not displayed in the image but some software can access this information.
Compression
Now we move to the compression settings. PNG is a lossless format which means the compression setting only effects the file size. In general it doesn't matter what setting you choose here, it will make no difference to the quality of the image but you may wish to tweak the file size using this setting. On slower machines the higher setting make take longer to process ('save'). Now click 'OK' and your new PNG is saved!


