An Introduction to Audio Editing
Audio is the most important factor which decides if you can hold the attention of your viewer or not. Viewers will tolerate poor quality video in order to find our what happens next. However, poor quality audio can be so intrusive that it makes your video unwatchable, especially at film screenings with poor quality amplifiers, speakers or room acoustics
Audio in your videos can be beautiful, stirring and communicate moods, emotions and group feelings that are not possible using video alone. Here are some tips to help you get good audio.
Blindfold Test
Ask someone to close their eyes and play them the video so that they concentrate only on the audio. Check their understanding afterwards. If they miss vital parts of the story consider re-editing to include some dialogue or include a voice over to make the story clearer.
Check for Harsh Audio
If you want to cut out and use only one part of a long interview, and there is there is no clear break in their speech or their last words end very abruptly, a 'harsh' cut out in the audio occurs. This can really effect the flow of you film and should be avoided. You may be able to make the transition better with a fade out or careful editing of volume using keyframes. The other solution is to make a hard decision to not include that particular clip.
Avoiding Harsh Audio
It is useful to ask interviewees to speak slowly and to pause between sentences. This may help them avoid rolling their sentences together and make editing much easier. Try to make sure that the interviewer leaves a pause before asking a new question, and that he/she avoids speaking at the same time as the interviewee. It is actually quite easy to slip up and make noises of agreement or sympathy when interviewing. However, it is almost impossible to fix this kind of problem during the edit.
Use the right amount of Voice Overs and use them well
Voice overs are a common technique for informational and educational films. You hear only the voice of a narrator while the screen shows footage of actions, graphics illustrating information. This is a very direct form of telling the story and can be useful for introducing the context of footage shot and comments in interviews.
Voice-overs are the main technique used by news reporters working to a tight deadline and documentary makers who need to form narrative connections between the comments of different interviewees and quickly gathered video footage.
We need to be aware of other issues about voice-overs. If we don't see the person giving the voice over it can give them the power of an all knowing 'Voice of God'. This can be used to give 'authority' to your video but it can also interfere with your message.About Audio Tracks
It is likely your editing software will give you a few audio tracks for each project as standard. You can always add more by using Project > Tracks > Insert Tracks or by right clicking on an existing track, near to the track name, and selecting Insert Track.
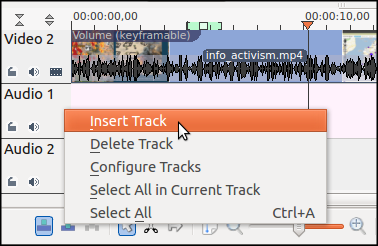
While it is normal to only see the top-most video track, the same is not true of audio. By default we can hear all audio tracks equally unless we mute the track or alter the volume.
Hands On: Adding Music to a Project
Adding music can help set the tone of your video and also can keep your viewers focused. Music with a creative commons licence is easy to source. There are many great audio search engines and music labelled by genre and mood on the Creative Commons website.1
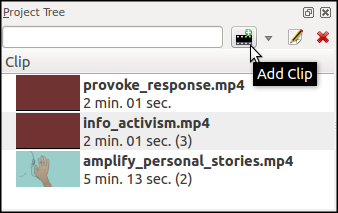
Download a song you like and add it your Project Folder. Next, put it in your Project Tree by clicking on the Add Clip icon.
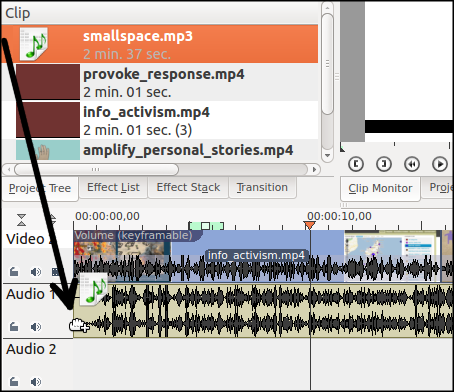
If you want to use nearly all of the piece of music, simply drag it from the project tree into your audio track.
If you only want to use a small part of the music track, then firstly click on the song you want to use and the preview it in the Clip Monitor. When you have found the part to want to use, select an in-point and out-point using the square-bracket buttons Set Zone start and Set Zone end.
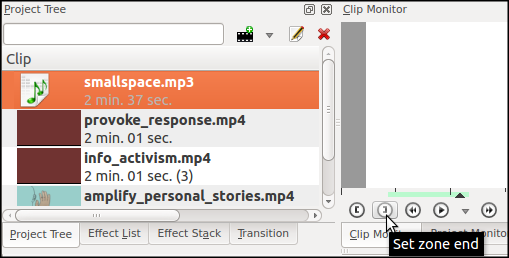
You will see the region you have selected is now highlighted in green. Click on the clip monitor screen in the white area and drag your new audio clip into your audio track.
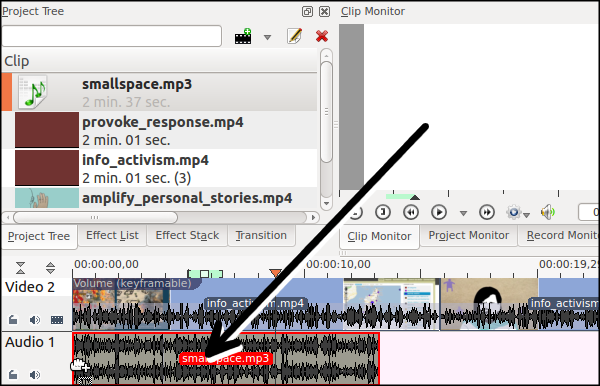
Adjusting the volume
You may need to adjust the volume of the music, also known as gain. A common mistake is to have background music too high over voices talking. Here are some tips for setting the correct levels for audio from different sources.
Enable the Audio Signal monitor by selecting it in the View menu.
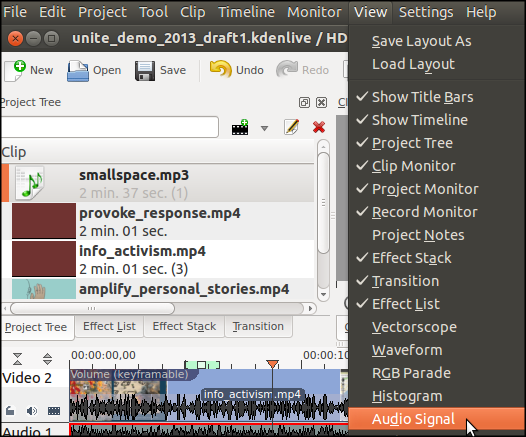
As you play your Timeline in the Project Monitor, you will notice that the audio signal goes up and down.
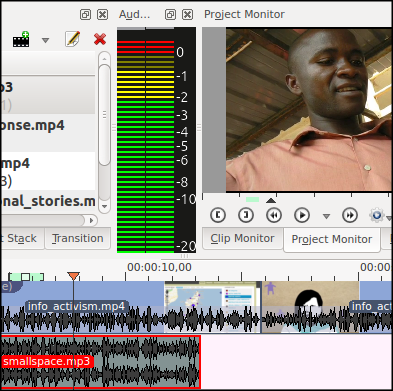
As the volume goes up and down it should not enter the red, above the 0db figure or it will distort and sound bad. You can decide your own audio level, but if you are unsure then try to make the audio go no louder than between -12db and -6 db as an average. This is called peaking between -12db and -6db. This allows you what is called 'headroom' for especially noisy parts of the video where the audio can be louder with out going over 0db and distorting.
To adjust audio level of the music clip we will apply a volume effect. It is located in the audio correction category.
Click on the Effects List tab in the project area. Type in 'Volume' in the box at the top to search for the Volume (keyframeable) effect.
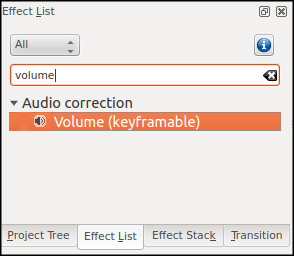
Drag the effect from the Effects List onto the clip in your music track.
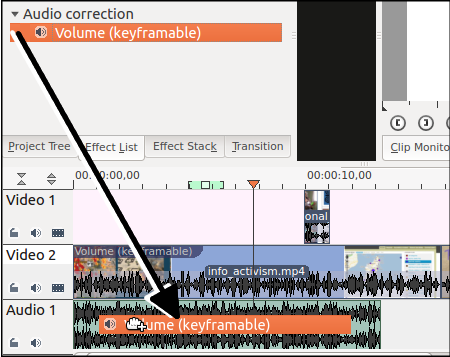
You will see the effect appear in your Effect Stack.
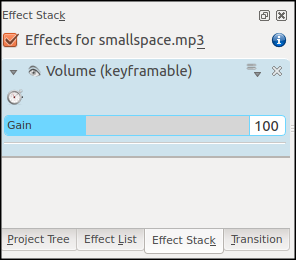
You can simply adjust the volume of the whole music track, by moving the slider left or right, or by typing a number into the box.
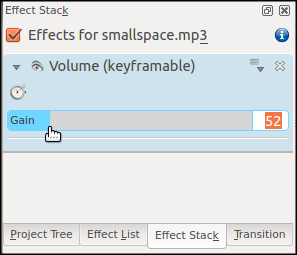
You can readjust the level of the volume of a clip after you have reviewed it until you are happy with the level.
- http://creativecommons.org/music-communities http://creativecommons.org/record-labels^


