


Editing with mobile editors
There are several editors available for mobile phones. Mapzen POI Collector is an application available for both Android and iPhones. Mapzen is aimed to be easy to use and make it easy for ordinary people to start mapping easily.
Vespucci is an application for Android phones that can be used for GPS point gathering and basic OpenStreetMap editing. It is aimed at more advanced users, as you need to know the tagging scheme used.
Editing with Mapzen POI Collector
Mapzen is available from both the Android Marketplace (https://market.android.com/details?id=com.mapzen) and the iTunes Store (http://itunes.apple.com/gb/app/mapzen-poi-collector/id338079717?mt=8). When you enter an area that you want to you open the app and the map will open in the location that the map was last shown. To get to your current location you select the android menu, and choose My location. The screenshots here are taken from the Android version of the App. The iPhone version is similar.
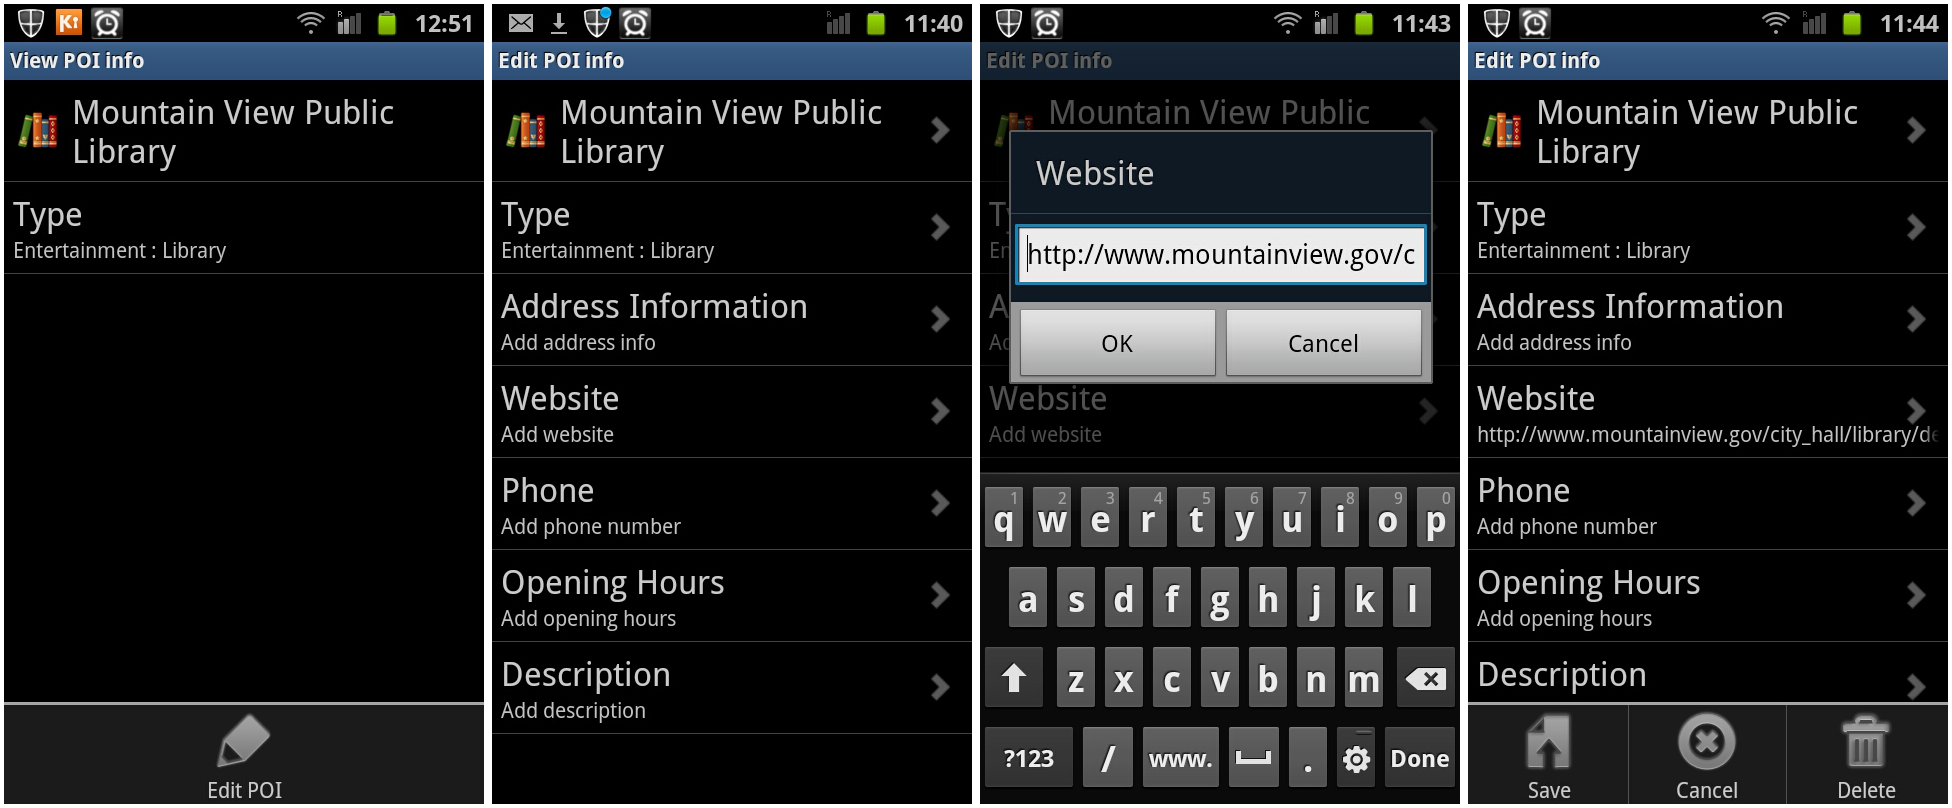
Mapzen is focused on simple editing of points of interest (POIs). The current set of POIs will automatically load. You can select a POI to get more info about it by tapping the little blue arrow.
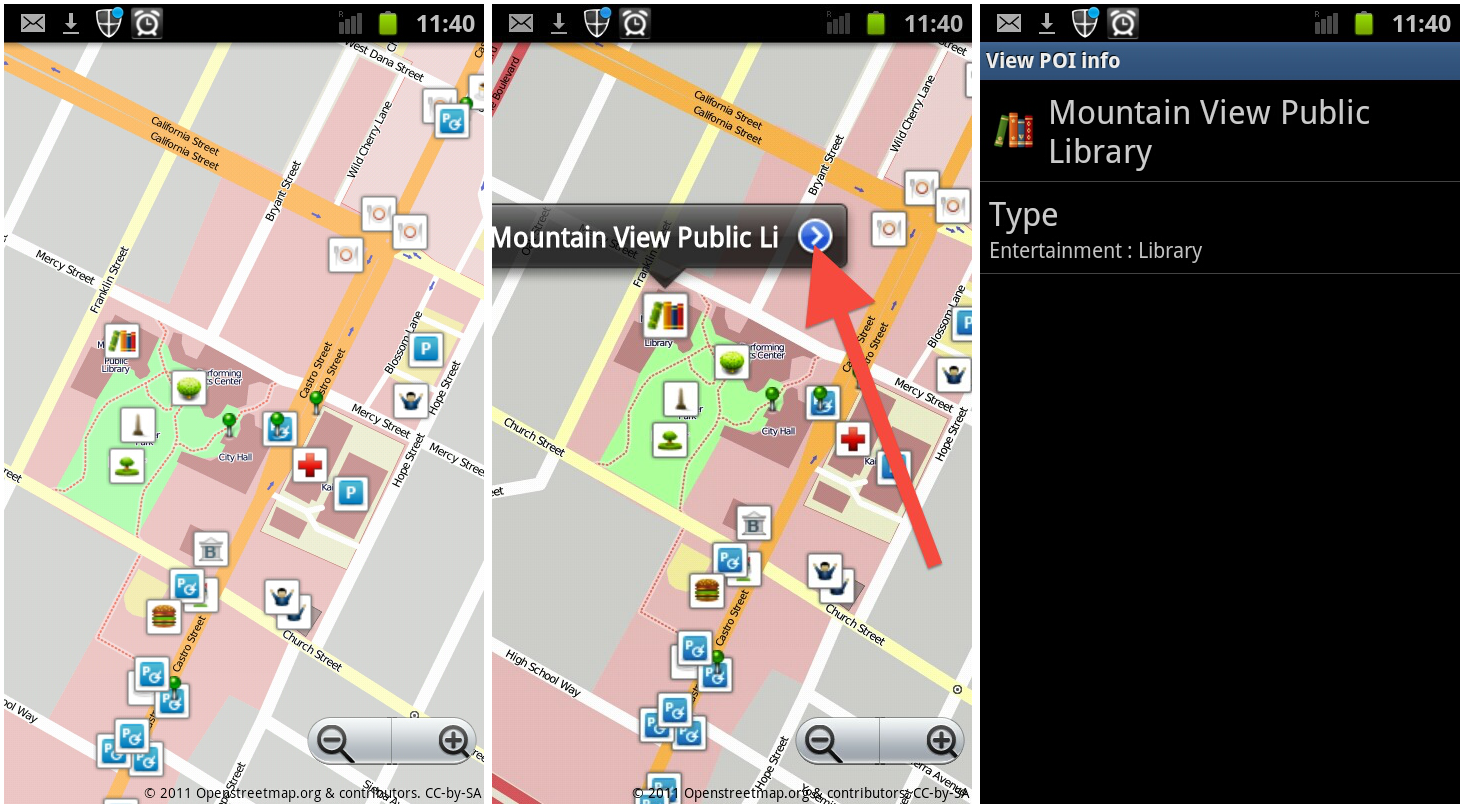
Editing a current point involves selecting a point and going through the menu system to change the properties of it, and then finally saving it.
We did not go very in depth into Mapzen POI Collector, because the application is intended to be intuitive.
Editing with mobile editor Vespucci
Vespucci is an advanced editor that allows you to update the OSM data in the field. Refer back to the JOSM section to understand tags. You also need to know about the OSM data model (a chapter in this book) and the tagging scheme which is described on the OSM wiki on the Map Features page: http://wiki.osm.org/wiki/Map_Features. You currently can't edit relations with Vespucci.
Installing Vespucci on Android
You can download Vespucci from the Android Market by searching for "Vespucci" or going to the following page (https://market.android.com/details?id=de.blau.android), and following the usual installation procedure for your phone.
Setting up Vespucci
To be able to edit OSM data you need to enter your OSM username and password into the settings.
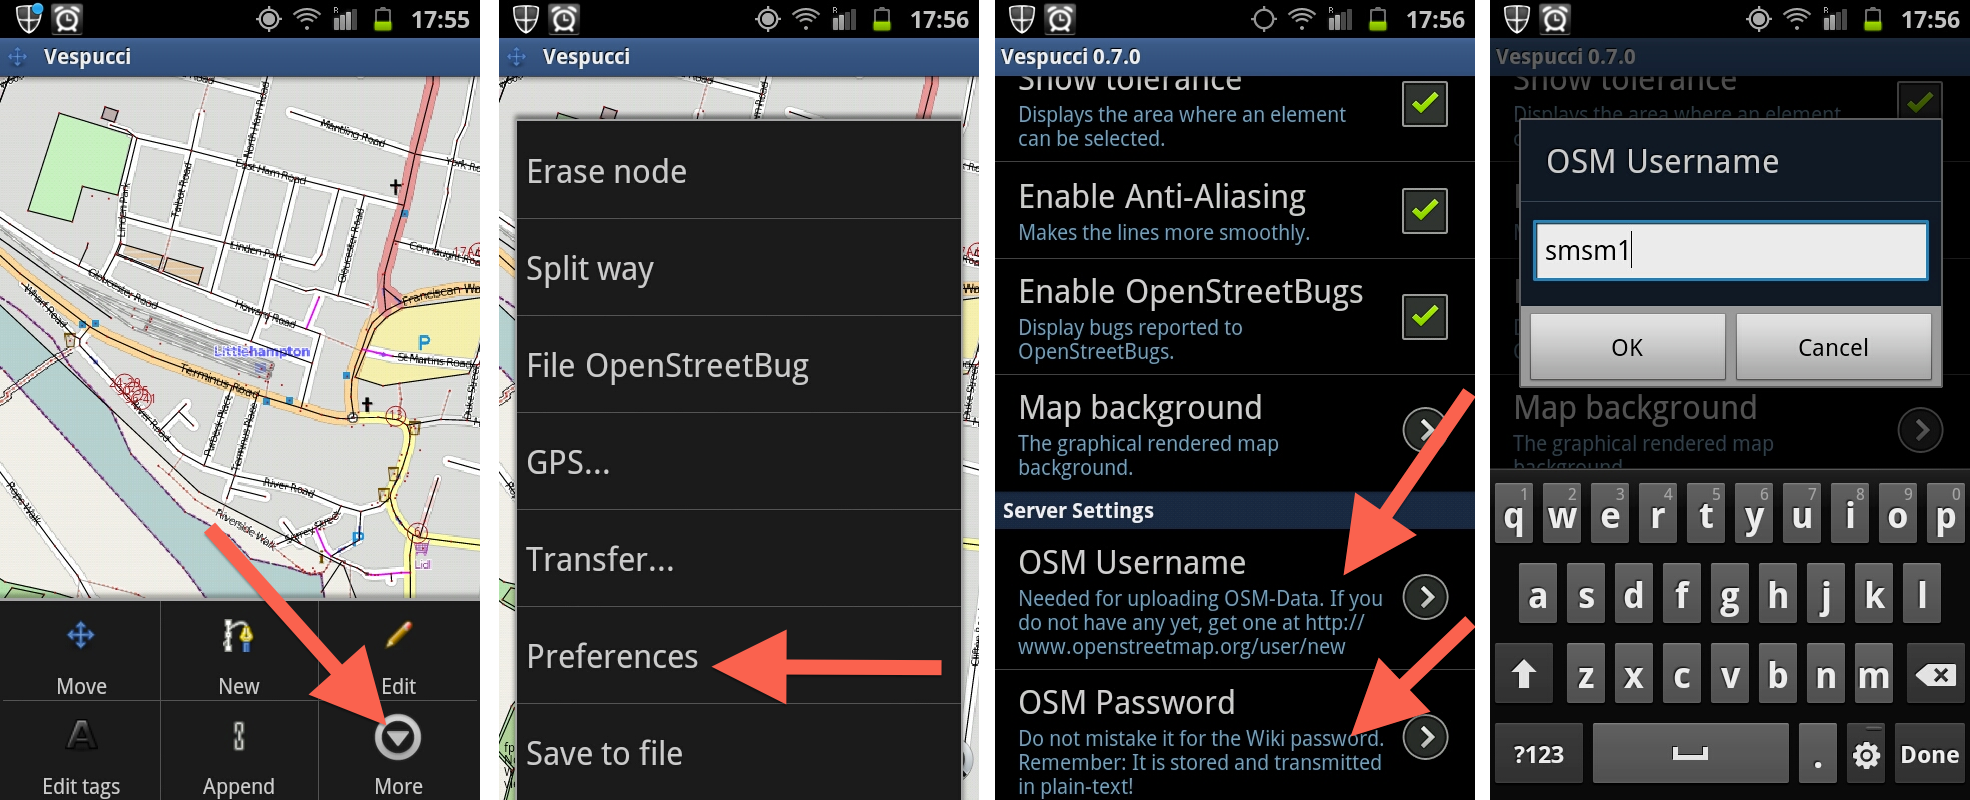
- Start Vespucci application on your Android.
- Press the Menu button on your Android phone.
- Select More and Preferences.
- Enter your OSM Username and OSM Password.
Downloading OSM Data
Once you are in an area you need to start the app, get your current location and download the current OSM data for the area.
- To get your current location to show press the phone's menu button, More, GPS... and Follow GPS position or Start/pause GPS track.
- Vespucci should center the map on your current location.
- To download the current data press the phone's menu button, and select More and then Transfer... and Download current view.
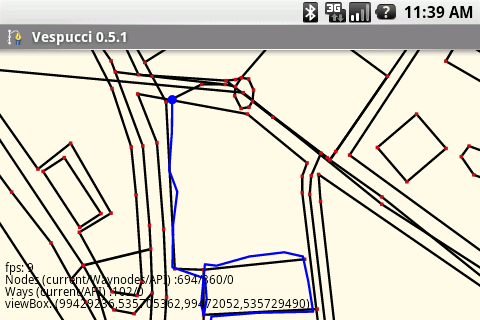
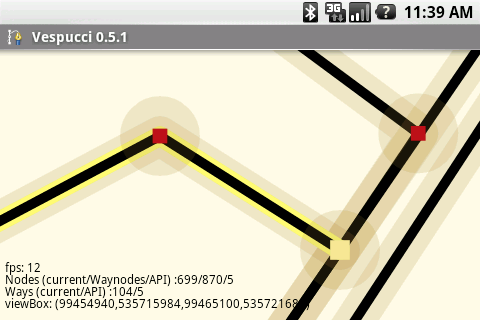
Screenshot showing a GPS track with the underlying OSM data.
Moving the map
You can move the map around when you are in move mode by dragging the map around. There are zoom in and out buttons that allow you to change the zoom level. You can also use the pinch gesture to zoom in and out of the map.
Moving nodes
- Push the Android Menu button and select Edit.

- Nodes and ways are now highlighted.
- You can move the nodes around by pressing a node to select it and then pulling it with your finger.
Editing tags
- Push Menu button on your Android. Select Edit Tags.
- Touch on a node.
- You will now see a menu of nodes.
- Select the node you want to edit.
- You can now edit the Key and Value pairs of the node.
- Enter a new Key and Value pair in the empty slots to add a new Key/Value.
- When you are finished editing the values you can push Okay.
Creating new features
- Press the Menu button and select New.
- Pushing once on the map creates a point. You can then switch to edit tags mode and re-select that node to give it some properties
- Pushing the map many times creates a way.
- Ending a way by pushing on the starting point creates an area.
Appending ways
- Press Menu button.
- Select Append.
- You are now able to continue an old way by adding new points to the way.
Deleting Nodes
- Press the Menu button.
- Select More.
- Select Erase node.
- Push on a node to delete it.
Saving your changes
Once you have made some changes to the data in the area you will want to share those with the rest of the OSM community.
- Press the Menu button on your Android.
- Select More, and then select Transfer.
- Select Upload data to OSM server. You will be shown a list of the changes that you are about to upload and make live on the OSM server, and be asked to enter a comment about what the changes are. You then tap the upload button.