


Hands On - DVD
After completing this tutorial you will be able to create a DVD with different menus and buttons for production (a process called DVD authoring or mastering). You will be comfortable with using VLC player and DVDStyler to prepare your menus and use the VLC-Player to check your video material. VLC media player is a free software cross-platform multimedia player and framework relased under the GLP-2 and LGPL licences and DVD Styler is a Cross-platform DVD authoring tool with Windows, Mac OS X, and Linux versions, using wxWidgets. It is free software under the license GNU GPL.
What you need: Footage
In this tutorial, we will call any kind of material that we will use "footage". There is audio footage and video footage. Footage comes in different formats. You may already have audio and video files available. If you dont have your own footage, please download these clips:
http://archive.org/download/RecordPlayer/RecordPlayer.mpeg
http://archive.org/download/HepCatSymphony/HepCatSymphony.mpeg
http://archive.org/download/CEP514/CEP514.mpg
DVD Specifications
Before we are going into opening our DVD authoring software lets have a look at the specifications for creating a DVD. Today we have two different video resolution modes that are used in certain countries.1

If you are happen to live in a PAL-Country your DVD -Resolution is 720x576px at 25 frames per second (fps), NTSC- Countries us 720x480px at 29.97 fps. If you find yourself in a SECAM country use PAL.
Transcoding your footage
If your footage doesn't fit to your wanted DVD-Standards DVD Styler can do the work for you. If you want to do the transcoding yourself then you should read more about transcoding.
Using DVD Styler
In this chapter you will learn to choose the right presets for DVDStyler, add your Video footage and burn your DVD with a menu.
Finally we are at the chapter you probably came here for.
If you don't have DVDStyler already installed download it here 2 or get it from your software center.
After starting DVDStyler choose your language (we will use english) and you will get this window
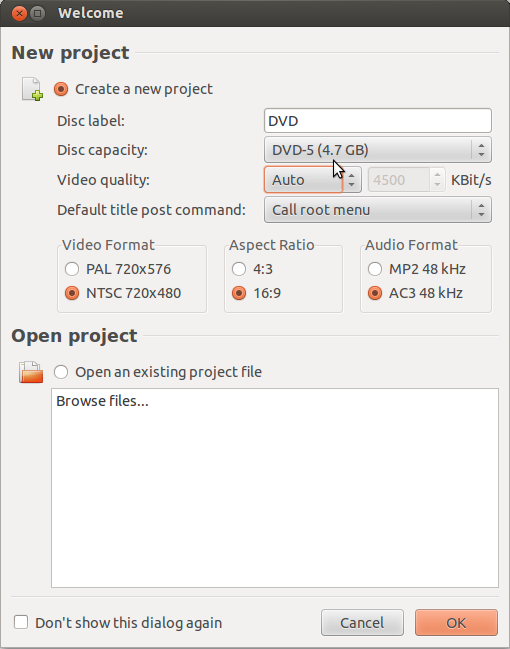
Choose create Project, your prefered DVD (usually it is a DVD-5). You could leave the Video Quality to Auto or for best results choose 8Mbit/s.
You might want to go back after each video to the Main menu, so choose "Default title post command: Call root menu"
Depending on the country you live in choose either PAL or NTSC (if you are not sure check back with chapter 3). Check back with your footage and select either 16:9 or 4:3.
For the Audio Format setting choose AC3.
In this Manual we will not cover the creation of individual menus and buttons although we will go into modifying existing templates.
DVDStyler is coming with templates and buttons you can choose from
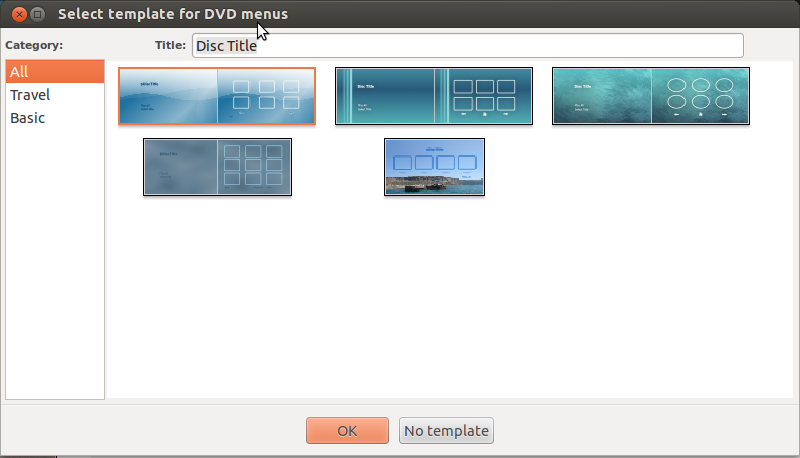
Lets choose the first menu as you see above.
We have everything in here we want to explore. A Main menu playing all the videos on your DVD, a referral to a second page where you can choose single videos and a back and forward button to navigate in between the two menus.
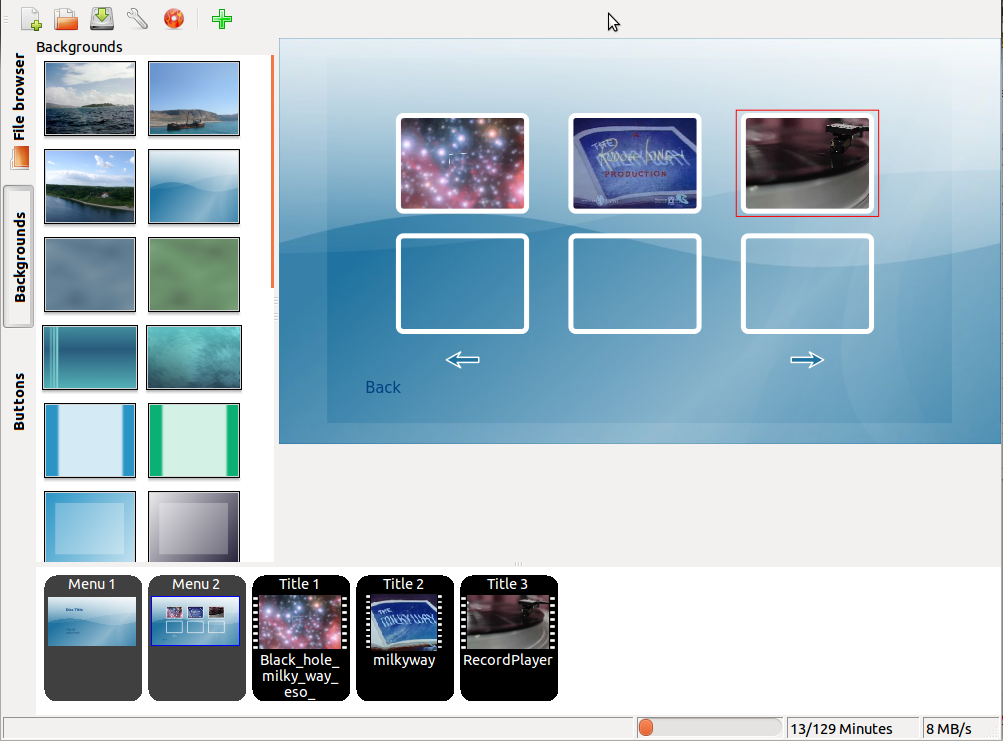
To add your video files you can either drag them into the space besides the menu-items or press the green + Button and choose your files from your computer.

Doubleclicking on an element opens the properties of the element.
After you imported your videos you see that they are already arranged to your Menu 2
What do we want to learn?
We want to change the background of both menus, enter the name of our DVD, delete unnecessary boxes, move our video titles to the middle of the screen and exchanging the back-button with an arrow.
Lets change the background which is really easy. Select the menu you want to change by clicking on it in the lower left corner and then choose your prefered background from the background menu.
Naming is easy too. Doubleclick on "Disc Title", in the properties menu change the name, font, color as you like.
To delete unwanted items select the item and either hit delete or delete it with the context menu by clicking the right mouse button and choose delete.
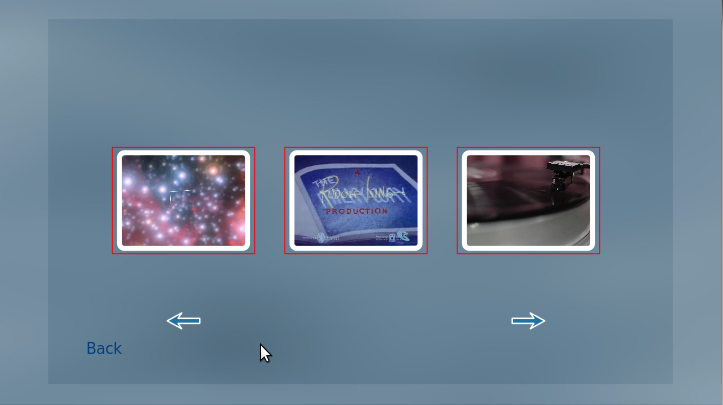
Let's delete the lower three boxes in our Menu 2. select the menus by keeping the ctrl-key pressed and hit delete.
To move all our clip items to the middle of our menu select them the same way by keeping the ctrl-button pressed and left-click on them, then right-click > Align > center vertically.
Now your Menu 2 should look like this:
Now lets delete the arrows and the "Back"-Button then go to the Button Menu and choose the nice little yellow arrow with the text inside and drag it into your menu.
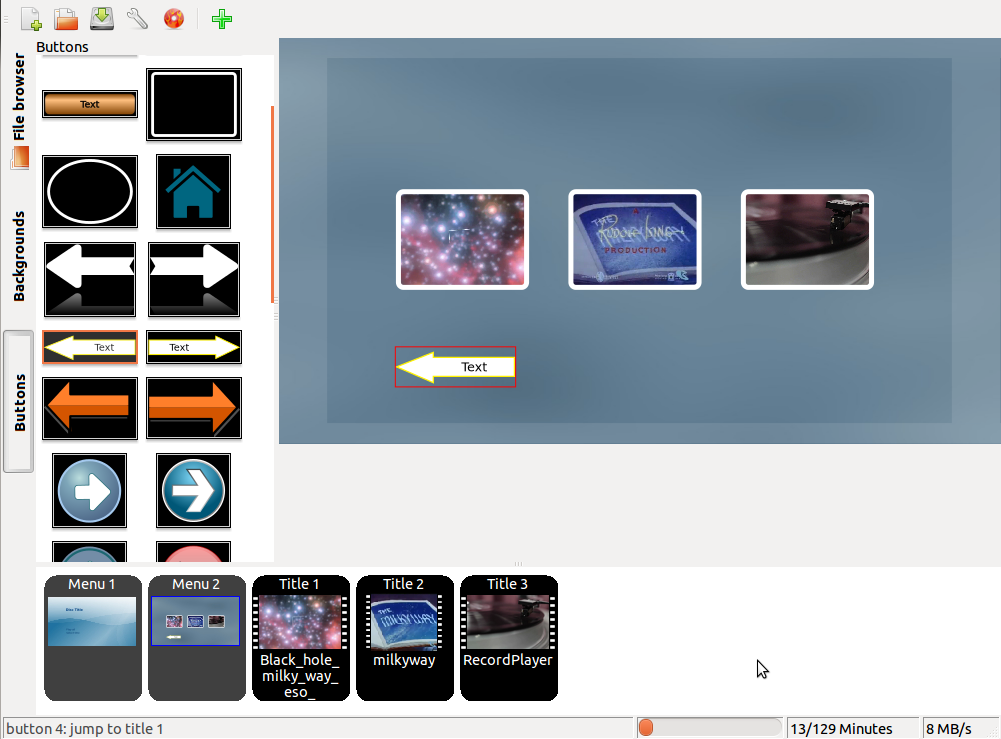
Doubleclick on the arrow in your menu to open the properties of this arrow.
To use the arrow for going back to our main menu (Menu 1) choose "Jump to: menu1". To change the text in the arrow just give it your prefered title in the "Text" field. changing the size of the arrow have a look at the lower part of the window and change the width and height field to your desired size but keep in mind that the size of the text is changing as well.
To keep the proportions of the arrow you might want to check the "Keep Aspect Ratio"
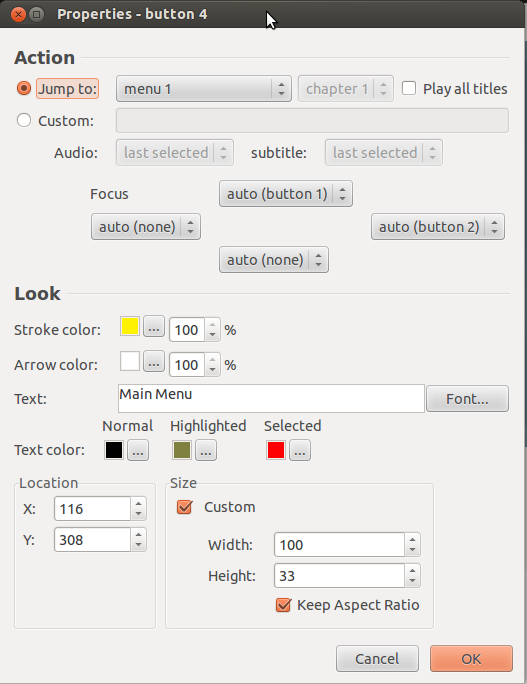
Hit OK and enjoy your menu.
You are really close to your final DVD. Hit F9 or the red DVD-Button to get the Burn-Menu
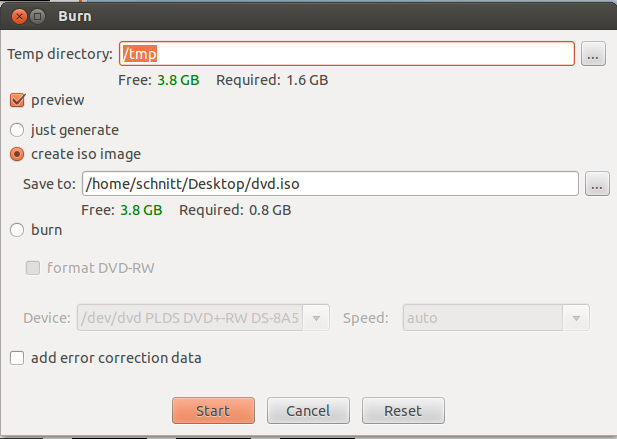
Now it is up to you if you want to preview your work or burn it straight to DVD.
Congratulations! You learned what different file formats are, how to check that, found out about you DVD specifications and finally make a DVD with different Menus.