Advanced Editing
Software name : Audacity
Software version : 1.3
There are some more advanced steps for editing that you can carry out with Audacity. Some of these include, adding silence, trimming audio, splitting and joining tracks, using panning.
Add Silence
You may want to add a silence to a track for several reasons. If we take the example of a two track project with one track as music and the other track as a voice track then we can imagine a situation where we would want to insert a silence in the voice track for several seconds to allow us to fade up the music. This would work in an advert or introduction for a radio show.
To start with your workspace should look a little like the still below.
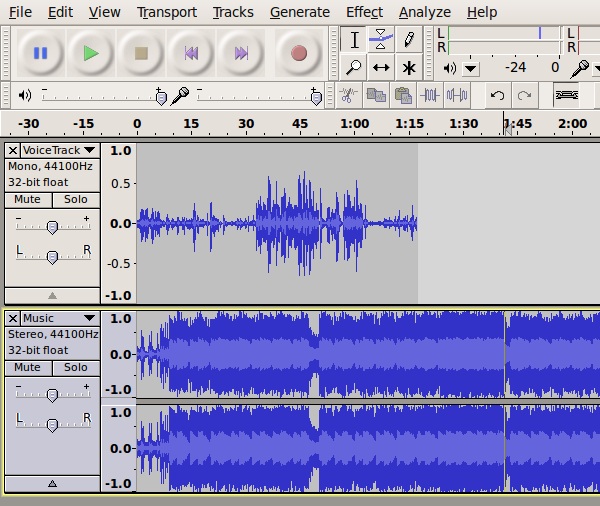
Click in the voice track where you want to insert your silence.
When the voice track is selected you will see the whole track go a darker colour.
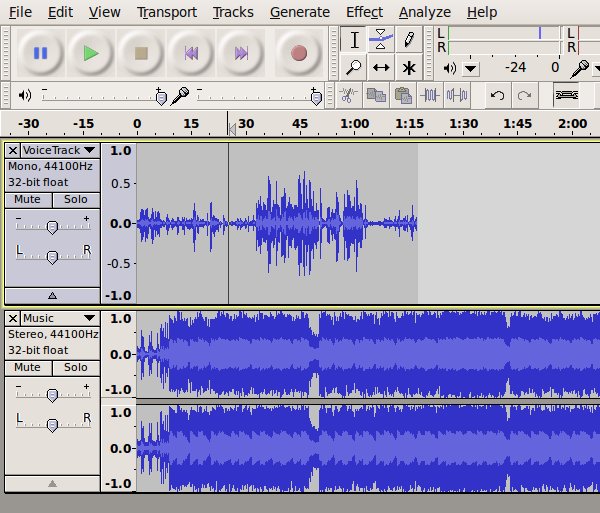
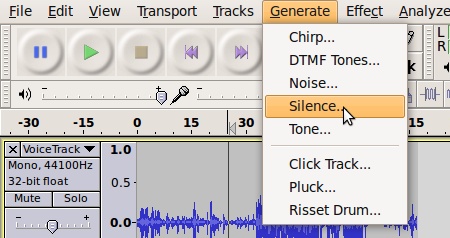
You are now ready to insert some silence. Do this by selecting Generate > Silence from the menus at the top of the screen.
When you are inserting a number of seconds for your Silence, it is easier to add more and then delete some silence later than to add to it. So I'm going to over estimate and put in 20 seconds of silence, as shown below.
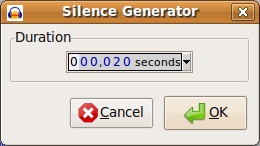
Enter the number of seconds silence you want to insert and then click 'OK'. You'll see the silence appear as a flat line on the relevant track of your project.
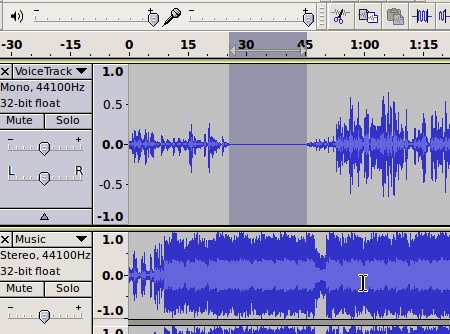
What we are going to do next is to decrease the volume of the music track while the voice track contains some voice audio.
This is done using a combination for the Time shift tool and the Envelope tool.
Time Shift Tool
The time shift tool allows you to alter the time location of the audio on a particular track. This is useful when you are arranging audio on different tracks to be placed on after the other in a sequence.
In the example below we have imported two audio files into a project. They both are set to start at 0.00 seconds.
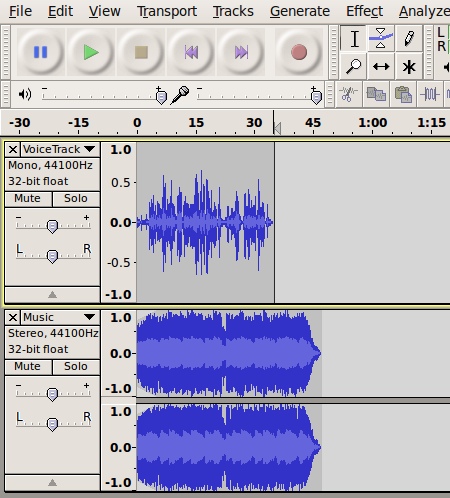
Our goal is to place the music track after the audio track. To do this use the mouse to select the Time Shift tool ![]() from the menu at the top of the workspace.
from the menu at the top of the workspace.
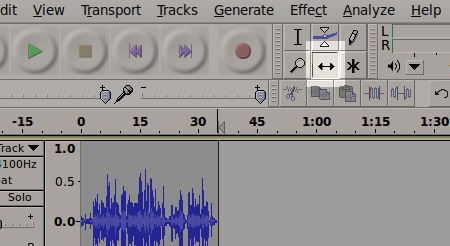
You can select the track you want and drag it left or right to occupy a new time location.
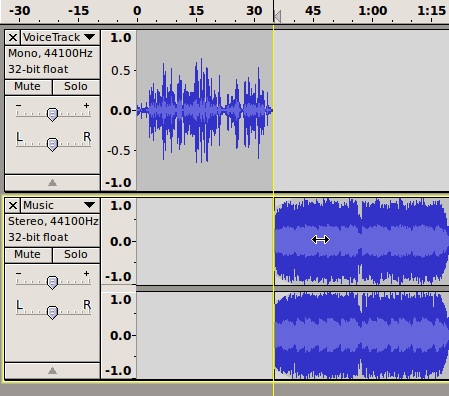
As you click and drag the second track to the right you may see some yellow guidelines appear to shows you the ending point of the other tracks. In the shot above the yellow guideline appeared when the start of the second track matched up with the end of the first one.
You should let go of the mouse when you are happy with the new time location of the track you a shifting.
Trimming Audio
Trimming audio tracks is useful when you only want to keep one part of the track. It is also different from using the cutting function as it maintains the time location of the part of the track you want to keep.
As an example we are going to trim a music track to only include the first 30 seconds or so. To do this select only the part of the track that you want to keep. Use the Selection tool to do this ![]()
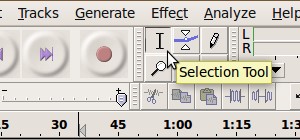
When you have selected the part of the audio that you want to keep it should show up in a darker colour. You should then select 'Edit > Trim' .
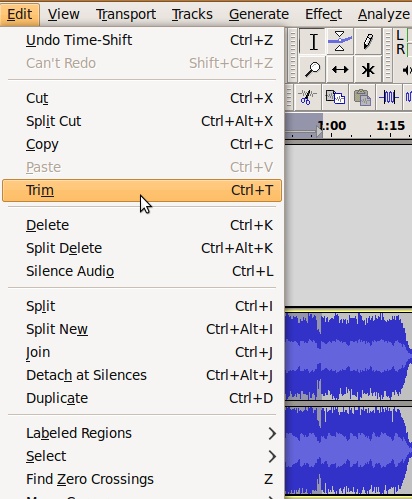
If all works well then only the part you had selected will still be present on your track
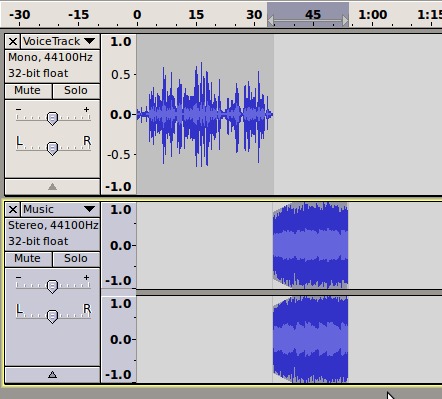
Splitting Stereo Tracks
Sometimes when you are recording you may only record one channel of your track correctly. Or there may be another reason that you want to only work with either the left or right channel.
Below shows a track with one channel much louder than the other.
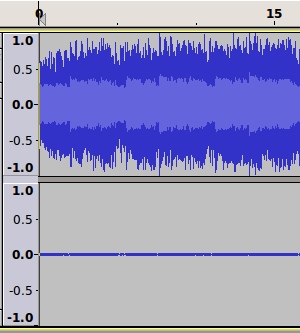
We are going to work on only the left channel (the top one). So we need to Select 'Split Stereo Track' from the drop down menu by the right of the track.
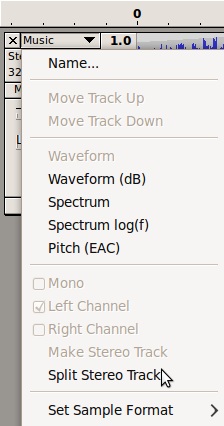
We can then delete the Right channel signal, as it has now become a separate track. Click on the X on the left of the track area.
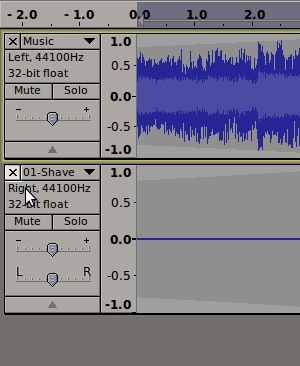
If we play the remaining track then we'll be able to hear that the sound is only coming through one channel. This can be seen in the green signal in the screenshot below.
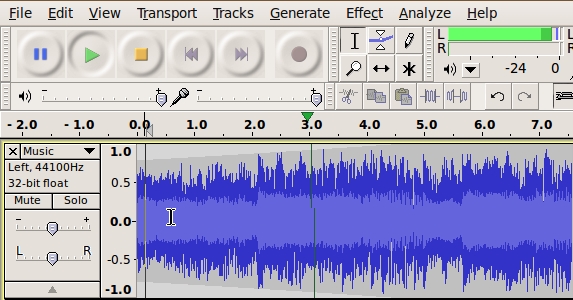
To adjust this we can select 'Mono' from the drop down menu on the left of the track bar.
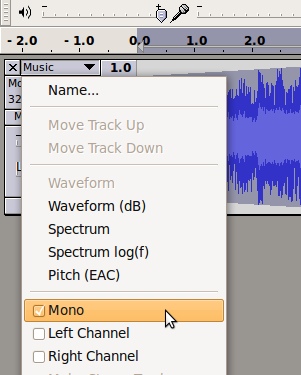
This track will now play the same mono audio signal through both channels. You can export it to a stereo track if you need to.


