Configuring Blender
Now that you've installed Blender, let's set it up ready for some work. This section is especially important for laptop users or people who prefer to use a mouse with their left hand.
Discovering Blender's hidden menu
Blender has a hidden menu, and it's here where the bulk of configuration relating to Blender is done.
To access the hidden menu, place your mouse cursor over the border between a 3D viewport and Blender top menu bar.
The cursor will turn into a 'double-headed' arrow. When you see this, LMB click, and drag downward. The hidden menu will appear.
The image below shows the border under which the hidden menu can be found.

For the most part you can leave the settings you find in the hidden menu as they are. There are a couple you might want to look at before you get going with Blender:
System & OpenGL --> Emulate Numpad (button)
Those of you that use laptops will want to take note of this option. This will allow you to use the number keys on your laptop for the same purpose they're used on a full sized keyboard in Blender: for changing view elevations(ie. Front view = 1Key, Top view = 7Key)
Views & Controls --> Select With (button options)
These options allow you to change what many find to be the most confusing default in Blender in the Blender interface: mouse selection.
Here you can change from RMB select, to the more familiar LMB select operation.If you do this, you'll need to mentally adjust references to 'RMB' and 'LMB' in the rest of this documentation, I will be using the default RMB in all instructions.
Edit Methods --> Undo --> Steps (slider)
This slider allows you to alter the number of total undos that Blender will record for you while you use it. While learning Blender, or working on a big proejct, make sure it's set to the maximum of 64.
File Paths (file path browsers)
If you have any fonts, textures or sounds you'd like to use inside your Blender environments, you can set the paths to those files here.
Creating Viewports
Blender is certainly useable at this stage, but it could be more so. Let's give our scene more 'eyes' than just one so we can see our work from more angles than one at the same time.
A useful way of thinking about 3D viewports is that they are basic 'cameras' in the scene.
Click in the same place as you did above to pull down the hidden menu, but this time click on the RMB when your cursor is over the border. You'll see something like this.

Choose Split Area by clicking the LMB once. You'll see a light grey vertical line that follows the mouse cursor, extending right down the entire viewport. Move it to the center of the viewport and click the LMB again. You've just split the viewport into two, producing two new independent views of our future scene.
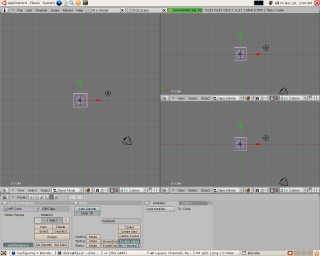
Now perform the same operation on the vertical split itself, this time producing a horizontal split in the rightmost viewport. Once you've created a split you can move it around by simply LMBRMB on the edge between two and choose Join Areas. A large arrow will appear giving you the option of choosing which viewport you want to join to the other. At the end, you should have something like this:
Viewports and Axes
Note the small green and red arrows in the bottom of each viewport. These are 2D axes that tell us what 3D elevation we are looking from. That may sound complex at first, but it gets easier when you learn that these are fixed directions in Blender, and it's just a case of remembering them: positive Z points upward, positive Y points forward away from us, and positive X to the right of us.
A handy way of remembering this is to put your left hand in a shooting pose - like a gun - with the middle finger pointing to your right, your thumb pointing up and your index finger extending forward. In this position the thumb is pointing along positive Z, your middle finger along positive X and your index finger along positive Y (this is a trick that's many centuries old).
Considering all this in terms of our viewports, we can look down at our scene from the Top view (down along Z onto Y and X), from the Front view (forward along Y onto Z and X ) or from the Side view (right along X onto Z and Y).
Looking at the viewport axes it's clear all our current viewports are all looking down at the object from the top (Y and X). Let's change that to something more useful.
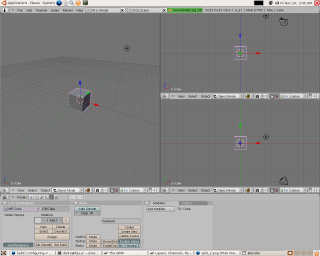
Change the top right viewport from Top to Front using the View menu at the base of that viewport. Now change the left-most viewport to Side in the same way and, while you're there, from Orthographic to Perspective (ie. from a mathematical rendering to a natural rendering mimicking the way we see objects).
Now the final touches. Place your mouse cursor over the left-most viewport. This is the way we tell Blender we're about to perform an operation just in that viewport (this is called Mouse FocusSelection). Now press down on the MMB - yes, the wheel button itself - until it clicks. Holding it down, drag downward with the mouse. What you're doing is rotating that viewport around a center, this is how we roll a viewport in Blender. We'll be doing this a lot in future sections..
Anyway, in the end you should have something like this:
It'd be painful to have to do all this every time you start Blender, which is why we're going to save it as a default configuration so that next time it's ready just as we see it now. To do this go to File --> Save Default Settings or just hit the CTRLKey+UKey and LMB click on Save User Defaults. Be warned, when saving default settings, you don't only save the views and settings, but also the file that was opened.
Now learn a bit about Editing in Blender!


