Blender Texturing
In this section we'll learn about basic texturing in Blender. This section will not cover Materials in any depth. Instead we'll focus only on getting raw images onto faces in your mesh, lighting the mesh and rendering the result. The reasons for this are two-fold: materials are a complex topic and what we do here will be sufficient for use in realtime 3D projects - ie the Blender Game Engine. I'll dedicate a section to working with Materials and advanced Rendering later on.
Faces have a shape, a size, a position in space and even a local orientation. None of these things however help us define how textures are drawn onto the surface on those faces. For this we need a system dedicated to mapping texture data onto the mesh surface. This is why UV mapping was invented. A mapping is best understood as an imaginary 2D or 3D shape onto which the texture is first projected before it is applied to the mesh itself. By changing the projection type we change the way textures are drawn onto the surface. Once we have chosen a UV Mapping we can manipulate it (scale, rotate, edit etc) independently of the mesh itself, thus changing the way the texture is drawn on the actual mesh surface.
A simplistic way of understanding this is that 'U' and 'V' in 'UV Mapping' are special values describing positions on the surface of a given mesh, just like X and Y are positions on an imaginary plane in the 3D world itself. The most basic UV Mapping is a per-face mapping, where the texture is simply drawn onto each face in the mesh; this is the default in Blender. Other UV mapping types are covered below.
Setting up a mesh for texturing requires understanding the Texture Face tab in the Editing panel. UV settings are defined in the Editing panel because we are editing a property of the mesh, ie its UV data.
Selecting Faces
Previously we've worked with the modes Object Mode and Edit Mode. Using the same Mode menu at the bottom of a 3D viewport, or with the F-key, change to UV Face Select Mode and ensure you're using the Textured viewport shading type.
![]()
Select a face in your mesh with the RMB or other selection method. The face is now 'active', meaning it is ready for the assignment of settings and textures.
Note: Selecting a face is not the same as making that face active. There is always only one active face in any UV Face selection. When a face is active it has coloured edges. In the below image there are four faces selected but just one is active:
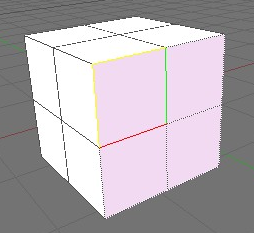
Faces can also be selected in UV Face Select mode using various selection methods.
Setting faces up to receive light
With the face active, click the In the Texture Face tab in the Editing panel (F9-key) and click the blue/green button labeled Light. Apply these settings to other faces using the method described in "Copying settings from one face to another" (below).
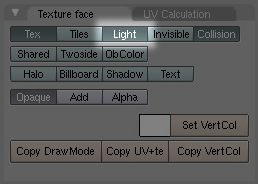
Now in a Top view add a light from the spacebar menu and place it right above the face you've selected. You can move the light around and the shading on the meshes will respond accordingly.
Important: without a light in your scene, and your faces set up to receive light, your mesh will have no shading in all viewports in Textured shading mode! This is almost certainly not what you want.
Applying a texture
Change the current window type in one of your splits to UV/Image editor.
Ensure you are in UV Face Select mode and have made a face active. Load a texture using Image->Open in the UV/Image Editor window and it will appear on your active face.
Important: texture data will only be visible in your viewport if it is set to the Textured shading mode.
You can load any number of textures this way and change between them using the dropdown menu at the base of the UV/Image Editor menu. Each time you select a texture from this menu it will appear on the face you have active in UV Face Select mode.
A lit and textured mesh with one face active in UV Face Select mode.
Note: one texture is applied per face (ie no UV Projection has been set).
Selected faces will appear in the UV/Image Editor window. Without any projection type applied (eg one texture per face), they will be drawn one-ontop-of-another in the UV/Image Editor, and so won't be easily discernable from each other.
Copying settings from one face to another
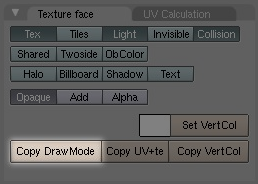
Texture and UV settings can be copied from the active face to any other selected faces using Copy Draw Mode. Simply make the face you want to copy settings from active, select any number of other faces and click the Copy Draw Mode button, which is found in the Texture Face tab in the Editing (F9-Key) panel.
UV Projection types
While in UV Face Select mode you can easily apply a new projection using the UV Calculation menu accessed with the Ukey. Here you'll find a variety of different projection types:
- Unwrap
The projection surface is an imaginary 'unwrapped' version of the mesh, such that faces are distributed on a 2D plane with as little distortion or overlap as can be computed. A texture is then projected onto this surface. This is the method used for highly accurate texturing work.
A good way of imagining unwrapping is the flat atlas of the Earth, which is an unwrapped sphere featuring as little distortion as is mathematically possible. This particular unwrapping has the name Goodes Interrupted Homolosine Projection.
- Cube
Projects the texture onto an imaginary cube first each of which are parallel to Global axes X, Y or Z. It will then find all the faces in the real mesh aligned most closely to the six sides of this cube object and draw the texture onto the faces accordingly.
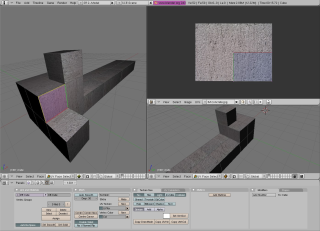
Image shows a Cube Projection of a mesh with all faces selected in UV Face Select mode.
- Cylinder from View
Cylinder from View first maps a texture onto a cylinder that has the same orientation as the viewport before projecting it onto the active face
- Sphere from View
Sphere from View first maps a texture onto a sphere that has the same orientation as the viewport before projecting it onto the active face
- Project from View
Project from View maps a texture onto the viewplane in every repeating tiles and then projects it straight onto the active face.
- Project from View (bounds)
Note the 'from View' in the above projections. This means that the given projection types are projected onto the mesh perpendicular to the viewplane. To understand this, imagine that the viewport you are looking through is the lens of a camera. The viewplane is an infinitely large imaginary plane flush to the surface of that lens (ie. parallel to the tangent of the viewport).
Modifying UV Mappings
Every UV face in the current selection is represented in UV/Image Editor. These faces are manipulated much in the same way as meshes are: they have vertices that can be individually selected and moved around with the G-key, faces can be rotated with R-key, scaled with S-key and so on.
Changes to UV faces will be immediately updated on the mesh in the viewport.
UV texture editor navigation
While you cannot (of course) rotate the view, you can drag the view about and even zoom. Just use the same controls you'd expect in a 3D viewport to do this.
Painting onto textures
First, change the mode to Texture Paint.
This will bring up a tab called Paint in the Editing (F9-key) panel.
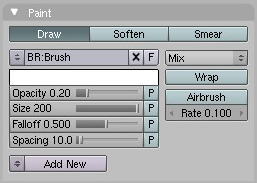
Here you can change the size, colour and type of brush used and paint straight onto the textured mesh in a viewport, or onto the texture in the UV/Image Editor window.
Vertex colours
Colouring vertices is an extremely resource unintensive way to add colour detail to your mesh. When a vertex is coloured the face is coloured from that vertex. If you have a face of 3 vertices, each coloured a different colour, the colours will mix based on how far away one vertex is from the other.
Unlike textures, vertex colours are not stored in the memory part of your graphics card, instead they are just computed and drawn when they are needed. The computation itself, done on the Graphical Processing Unit of a modern graphics card is, in itself, computationally undemanding: vertices - and the faces attached to them - have a colour anyway (they have to be drawn as some colour) usually grey in 3D modeling programs - so it's just a case of giving them a new one as you see fit. Vertex painting can be used to add extra colour detail or highlights, even in the absense of texture data altogether.
For this reason if you need a part of your mesh to be coloured red, don't make a red texture, just colour the affected vertices red and the faces will follow.
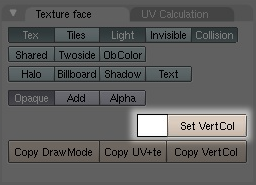
To set the vertex colour on a face, ensure it is active in UV Face Select mode and click on the small white square next to the button Set VertCol in the Texture Face tab. This will pull up a colour palette from which you can select a new colour. Clicking on Set VertCol next will apply that colour to all the vertices in that face. You can now copy these settings onto other faces in your mesh with Copy DrawMode as usual.
Alternatively you can 'paint' vertex colours straight onto your mesh using the Vertex Paint mode, found in the dropdown menu at the base of any viewport. This will present a new tab called Paint in the Editing panel. It looks similar to the Paint tab presented when in Texture Paint mode:
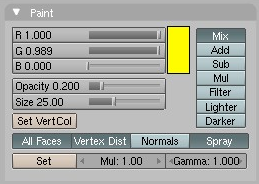
Paint tab in Vertex Paint mode with a yellow colour selected.
Note the mix buttons to the right will determine how your vertex colours should mix with existing colours on the mesh.
Note: You can combine Vertex Colours and Textures in your work, one 'on top' of the other. For instance if you wanted one part of your textured mesh to have a yellow tinge, you could colour the vertices in that region. The texture data and vertex data will be mixed together based on the mixing mode you have chosen.
Packing the Image (or sound or video)
A common problem in the development of multimedia projects is keeping track of the many different files that a multimedia project inevitably depends on. Blender provides a neat solution to this problem.
Each Blender file (ending in *.blend) can be thought of as an archive - a bit like a ZIP file. When you add external data to your Blender project (a texture, a sound, a video) you have the option of 'packing' it into your Blender file so that you don't need to distribute that file separately. You can then confidently distribute your Blender project knowing that when someone else opens up the file in somewhere else this data will not be missing in your scene. At any point you can also 'unpack' these files, work on them and re-pack them.
When you see this button you have the option of packing data. Clicking on it will ensure it is stored in the file itself. Clicking on it again later will give you the option to 'unpack' it to a location on the harddisk.
Texturing Tutorial (basic)
Keywords: UV/Image Editor, Face Select mode, DrawMode, Cube projection
Let's take the chair we made in the previous lesson and texture it now, using some of what is written above.
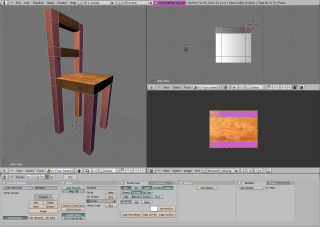
First load up the chair in Blender and go into UV Face Select mode in a viewport (see Selecting Faces above).
Save this wood texture to the same directory that the Blender file of the chair is saved (right-click ->save as in most browsers). <mention texture formats!>
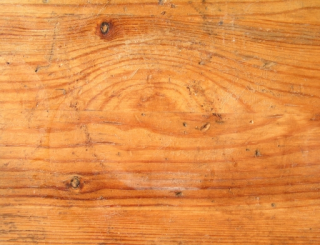
We're currently using the Solid viewport shading type which draws no texture information and only provides a default lighting for your mesh. To be sure we can see what we're doing in the course of texturing and lighting our mesh we need to change to the Textured shading mode. Do this now by clicking on the Viewport Shading menu at the base of the viewport you're working in.
Place the 3D cursor (the red and white ring in the scene) just to the left of your chair and in a Top View, spacebar Add->Lamp-Lamp. The lamp will be added right where you placed the 3D cursor. At this stage your mesh will go white. Why? Because we haven't setup the faces to receive light yet.
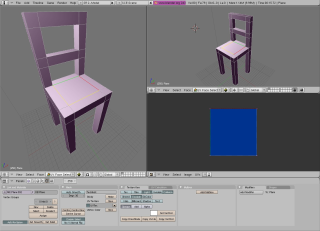
Setting faces up to receive light is relatively simple: select all the faces in your mesh (A-key) and click on the button labelled Light in the Texture Face tab in the Editing panel (F9-Key). This will enable the current active face (the face with a coloured border) to receive light from lights in our scene. Now we need to ensure all the remaining faces can receive light too: clicking on Copy DrawMode will copy the settings from this face to all the other faces in your mesh. Select the lamp and move it around to get a balance of light you like.
At this stage you should have something that looks like this:
With all the faces still selected let's add some texture data to our faces.
Change one of your three viewports to the type UV/Image editor by clicking on the bottom left-most button in that viewport. That button changes the current viewport type and looks like this:
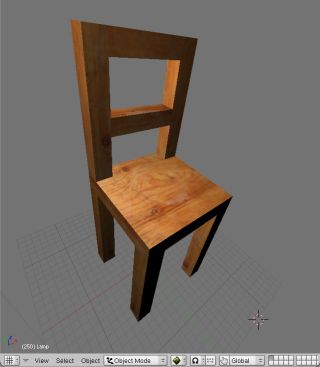
Click on Image->Open in the UV/Image Editor menu and load in the wood texture you downloaded earlier. This will immediately apply the texture to the faces. Change to Object mode by changing the mode at the base of the viewport you're working with so we can see what we've made in all it's glory.
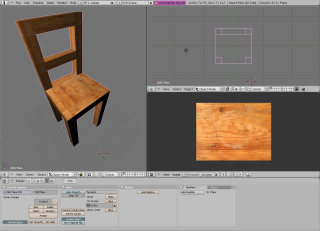
Here's what I have after doing all this:
Looking closely at this textured mesh you'll notice that one texture has simply been applied to each face. This is the default in Blender and while it works reasonably well for objects that have faces of equal proportion and textures with evenly repeating parts, it doesn't in others. Taking this chair as an example, the parts of the chair looks like they're made up of several blocks of wood, not continuous pieces (look closely at the back legs and the seat). Faces that are perpendicular to each other don't match up also, giving the impression that the parts of the chair aren't made of solid wood.
Let's play around with the placement of the texture on faces now to get an overall result that better describes the way the chair would be constructed with wood if it were real.
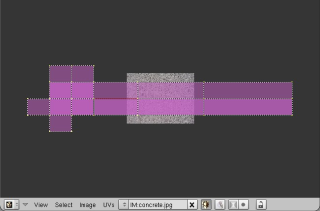
Enter UV Face Select mode again and select all the faces in all the legs, including the upper vertical parts that make the chair's back. With your cursor still over that viewport, now hit Ukey, and LMB click on Cube. The cubic projection will be represented in the UV/Image Editor as two strips of faces vertically aligned with the texture. If you look at the chair now, you'll see that the wood grain goes left to right across the leg, eg not along the leg. This is not the way a wooden chair would be made, so let's rotate the projection 90 degrees to make the grain implied in the texture go along the leg.
With your mouse cursor over the UV/Image Editor hit A-key to select all the vertices in the projection. They should all go pink. Now hit R-key (just as you would with an object or parts of a mesh) and - while holding the control key down - rotate the projection 90 degrees. Once done hit ENTER or LMB and use S-key to scale the projection up so that it just fits within the limits of the texture itself. Note: if we scaled the projection up to be larger that the texture, it would tile the texture, meaning it would visibly repeat across the selected faces.
This is what I have after doing this.
Next consider learning about Rendering.


