Adding Text and Images
In the pane to the right of the Site Manager is where all the content of the page is entered. To enter text, simply click on the window and start typing. Don't worry about fonts or other formatting issues just yet, we'll get to that a little later. After entering a few lines of text, you need to save the file. Since this is the first, or default page of the site, it should be called index.html. Saving the page is only a matter of clicking on the Save button in the upper left corner of the NvU Window. Since this is the first time the page is to be saved, a dialogue box will pop up asking you to provide a title for the page.
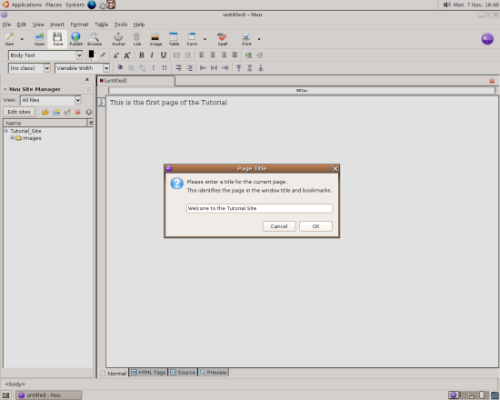
You can enter any text you like here. The text you enter will appear in the title bar of the web browser when the page is viewed. You can always change this later if you would like. After clicking OK, another dialogue box will appear asking you to save the file. It is important to make sure that the file is saved in the folder you created when you defined the site. Save the file as index.html inside the Tutorial_Site folder that you created earlier. Most likely, the web server that you will later upload your site to will automatically display the page named index.html when a visitor enters a web address with naming a specific file. There will be more about this in a bit, but for now make sure that the first page that you want visitors to see when they come to your site is called index.html (no CAPITAL LETTERS).
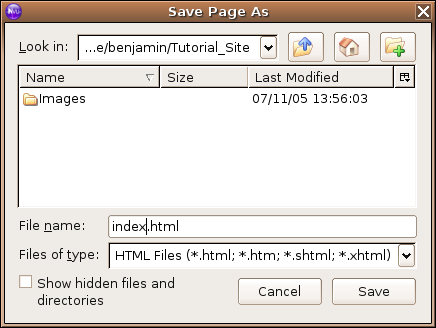
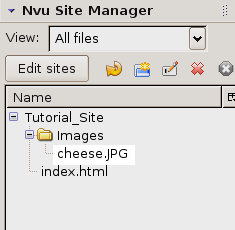
Click Save. You should see the the file, index.html in the Site Manager. If you don't click on the refresh button and it should appear. If it's not there, its likely that you did not save it in the folder that contains your site. If you need to make sure that you repeat the steps above until you see the file appear in the Site Manager.

Let's add an image to the page. Before inserting an image, it's necessary to place the image file in the Images directory. Before copying the image into the directory, make sure that it is an appropriate size for viewing on the web. Keep in mind that large files take longer to download that small files do, and that all images displayed on the web are measured in pixels. Take a look at the Gimp tutorial for more detailed instructions on how to do this. Save the file as jpeg image and be certain that the file name ends with .jpg or .jpeg . If you would rather, you can use any of the images I've provided here to use for the exercise.
If the file is not in the Images directory, copy it there now.
You should now see the file in the Images directory in the Site Manager pane of the NvU window. If it's not there, try the refresh button.
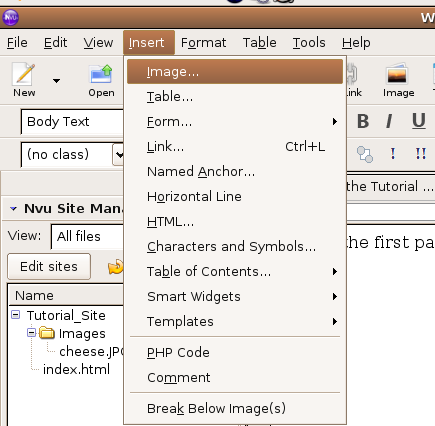
It's time to place the image in the page. From the drop down menu at the top of the NvU window, click on Insert -> Image.
A dialogue box will appear. Click on the Choose File button, select the file that is inside the Images directory for your site, and click on the Open button.
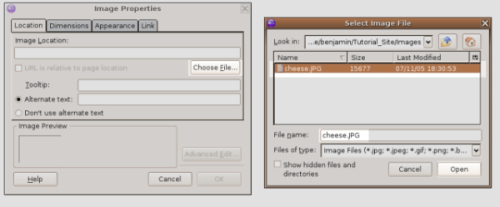
Before clicking on OK, there are a few important things you need set first. First, check to make sure that the text under Image Location Starts with the Images directory for your site. Also, if it is not already, check the box URL is relative to page location. Finally add some text to the Alternate text section of the window.
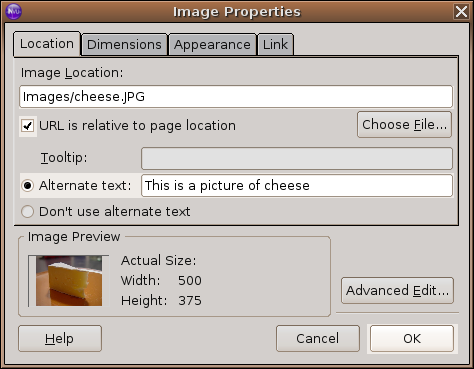
Once all set correctly click the OK button. The Image should appear on the page. Now would be a good time to save the page with the image inserted. Just click the Save button in the upper left corner. If you did not hit the Return key before inserting the image it will appear at the end of the text. If you did press the Return key the image will appear on its own line as if it were beginning a new paragraph. Don't worry about getting the position of the image just right quite yet. We'll get to that later. Right now, the important thing is that the image is in the proper directory, and that you have given enough information for the web browser to find it. That it why it was necessary to enter all the information in the Image Properties window. When NvU "inserted" the image, what is actually did was write instructions for the browser on where to find the image file and a little information about how to display it. To see this in action, click on the source tab at the bottom of the NvU window. This will display the HTML code that NvU has written for you. Don't worry, you're not going to have to edit any of the code directly but it's nice to see what NvU is doing for you and what and image looks like in HTML. Clicking on the Normal tab at the bottom of the NvU window will return you to more familiar territory.
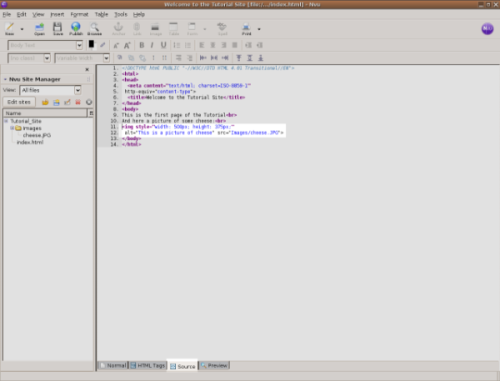
Look for the bit of code that looks like this:
<img style="width: 500px; height: 375px;" alt="This is a picture of cheese" src="..//bin/edit/images/cheese.JPG">
This is HTML code for telling the browser: "Display an image dimensioned 500x375 pixels. You can find it in the Images directory in the same place that this page is, and the name of the file is called cheese.JPG.
The important bit is the src="/bin/edit/images/cheese.JPG". This is where the HTML tells the browser where to find the image file. These instructions are called the URL (an acronym for Universal Resource Locater) and the way that the URL is written tells the browser how many steps it needs to get to its destination (a file). There are two types of URL's, relative and absolute. Before getting into the differences between relative and absolute paths, lets make a couple of links to other pages one relative, one absolute.


