Case Studies
We look at three groups that can benefit from using ownCloud: home users, smaller organizations including media and NGOs, and larger businesses.
Your options for file sharing are Dropbox, WeTransfer or other commercial services on the internet. Good news however, ownCloud is a free and open source file sharing alternative. It is actively being developed and rapidly gaining popularity.
Home users sharing files
Imagine you have a relative or friend who lives on the other side of the world and you want to share photos and home movies with each other. Or, you are part of a local community or interest group that wants to share contacts. You don't want to upload these personal documents to a commercial file sharing space because you are concerned about the integrity of your data. Or maybe you are uncomfortable with the increasing monopoly of huge corporations controlling data sharing.
If you already have some server space or a VPS, you can take full advantage of ownCloud.
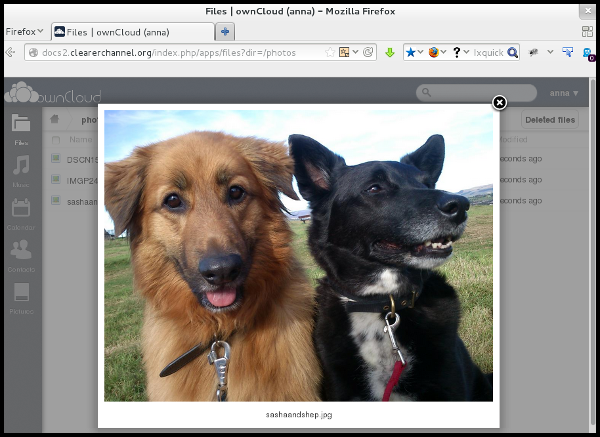
Previewing images from within your pictures area
Using ownCloud is also a good way to learn about how to set up a web application and undertake server administration. Use this guide as a starting point to teach yourself how to set it up and keep ownCloud running. It can become a valuable service for your family, friends or community.
NGOs, media organizations and similar projects
While some businesses can afford expensive in-house or third-party implementations for sharing documents and working collaboratively, there are also many charities, NGOs and smaller journalism outlets that do not have large budgets. They often rely on free tools for collaboration including Google Drive (docs) and sharing services like Dropbox.
However, many of these organizations also work with confidential info that needs to be protected. Anyone holding data with regards to investigating regimes, authorities or corporations should be careful about the information systems they are using. This includes contact details or information on 'who is meeting who and when'. Prevent private data from becoming public data.

ownCloud includes an app to encrypt your data. This is to prevent the system administrators on your VPS from being able to view your data. The encryption app is still under development and hasn't been widely tested. However, simply by having your documents, calendar and contacts on your own servers rather than those controlled by large corporations is a major step in preventing your data from being accessed by governments, agencies and associated contractors.
Business use
Businesses are a primary target group for ownCloud. So much so, that ownCloud Inc. provides a commercial service which runs from the website ownCloud.com. Some of the following material is adapted from documentation provided on ownCloud.com.
There are also other organizations like OwnCube that provide hosting for business.
Ways a small business could use ownCloud
If you run a business with just a few people, or even alone, ownCloud could save you time, keep you organized and make collaborating easier. You could use it for
- Backing up important files
- Keeping master copies of files that several people use (such as your business logo)
- Keeping libraries of important files, for example product photos
- Keeping 'your data at your fingertips': for example, having a central copy of your cash-flow allows everyone to check the impact of their spending/selling quickly
- Sharing files easily with customers, e.g. sharing your product specifications/photos with your retailers
- Avoiding sending large attachments by email, instead you could just send a download link (may save you money/bandwidth)
- Keeping you mobile – allows you to access important info when you are 'on the shop floor' or 'out of the office' on your mobile or tablet
- Keeping a centralized address book
- Minimizing problems caused when a colleague leaves or is off sick
By making use of free and open source software such as OwnCloud, you can maximize your efficiency (and compete better) without spending lots of money and becoming vendor-locked to specific companies and products. This keeps you flexible, enabling you to grow and change as you need without extra expense. It lowers the risk of trying something new and enables you to have the tools of big business on your side, without having a huge IT department behind you.
Businesses: keeping control of your data
One of the major issues faced by businesses is the widespread use of consumer services – such as Dropbox – by their staff. If accounts are hacked or opened up to the public by mistake, businesses lose their competitive advantage. Employee behavior bypasses all of the hard work done by the IT department of the company to protect intellectual property. As as business you have essentially no control of a document once it goes into someone's personal cloud file share. Business management is based on information. If you don't know exactly where the data goes next, you can't reliably plan and steer your business.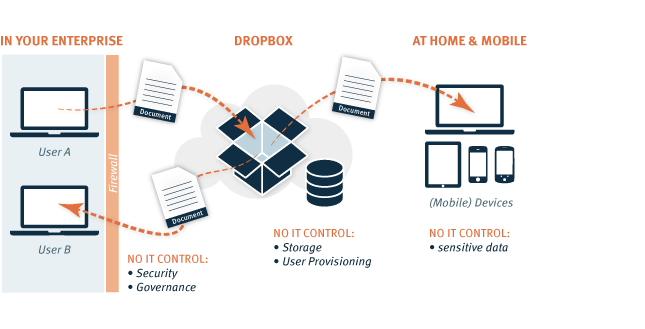
Image from https://owncloud.com/owncloud-overview
There are some statistics on the ownCloud.com website which are aimed at those making decisions about IT for their company.
- More than 75 percent of businesses have shared or stored sensitive company information on public cloud services – Symantec
- 40% experienced the exposure of confidential information
- 40% reported that they had lost data in the cloud and had to restore it from backups
- One out of five users surveyed said they use the consumer file-sync-and-share system with work documents – Nasuni, an enterprise storage management company
- Half of those users do this even though they know it’s against the rules.
- Average cost of a data breach equaled $5.5 Million in 2011 – Infosecisland.com
The reason that employees use Dropbox, their personal email accounts and home internet connections is mainly due to the ease of use of these services compared to the more clunky solutions offered by the traditional business's IT department.
ownCloud is presented as a user-friendly and reliable solution to sharing, that is also easily maintained and monitored by IT departments.
Syncing Calendars and Contacts
If you have a laptop at home, a desktop at work, and have a mobile device like a smartphone or a tablet then it can be hard work keeping all of your calendars and contacts up to date. ownCloud has a good way of doing this so one no longer has to resort to using Google calendars and Google contacts to manage your personal information system.
ownCloud uses the web standards CalDAV and CardDAV to achieve being always up-to-date. They are open standards and are used by many applications to send and receive information to keep everything synchronized.

A quick search on the web will reveal a lot of different CalDAV and CardDAV personal information managers to choose from. We will cover the popular email client Thunderbird as it is cross platform and works with both CalDAV and CardDAV. We will also look at a couple of apps available for Android devices.
Synchronizing calendars with CalDAV
Install the latest version of Thunderbird from http://www.mozilla.org/thunderbird/
Then install the latest version of Lightning and the Sogo Connector plugin for Thunderbird from this address http://www.sogo.nu/english/downloads/frontends.html. These plugins will give you the ability to add a remote calendar and address book to Thunderbird. You may need to restart Thunderbird to see your calendar.
Activate your Thunderbird calendar by selecting Events and Tasks > Calendar Book.
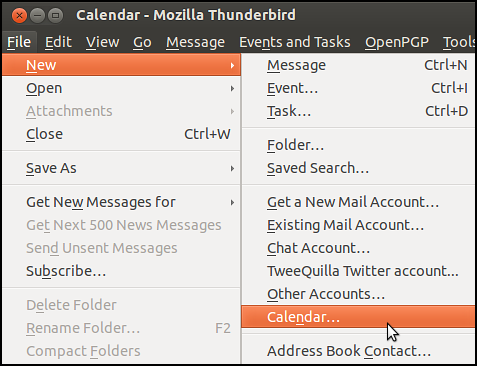
Now select File > New > Calendar.
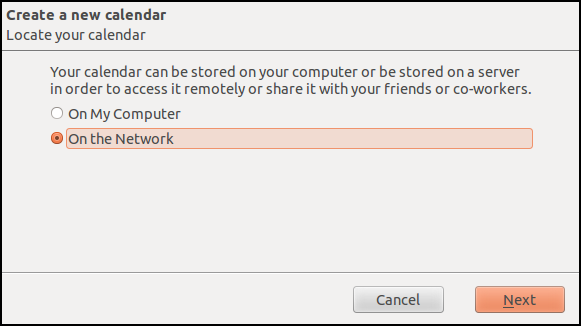
Select On the Network.
Then enter the CalDAV Link URL of the chosen calendar from ownCloud.

Click the globe in your calendar settings to get the right link.
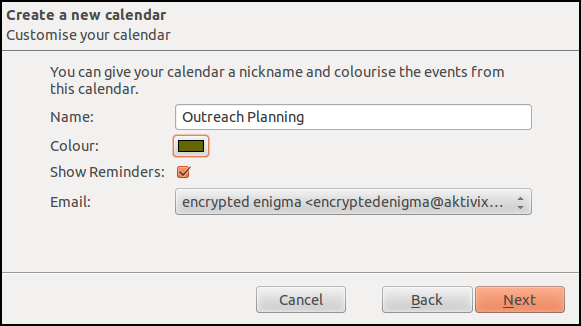
Give the calendar a name and choose a color.
Then link it with your email.
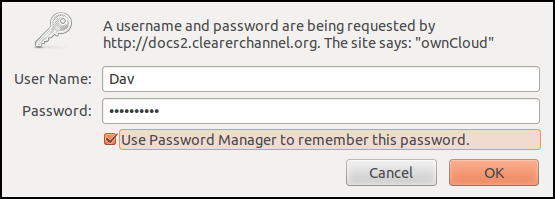
Insert the User Name and Password that you use for ownCloud and click OK.
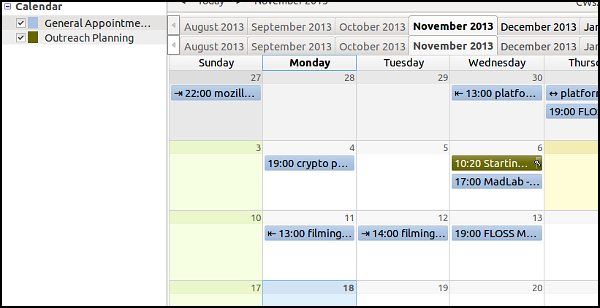
You should now be able to read and write to your calendar from inside Thunderbird. You can repeat this process with other remote calendars.
Synchronising contacts with CardDAV
The following is a guide to the process of using an Address Book in the cross platform Thunderbird email client. A similar approach should work for other CardDAV enabled applications.
Install Thunderbird and Sogo Connector plugin as detailed in the section above.
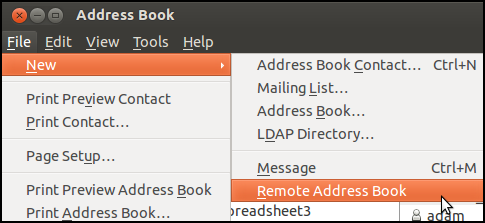
Activate your Thunderbird address book by selecting Tools > Address Book.
Now select File > New > Remote Addressbook.
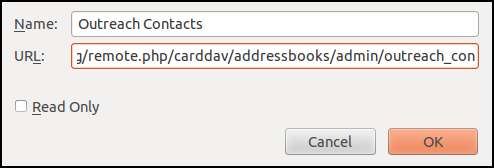
Name: Enter a name for your address book.
URL: Add the relevant CardDAV URL from your ownCloud Contacts area.
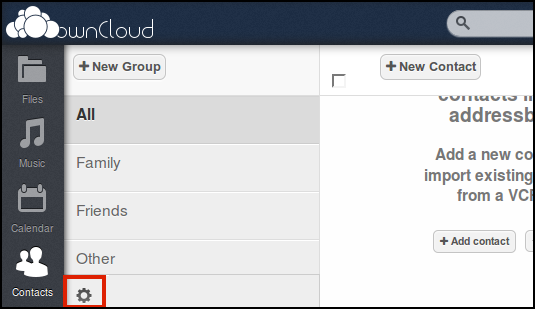
To find the URL, click on the settings cog in the bottom left of your contacts area.
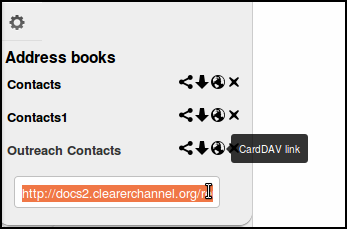
Each address book has it's own CardDAV link indicated by the globe icon.
Back in Thunderbird, synchronize with the remote address book by right clicking select Synchronize.
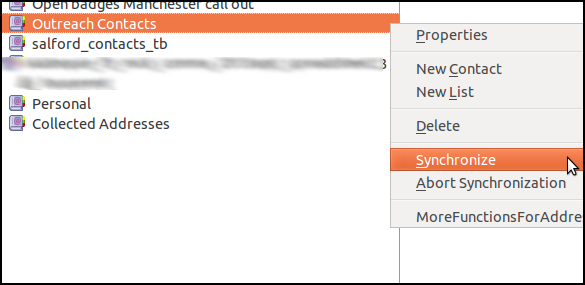
You’ll see your local address book fill with the contacts in ownCloud. Similarly, adding or editing your contacts in Thunderbird will trigger a sync with the ownCloud server.
Note: Be careful when arranging your contacts. Moving a contact from from a remote 'OwnCloud address book' to a local address book removes the contact from the OwnCloud server, (thus deleting it from all the other synchronized installations). Take care and be sure to copy not move if you don't want this to happen.
Connecting contacts and calendar to mobile devices
There are instructions for connecting iCal and contacts of Apple devices to ownCloud in the official ownCloud documentation.
Contacts and syncing on Android devices
There are several apps available to sync your Android device contacts with those on a CardDAV compatible service like ownCloud. We have documented one called CardDAV sync beta free which we have tested and concluded that it works well.
Search and install the app in your usual way.
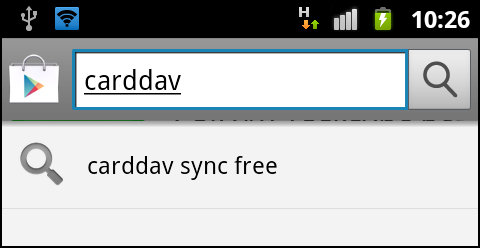
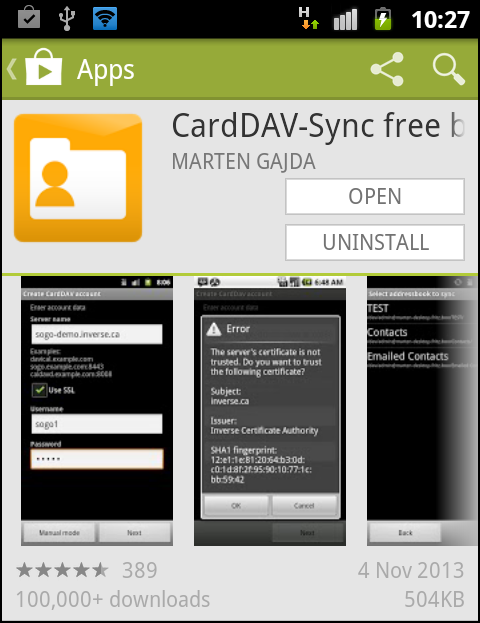
Once installed start the app in the normal way.
Select CardDAV from the options presented.
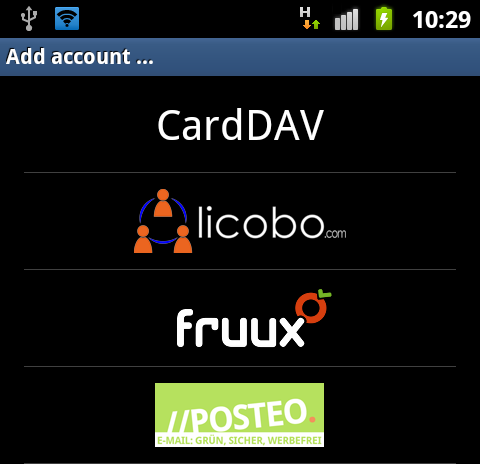
Enter your user details and the URL of the CardDAV address book that you want to connect to.
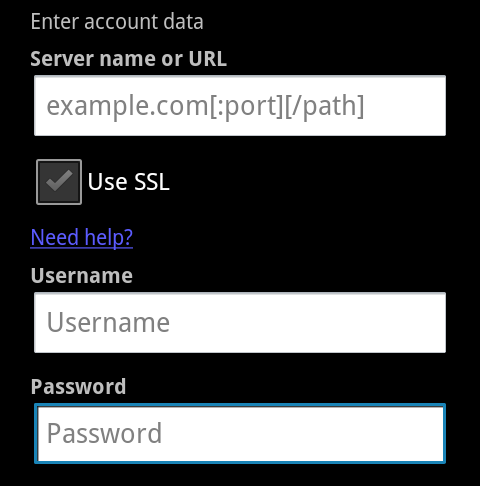
If you have SSL/https enabled on your server keep the tick in the Use SSL. If not take the tick out. See the chapter on security for the reasons why using SSL increases the security of ownCloud.
If you are entering a normal URL you can find it in the settings of your ownCloud Contact Settings. Look for the CardDAV link.
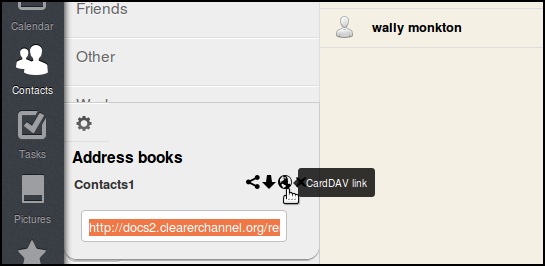
Make sure to enter the link details exactly. A typo will result in an error. Then click on Next.
You should be presented with the name of your default address book. If you have added, or have other address books shared with you they should also appear in your list to choose from. You can only choose one now, however you can repeat the process with other address books.
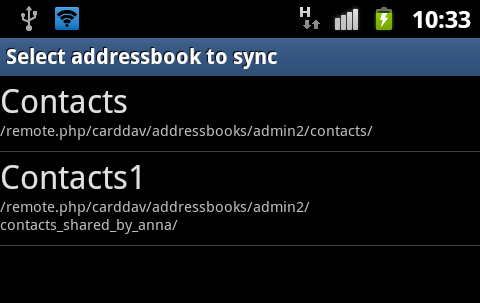
You can then give another name to the address book if needed.
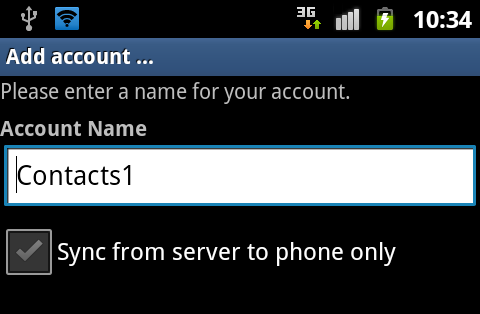
You are given the option to Sync from server to phone only. If you un-tick this then changes that you make on your devices will by synced back up to the server.
When using contacts in Android or via the ownCloud server you may find it slightly clumsy. This area is still quite experimental and changes are being made to make it more user-friendly.
You may want to choose a more mature system like the Thunderbird email client to be the interface where you manage your contacts. Changes you make there will be updated to your server and to any android clients that you have synced.
Calendars and syncing on Android devices
Android does not support CalDAV by default, so we need to install an app to allow our devices to do this.
Searching for CalDAV in the Google Play store will give you a number of choices.
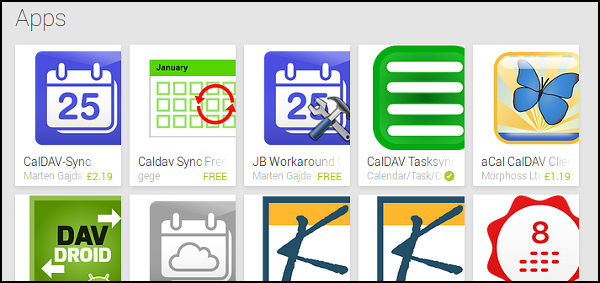
The first two results are called CalDAV Sync and CalDAV Sync Free. These have been shown to be effective by people using ownCloud.
We recommend that you install them and repeat a similar process to that listed above for syncing Contacts in Android and Calendars in Thunderbird.
Using the Web Calendar
This section is called Using Web Calendars, as it is possible to access ownCloud calendars in other ways – via desktop synch applications or on mobile devices. This section concentrates only on using your web browser to use calendars.
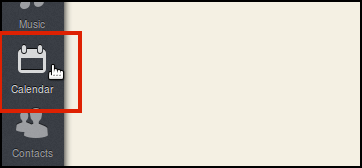
To start using web calendars, Select the Calendar button in the navigation bar.
When you use the calendar the first time, there will be already a calendar called Default calendar. To alter the settings click on the image of the cog in the top right.
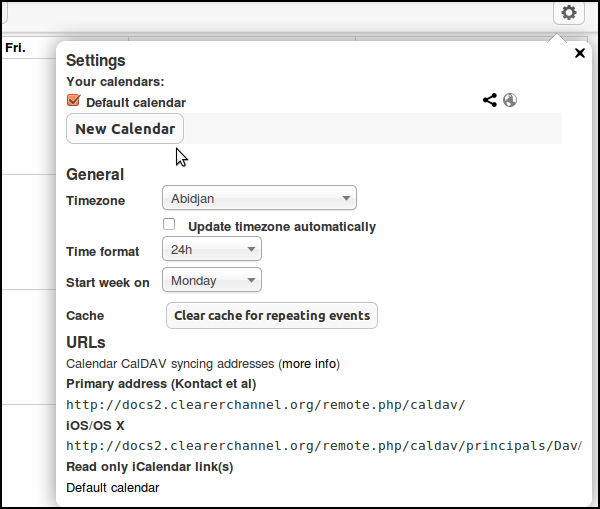
In this Settings area you can add, edit, export, enable, share and delete your calendars. You can also configure the right timezone. Without the correct timezone there will be a time offset between the events on the server and on your desktop when using ownCloud's synchronization functionality. You may be asked to set your timezone automatically so it is a good idea to accept this request to help ownCloud keep all the devices in sync.
The URLs listed in the Settings area are for CalDAV access. CalDAV is a way of syncing your calendar with other applications on your phone or desktop computer. This process is covered in another chapter.
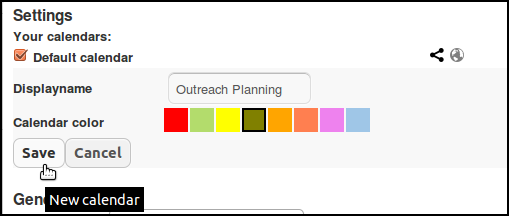
To start we will add a new calendar for a project. Click on the New Calendar button and fill in the details and choose a color for this calendar.
Creating events
To create an event just click on the date in the month view and enter the event details.
We can see an option to choose between our Default calendar and any new calendars we have created.
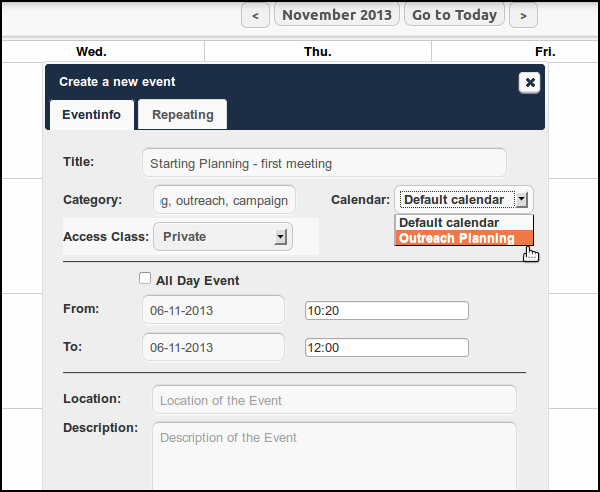
Click on the Advanced Options to set the description and the location of the event. There is also an option to create repeating events in the Repeating tab.
Viewing events can be done by Week, Month or as a List of upcoming dates.

Sharing calendars
To share a calendar with other users on your ownCloud set up, first go the the Calendar settings area.
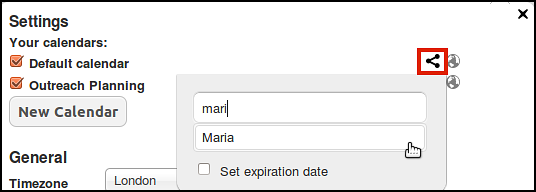
Click on the Share icon shown above. Then enter the name of the person you want to share with.
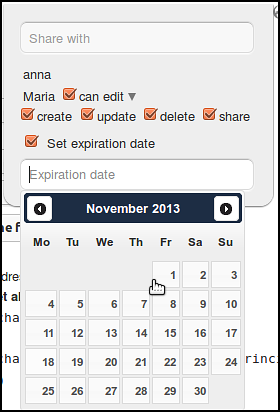
We can see that if we allow the user to edit our calendar there are different options available for us to control their level of access and set an expiry date too.
Exporting / importing events
Exporting
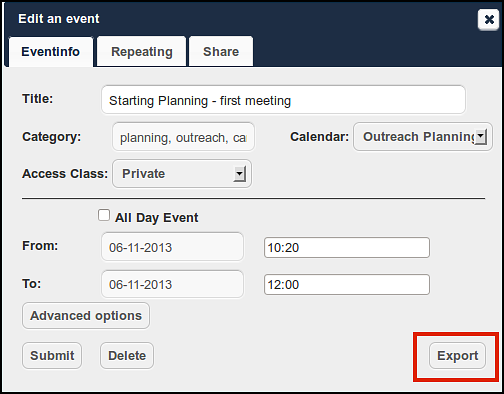
You can export either a single event or a whole calendar. If you want to export a single event click on it and press the
Export button in the bottom right corner.
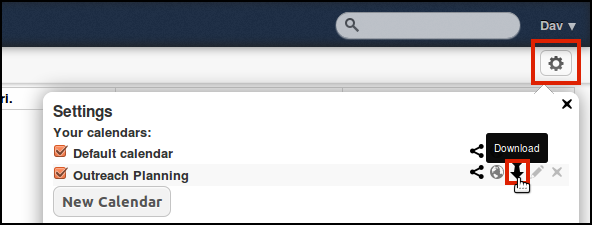
If you want to export a whole calendar click on the Settings cog, and then click the Download link arrow of the calendar you want to export.
ownCloud generates an .ics file when exporting an event or calendar. The iCalendar format must not be confused with Apple's old email application which was called iCal. iCalendar is build on the previous vCalendar format which generates .vcs files.
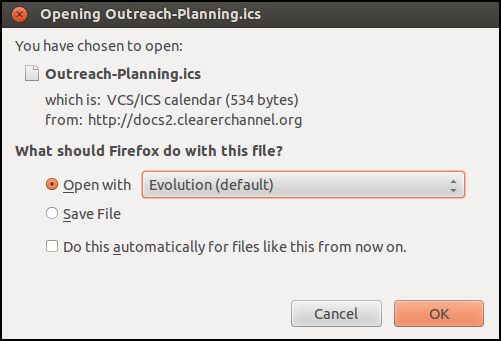
iCalendar files can be understood by nearly all email or calendar applications.
Importing
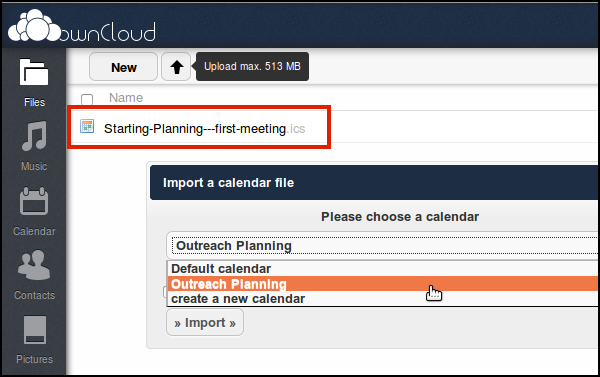
Imagine the case in which a colleague has done some planning in their own calendar for the coming months. They want to share this planning with you and have mailed the calendar file to you. You save it to your computer and need to import into your ownCloud now.
Click on the calendar file you've saved and follow the instructions to import it into a new calendar or into an already existing calendar.
Syncing calendars between computers and devices
Importing and exporting is a good way of moving calendars between devices. However, it would be better if they were automatically synchronized so that when altered or added to in one place they are updated automatically everywhere we access the calendar. You can find out how to do this in another section of this guide.
Using Web Contacts
ownCloud has a simple web interface to manage your contacts. It works by allowing you to create, import and export contacts in the vCard (vcf) file format. There is another section in this guide on how to connect to your ownCloud contacts with the Thunderbird email client and an Android App.
Adding contacts
To add a new contact, click on the
Contacts icon in your navigation bar.

Then click Add Contact or New Contact.


You are now ready to input your contact information.
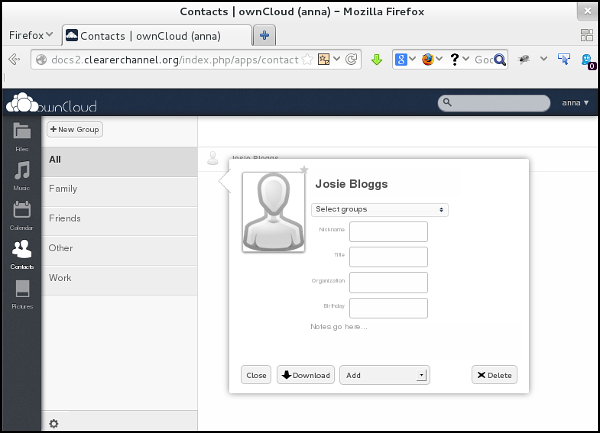
Fill in some or all of the boxes.
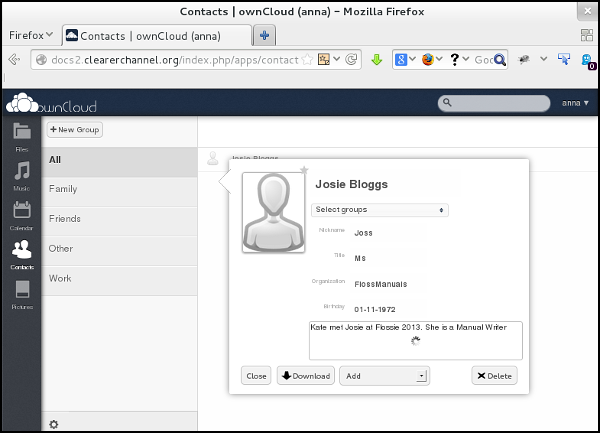
When you have finished editing the contact, click Close.
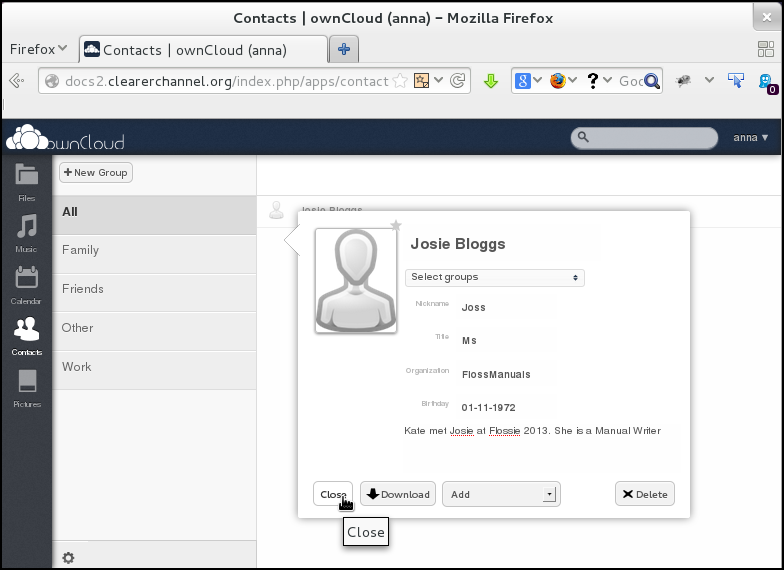
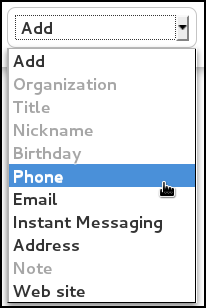
There are various types of additional information that you can add to your contact. It's a good idea to take time to explore the contact dialogues so you can get the most complete contact list right from the start.
While editing your contacts, click on the Add drop-down menu to add details such as Phone, Email Address and Web site.
Viewing and editing your contact
To view your contact, click on the contact name.

To edit the contact information, click on the part that you wish to edit, and a cursor will appear. You can add to or replace information by typing in the box.
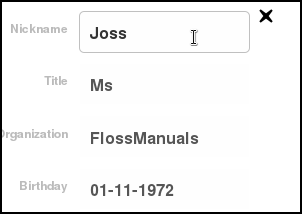
You do not need to save the contact, changes are saved automatically.
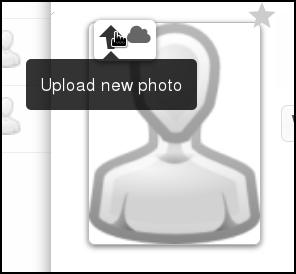
You can also add photos of your contacts by clicking on the up arrow. This may help you to 'put a name to a face' or to remember more about your interactions with the contact.
Organizing your contacts
To organize your contacts you are recommended to use groups. This can make it easier to find your contacts, and can be useful for compartmentalizing your contacts between different jobs, for example, or between social and work.
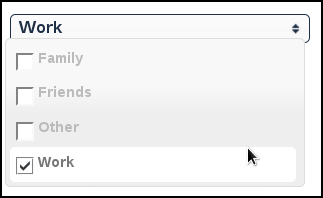
When you are editing a contact you can click on the Select Groups drop-down to put your contact into a group of similar contacts.

It is possible to add your contacts to many different groups.
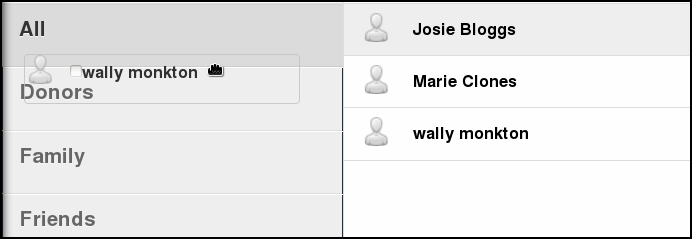
You can also drag and drop contacts into groups from the main Contacts window.
To do this, click on the contact name and drag it to the left and drop it over the group you want to add it to.
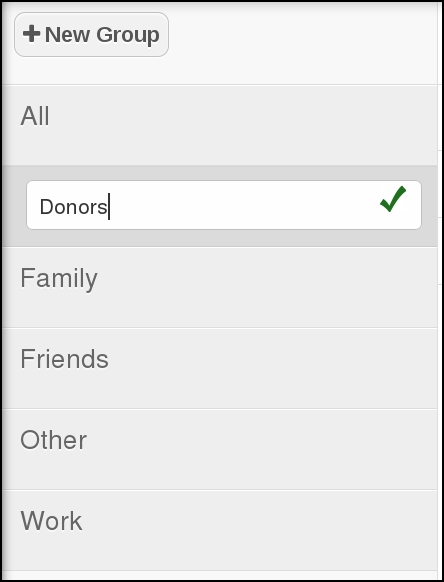
You can also add additional groups by clicking on the New Group icon.

For example, you could break your work contacts down into Donors, Leads, Staff, Interns, Designers, Fund-raisersfont-family: "Times New Roman";mso-ansi-language:EN-AU;mso-fareast-language:DE" lang="EN-AU">– anything you like.
How to import contacts from other sources – vCards
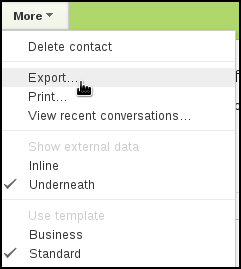
If you have a contact stored in another location, for example, in Thunderbird email client, Gmail web mail, or in another CRM system, you may be able to export it as a vCard. If so, you can import the contact, rather than manually inputting all the data. This will save you time and reduce inputting errors.
First export the contact, here is an example using Google mail.
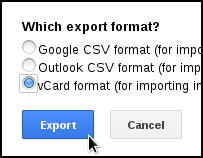
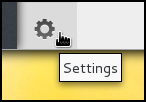
To upload your vCard click on the cog-shaped settings icon (bottom left).
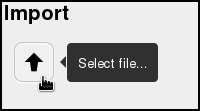
Then click the up-arrow to import.
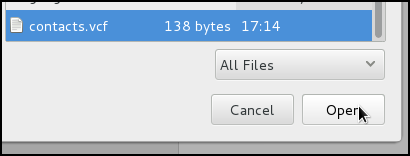
Locate the file on your computer (try in your downloads file) and click open (or similar, depending on your operating system).
Your contact will then be uploaded, and should appear in your contacts list. You can then add it to groups, and add additional information as normal.
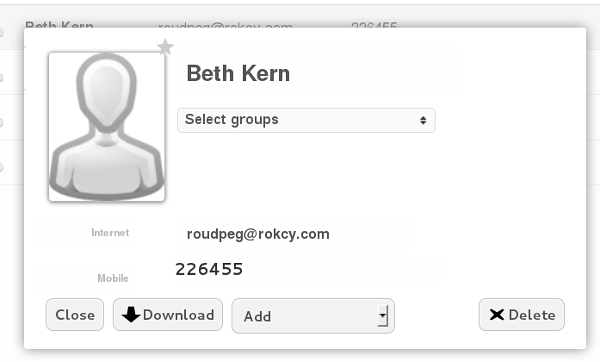
Sharing and exporting your contacts
By clicking on the cog-shaped setting menu, you reveal a series of buttons for sharing and exporting your contacts. If you click the share button,
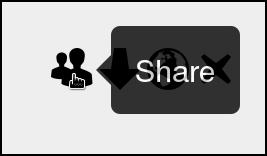
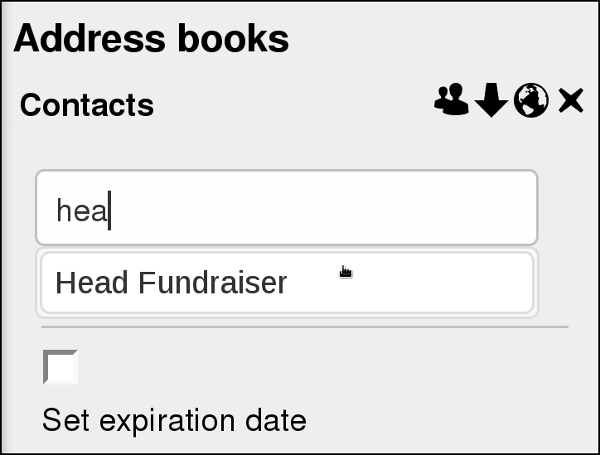
you can share ALL your contacts with another person on your team. Start typing their user name and you will be able to choose them from a list of suggested people by clicking on their name.
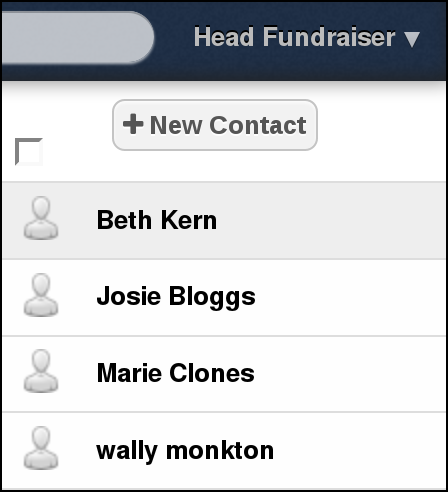
All of your contacts will then be displayed in a sub-folder of their contacts.
You can export/download ALL of your contacts together, by clicking on the second icon in the set.
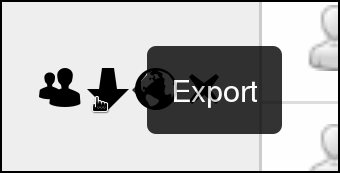
You can save your contacts as a .CSV or open them in an application, such as your email client.
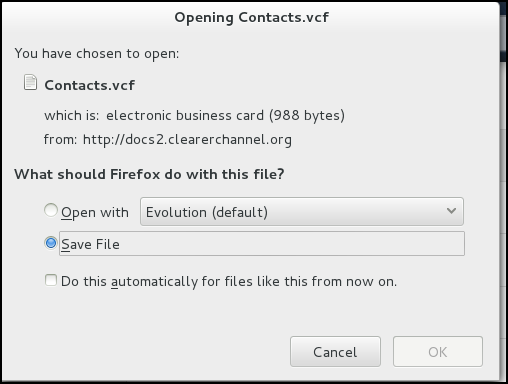
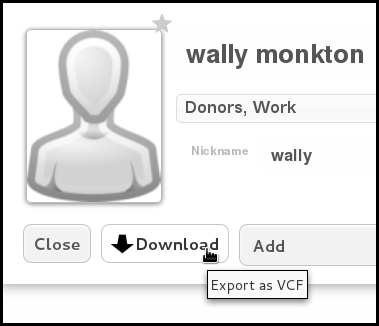
However, if you just want to download an individual contact, then there is an option for this within the contact information box. Click on the contact name, and click on the Download button.
The third icon in the set of sharing buttons, found in the setting menu, is CardDAV link. This is used by other applications to connect to your ownCloud contacts.
Limitations of contacts web interface
There several noticeable limitations to the way you can work with contacts currently in the web interface of ownCloud especially when it comes to sharing and organizing groups of contacts.
You may want to explore using the CardDAV connection method in a more advanced client like Thunderbird to use the more advanced functionality and link this to your ownCloud site. This is explained in another chapter of this guide.
System Admin in the Web Interface
The system administration tasks covered in this chapter can be found in the Admin menu. There is another section on administration in this guide which goes into more detail. For a deeper look at configuring ownCloud via the text based config files please refer to the ownCloud administrator documentation here and especially the section on configuration here.
Select Admin from your user menu on the top right of your page.

File handling and backups
The first item on this Admin page is File handling.
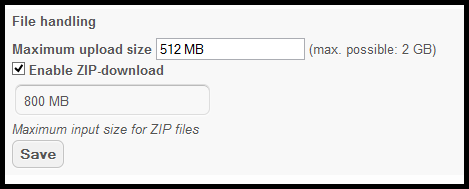
If you are going to share movies for example, you can change the Maximum upload size to 1 or 2 GB. But for file sharing documents and photos and music 100-200 MB may be a good setting. You can increase this limit later if needed.
The Enabled ZIP-download is activated because it is Needed for multi-file and folder downloads. Entering 0MB in this field means that users can download unlimited data.
The next item – Updater – allows you to update your ownCloud instance from the web interface.

Once you've clicked Update Center you see:
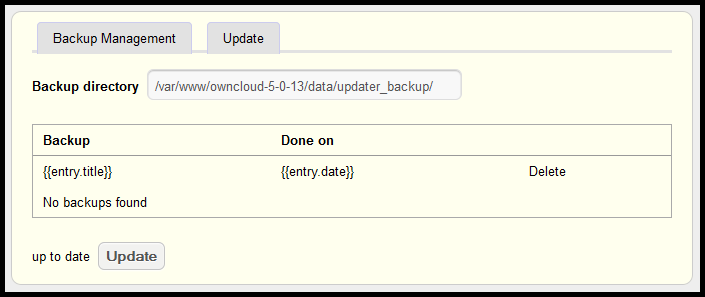
If you are up to date, clicking Backup Management, Update (top right) or Update (bottom) does not return anything. However, when there is a new version available this tool allows you to update automatically.
It is good to make a manual back up before trying this in case there are problems and you have to update manually following these instructions from the official ownCloud manual.
The next item – Export this ownCloud instance – is very useful. An administrator can use this to migrate or backup data.
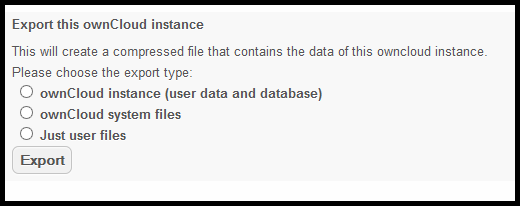
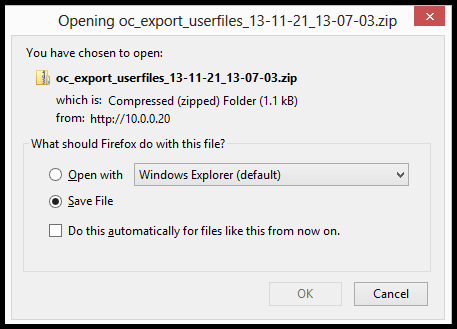
Each option needs to be exported separately. Activating one and clicking on Export will result in a pop-up asking what to do with the ZIP file.
Background jobs
A system like ownCloud sometimes requires tasks to be done on a regular basis without blocking the user interface. For that purpose you, as a system administrator, can define background jobs which make it possible to execute tasks without any need of user interaction, e.g. database clean-ups etc. For the sake of completeness it is additionally worth knowing that background jobs can also be defined by installed apps.
Three methods are given in the
Admin menu. While
AJAX is the default setting, using the system's
Cron service is a better way to run scripts.

There are no cron jobs activated by default. The file cron.php in the ownCloud directory does some basic housekeeping. It checks for locked files (perhaps after an unexpected shutdown) and cleans up the /tmp directory. It is good to activate this job. Using the AJAX method will trigger this cron job when a user logs in. But this may not be often enough so it is recommended to Use systems cron service and create a cron job on the server:

Here you see that user www-data (that runs the web server) will trigger the cron.php file every 15 minutes.
The command crontab -e is to edit the cron file and crontab -l is to list its content. For more information on background jobs and cron see this page.
Sharing, security and logs
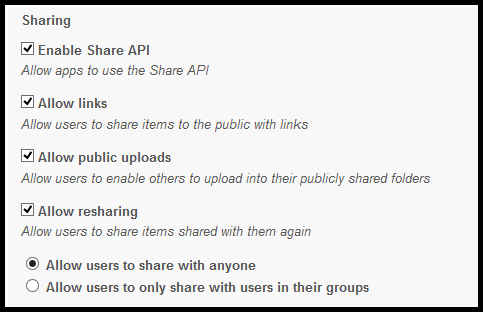
Next you see the Sharing item and all options are enabled. Some of these options may be too 'open' for your set up.
You could start by allowing apps to use the Share API and Allow links, and enable other functions if they are required by users.
The next item is Security.

Unless you are connected via HTTPS the option Enforce HTTPS will be grey and you won't be able to tick it. To enable HTTPS see the section on security elsewhere in this guide. It involves enabling a SSL certificates.
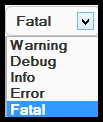
The final item, Log, concerns viewing the system log files. It is useful to be able to view them via a web interface. There are various levels to choose from.
At the very bottom of the
Admin menu page you can see what version your ownCloud installation is at, which is useful to know and easily check.
In conclusion, the web interface gives a good selection of items for a system administrator to view and tweak.
However, the best degree of control over the ownCloud installation is still from the command line interface, when logged into the server.
Editing your Details and Previewing Files
This section covers altering your user details, previewing photos, music and text based files.
Changing your password and other details
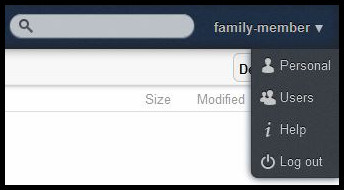
To change your own passwords you can do this in your Personal settings page.
Click on your user name and select the Personal option.
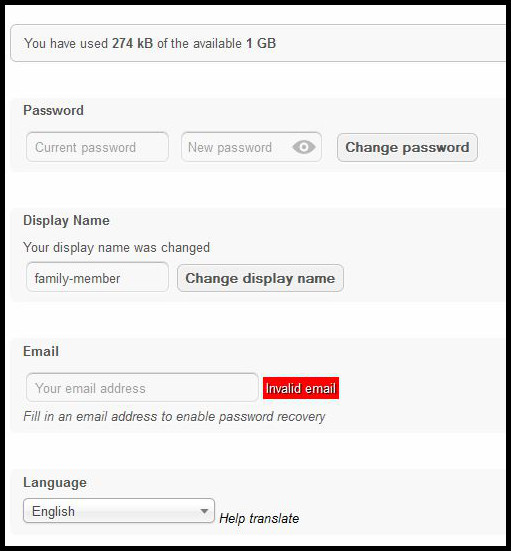
Here you can change also the Language of ownCloud's user interface, your display name and your password. You also see how much of your space allowance you have used. Users can ask the ownCloud administrator to change this setting if the limit is too low.
It is highly recommended that users enter valid email accounts as your email address is used by the system for sending password reset details.
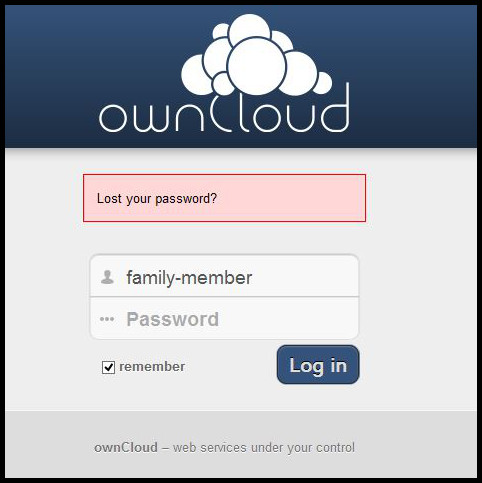
If you forget your password click on the red field Lost your password? and enter the email address that corresponds with the email address that you added to your ownCloud account, in the Personal menu.
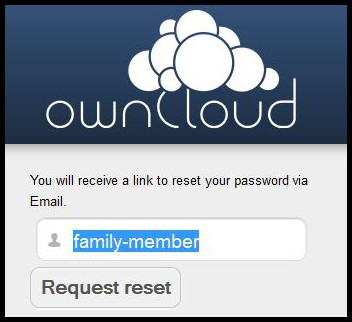
After clicking on Request reset you should receive an email with a link to reset your password.

If you don't receive an email perhaps the ownCloud server's mail settings have not been installed or are broken. Contact the administrator to take a look at the problem.
Previewing photos
There are two ways to preview photos in ownCloud, both are quick and simple.
Previewing images from within your files and folders.
This method is best suited to situations where you know roughly where your image is already. First, find the photo that you want to preview by by clicking the Files icon in your navigation bar and searching through your folders.
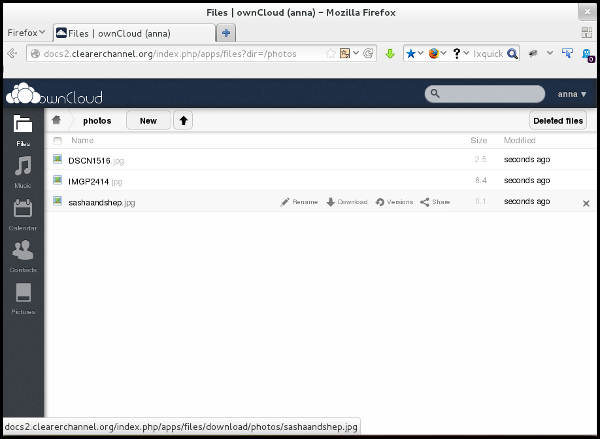
To preview an image from within this files viewer, simply click on the file name.
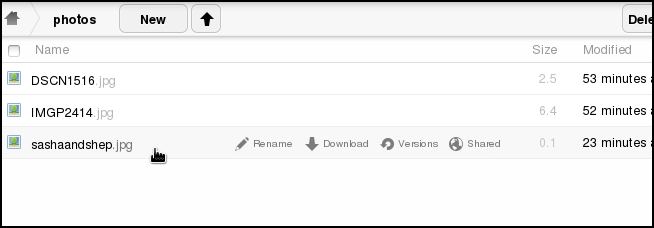
Your image will then appear in a pop-up window within the browser screen.

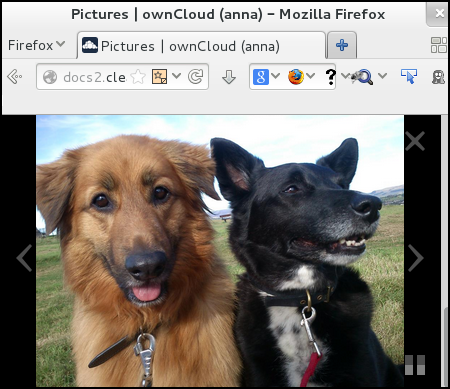
Previewing images from within your pictures area
This method is best suited to situations when you are unsure where the image stored, or when you do not have a specific image in mind and simply wish to browse all images.
First, click on the Pictures icon in your navigation bar and browse through the thumbnail images till you find an image which you would like to preview.
Then click on the image,
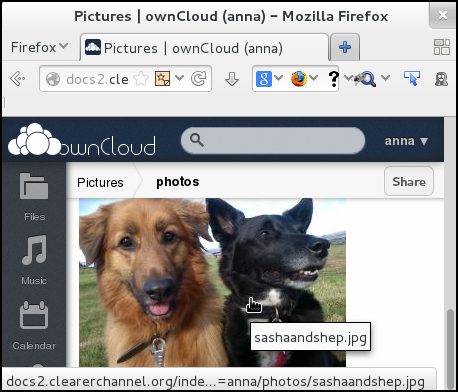
and view it in the image viewer, using the left and right arrows to navigate further.
Previewing music and audio files
Music and audio files can also be previewed using your web interface. First click on the Music icon in the navigation bar.

The web interface will then collect all the music files together into one place for you to preview. The first song may auto-play. To select a new song click on the file name.

You can use the play, pause, forward, backwards and volume controls just as you would in any music player.
Previewing other documents
You can preview various types of documents in your ownCloud web interface by clicking on the file.
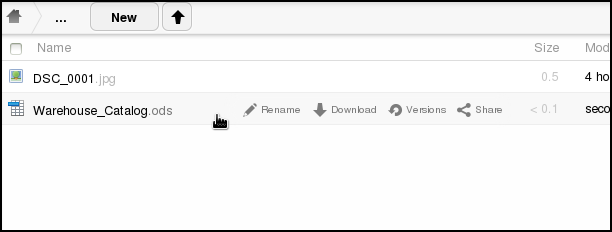
For example you can preview .odt word processing files,
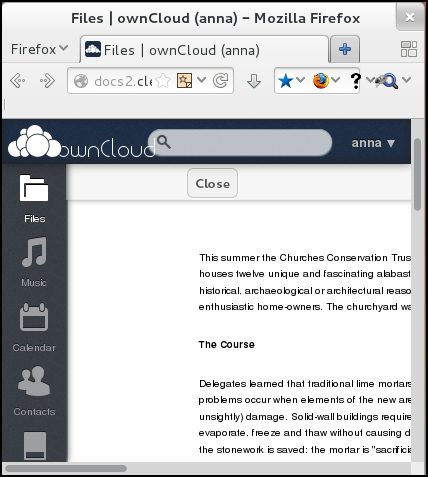
and .ods spreadsheet files,
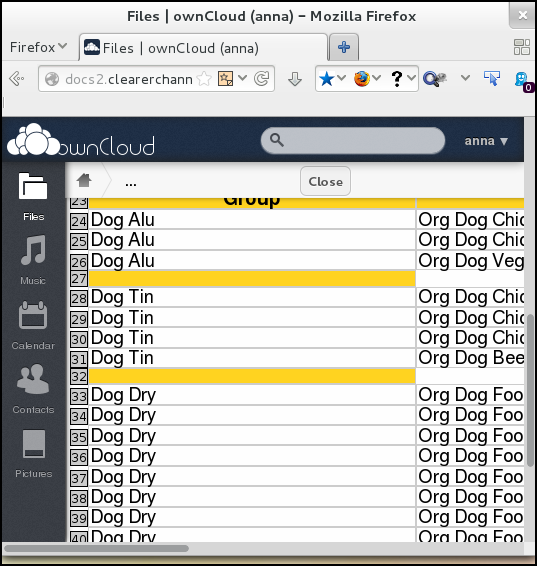
and plain text files.
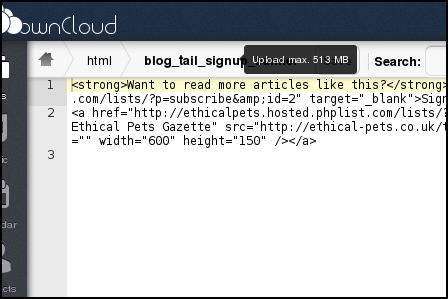
Plain text files including html or code files can also be edited from within the web interface.
Other preview and editing apps
There may be ownCloud apps that are available that allow you to preview or edit other kinds of files that you use.
There is a section on how apps work and how to install new ones elsewhere in this guide.
About ownCloud Apps
ownCloud apps provide you with optional features and enhancements. They are similar to Android apps or WordPress and Firefox plug-ins. Apps are divided into 'internal' apps, which are made by ownCloud themselves, and 'third party' apps which are made by other developers and companies.
A number of internal and external apps are made available during the ownCloud installation. One can enable or disable them in the Apps menu item. Other applications can be installed from the ownCloud apps store:
http://apps.owncloud.com/
How to view your apps
To view, enable, disable and install apps you can click on the Apps menu, which is in the drop-down menu that appears when you click on your user name (in the top right hand corner of the web interface).
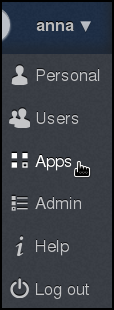
In the Apps menu there is a long list of apps: these give ownCloud much of its functionality. Those in bold and with a grey background are enabled by default, the rest are disabled.
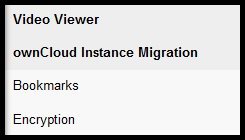
The active apps provide many features you will be familiar with already, for example document viewers, image viewers, contacts and calendars.
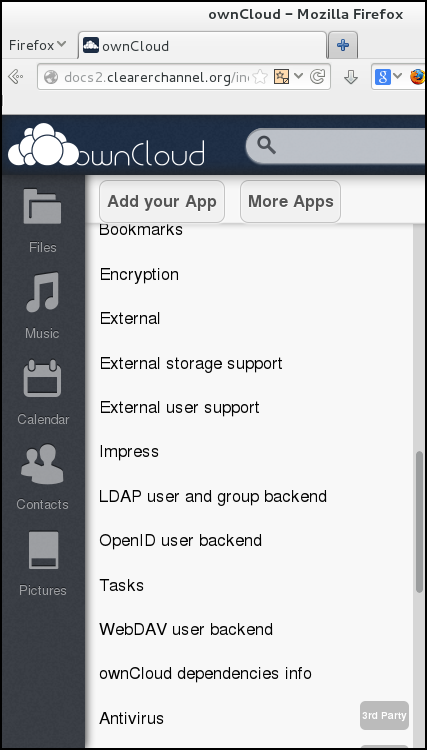
The other pre-installed third party apps, made by independent people or companies, can be enabled here. Their functionality can vary from necessary to frivolous. Keep in mind that there are no guarantees about the degree to which they are kept up to date and whether they will work in the next ownCloud core update.
How to activate an app
To activate a pre-installed app, locate the app in the list and click on the app name.
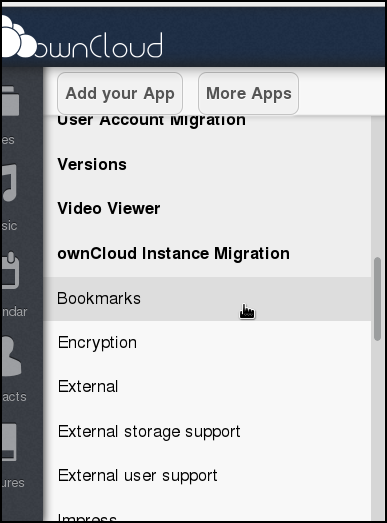
Then click Enable.
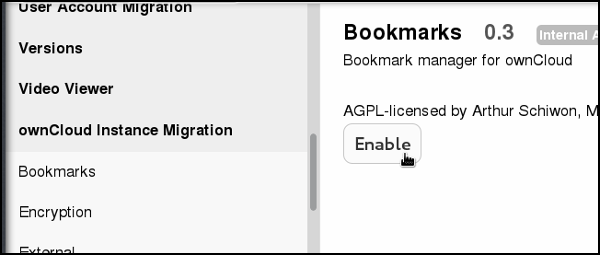
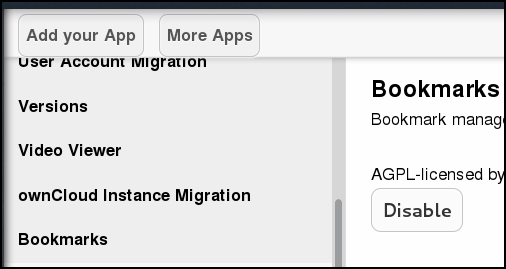
The app is now enabled.
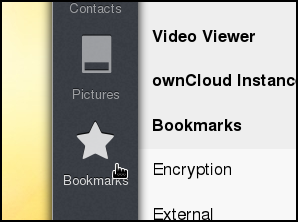
You will see that it has integrated with your ownCloud, in this instance you have a new icon in your navigation area.
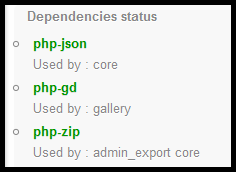
Another example is the ownCloud dependencies info app. This is something a server administrator normally wants to know.

Once enabled, you can find the information in the Admin menu.
How to deactivate an app
Good practice is to only enable what is needed. For example, if you don't use the ownCloud instance for PIM (personal information management) tasks, then you should disable the Calendar and Contacts apps.
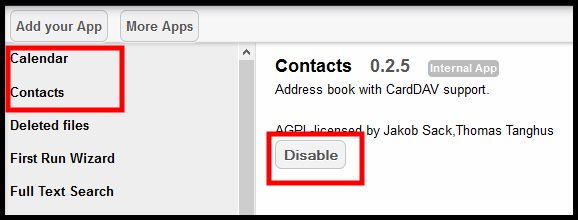
Once disabled the icon disappears from the left hand column and the apps are no longer highlighted. You can always enable them again at a later stage.
The more apps button
In the apps window there is a button labelled More Apps.
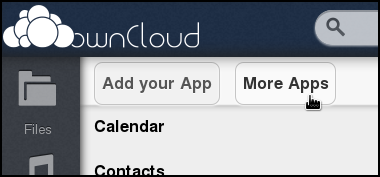
Clicking on Add your App opens a new tab in the browser for page http://owncloud.org/developer/, the ownCloud Developer Center, and clicking on More Apps opens a new tab for http://apps.owncloud.com/, the app market of ownCloud.
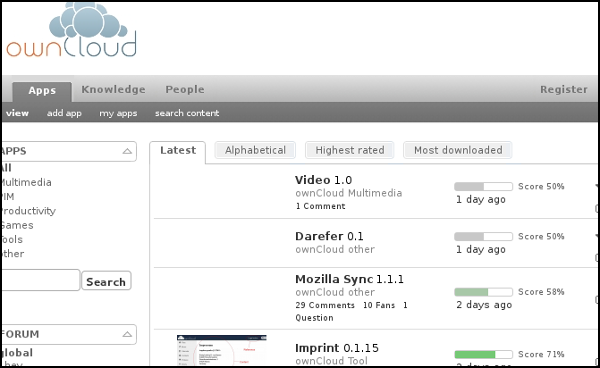
Be mindful of the fact that adding apps can cause issues on a server. Third party apps are not verified by the ownCloud community or by employed developers. Read reviews and comments about an app before installing it, and have a backup system in place. If you run into problems you can restore the ownCloud instance to a point in time when it was stable.
To install an app proceed with the following steps:
- Download the app code from http://apps.owncloud.com/. It is provided as a zip file
- Unzip this file and upload the resulting folder into the /apps folder of your ownCloud installation
- Make sure this folder and all files in the /apps directory are owned by www-data
- The app should appear in your list of apps, enable it in the normal way
Good news! A new, simple app installer is being designed at the moment.
File Uploading and Sharing
Depending on the operating system and browser you're using, the log will look something the image below:
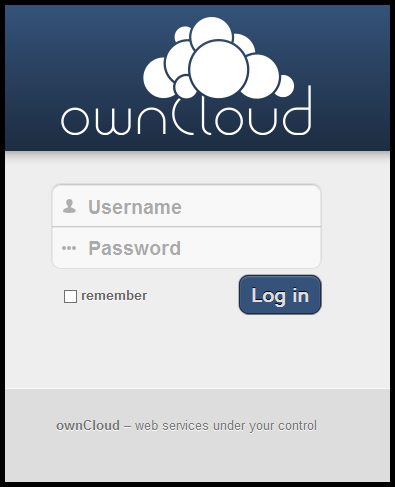
One needs a name and password to use ownCloud. Once you're logged into your account you see the following:
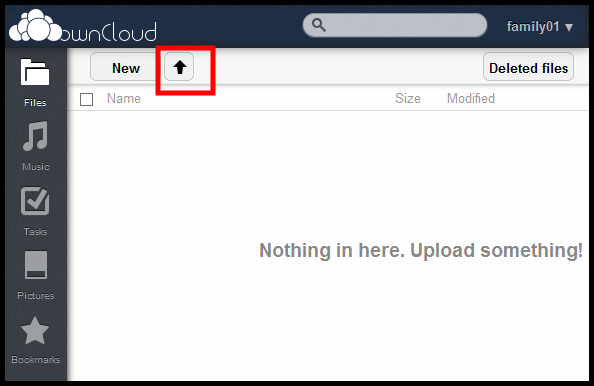
To upload a file click on the arrow. Hovering over it you will see how large the upload may be. The default value is: Upload max. 512MB.
Once you've uploaded an image and a sound file (music or podcast) you will see them listed in the Music and Pictures menus in the navigation bar on the left. Click the icons to access the media player and image viewing functions of ownCloud.
Creating new files and folders
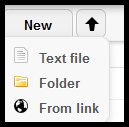
Clicking on the New button will result in a menu with three options: create a new Text file, a new Folder or to create a new file From link.
Creating folders
The most common use will be creating Folders to help you to organize the files in your ownCloud.
You can create as many folders as you like. Inside the folder you can once again upload and create new files. One reason to create folders is that they allow you to manage access to the data within those folders for different users or groups. For example, the homework folder you only want to share with fellow students, and not with friends and colleagues.
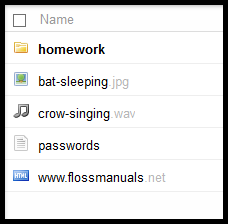
Creating text files
You can create a simple text file. This can be edited fom right inside the browser - to start editing click on the file name.

Unlike Google docs or blogging software, there is no WYSIWIG (for formatting) in ownCloud so creating a text file is simply a matter of giving it a name, opening it and entering text. There is also the option to Search the text.
When you're finished click Save (or Close if you don't want to save the changes).
Importing files from links
The import From link can be used to import a file from the web URL into your files section. Click on From link text then type/paste the URL of the file you want to import into the box and press Enter.
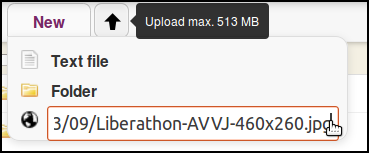
The file will be downloaded into your current folder.
Managing files
Renaming, downloading and versions of files
You may want to change a file's settings, for example to Rename, Download, revert to older Versions, Share or delete the file (marked by the X). If you hover over the file with the cursor you will see the options to achieve these things.

Most of the options are self explanatory, after clicking one of the above options either the action will proceed right away, or a pop-up or a field appears. There is more information on Versions elsewhere in the guide.
Sharing files and folders
To share a file or folder with other people click on the Share icon.

At first one only sees the Share with field and an option Share with link.
Sharing with users or groups
To share with another user or group on you ownCloud enter the name of the user or group in the Share with box. You can find a list of groups in the Personal menu item under your name in the top right hand corner.
In the example below, the folder is being shared with other family members.
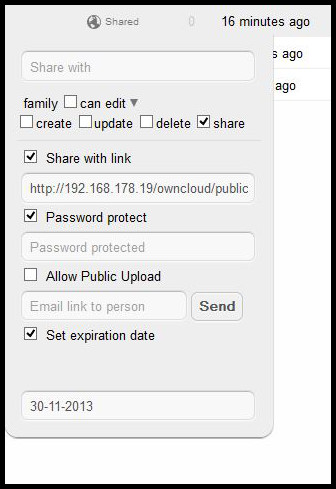
One can choose to give the group different access levels. These include the ability to edit, update, create and delete files.
If you don't want to run the risk of someone in the group accidentally deleting or wrongly editing files you leave only the share setting activated.
Sharing with a link
It is also possible to share a file or folder with a link. This is a very useful option for sharing with people quickly, especially if you don't want to give them an account on your ownCloud, or if you want to share one file with several people (even a mailing list). Once you've activated it copy the link and paste it into an email to the person/people you want to share with.
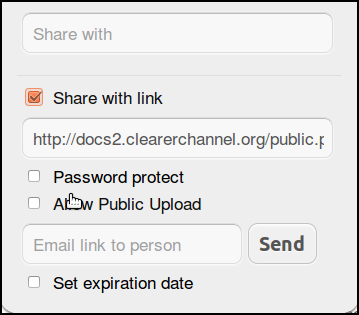
When the recipient clicks on the link in the email they will instantly be redirected to either the file or list of files in the folder you have shared on your ownCloud website.
There is also the ability to
- Password protect the link you are sharing
- Enter the email of the person you want to send a link to
- Allow people to upload into the folder you are sharing
We can see and example of a shared folder containing some images below. You will notice the ability to Upload. This is a simple way of sharing files with and receiving them in return via the web and very suitable for group working.
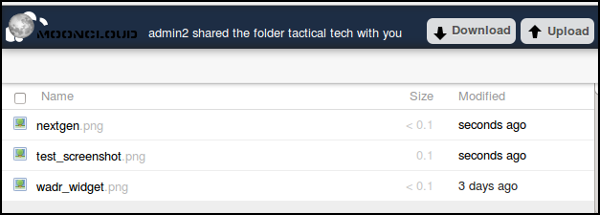
It is good practice to set an expiration date for shared files of folders. Your shared files are normally publicly available on the Web. If there was no expiration date there is a chance that a piece of software trawling the internet for data will find the link eventually and download or index your files. This might make them turn up in search engines and be shared in this way and this is not really what ownCloud is designed for.
Deleting and downloading multiple files
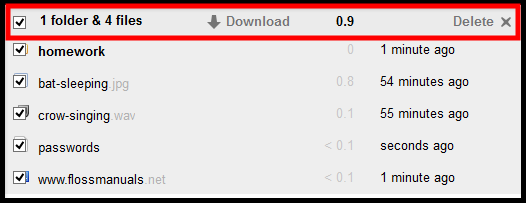
To select more than one file or folder to delete or download click on the check-boxes to the left of name of the file or folder.
You will now see the option to either download or delete all in one go:
Searching
ownCloud has a new full text search engine where you can find files files by name and content. If you want to search for something, type into the search box, located at the top right of your screen.
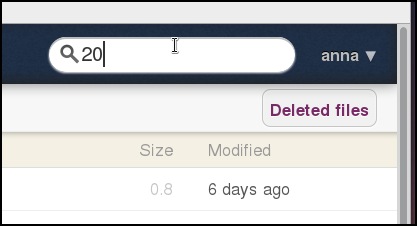
Hit return to search. You can see in the example below, files are suggested and scored on their relevance to your search term.
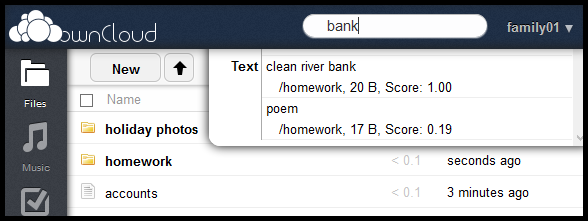
There seem to be some bugs in ownCloud 5 with the search, which are set to be fixed in oc6. One particular issue seems to be searching in shared folders, and also a delay in how long items take to turn up in searches. https://github.com/owncloud/core/issues/744
ownCloud and Security
We don't discuss general security aspects of system administration here. We only detail that which is specific to ownCloud. We can recommend doing some reading around this subject specifically for the following areas:
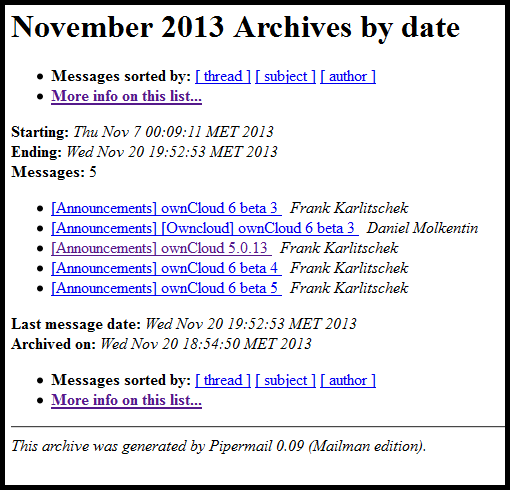
A quick recommendation to ownCloud administrators is to subscribe to the Announcements mailing list: http://mailman.owncloud.org/mailman/listinfo/announcements
This will keep an admin up to date with new, stable releases. It is good practice to keep one's server up to date. And to get an impression when the next major release is due.
In this chapter we cover two aspects where ownCloud offers system administrators a way of increasing the level of security of their installed instance. One, the Encryption app, is found under the Apps menu and the other, the Enforce HTTPS setting, in the Admin menu.
Encryption
Why would you use the Encryption app? The cheapest and easiest and most common way to have your own server these days is to hire a VPS (virtual private server), from a hosting provider. The system administrators of the hosting provider have access to all the data on all the VPSs. To obfuscate your data from these sysadmins you can choose to use ownCloud's built in encryption app.
In the Apps menu find the Encryption app and enable it:
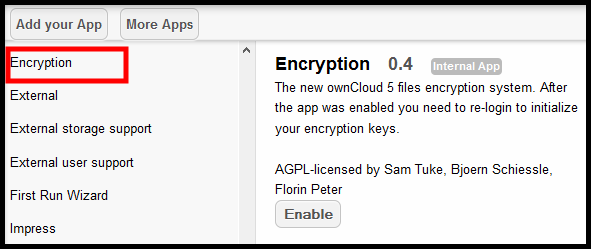
Log out and log in again. You will not notice a change. Looking in the /var/www/owncloud/data/ directory on the server you will see two new files:

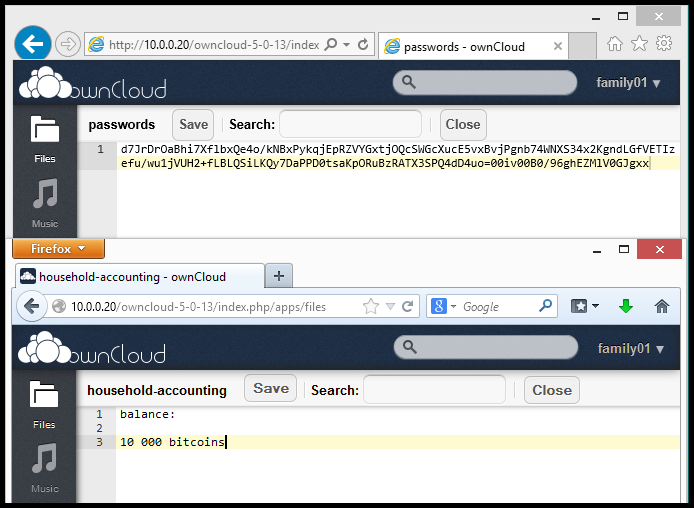
Before encryption a sysadmin can view your files with the commands less or cat. After encryption, this is what a sysadmin sees in your secret file:

Limitations of encryption app
This app has had issues in the past involving data loss and corruption after upgrades. It is not well tested or mature yet. We encourage people to try it but not to rely on it. We feel it is worthwhile to evaluate different encryption methods and to get into the habit of using it. Be aware that you may lose data. Keep an offline backup of your data. Encryption is an incredibly complex but important topic. ownCloud may offer an easy way for us to start encrypting our online data by default.
There is no way to decrypt your files directly on the server if you decide to stop using the Encryption app. The only way to get a complete copy of your unencrypted data is to download/sync all files as long as the Encryption app is enabled. After the Encryption app is disabled you can upload your unencrypted data again. It is already planned to add a option to switch from encrypted to unencrypted files directly on the server. For more info see this page.
Below one can see a screenshot where we can't read the contents of a file because it was made when the Encryption app was enabled and we are viewing after it has been disabled.
Enforce HTTPS
The Hypertext Transfer Protocol (HTTP) is the networking protocol used by browsers that allows communication between you and a site you are visiting. Because communication is transmitted in plain text it is unsafe, especially when using wireless networks. It is like transmitting a message with personal information on a postcard. Data, such as user names and passwords, sent to and received by websites, is easily read by third parties.
To solve this problem the Hypertext Transfer Protocol Secure (HTTPS) was invented to provide encrypted communication and secure identification of a network web server. Most major websites, including Google, Wikipedia, and popular social networking platforms such as Facebook and Twitter can also be reached via a secure connection, but not necessarily by default. Note that most sites do not provide encryption.
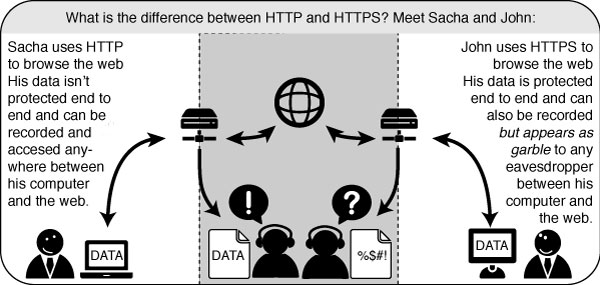
Using SSL (secure socket layer) for your ownCloud website makes it almost impossible to view your traffic. Everything that is done on a website, for example logging in, opening new pages, uploading and downloading files, will be encrypted with the help of certificates. The URL of your site will need to be opened with https:// as opposed to simply using http://
There are three parts to getting your website to use https: install the software, generate key and certificate, and configure the web server.
Installation
On your Debian 7 (codename Wheezy) Linux server run:
apt-get install openssl
Generate key and certificate
As root user log into your server and execute the following string of commands:
openssl req -x509 -nodes -days 365 -newkey rsa:2048 -keyout myowncloud.key -out myowncloud.crt
- The req command creates and processes certificate requests
- The -x509 option outputs a self-signed certificate instead of a certificate request
- Nodes stands for 'no DES'. When -nodes is given as an argument, OpenSSL will not encrypt the private key
- The -days option is needed when using x509, i.e. generating a self-signed certificate. The default is 30 days
- The -newkey option creates a new certificate request and a new private key. If one types -new instead of -newkey, only a new certificate request will be generated
- If the -keyout option is not specified then the newly created private key file name will be taken from the one present in the configuration file
- The -out option specifies the certificate file name
You now have two new files on your server, a certificate and a private key.

Configure web server
As root user log into your server and execute the following:
a2enmod ssl
Create a new VirtualHost, for example naming it ocvh and add the following lines:
<VirtualHost *:443>
      ServerName 192.168.178.20
      SSLEngine
      SSLCertificateFile /etc/ssl/filename.crt
      SSLCertificateKeyFile /etc/ssl/filename.key
      DocumentRoot /var/www/owncloud
</VirtualHost>
Your ServerName, DocumentRoot and file names will differ.
Activate the VirtualHost by running:
a3ensite ocvh
Restart the web server:
service apache2 restart
Open your ownCloud instance with a browser. Remember to use HTTPS. Since we are using a self-signed certificate you will see an 'untrusted connection' page.
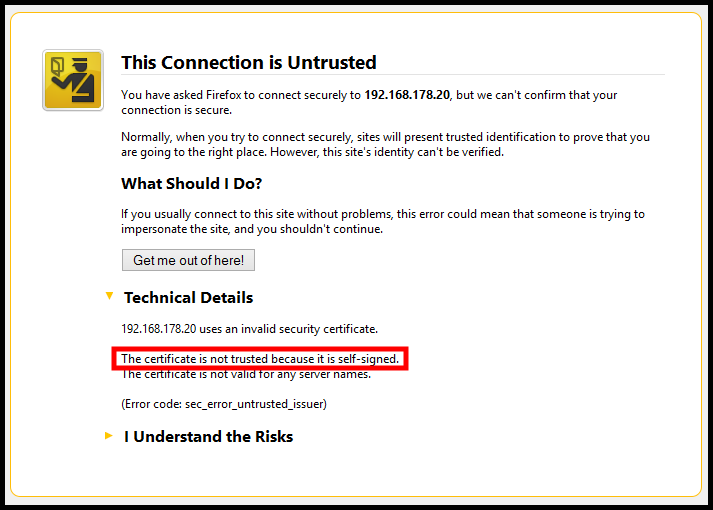
Be aware that every browser handles self-signed certificates in a slightly different way.
To continue click on I Understand the Risks and Add exception... A pop-up will open. Click on Confirm security exception and you should see the log in page of ownCloud.
Additional documentation
If you get stuck there is additional documentation for these steps here.
http://ubuntuserverguide.com/2013/04/how-to-setup-owncloud-server-5-with-ssl-connection.html
ownCloud Android Client
This chapter focuses on the Android Client available for ownCloud. There is also an app available for iPhones and iPads which works in a similar way.
Key features of the Android app include:
- Browsing your files and folders
- Downloading and viewing files
- Uploading videos and pictures from your phone to the server
- Ability to set a security password
Installing your mobile app
You can install the ownCloud client from the Google Play store or through the F-Droid store. There is a charge to download the app from the Google Play store but F-Droid do not charge you for apps.
There are other advantages to using F-Droid instead of Google Play:
- F-Droid respects your privacy. They don’t track you, or your device
- Apps in the F-Droid store are all free and open source software
- All apps are advert free (unless you enable adverts) and cannot track you (unless you enable tracking)
There are instructions for how to install from F-Droid at the end of this section.
Using the ownCloud Android client app
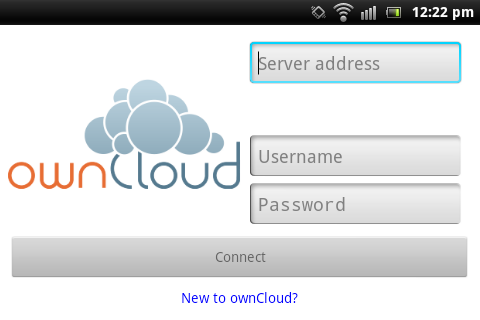
First add your Server Address – this is the web address of your ownCloud instance.
The app will try to make a connection – if it is successful it will say Secure Connection Available or Secure Connection Unavailable.
If the app fails to make the connection it will tell you so in red text: in this instance check the URL and try again.
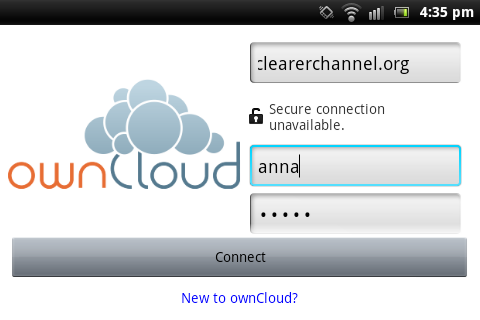
Next, put in your Username and Password, the same ones you use to access your ownCloud normally, and click Connect.
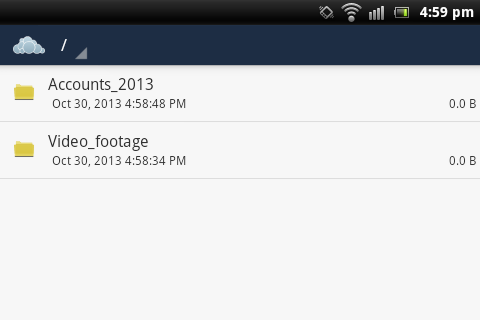
You are now logged on and can access your Cloud. What you see on your phone is synchronized with what is on your Cloud. From the menu you can access a wide range of features, including Refresh (which re-synchronizes) to create directory and upload.

Securing your client
In the Menu > Settings you can set up a pin to protect your ownCloud. This means that if some one steals your phone, or finds it unlocked, there is an additional password to protect your data. To add this password:
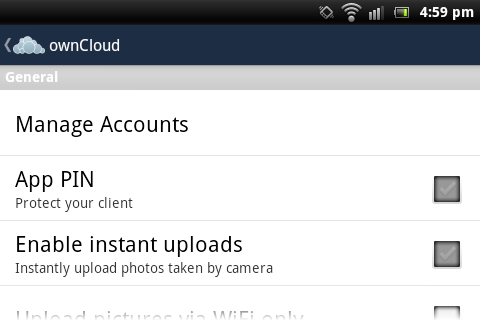
Click App PIN,
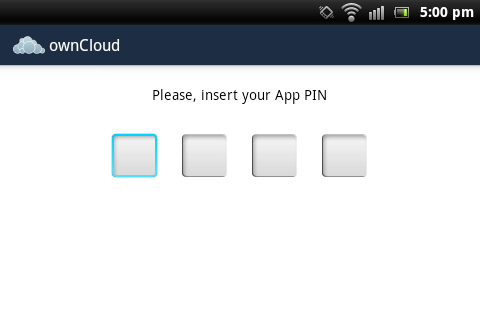
and enter, then confirm your pin. From this point you will need to enter this pin each time you open your client.
Installing the ownCloud Android client in F-Droid
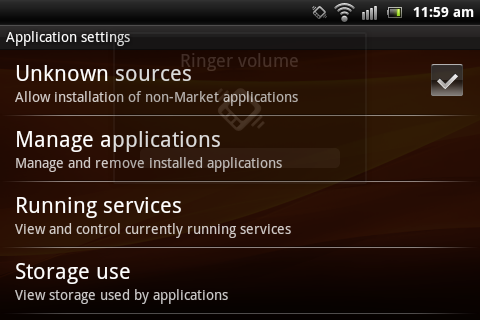
To install the ownCloud client through F-Droid make sure you have 3rd party applications install enabled in your Settings> Applications menu.
Then scan the QR code below,

and choose Open Browser.
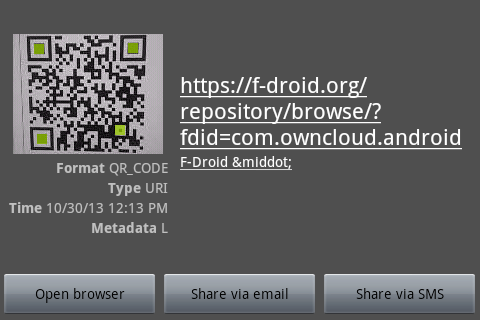
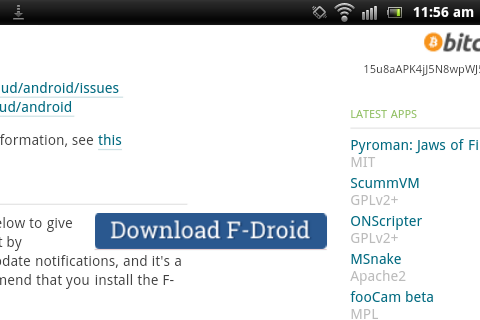
Click the large button which says Download F-Droid.
Once the download has finished, click Install.
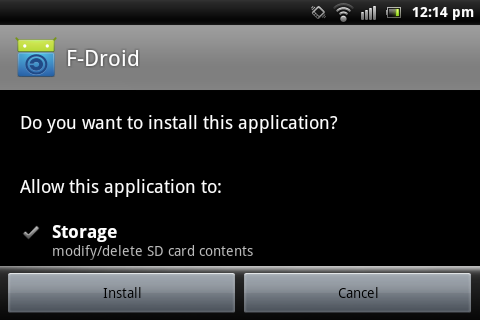
Click Open:
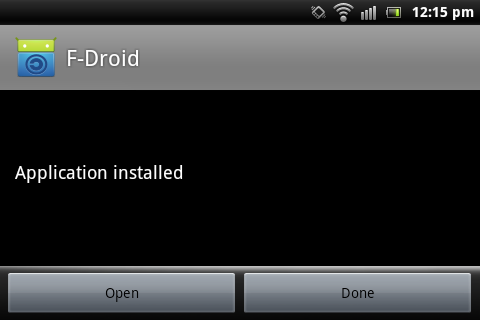
You are now in the F-Droid store.
Next you can can download the ownCloud client app. Click your menu, and then chose Search.
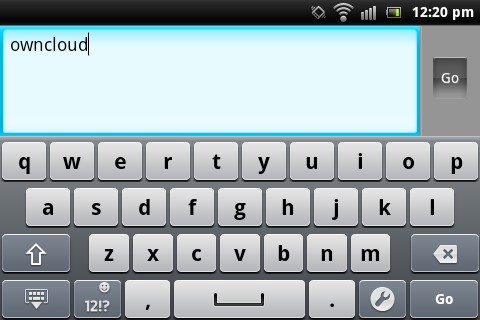
Type in ownCloud and click Go.
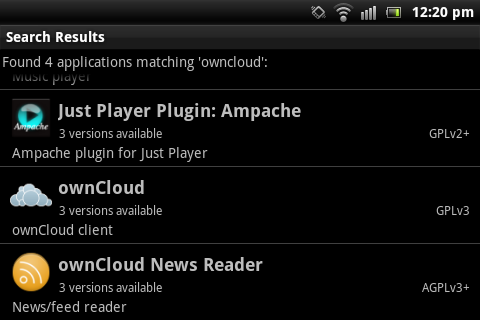
Choose the ownCloud client from the list of applications.
Select the starred version (which is the best version for your phone),
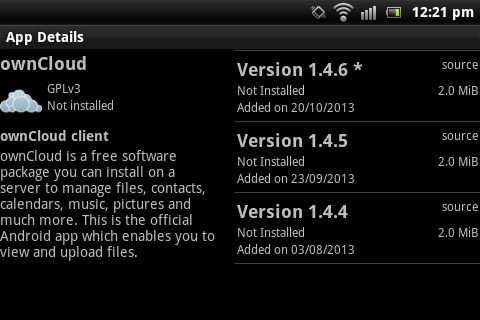
and click Install and then Open.
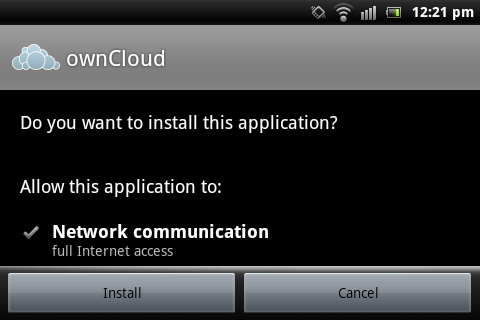
You are now running the ownCloud client app for Android.
Syncing Files in ownCloud
At the core of services like ownCloud and DropBox is the ability to store, share and synchronize files between different computers, mobile devices and the web.
We have covered sharing and file versioning in other parts of the guide but it would be a good idea to explore what syncing files really involves and how ownCloud approaches it.
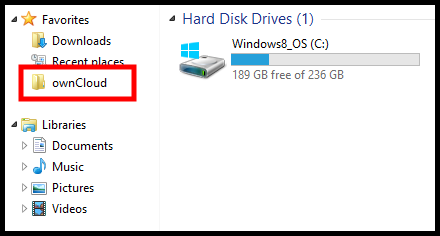
A real benefit of syncing is that the web service seamlessly integrates into each device. For example on a desktop you can use your ownCloud instance without opening a browser. The folder is then integrated into the local file system.
What is syncing?
 Syncing or sychronizing is the process of making sure that different repositories of information contain the same data.
There are different ways of syncing your data. For calendar and contact information the process is different than the process for files. Please see other chapters dealing with contact and calendar syncing.
The ownCloud system operates by having the web server act as the main repository for data. When a computer or device (client) connects with the server it updates its own list of the data that remains the same and the data that has changed.
This is more efficient than downloading all the files every time you log into ownCloud. The client only gets and sends the files that have been changed. This speeds up the process of scanning through a lot of files and analyzing which files need to be updated and in which direction.
Tech Note: If you are interested in the technology behind the syncing in ownCloud there is more information here. In short, the library 'csync' is used in combination with WebDAV technology.
Tools to sync your files in ownCloud
For the syncing of files there two main options
- WebDAV folder sharing using the default File Manager / Finder application
- Clients – applications which connect to the ownCloud server to allow synching
WebDAV is a well established protocol for sharing files via the internet. It can be set up in a simple way to act like a network drive on your computer or device.
However, although it may be simple theoretically, in practice you may run into complications and limitations. Try setting up WebDAV to connect and sync to your ownCloud server using the instructions on this page.
If this easy way of syncing doesn't work in the way you want or if you need more functionality, you can try using a sync 'client'.
There are several clients which can be used with ownCloud but this guide will focus on the use of the ownCloud client. This is covered in another chapter of this guide.
Synchronization of files via WebDav
Setting up WebDAV in Nautilus (GNOME)
Nautilus is a popular file manager for Linux based operating systems. If you are using a major distribution of Linux is it likely to be your default file manager.
Connecting to an ownCloud server from your file manager has several advantages. It is quick, easy and will probably fit into your normal way of working with files.
To star the process, start Nautilus and Select File > Connect to server.
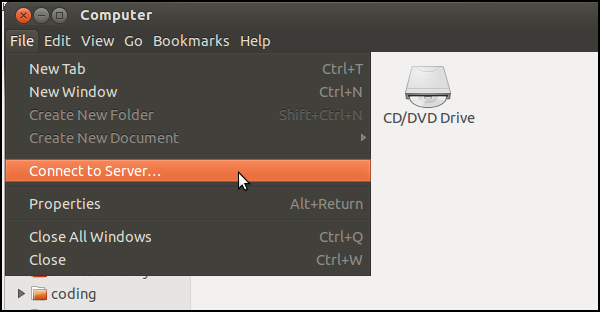
You will normally choose WebDAV (HTTP).
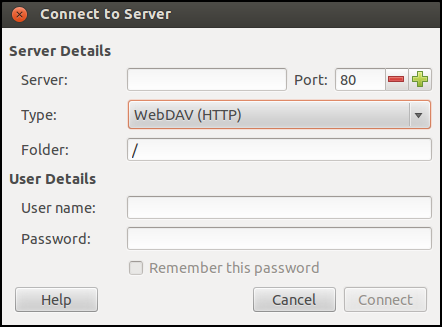
You can also choose Secure WebDAV if your server has that option (via using SSL / https).

The URL that you have to enter into the Server: box is the same as the URL you use to log in via the web, but with /remote.php/webdav added to the end.
For example: youraddress.com/owncloud/remote.php/webdav
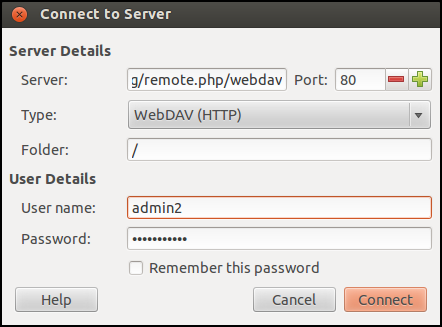
You should now see your ownCloud server as a connection in the sidebar of your file browser.
This may appear in a different way depending on your settings in Nautilus.
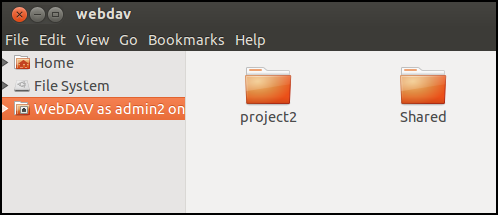
Any new folders you create or files that you add to this directory will be transferred to your ownCloud server.
Setting up WebDAV in Mac OSX
In the Finder choose Go > Connect to Server, type the address of the server in the Server Address field and click Connect.
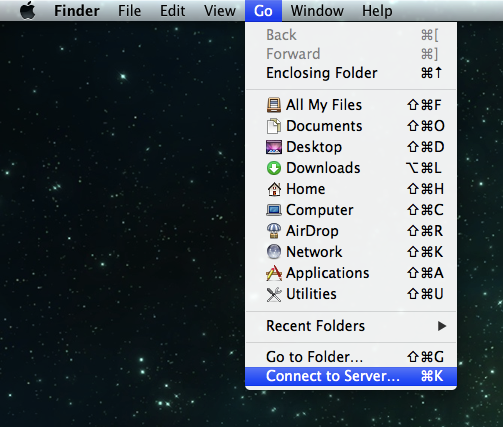
The URL that you have to use to connect to the ownCloud installation in Finder is:
http://youraddress.com/owncloud/remote.php/webdav
Note: Finder in Mac should only be used if the ownCloud server runs on Apache with mod_php enabled. If not, please use the ownCloud client.
Setting up WebDAV in Windows
Using Windows Explorer right-click on Computer and select Map network drive.
Choose a local network drive to which you wish to map ownCloud. Finally, enter the address to your ownCloud instance, followed by /remote.php/webdav, e.g.
https://youraddress.com/owncloud/remote.php/webdav
For an SSL protected server. Check Reconnect at logon to make this mapping permanent each time you restart your computer. If you wish to connect as another user, check Connect using different credentials.
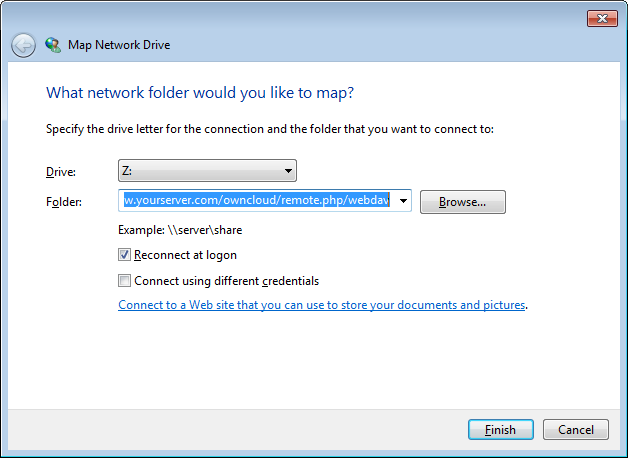
After pressing Finish, Windows Explorer will map the network drive and your ownCloud instance should be available.
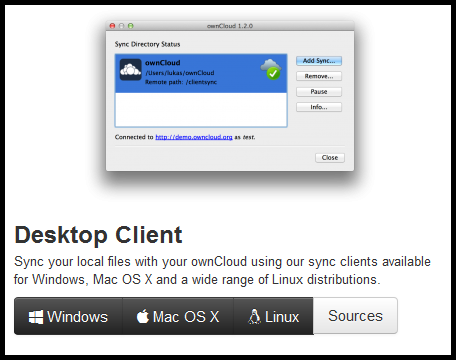
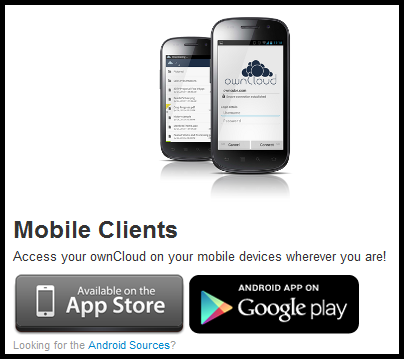
To summarize, there are two ways of syncing local devices with the remote ownCloud server. Either you use the system's file manager and connect to the the WebDAV URL or you download and install the ownCloud client. There are clients for both desktop computers and mobile devices.
Installing ownCloud Server
At the time of writing this manual, version 5.0.13 is the stable version of ownCloud server.
ownCloud can be installed on either Linux or Windows servers. Due to an issue with Mac OS Unicode support, installing ownCloud Server 5.0 on Mac OS is currently not supported.

There are many ways to install ownCloud. This guide covers two ways, via the web installer and by uploading the latest code via a tar/zip file to your webspace.
What you need to install ownCloud
It is beyond the scope of this document to fully describe the setup of the hosting part of running a server. If you are new to the process we would recommend a LAMP set up which involves (Linux, Apache, MySql and PHP).
Most hosting plans can provide an already working LAMP set up. If you a running your own server with root access there is good help online for 'setting up a LAMP server'.
Here are the prerequisites for installing ownCloud. You will need:
- webspace as part of a hosting package or VPS (virtual private server)
- php5 (>= 5.3) php5-gd & php-xml-parser
- file server (probably Apache if you are unsure but Nginx or Lighttpd are also good options)
- a way of accessing your files on the server and changing their 'owner' and 'permissions' (ftp, ssh and cpanel are the most normal ways)
There are other optional requirements that allow for additional functionalities. These include:
- MySql
- php5-intl php5-sqlite (>= 3) php5-mysq php5-pgsql (or php-pgsql depending on your distro)
You can choose to use an external database like MySql or the more simple file based system SqLite.
By default ownCloud installs with SQLite are not recommended for large ownCloud installations. The most popular database on Linux is MySQL but MariaDB or PostgreSQL are also good options.
There is fuller detail about this aspect and details of how to install these prerequisites, if they are already active on your server, at this page of the official ownCloud documentation.
Installing on Debian / Ubuntu
As an example here are some commands to install some needed components for Ubuntu and Debian using a LAMP (Apache) setup. Run these commands on the command line as root:
apt-get install apache2 php5 php5-gd php-xml-parser php5-intl
apt-get install php5-sqlite php5-mysql php5-pgsql smbclient curl libcurl3 php5-curl
If using Apache, you need to have the rewrite and headers modules enabled so run:
a2enmod rewrite
a2enmod headers
And restart your server for these settings to take effect:
service apache2 restart
Enabling .htaccess and Apache modules
You need to allow the .htaccess file of ownCloud space to be active. If you are a beginner to web administration you may need help with this aspect.
The most direct way is to changing None to All in the <Directory /var/www/> section of the VirtualHost file which is normally located here: etc/apache2/sites-enables/000-default
So an example could be:
         <Directory /var/www/>
                Options Indexes FollowSymLinks MultiViews
                AllowOverride None
                Order allow,deny
                allow from all
        </Directory>
This process can be done in different ways to make your server more secure. You may need to do some research or get support to find the most secure way for you to achieve this for your particular server.
We are also aware that it is possible to install your ownCloud directory in different folders on your server depending on how it is set up. In this guide we will presume that /var/www/ is the root folder for your web server and we are going to install ownCloud inside there. If this is not appropriate we use /path/to/owncloud/. If you see this you should replace it with the correct path to where you are installing ownCloud on your server.
Installing with Web Installer
This section covers how to install ownCloud with the web installer and using an external database MySql.
Point your browser at www.owncloud.org and find the link to the Install page:

The list of three options link to instructions on installing ownCloud manually (downloading the Tar or Zip File), the Web Installer and installing ownCloud using distribution specific packages.

Clicking the Web Installer link results in a pop-up window with instructions.
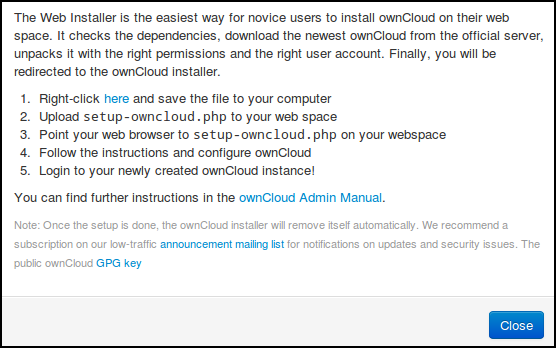
Before following these instructions, the web directory should be owned by the web server. This user must have read, write and execute permissions on the directory, plus read and write permissions on all the files in the directory. Finally, all future files created in this directory must have the same permissions:
chown -R www-data:www-data /var/www/
chmod 775 /var/www/
chmod 664 /var/www/*
chmod g+s /var/www/
Go to the web directory and download the script that ownCloud calls the Web Installer:
cd /var/www
curl -O -L https://download.owncloud.com/download/community/setup-owncloud.php
In a browser point it to your web server where you have installed ownCloud to run the setup script:

If all goes well you should see a page welcoming you to the setup wizard; click Next. The dependency check is run and one is served the following page:
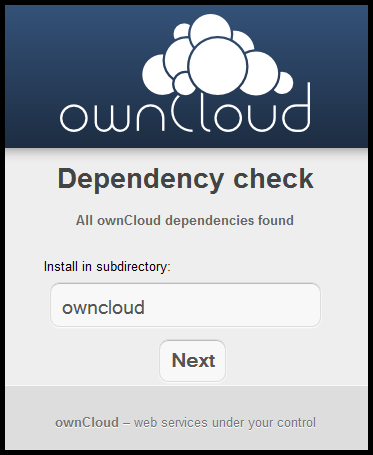
One can change the owncloud subdirectory to anything you like, for example mydocs. Click Next and wait about half a minute while the script creates the necessary files. You should see Success and press Next.
The final step is to create an database and a user:
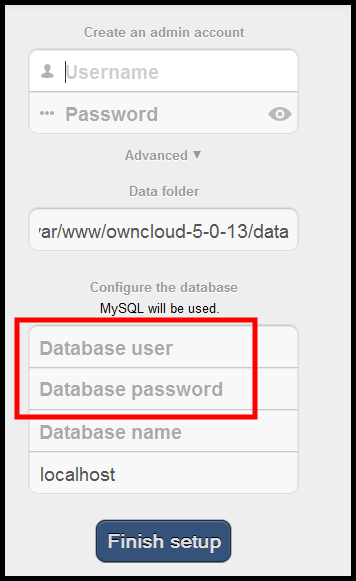
Make sure you have the details at hand for a Database user and Database password and Database name. You may need to create your database in phpmyadmin, cPanel or via the mySql command line. If this is not possible you may need to ask your hosting company or server admin to help you.
The Username for the admin account can be anything you wish to make it.
On completion of the ownCloud Web Installer you will automatically logged into your new ownCloud server setup. Congratulations! Happy saving, syncing and sharing of your own data.
Installing by downloading Tar/Zip file
This section covers how to install ownCloud by downloading the code to your website. We will use the simple method of using the default SqLite system and FTP to upload our files.
Point your browser to the install page of ownCloud at http://owncloud.org/install/
Click on the Tar or Zip File link.

Choose either the tar download for Linux or the zip download for Windows (or Mac).
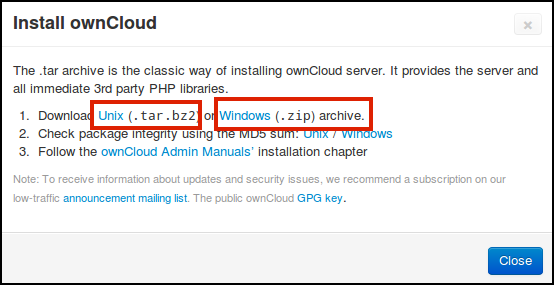
Save the downloaded file to your computer and double click on it to uncompress it.
The next stage involves uploading this unzipped code to your web space. You can do this in different ways either via a (s)ftp client, a cPanel File Manager or other command line tools.
In this example we will use FileZilla, a (s)FTP client.
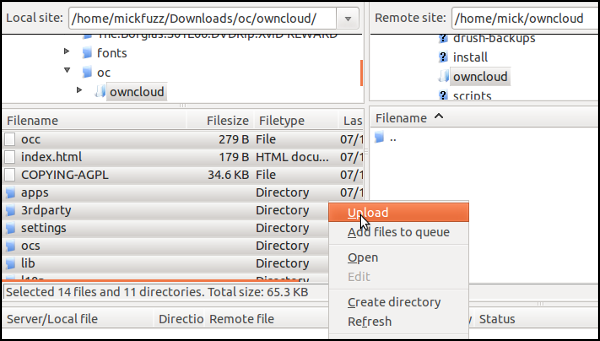
Connect to the server with your server login details and copy all the unzipped files to the directory on your server you are going to use as the home for your ownCloud directory.
When we point our browser to the URL that we have linked to this web directory we will see an error that we need to fix. Cannot create data directory (/path/to/owncloud/)
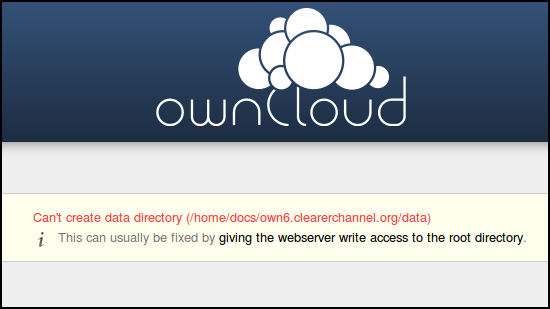
This message is asking us to change the ownership setting of some of the folders on the install. Specifically for this Linux server to be owned by the web server user www-data.
Unfortunately there isn't a way of doing this in FTP or even most SFTP clients. But we have a few options.
For Cpanel users to change permissions this is done in the File Manager section see this page for more help on using cPanel.
If you are renting space you can ask them to set the ownership of the /data /apps and /config folders to be owned by the web server. You can point them to this for more info.
We can learn how to get command line access to the server and enter the following commands as root user.
cd /path/to/owncloud/
mkdir data
chown -R www-data:www-data data config apps
The exact commands may be different depending on what server you are running. See this page for cross platform instructions.
If you return to the web page where ownCloud was installed the error should be replaced with a welcome screen asking you to create an admin user with the first log in.
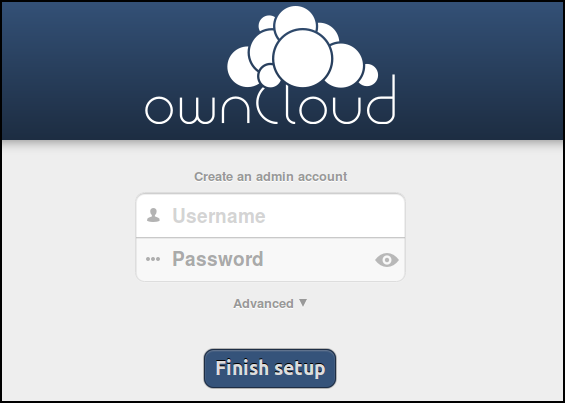
If you just want to get started with a basic install then enter your details, click Finish setup and continue using ownCloud.
If you want to change the data directory or install with MySql you can click on the Advanced link.
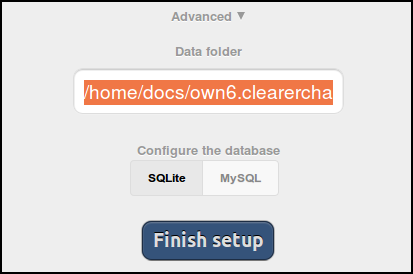
Troubleshooting
Complementary documentation is available at:
http://doc.owncloud.org/server/5.0/admin_manual/
There is also a very useful user forum at:
http://forum.owncloud.org
User Management
If you are the user who first logged in to your ownCloud install or if you are in the admin group, you have more powers than other users. You will have more options available to you including the ability to do user management.
This section covers the tasks of creating and configuring user accounts and resetting the passwords of other users.
Creating user accounts
ownCloud is a file sharing service which means that while it is possible for only a single person to use it, there will normally be more people using an instance. Each person needs their own account and this will be created and managed by any user in the admin group.
Once an administrator is logged in, they can click on the triangle to the right of their username, in the top right hand corner.
In the case below the user's name is admin. This account was the first one to be created during installation. The first user is in the admin group by default. It is possible to add more administrators simply by adding more users to the admin group.
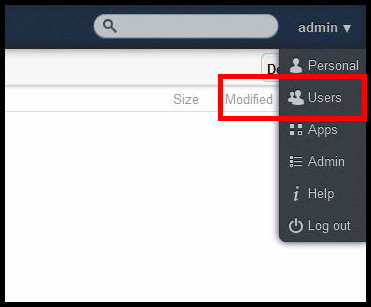
After clicking the triangle a menu unfolds with options to enter the following sections: Personal, Users, Apps, Admin, Help and Log out.
Click on the Users item to get an overview of which accounts are already installed.
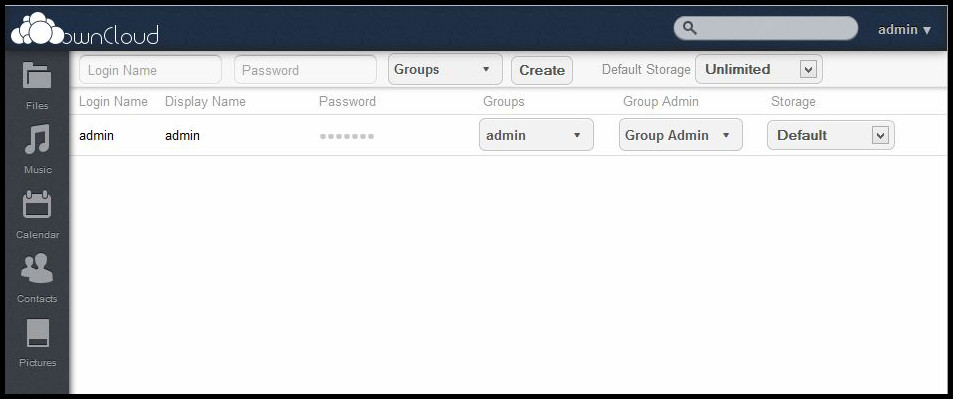
Groups are normally used for sharing files between users. One of the first things to do after a new installation is to create groups based on how you imagine people will be grouped on your server.
Only an admin group exists in the beginning.
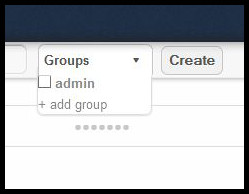
Why not add two or three groups, for example friends, family or colleagues? Or if this a work related installation outreach, planning, monitoring, etc.
To do this go to the Groups field and wait for the menu to open. Hover over the + add group field, enter a name for the group and hit enter.
Now one can start adding users and adding them to specific groups. To create other administrators add them to the admin group.
Simply enter the new user's name, a password, check a group and press Create.
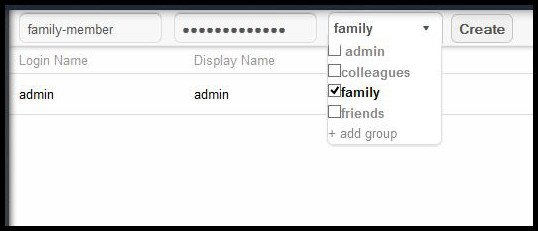
If you have problems with your page not refreshing, press Ctrl-R to refresh the page and make sure your new entry is visible.

Storage and upload settings
By default Default Storage is set to Unlimited. This may increase the chance of a server accidentally filling up. To have more control over the growth of data on the server, set a limit for how much data each group can upload.
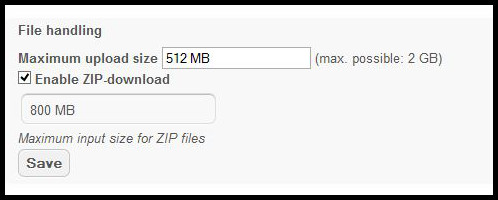
A related setting can be found in the
Admin menu. Here you set how much a user can upload at a time. You may need to raise this from the default
512MB, say if you share home movies with family members.
Another setting to consider is that users can only share with other users in their group or with anyone. This setting is located in the Sharing section in the Admin menu. The default is set to Allow users to share with anyone.
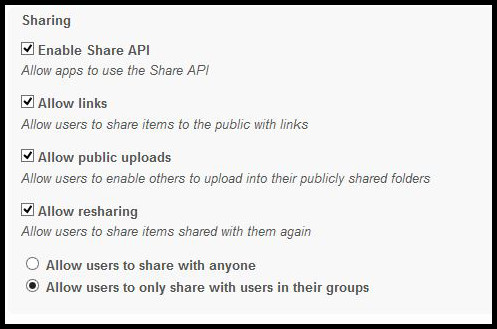
To summarize, the steps involved in creating a new user are entering a name and password, and delegating the user to a group. The new user can now log in to ownCloud and start uploading and downloading files.
Changing passwords and groups
In the Users window, any user in the admin group can change their own password and that of other users.
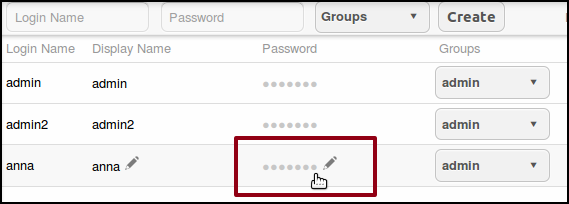
Click in the Password field for the relevant user and enter a new password. Admins can also change the Groups users are in.
Using Version Control
The process of creating a document often involves creating many updates of a file. During the process one may want to go back and use something from a previous version that has been deleted. Using version control makes reverting to a particular point in time easy. It is used by teams and individuals from the software development, graphic design, writing and editing sectors.
Deleted files
Version control can also be used as a backup server. If someone deletes a file by accident it is easy to recover it. ownCloud has included this feature, namely the Deleted files button.
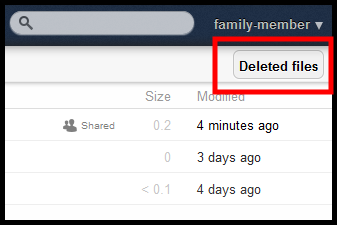
Files that are deleted in ownCloud are moved to a trash bin folder.

Here one can 'undo' the deletion of a file by clicking on Restore.
In addition one can delete a file permanently by clicking on the X. This is something to keep in mind when you are running out of available space. By default, deleted files stay in the trash bin for 180 days.
Versions
ownCloud comes with a built in version control system called Versions. It can be viewed and disabled by logging in with the administrator account and going to the Apps menu.
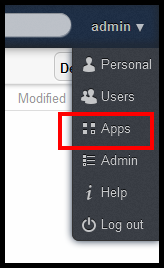
The way that Versions works is that it copies new and deletes old files, following a specific routine. Copying files every minute will result in rapid data growth, hence the regular deleting of files.
Tech note: Other version control systems store only the differences between old and new versions of a file, but PHP – the language that ownCloud is written in – can't handle working with these incremental changes.
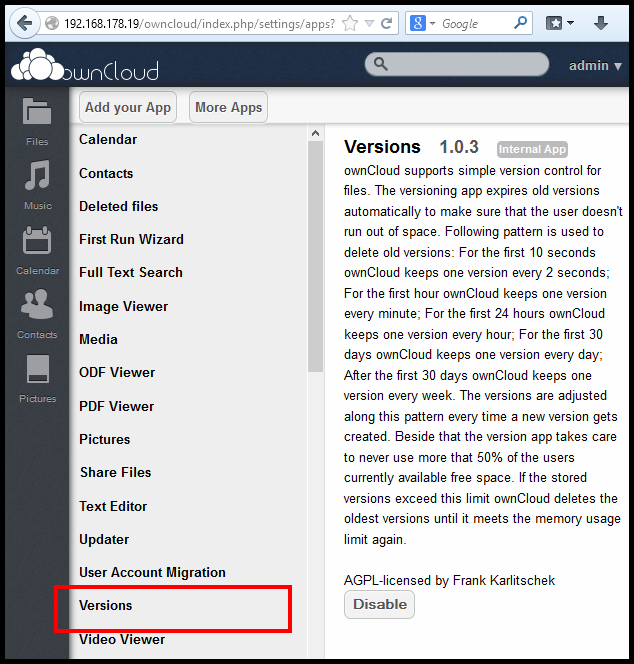
Versions uses the following scheme of copying files:
- For the first 10 seconds ownCloud keeps one version every 2 seconds
- For the first hour ownCloud keeps one version every minute
- For the first 24 hours ownCloud keeps one version every hour
- For the first 30 days ownCloud keeps one version every day
- After the first 30 days ownCloud keeps one version every week
The app is set to never use more than 50% of the user's available free space. When the stored versions of files exceed this limit, Versions deletes the oldest files until it meets the storage usage limit again.
Hover over the file you want to revert or restore and select the Versions option. It can be found between the Download and Share options.

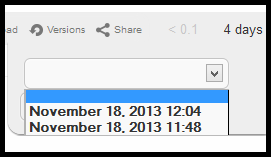
Clicking on this item, a drop down menu appears with two options. Either you click the little arrow to the right and get a list of all the versions of the file saved, or the option to enter an All versions... page.

Clicking on the arrow will produce a list of all the versions saved so far.
Clicking on All versions... will open a new page with all the versions saved so far.
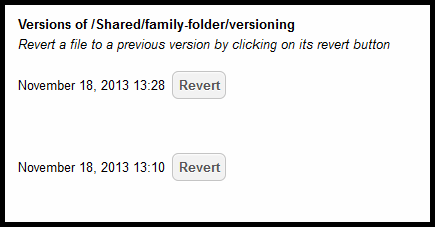
After clicking Revert the page returns a sentence in the color green, stating that the file has been restored to a particular version.
At writing the Versions app was at version 1.0.3. It is stable but there is room for improvement. One weakness for example is that the history listed does not show the name of the user who saved a version of the file.
Theming OwnCloud
The standard ownCloud theme is very attractive but changing it to fit your own organization's house style will make users, for example, customers, volunteers and donors feel more at home on your website. This can be achieved with a few simple tweaks to the color scheme and images. We call the changing of the look of websites 'theming'.
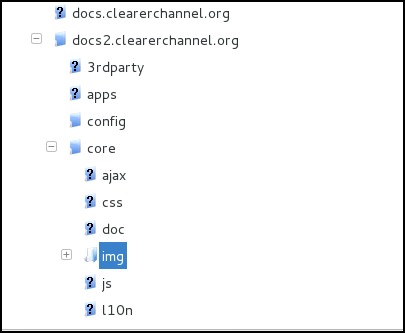
In the following guide we will change the splash screen image or logo, the logo in the top left hand corner when logged in, and the favicon. To change these you will need to be able to upload images to the ownCloud server, with FTP or SCP to the owncloud/core/img directory.
Changing the log in logo
The default ownCloud logo is the pile of circles looking like a cloud. We are going to replace this image with our own organization's logo.
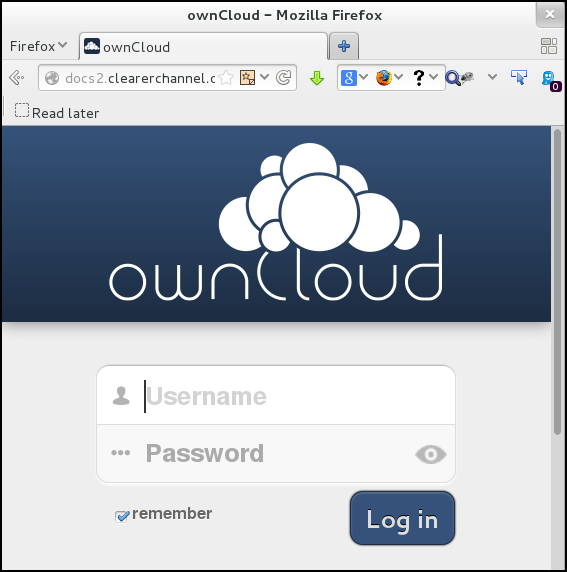
First prepare a version of your own logo. It must be approximately 252x122 pixels (width x height). Use an image manipulation application like GIMP or Inkscape to make the image.
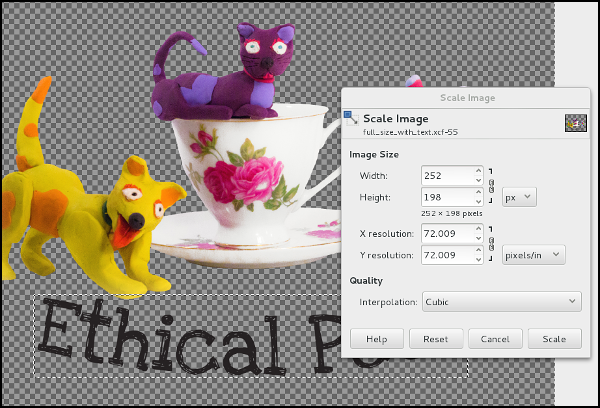
Save the file in the SVG (use Inkscape) format and call it logo.svg. This format is preferable to .jpg or .png because it is a vector file and does not degrade in quality. Scaling a vector image (as opposed to a bitmap image) preserves the shapes.
Backup the original ownCloud logo. Then replace the logo.svg file on the server with your own logo.svg file. The name of the file must be logo.svg.
The file path will look something like this:
yourowncloud.org/core/img/logo.svg
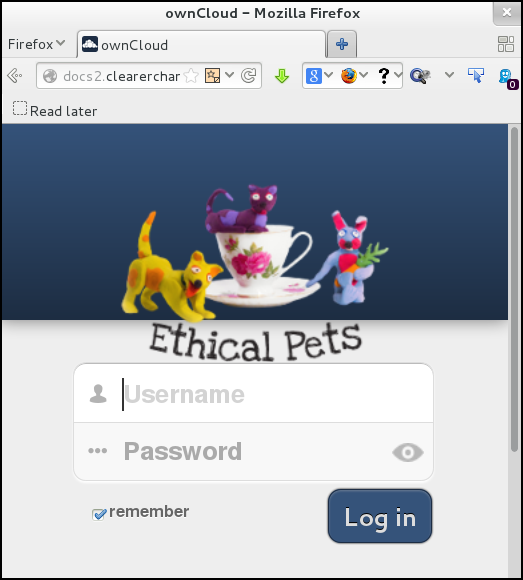
Once you have put your new logo on the server you will see the image change on the splash or log in screen.
Changing the logo seen when logged in
You can also change the logo that displays at the top of your ownCloud web interface using a similar method. This logo is much smaller – only 140w x 32h pixels.
The path to replace that is owncloud/core/img/logo-wide.svg.
Changing the favicon
Upload your own 32x32 pixel favicon.png file to owncloud/core/img/.
Using new themes
Above we have been editing images of the core website. This works just fine but ideally we should use the owncloud/themes directory to change the look and feel of an ownCloud. In this way one does not change the core code and makes migrating or updating ownCloud less prone to data loss.
Get an example theme online:
https://github.com/owncloud/themes/tree/master/responsive
Upload the files into owncloud/themes/responsive on your ownCloud server. Because ownCloud is written in PHP there are no HTML files so one needs to change the CSS files.
Place the CSS and image files you've made in the new theme folder. To activate the theme edit
owncloud/config/config.php by adding the following line to the file:
'theme' => 'responsive',
Changing ownCloud colors
We can change the color scheme of our ownCloud by either editing the core CSS file, or by making a new theme. As child themes prevent your changes from being lost when you update the server we will explain that process.
Copy the css file from /core/css/styles.css into our example theme directory /themes/example/core/css/styles.css.
In the style sheet, a bit further down, is a set that looks something like this:
/* HEADERS */

#body-user #header, #body-settings #header { position:fixed; top:0; z-index:100; width:100%; height:2.5em; padding:.5em; background:#1d2d42; -moz-box-shadow:0 0 10px rgba(0, 0, 0, .5), inset 0 -2px 10px #222; -webkit-box-shadow:0 0 10px rgba(0, 0, 0, .5), inset 0 -2px 10px #222; box-shadow:0 0 10px rgba(0, 0, 0, .5), inset 0 -2px 10px #222; }

background: -moz-linear-gradient(top, #33537a 0%, #1d2d42  100%); /* FF */
background: -webkit-gradient(linear, left top, left bottom, color-stop(0%,#F1B3A4), color-stop(100%,#1d2d42)); /* Chrome,Safari4+ */
This section deals with the headers for different browser types.
We can change the #35537a (lighter blue) and #ld2d42 (dark blue) color to the colors of our choice.
The log in page background has a horizontal gradient. The first hex number, #35537a, is the top color of the gradient at the log in screen. The second hex number, #ld2d42 is the bottom color of the gradient at the log in screen. You can change these colors to the hex color number of your choice, save the file and refresh the web page to see the new log in screen.
The other major color scheme is the blue header bar on the main navigation page under once you log in to ownCloud. This can be changed under #header in the code above change the value of:
background:#1d2d42
Save the file and refresh the browser for the changes to take affect.
A handy color picker
To find out the HTML color values for the colors on your website use a color picker or check what the values are in your website's source code. One useful tool is the Firebug plugin for Firefox, another, the little program Gpick.
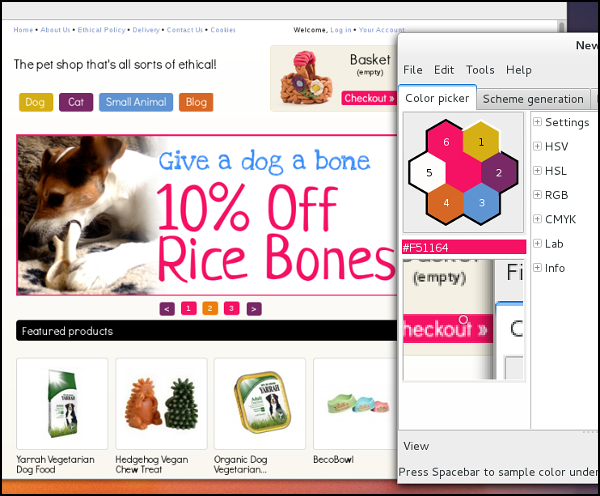
More information about theming can be found at the developer manual:
http://doc.owncloud.org/server/5.0/developer_manual/core/theming.html
Using ownCloud Desktop Clients
In other parts of this guide we explain how version control and synchronizing folders and files works using WebDAV and the file manager of your operating system.
The ownCloud client is a good way to have more control over the way files are synchronized between your ownCloud server on the web and your computer. This can be helpful if a simple WebDAV set up isn't performing as it should or if you want to take advantage of the extra settings the ownCloud client gives you. These include limiting the bandwidth used, viewing the space allocated and used, and setting certain files and folders to be ignored during the syncing process.
Installing client on Windows and Mac
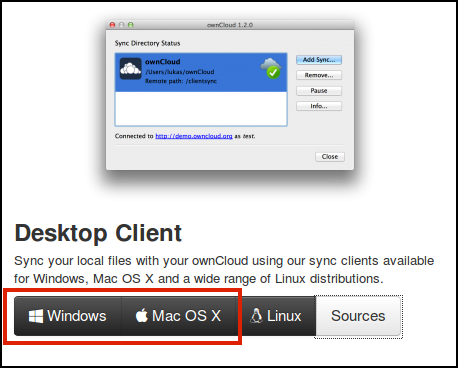
Point your browser to http://owncloud.org/install/ and click on the button for either Windows or Mac and follow the instructions to download and install your client.
Installing client on Ubuntu
First you will need to add a new repository to your software sources list. To do this, open the Software Center.
Click the Other Software tab.
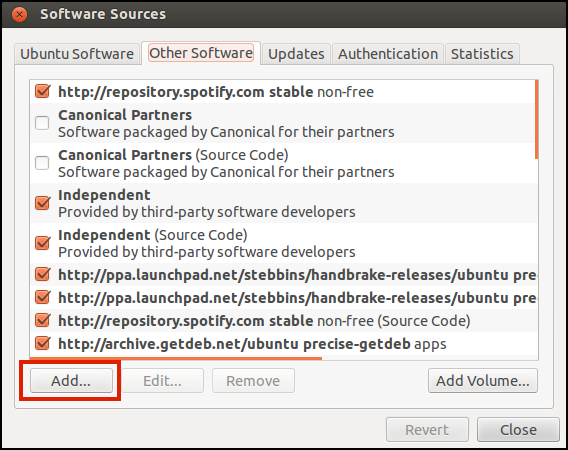
Click on Add source.
Enter one of the following lines into the box, choosing the correct one for your version of Ubuntu. The version numbers are in bold:
deb http://download.opensuse.org/repositories/isv:ownCloud:devel/xUbuntu_13.10/ /
deb http://download.opensuse.org/repositories/isv:ownCloud:devel/xUbuntu_13.04/ /
deb http://download.opensuse.org/repositories/isv:ownCloud:devel/xUbuntu_12.10/ /
deb http://download.opensuse.org/repositories/isv:ownCloud:devel/xUbuntu_12.04/ /
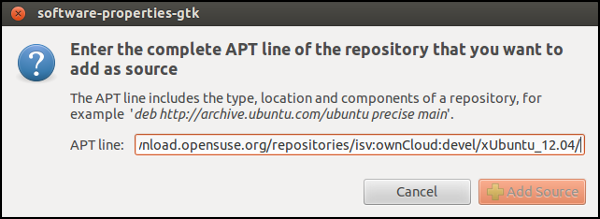
Select Add Source.
Click Close. You will need to enter your admin password for your Ubuntu install.
Now you have installed the repository, you can search for owncloud-client in the top right of the Software Center.
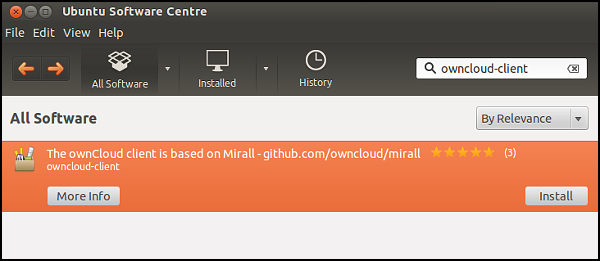
Select the ownCloud client and click on Install. Enter your password to confirm.
Setting up your ownCloud client
After you have installed ownCloud you should be able to follow the ownCloud connection wizard to configure your client. If the wizard doesn't start automatically after install you can either restart your computer to trigger it or type the command 'owncloud' from your terminal window.
Note: if the wizard doesn't start, read on to configure it in a different way.
When the the ownCloud wizard starts follow these steps:
Enter the Server Address of your client.
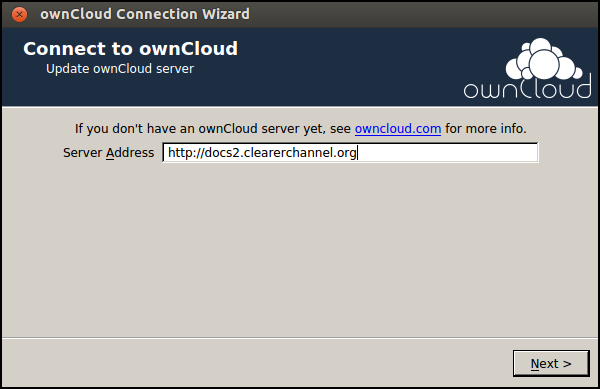
Enter your Username and Password.
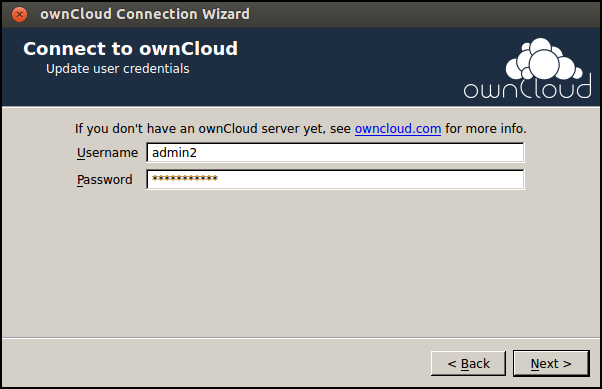
Next, choose a directory to use as your Local Folder to be synchronized with the server.
By default the wizard may choose a directory called ownCloud in your home directory / My Documents.
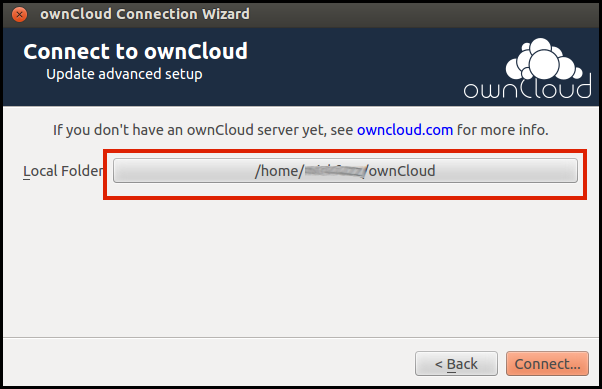
You can click on the button next to Local Folder, highlighted in red in the image above, to choose another folder.
If these stages were successful you should see a green tick next to the icon of the cloud detailing your local folder in the Sync Status window. This means the local file is being synced with the remote files.
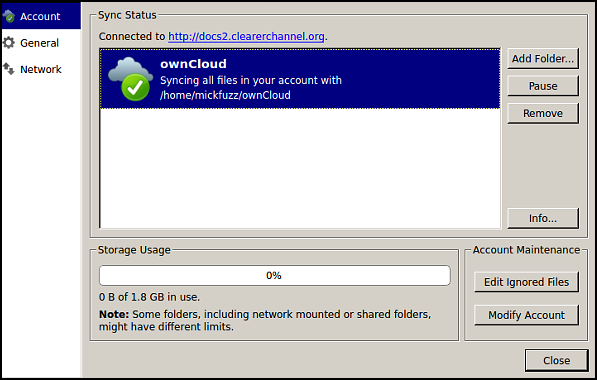
Using the ownCloud client
Once the ownCloud client is installed and configured you can view, edit and save files using the directory that you have set to sync to your ownCloud. These changes will be be available to you on the server and on other computers that you have synced-up to the server.
There are also also a helpful status icon and toolbar menu available to you.
In Ubuntu or other similar operating systems this toolbar menu is available at the top right of the desktop. If all is going well it should consist of an icon of a cloud and a green tick sign.
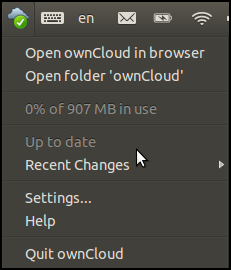
You will see some useful options here which you can select:
- Open ownCloud in browser: This will direct you to log in to your ownCloud server via a web page
- Open folder 'ownCloud': This will open your local version of your ownCloud directory, which you created when you set up the client
- X% of x G/MB in user: This is a quick way of seeing how much storage space is available to you and how much of your quota you have used
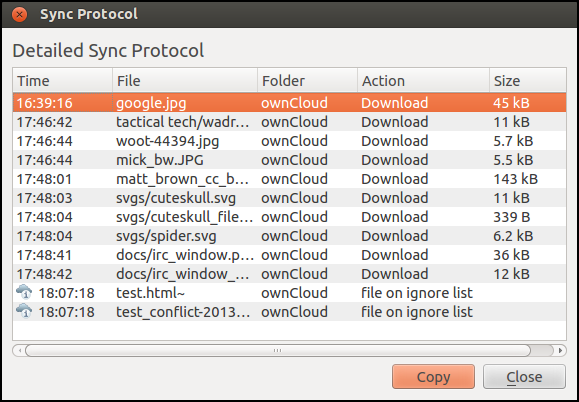
- Recent Changes: Clicking on this will show recent activity, such as which files have been uploaded or downloaded to/from the server to keep the folders in sync. Clicking on Details will show this information in greater detail as a table
- Settings...: This opens the settings window of your client including options for Account, General and Network
- Help: Takes you to the relevant help pages online
- Quit ownCloud: This exits the ownCloud settings until you restart your computer
Configuring the ownCloud client
After opening the Settings window, as described in the section above, there are three main tabs which allow you to configure the use of the client. These are Account, General and Network.
Account settings
In account settings you have the option to add new folders to snyc, to remove existing ones and to pause syncing.
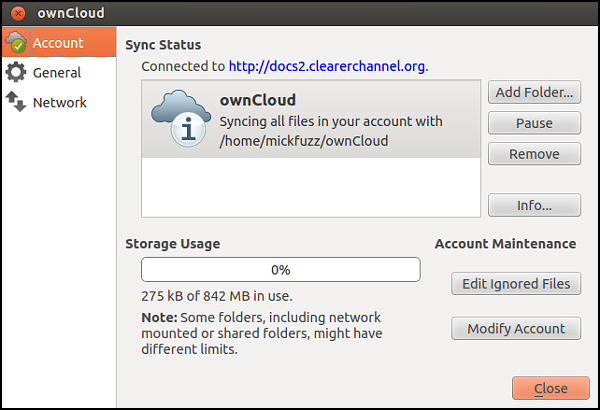
There is a useful section on Storage Usage which shows you how much of your allocation of space on the server you have used.
The Info button gives a more detailed view of the files that have been transferred or any problems with the synchronization.
There is also an option to Edit Ignored Files. This opens the Ignored Files Editor.
This option allows you to not sync certain files or folders on your local or remote server.
By default you can see that there are already some files that are ignored. These are normally files that are automatically created by other applications, rather than files you would normally use yourself.
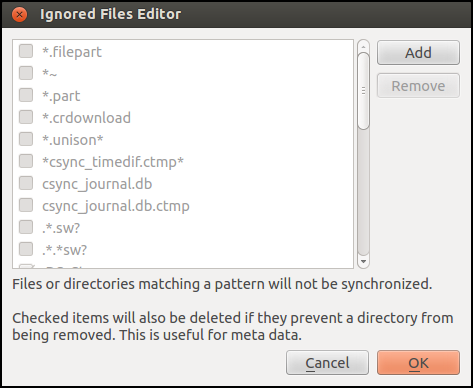
There is also an option to add patterns for file or folder names/types to be ignored. There is more information on this in the ownCloud documentation.
General settings
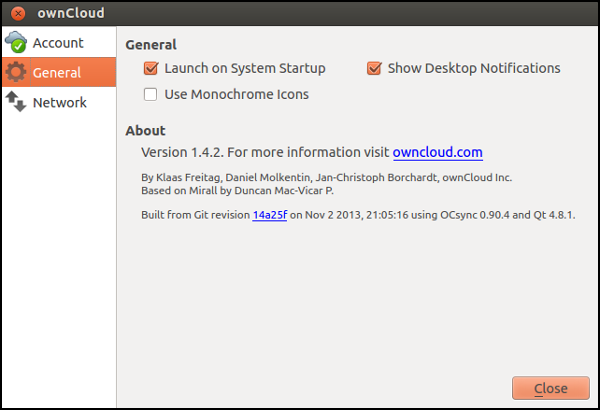
Under the General settings tab there are options to disable or Show Desktop Notifications which show next to your client icon when files are synced successfully.
There is also an option to stop your ownCloud client from loading automatically when you start your computer, called Launch on System Startup.
Both of these options are enabled by default. Remove the tick in the relevant box to stop this functionality.
Configuring network settings
In the Network tab, you can change the Bandwith Limits depending on the bandwidth of your connection. If you have a slower connection and don't want to overload it (which would slow down your internet access every time you are syncing) then you can set these limits to be low.
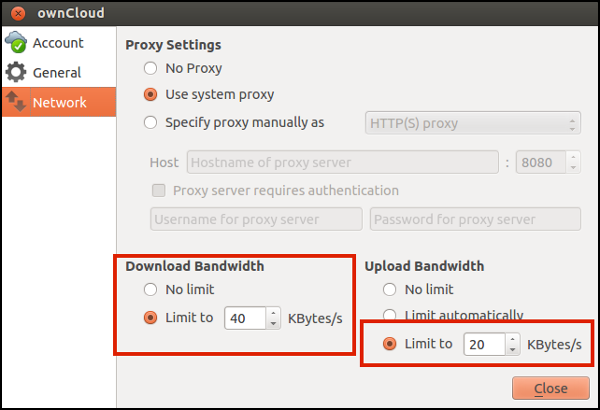
There also options for setting up Proxy Settings:
- No Proxy: Check this if you do not wish ownCloud client to use the default proxy
- Use system proxy: This is the default option. ownCloud will then use your computer's proxy settings
- Specify proxy manually as: This allows users to fill in custom proxy settings
Using Tasks and Bookmarks Apps
This chapter documents a couple of the most popular apps for ownCloud. It assumes that you know how to activate apps.
The bookmarks app
Activate your bookmarks app and then click on the Bookmarks button in your navigation bar.

Drag the Read It Later button, displayed in the bookmarks window, to the bookmark area of your browser. (You may need to configure your browser to show this if it isn't present already.) Your browser should indicate when you are in the correct place (in the example below, a small yellow arrow and a separator line appeared).
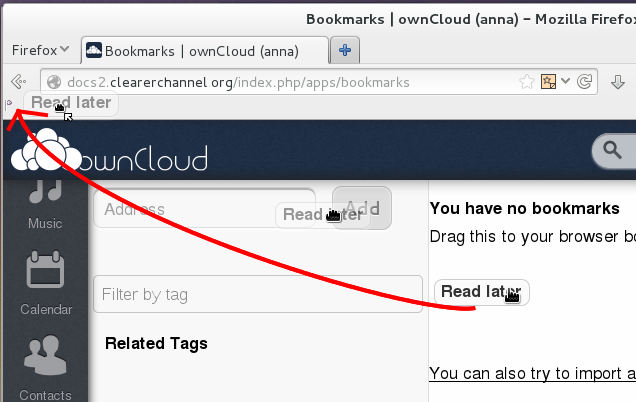
The button should stay/stick in your browser and will be there all the time.
When you are browsing the web and you find a page that is important, perhaps a site you use as a reference tool, news center or simply something fun you might want to share or see again sometime, you can click the Read Later button.
This will bring up a dialogue window to help you categorize and save the bookmark to your ownCloud instance.
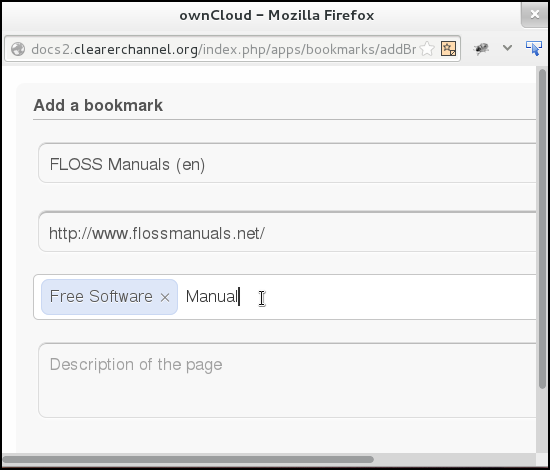
The page name and web address will be recorded automatically.
To help you find the Bookmark easily next time you need it, enter some tags by typing in the box, and hitting enter at the end of each tag (at which point they turn blue). A moment taken here to think of which tags to put will save you time looking for your links later.
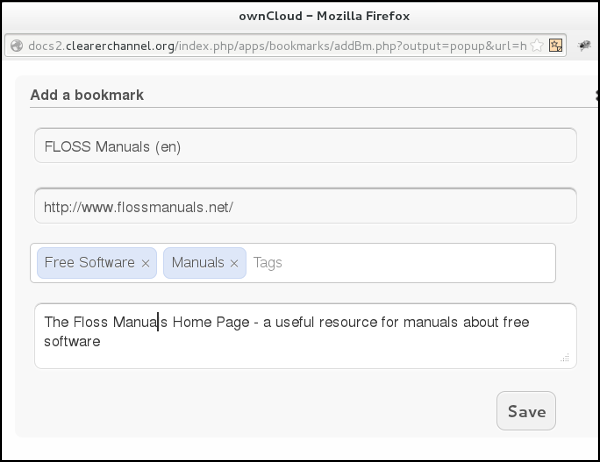
You can also include a description. Click Save, and the window will close. Your bookmark, and any new tags you used, will appear in your ownCloud instance (you may have to refresh the page).
You can also use the search bar of ownCloud in the top right of your screen to find saved bookmarks.
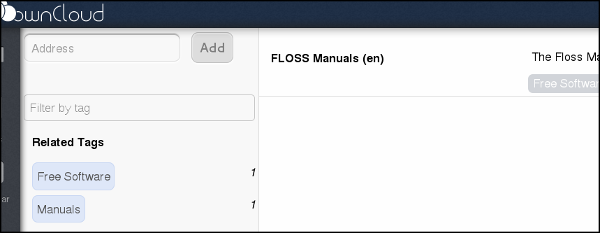
The tasks app
Enable tasks in your apps section, and a new icon will appear in your navigation bar.

Click on the Tasks icon to go to your tasks window.

To add a new task click Add Task.

This will bring up an untitled, empty task. Click on the text reading <no title> to name your task.

Then fill in the details if you need to. You can chose a category, which will function like a to-do list.
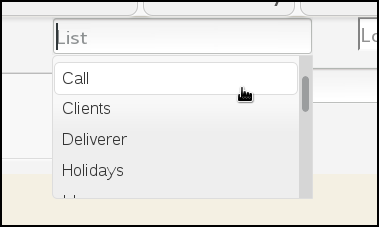
You can set a due date for the task.
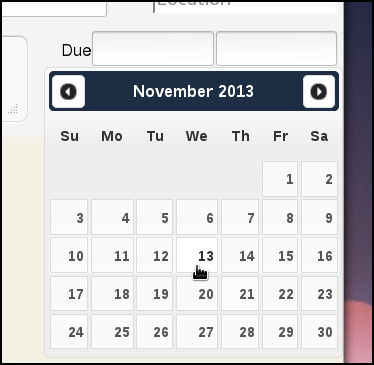
You can set a time for the task, in hours and minutes.
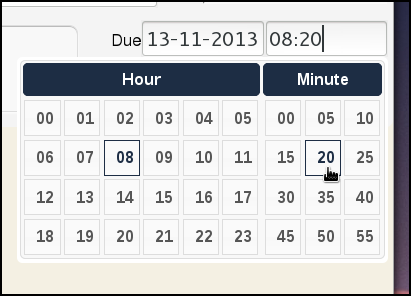
You can add notes, and even a location.

To mark a task as complete, click the tick-box next to the task name.

To minimize a task so you only see the name, click the little black arrow.
If you have several tasks you can order them using the filter buttons at the top of the page.

You can also use the tags down the side of the page to view individual lists. This relies on you reliably linking tasks with list categories. It can be easy to lose tasks once you start using the list filters. It seems advisable to only use a few of the list categories, for example, just use work and personal. You can only add each task to one list.


 Syncing or sychronizing is the process of making sure that different repositories of information contain the same data.


