


ownCloud and Security
We don't discuss general security aspects of system administration here. We only detail that which is specific to ownCloud. We can recommend doing some reading around this subject specifically for the following areas:
- File and folder permissions
- Installing third party apps / plugins
- Choosing strong passwords
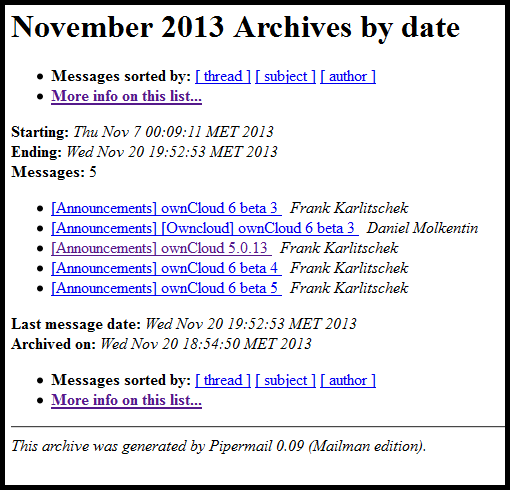
A quick recommendation to ownCloud administrators is to subscribe to the Announcements mailing list: http://mailman.owncloud.org/mailman/listinfo/announcements
This will keep an admin up to date with new, stable releases. It is good practice to keep one's server up to date. And to get an impression when the next major release is due.
In this chapter we cover two aspects where ownCloud offers system administrators a way of increasing the level of security of their installed instance. One, the Encryption app, is found under the Apps menu and the other, the Enforce HTTPS setting, in the Admin menu.
Encryption
Why would you use the Encryption app? The cheapest and easiest and most common way to have your own server these days is to hire a VPS (virtual private server), from a hosting provider. The system administrators of the hosting provider have access to all the data on all the VPSs. To obfuscate your data from these sysadmins you can choose to use ownCloud's built in encryption app.
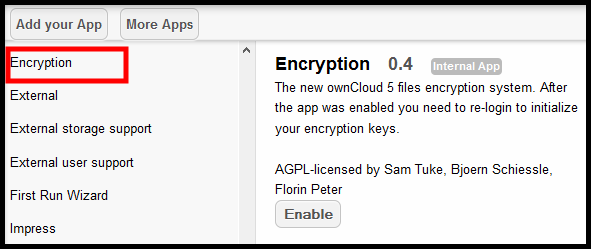
In the Apps menu find the Encryption app and enable it:
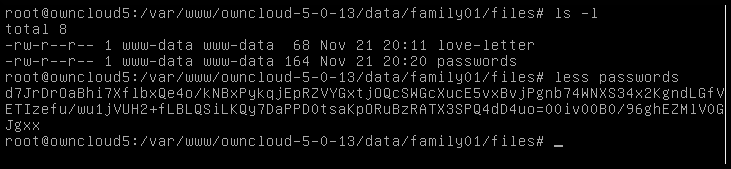
Log out and log in again. You will not notice a change. Looking in the /var/www/owncloud/data/ directory on the server you will see two new files:
![]()
Before encryption a sysadmin can view your files with the commands less or cat. After encryption, this is what a sysadmin sees in your secret file:
Limitations of encryption app
This app has had issues in the past involving data loss and corruption after upgrades. It is not well tested or mature yet. We encourage people to try it but not to rely on it. We feel it is worthwhile to evaluate different encryption methods and to get into the habit of using it. Be aware that you may lose data. Keep an offline backup of your data. Encryption is an incredibly complex but important topic. ownCloud may offer an easy way for us to start encrypting our online data by default.
There is no way to decrypt your files directly on the server if you decide to stop using the Encryption app. The only way to get a complete copy of your unencrypted data is to download/sync all files as long as the Encryption app is enabled. After the Encryption app is disabled you can upload your unencrypted data again. It is already planned to add a option to switch from encrypted to unencrypted files directly on the server. For more info see this page.
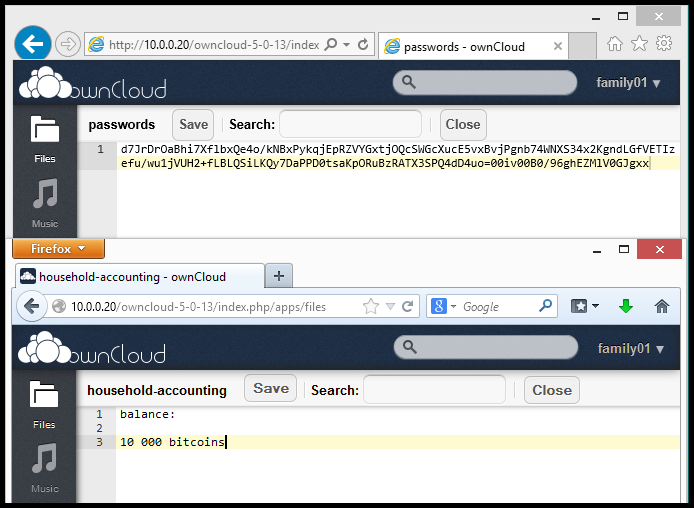
Below one can see a screenshot where we can't read the contents of a file because it was made when the Encryption app was enabled and we are viewing after it has been disabled.
Enforce HTTPS
The Hypertext Transfer Protocol (HTTP) is the networking protocol used by browsers that allows communication between you and a site you are visiting. Because communication is transmitted in plain text it is unsafe, especially when using wireless networks. It is like transmitting a message with personal information on a postcard. Data, such as user names and passwords, sent to and received by websites, is easily read by third parties.
To solve this problem the Hypertext Transfer Protocol Secure (HTTPS) was invented to provide encrypted communication and secure identification of a network web server. Most major websites, including Google, Wikipedia, and popular social networking platforms such as Facebook and Twitter can also be reached via a secure connection, but not necessarily by default. Note that most sites do not provide encryption.
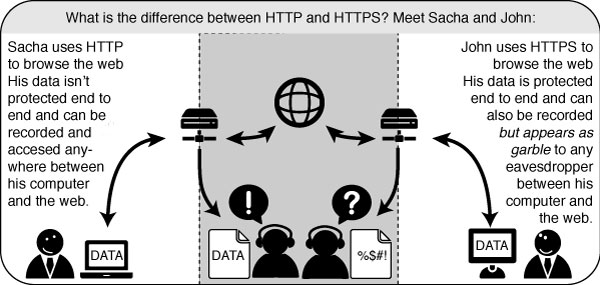
Using SSL (secure socket layer) for your ownCloud website makes it almost impossible to view your traffic. Everything that is done on a website, for example logging in, opening new pages, uploading and downloading files, will be encrypted with the help of certificates. The URL of your site will need to be opened with https:// as opposed to simply using http://
There are three parts to getting your website to use https: install the software, generate key and certificate, and configure the web server.
Installation
On your Debian 7 (codename Wheezy) Linux server run:
apt-get install openssl
Generate key and certificate
As root user log into your server and execute the following string of commands:
openssl req -x509 -nodes -days 365 -newkey rsa:2048 -keyout myowncloud.key -out myowncloud.crt
- The req command creates and processes certificate requests
- The -x509 option outputs a self-signed certificate instead of a certificate request
- Nodes stands for 'no DES'. When -nodes is given as an argument, OpenSSL will not encrypt the private key
- The -days option is needed when using x509, i.e. generating a self-signed certificate. The default is 30 days
- The -newkey option creates a new certificate request and a new private key. If one types -new instead of -newkey, only a new certificate request will be generated
- If the -keyout option is not specified then the newly created private key file name will be taken from the one present in the configuration file
- The -out option specifies the certificate file name
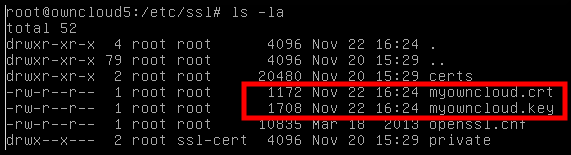
You now have two new files on your server, a certificate and a private key.
Configure web server
As root user log into your server and execute the following:
a2enmod ssl
Create a new VirtualHost, for example naming it ocvh and add the following lines:
<VirtualHost *:443>
      ServerName 192.168.178.20
      SSLEngine
      SSLCertificateFile /etc/ssl/filename.crt
      SSLCertificateKeyFile /etc/ssl/filename.key
      DocumentRoot /var/www/owncloud
</VirtualHost>
Your ServerName, DocumentRoot and file names will differ.
Activate the VirtualHost by running:
a3ensite ocvh
Restart the web server:
service apache2 restart
Open your ownCloud instance with a browser. Remember to use HTTPS. Since we are using a self-signed certificate you will see an 'untrusted connection' page.
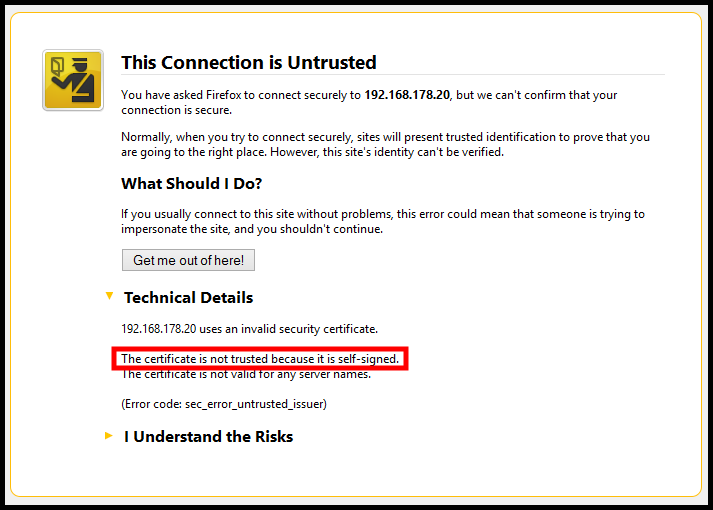
Be aware that every browser handles self-signed certificates in a slightly different way.
To continue click on I Understand the Risks and Add exception... A pop-up will open. Click on Confirm security exception and you should see the log in page of ownCloud.
Additional documentation
If you get stuck there is additional documentation for these steps here.
http://ubuntuserverguide.com/2013/04/how-to-setup-owncloud-server-5-with-ssl-connection.html