Add Ons for Working Offline
These plugins are useful if your don't have a reliable or unfiltered Internet connection. In this situation when you are able access materials it is an advantage to download this material for offline use.
In addition, some tools and services which increase your security or bypass censorship make using the Internet much slower. In this case it is good to be able to work offline in a way that makes it quicker to publish or share your content quickly when you do have a suitable connection.
Some of these issues can be solved by using other tools, perhaps an email client like Thunderbird. There are also some great Add Ons for Firefox that can help.
DownThemAll
 The key advantages of using this Add On is that it gives you the ability to download lots of images all at once, and to be able to download them quickly,
It also allows you to be able to resume downloads. This is very helpful if internet connection is intermittent or files are too large to download in one session.
After you have installed the Add On you can start to download large files by right clicking on a link to a file and selecting Save Link with DownThemAll
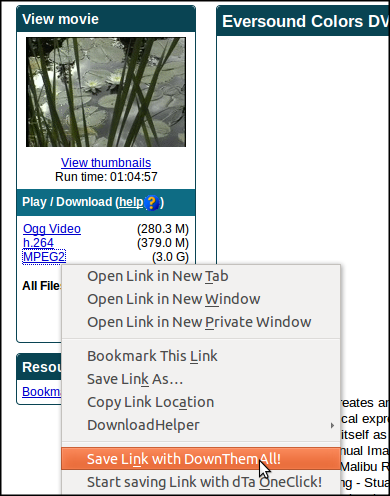
You will be presented with some options about where to save your file.

Click on the Start! buttons and you will see a download manager.

This manager allows you to select individual files scheduled for download, to pause or resume downloading and provides other extra features not possible by default in Firefox.
With a little bit of configuring you can use DownThemAll to download a whole gallery of images very quickly. It is a very powerful tool. Try it out.

Screengrab (fix version)
 This Add on saves pages or sections as an image quickly.
After installing you will see an icon in your Location toolbar.
If you click on the arrow next to the icon you are presented with different options. These include Save, Copy, Upload and Settings.
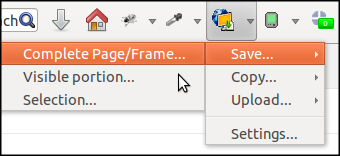
These the Save and Copy options work as you would expect them. The upload feature is a nice addition which quickly uploads the image you choose to a web service which is a very quick way of sharing something.
Grab my Books
 The Grab my Book Add On allows you to save online content to epubs for offline viewing. Epubs are a fantastic format as they contain all images and text and retain the order of your pages all in one file. This is a great way quickly to transfer content from Internet pages onto mobile devices for offline networking.
The tool (which is a html to epub converter) also contains an simple to use editor that allows you to edit the contents of your pages before transferring it into your ebook format. You can also add a cover and title to your book using this editor.

Grab My Books allows you to save the tabs you have open as a series of chapters in your epub. You can also save the content of your saved RSS news feeds to create a snapshot of news articles.
Download Helper
 Download Helper Add On is a good way of downloading web videos to your computer to view offline or to share in other ways. It is able to store on your disk movie files for which the web site does not provide a "Save File" feature. In addition, DownloadHelper can download, in 3 user clicks, all the image and video files linked from a Web page.
After installing Download Helper, you should see a new icon in your toolbar.

Sometimes, this icon does not install automatically or disappears this can happen after an update of Firefox or of the extension itself.
If you don't see the icon in the toolbar,. go to menu View/Toolbar/Customize and drag the Download Helper icon to your toolbar
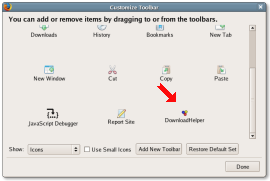
To use the Add On, use your browser to visit video sites, when Download Helper can do something for you, this icon turns from being gray to being colorful and animated:

When the icon is animated, you can see a small triangle at the right of the icon. Click on this arrow to open the download menu.
You are offered the ability to download the file in a variety of sizes and formats.
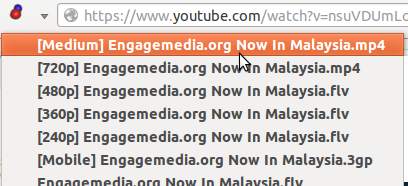
For more information on using Download Helper you can also look at the user manual.
Scribefire
 This is an interesting tool for Bloggers. Scribefire allows you to write your blog posts offline and then upload them very quickly in the right format. The Add On is compatible with Wordpress, Tumblr, Blogger and a few other types of blogs.
The writing interface it uses will be familiar to bloggers. Using this Add On allows you to format your text and images whilst you are not connected to the Internet. By adding your blog user details you can publish it all with one click when you do go online.
After installing the Add On you can click on the Scribefire icon if it is visible in your bottom tool bar.

This brings up the writing and configuration Interface.
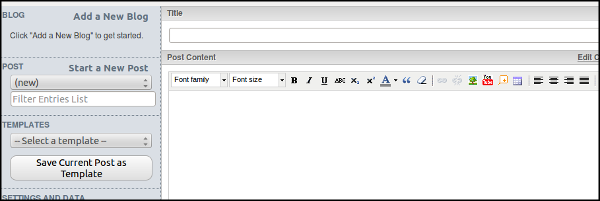
To set up your publishing details for a blog click on the
Add A New Blog link. Follow the instructions to fill in the URL of your blog. You may need to be logged in to your blog while you are setting this up to enable this to work.
Firefogg

Firefogg is an open source, GPL-licensed Firefox extension for encoding Ogg video and WebM video files. It's simple to use, especially if you are already using the Firefox browser. FireFogg is an extension for Firefox and you will not have to download and install a separate application. Just install the extension and encode your video in Firefox!
When you have Firefox running, visit firefogg.org.

Click “Install Firefogg.” Firefox will ask you whether you really want to allow the site to install an extension. Click “Allow” to continue. Firefox will present the standard software installation window. Click “Install” to continue.
After restarting Firefox, go back to firefogg.org to confirm that Firefogg was successfully installed. You can now encode your video directly from Firefox.
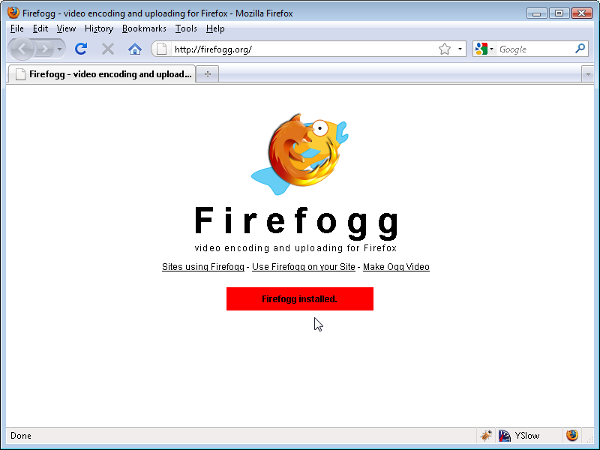
Click “Make web Video” to start the encoding process.
Click Select File, and browse to select a file from your computer.The video will show up with some information about its current encoding and size.

Select either Ogg or WebM video and then select the quality you want your target file to be.
Click on Encode and choose a location to save your open video file.
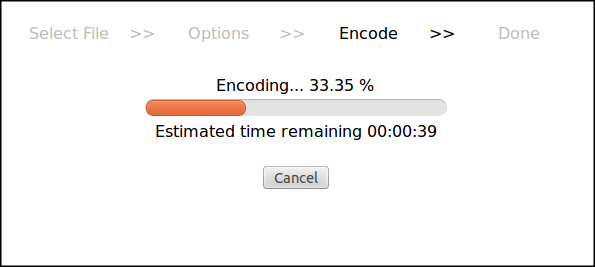
Depending on the size and length of your video, encoding can take a while. When it is finished, you will be able to find it in the location you chose above, under the same name as the original and ending on .webm or .ogv
Installing Add-ons
To install Add-ons, select Tools > Add-ons to open the Add-ons window in a new tab. This page allows you to search for available Add-ons and explore the nature of Add-ons generally.
In the Get Add-ons panel of the Add-ons window, search for an add-on by typing the search term in the search box at the top right an pressing Enter. A list of add-ons matching your search term will display.
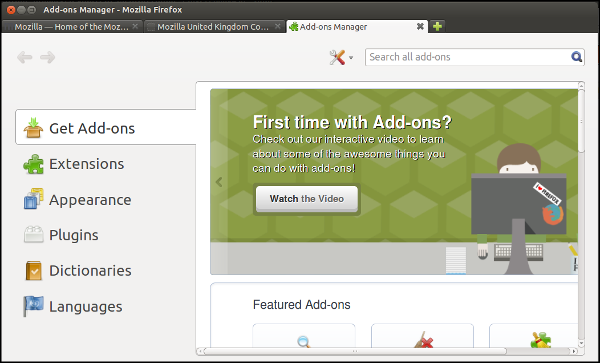
Follow the instructions on the page to install any desired add-on. You may be required to review and accept the End User License Agreement. To continue with the installation, click Accept and Install.
Firefox will then fetch the add-on, and display the Software Installation window. To begin the installation, click
Install Now.
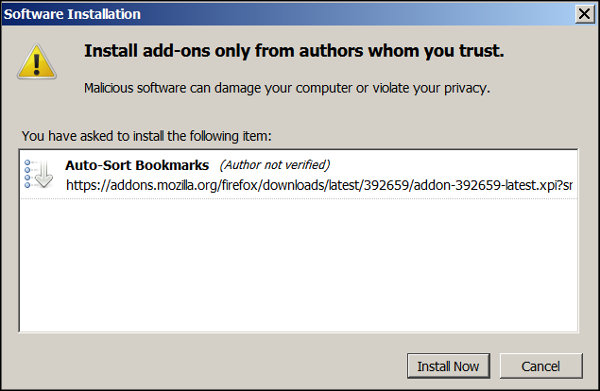
After the installation is complete, you must restart Firefox to start using the new add-ons. To restart, click
Restart Firefox that appears after installation is complete.
To manage or remove your Extensions, click on the Extensions button.
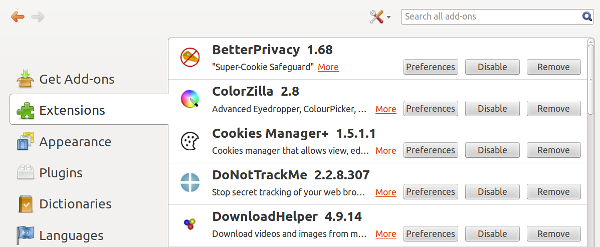
Disabling Add-ons
Be sure to disable or remove Add-ons that you are not using. Each Add-on is code that has been contributed by a different individual or team. The more you have installed the more likely they are to conflict with each other in some way.
If this does happen you may experience problems using Firefox, it may for example become very slow. You can test if your installed Add-ons are causing this problem by restarting Firefox with Add-ons disabled.
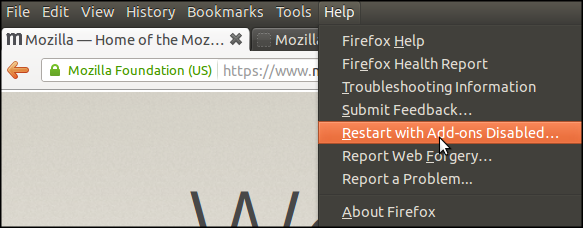
To do this select Help > Restart with Add-ons Disabled.
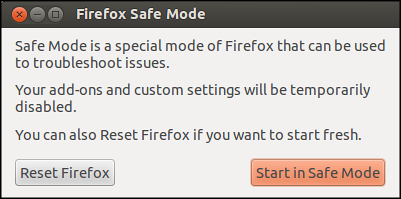
Then choose Start in Safe Mode. As you can see if this doesn't fix your problem you also have an option to Reset Firefox. This restores Firefox to its factory default state while saving your essential information.
Tabs, Searching and Saving
Using Tabbed Browsing
Tabbed browsing enables you to open several web pages in a single Firefox window. Each page appears in a separate tab. In the screen shot below you see a single window with two tabs displayed at the very top of the page.

To open a new tab, click on the + sign to the right of the two tabs shown or use the Orange Button menu command: New Tab or Press Ctrl+T. New tabs will open immediately to the right of the current tab.
To open a link in a new tab, if you have a mouse with a scroll wheel, click the wheel while pointing to a link or right-click the link and the link will open in a new tab.
A simple way to close single tabs is to click the Close Tab button

Searching
The Firefox search bar comes pre-loaded with access to some search engines.
For example, if you want to find information about the World Cup: Click in the search bar:

Type the phrase
world cup. Your typing replaces any text currently in the search bar.
Press
Enter, Return or click the magnifying glass to search.
The search results for "world cup" appear in the Firefox window.Other search engines can be accessed from the drop down menu included in the left hand side of the search box.
Searching for text within a page
To find text within the page you are currently viewing in Firefox:
Press Ctrl+F or select from the Firefox Orange Menu Button to open the Find Toolbar at the bottom of the Firefox window. Type the text you want to find. The search automatically begins as soon as you type something into the search box:

Clearing all search items in the History
To clear all items in your search history, right click / hold down the Ctrl key while you click on the input field of the search bar, and select Clear Search History.
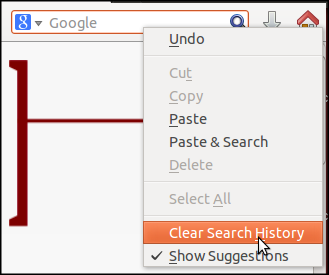
Your search bar history is cleared.
Switching search engines
To change the active search engine, click the down arrow next to the search engine's icon, then select a new search engine.

In the event you wish to add an additional search engine not shown in the list, you will need to open the the Search Engines Manager, click the search engine icon and select Manage Search Engines.
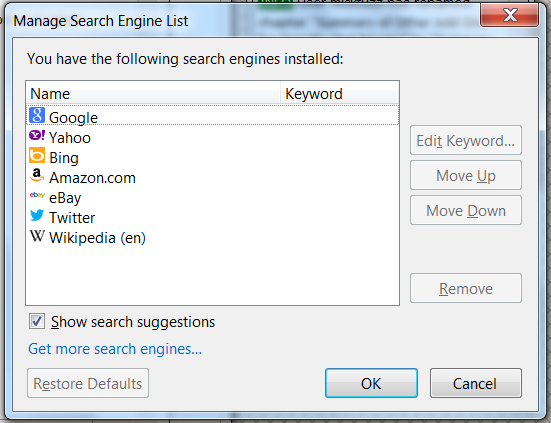
Click
Get more search engines. This will take you to the relevant Mozilla webpage when you will be able to down load other search engines as an
Add-On For more information on how to do this, see the chapter on
Add-ons.
Saving whole pages and single images
On the . The Save As dialog box appears.
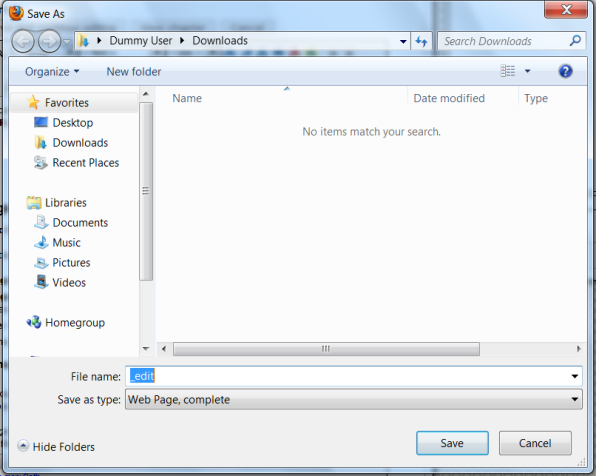
- Web Page, Complete: Save the whole web page along with pictures.
- Web Page, HTML Only: Save the original page without pictures. This choice preserves the original HTML in one file.
- Text file: Save the original page as a text file.
Type a file name for the page and click
Save
To save an image from a page
Position the mouse pointer over the image.
Right-click / Press Ctrl and click on the image to display a pop-up menu.
Click
. The
Save Image dialog box appears which looks much the same as the
Save As dialogue box above. Choose a location for the saved image. Type a file name for the image and click
Save.
Bookmarks, History and Downloading Files
About Bookmarks
Bookmarks (also called "Favorites" in some browsers) are links to Web pages. By saving bookmarks in your Firefox browser, you can easily revisit pages without having to remember the address or search for them again, much like using bookmarks in a book.
How to bookmark a page
There are many ways to bookmark a page.
Bookmarks menu: To bookmark the page you are currently viewing, click the Bookmarks button at the top right of the page and choose Bookmark This Page. This brings up a dialog box with the Bookmark Menu selected as the default folder.
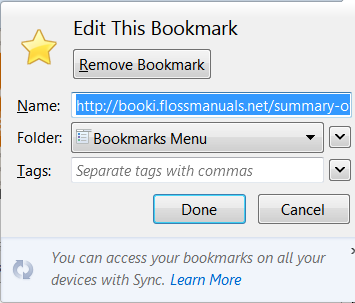
Keyboard shortcut: To bookmark a page using the keyboard, press
Ctrl+D (
Cmd+D on Mac). This displays the
Edit Bookmarks dialog box as above.
Bookmark star: You can use the bookmark star inside the location bar to create or remove a bookmark.
Fill in the required information and choose a folder. For a complete list of folders click the drop-down arrow to the right of the Folder box.
What information to enter for Bookmarks
Name: Firefox automatically fills in this field with the title of the current page, but you can always change it.
Folder: This is where the bookmark is stored. It can be a default folder or a folder you create. There are three standard choices:
- Bookmarks Menu: The drop down menu on the menu bar.
- Bookmarks Toolbar: The optional toolbar
- Unsorted Bookmarks: This contains bookmarks that are not shown in your menu or toolbar.
You can put your bookmarks in sub-folders of these folders by instead selecting Choose... and picking a folder from the Folder dropdown.
Tags: Tags are optional descriptive words or short phrases that help when organizing or searching bookmarks. For example, tags for an artist supply store might be "art supplies, paint".
Where to find bookmarks
Your bookmarks can be displayed in a toolbar, a sidebar, or a menu. These are explained below.
The first place you'll see bookmarks is the bookmarks toolbar. By default it is displayed below the main toolbar. Firefox may come with a few bookmarks on the toolbar to help get you started. You can remove these, or leave them there, and add your own.

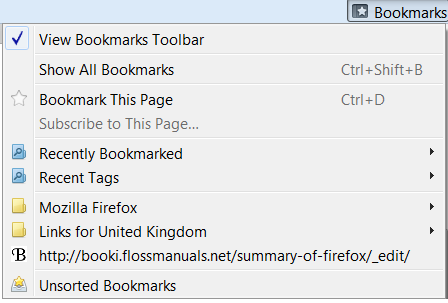
If you'd prefer not to use the bookmarks toolbar, you can hide it, or if you cannot see it and wish to, go to the Bookmarks dropdown menu. On the menu, check or uncheck the View Bookmarks Toolbar option as desired.
The various options on the Bookmarks dropdown menu enable you to view all your bookmarks. The Mozilla Firefox folder (located in the lower part of the Bookmarks menu) contains some bookmarks to help you with using Firefox and getting to know Mozilla.
Your History of Browsing
By default Firefox keeps record of all the pages you visit. This can be very useful when you want to retrace your steps. However there may be times when you want to delete the record that you have visited sites from your History. Or you may not want to keep a record of the sites you visit at all.
Clearing your History
To clear all or parts of the history of your browsing select the drop down menu option from the Orange Firefox button and click on History > Clear Recent History.

You can then select different options of how much of you history you want to delete based on the time period and the kind of information that Firefox stores.
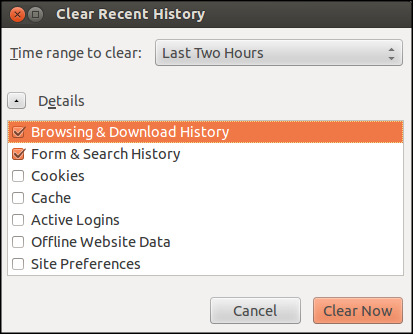
You can learn more about these settings in other parts of this guide about security and privacy.
Searching your History
To search your history, select the menu option History > Show All History.
This brings up the History section of the Library window
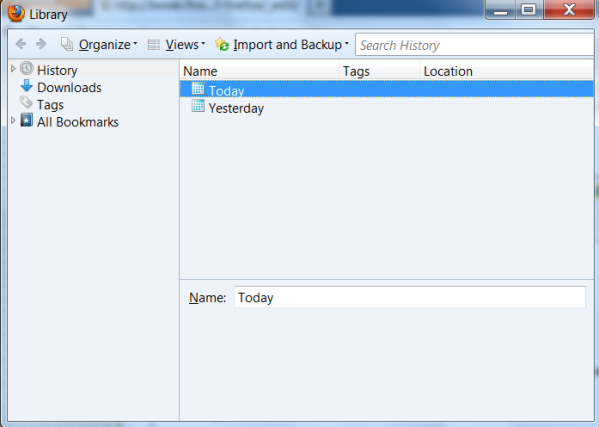
If you can remember part of the name of your page you can search for it in the search (Search History) bar at the top right of the dialogue box.
Using Forms on the Web
Firefox remembers what you have typed in forms and presents a drop-down list which can be used to reduce the amount of typing required.
Personal information such as name, address, phone number and credit card number will be retained on the computer upon which you have entered this information. As this can present a security risk, you should clear this information from any computer which is not secure.
If you want to remove one of your previous form entries from Firefox's history:
- Click on the form field and press the down arrow key to display all the saved entries. You may type the first few letters of the entry to limit the number of entries displayed.
- Use the down arrow key or the mouse pointer to highlight the entry you wish to delete.
- Press Delete. The entry will be removed.
Clearing form history
If you want Firefox to forget all of your previous form entries this is possible. Have a look at the section on History.
If you don't want Firefox to remember what you've entered into form fields, you can turn off the auto form fill feature:
Click on Options from the Orange Firefox Button drop-down menu and select the Privacy panel.
Under History, choose the Never remember History option from the drop down menu and click OK
Managing Passwords and setting a Master Password
When you fill out your passwords online Firefox may ask if you want to remember this password.

This is a handy thing to do right? Well yes it is but you should be aware what is involved in saving this password. The password is stored on your computer that is easy for Firefox, for you or for anyone who can get access to your computer to access.
To have a look at the passwords you have saved go to your Options / Preferences, select the Security tab and Click on Saved Passwords.
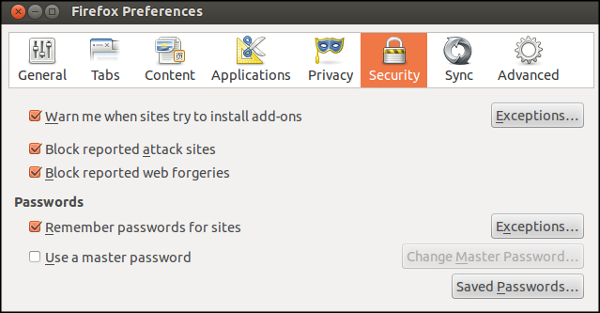
This will bring up a list of all the websites and usernames associated with passwords you have saved.
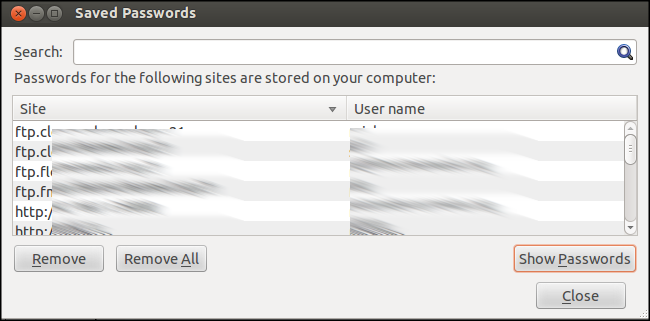
Click on the Show Passwords button and uou can see a new column with all the saved passwords.
This is a great thing to know if you want to discover a password you have forgotten but it does represent a bit of a security risk. In order to make this safer you can set a Master Password. Firefox will ask for this Master Password when you start browsing in order to access all of your saved passwords.
Return to the Security tab of your preferences and you will see the option to Use a master password. Select this option and you will be asked to enter a password.
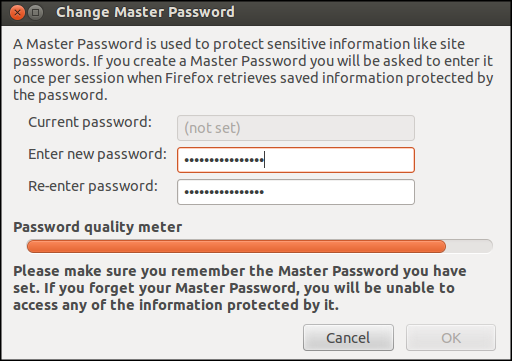
The next time you start Firefox,you will be asked for the Master Password.

Don't lose this password or you will also lose access to all your saved passwords if you have to reset it. 1
Downloading Files
Perhaps the most essential function of the Internet is the ability to quickly transfer data files from one location on the Internet to another location. These files can be programs, images, music, video or documents. When you click a link, it is handled according to preferences set in Firefox's Applications settings if this. Normally we do not need to change these settings.
Downloading Files Without Displaying Them
Even if a file will display in your browser, a pdf file for example, you may want to save it for later, rather than reading it immediately. In many cases, you can right click on a link, and select Save Link As...
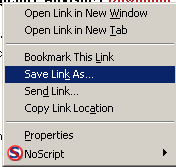
Depending on your download settings, Firefox will attempt to download the file or show you a dialog box to select file destination and file name.
The Downloads progress bar
When you are downloading the file, you will be able to check how long it will take by looking at the downloads progress bar / button.
The Download button is a relatively new feature for Firefox. Normally the button is viewable as an arrow on the location toolbar.

You can click on it to get a list of recent files you have downloaded
If you are currently downloading files it looks different. There is a progress bar and an number of minutes that your downloads are predicted to take.

Clicking the button gives us a more detailed progress bar of the current downloading file/s
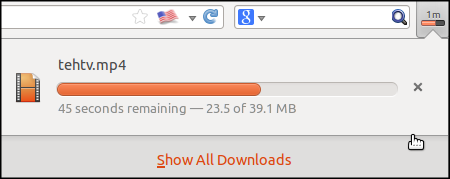
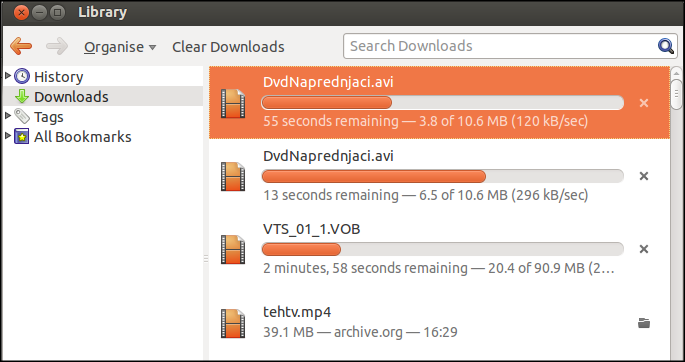
Click on Show All Downloads to go to the Downloads section of Library window.

- https://support.mozilla.org/en-US/kb/reset-your-master-password-if-you-forgot-it^
Configuring your Browser
You can configure Firefox by altering the Preferences / Options of your browser. Confusingly the window to do this and the menu options are a bit different depending on what operating system you are using.
Use Tools > Options in Windows, Edit > Preferences in Linux and Firefox > Preferences on Mac.
Overview of the different Options / Preferences
There are too many different preferences for us to describe in this manual but below is an overview of what can be changed.
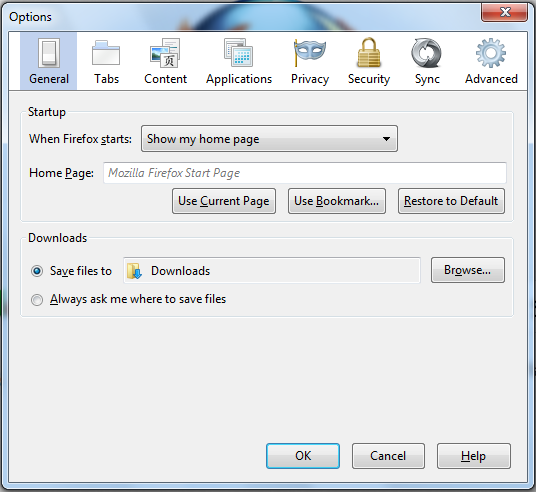
General: You can change options here about where to save files and to set your home page.
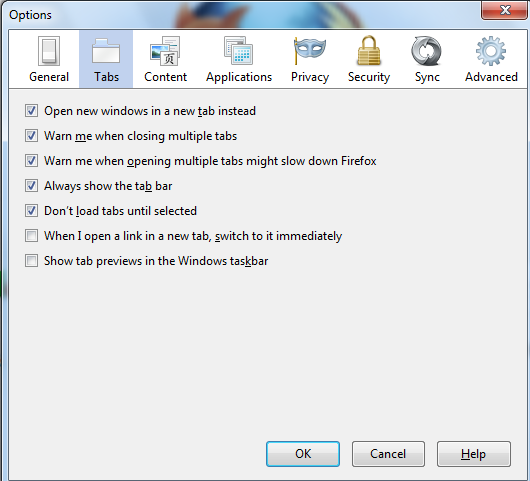
Tabs: The options here are about how Tabbed browsing is handled.
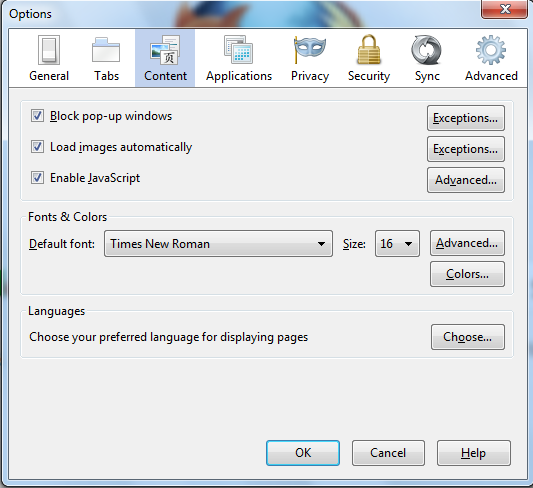
Content: The main options here are about Languages for display and allowing pop-up windows and java script.
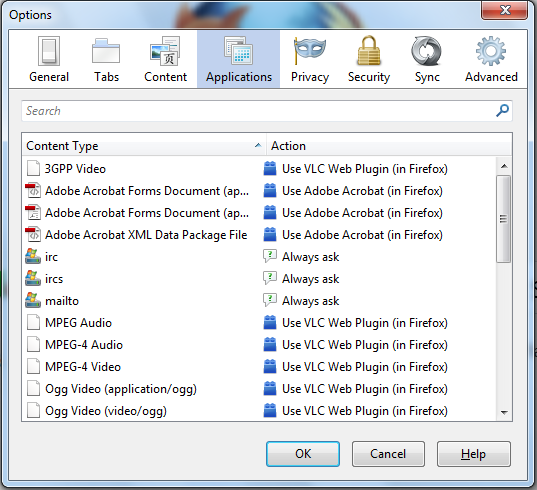
Applications: These options can be changed if you are unhappy with the default way that Firefox deals with different files.
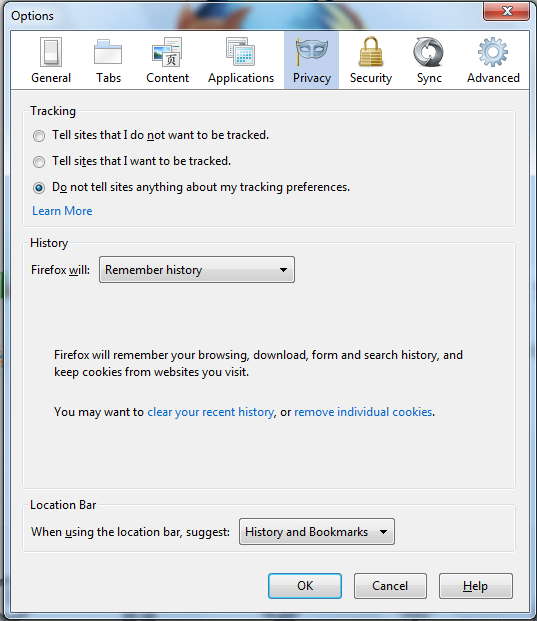
Privacy: There are important settings for privacy here.

Security: Passwords can be viewed and deleted here and a Master password set. There is more on this elsewhere in this manual.
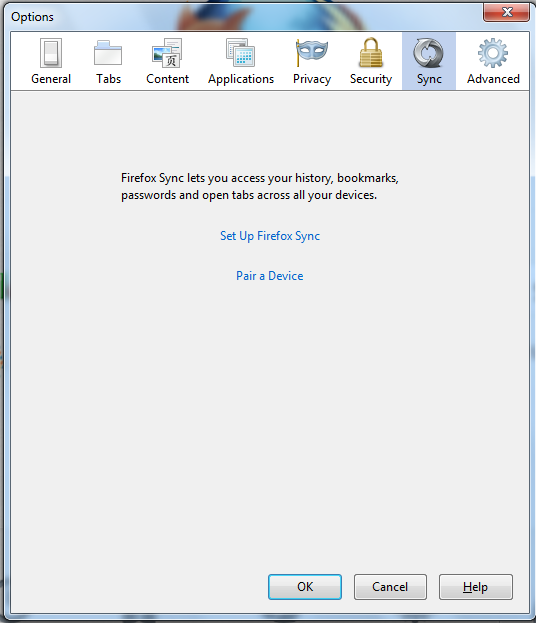
Sync: Sync is a service to share Firefox data across different computers.
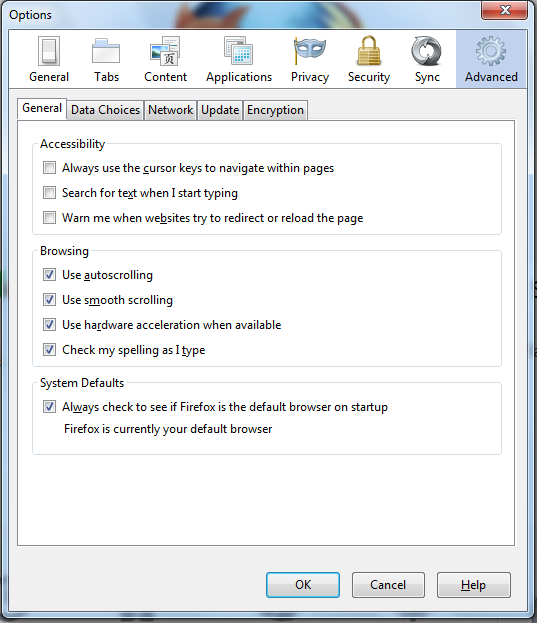
Advanced: There are many options here but dealing with cache and certificates are ones we deal with later.
Expert configuration using the about:config page
You can access more configuration in your browser window by entering about:config into the Firefox window. You will receive the following warning:

Click I'll be careful, I promise! You're now on the advanced configuration page. From here, you have access to all Firefox configuration variables. You should have a solid grasp of the configuration variables before making any changes to avoid unwanted browser behavior.
Safer browsing and Firefox Privacy
Firefox has several security and privacy features that help to keep you safer when you are browsing the web.
Privacy Settings
To improve your experience on the internet, Firefox stores a collection of data relevant to the sites you visit. For example, Firefox may store the following information as you browse:
- Visited page history: This allows you to go back to sites you've visited.
- Form and Search Bar entries: This remembers what you've filled out in the search bar and on forms on pages.
- Logins and passwords: Firefox will never store these without asking.
- Download list: This helps you find files you previously downloaded.
- Cookies: Cookies are small bits of information that sites use to save site preferences and sessions.
- Web cache: A cache stores pages you've already visited, greatly speeding up browsing.
- Browsing sessions: This allows Firefox to restore the tabs you had open.
In general, these can optimize your browsing experience and are very useful. We already covered how to delete this information in a previous chapter on History. However, you may prefer not to save this information, or to save only some of this information. For example, you may be using another person's computer or visiting sites with sensitive information. You might also wish to remove previously stored data.
Private Browsing
Firefox has a feature called Private Browsing where none of the above information is saved until Private Browsing is turned off.
To start Private Browsing, go to your menu and Select File > New Private Window.
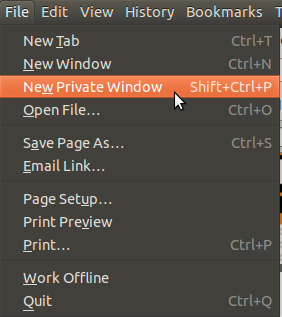
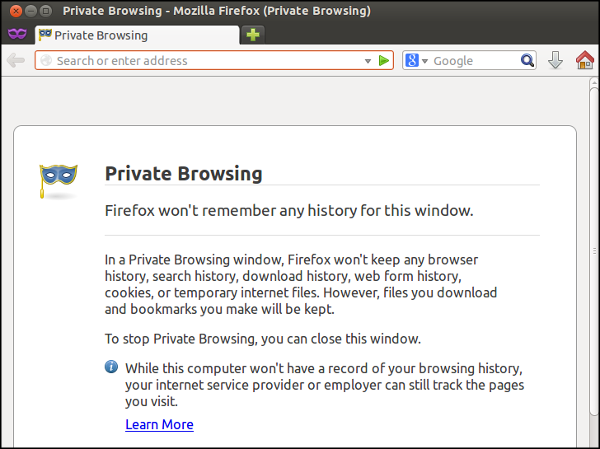
- You will then enter Private Browsing mode, and the Private Browsing information screen will appear.
-
When browsing in Private Browsing mode, the Firefox window title will show (Private Browsing) during your session.
Privacy Preferences
You can tell Firefox what type of information you'd like stored, and even default to saving no browsing history at all.
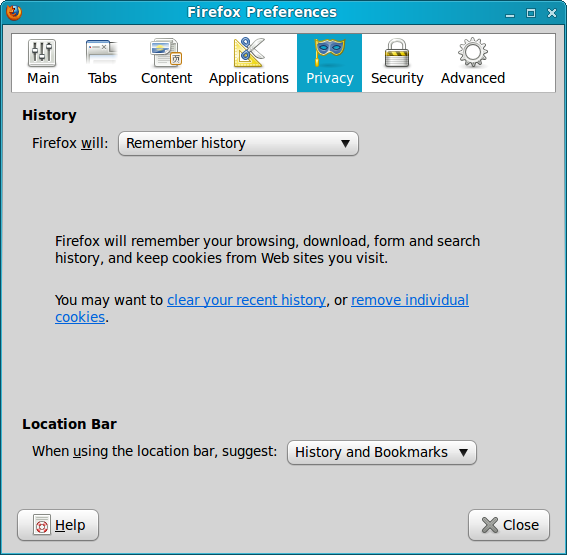
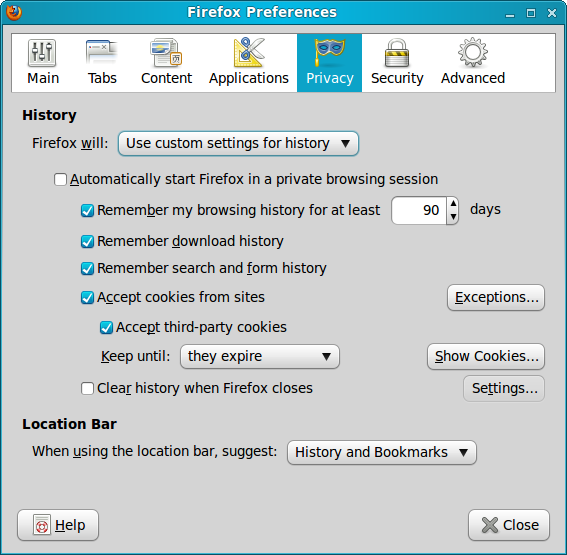
- To configure these settings go to Preferences.
- From the Dropdown menu, select from Remember history, Never remember history, or Use custom settings for history.
- Choose Use custom settings for history, this will give very fine-grained control over privacy settings.
-
You can specify how long Firefox will remember your browsing history. The default is 90 days, but it can be changed to any value.
- You can define whether the location bar will suggest from your browsing history and/or bookmarks. Choose from the dropdown menu next to Location Bar in the dialog.
- Once the preferences are to your liking, click Close.
Firefox's privacy controls do not affect the fact that website will still log requests from your computer. The pages you request may also be visible to anyone monitoring network traffic on your local network. Firefox's privacy settings only control the information stored on your computer.
The Difference between HTTP and HTTPS
The Hypertext Transfer Protocol (HTTP) is the networking protocol used by browsers that allows communication between you and a site you are visiting. Because communication is transmitted in plain text it is unsafe, especially when using wireless networks. It is like transmitting a message with personal information on a postcard.
To solve this problem the Hypertext Transfer Protocol Secure (HTTPS) was invented to provide encrypted communication and secure identification of a network web server. Most major Web sites, including Google, Wikipedia, and popular social networking platforms such as Facebook and Twitter. can also be reached via a secure connection, but not necessarily by default. Note that most sites do not provide encryption.

Site Identity Button
The Site Identity Button is another Firefox security feature that gives you more information about every site you visit. Using the Site Identity Button, you can find out who owns the website, and who verified that ownership, and if the communication channel between you and the site is encrypted via HTTPS.
The Site Identity Button is in the Location bar to the left of the web address in the location bar.
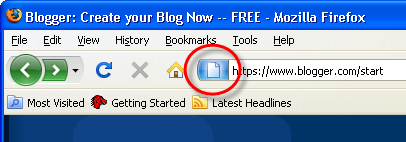
When viewing a website, the Site Identity Button will display in one of three colors - gray, blue, or green. Clicking on the Site Identity Button displays more details security and identity information about the website and a gray, blue, or green "Passport Officer" icon.

Gray - No identity information
 When the Site Identity button is gray, that indicates that the site doesn't provide any identity information at all.
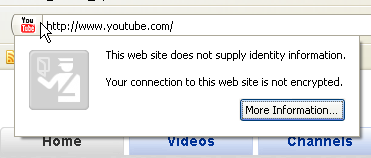
Most websites have the gray button, because they don't involve passing sensitive information back and forth.
However, if you are sending any sort of sensitive information (bank information, credit card data, Social Security Numbers, etc.) the Site Identity Button should not be gray.
When the Site Identity button is blue, that indicates that the site's domain has been verified, and the connection between Firefox and the server is encrypted and protected against eavesdroppers.
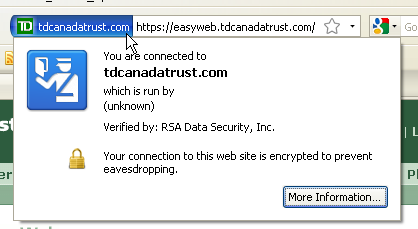
When a domain has been verified, it means that the people who are running the site have bought a certificate proving that they own the domain .
You can see more information about the site by clicking the More Information button on the Site Identification dialog.
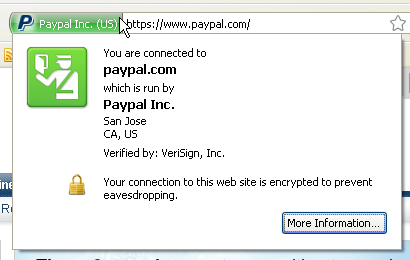
When the Site Identity button is green, that indicates that the site provides fully verified identity information about its owner, and that the connection is encrypted.
Phishing and Malware Protection
Web Forgery (also known as “Phishing”) is a form of identity theft that occurs when a malicious Web site impersonates a legitimate one in order to trick you into logging in or filling out a web form, in order to steal this information. The Stop Badware site has a good list of the symptoms you might see if you're computer has been infected by malware (http://www.stopbadware.org/home/badware_symptoms).
When you see this web page appear while surfing the web, Firefox has worked in conjunction with the Stopbadware database of bad sites to identify a site that might put you at risk.
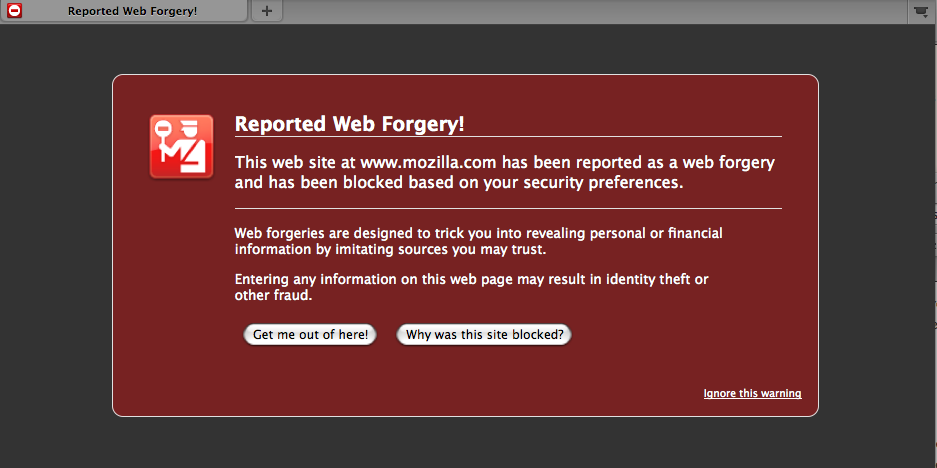
Phishing and Malware Protection works by checking the sites that you visit against lists of reported phishing and malware sites. The Phishing and Malware Protection feature is turned on by default.
You can test to see if Phishing Protection is active by trying to visit the phishing test site (http://www.mozilla.com/firefox/its-a-trap.html) or the malware test site (http://www.mozilla.com/firefox/its-an-attack.html) to confirm that Firefox is blocking attack sites.
If you happen to own a site or blog page that was attacked and you have since repaired it, or if you feel that your site was reported in error, you can request that it be removed from the lists.
FireFTP
FireFTP is a Firefox add-on that gives you a free, open source, cross-platform FTP client. If you have access to a Web server and you have an FTP account on that server, then by using FireFTP you can put all your HTML files, podcasts, media files, backup files, or anything you want online. It works on Mac OS X, Windows, and Linux; this is very useful if you ever find yourself on someone else's machine or if you travel and find yourself stranded in an Internet cafe in desperate need of an FTP application. It is free software, the download size is extremely small, and even better — the FireFTP installation process is simple. It's truly a wonderful thing.
Starting FireFTP
To start FireFTP, click Tools>FireFTP.
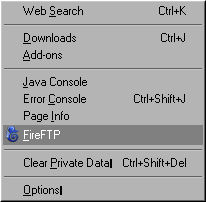
FireFTP opens in a new window within Firefox:
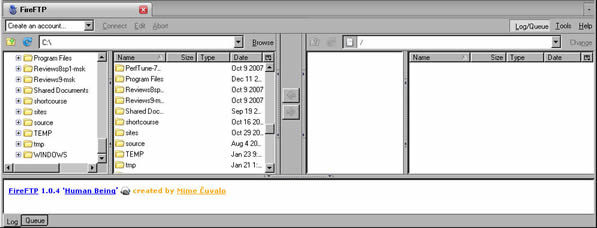
Although FireFTP opens in a browser as a web page, it is actually a full-featured FTP application. As you use FireFTP, you will appreciate the convenience of its browser-based interface. You can upload files to a website using FireFTP, and then simply click a browser tab and refresh to see the changes in your web page.
The first time you open FireFTP, you see the homepage of the FireFTP web site. From this site, you can access support and developer information.

Do not donate if you don't want to. FireFTP is absolutely free and a donation to this worthwhile cause is completely optional.
Sending a file to your server
This section covers how to upload a file to a server, assuming the server does not impose security restrictions beyond authenticating your 'log on' credentials. You need the following information to connect to the server:
- Host: the domain name or IP address of your web server
- Login: the user name for the account on the server
- Password: the password for the account
To obtain the connection information, contact the person or organization, such as your Internet service provider, who created the account for you. You can store this information in FireFTP, so you can access the web server quickly. To store the connection information, click Create an account.

You see the Account Manager window.
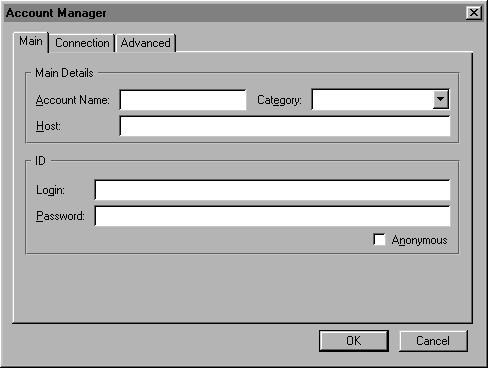
In
Account Manager, enter the connection information. In
Account Name and in
Category, you can type any names you like. If you do not type an account name, FireFTP copies the information you type from the host field to the account name field. After you fill in the fields in
Account Manager, the window looks something like this:
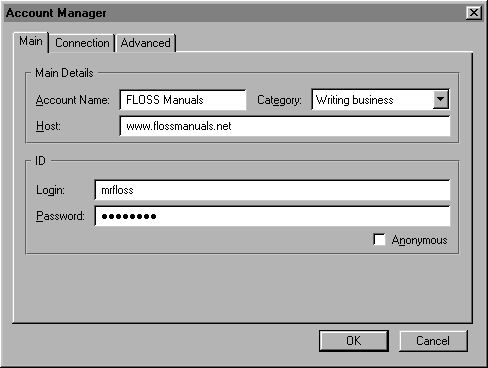
Click OK.
Connecting
After creating an account, click Connect. FireFTP connects to the server, as shown in the log messages in the lower part of the window. Files on the web server appear on the right side of the window. Files on your computer display on the left side of the window.
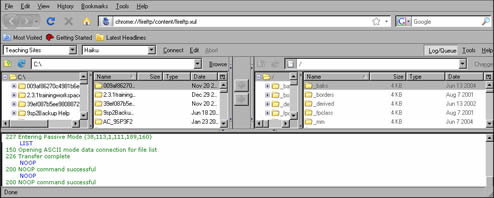
Transferring files
You can transfer files from your computer to the server, or from the server to your computer. Navigate to the files you want to transfer and select the folder on the other side of the window where you want to transfer the files.
Click the arrow pointing to the right to transfer file from your computer to the server.

Click the arrow pointing to the left to transfer files from the server to your computer. You see that the status of the transfer in the log at the bottom the window:
That's it. You have transferred your first files from your computer to a web server using FireFTP. You can also transfer entire directories and multiple files.
How the Web Works
Although many people use the terms "the Internet" and "the Web" interchangeably, actually the Web refers to just one way of communicating using the Internet. When you access the Web, you do so using software called a Web browser, such as Mozilla Firefox, Google Chrome, Opera or Microsoft Internet Explorer. The protocol that the Web operates on is called the Hyper-Text Transfer Protocol or HTTP. You might also have heard of HTTPS, which is the secure version of HTTP that uses Transport Layer Security (TLS) encryption to protect your communications.
Following your information on the Internet - the journey
Let's follow the example of visiting a Web site from your home computer.
Connecting to the Internet
To connect your computer to the Internet, you may need some extra equipment, such as a modem or a router, to first connect to your ISP's network. Usually, end-user computers or home networks are connected with ISPs via one of several technologies:
- telephone modem ("dial-up"), sending Internet data over telephone lines in the form of a telephone call
- DSL, a more efficient and higher-speed way to send data over telephone lines over short distances
- cable modem (or "cable Internet"), sending Internet data over a cable television company's coaxial cable
- fiber-optic cables, particularly in densely-populated areas of developed countries
- wide-area fixed wireless links, particularly in rural areas
- data service over the mobile phone network.
Browse to the Web site
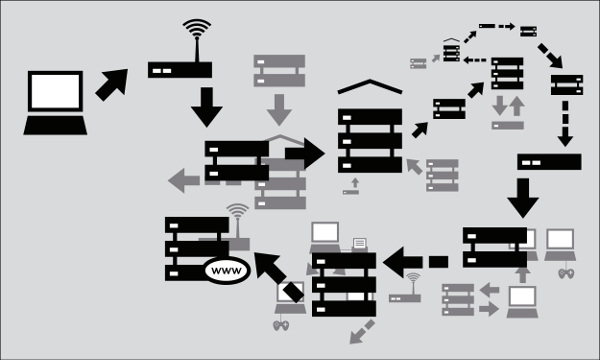
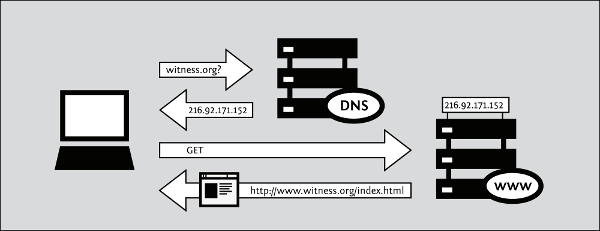
- You type in https://security.ngoinabox.org/. The computer sends the domain name "security.ngoinabox.org" to a selected DNS server, which returns a message containing the IP address for the Tactical Tech Security in a Box Web server (currently, 64.150.181.101).
- The browser then sends a request for a connection to that IP address.
- The request goes through a series of routers, each one forwarding a copy of the request to a router closer to the destination, until it reaches a router that finds the specific computer needed.
- This computer sends information back to you, allowing your browser to send the full URL and receive the data to display the page.
The message from the Web site to you travels through other devices (computers or routers). Each such device along a path can be referred to as a "hop"; the number of hops is the number of computers or routers your message comes in contact with along its way and is often between 5 and 30.
Domain names and IP addresses
All Internet servers, such as those which host Web sites, also have IP addresses. For example, the IP address of www.witness.org is 216.92.171.152. Since remembering IP addresses is cumbersome and IP addresses might change over time, specific systems are in place to make it easier for you to reach your destination on the Internet. This system is the Domain Name System (DNS), where a set of computers are dedicated to serving your computer with the IP addresses associated with the human-memorable "names".
For example, to access the Witness Web site you would type in the www.witness.org address, also known as a domain name, instead of 216.92.171.152. Your computer then sends a message with this name to a DNS server. After the DNS server translates the domain name into an IP address, it shares that information with your computer. This system makes Web browsing and other Internet applications more human-friendly for humans, and computer-friendly for computers.
Why This Matters
Normally all of these complex processes are hidden and you don't need to understand them in order to find the information you need. However, when people or organizations attempting to limit your access to information interfere with the operation of the system, your ability to use the Internet may be restricted. In that case, understanding just what they have done to interfere with your access can become extremely relevant.
One example is DNS servers, which were described as helping provide IP addresses corresponding to requested domain names. However, in some cases, these servers can be used as censoring mechanisms by preventing the proper IP address from being returned, and effectively blocking access to the requested information from that domain.
Censorship can occur at different points in the Internet infrastructure, covering whole networks, domains or subdomains, individual protocols, or specific content identified by filtering software. The best method to avoid censorship will depend on the specific censorship technique used. Understanding these differences will help you to choose appropriate measures for you to use the Internet effectively and safely.
HTTPS Everywhere
HTTPS Everywhere is a Firefox add-on produced as a collaboration between The Tor Project (https://www.torproject.org) and the Electronic Frontier Foundation (https://eff.org/). It encrypts your communications with a number of major Web sites, including Google, Wikipedia, and popular social networking platforms such as Facebook and Twitter.
Many sites on the Web offer some support for encryption over HTTPS, but make it difficult to use. For instance, they may connect you to HTTP by default, even when HTTPS is available. Alternatively, they may fill encrypted pages with links that go back to the unencrypted site. This way, data (such as usernames and passwords) sent to and received by these Web sites are transferred as plain text and are easy to read by third parties.
The HTTPS Everywhere extension fixes these problems by rewriting all requests to these sites to HTTPS. (Although the extension is called "HTTPS Everywhere", it only activates HTTPS on a particular list of sites and can only use HTTPS on sites that have chosen to support it. It cannot make your connection to a site secure if that site does not offer HTTPS as an option.)
Please note that some of those sites still include a lot of content, such as images or icons, from third party domains that is not available over HTTPS. As always, if the browser's lock icon is broken or carries an exclamation mark, you may remain vulnerable to some adversaries that use active attacks or traffic analysis. However, the effort required to monitor your browsing should still be usefully increased.
Some Web sites (such as Gmail) provide HTTPS support automatically, but using HTTPS Everywhere will also protect you from SSL-stripping attacks, in which an attacker hides the HTTPS version of the site from your computer if you initially try to access the HTTP version.
Additional information can be found at: https://www.eff.org/https-everywhere.
Installation
First, download the HTTPS Everywhere extension from the official Web site: https://www.eff.org/https-everywhere.
Select the newest release. In the example below, version 0.9.4 of HTTPS Everywhere was used. (A newer version may be available now.)
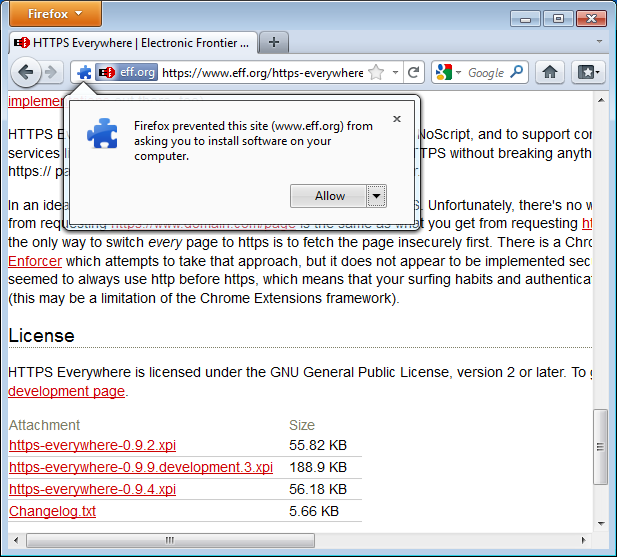
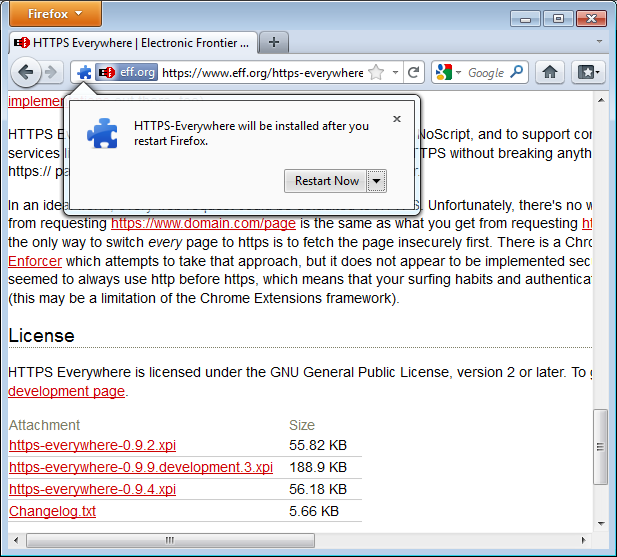
Click on "Allow". You will then have to restart Firefox by clicking on the "Restart Now" button. HTTPS Everywhere is now installed.
Configuration
To access the HTTPS Everywhere settings panel in Firefox 4 (Linux), click on the Firefox menu at the top left on your screen and then select Add-ons Manager. (Note that in different versions of Firefox and different operating systems, the Add-ons Manager may be located in different places in the interface.)
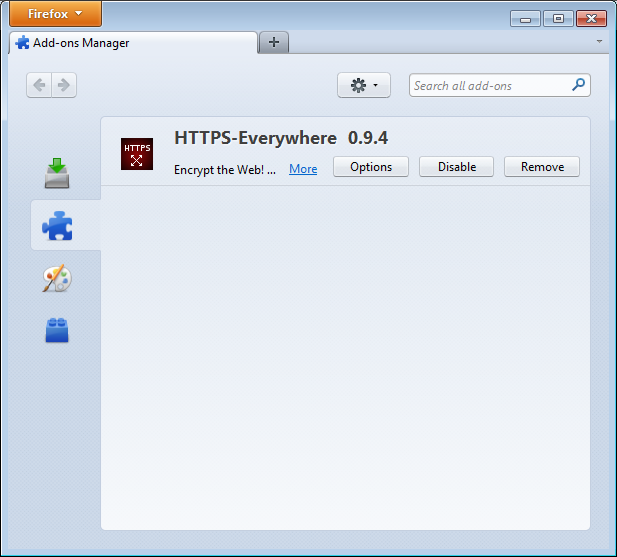
Click on the Options button.
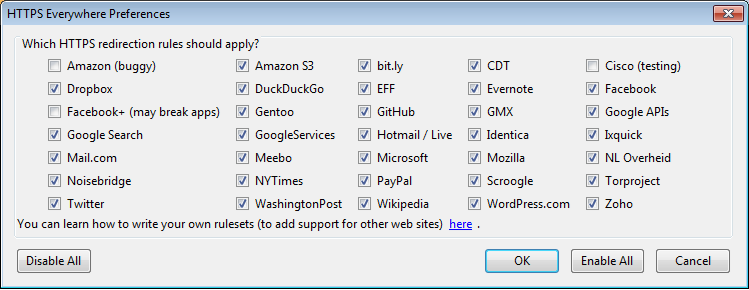
A list of all supported Web sites where HTTPS redirection rules should be applied will be displayed. If you have problems with a specific redirection rule, you can uncheck it here. In that case, HTTPS Everywhere will no longer modify your connections to that specific site.
Usage
Once enabled and configured, HTTPS Everywhere is very easy and transparent to use. Type in an insecure HTTP URL (for example, http://www.google.com).
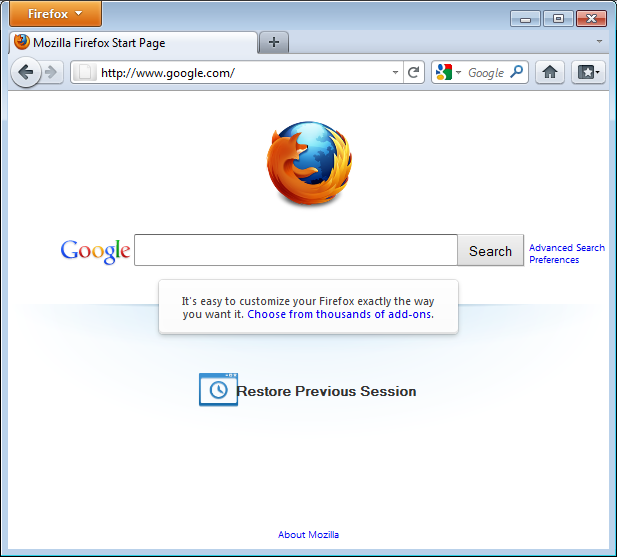
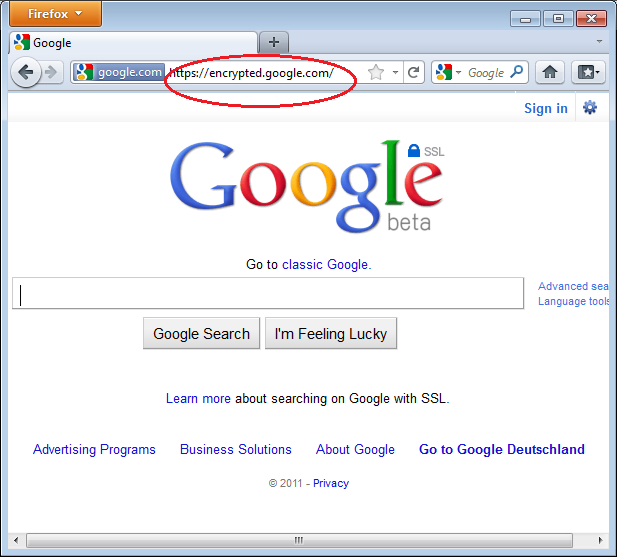
Press Enter. You will be automatically redirected to the secure HTTPS encrypted Web site (in this example: https://encrypted.google.com). No other action is needed.
If networks block HTTPS
Your network operator may decide to block the secure versions of Web sites in order to increase its ability to spy on what you do. In such cases, HTTPS Everywhere could prevent you from using these sites because it forces your browser to use only the secure version of these sites, never the insecure version. (For example, we heard about an airport Wi-Fi network where all HTTP connections were permitted, but not HTTPS connections. Perhaps the Wi-Fi operators were interested in watching what users did. At that airport, users with HTTPS Everywhere were not able to use certain Web sites unless they temporarily disabled HTTPS Everywhere.)
In this scenario, you might choose to use HTTPS Everywhere together with a circumvention technology such as Tor or a VPN in order to bypass the network's blocking of secure access to Web sites.
Adding support for additional sites in HTTPS Everywhere
You can add your own rules to the HTTPS Everywhere add-on for your favorite Web sites. You can find out how to do that at: https://www.eff.org/https-everywhere/rulesets. The benefit of adding rules is that they teach HTTPS Everywhere how to ensure that your access to these sites is secure. But remember: HTTPS Everywhere does not allow you to access sites securely unless the site operators have already chosen to make their sites available through HTTPS. If a site does not support HTTPS, there is no benefit in adding a ruleset for it.
If you are managing a Web site and have made an HTTPS version of the site available, a good practice would be to submit your Web site to the official HTTPS Everywhere release.
Installation and Updating
This section contains detail on installing Firefox on Window, Ubuntu and Mac. Installing normally starts in the same way by visiting http://www.mozilla.com/firefox/. This website automatically detects the version of Mozilla Firefox that works best with your computer.
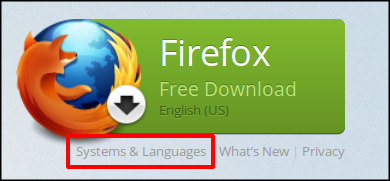
However If you want to download Firefox for a different language or for a different operating system than the one detected, click "Systems and Languages" under the green download button to see a list of all the options available.
Download and Install Firefox on Windows
- Open your internet browser (such as Microsoft Internet Explorer Google Chrome) and visit: http://www.mozilla.com/firefox/.
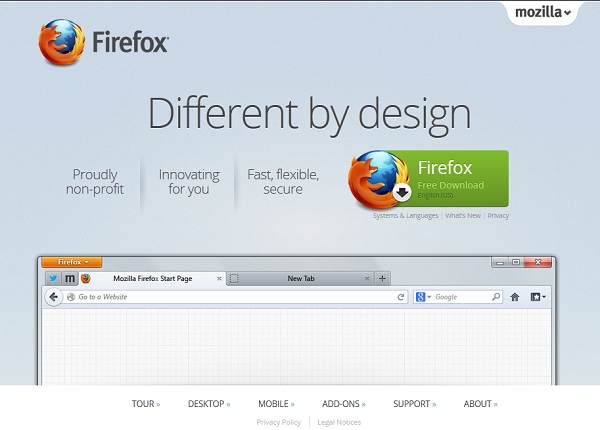
- Click Firefox Free Download and your computer will start receiving the setup file. This should appear in your Downloads folder. Once the download completes, close all of the programs you are using before you install Mozilla Firefox.
- Open the file (by double-clicking the file with your mouse) to start the Firefox install wizard.
- If you get a Security Warning and you should allow the setup to run by clicking Run.
- If prompted to allow the program to make changes to your computer click Yes.
A welcome screen appears.
- Click Next to continue. The Setup Type screen appears. A "Standard" setup is selected by default (using the custom option is only recommended for experienced users).
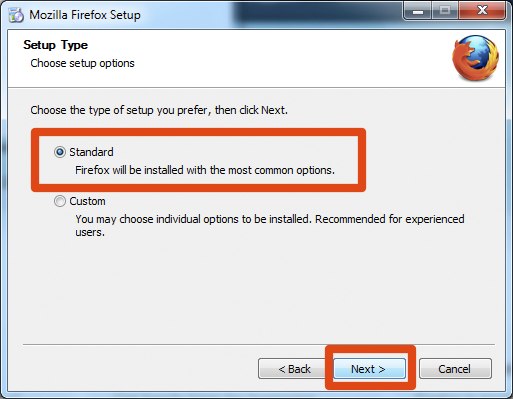
- Click Next to continue.
- Firefox installs itself as your default browser. If you do not want Firefox to be your default browser, clear the check box Use Firefox as my default web browser.
- Click Next.
- Once Firefox has been installed, click Finish to close the setup wizard.
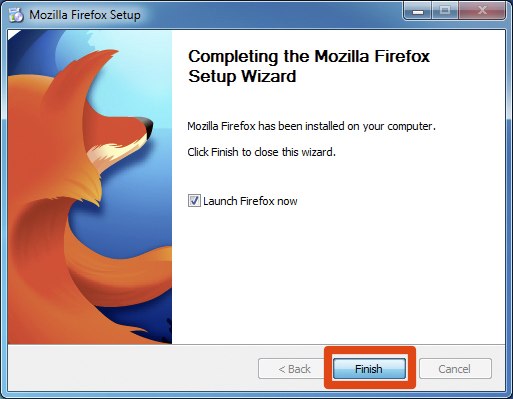
If the Launch Firefox now check box is checked, Firefox will start after you click Finish. You may then be asked if you want to import Options Bookmarks History Passwords and other data from your previous browser. Check the appropriate box in accordance with your wishes and click Next.
Installing on Mac OS X
- To download Firefox for Mac visit http://www.mozilla.com/ and follow the steps above.
- When prompted, click OK.
Once the download is complete this window appears: 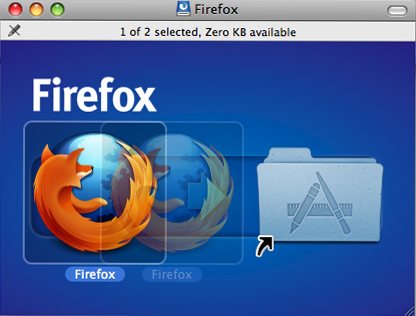
- Click and hold the Firefox.app icon, then drag it on top of the Applications icon. When it is on top of the Applications icon, release the mouse button. This starts copying the program files to the Applications directory on your computer.
- Eject the Firefox disk image. If this does not work by normal means, select the disk image icon and then, in the Finder menu, select File > Eject Firefox.
- Now, open the Applications directory and drag the Firefox icon to the dock:
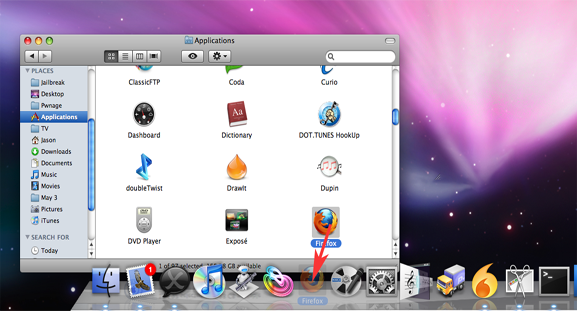
- Click either icon (in the Dock or the Applications folder) to start Firefox. The Import Wizard dialog box appears:
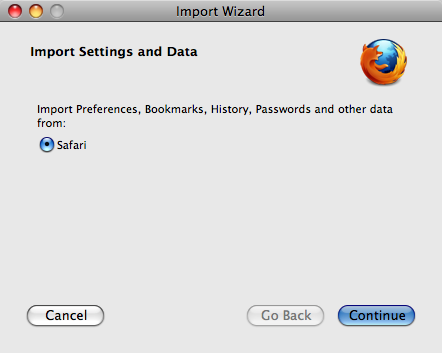
- To import your bookmarks, passwords and other data from Safari, Click Continue.
- Click Continue. Now you see the Welcome to Firefox page.
Congratulations, you are now ready to use Firefox!
Installing Firefox on Ubuntu
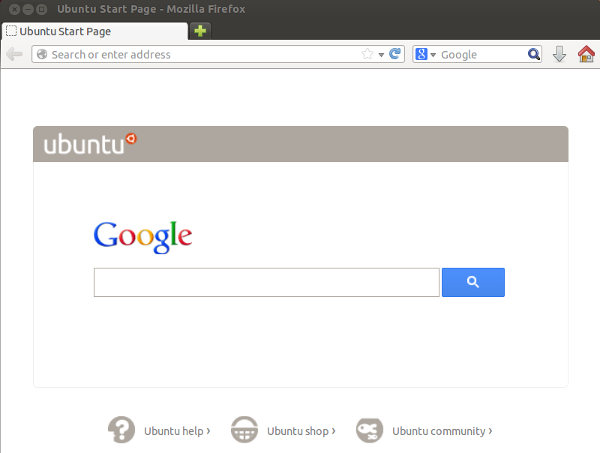
Firefox is already installed on Ubuntu as part of the normal installation. Accessing it is easy. If you are using an installation of Ubuntu with no changes to the default Desktop you should see the Firefox logo towards the top left of your screen.

Click on the log and Firefox starts and a welcome window opens:
Updating Firefox
Recent versions of Firefox automatically update themselves. Updates are downloaded in the background and installed when you restart Firefox.
Interface Overview
The basic Firefox window includes menus, buttons, toolbars, and a search box. The following image shows the basic window. For an explanation of the main functions, see the table following the image.

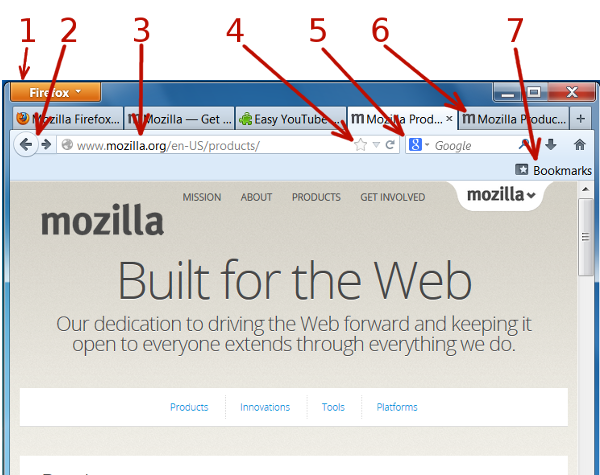
| Pointer |
Feature |
Description |
| 1 |
Menus or Orange Drop Down Menu Button |
Provide various commands for using Firefox. |
| 2 |
Browse Buttons |
The arrows at the top left are your Back and Forward buttons. The Refresh button is found to the far right actually in the Location Bar . |
| 3 |
Location Bar |
This long box ("search or enter address") is where you enter text for typing the URL of a web page. |
| 4 |
Edit Bookmark Tools |
Enable you to remove, name, move, or tag a bookmark. |
| 5 |
Search Box |
Text box for typing a search term, with a menu of search engines to select from. |
| 6 |
Tabbed Pages |
Allow you to open multiple web pages at the same time and switch between them by clicking on a tab. |
| 7 |
Toolbars |
Used for navigation and bookmarking, among many other functions. Clicking on the Bookmarks button to the top right of the page displays your bookmarks and enables you to make, remove, name, move, or tag a bookmark. |
Menus
The way that menus are displayed in Firefox varies depending on which operating system you are using. This makes it a little tricky to write this guide. To make it easier here is a short summary of how to find the menus.
Windows
In windows most menu options are available by clicking on the orange Firefox button.
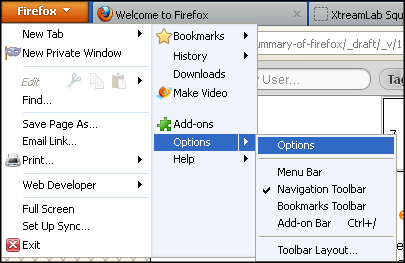
To access general Firefox preferences go to Firefox > Options.
This layout has changed recently and if you prefer to see a list of menu options always displayed at the top of your window you can click on Options > Menu Bar to make that happen. The menu options will look similar to those shown below.
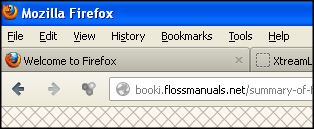
In this guide we will try to use the second option, with the menu options lined up at the top of the window, as this view is more compatible with other operating systems.
Ubuntu
Menu items are available at the top of your screen. If you cannot see them to start with then move your mouse pointer to the top of the screen and they should appear.
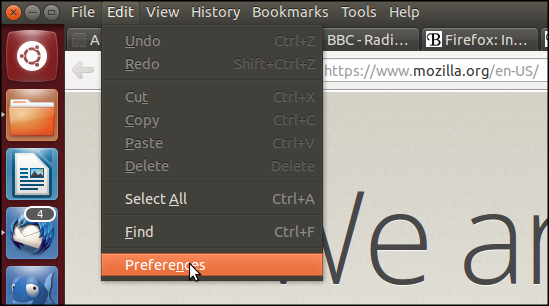
To access general Firefox preferences go to Edit > Preferences.
Mac OS
In Mac OS the menus are also at the top of the browser window.
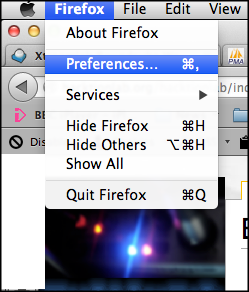
To change Firefox preferences navigate to Firefox > Preferences.
Using the Location Bar
Going to a website in Firefox is easy. Just type a website address (also known as a "URL", for "Uniform Resource Locator") into the location bar and press Enter.

If a page is loading too slowly or you no longer wish to view a page, click the Stop button. Firefox displays what has been loaded so far. You can then navigate to a different page using the back button or the location bar.

To reload the current page or to get the most up-to-date version, click the Reload button or press Ctrl+R.

It is not necessary to type "http://" at the beginning of the address. While you are typing, Firefox looks for visited and bookmarked page titles and tags along with visited web addresses, making guesses at which sites or pages you want to visit.
This way, if you don't remember the URL of a page you've visited or bookmarked, you can type some words from the title of the page, and Firefox will display some suggestions.
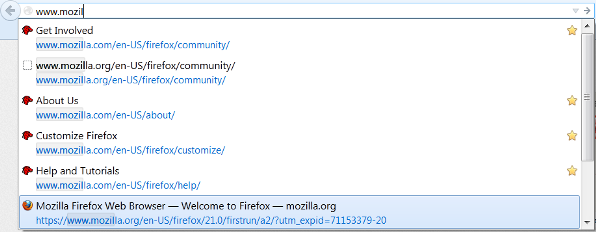
This powerful search feature of the Location Bar is the reason why some Firefox developers affectionately call it the Awesome Bar instead. It allows you to use the Down Arrow key or your mouse to highlight the URL of the site you want to visit. Press Enter or click your selection. The website you selected appears.
The Location Bar learns which sites you visit most frequently and optimizes the result listing to match your personal style. After a few weeks, it can require as little as typing a single letter in the location bar to get to frequently visited pages.
Web keyword searches
If you enter text into the Location Bar that is not a valid web address, Firefox tries to direct you to the location it believes you intended.
Firefox first tries to send your request to an Internet Keyword search service. This service is Google's Browse by Name (http://toolbar.google.com/bbn_help.html) service by default. For example, If you type mozilla foundation into the location bar, Firefox sends that text to the Google Browse by Name service, since it is not a valid URL address. The service directs you to its best match for your request, in this case: http://www.mozilla.org. For an entry without a clear match to a URL, Firefox displays search results for the entry. If you enter an incomplete web address, Firefox tries to "guess" the address.
Clearing the history
Firefox keeps a "history" of the Web sites and pages that you've visited. It uses this list to generate suggestions as you type in the location bar. However, you might not want the history of pages you've visited to be stored on your computer.
You can clear a single item or all items from location bar history.
To clear a single item, Click the drop-down arrow in the location bar.

Press the Down Arrow key, or move your pointer, to "highlight" (by way of a blue outline) the entry to delete.
Press the
Delete key to delete the item.
You can clear many items from the location bar by removing Browsing History via the Clear Recent History dialog window. For more information, see the section on Privacy in Firefox.
Bookmarks and the Refresh Buttons in the Location bar
At the far right in the Location bar itself can be also be found a star shaped button.
 If this button is shown in yellow it means the URL shown in the bar has been bookmarked and clicking on it will enable you to edit the bookmark entry. If it is not shown in yellow then clicking will place the URL in your list of bookmarks.
Clicking on the circular arrow in the Location bar will "refresh" the web page you are looking at, updating it and showing any changes which might have taken place since you first started to view the page.

Showing or Hiding Toolbars
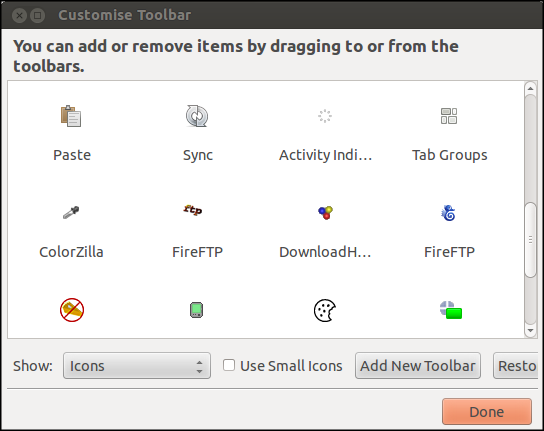
You can show or hide a toolbar at any time by navigating to View > Toolbars on your menu and select or de-selecting a toolbar. When selected, a toolbar shows a checkmark next to it on the menu.

There is also the option to Customise your toolbars. This is quite intuitive to use as it mentions "You can add or remove items by dragging them to or from the toolbars." This is a great way to take control of your browser by creating short cut icons to tools you use often.
Introduction to Firefox
Our guess is that you wouldn't be reading this chapter unless you already knew what a Web browser was. However, if you don't know, a browser is the software you use to visit and view Web sites on the Internet.
The Internet is a giant network of computers, all connected to each other. Some of the computers are "Web servers" – computers that have Web sites on them. If you want to visit these sites from your computer or a mobile device, you need a way to surf around and display them. That's what a browser does.

One of the most popular browsers is Firefox, a free, open source Web browser created by the Mozilla foundation in 2003. Firefox runs on all the major operating systems – Windows, MacOS and Linux – and it has been translated into more than 75 languages. Best of all, It's completely free of charge.
Where to get Firefox
If you want to install Firefox you can find the installation files here:
https://www.mozilla.com/
When you visit this site you will be presented automatically with the correct installation file for your operating system (Windows/Mac/Linux). For more information on how to install Firefox on each of these operating systems, please see later chapters.
What is a Firefox Add-on?
When you first download and install Firefox, it can handle basic browser tasks immediately. You can also add extra capabilities or change the way Firefox behaves by installing add-ons, small additions that extend Firefox's power. There are several kinds of add-ons:
- extensions that provide additional functionality to the browser
- themes that change Firefox's appearance
- plugins that help Firefox handle things it normally can't process (for instance Flash movies, Java applications, and so on).
The variety of add-ons available is enormous. You can add dictionaries for different languages, track the weather in other countries, get suggestions for Web sites which are similar to the one you are currently viewing, and much more. Firefox keeps a list of current add-ons on its site (https://addons.mozilla.org/firefox).
Before you install any add-on, keep in mind that it can read a lot of information from your browser so it is very important to choose add-ons from trusted sources. Otherwise, an add-on you install might share information about you without your knowing, keep a record of the sites you have visited, or even harm your computer.
We recommend that you never install an add-on for Firefox unless it is available from the Firefox add-on pages. You should also never install Firefox unless you get the installation files from a trusted source. It is important to note that using Firefox on someone else's computer or in an Internet café increases your potential vulnerability.
About this Manual
This summary of the Firefox manual focusing on the security use was commissioned by Internews as part of the Human Rights Connect Expand programme.
It contains an updated summary of the longer Firefox manual on FLOSS Manuals and uses other existing material from Bypassing Internet Censorship and Basic Internet Security. New original material has been added by project editors Mick Fuzz and Jacques Sauvage.
Original Firefox BookSprint
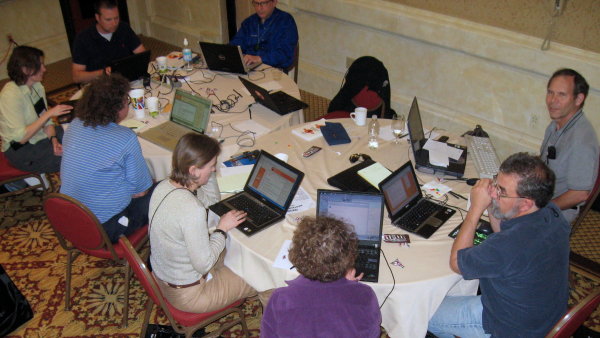
The longer Firefox manual evolved during a two-day Book Sprint at the Doctrain West conference. Scott Abel extended the invitation, and the sprint was a collaborative effort by FLOSS Manuals, Doctrain West, and the Mozilla Foundation. 25 writers collaborated over two days in virtual and real space to produce a book in two days! In addition to original content, large amounts of material were reused from the excellent Firefox Support Knowledge Base.
What is FLOSS?
Firefox is entirely free (FLOSS) software. You do not have to pay anything to download and install it.
FLOSS is an abbreviation for Free/Libre/Open Source Software. While there are dozens of variations of these terms in use, all FLOSS software shares some of the same basic ideals of software freedom, including:
- Freedom to run the program
- Free access to complete source code
- Freedom to study the code
- Freedom to modify the code
- Freedom to redistribute the modified code
Firefox and the Community
For many users, Firefox is their first introduction to FLOSS and the ideas it represents. FLOSS is a core aspect of the Mozilla project, which has developed the Firefox web browser. As a result, everyone is free to use, copy, improve, or extend Firefox. Another core aspect of the Mozilla project is its participatory development strategy, which means anyone can get involved with making Firefox better. Millions of community members help make Firefox better every day.
More than 30% of Mozilla code is contributed by volunteers, with the rest being contributed by full-time contributors who are paid either by Mozilla or by other companies involved in Mozilla development. Mozilla is a diverse set of people, and nearly anyone can make a big difference, whether by developing code, writing documentation, testing software, or just telling friends about Firefox!
Noscript and Adblock
While no tool can protect you completely against all threats to your online privacy and security, the Firefox extensions described in this chapter can significantly reduce your exposure to the most common ones, and increase your chances of remaining anonymous.
AdBlock Plus
Adblock Plus (http://www.adblockplus.org) scans Web pages for advertisements and other content that may try to track you, and then blocks it. To keep current with the latest threats, AdBlock Plus relies on blacklists maintained by volunteers.
Getting started with AdBlock Plus
Once you have Firefox installed:
- Download the latest version of AdBlock Plus from http://adblockplus.org/en/installation#release or search for the plugin with Firefox's Add-ons Manager ("Firefox" > "Add-ons").
- Confirm that your want AdBlock Plus by clicking "Install Now".
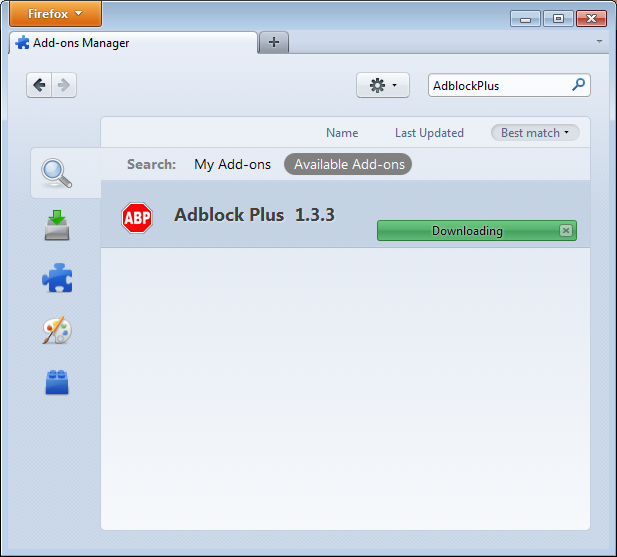
- After AdBlock Plus has been installed, Firefox will ask to restart.
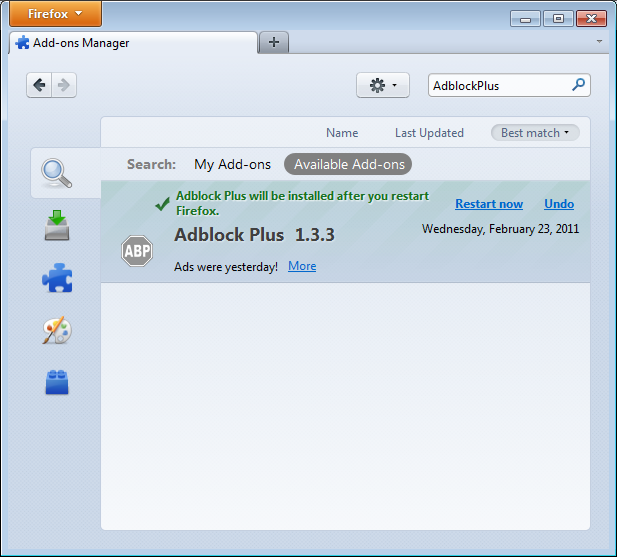
Choosing a filter subscription
Adblock Plus by itself doesn't do anything. It can see each element that a Web site attempts to load, but it doesn't know which ones should be blocked. This is what AdBlock's filters are for. After restarting Firefox, you will be asked to choose a filter subscription (free).

Which filter subscription should you choose? Adblock Plus offers a few in its dropdown menu and you may wish to learn about the strengths of each. A good filter to start protecting your privacy is EasyList (also available at http://easylist.adblockplus.org/en).
As tempting as it may seem, don't add as many subscriptions as you can get, since some may overlap, resulting in unexpected outcomes. EasyList (mainly targeted at English-language sites) works well with other EasyList extensions (such as region-specific lists like RuAdList or thematic lists like EasyPrivacy). But it collides with Fanboy's List (another list with main focus on English-language sites).
You can always change your filter subscriptions at any time within preferences (press Ctrl+Shift+E). Once you've made your changes, click OK.
Creating personalized filters
AdBlock Plus also lets you create your own filters, if you are so inclined. To add a filter, start with Adblock Plus preferences (Ctrl+Shift+E) and click on "Add Filter" at the bottom left corner of the window. Personalized filters may not replace the benefits of well-maintained blacklists like EasyList, but they're very useful for blocking specific content that isn't covered in the public lists. For example, if you wanted to prevent interaction with Facebook from other Web sites, you could add the following filter:
||facebook.*$domain=~facebook.com|~127.0.0.1
The first part (||facebook.*) will initially block everything coming from Facebook's domain. The second part ($domain=~facebook.com|~127.0.0.1) is an exception that tells the filter to allow Facebook requests only when you are in Facebook or if the Facebook requests come from 127.0.0.1 (your own computer) in order to keep certain features of Facebook working.
A guide on how to create your own Adblock Plus filters can be found at http://adblockplus.org/en/filters.
Enabling and disabling AdBlock Plus for specific elements or Web sites
You can see the elements identified by AdBlock Plus by clicking on the ABP icon  in your browser (usually next to the search bar) and selecting "Open blockable items", or by pressing Ctrl+Shit+V. A window at the bottom of your browser will let you enable or disable each element on a case-by-case basis. Alternatively, you can disable AdBlock Plus for a specific domain or page by clicking on the ABP icon and ticking the option "Disable on [domain name]" or "Disable on this page only".
NoScript
The NoScript extension takes browser protection further by globally blocking all JavaScript, Java and other executable content that could load from a Web site and run on your computer. To tell NoScript to ignore specific sites, you need to add them to a whitelist. This may sound tedious, but NoScript does a good job in protecting Internet users from several threats such as cross-site scripting (when attackers place malicious code from one site in another site) and clickjacking (when clicking on an innocuous object on a page reveals confidential information or allows the attacker to take control of your computer). To get NoScript, visit http://addons.mozilla.org or http://noscript.net/getit.
The same method by which NoScript protects you can alter the appearance and functionality of good Web pages, too. Luckily, you can adjust how NoScript treats individual pages or Web sites manually – it is up to you to find the right balance between convenience and security.
Getting started with NoScript
- Go to the NoScript download section at http://noscript.net/getit. Click on the green "INSTALL" button.
- Confirm that you want NoScript by clicking "Install Now".
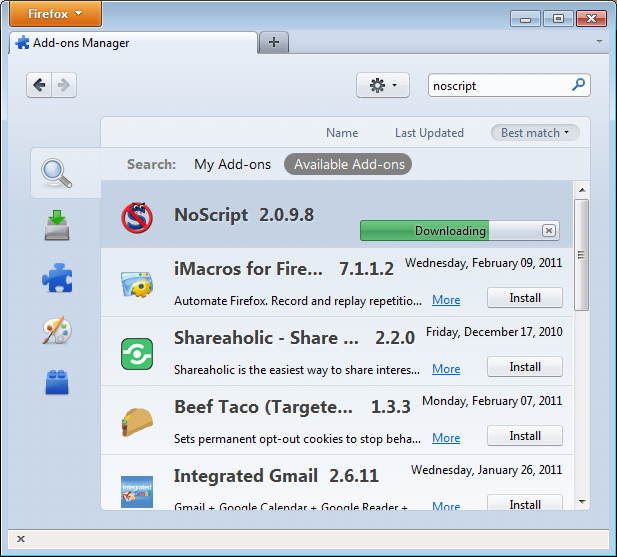
- Restart your browser when asked.
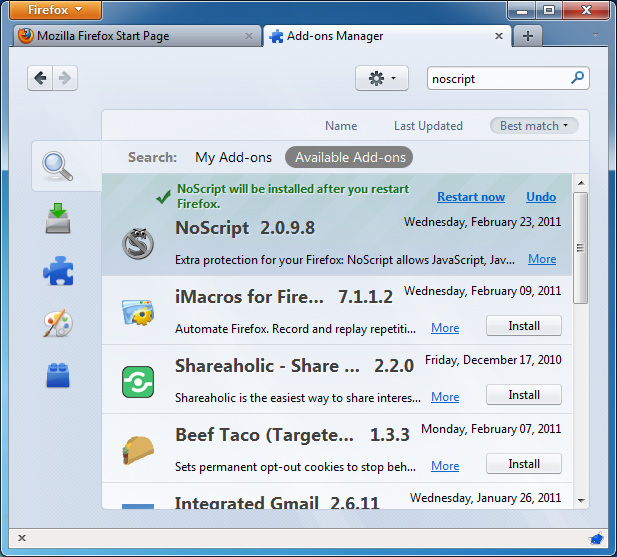
NoScript notifications and adding Web sites to your whitelist
Once restarted, your browser will have a NoScript icon at the bottom right corner, where the status bar is, indicating what level of permission the current Web site has to execute content on your PC.
 Full protection: scripts are blocked for the current site and its subframes. Even if some of the script sources imported by the page are in your whitelist, code won't run (the hosting documents are not enabled).
 Very restricted: the main site is still forbidden, but some pieces (such as frames) are allowed. In this case, some code may be running, but the page is unlikely to work correctly because its main script source is still blocked.
 Limited permissions: scripts are allowed for the main document, but other active elements, or script sources imported by the page, are not allowed. This happens when there are multiple frames on a page or script elements that link to code hosted on other platforms.
 Mostly trusted: all the script sources for the page are allowed, but some embedded content (such as frames) are blocked.
 Selective protection: scripts are allowed for some URLs. All the others are marked as untrusted.
 All scripts are allowed for the current site.
 Scripts are allowed globally, however content marked as untrusted will not be loaded.
To add a site that you trust to your whitelist, click on the NoScript icon and select:
- "Allow [domain name]" to allow all scripts that are hosted under a specific domain name, or
- "Allow all this page" to allow complete script execution - including third party scripts that may be hosted elsewhere, but are imported by the main Web site.
(You can also use the "Temporarily allow" options to allow content loading only for the current browsing session. This is useful for people who intend to visit a site just once, and who want to keep their whitelist at a manageable size.)
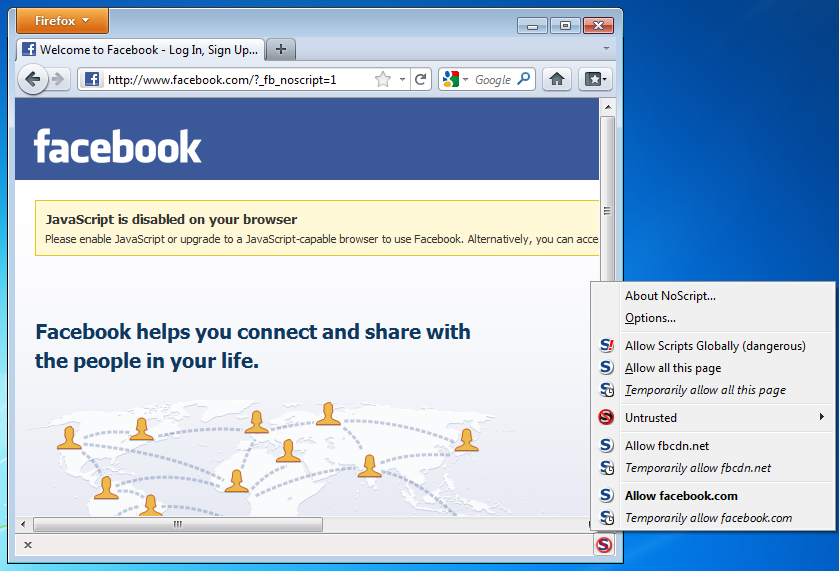
Alternatively, you can add domain names directly to the whitelist by clicking on the NoScript button, selecting Options and then clicking on the Whitelist tab.
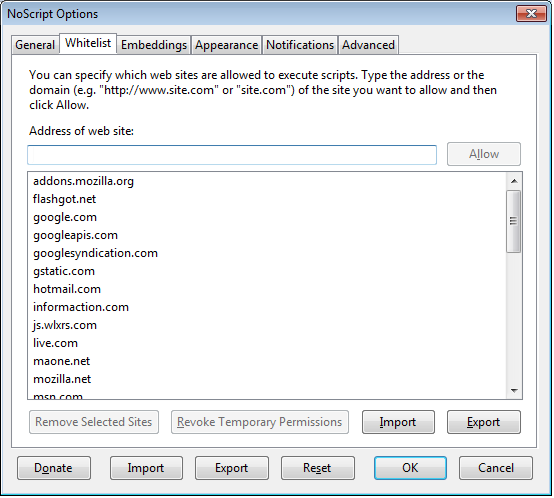
Marking content as untrusted
If you want to permanently prevent scripts from loading on a particular Web site, you can mark it as untrusted: just click the NoScript icon, open the "Untrusted" menu and select "Mark [domain name] as Untrusted". NoScript will remember your choice, even if the "Allow Scripts Globally" option is enabled.
Bypassing Censorship in Firefox
Just as many individuals, corporations and governments see the Internet as a source of dangerous information that must be controlled, there are many individuals and groups who are working hard to ensure that the Internet, and the information on it, is freely available to everyone who wants it. These people have as many different motivations as those seeking to control the Internet. However, for someone whose Internet access is restricted and who wants to do something about it, it may not matter whether the tools were developed by someone who wanted to chat with a girlfriend, write a political manifesto, or send spam.
There is a vast amount of energy, from commercial, non-profit and volunteer groups, devoted to creating tools and techniques to bypass Internet censorship, resulting in a number of methods to bypass Internet filters. Collectively, these are called circumvention methods, and can range from simple work-arounds, protected pathways, to complex computer programs. However, they nearly all work in approximately the same manner. They instruct your Web browser to take a detour through an intermediary computer, called a proxy
About Proxy Servers
A proxy server allows you to reach a Web site or other Internet location even when direct access is blocked in your country or by your ISP. There are many different kinds of proxies, including:
- Web proxies, which only require that you know the proxy Web site's address. A Web proxy URL may look like http://www.example.com/cgi-bin/nph-proxy.cgi
- HTTP proxies, which require that you modify your Browser settings. HTTP proxies only work for Web content. You may get the information about an HTTP proxy in the format "proxy.example.com:3128" or "192.168.0.1:8080".
- SOCKS proxies, which also require that you modify your Browser settings. SOCKS proxies work for many different Internet applications, including e-mail and instant messaging tools. The SOCKS proxy information looks just like HTTP proxy information.
You can use a Web proxy directly without any configuration by typing in the URL. The HTTP and SOCKS proxies, however, have to be configured in your Web browser.
Default Firefox proxy configuration
In Firefox 4 (Linux), you enter the configuration screen by clicking on the Firefox menu at the top left on your screen and then selecting Options. In the pop-up window, select the icon labeled Advanced and then choose the Network tab. You should see this window:
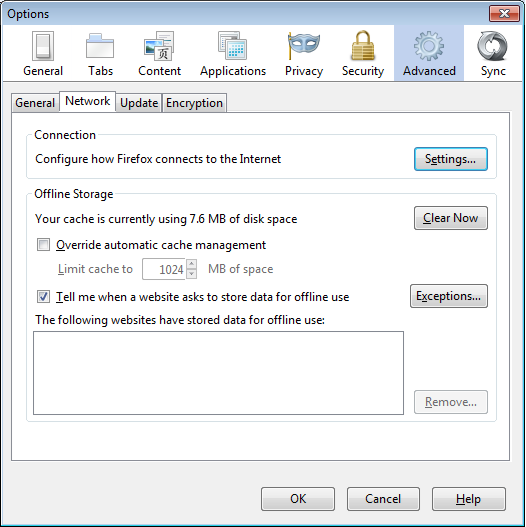
Select Settings, click on "Manual proxy configuration" and enter the information of the proxy server you want to use. Please remember that HTTP proxies and SOCKS proxies work differently and have to be entered in the corresponding fields. If there is a colon (:) in your proxy information, that is the separator between the proxy address and the port number. Your screen should look like this:
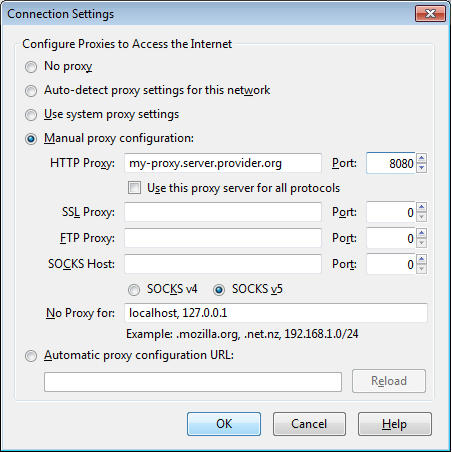
After you click OK, your configuration will be saved and your Web browser will automatically connect through that proxy on all future connections. If you get an error message such as, "The proxy server is refusing connections" or "Unable to find the proxy server", there is a problem with your proxy configuration. In that case, repeat the steps above and select "No proxy" in the last screen to deactivate the proxy.
Stealthy

"Does your country/ organisation block you from facebook / youtube or other websites?" ask the makers of Stealthy. This tool was originally developed to help disseminate information in the Arab Spring.
The Add-on allows you you to view content which may normally be blocked in your country. It works using proxy servers but instead of having to choose and set them up yourself it automatically selects them from a list kept up to date by the Add On developers.
This has the advantage of not having to keep constantly searching for up to date proxy servers and configuring them yourself. It is very easy to install and use. You can turn it on and off with a simple click of a button form your navigation toolbar.

When the button is red 'stealthy browsing' is off. when it is green it is on.
Clicking on the arrow next to the buttons allows you to set the configuration options.

There are PRO settings that you have to pay for after a trial period. However there are also settings which are free allowing you to either choose a proxy in a random location or to choose as specific country. If you do not want to pay make sure to set your configuration to use a non PRO option.
One disadvantage is that because the makers of Stealthy do the work to choose proxies for you, you lose some control over how your computer connects to the Internet.
FoxyProxy
FoxyProxy is a freeware add-on for the Firefox Web browser which makes it easy to manage many different proxy servers and change between them. For details about FoxyProxy, visit http://getfoxyproxy.org/.
Installation
In Firefox 4 (Linux), click on the Firefox menu at the top left on your screen and then select Add-ons. In the pop-up window, type the name of the add-on you want to install (in this case "FoxyProxy") in the search box on the top right and click Enter. In the search results, you will see two different versions of FoxyProxy: Standard and Basic. For a full comparison of the two free editions, visit http://getfoxyproxy.org/downloads.html#editions, but the Basic edition is sufficient for basic circumvention needs. After deciding which edition you want, click Install.
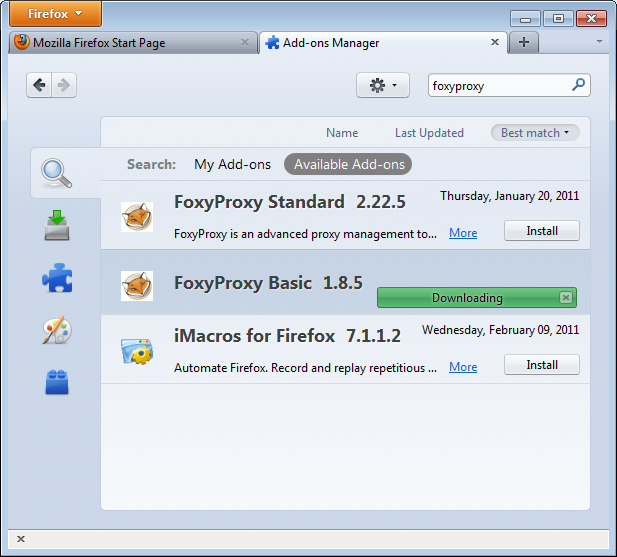
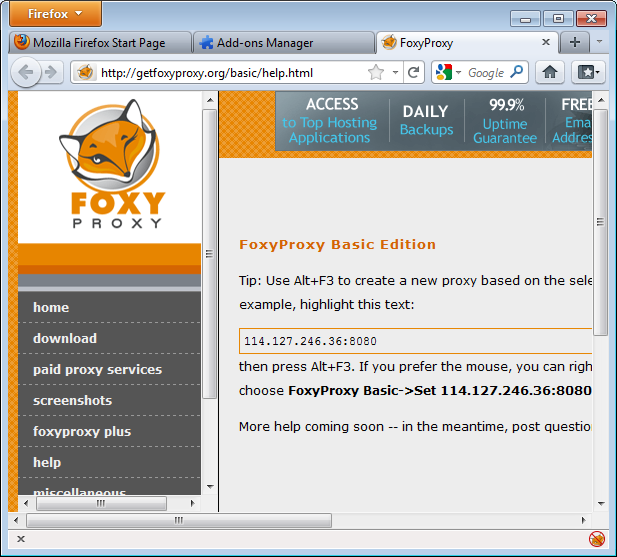
After installation, Firefox should restart and open the Help site of FoxyProxy. You should see the FoxyProxy icon at the bottom right.
Configuration
For FoxyProxy to do its job, it needs to know what proxy settings to use. Open the configuration window by clicking the icon at the bottom right of the Firefox window. The configuration window looks like this:
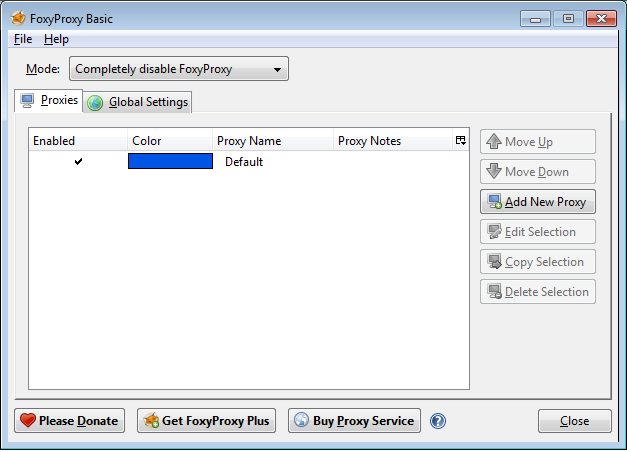
Click on "Add New Proxy". In the following window, enter the proxy details in a similar way to the default Firefox proxy configuration:
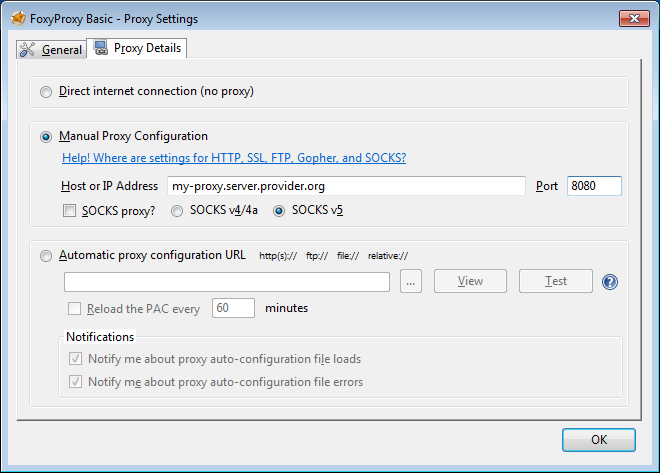
Select "Manual Proxy Configuration", enter the host or IP address and the port of your proxy in the appropriate fields. Check "SOCKS proxy?" if applicable, then click OK. You can add more proxies by repeating the steps above.
Usage
You can switch among your proxies (or choose not to use a proxy) by right-clicking on the fox icon on the bottom right of your Firefox window:
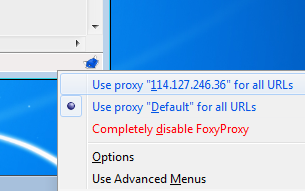
To select a proxy server, simply left-click on the proxy you want to use.
Add-ons for Security
There are many Firefox Add-ons that are useful for privacy and security and for bypassing Internet censorship. This chapter contains a short summary of some of our favourites.
Other important Add-ons are listed in other chapters of this guide and some of the concepts like using proxy servers are also covered in other sections.
Cookie Manager +
 Cookie Manager+ is a simple tool which enables you to see what cookies are being set on your computer. Cookies are small bits of information stored by your browser. Some cookies may be useful to you and set by organisations you trust. Other cookies are are used to track the sites you are visiting.
You can access a list of the different cookies on your system by accessing the Cookie Manager + interface.
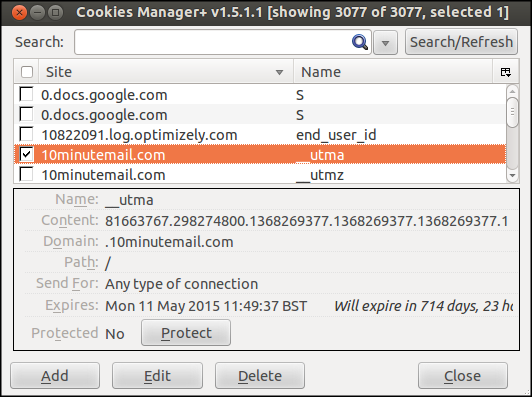
This interface allows you to protect the cookies that you want and are useful to you and delete the rest.
Better Privacy
 "Better Privacy serves to protect against special longterm cookies, a new generation of 'Super-Cookie', which silently conquered the Internet. This new cookie generation offers unlimited user tracking to industry and market research. Concerning privacy Flash-cookies are most critical.
This add-on was made to make users aware of those hidden, never expiring objects and to offer an easier way to view and to manage them - since browsers are unable to do that for you."
This Add-on works in a similar way to other cookie managers. It can list and manage these Flash-cookies. It can also remove these objects when you start Firefox.
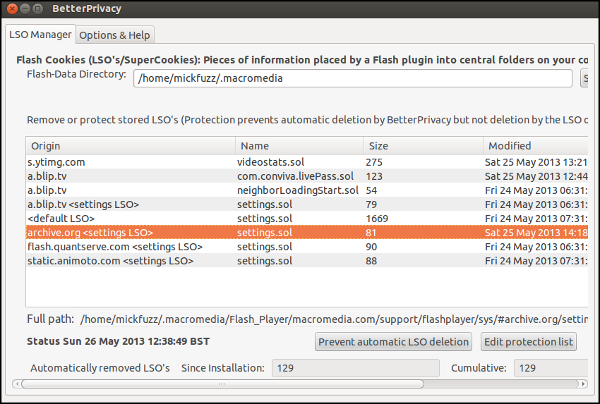
Usually automatic deletion of flash cookies is safe. You can protect certain desired Flash cookies. This might be needed if you play online flash games. After some configuration to project the flash cookies you do want you can leave this Add On running in the background where it will keep working without your attention.
World IP
 This Add-on shows the IP of the server you are connecting to. It aims to display "up-to-date information about physical location of a Web server you are currently visiting".
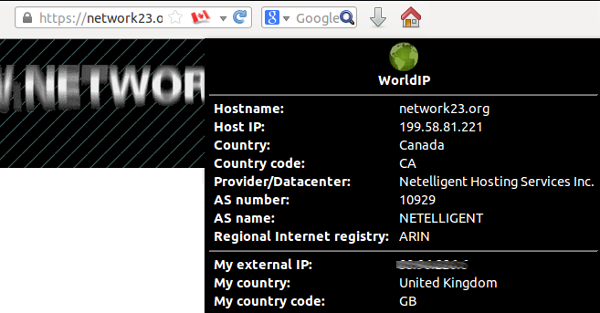
It represents this in different ways. By listing the country, showing a flag which can be displayed in the location toolbar, showing all IP addresses of the server (IPv4 and IPv6) and listing the name of the data center the webserver is hosted in.
After installing World IP, left clicking on the flag shown will bring up a summary of this information.
If you right click on the flag you will get a more detailed set of data and some tools which may be useful to check your security.
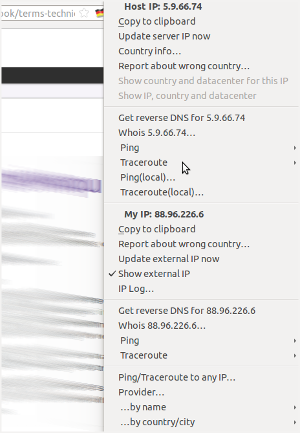
One of the tools available is Traceroute, which briefly lists the path of your Internet connection to other websites.
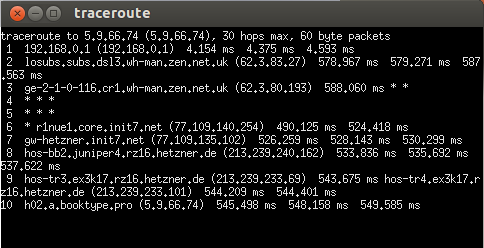
Do Not Track Me
 DoNotTrackMe can stop identity thieves, authorities, advertisers, social networks, and spammers from tracking you.
When the Add-on has been installed successfully, you will see a button appear on your browser toolbar. By default the Add On blocks all tracking.
When you visit a new webpage, the button will show you a number that indicates how many trackers were blocked on that particular page.
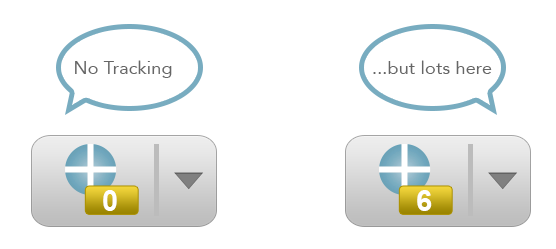
Clicking on the arrow next to the image will give you the option to Open DNTMe This will show you more information about who is trying to track you.
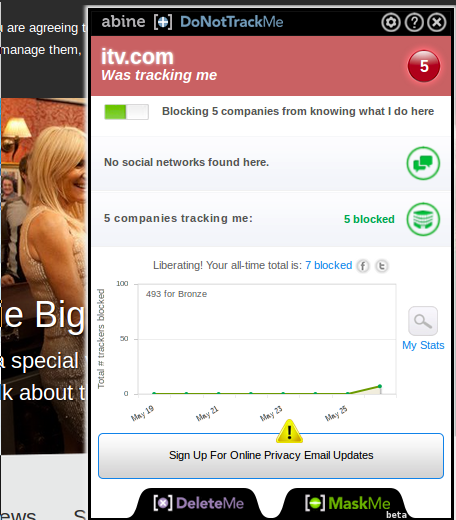
If you want to know more about tracking, who is doing it and how it works then the creators of DoNotTrackMe have created a Frequently Asked Questions page. 1
There is a huge variety of Add-ons which provide Do Not Track-like capabilities. Try Ghostery or Collusion if DoNotTrackMe doesn't work for you
- https://www.abine.com/donottrackme/faq/^
Tor : The Onion Router
Tor (The Onion Router) is a very sophisticated network of proxy servers.
When you use Tor to access a Web site, your communications are randomly routed through a network of independent, volunteer proxies. All the traffic between Tor servers (or relays) is encrypted, and each of the relays knows only the IP address of two other machines – the one immediately previous to it and the one immediately after it in the chain.

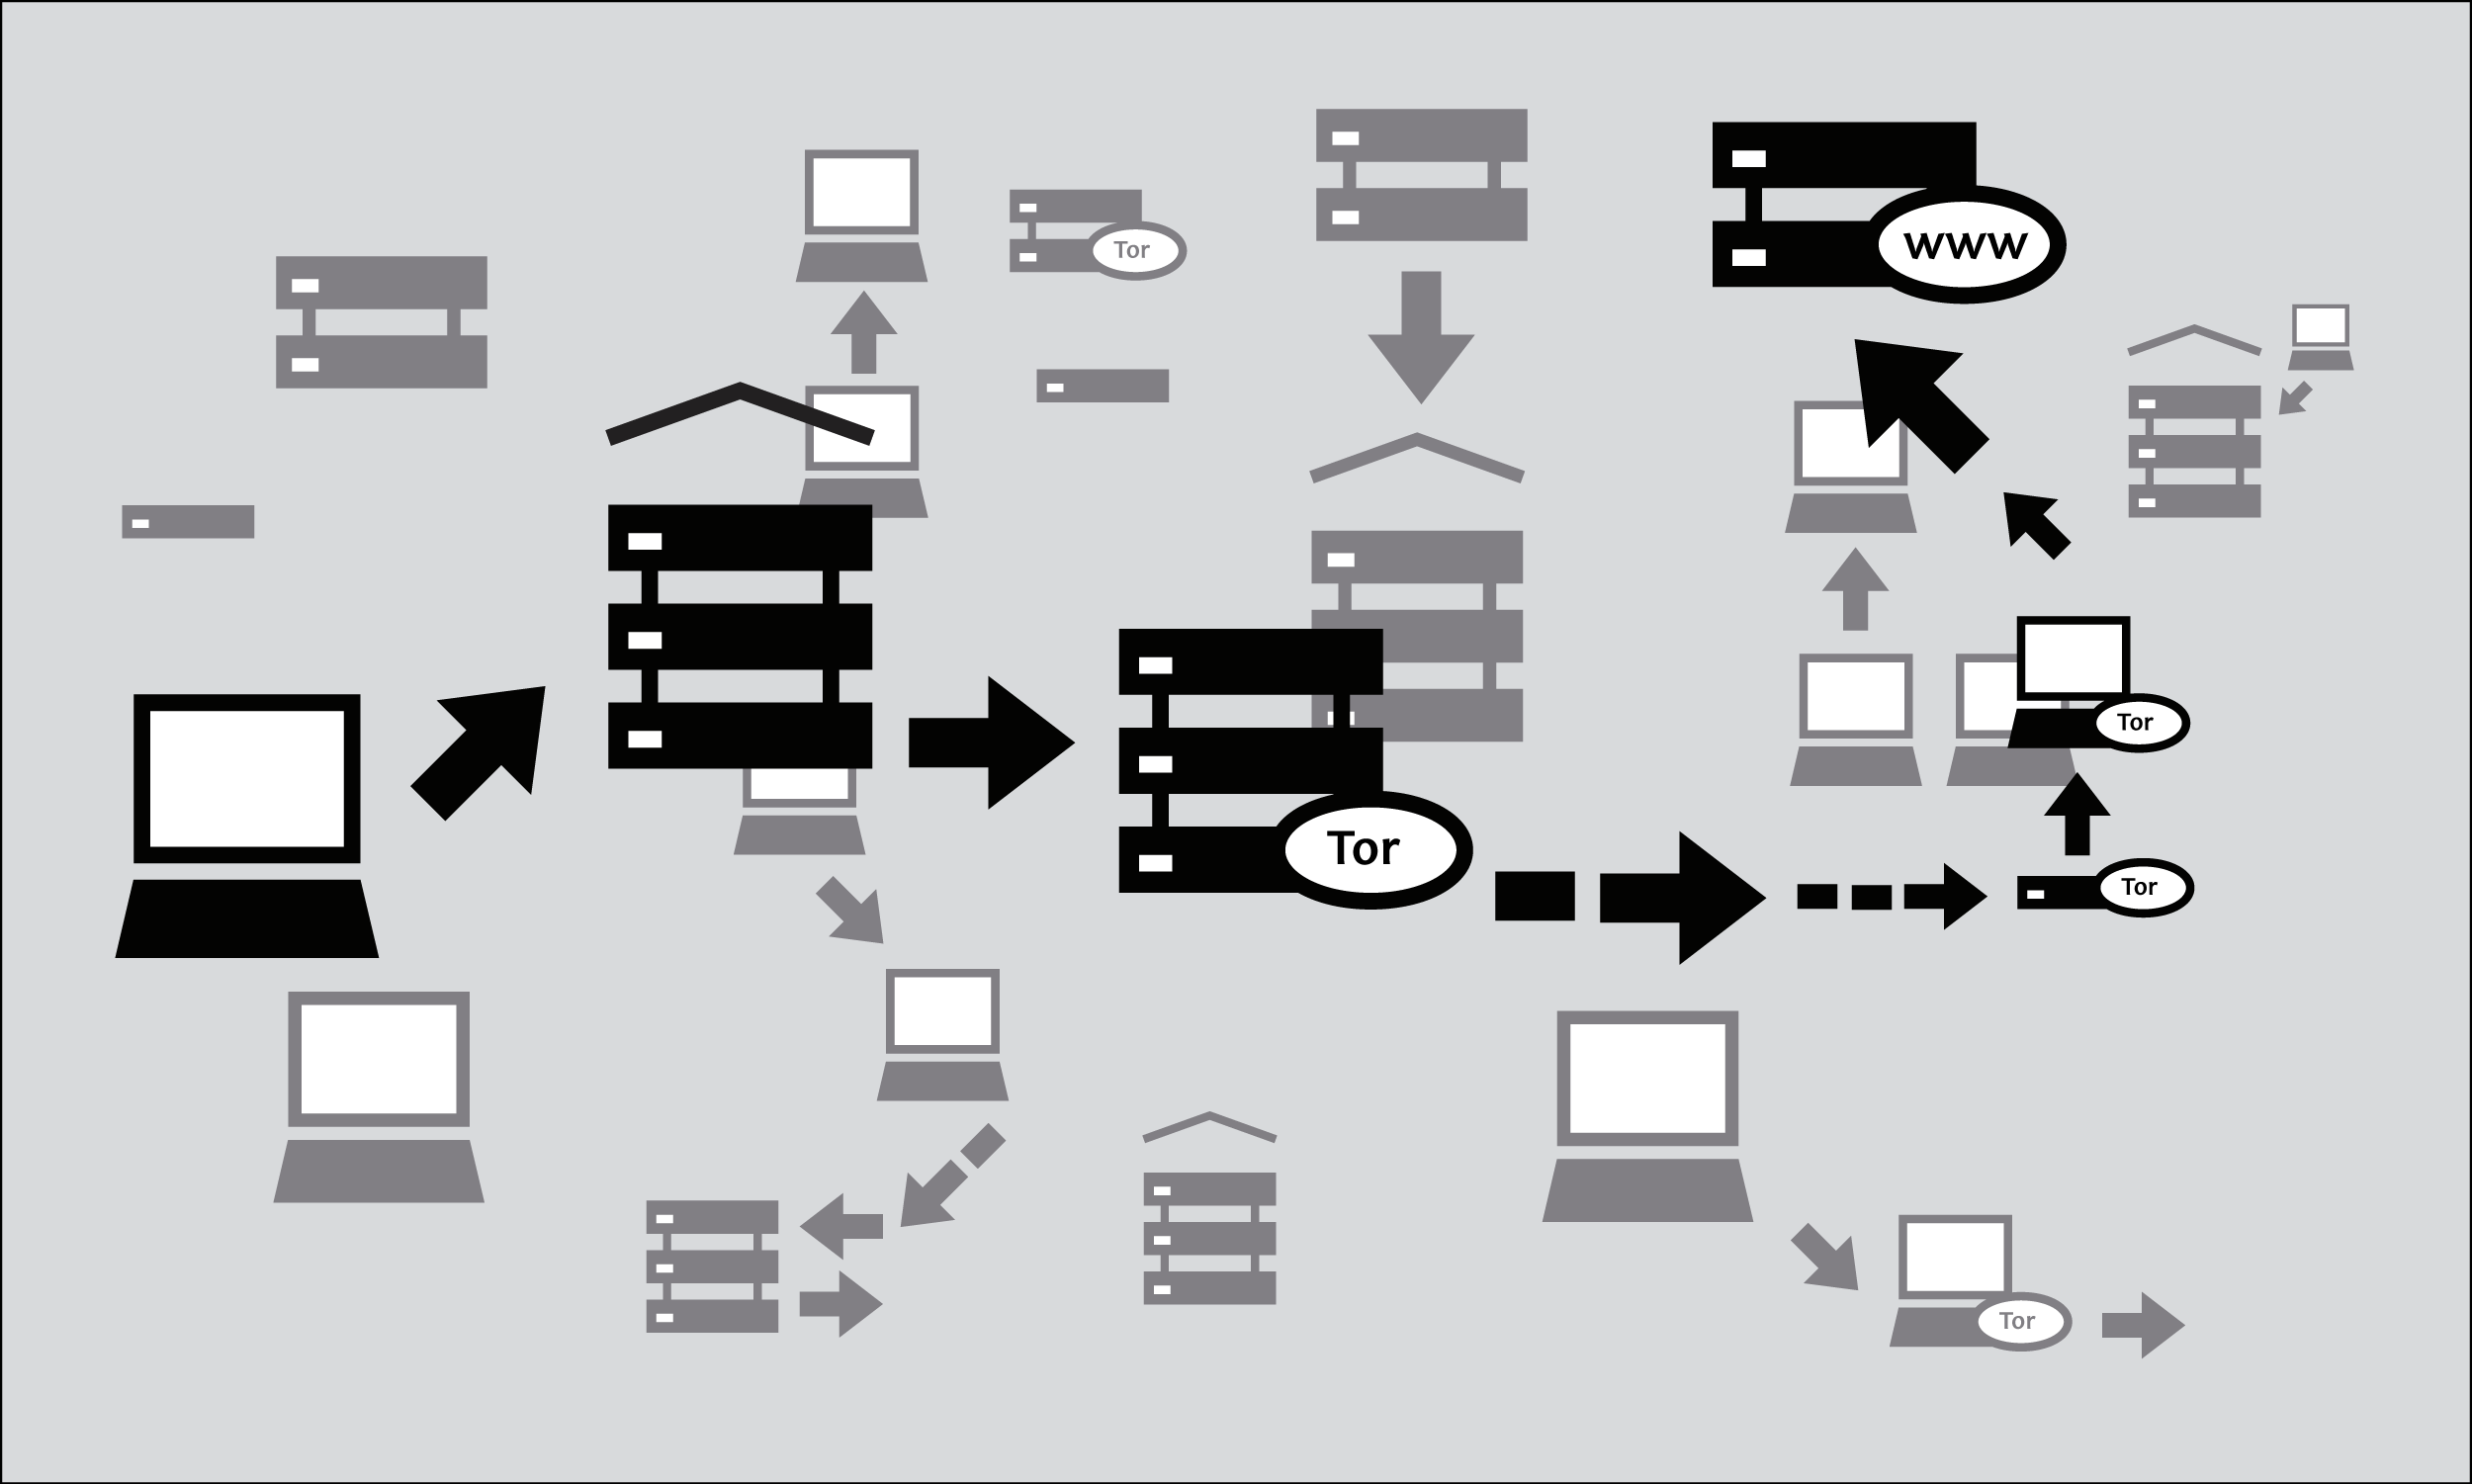
The goal of this is unlinkability. Tor makes it very difficult for:
- your ISP or any other local observer to know what your target Web site is or what information you are sending
- the target Web site to know who you are (at least, to know your IP address)
- any of the independent relays to know who you are and where you go either by directly having your IP address or by being able to correlate browsing habits by consistently observing your traffic.
What do I need to use the Tor network?
To connect to the Internet through the Tor network and use it for anonymity, privacy, and circumvention, you need to install the Tor client software on your computer. It is also possible to run a portable version of the program from a USB flash drive or other external device.
Tor is compatible with most versions of Windows, Mac OS X, and GNU/Linux.
With what software is Tor compatible?
Tor uses a SOCKS proxy interface to connect to applications, so any application that supports SOCKS (versions 4, 4a and 5) can have its traffic anonymized with Tor, including:
- most Web browsers
- many instant messaging and IRC clients
- SSH clients
- e-mail clients.
If you installed Tor from the Vidalia Bundle, Tor Browser Bundle or Tor IM Browser Bundle, Tor will have also configured an HTTP application proxy as a front-end to the Tor network. This will allow some applications that do not support SOCKS to work with Tor.
If you are mostly interested in using Tor for Web surfing and chatting, you may find it easiest to use the Tor Browser Bundle or the Tor IM Browser Bundle which will provide you with ready-to-use pre-configured solutions. The Tor Browser Bundle also includes Torbutton, which improves privacy protection when using Tor with a Web browser. Both versions of Tor can be downloaded at https://www.torproject.org/projects/torbrowser.
Advantages and Risks
Tor can be a very effective tool for circumvention and protecting your identity. Tor's encryption hides the contents of your communications from your local network operator, and conceals whom you are communicating with or what Web sites you're viewing. When used properly, it provides significantly stronger anonymity protection than a single proxy.
But:
- Tor is vulnerable to blocking. Most Tor nodes are listed in a public directory, so it is easy for network operators to access the list and add the IP addresses of nodes to a filter. (One way of attempting to get around this kind of blocking is to use one of several Tor bridges, which are Tor entry nodes not publicly listed, specifically to avoid blocking.)
- Some programs you might use with Tor have problems that can compromise anonymity. The Tor Browser Bundle comes with a version of Firefox with Torbutton installed. Torbutton disables some plugins and changes your browser fingerprint so it looks like any other Torbutton user. Tor will not protect you if you do not configure your appplications to run through Tor. Some plugins and scripts ignore local proxy settings and can reveal your IP address.
- If you're not using additional encryption to protect your communications, your data will be unencrypted once it reaches the last Tor node in the chain (called an exit node). This means that your data will be potentially visible to the owner of the last Tor node and to the ISP between that node and your destination Web site.
The developers of Tor have thought a lot about these and other risks and offer three warnings:
- Tor does not protect you if you do not use it correctly. Read the list of warnings here: https://www.torproject.org/download/download.html.en#warning and then make sure to follow the instructions for your platform carefully: https://www.torproject.org/documentation.html.en#RunningTor
- Even if you configure and use Tor correctly, there are still potential attacks that could compromise Tor's ability to protect you: https://trac.torproject.org/projects/tor/wiki/TheOnionRouter/TorFAQ#Whatattacksremainagainstonionrouting
- No anonymity system is perfect these days, and Tor is no exception: you should not rely solely on the current Tor network if you really need strong anonymity.
Using Tor Browser Bundle
The Tor Browser Bundle lets you use Tor on Windows, OS X, or GNU/Linux without requiring you to configure a Web browser. Even better, it's also a portable application that can be run from a USB flash drive, allowing you to carry it to any computer without installing it on each computer's hard drive.
Downloading Tor Browser Bundle
You can download the Tor Browser Bundle from the torproject.org Web site, either as a single file or a "split" version that is multiple files. If your Internet connection is slow and unreliable, the split version may work better than trying to download one very large file.
If the torproject.org Web site is filtered from where you are, type "tor mirrors" in your favorite Web search engine; the results will probably include some alternative addresses to download the Tor Browser Bundle.
Get Tor through e-mail: send an e-mail to gettor@torproject.org with "help" in the message body, and you will receive instructions on how to have the autoresponder bot send you the Tor software.
Caution: When you download the Tor Browser Bundle (plain or split versions), you should check the signatures of the files, especially if you are downloading the files from a mirror site. This step ensures that the files have not been tampered with. To learn more about signature files and how to check them, read https://www.torproject.org/docs/verifying-signatures.
You can download the GnuPG software that you will need to check the signature here: http://www.gnupg.org/download/index.en.html#auto-ref-2.
The instructions below refer to installing Tor Browser on Microsoft Windows. If you are using a different operating system, refer to the Tor Web site for download links and instructions.
Installing from a single file
- In your Web browser, enter the download URL for Tor Browser: https://www.torproject.org/projects/torbrowser
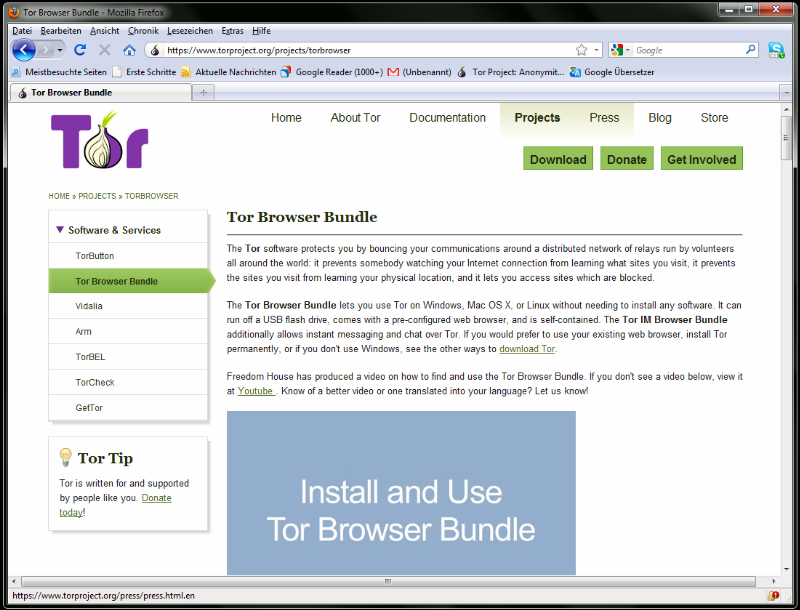
- Click the link for your language to download the installation file.
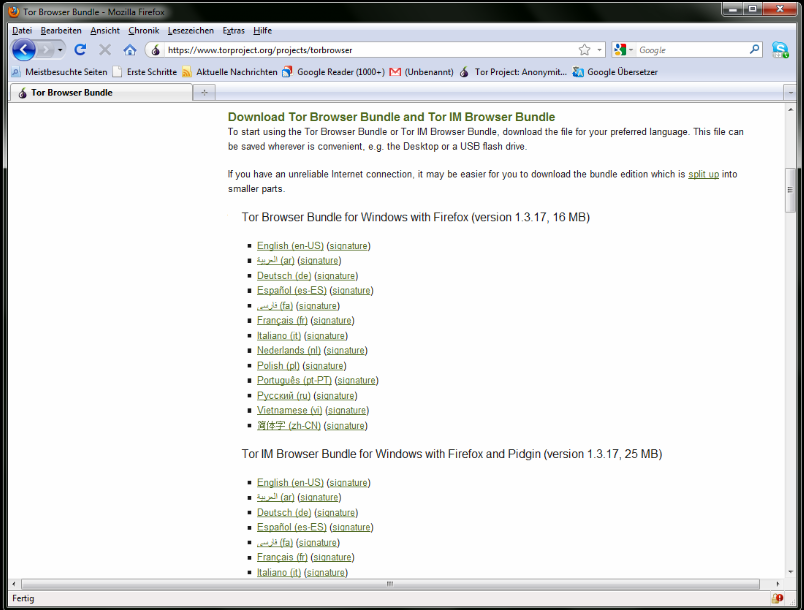
- Double-click the .exe file that you have now downloaded. A "7-Zip self-extracting archive" window appears.
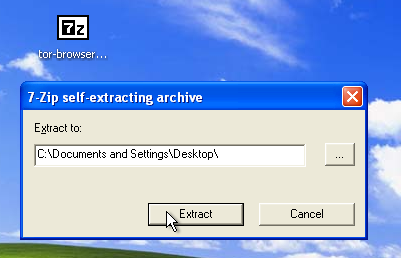
- Choose a folder into which you want to extract the files and click Extract.
Note: you can choose to extract the files directly onto a USB flash drive if you want to use Tor Browser on different computers (for instance on public computers in Internet cafés).
-
When the extraction is completed, open the folder and check that the contents match the image below:
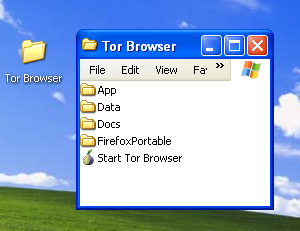
To clean up, delete the .exe file you originally downloaded.
Installing from split files
- In your Web browser, enter the URL for the split version of the Tor Browser Bundle (https://www.torproject.org/projects/torbrowser-split.html.en), then click the link for your language to get to a page that looks like the one for English below:
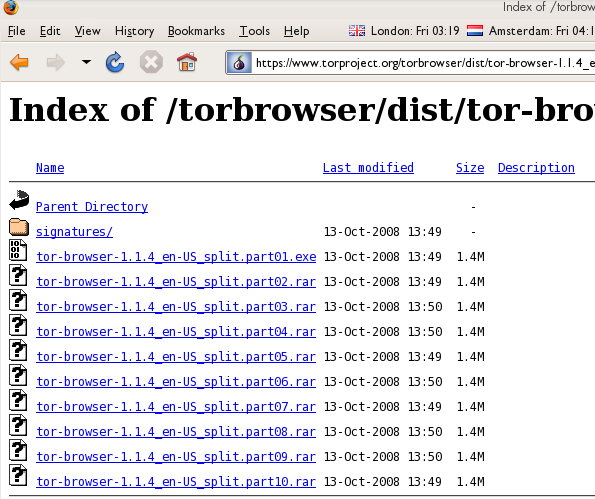
- Click each file to download it (one ending in .exe and nine others ending in .rar), one after the other, and save them all in one folder on your hard drive.
- Double-click the first part (the file whose name ends in .exe). This runs a program to gather all the parts together.
!["<span id=]() "Split installer for Tor Browser Bundle" src="_booki/summary-of-firefox/static/CircumventionTools-InstallingTor-tor_winrar_2-en.png" height="384" width="562">
"Split installer for Tor Browser Bundle" src="_booki/summary-of-firefox/static/CircumventionTools-InstallingTor-tor_winrar_2-en.png" height="384" width="562">
- Choose a folder where you want to install the files, and click Install. The program displays progress messages while it's running, and then quits.
- When the extraction is completed, open the folder and check that the contents match the image below:

- To clean up, delete all the files you originally downloaded.
Using Tor Browser
Before you start:
- Close Tor. If Tor is already installed on your computer, make sure it is not currently running.
Launch the Tor Browser:
In the Tor Browser folder, double-click Start Tor Browser. The Tor control panel (Vidalia) opens and Tor starts to connect to the Tor network.
When a connection is established, Firefox automatically connects to the TorCheck page and then confirms that your browser is configured to use Tor. This may take some time, depending on the quality of your Internet connection.
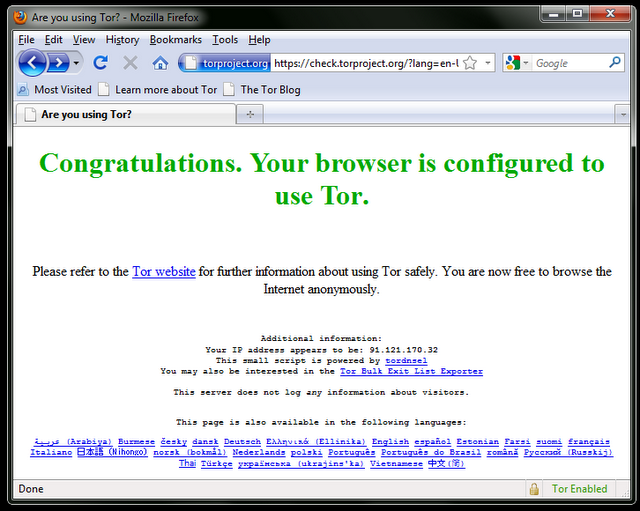
If you are connected to the Tor network, a green onion icon appears in the system tray on the lower-right-hand corner of your screen:

Browsing the Web using Tor Browser
Try viewing a few Web sites, and see if they are working. The sites are likely to load more slowly than usual because your connection is being routed through several relays.
If this does not work
If the onion in the Vidalia Control Panel never turns green or if Firefox opened, but displayed a page saying "Sorry. You are not using Tor", as in the image below, then you are not using Tor.
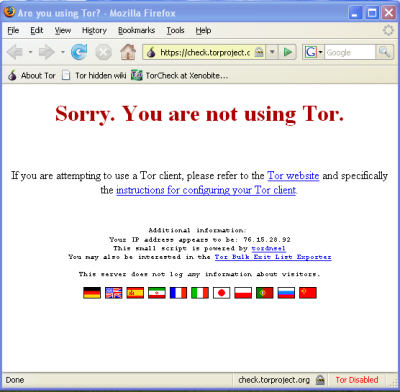
If you see this message, close Firefox and Tor Browser and then repeat the steps above. You can perform this check to ensure that you are using Tor at any time by going to https://check.torproject.org/.
If Tor Browser doesn't work after two or three tries, Tor may be partly blocked by your ISP and you should try using the bridge feature of Tor – see the section below on "Using Tor with Bridges".
Using Tor with Bridges
If you suspect your access to the Tor network is being blocked, you may want to use the bridge feature of Tor. The bridge feature was created specifically to help people use Tor from places where access to the Tor network is blocked. You must already have successfully downloaded and installed the Tor software to use a bridge.
What is a bridge?
Bridge relays (or bridges for short) are Tor relays that aren't listed in the main public Tor directory. This is a deliberate measure to stop these relays from being blocked. Even if your ISP is filtering connections to all the publicly known Tor relays, it may not be able to block all the bridges.
Where do I find bridges?
To use a bridge, you need to locate one and add its information in your network settings. A simple way to get a few bridges is by simply accessing https://bridges.torproject.org/ with your Web browser. If that Web site is blocked or you need more bridges, send an e-mail from a Gmail account to bridges@torproject.org with "get bridges" (without the quotemarks) in the body of the message.
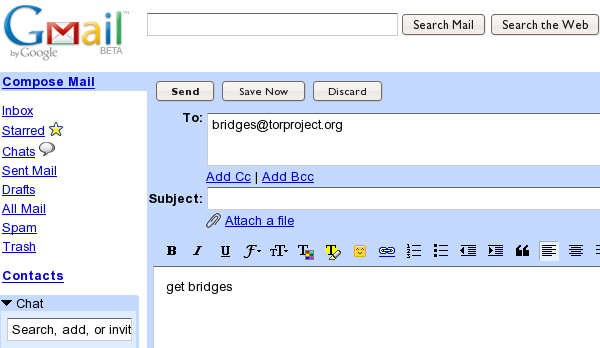
Almost instantly, you will receive a reply that includes information about a few bridges:
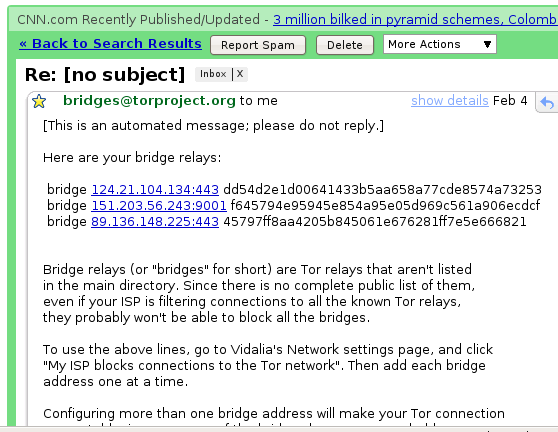
Important Notes:
- You must use a Gmail account to send the request. If torproject.org accepted requests from other mail accounts, an attacker could easily create a lot of email addresses and quickly learn about all the bridges. If you do not have a Gmail account already, creating one takes only a few minutes.
- If you are on a slow Internet connection you can use the URL https://mail.google.com/mail/h/ for a direct access to the basic HTML version of Gmail.
Turn on bridging and enter bridge information
After you get addresses for some bridge relays, you must configure Tor with whatever bridge address you intend to use:
- Open the Tor control panel (Vidalia).
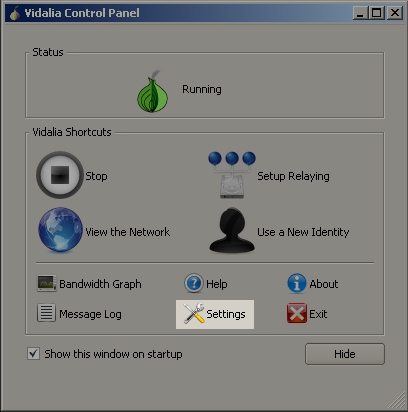
-
Click Settings. A Settings window opens.
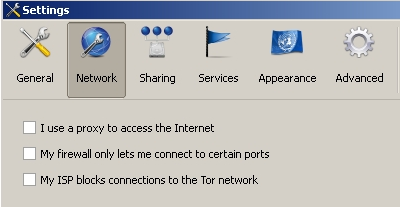
- Click Network.
- Select "My Firewall only lets me connect to certain ports" and "My ISP blocks connections to the Tor network".
- Enter the bridge URL information you received by e-mail in the "Add a Bridge" field.
- Click the green + on the right side of the "Add a Bridge" field. The URL is added to the box below.

- Click OK at the bottom of the window to validate your new settings.
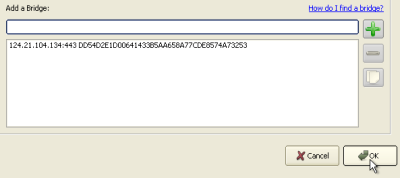
- In the Tor control panel, stop and restart Tor to use your new settings.
Note:
Add as many bridge addresses as you can. Additional bridges increase reliability. One bridge is enough to reach the Tor network, however if you have only one bridge and it gets blocked or stops operating, you will be cut off from the Tor network until you add new bridges.
To add more bridges in your network settings, repeat the steps above with the information on the additional bridges that you got from the bridges@torproject.org e-mail message.
 The key advantages of using this Add On is that it gives you the ability to download lots of images all at once, and to be able to download them quickly,


 This Add on saves pages or sections as an image quickly.
 The Grab my Book Add On allows you to save online content to epubs for offline viewing. Epubs are a fantastic format as they contain all images and text and retain the order of your pages all in one file. This is a great way quickly to transfer content from Internet pages onto mobile devices for offline networking.
 Download Helper Add On is a good way of downloading web videos to your computer to view offline or to share in other ways. It is able to store on your disk movie files for which the web site does not provide a "Save File" feature. In addition, DownloadHelper can download, in 3 user clicks, all the image and video files linked from a Web page.

![]()

 This is an interesting tool for Bloggers. Scribefire allows you to write your blog posts offline and then upload them very quickly in the right format. The Add On is compatible with Wordpress, Tumblr, Blogger and a few other types of blogs.


 Cookie Manager+ is a simple tool which enables you to see what cookies are being set on your computer. Cookies are small bits of information stored by your browser. Some cookies may be useful to you and set by organisations you trust. Other cookies are are used to track the sites you are visiting.
 "Better Privacy serves to protect against special longterm cookies, a new generation of 'Super-Cookie', which silently conquered the Internet. This new cookie generation offers unlimited user tracking to industry and market research. Concerning privacy Flash-cookies are most critical.
 This Add-on shows the IP of the server you are connecting to. It aims to display "up-to-date information about physical location of a Web server you are currently visiting".


 DoNotTrackMe can stop identity thieves, authorities, advertisers, social networks, and spammers from tracking you.


