Fill and Stroke
The Fill and Stroke Paint panels are found in the Style dialog. The settings contained in these panels are used to apply color or pattern styles to their respective object elements, and function almost the same for each. Fill affects the interior part of an object (anything inside the object's path), Stroke Paint affects the path's stroke following its border.
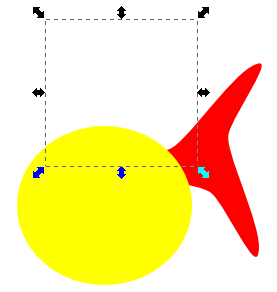
An interesting point: when stroke paint has partial transparency, the object's fill will show through the inner half of the stroke paint but not the outer half, since the path stops at the center of the stroke and bounds the object's fill. This can either make for interesting drawing possibilities or frustrated artists. This is by SVG specification design.
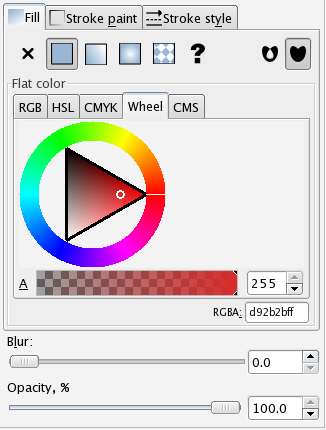
The fill or stroke paint of an object can be set to:
-
No Paint
- Plain Color
-
Linear Gradient
-
Radial Gradient
-
Pattern
-
Unset (used mostly for creating clones that are styled independently from their master)
In addition, there are a few settings that can really complicate the ease with which this dialogue might otherwise be understood:
- Even-odd
- Non-zero
- Blur
- Opacity
How to Use
Select one or more objects or groups you want to edit, then call the Fill and Stroke dialog by selecting > or by pressing Shift+Ctrl+F.
The following list describes each property setting. (Examples are given using the Fill properties since they are seen more easily.)No Paint
No paint or fill is visible in the object or stroke. This means that any visible object behind the invisible fill will show through it. Though it may seem counterintuitive, this is not the same as "Unset" since this is actually a fill type rather than no fill type.
Objects set to "No Paint" still act as normal shapes and paths when they are manipulated in path operations. For instance, a boolean operation will react to the path exactly the same whether it has no paint fill or any other kind of fill.
Note: any object with 0% opacity (completely transparent) on both fill and stroke is not selectable by normal click selection. Any other selection method should work for transparent objects.
Plain Color
A solid color paints the object or stroke. In both Fill and Stroke Paint tabs, there are sub-tabs whereby color selections can be made either precisely (with the numeric and alpha-numeric controls) or more generally (with wheels and sliders). Each selector type also shows an RGBA definition box at the bottom-right in which one may define a specific hexadecimal color.
RGB offers four sliders representing percentages of red, green, blue, and alpha
HSL offers four sliders representing percentages of hue, saturation, lightness, and alpha
CMYK offers five sliders representing percentages of cyan, magenta, yellow, black and alpha
Wheel offers a convenient (though less precise) selection apparatus consisting of a hue wheel and a combination saturation/lightness triangle, underneath which is an alpha slider
CMS (only available in some distributions) allows selection of a color profile and offers an alpha slider underneath
Linear Gradient
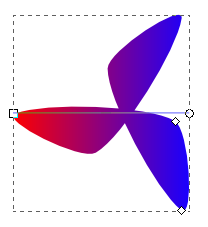
A linear gradient paints the object or stroke according to two settings. The gradient selector box chooses the gradient definition to use. The repeat type selector box chooses none (the gradient only fills once from it's beginning point to its end point), direct (repeats the gradient infinitely, likely causing an abrupt color change at the end of each repetition if the ends are different colors), or reflected (repeats the gradient infinitely also, except that each repetition flips the gradient so the color changes are always smooth at the end of each repetition).
The direction and extent of the gradient is adjusted by dragging the handles.
Gradients may also be duplicated or edited from this dialog panel using the provided buttons.
Radial Gradient
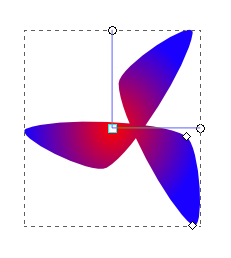
This panel works the same as linear gradient except that the gradient is applied radially.
The elliptical "shape", placement and extent of the radius is controlled by the three handles.
Pattern
An SVG or bitmap pattern, selected from the selection box, paints the object.
To create your own pattern, select the object from which the pattern will be created. Then select > > or pressAlt+I. Your object will dissapear from the canvas and appear on the list of patterns.
To do the reverse, select > > or press Shift+Alt+I.
If the object filled with pattern is transformed, the pattern will be also. If you don't want the pattern to be transformed, uncheck "Transform patterns" from the Transforms tab in the Preferences dialog.
Unset
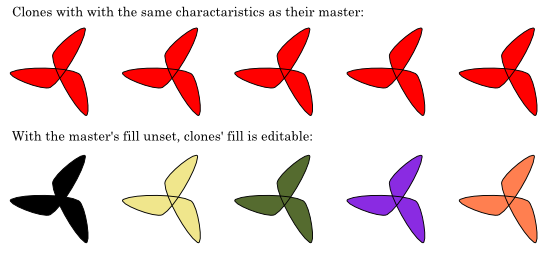
Unset fill is applied to a master object of clones in order to make the clones paintable. This must be applied individually to the object's fill and stroke to affect each. This will make the object's fill appear black and its stroke appear invisible.
Even-Odd
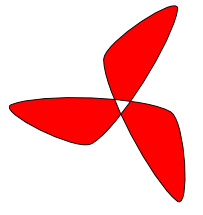
This setting is available only for an object's Fill. It causes the fill to be completely transparent wherever a path crosses over itself.
Non-Zero
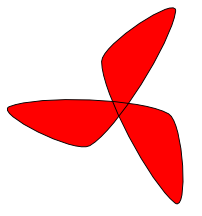
This setting is available only for an object's Fill. It causes the fill to be shown wherever a path crosses over itself. This is the default setting.
Blur
Blur is not actually a paint function at all - it is actually an SVG filter effect. However, it makes sense in Fill and Stroke, since it is a very commonly useful visual effect. It is also important to note that blur affects the entire object, not just the fill or the stroke, and cannot be applied separately to either.
Apply blur by dragging the slider or setting the number box to the desired blur factor. Usually only a small factor (0-10) is needed.
Opacity
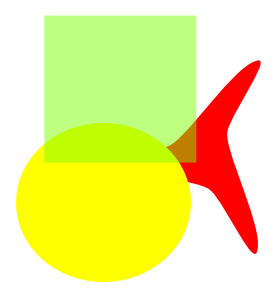
Opacity sets the degree to which objects behind the affected object may be seen through it.
This opacity setting is separate from the color alpha setting, which is particular to either the fill or stroke paint. Like blur, opacity applies to the entire object, affecting both fill and stroke together.


