


Capturing Video
Connecting your camera
Kino has good support for the IEE1394 standard. You will need both a PC and a camera with this type of interface. IEE1394 connections come with 4 or 6 pins, laptops and cameras usually have a 4 pin connection, PC boxes the 6-pin connection. Connect your DV camera to the PC using a an IEE1394 cable.
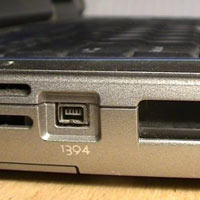
A 4-pin IEEE1394 port connector on the side of a laptop.

A 4 pin cable
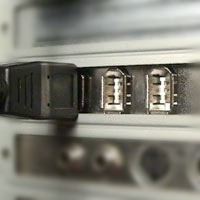
A 6-pin, 3 connector Firewire card one with a cable attached.
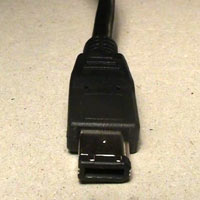
A 6-pin cable
Opening Kino
Before opening Kino turn the camera on and go to Playback (or VCR) mode. On your PC open a terminal window and type the command line 'kino'. Press Enter and Kino opens.
The Kino Layout
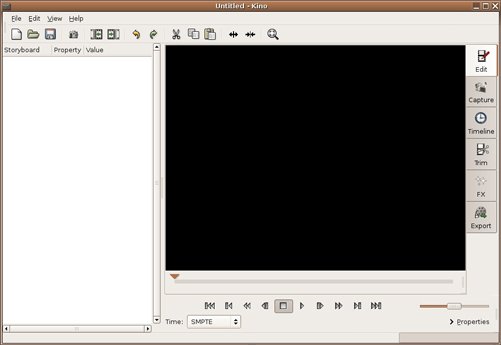
The Kino layout is straightforward and is divided into three main columns:
- Storyboard for arranging clips
- Main window video and mode options
- Function buttons for different editing modes
The Toolbar at the top adds quick access to the more commonly used features in Kino.
The Transport Controls below the main window let you playback your footage:
- Scrub bar: Click and drag to view the project video clips
-
- Transport
-
- For playing, advancing and rewinding.
- Shuttle
-
- Plays the project at different speed. The speed will display bottom left of the Kino window.
-
Kino Help: Press the F1 key when Kino is open for help file.
Preferences
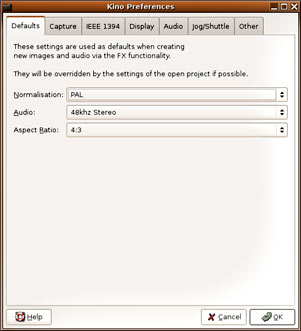
Before capturing check Kino preferences. Open Edit > Preferences and select the options below:
- Defaults
-
- PAL; 48khz; 4:3;
- Capture
-
- DV AVI type 2;
- Audio
-
- Enable Audio Scrub;
- Other
-
-
2Pass Encoding.
- See the appendix for more detailed information on defaults.
-
2Pass Encoding.
Capture location
To set the where captured video is stored on your hard drive, click on the folder icon above the transport controls. Create a folder and add a file name and Kino will do the rest, sequentially numbering clips and adding the file extension.
Remember to Save your work regularly: File > Save.
If you want to undo any changes made select the Edit mode then Edit > Undo
Camera Control
Select the AV/C tab to activate the cameras VCR controls. Hover the mouse over a button to view function information. Play, capture and stop the footage as required.
If your camera doesn't support this then use the in-camera VCR controls. The recorded clips will appear in the storyboard window. Repeat the process until the footage is in the computer.
The clips are displayed in the storyboard window. To view the different properties of a clip use the Time pull down list below the transport controls.