Using VLC to RIP a CD
Software name : VLC
Software version : 0.8.6
VLC can copy audio tracks from a CD into other audio file types through a process called 'ripping'. For example, a CD audio track can be ripped to your hard drive as an MP3 file. VLC has several output file types to select from depending on your desired quality or file size. The only downside is that VLC cannot handle an entire CD at once, files must be converted one at a time.
To begin, you will need to have a CD to 'rip' and know which particular track you want to copy. Next, insert the CD into your computer's CD drive.
Using the Wizard
We will use the VLC Wizard to rip the track from the CD.
To open the wizard, select File > Wizard.
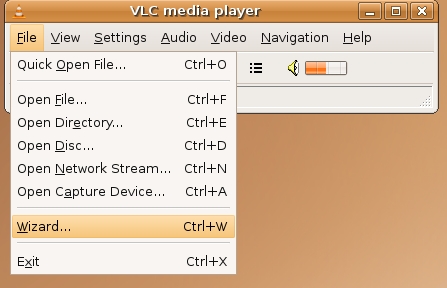
This opens the following window:
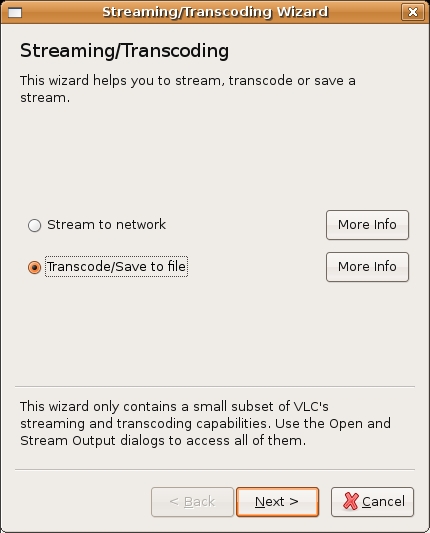
We want to Transcode the file. Transcoding is a fancy name for converting the file from one type to another. In this example, we are converting the CD audio to Ogg Vorbis (you could also choose MP3 or another type of audio file). Make sure Transcode is selected:
![]()
Then press Next, and the following window appears:
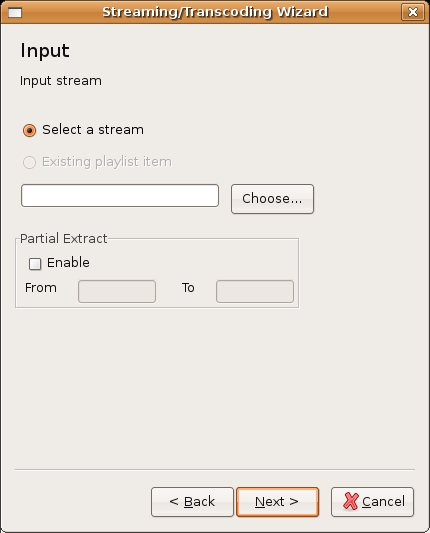
Here is where we select the CD and the particular track for ripping.
Press the Choose button, and this window appears:
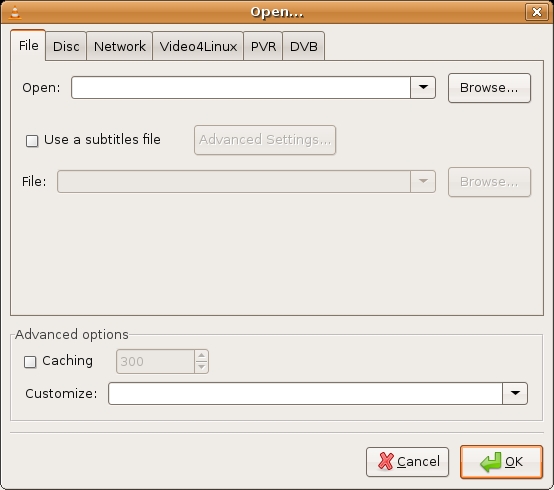
Here you can select from any number of sources to copy. We are going to choose a disc (CD) so we choose Disc. You could also copy DVDs following a similar process, but for now we will just look at audio. When you click on the Disc tab, the following options appear:
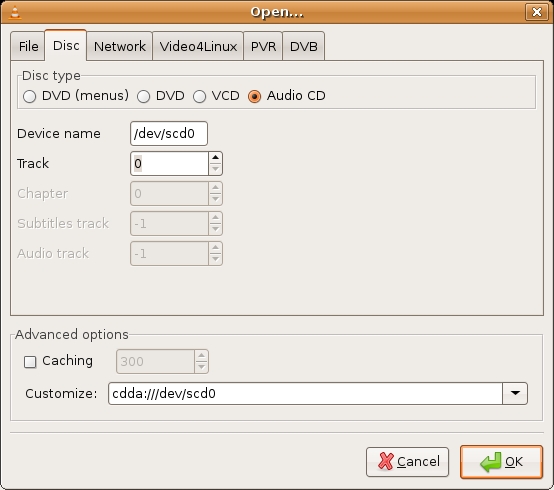
Select Audio CD:
![]()
Now select which track number to rip. In this example, we are using the first track, so press the up arrow and change it from '0' to '1':
![]()
Press OK, and you return to the same screen of the Wizard. Press OK again, and we move forward to the next screen:
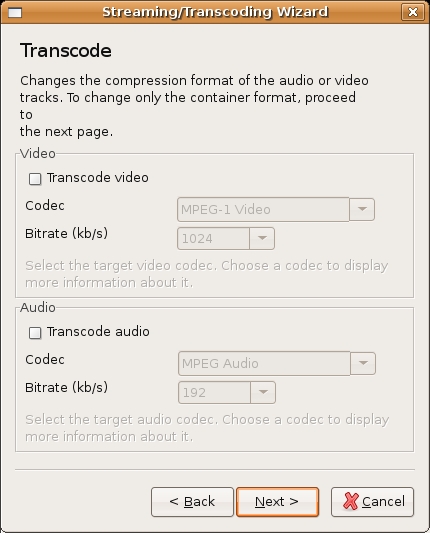
Here is where we select your desired file format to convert the audio to. We don't need to worry about video options.
Check the Transcode audio box:
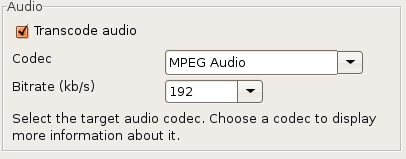
Options in the audio box are now highlighted, which means you can change them. We want to convert the CD audio to a OGG Vorbis audio file, so we select Vorbis from the drop down menu :
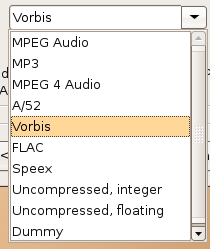
Leave the bitrate option as is and then press Next:
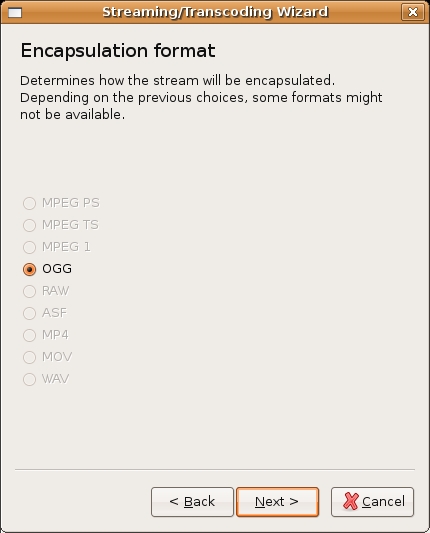
We have no choices here so press Next.
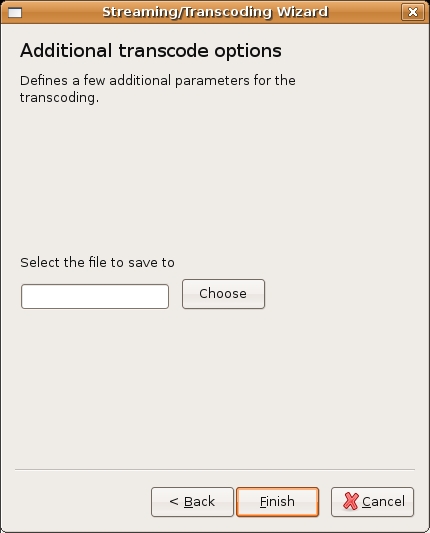
The above window asks us to choose where on our computer we wish to save the file. Press Choose and the Save to file window appears:
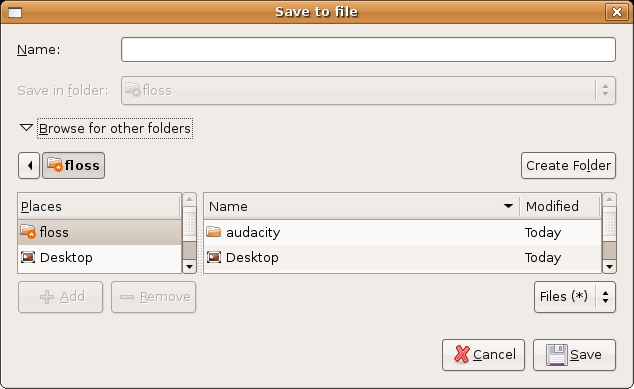
Browse to the directory you wish to save the new audio file, and then enter the name of the file in the Name box. We must also include the correct file extension in the name. We will call the file 'myfile' and the extension for OGG Vorbis files is '.ogg' (MP3 files use '.mp3'), so the complete name is 'myfile.ogg' :
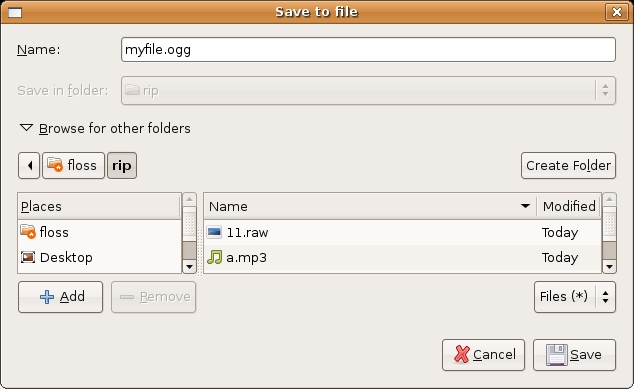
When you have chosen your desired directory and given your file a name, press Save.


