


Creating MPEG-4 AVI
Software name : Avidemux
Software version : 2.4
This chapter will show you how to create a AVI file from an existing video file. There are many reasons why you may need to create a AVI file from an existing video file - to make a downloadable preview file for a longer movie that can be viewed in VLC player, for example.
I will assume that you already have a video file which you want to turn encode.
If you don't already have a suitable video file, then you may need to either :
- export a file from a video editing programme
- capture a DV tape to a file on your hard drive
Opening the Original File
So, assuming you have a file ready to go...Open the video file you already have. This should be as high quality as you can - this is because every time you convert a video file into another type of file quality is lost. So you want to start with the highest quality file as possible to ensure the newly created file is the highest quality it can be. Ideally it will be a DV file exported from a video editing program or captured from a camera or an MPEG-2 file or VOB from a DVD.
Click on 'File' and then on 'Open' :
You will see a window appear that you can use to browse your computer to find the file you want. Highlight the file you wish to open and either double-click on it or press 'Open'.
Encoding Settings
When you have opened a video, copy the settings shown below by selecting them from the drop down menus on the left. Select MPEG-4 ASP (Xvid4) from the Video drop down menu (please note the relationship between the encoder and format in the drop-down menu - Xvid is the software library that's used for encoding, while MPEG-4 ASP is the video format the Xvid library encodes into). Select MP3 (LAME) from the Audio drop down menu. Finally select AVI from the 'Format' list at the bottom of that section :

Click .
Deinterlacing
The next thing that we might want to do to the video file is to add a deinterlace filter. This would be appropriate if you had a video that was edited from a DV camera and is still interlaced.
There is help elsewhere on how to Deinterlace.
Screen size and Bitrate
The screen size and bitrate you use really depends on what you want to do with the MP4 file you are creating.
There is help elsewhere on how to change screen size and bitrate.Saving the file
To save the file click on the 'Save' button.
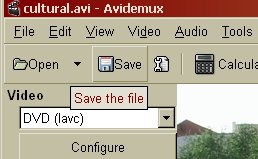
You will see a pop-up box that may look a little like this:

Choose a place to save the file by browsing your computer using the list of folders displayed. Then in the name field:

write in the name you want the file to be called and end the name in ".avi". When you are finished press 'Save'.
You should see a box which lets you know how long you have to wait for the encoding to finish and shows the encoding progress.
You'll get a success message if the encoding works correctly. You can now play the file in a media player.