


Create DVD file
Software name : Avidemux
Software version : 2.4
The following material will show you how to create a MPEG-2 file which can be used to create a Video DVD. The process does not cover creating the DVD itself, just preparing a file that can be used for creating a DVD.
It's assumed that you already have a video file which you want to turn into a DVD file that will play on PAL system TVs. This may be a DV or AVI file, or other file. Usually this file has come from capturing video from a tape or it's a file from a video editing programme. It may also be a file you have downloaded from the Internet.
If you don't already have a suitable file, then you may need to:
- export a file from a video editing programme
- capture a DV tape to a file on your hard drive
- download an appropriate file
The file should be as high quality as you can get - this is because every time you convert a video file into another type of file quality is lost. So you want to start with the highest quality file as possible to ensure the newly created file is the highest quality it can be. Ideally it will be a DV file exported from a video editing program or captured from a camera or an MPEG-2 file or VOB from a DVD.
Opening the File
So, assuming you have a file ready to go... Open the source file you have for your DVD. Click on 'File' and 'Open' :
You will be presented with a file browser. Find the DV file or similar on your computer by browsing the files and folders. You can't mess anything up doing this so just click around until you find the file you want. When you have found it, highlight it by clicking on it and then either double-click on it or press 'Open'.
The video should then open up in the screen in the centre of Avidemux.
DVD Encoding Settings
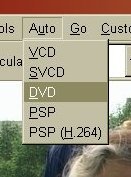
Now you will see the front of the Avidemux application again. Select from the top menu 'Auto' and then 'DVD'
You will see a pop-up window from which you can choose the relevant aspect ratio for source and destination of your project. 16:9 gives a widescreen effect in this example our video is 4:3 shape.

Choose the correct settings from the drop down menu. When you have done so click 'OK' on this pop-up window.
Saving the File
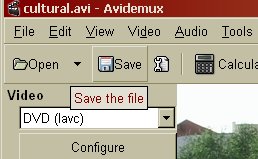
To save the file click on the 'Save' button.
You will see a file browser open :

Choose a place to save the file by clicking on the folders you see. The you need to give the file a name by typing this into the text box at the top:

Make sure the name ends in ".mpg". When you have done this click 'Save'.
You should see a box which lets you know how long you have to wait for the encoding to finish and shows the progress:

When it's done you'll get a success message if the encoding works correctly :

Next steps
The ultimate test to see if your file has been encoded currently is to try to make a DVD with it. Most DVD authoring programmes will tell you if your file is the right format or not when you try to import it.