


Create MPEG-1 / VCD File
Software name : Avidemux
Software version : 2.4
MPEG-1 files are useful for use in computers with low specifications. They can also be played by nearly all computers without having to install additional software. This makes them ideal when creating a CD-ROM or an internet video file that you want to be very compatible.
I assume that you already have a video file which you want to turn encode.
If you don't already have a suitable file, then you may need to :
- export a file from a video editing programme
- capture a DV tape to a file on your hard drive
- download an appropriate file
The file should be as high quality as you can get - this is because every time you convert a video file into another type of file quality is lost. So you want to start with the highest quality file as possible to ensure the newly created file is the highest quality it can be. Ideally it will be a DV file exported from a video editing program or captured from a camera or an MPEG-2 file or VOB from a DVD.
Opening a File
You probably have a file on your harddrive that you wish to open. To do this click on main tool bar 'File' and then 'Open' :
Find the DV file or similar on your computer by browsing the files and folders. You can't mess anything up doing this so just click around until you find the file you want. When you have found it, highlight it by clicking on it and then either double-click on it or press 'Open'.
Deinterlacing
The next thing that we might want to do to the video file is to add a deinterlace filter. This would be appropriate if you had a video that was edited from a DV camera and is still interlaced.
There is help elsewhere on how to Deinterlace
Select VCD template
Next we want to select 'VCD' from the 'Auto' menu item :

This pop-up window will appear :

Select the Aspect Ratio from the drop down menu that matches your original file (the Source) and the file you are creating (the Destination). Usually you will use '4:3' for mpeg1 files. When you have chosen the right setting press 'OK' on this window and you will be returned to the interface of Avidemux.
This template will sort out the screen size and bitrate of your output file for you.
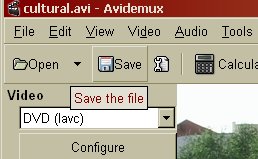
Saving the file
To save the file click on the 'Save' button.
You will see a file browser open :

Choose a place to save the file by clicking on the folders you see. The you need to give the file a name by typing this into the text box at the top:

Make sure the name ends in ".mpg". When you have done this click 'Save'.
You should see a box which lets you know how long you have to wait for the encoding to finish and shows the encoding progress.
When its done you'll get a success message if the encoding works correctly :
