Adding Links
To add links to your Wordpress site you can use the backend (Dashboard) to do this. They appear as block on the side of your page. The link block is actually enabled as a Widget so if you don't know how to do that you should read the chapter on that.
A finished link block might look like the one below.
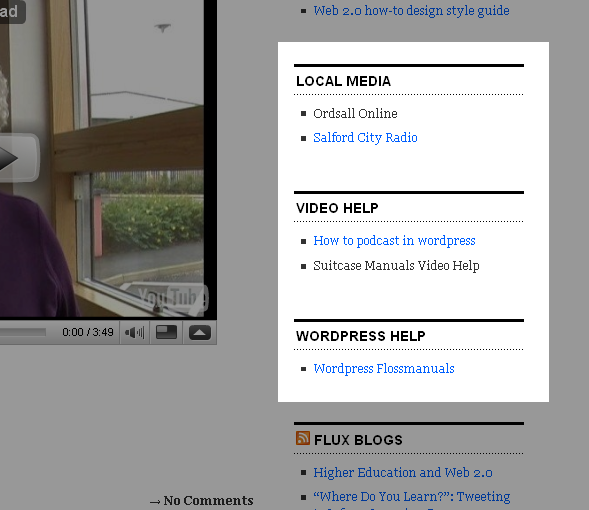
As you can see links can be given different categories and they will show up in the category assigned under a header text with the categories' name. We are going to try to recreate a link block a bit like the one above.
Categories
Before we get started adding a link, let's add a category to put our link in.
In this case let's create a category called Local Media. To do this make sure you are logged in to Wordpress and point your browser to the Dashboard of the blog that you want to create a link for.
Click on the Links menu item.
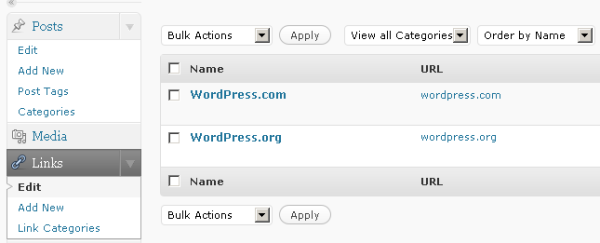
The menu then expands to show you Three options, Edit, Add New and Link Categories.
If you click on Edit then you'll see that you are given to links to start with. These are links to Wordpress.com and Wordpress.org.
We are going to click on Link Categories to add our own category.
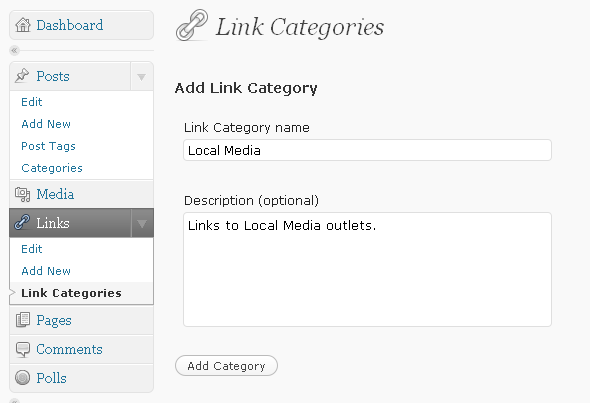
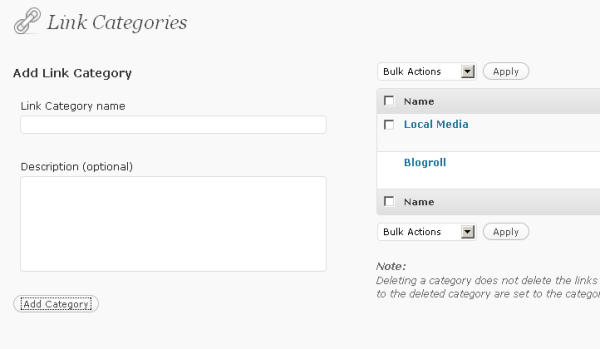
You need to give a name for your Category and a short description of what kind of links you are going to put in there. Click on Add Category and your it should appear in the column on the right.
Adding your link
Now we are ready to add a link. From the dashboard, on the left sidebar under the Links header, click on Add Link.
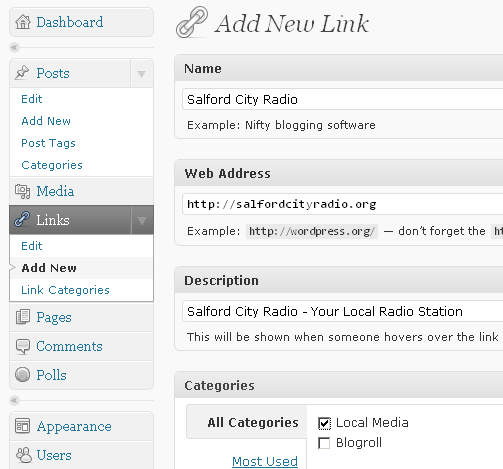
Fill out the details for the link you are going to add. Most importantly the Name of the link, and the Web Address of the website you are linking too. The description is optional but gives users more information about the website if they are hovering over the link.
Then put a tick in the Category of link that you want your link to appear in. And finally click on the Add Link button on the right of the screen. ![]()
Checking appearance
Let's check to see what that looks like. If you haven't already added the Links Widget to your sidebar on the Widgets page you'll need to do that. There is more detailed help in another chapter, but essentially from the appearance part of the Dashboard, you go to the Widgets page and drag the Links Widget to your sidebar.
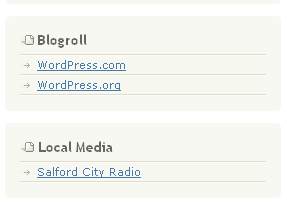
Now when we refresh any page on our blog we should see the Links part of the sidebar. After adding only one link in the Local Media category, your sidebar should look a bit like the screenshot below.
So now it's up to you to create the Categories and the links that you want. You can really make this look good if you put in a bit of effort to link to relevant sites, resources and useful things for the people reading your blog. Also if you link to other people you can get in contact with them and let them know that you have done that. They may link back to you as well if you ask them, in this way you can increase the readership of your blog and get connected to other bloggers and groups.


