About this Manual
This manual has been a work in progress from 2007 with contributions from FLOSS Manuals and Tactical Tech.
In 2011 Mick Fuzz and Martin Kean took on co-ordination of the update to the existing manual to use it as a way of documenting the process of setting up a WordPress community, and to encourage other groups to set up their own community sites and networks.
The first printed edition was finished in the summer of 2012. Special thanks go to Helen Varley Jamieson, treb0r, and Roy from mantex for their great input. And finally, a dedication to the WordPress documentation community for their tireless work maintaining the documentation at http://wordpress.org.
If you would like to contribute to the manual and help keep it up to date, please sign up for an account and edit away. Please join the FLOSS Manuals 'discuss' mailing list, let us know about your changes, and we will make your draft changes part of the live manual. http://lists.flossmanuals.net/listinfo.cgi/discuss-flossmanuals.net
Adding and Editing Posts
One of the first things to do when starting up a blog is to learn how to add a post. There is a section later in the chapter showing you how to edit a post you have created earlier.
Once you have logged in, you should be on a page called the Dashboard (explained in the previous chapter). On the left there is menu which includes Posts.
Click on this link and the Posts page should appear. This shows a list of the post that have already been made.
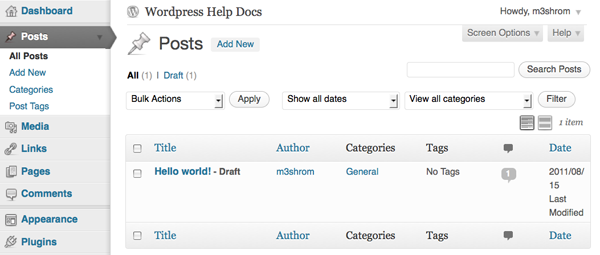
To get started, click on Add New. You can click on the button shown below or on the text in the lefthand menu.

If you have already created a post and want to come back to it to make changes then you can hover over the post you want to edit and then click on the Edit link when it appears:

Enter a title for your new post and some text which is the main body of the post. Think of this as similar to writing an email - it really is as easy at that. The title is important, as it will act as a link to your post in some cases, so don't forget to fill that out.
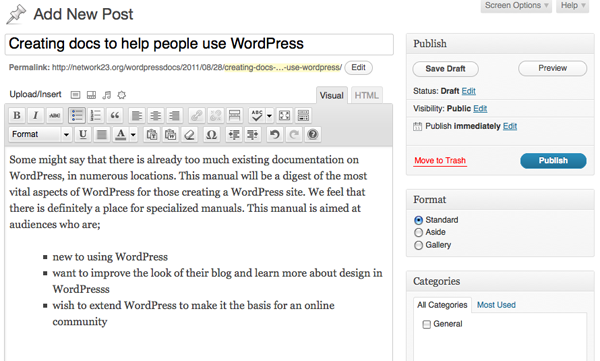
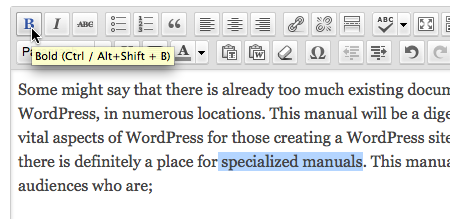
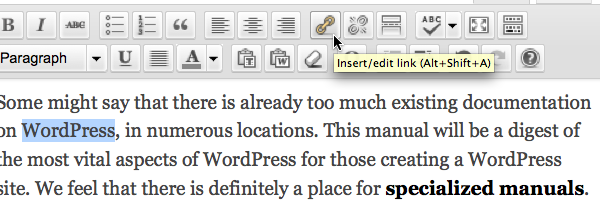
Click in the large blank space and type (or paste) the text content of your post. This space for text functions in the same way as a word processor: there are icons above the space which allow you to format the text. This called a WYSIWYG editor, which stands for "What You See Is What You Get". In the example below we are highlighting some text and making it bold.
When you have finished writing your post, you can click Preview to see how the post will appear to readers of your blog; the preview will normally open in another browser tab, so that you can easily switch back to the edit screen to make any changes.
When you are satisfied that your post is finished, click Publish. Your post will now appear on your web site for site visitors to read.
If your post isn't finished and you want to come back to it later, click Save Draft to save it without publishing it. You can then find it in the list of posts on the Posts page, and click Edit to continue working on it.

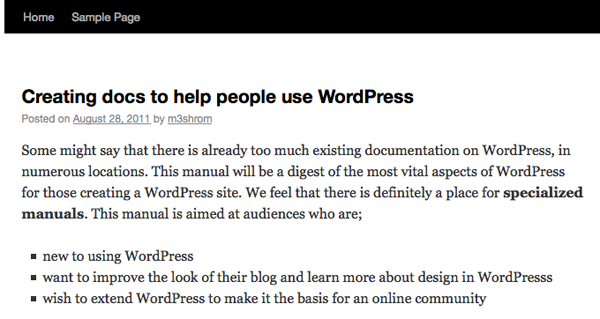
If you want to see what your post looks like, click on the View Post link that appears above what you have written.
On clicking this link you will be taken to the web page which features your post. You can see the formatting changes that you have made.
This is the core information you need to know to add a new post. We can do a lot more if we learn how to format using the WYSIWYG editor.
Using the WYSIWYG editor
We can use the WYSIWYG editor to make lots of formatting changes to the post. If you want to add images and other documents to the post, this is covered in other chapters.
You will notice that at the top righthand corner of the text input area are two tabs: "Visual" and "HTML". You need to be on the "Visual" tab in order to use the WYSIWYG editor. The HTML tab will show you the HTML code as well as the text content of your post, and no formatting icons.
Adding links to other internet pages
 We can add a link to another page on the internet by highlighting the text that we want to make into a link and then clicking on the icon with chain links on it:
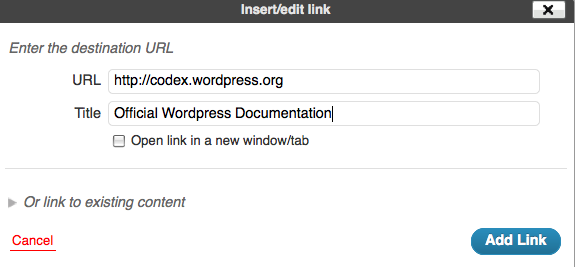
A dialogue box appears; enter the web address (URL) of the web page you want to link to. You need to include the http:// at the beginning of the address:
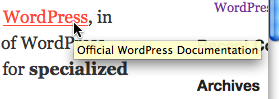
Then click Add Link. Your link should now be in your editor's window and show up as a blue colour. When you have Published or Updated your post, you will see that when you hover over the link, the title of the link shows up in an information box.
Adding Bullet Point Lists
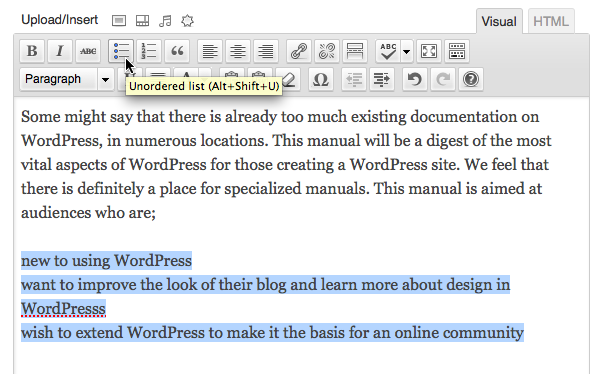
 You can make bullet points by selecting text and click on the icon to add a bullet point list:
Using the 'Kitchen Sink' icon
If you are looking at these screenshots and thinking that there are more icons shown there than you can see, then you need to know about the "Kitchen Sink" icon:

Clicking on this icon either hides or shows a second row of icons which give extra options for formatting your text. These functions include adding different headings, underline, adding colours to text, indenting and more.
Adding headings to WordPress posts
Text headings can be very useful to divide up your writing into different sections, making it more readable on the screen. Headings are also useful as they are read by search engines and therefore make your content more findable.
WordPress allows you to select from Heading 1 to Heading 6, with Heading 1 being the largest font size. Normally you will only need to use Headings 1 to 3. If you think you need more than that, you might want to consider restructuring your writing.
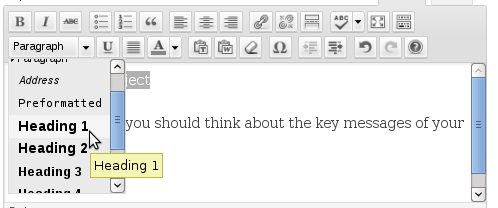
Select the text that you want to make into a heading. Then click on the Paragraph drop down menu (if you can't see that then first click on the Kitchen Sink icon - see above).
Select the size of heading that you want to apply to your text:
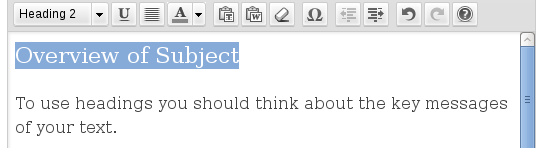
You should see a change in the size of the text you highlighted:
Indenting text
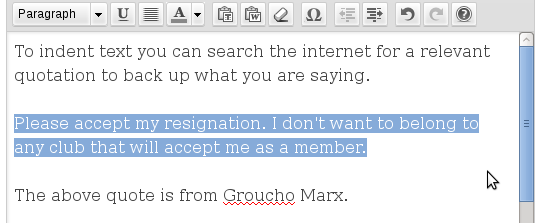
You can indent text when you are formatting a post in WordPress; this is often used when quoting another source. The example below shows a quote which we want to make more distinct from the rest of the text. First we highlight the text that we want to indent:
Click on the Indent button. This is the righthand button of the two similar looking buttons which feature lines and an arrow. The arrow indicates if the text is to be indented (pointing to the right) or outdented (pointing to the left).

When you have pressed the Indent button the text should move to add more space on the left as shown below:

ADDING AUDIO
Adding audio clips to your Wordpress site can be done in a number of ways. This chapter is a guide for one of the most simple ways to do it. If you are interested in more possibilities, look at the "Podcasting" chapter as well.
Using Audio Player Plugin
This section applies only to self-hosted sites. If you are on Wordpress.com you can skip to the section at the end of this chapter.
Install and activate the Audio Player Plugin 1. Download and install the plugin in the normal way. This plug in has no settings that need to be altered.
Where is your audio file?
To be able to add an audio player to your page, you need to know the full URL of the where your audio file is stored. This is a direct link to the mp3 file. In other words you need somewhere to upload your audio to that allows you to directly link to those files.
You may be able to set up your site so that you can upload audio files. Refer to the "Upload Settings" chapter for information about how to do this.
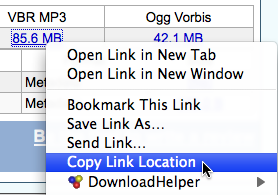
If you can't upload audio files to your WordPress site then Archive.org is one website that allows this. You can see a link to an Mp3 in the screenshot below:

To copy that link you can right-click (Ctrl + Click on Mac) on the link and select Copy Link Location.
Add the audio to a post
Once you have this direct link to the file, you can create an entry in your blog to stream the audio file with the Flash player.
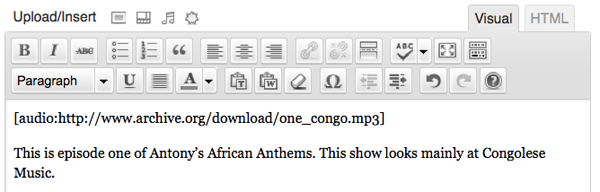
Create a post which describes your file and add the following code within the body text of the entry:
[audio:http://www.example.org/linkto.mp3]
This will look like this in the Wordpress edit interface:
Click Publish on the right of your screen and then View Post.
If your browser has the Flash player plug-in installed (which is standard in most browsers), you will see a simple player; click on the play arrow to play the audio file from your browser.

The player is basic but quite functional. You can skip forward to different parts of the file and the time elapsed of the audio file is also displayed.

Adding Audio to a WordPress.com site
The ability to add audio to a site at Wordpress.com is already built in. Follow the instructions above but with a slight change to the short code you add: replace the colon with a space, as shown in the example below.
[audio http://www.example.org/linkto.mp3]
- http://wordpress.org/extend/plugins/audio-player/^
Adding images to posts
There are several ways of adding images to posts. The two most common are uploading an image file from your computer or linking to an image that is already on the internet by finding its web address (URL).
The advantage of linking directly to an image that is already on the internet is that you don't have to spend time uploading it to your site. The disadvantage that the image you link to may disappear. To be safe, take a moment longer to download the image and upload it your own blog.
If you are using your own installation of WordPress, you may have to make changes to your
Upload Settings in the
Settings part of your Dashboard before you are able to upload images. There is help on that aspect elsewhere in this manual.
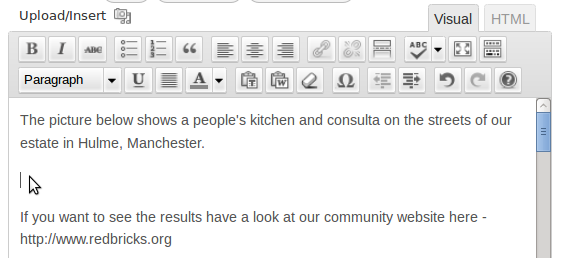
When you are in the editing interface for your post, place the cursor where you want your image to appear. This is usually easier if you write the text first.
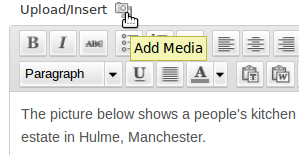
Then click on the  icon, which is the button to Add Media.
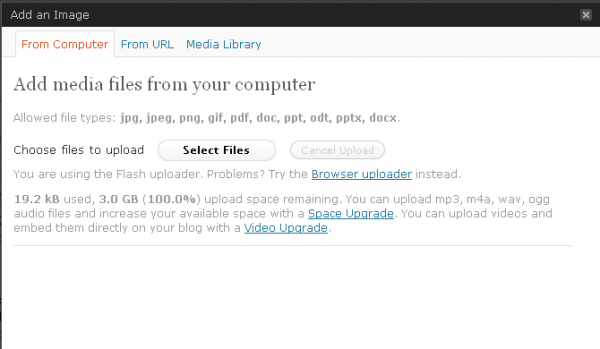
A dialogue box will appear. This gives you a choice of several ways to add your image
Uploading images from your computer
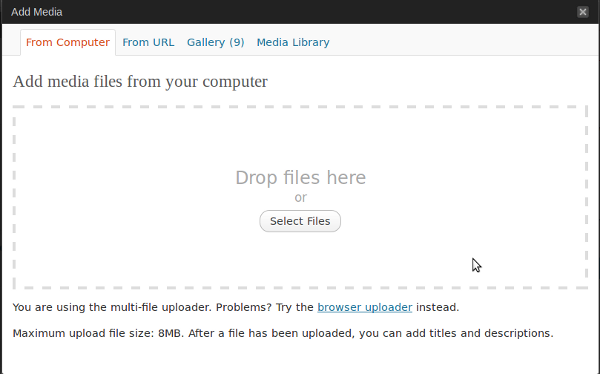
You can then drag and drop files from your computer's file browser into the big space shown in this window.
Or, there is also an option to use 'browser uploader' which will give you the following dialogue box.
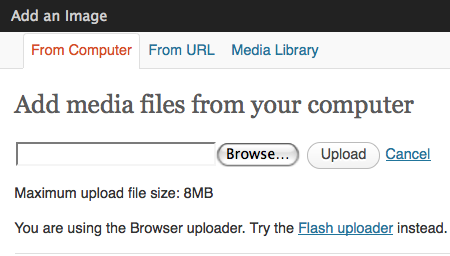
If you want to upload an image from your computer then click
Browse.
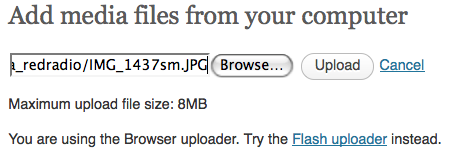
You will be presented with a File Upload or similar dialogue box that allows you to navigate to the image on your computer; this will look different depending on the type of operating system you have. When you find the file you want to upload, select it and click Open.

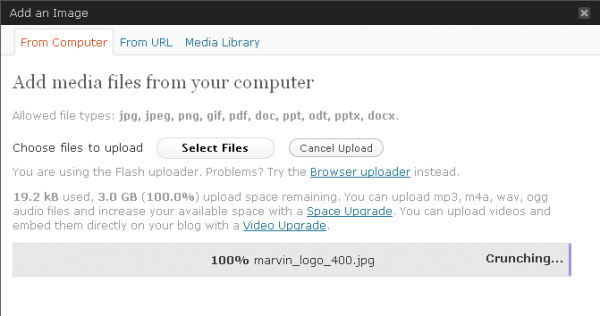
This will bring you back to the Add Media screen. You should see the path and the filename of the image you selected in the box. Now click on the Upload button to the right of this.
Configuring your uploaded Image
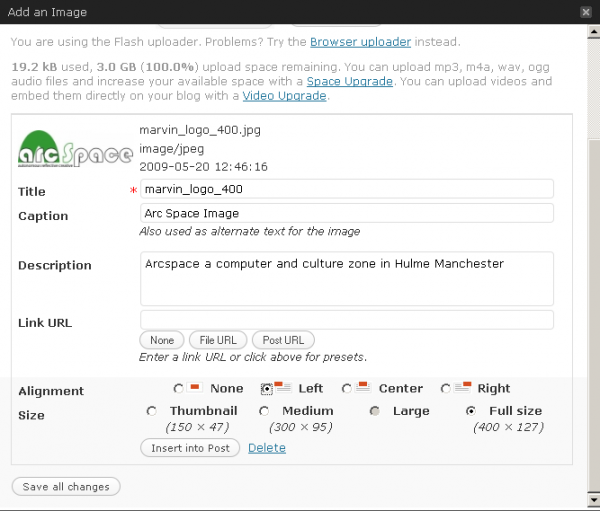
After your file/s has uploaded, you should see a thumbnail of the image followed by options about how to display it in your post.
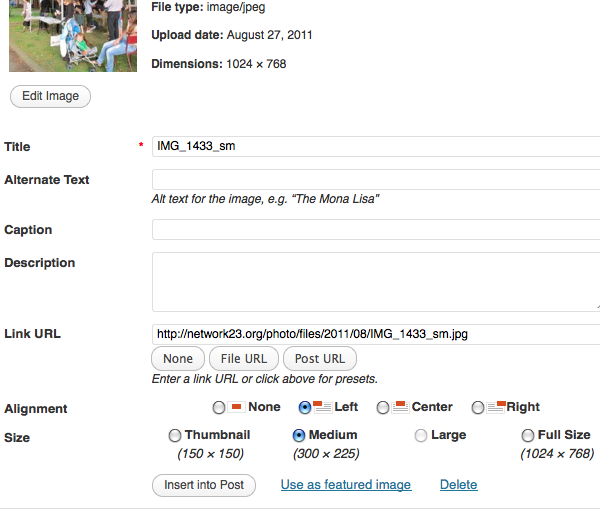
For this image I want to align the image to the left so that the text I've written wraps around it. I also want to select a Medium version of the image as the Full Size one would be too big to fit on the page.
I don't need a caption or description at the moment (if I change my mind, I can always return later and add that information).
When you have filled in as many details as you need to, click Insert into Post at the bottom of the options.
You should now see you image in your post about the right place you wanted it, or at least where you had the cursor flashing when you started the process.

Making changes to an image
If you want to adjust the size of the image on your screen, or change the spacing around the image, then you need to edit the image.
Changing image spacing
To change the spacing you need to alter the Advanced Settings of the image. First, click on the image in your post. Remember we are still in the edit mode; if you have published your post and are looking at the final result you'll need to go back to the editing interface.
When you click on the image, you'll see two icons appear in the top left of the image:
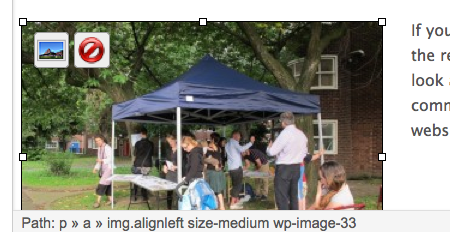
The first icon shows a landscape; this allows you to change the settings of the image. The second is a red circle which is to delete the image if you no longer want it to appear in your post.
Click on the landscape icon. You'll see a dialogue box similar to when you first inserted in the image into the post. Click on the tab which says Advanced Settings.
To create a bit of spacing around the image, enter numbers in to the boxes. Vertical space creates a margin on the top and bottom of the image, and Horizontal space creates space to the left and right of the image.
Enter a number in the box of your choice. Something around 10 pixels creates a good margin. Then click Update at the bottom of the window.
Preview your post to check the result before you publish or update the post; the margin around the image may be bigger or smaller than you want. Just go back to the Advanced Settings to adjust it.
Changing the size of an Image
There are a few different ways to change the size of an image. When you upload you are normally given four general options: thumbnail, medium, large and full size.
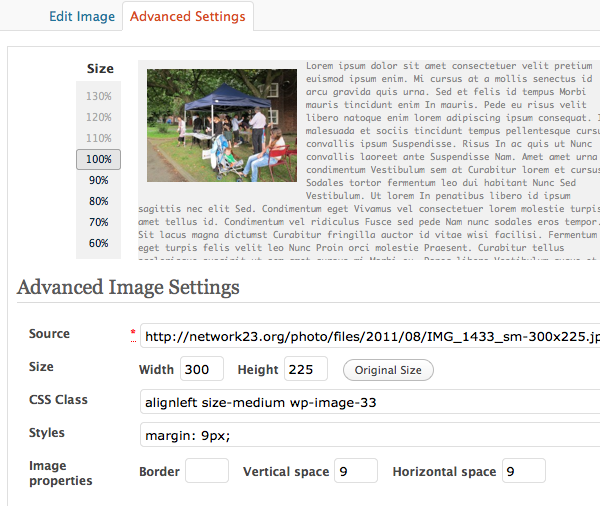
Another way to change the size and alignment of an image is in the Advanced Settings. Navigate to the Advanced Setting screen as shown above.
You will see the image size as you inserted it in the Size row. In this case it is Width 300 and Height 225. The numbers refer to pixels. A normal width for your posts in WordPress is about 600.
You are able to set a smaller size by clicking on the 90%, 80%, 70% and 60% numbers to the left of your image.
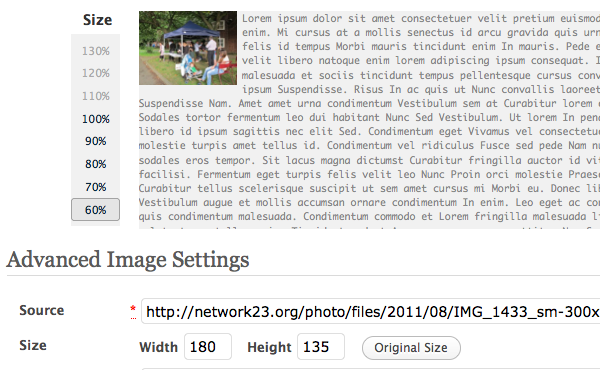
In the example above, 60% is selected and you can see that the Width and Height figures have gone down. You can also put in your own numbers into the Width and Height boxes.
When you have found a size you like, click Update at the bottom of the window, and then either Publish or Update your post.
In this example you may have noticed that once we had inserted the image as a medium sized image, in this case 300 pixels wide, that we couldn't increase its size even though the original had been 1024 pixels wide.
We could upload the image again and insert it as full size, but we could also do it another way if we learn how to use the Media Library.
Using the Media Library
To continue with the example above, let's re-insert our original image as a full size image. We can select the image in our post and delete it. Click on the image and then Click the red icon to delete it.
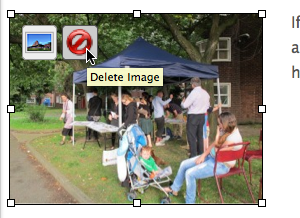
Although the image is no longer visible in the post, it is still in your WordPress system somewhere behind the scenes. To insert it again, we need to find it in the Media Library.
To access the Media Library, follow the same procedure as above when you are adding an image for the first time. However after you click Add an Image icon, select the tab Media Library in the Add an Image window.

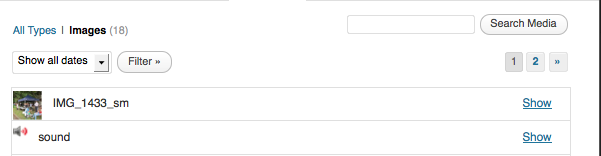
This shows you all the images that have been uploaded to your WordPress site. If you have uploaded more than 10 then you may need to click on the numbers on the top right to move to the next pages of images to find the one you have looking for. You can also use the Search function, if you know the name of the file.
In this case the image we want is right at the top. To re-insert it at its original size, click the Show link to the right of the relevant image.
This will open up a familiar looking window which will allow you to change the settings for the image. In the screenshot below, the image is full size and aligned to the centre. There is also a description of the image and a caption.

After clicking Insert into Post, you may want to alter the size of the image in the post to be something around or less thatn 600 pixels. This will depend on the theme your site is using, but most themes have a post width that is 600 or less.
You can alter the size in one of the ways described above or there is another way. In the edit view you can click on the corner of the image and drag it to the appropriate size. This will also preserve the shape of the image.

When clicking the mouse, hold it down and start to move the pointer. You'll see a grey window which tells you dimensions of the new image size. You can release the mouse button when you are happy with the size of the image.
Don't forget to click on the Update button on the right to save your changes.

Adding Links
There are various ways to add links to other sites from your WordPress site. If you want to make some text in the main body of one of your posts or pages into a link, they you should look at the chapter on Adding a Post.
Links can also appear as a block on the side of your page. The link block is enabled as a Widget so if you don't know how to do that you should read the chapter on Using Widgets.
A finished link block might look like the one below:

Here the links can be given different categories (Local Media, Video Help and WordPress Help). Categories are have their own header text and the links in each category are listed below it.
You can make this section look really good if you put in a bit of effort to link to relevant sites, resources and useful things for your readers. If you link to other people you can get in contact with them and let them know that you have done that. They may link back to you as well if you ask them, and in this way you can increase the readership of your blog and get connected to other related bloggers and groups.
Deleting Links
Click on the Links menu item.
The menu then expands to show you Three options: Edit, Add New and Link Categories.
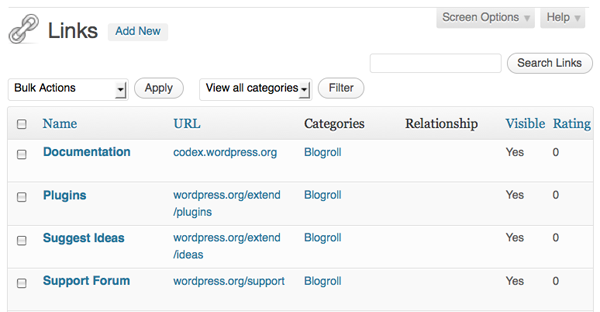
Click on Edit and you'll see that you are given some links to start with:
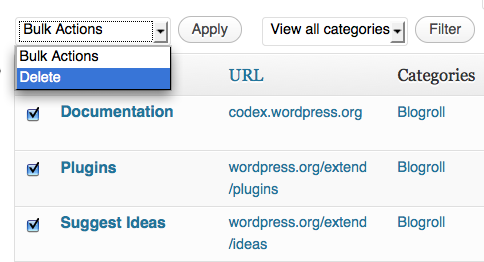
We are going to make a fresh start and delete these existing links. Put a tick in the box to the left of each one and select Delete from the Bulk Actions dropdown menu.
Categories
Before we get started adding a link, let's add a category to put our link in.
In this case let's create a category called Local Media. Click Link Categories:
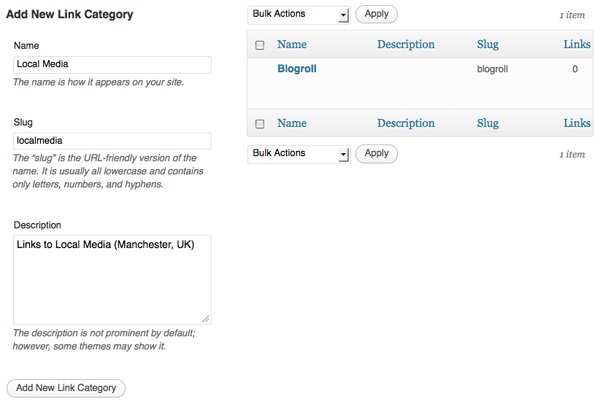
You need to give your category a name and a short description of the kind of links you are going to put there. Click Add New Link Category and it should appear in the column on the right:

Keep adding your categories in this way until you are done.
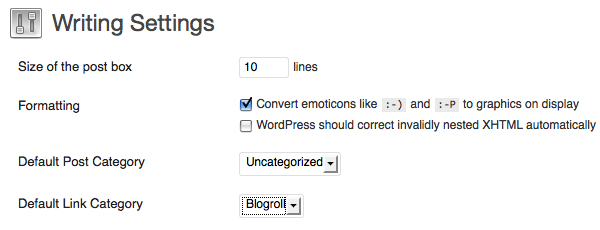
You may also want to set a default link category for your links. You can do this by going to Settings > Writing Settings and setting the Default Link Category there.
Adding links
Now we are ready to add a link. From the Dashboard, on the left sidebar under the Links header, click Add New:

Fill out the details for the link you are going to add. Most importantly the Nameof the link, and the Web Address of the website you are linking too. The Description is optional but gives users more information about the website if they are hovering over the link.
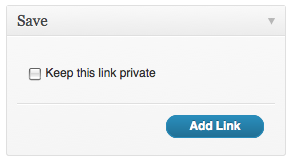
Then put a tick in the Category that you want your link to appear in. Finally, click the Add Link button on the right of the screen.
Enabling the Links Widget
If you haven't already added the Links Widget to your sidebar on the Widgets page, you'll need to do that. There is more detailed help in the chapter Using Widgets, but essentially from the Appearance section of the Dashboard navigation, go to the Widgets page and drag the Links Widget to your sidebar.

Depending on your theme you may be able to show the description and other information:
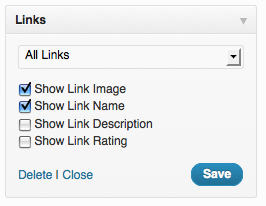
There is also the option of only adding one of the categories of links you have. This gives you more flexibility to show the links in different order on your widgets sidebar.

Now when we refresh any page on our blog we should see the Links in the sidebar. Your sidebar should look a bit like the screenshot at the beginning of this chapter.
More advanced link settings
Here are some details on Advanced link settings taken from the WordPress codex pages. 1
Image URI - An image to be displayed with the link. This can either be an absolute URI (http://some.site/images/image.png) or a relative path (/images/some.png). You may want this to be rather small, around 16x16, similar to a favicon.2

RSS URI:
URI of the
RSS feed associated with the link, which will be displayed next to the link itself (if your theme allows it). Example: http://example.com/feed/
Notes: Any notes you want to store, for your own internal use, about the link. Example: Nice design, from #wordpress.
Rating: A ranking of the link, which can be used to sort links within categories.
Target: Specifies the
target attribute that will be put onto the link's
a tag when displayed on the screen, which tells where the page will appear if the user clicks on the link. There are three options:
- none: open the link in the same window or frame (default).
_top: if you're using frames, open the link at the top level of the frame system.
_blank: open the link in a new window.
- http://codex.wordpress.org/Links_Manager^
- http://codex.wordpress.org/Creating_a_Favicon^
Adding Video
This chapter deals with now to embed a video that has been uploaded to a video sharing site into a post.
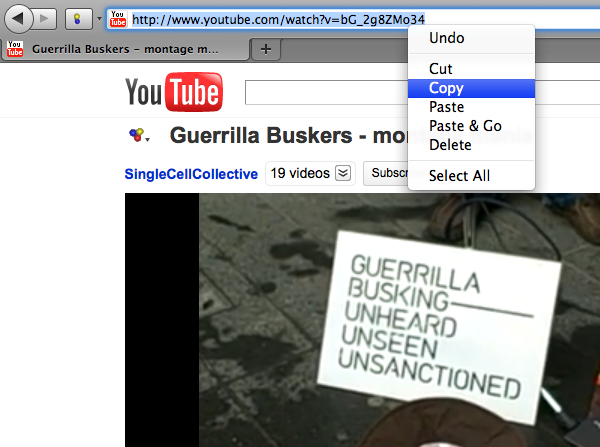
To add videos from YouTube, Vimeo and other similar video sharing websites, you can simply copy the URL of the video you want to embed and paste it into your post.
A URL is another name for a web address; you can find this the navigation bar of your browser. To copy the web address/URL to your computer's memory, right-click (ctrl + click on Mac) on the URL and select Copy from the menu that appears:
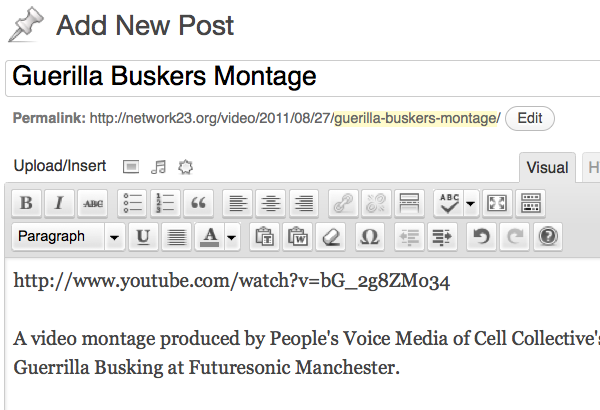
Then in your WordPress blog you can add a new post, give it a title, write a short description and then paste (right-click > Paste) the URL of the video where you want it to appear.
Click
Publish on the right of the edit screen, and you will get a message at the top of the screen that you post has been published:

You can then click on View post to check to see if the embedding of the video has worked. You should see a box showing a still of the video and a play button:

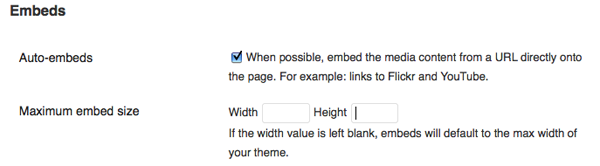
For this method to work you need to have the Auto Embeds setting turned on in Settings > Media. It is normally on by default but check it if this process doesn't work for you.
Controlling the size of videos and using embed codes
If you want to control the size of your video on the page when you embed it or if you are using a video sharing site that isn't supported by the WordPress Auto Embed method, then you will need to add your video in a different way.
One way is to use an embed code. Most video sharing sites will give you access to an embed code. They all do it in slightly different ways but look for buttons which say Embed or Share.
On YouTube, click on the Share button underneath the video you want:
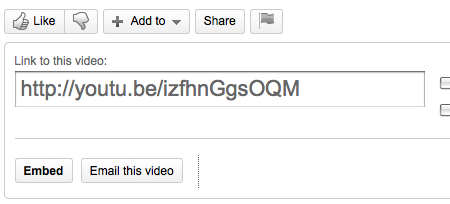
Now click on Embed to see the embed code you need.
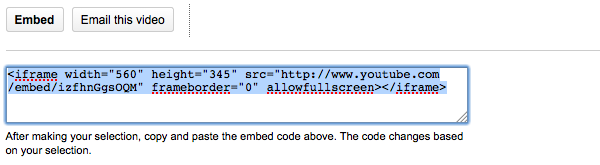
Copy this code to your computer's memory (right-click, or ctrl+click on Mac, and select Copy).
In the edit screen for your post, click in the body input field so that the flashing cursor is at the place where you want your video to be appear. If you are in the Visual editor, you will need to change the view from Visual to HTML.
If you are not sure what this means, have a look at the screen shot below. You will see two tabs to the top right of your editor. The default view is Visual.
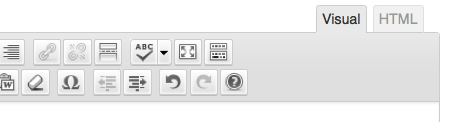
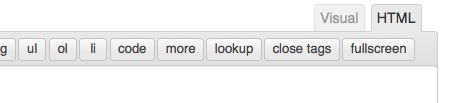
Next to it there is a second tab called HTML. If you click on it you will see that the formatting icons in the bar above the body input field are replaced by other buttons:
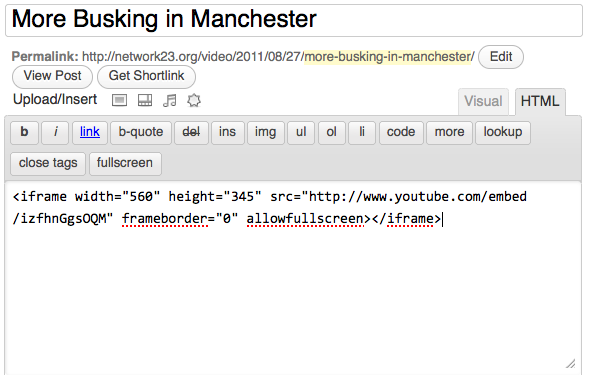
We don't need to know what these Visual and HTML buttons mean right now (they are explained in another chapter), so go ahead and paste in the Embed Code that you copied earlier and give your post a title. It should look something like the screen shot below.
If you now switch back to the Visual Tab you'll see a square where the video will appear:

If you want to resize the video to make it smaller or bigger you can click on a corner and drag the square to be the size you want. As you drag it you will see the size change and display the news size in pixels. As a test, try making the video 320 pixels wide.
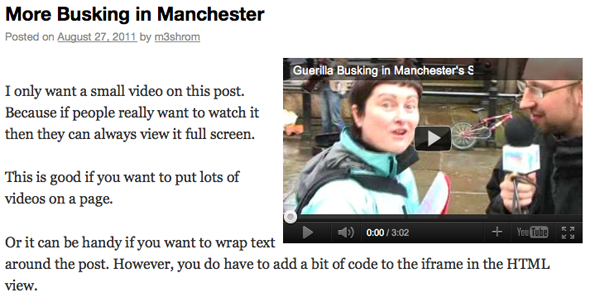
Click Publish and View Post. You will see that the video now only takes up half or so of the main area of your post.

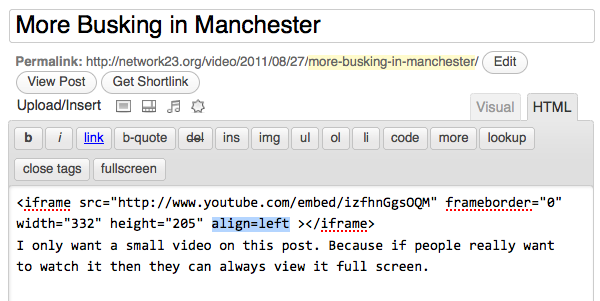
If you want your text to wrap around your image then you may have to add a little bit of code to the HTML view. There may be other ways to do this but learning to tweak the code in the HTML view is a good thing to do as it will give you more flexibility on how your posts look.
Edit your post and click the HTML tab as explained above. You should see the embed code and any text that you have added to the post.
Add align=left to the embed code as shown in the screen shot below:
Now click Update on the right hand of the screen and View Post. Your text should wrap around the video. If you would prefer to have your video on the right, as shown in the example below, add align=right to the embed code.
Analytics
If you want to know the movements and numbers of people visiting your WordPress site, you can use an external analytics software or you can install a plugin for this.
Statistics plugins and softwares enable you to view a broad range of information about your website visitors such as which web browsers they are using, their geographic location, pages visited, referring website, and more1. This information is not intended to identify individual users, although certain aspects such as IP address or the combination of operating system, browser, and other attributes may be exclusive to an individual2. Analytics are generally designed to give a statistical basis with which to make decisions about site design, outreach tactics, usability, and other issues.
You may wish to disable some of the record gathering features of these analytics tools for privacy reasons. For example, the ability to log IP addresses may cause concern when it comes to the controversial area of data retention.3 It is possible to set up an analytics tool so that it acts just as a page counter for the different areas of your site
There are several popular analytics packages on the internet that can be integrated into WordPress with relative ease. This chapter gives an introduction to some of these solutions, but there are plenty of other solutions out there.4
OpenWebAnalytics
The OpenWebAnalytics package is open source, GPL licensed (the same license as WordPress).
WP Slim Stat
According to the developers Slim Stat is:
A lightweight but powerful real-time web analytics plugin for WordPress. Spy your visitors and track what they do on your website. 5
There are some details on their installation page that is worth knowing about if you are considering using Slim Stat for a network of sites.
Database usage: WP SlimStat needs to create its own tables in order to maintain the complex information about visits, visitors, browsers and countries. It creates 3 new tables for each blog, plus 3 shared tables (6 tables in total, for a single-user installation). Please keep this in mind before activating WP SlimStat on large networks of blogs.
Install and activate the plugin in the normal way and then navigate to the Settings > SlimStat Config page to set your configuration.

When you have set up the system then you can check to see if it is working by viewing the Stats for your website:
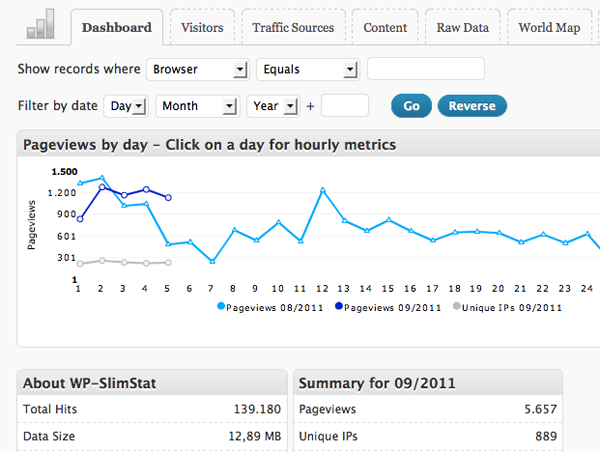
The Dashboard show the total number of hits. But a more accurate representation of how many people are looking at your site is show in the Visitors tab.
Piwik
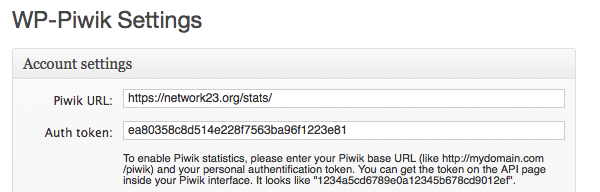
Piwik is an external stats service that needs a separate install. WP-Piwik is a WordPress plugin which allows you to sync one site or even a network of sites to your Piwik install. There is documentation on installing and using Piwik on their site.6
You install and activate the WP-Piwik plugin in the normal way. Then get an auth code from your Piwik installation and enter it in Settings > Piwik.
Piwik Plugins and AnonymizeIP
One of the handy things about Piwik is the number of plugins that you can enable for it.
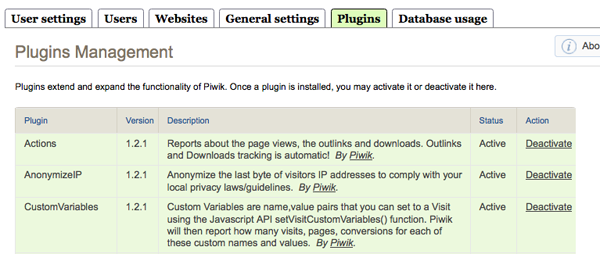
Navigate to the Plugins tab of your Piwik installation to see the currently activated plugins and those that are ready to activate.
In the screenshot above we can see one particularly useful plugin called AnonymizeIP. This allows you to anonymize the details of the IP addresses that are stored in the database. To do this you will need to make sure that the following is included in the global.ini.php files in the config directory and that the AnonymizeIP plugin is installed. There are more details on how to do this here - http://forum.piwik.org/read.php?2,1810
; number of octets in IP address to mask, in order to anonymize a visitor's IP address
; if the AnonymizeIP plugin is deactivated, this value is ignored
; for IPv4 addresses, valid values are 0..4
ip_address_mask_length = 4
- http://en.wikipedia.org/wiki/Web_analytics^
- https://www.eff.org/deeplinks/2010/01/primer-information-theory-and-privacy^
- http://en.wikipedia.org/wiki/Telecommunications_data_retention^
- http://wordpress.org/extend/plugins/search.php?q=stats^
- http://wordpress.org/extend/plugins/wp-slimstat/ ^
- http://piwik.org/^
Anti-spam Plugins
Comment spam was mentioned in the chapter on comments. Apart from turning off the ability for users to add comments, how can you prevent comment spam? One way is to install an anti-spam plugin.
Akismet
Akismet is a system which automatically detects comment and trackback spam. It is an external service run by Automattic, the company that provides WordPress.com.
Akismet can be installed for free on non-commercial websites by installing a plugin that interacts with the Akismet mothership using an API key. You can review the spam it catches under "Comments".
There is an overview on how to use Akismet on the WordPress Codex site here: http://codex.wordpress.org/Plugins/Akismet
Other spam plugins
There are other plugins and ways of stopping comment spam - too many to include everything here, so we will look at two: Captcha plugins and the wp-Spamfree plugin.
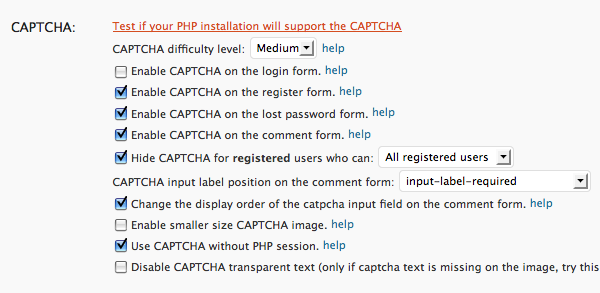
Captcha plugins
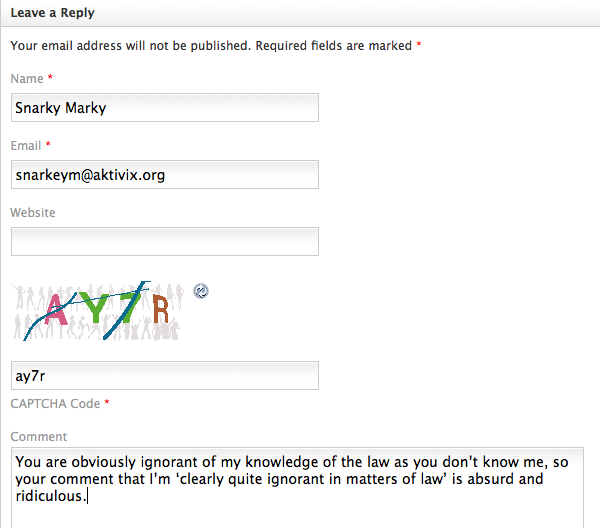
Captcha is a system which asks users to copy a short sequence of letters and numbers which is displayed as an image, therefore only readable by human. This prevents robots from posting comment spam.
If you search for "captcha" in the plugins page of your WordPress site, you will see quite a few alternatives that you can try.
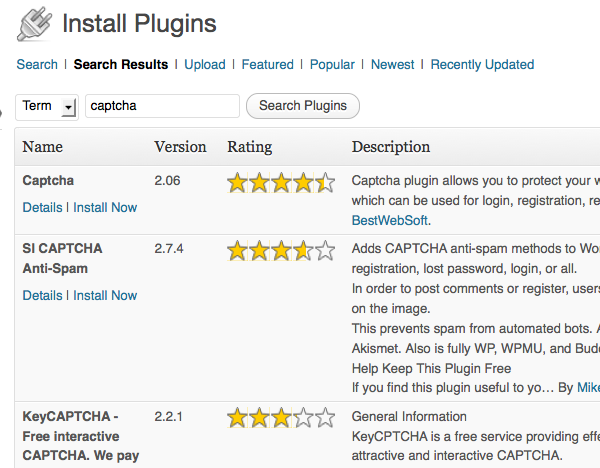
In this example the SI-Captcha plugin is used: http://wordpress.org/extend/plugins/si-captcha-for-wordpress/.
After installing the SI-Captcha plugin, users see an addition to the comment form:
The default settings for the SI-Capture plugin seem to be effective.
Navigate to Plugins and then SI-Captcha Options in the lefthand menu of your Dashboard.

Here, you are able to set the different users and parts of your site where the form captcha is used.
Other anti-spam plugins
Buddy Press
BuddyPress is a way of creating a community in your WordPress site or network of sites. It is commonly used to create networks in universities, private companies or communities of interest. It does this by building common social media possibilities into a network of WordPress blog users.
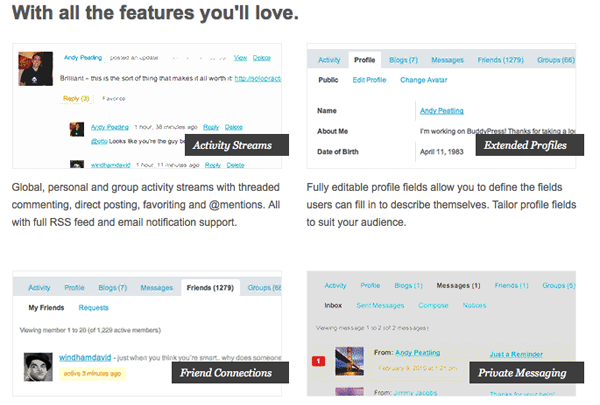
Features of BuddyPress
For a full breakdown of the features of BuddyPress you can visit the project's home page. 1 Some of the most notable and useful features are: Activity Streams, Extended Profiles, Friend Connections, Private Messages, Private Messaging, Groups and Discussion Forums.
How does BuddyPress work?
BuddyPress is a plugin for WordPress which you download and install in the normal way. You need to then install a theme which is compatible with BuddyPress.
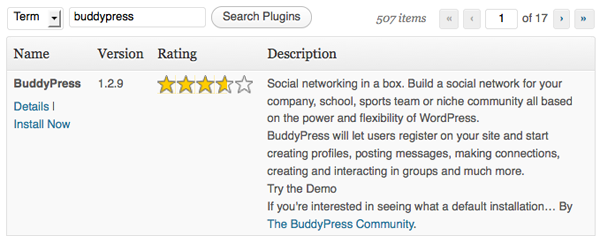
After installing the plugin you will get this message:
BuddyPress is ready. You'll need to activate a BuddyPress compatible theme to take advantage of all of the features. We've bundled a default theme, but you can always install some other compatible themes or upgrade your existing WordPress theme.
If you navigate to the Appearance section of your Dashboard, you will see the new default theme.

When you click Activate, the installation will be complete.
BuddyPress adds a lot of extra functionality and significantly alters the way your site works. You can only use certain themes for BuddyPress and these themes will significantly alter the front page of your network to highlight the BuddyPress features that you have enabled. These features include Activity Streams, Group Directory, Member Directory and Blog list.

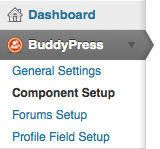
Configuring BuddyPress
The default settings for BuddyPress offer a lot of functionality. You may not need or want a lot of the things that are possible for your network. With this in mind, the makers of BuddyPress have made it easy to disable these features. Navigate to Component Settings in the new BuddyPress section of your Dashboard.
Select only the functions that you want. You may want to test some of them out on a site before asking the users of your network to use them. Some features, such as Groups, look a bit sad and lonely if you enable them but they are then are not used. It may be that you decide to introduce these features one by one to your network.

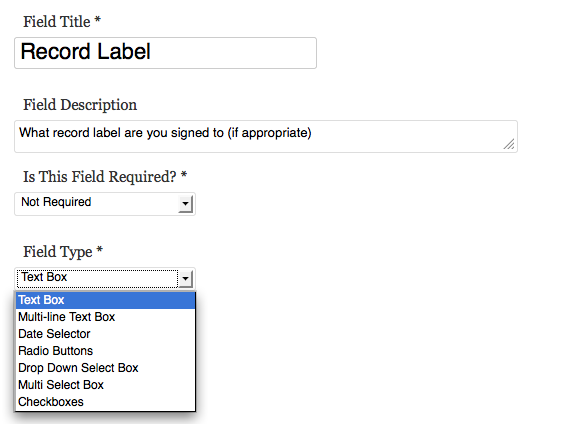
You may want to change the information that users are allowed to enter on their profile page. This is especially useful if your network is set up for a community of interest which has specific information they want to share. The Profile page is a great place to have that information.
To add extra fields for information, navigate to Profile Field Setup under the BuddyPress menu.

You can set the name and description of a field and choose what kind of field you want it to be: Text Box, Date Selector, Radio Buttons, Drop Down Select Box, Multi Select Box or Check Boxes.
Quick guide to using BuddyPress
Documenting how to use all of the possible features of BuddyPress is beyond the scope of this chapter. However, here is a quick guide to getting started. There is good support in the BuddyPress support forums.2
Joining Groups
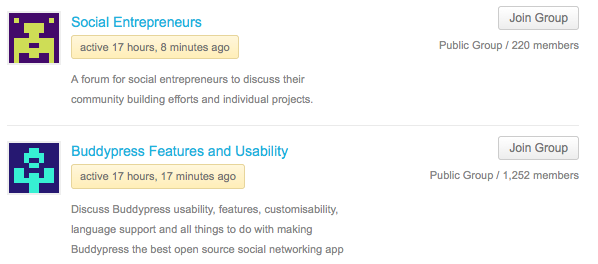
To join a Group in your BuddyPress network, go to the Group Directory by clicking this menu item under the Community tab.

From the list, you can join groups which interest you by clicking Join Group to the right of the group name and description.
Adding Friends and Messaging Users
When you have joined groups and watched the activity which happens there, you may want to message other users and add them as friends.

For example you may want to have a discussion with the user krishna c about their question in the screenshot above.
The easiest way to do this is to click on their username or avatar to go to their profile page.
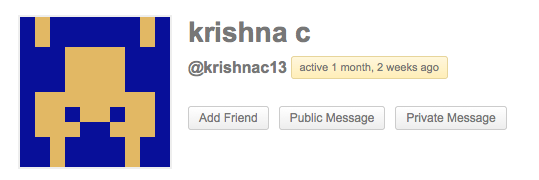
To add the user as a friend just click the Add Friend button.
If you click Public Message you are given a message box starting with the user's username for your message. This message will be visible to all other users.

If you want to send a Private Message, click on that button to go to the message section of your BuddyPress Dashboard.
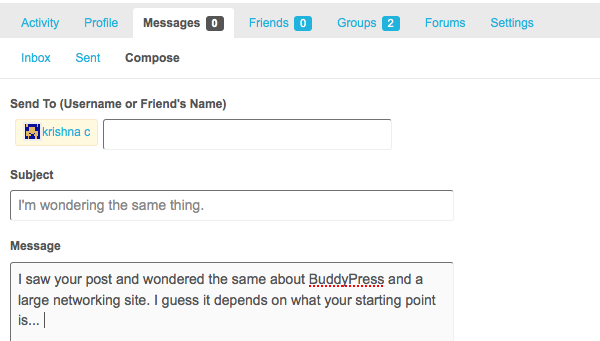
You can see there that there is already an entry in the Send To box so just fill in the Subject and Message, and click Send Message.
Extending BuddyPress
There are a large number of extra features that can be enabled through adding extra plugins to your WordPress/Buddy press system. 3
Many of these plugins can be used on WordPress sites without BuddyPress and some are written especially for BuddyPress installations.
- http://buddypress.org/^
- http://buddypress.org/support/topics/^
- http://buddypress.org/extend/plugins/^
Calendar plugins
It may be that you want a calendar to display upcoming events or significant dates on your WordPress site. If so, there are quite a few different options for getting that job done.1
In this chapter we are going to look at the Events Calendar plugin. One of the reasons for choosing this plugin is that it works in a multi-user WordPress network set up.
Events Calendar Plugin
You can install the Events Calendar plugin in the normal way. It has a download and information page on WordPress.org.2
Adding Events to the Calendar
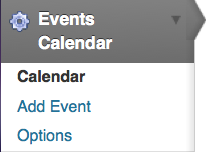
When you have installed the Events Calendar plugin, navigate to the Events Calendar page by clicking the link on the bottom of the left hand menu:
Scroll down the page and then add the details of the event in the form you see there. An example is shown below.
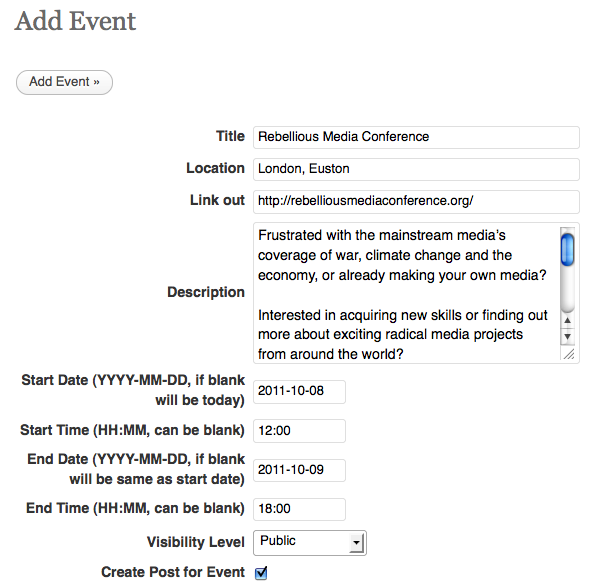
Ticking the box Create Post for Event will do just that and make the event more noticeable on your site. You will be asked if you want post to be a Draft post or a Published post. Normally it will be Published if you want visitors to your site to see it right away.
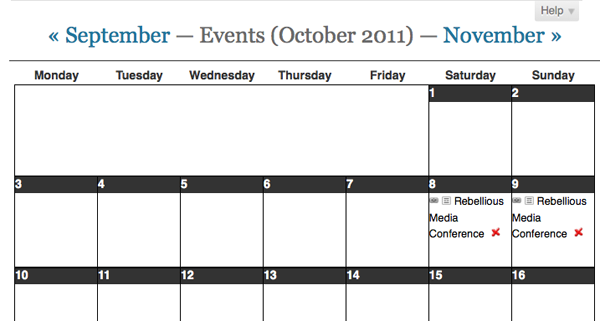
If the process is sucessful, your event should then be visible in the Dashboard view of the Calendar:
Displaying the Calendar
Adding a Widget
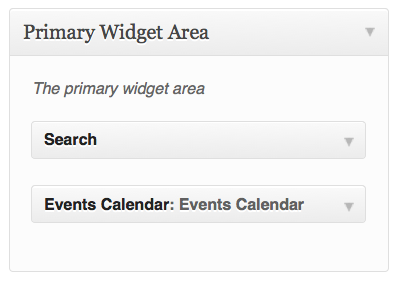
To display a calendar in the sidebar or similar area of your site, you can install a widget in the normal way.
This creates a calendar like the one shown below. The current date is shown with a blue circle and future events are highlighted in red.

When a visitor to the site hovers over the red dates they are shown a summary of what is happening.
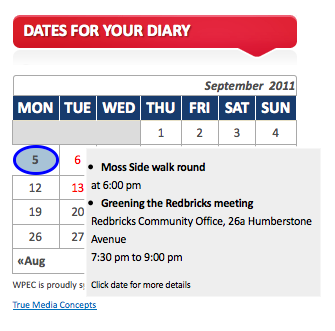
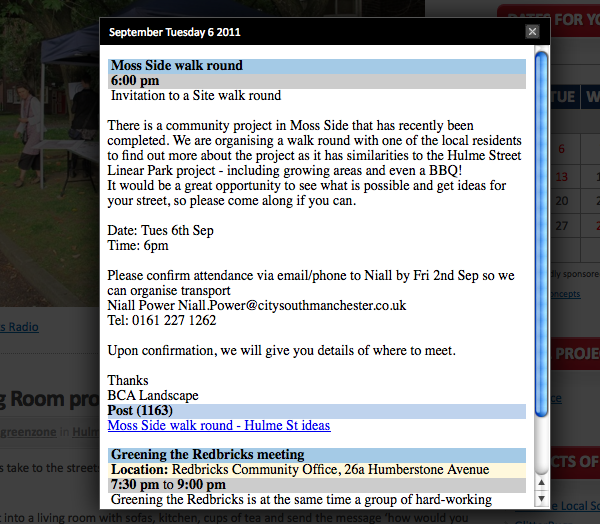
If they click on the date for more details, a pop up box appears; the rest of the site is greyed out to make the information more prominent:
Adding a Calendar to a Page
If you want to display a large calendar in a post or a page, simply place [events-calendar-large] in the html of the post or page. This can work very effectively if you create a page which you then add to the menu of your site.
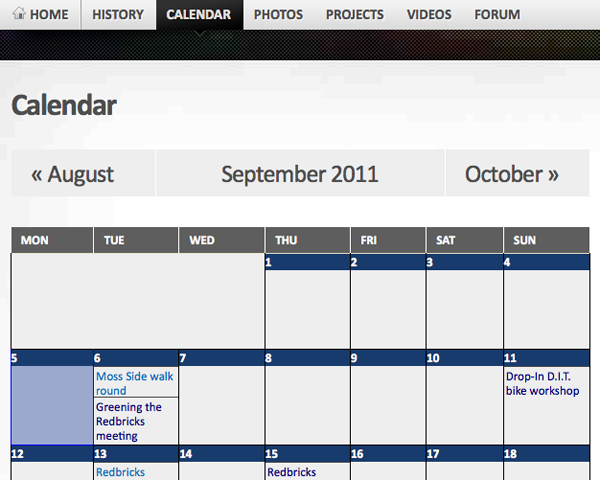
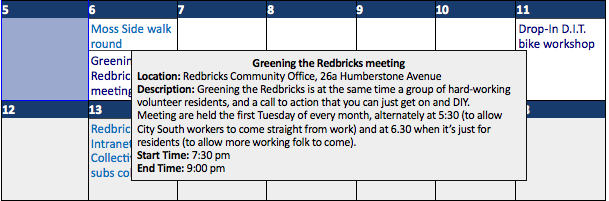
Hovering over the entries gives a full overview of the event and if you click on the title of the event you are taken to a page with more information.
- http://chasesagum.com/7-wordpress-calendar-plugins^
- http://wordpress.org/extend/plugins/events-calendar/^
What is a BLOG?
A BLOG is a shortened version of the term "Web - Log". A "log" is something like a diary, and a "web - log" is a diary that is kept on the web. The first Blogs were very much like diaries, personal accounts of peoples' lives. However in more recent times Blogs are used for a wide diversity of activities. Blogs are used by independent journalists for publishing, they are used by companies for reporting on internal activities, web businesses use them to inform their users what they are doing, or they are used as a kind of online magazine. There are many, many other uses for Blogs.
The software behind Blogs is, unsurprisingly, known as "blogging software". Generally these software applications run on a server so contributors and readers can access the blog through a browser from anywhere in the online world. This generally means that if you cannot get internet access you cannot participate in blogging.
There are many many different blog software applications. Each of these applications has its own approach and its own community of users. Finding a blog software that is suitable for you comes down to two basic factors:
- finding a blog you can use - can you get access to a blog you can use?
- functionality - does the software work the way you like and does it have the features you like?
Finding a Blog You Can Use
You do not need to install blogging software unless you have a specific reason to do this. There are many websites that enable you to set up a blog for free. These sites support many users and they let you set up your own blog or 'account' for free. Examples include :
WordPress.com
http://wordpress.com/signup/
Installing WordPress
This process is not easy! If you have no experience with installing software on servers then this process is probably not for you - you may wish instead to visit the WordPress site and create a Blog account for free. However if you need more control over the configuration of WordPress then the following is for you.
Pre-requisites
You need some basic system administrations skills and the following to install WordPress on your server. It is beyond the scope of this guide to walk you through each technology so a high level of prior understanding is assumed.
- MySQL 4 or better (other SQL variants will require additional configuration not covered by this chapter).
- PHP 4 or better
Optionally access to htaccess or server rewrites (needed for custom permalinks).
You will also need the following skills.
Installing WordPress via FTP/sFTP
- Download WordPress.
http://wordpress.org/latest.zip
- Double click to decompress the "latest.zip" file. This creates a "wordpress" directory.
- Create a new directory called "uploads" within the "wp-content" directory inside the "wordpress" directory.
- Upload the contents of the "wordpress" directory to the root of your website, or into a subdirectory, e.g.: a "blog" directory.
- Find out where to set file permissions or CHMOD in your FTP/FTPS client.
- Set the permissions on the root directory and the "uploads" directory to be read/write/execute (777) for all users.
Installing WordPress via Fantastico Script Installer
Many websites come equipped with a cPanel. cPanel comes with an automatic script installer called a Fantastico Script Installer. One feature that this has is an automatic installation of WordPress. To do this, navigate to the Fantastico Script Installer from your cPanel control panel and follow the instructions choosing to install WordPress
Installing WordPress via the command line
- Download the latest version of Wordpress.
curl -O http://wordpress.org/latest.tar.gz
- Decompress it into the "./wordpress/" directory.
tar zxf latest.tar.gz
- Move the contents to the root directory of your webserver, or a subdirectory therein.
mv wordpress/* webroot/
- Make an uploads directory in the place WordPress expects it to be.
mkdir -p webroot/wp-content/uploads
- Discover the User that Apache runs under, in this case "www"
grep -r ^User\ /etc/httpd/
- Set the permissions of the root directory and uploads directory
sudo chown www webroot/ webroot/wp-content/uploads/
Completing the installation
Before continuing you will need
- The name of the database you will be using. i.e.: user1db
- The username that allows access to that database. i.e.: user1
- The password associated with that user.
- The server your SQL database is hosted at (if you are running from you own server, this is probably localhost, but otherwise this should be available from your web host).
Browse to the front page of your website e.g.: http://mywordpress.com/
The automatic configuration scripts will guide you through the next part of the process.
- Click the link that offers to "Create a wp-config.php file through a web interface".
- Click the link that invites "If you"re all ready, let"s go!".
- Enter the information required, that you have already gathered. For table prefix, change "wp_" as offered to something meaningful such as "blog1_"
- Press "Submit".
- If no errors occur, press the "If you are ready, time now to run the install!" link.
- Write in the first field the name of your blog. Note: This can be changed at any time.
e.g. : "Getting started with Wordpress"
- Enter your email address. This is the only way to retrieve an administrator password in the event that you loose it and have no other administrator users.
- Allow my blog to appear in search engines ... [needs work, explain what the ramifications are of this]
- Press the button called "Install Wordpress".
If you need to stop work now, make sure that you either
- have received the administrator password via email or
- recorded the admin password securely.
If you have not, you will need to remove the database tables and start again which is not covered by this chapter. Otherwise, copy the admin password, and press the "Login" button.
The initial administrator user name is "admin" without the quotes. Type that in the user field and paste the password in the password field. If you are working on a shared computer, do not check the "Remember me" box.
The first thing that should be done upon logging in is to create a new user for yourself with a memorable password.
- Click the Users tab towards the right side of the top menu bar.
- Scroll down the page until you see the "Add New User" heading.
- Enter your username, your email address and your new password. Set the Role drop down menu to Administrator and press the "Add User" button.
The last thing that should be done before finishing the WordPress install is to change the permissions of the web root directory back to something more secure. Via FTP/sFTP Set the permissions or CHMOD of the root directory to read/write/execute for the owner only, and read/execute for groups and other users. From the command line.
sudo chown `whoami` webroot/
Installation and some minor configuration is now complete. If you browse to the front page of your blog you should now see a standard install of WordPress with (nearly) no content and with your blog title at the top of the page.
Get a WordPress.com blog
If you do not wish  to host your own blog, or do not have that option for one reason or another, you can still run a WordPress blog by signing up for a free account with the makers of WordPress themselves. Although a blog set up at WordPress.com will not be as customisable as one that you host elsewhere, you will not have to spend time or money setting it up, getting it working or dealing with maintenance in the future.
Get a Wordpress Account
- Go to the WordPress.com sign up page :
http://www.wordpress.com/signup/
- Scoll down and click the fascinating terms of service. Read the information and then click your browser's back button to return to the sign up page.
- Choose a Username for yourself. It will be required to sign in to your blog. Note: It does not have to be the same as your blog name.

- Choose a password and enter it in both the Password and Confirm fields.
Note: If the status bar that displays underneath the password field as you type does not say "Good" or "Strong", then you will not be able to proceed until you have provided a stronger password.
- Enter a valid email address that you can access.
- Check the Legal Flotsam checkbox.
- To have your blog named the same as your Username, select Gimme a blog! (Like username.wordpress.com).
- Press Next.
Note: If your Username is taken, or your password isn't strong enough, you will be prompted to change those before continuing.

Choose a Domain Name
On the next page you can set the subdomain of your blog. Note: You will not be able to change this once it is set, so chose carefully.
A subdomain is a 'child' of a regular domain. In this example, the domain name is wordpress.com, and our subdomain is "flossmanuals". Therefore, our web address, or URL, is http://flossmanuals.wordpress.com.

You can also give your blog it's title. You can change the title in the future if you need to. You should also set the language now using the drop-down menu.
And finally, press Signup.

If all goes well at this point (your subdomain will have to be unique, or you will be asked to change it) you should see saying "Your account is now active!".
Log In to Your New Blog
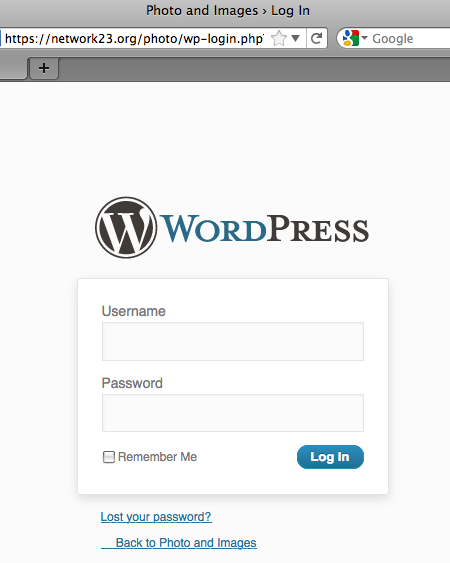
Once you've received your activation email, you need to log in. There are couple of ways of doing this. The first is to go to the main wordpress page and fill in your username and password and click Log In on the top bar of the screen, as shown below.

The other way is to browse to the domain you chose.

Find the Meta section in the sidebar and then click the Login link.
Then enter your login details and click Log In.

You should now be logged in to your new blog. You should see what is called your 'Dashboard'. This is the control panel where you can add new content to your blog and change the settings.

You can think of the Dashboard as the back end of your blog, compared to the front end which is what everyone else gets to see. Learning to understand your Dashboard, and how changes there affect your site is the key to getting the hang of using Wordpress.
Why not try opening a new tab in your Internet browser so you can see both 'Your Site', the public part of your blog, and your dashboard at the same time. This will make it easier when you are working on your blog to see the changes.

When you have done this, click on the new tab to see the 'Front end' of your blog. It will be available at the URL in the address bar of your browser. eg. http://yourblog.wordpress.com

You'll get to learn more about your Dashboard and how to use it if you look at the tasks in the other chapters of this manual.
Adding a Post
The first thing to do when starting up a blog is to learn how to add a post. First you will need to log in, see other chapter for that instruction
When you have signed in a tool bar should appear at the top of the screen. From this toolbar select the New Post option.

If you have signed up for more than one blog then they will be listed here in a drop down menu, as below. Select the blog which you want to make the post to.

The next stage of add your post is to enter a Title for the post and some text which is the main body of the blog post. Think of this part in the same way as sending an email. It really is as easy at that. The title is important, as it will act as a link to your post in some cases, so don't forget to fill that out.

Then you should click in the large blank space and type the main body of what you want to post about. This space acts like a wordprocessor. There are some icons above that space which allow you to format the text. This is called a WYSIWYG editor, which stands for 'What you see is what you get'. In the example below we are highlighting some text and making it Bold.

When you have finished writing your post then click on Publish. This will create an internet page which features your post.

If you want to see what your post looks like then you should click on the link that appears above what you have written which says View Post

On clicking this link you will be taken to the internet page which features your blog post.

There are other chapters about how to add Links, and Images to the post using the WYSIWYG editor.
Adding Images to posts
There are several ways of adding images to posts. The two most common are to upload an image file from your computer or to link to an image that is already on the Internet by finding it's web address (URL).
The advantage of linking directly to an image that is already on the Internet is that you don't have to spend the time to upload it to your blog. There is a possible disadvantage however, and that is that the image you link externally to may disappear. So to be safe you may want to download that image and upload it your own blog. You get loads of free space when you sign up for Worpress account so space isn't an issue.
Getting ready to add an image
When you are in your post you should place the cursor where you want your image to appear. This is usually easier if you write the text first.

Then you should click on the  icon.
icon.

A dialogue box will appear. This gives you the choice to add your image in a few ways.
Uploading from your Computer
If you want to upload an image from your computer then you should click on Select File
and find the image on your computer.

You'll see an upload bar while you file is uploading.
When your file has uploaded you'll get some options which control how it is inserted into the page.
For my image I want to align the image to the left so that the text I've written wraps around it. Also I want to put in a caption and description to help the viewers know what it is about.
When this is filled in you need to click on to the Insert into Post button at the bottom of the options. Don't forget to do this or it all gets a bit tricky and you might have to start again.
You should now see you image in your post about the right place you wanted it, or at least where you had the cursor flashing when you started the process.

One thing that you might want to change is the spacing around your image. In my example it all look ok as the image is white. But in your example it may look a bit cramped.
If this is the case then we can add some spacing around the image. We'll need to alter the Advanced Settings of the image. To do this you should click on the image in your post. Remember we are still in the edit mode. If you have published your post and are looking at the final result you'll need to edit again.
When you click on the post then you'll see two options appear.

The first is a image of a landscape, this allows you to change the settings of the image. The second is a red circle which is use to delete the image if you no longer want it to appear in your post.
Click on the image of the landscape. You'll see a dialogue box similar to when you first inserted in the image into the post. There is a new tab which says advanced settings. Click on that.

To give a bit of spacing around the image you should enter some details in to the boxes - Vertical Space (leaving a margin on the top and bottom of the image) and Horizontal Space (which leaves a space to the left and right of the image).

When you have entered a number ( I suggest around 10 as a good margin), they you should click on the update button at the bottom of the box.

Check the result when you publish your post. You should see a margin around your image.
Adding Images from the Internet
To add images that are elsewhere on the Internet you should click on the From URL tab.

You'll need to fill out the form that then appears on the screen and to do this you'll need to know the URL of the image that you are trying to insert into your post. There a number of ways of doing this but the easiest one is to find the Image on an internet page and to do a right click on your mouse, and select Copy Image Location- this saves the image web address (URL) to the computer's memory. You can then return to the following form and paste in the URL to the top box.

When you have filled out the form with the details that are right for your image then make sure to click Insert into Post
Adding Links
To add links to your Wordpress site you can use the backend (Dashboard) to do this. They appear as block on the side of your page. The link block is actually enabled as a Widget so if you don't know how to do that you should read the chapter on that.
A finished link block might look like the one below.
As you can see links can be given different categories and they will show up in the category assigned under a header text with the categories' name. We are going to try to recreate a link block a bit like the one above.
Categories
Before we get started adding a link, let's add a category to put our link in.
In this case let's create a category called Local Media. To do this make sure you are logged in to Wordpress and point your browser to the Dashboard of the blog that you want to create a link for.
Click on the Links menu item.

The menu then expands to show you Three options, Edit, Add New and Link Categories.
If you click on Edit then you'll see that you are given to links to start with. These are links to Wordpress.com and Wordpress.org.
We are going to click on Link Categories to add our own category.

You need to give a name for your Category and a short description of what kind of links you are going to put in there. Click on Add Category and your it should appear in the column on the right.
Adding your link
Now we are ready to add a link. From the dashboard, on the left sidebar under the Links header, click on Add Link.

Fill out the details for the link you are going to add. Most importantly the Name of the link, and the Web Address of the website you are linking too. The description is optional but gives users more information about the website if they are hovering over the link.
Then put a tick in the Category of link that you want your link to appear in. And finally click on the Add Link button on the right of the screen. 
Checking appearance
Let's check to see what that looks like. If you haven't already added the Links Widget to your sidebar on the Widgets page you'll need to do that. There is more detailed help in another chapter, but essentially from the appearance part of the Dashboard, you go to the Widgets page and drag the Links Widget to your sidebar.
Now when we refresh any page on our blog we should see the Links part of the sidebar. After adding only one link in the Local Media category, your sidebar should look a bit like the screenshot below.

So now it's up to you to create the Categories and the links that you want. You can really make this look good if you put in a bit of effort to link to relevant sites, resources and useful things for the people reading your blog. Also if you link to other people you can get in contact with them and let them know that you have done that. They may link back to you as well if you ask them, in this way you can increase the readership of your blog and get connected to other bloggers and groups.
Creating an Image Gallery
While working on this chapter this link is included as a useful reference. Wordpress Gallery FAQ
Wordpress seems to be changing a lot in the way it presents Galleries, so while we will try to keep this section up to date it may have changed.
To create an image gallery you should upload your images for a gallery to a particular post or page.
Wordpress allows you to create image galleries to insert into your posts and pages. You can add captions, decide how many images you want to display per row, and decide what happens when your visitors click on an image. A sample image gallery is shown below.

Creating a Gallery in posts
To create a gallery in a post you should bring up the Add Image dialogue box as if you were adding a single image to add your first image - see help in another chapter. One thing to realise is you can add more than one image at the same time.
If you do upload one image at a time, rather than clicking Insert Into Post you should click on 'Select Files' and repeat the process by browsing for another image.
As you do this you will see the Gallery tab appear and a number will appear next to it. This shows that you are adding your images successfully
 .
.
When you have added all your images then click on to the Gallery tab. You will see all of your added images there.
When you see your image appear and get the chance to add a caption and description, by clicking on the Show link on the right of the screen.
Gallery Settings
Under You now get options for adding your Gallery to this post. You can choose how many columns to display. This may depend on the theme you are using. You may want to experiment with this.

You can also choose if you want your visitors to see only the image itself when they click on it, or a page with the image within the look of your site. Experiment with both settings for a comparison. I would recommend keeping the Attachment Page setting as it makes it easier for your readers to navigate to different parts of the site.
When you click on 'Insert Gallery' you should see a yellow block appear within the body of the post. If you want to add text to the post as well you should click after the yellow box and type there.

You should then click on 'Publish', and then 'View post' (see previous chapter for more details) to see the result of your image gallery, as show in the first image of this chapter.
Embed a streaming audio player
You may want to add a preview of the audio file. You might also call this a "click and listen" version. You need to know the full URL of the where you have that media file stored. This must be a direct link to that file. In other words you'll need a site to upload the audio to that allows you to directly link to the audio files you've uploaded. Blip.tv is one site that lets you do this.
Once you have a direct link to the file then you can create an entry in your wordpress.com blog to stream the audio file with a flash player.
Create an entry which describes your file and add the following code within the body text of the blog entry.
[audio http://www.example.org/linkto.mp3]
This will look like this in the Wordpress interface.

Then click on "Publish" clicking on the button on the right.

Then when you look at your blog, if you have the flash plug-in installed, you'll see a player which you click on to play the audio file from your browser.

The player is quite basic but very functional.
Now that you have created a Podcast with streaming audio, you should learn how to find and promote your blog.
Podcasting with WordPress
To proceed with podcasting using WordPress this you will need the following :
- A WordPress blog on your server or a WordPress.com blog with a "Space Upgrade" (a minimum of $20 USD).
- Audio or video files that you wish to publish.
Create your media
First, create your media file. You can choose almost any media file but you should know that iTunes and iPods specifically support the following formats: .m4a, .mp3, .mov, .mp4, .m4v, and .pdf.
To ensure that as many people as possible can access your content it's best to use mp3 for audio. Video can be in a variety of formats though mp4 is recommended specifically for iPods. Remember podcasting is not just about iPods, most computers will be able to subscribe to podcasts and play the media files you download.
Uploading the audio file
- Login to your WordPress blog. In the example we will use the example flossmanuals blog : http://flossmanuals.wordpress.com/wp-admin/

Note: If you are using the "free" WordPress.com blog service, you will need to pay in order to upload mp3's to your site. Follow the link in the wp-admin page called "Upgrades". Click on the 'Upgrades' tab to view this.
http://flossmanuals.wordpress.com/wp-admin/paid-upgrades.php


- Create a new post using the 'Write' tab in the topbar

- Title your new podcast, and change the "Post" subsection from "Visual" to "Code" view.
- Scroll down the page until you see the "Uploads" subsection. (Video podcasting works slightly differently if you are using WordPress.com instead of your own website. See the additional notes in the "Advanced" section below.)
- Press the "Browse" button next to the File input area beneath the Uploads tab. Do not confuse the "Browse" button with the "Browse" or "Browse All" tabs.
- Locate and select the media file on your computer's system.

- Title the file in the field provided beneath.

- Press the "Upload" button at the bottom of the "Uploads" subsection. Do not confuse the "Upload" button with the "Uploads" tab.
- For some time your browser will be busy uploading the new file to the web server. Be patient and do not close the browser or press Stop, Reload or Back buttons.
- When the upload is complete, the "Uploads" subsection will automatically switch to the "Browse" tab displaying your newly uploaded file.
- From the "Browse" tab, select "Show: Title" and "Link to: File" before pressing the "Send to editor" button.
- Identify that the "Post" subsection above now contains the HTML code for a link to the mp3 file. Make sure that the link is 'absolute' and gives the full path. eg:
http://flossmanuals.wordpress.com/files/2008/02/spirittxt.mp3
not /files/2008/02/spirittxt.mp3

- Any additional text in the "Post" section of the "New Post" page will be added into the "Description" field of the podcast.
- Optionally, add the post to a podcast category in the right hand sidebar.
- Finally press the Publish button. It is located between the "Post" (or "Tags") subsection and the "Uploads" subsection. Momentarily, your Post page will be replaced with a new empty Post page, with the words "Post saved" in the top alert box.
 Adjacent to that, there is a "View post" link. Click that now.
Publishing the podcast
WordPress automatically understands how to publish podcasts. It looks for a link to an mp3 within a post, and formats the RSS feed appropriately. All you need to do now is advertise the RSS feed. If you are using Firefox you will see that there is an RSS icon in the location bar.

If you are using the default WordPress template, then you will see an "Entries (RSS)" link in the footer of every page. If you click on either of those, you will see the RSS feed for your blog, including the podcast posts.

http://flossmanuals.wordpress.com/feed/
Firefox will automatically offer to subscribe you to this feed. If you have iTunes or another mp3 player installed, you may be able to use the "Subscribe to this feed using..." dialog box at the top of the page.
Testing the podcast
Either attempt to get Firefox to automatically subscribe you to your new feed, or copy the feed link and open your music player. Using iTunes, you can use the menu item Advanced > Subscribe to Podcast. Simply paste in the feed URL that you had copied earlier. Once you have done that, iTunes will connect (by default) every day to your blog and download all the new media files that you have uploaded.
- Select the Podcasts item in the Library sidebar.
- Press the reveal arrow next to the title of your blog in the Podcasts list.
- Double click on one of the files listed.

Note: To force iTunes to update the podcast listing, right click on the blog title, and select "Update Podcast" from the contextual menu.
Songbird is a cross platform open source media player based on the Mozilla platform. To subscribe to a podcast using Songbird, select the menu item File > New Subscription…. Paste in the feed URL that you had copied earlier. Once you have done that, Songbird will connect (by default) every day to your blog and download all the new audio files that you have uploaded.

Important: As of version 0.4 Songbird will fail to see any media files posted before a post that does not contain a media file. In order to work around this bug, follow the method Creating a podcasting category feed, outlined in the Advanced section below.
Advanced topics
Video podcasting using WordPress.com
There is a slight difference in the interface used on WordPress.com when you are dealing with video. Follow the steps above (1-4) until you get to 4f. The continue from here
- Uploading video
- When the upload is complete, the "Uploads" subsection will automatically switch to the "Videos" tab displaying your newly uploaded video. It will show a small still from the video, probably with the word "Transcoding" printed over the top. This means that the WordPress.com server is converting (or transcoding) the video into its preferred format.
- Click on the still image of the video you wish to podcast. You will see a small playable version of the video, and the "shortcode" for embedding the video in the post. You may add the shortcode to the post, but in order to podcast it, we need to add a proper link to the file. Click on the "Links" link on the right side of the "Videos" tab
- Copy the full absolute link from the "File:" area.
- In the "Post" section, above, type in the title of the video. Highlight the title and click on the "Link" button in the code editor. In the window that pops up, paste in the link that you copied from the video upload section below and press "OK"
- Carry on with the instructions aboe from 4h.
Creating a podcasting category feed
To advertise a feed that contains only podcasts, or a subsection of podcasts, first add each of these posts into a category of their own. For example, "Podcasts" or "Video".
- Secondly, visit your WordPress admin page and follow the topbar tabs to "Manage > Categories"http://flossmanuals.wordpress.com/wp-admin/categories.php
- Note down the category ID on the left hand side of the category that you created.
- Now visit the main Feed page of your blog. For example, at WordPress.com http://flossmanuals.wordpress.com/feed or on your own site http://wordlist.just1.name/?feed=rss2
- Now append either a query to the end of the URL (web address) or extend the query if one already exists. The format is cat=[id] For example, on WordPress.com add ?cat=[id] http://flossmanuals.wordpress.com/feed?cat=1142 or on your own server you might need to add &cat=[id] depending on your permalink settings. http://wordlist.just1.name/?feed=rss2&cat=37
- An alternate method for WordPress.com follows the following format.
http://flossmanuals.wordpress.com/category/podcast/feed/
- Now press return or enter, and check that only the required posts are displayed.
References
Create a Free Audio Podcast
It is possible to create an audio podcast with a free Wordpress.com account. To do this you will first need to upload an audio file to a
webserver or to a service that enables you to store media files (e.g. Archive.org or Blip.tv). However you must know the
full or
direct link (
URL) to that file.
When you have uploaded your file, you need find a direct link to your mp3 file.
Now start a new post on Wordpress, enter a Title and some text for the post. Then we need to create a link to the audio file in the post.

Select some text and click on the part of the tool bar that looks like a chain.
You are presented with a window for pasting in the URL of the mp3 file. Put the link details in the "LINK/URL" field.

Now click on "Insert", then then return to your post and your link should have appeared in the text.
Click on "Publish" on the right of the screen.
Embedding a Video from Blip.tv
One good and easy way to enhance the multimedia functionality on your web site is to embed videos in it. Wordpress makes it easy for you to add a flash player in your site that is easy to just click and view. You can do this from a range of different websites. For the purposes of this chapter we're using Blip.TV.
First find the video that you wish to embed in your blog on the Blip.tv site. On the right of the screen you will see a graphic saying Share.
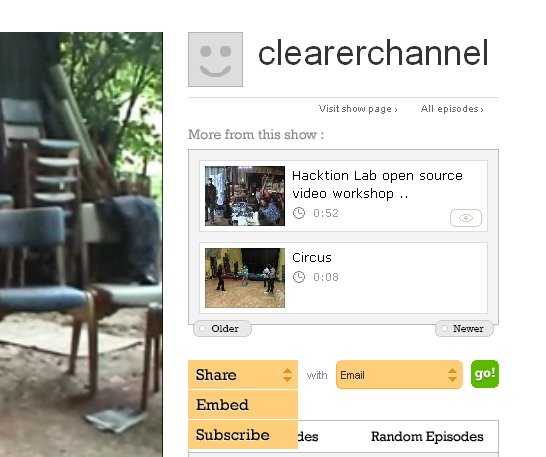
Click on that Share graphic and then move your mouse down and click on Embed.
Then from the right hand part of that graphic, click on default which is Show Player and then select Wordpress.com, as shown below.

Then Click on Go
You will see a small amount of code to embed in your Wordpress blog. It's so small let's just call it a line.

You should select that code and Copy it.
You can now return to your Wordpress blog and paste that code into the HTML part of your blog entry. This embeds a player in that post.
To enter the embed code you should paste the copied line into your Blog post window.

Then when you have entered your supporting text in the default Visual view you should click on Publish on the right hand of the screen to publish this post to your blog.
If you check the front page of your blog then the embedded video should be showing.
The result is below.

Adding Embedded Video from YouTube
One of the great things about Wordpress is that they make it really easy to add multimedia to your blog. This is certainly true of adding Video that has been uploaded to another Video sharing site. There is another chapter on how to create a Video Podcast (a video feed that will work in podcast players like iTunes and Miro). This chapter simply shows you how to take a Video from You Tube, and embed it into one of your posts.
Adding You Tube Videos
To add You Tube videos you need to find out the URL of the Video you want to embed. A URL is another name for the web address. You can get this by copying it from the Navigation Menu of your browser.

You'll need to copy the Web Address / URL into your computer's memory. There are different ways of doing this. I'm going to select the address, do a right mouse click and select Copy .

Then back in the World of your Wordpress blog you should add a new post, give it a title, write a short description and then place the mouse cursor.

The next thing we need to do is to click on the  icon.
icon.

When you click on this Add Video icon you'll see the following screen.

We are not going to upload a video file from our computer, so we need to click on the second tab at the top of the screen, From URL

After you have clicked on the From URL tab you can paste in the URL of the video on YouTube.
Then click on the Insert into Post button.
You'll see that it inserts a bit of code into your post. Try not to edit this as it'll stop your embeded video from working properly. If all goes well your post should look a bit like this.

You can now click on the Publish Button on the right of the screen. And when you get a message at the top of the screen that you post has been published.

IYou can then click on View post to check to see if the embedding of the video has worked. You should see a box with a still of the video in it and a play button if it's worked.
Create a Free Video Podcast
It is possible to create a video podcast (unfortunately sometimes called a vodcast) with a Wordpress.com account. You can do this in two different ways.
- You can pay for a service to be able to upload video files
- you can use a free account, upload your video files to another service and link to them.
This tutorial shows you how to use a free Wordpress account.
Create Podcast
To create a video podcast you need a way to create a RSS feed. If you add an entry to your blog in Wordpress and include a link to a Video file, then Wordpress will automatically create a podcast for you.
First you need to know the direct link to your video file. Then you will need to create a a normal Wordpress post.
Once you have started a new post on Wordpress, enter a Title and some text for the post. Then select some text and click on the link tool (it looks like a chain) and enter a link to the video file in the post as shown below.

Then click on "Publish".
You should have an entry linking to a video on your blog now (below is an example of what it migt look like) and you're ready for the next step.
Find your RSS feed / Video podcast
The next stage of the process is to be able to point people to the web address of your Podcast. With Wordpress.com this process is easy. The internet address of your podcast is simply your Blog address with /rss added to the end of it.
For example a Wordpress blog with a home page here.
http://mickfuzz.wordpress.com
Would have the following WordPress URL / rss
http://mickfuzz.wordpress.com/rss
If you go to that page in a podcast reader then you'll start to view the video podcast as a series of downloadable media files.
If you visit that page in a browser it should look something like this.

You'll probably want to find out more information about promoting your podcast as well now.
Changing the Look
WordPress allows you to change the look of your page. There are several ways in which this can be done. The most obvious way is to change the Theme you are using.
Themes
To change the theme of your Wordpress site you should log into your blog and in the Dashboard click on the "Appearance" link in the column on the left.

When the next page loads you should see your current theme and then underneath that, a list of different themes that you can choose, their names and a screen shot of what they look like.

You can filter the themes based on certain characteristics. For example if you wanted to only show themes which have 2 columns, then you could select that possibiliy from the drop down menu.

Then click on the Filter button.

Changing Themes
To change to one of the listed themes then click on either the title of the theme or the screenshot image of it.
You will then see a preview of your wordpress blog in the style of the theme.

If you don't like the look of the theme or if you are not sure you can return to the previous page by clicking on the "x"in the top left of the preview screen :

Or if you like the Theme and want to use it then click on the link in the top right of the preview screen :

You might also want to change the design of your Wordpress blog by adding or changing the contents of your additional columns. This is done by adding Widgets.
Customising Themes
With some themes you have the ability to change the 'Header Image' which appears at the top of your blog.

Click on 'Custom Header'. There are several things you can do, we are going to upload a different image.

We are going to upload a New Header Image. If you have access to an Image manipulation programme then you can get your image to be exactly the right size. For this theme that size is shown as 740 x 192 pixels.
I'm going to upload an image which isn't exactly the right size as if you do you get a chance to just choose part of the image.

You can move the selected part of the image that you have decided to upload and then click on 'Crop Header' when you are happy with it. I'm being lazy and uploading one of the screenshots I took earlier as it has a good Wordpress logo on it.
You should see a message saying. "Header complete! Visit your site and you should see the new header now."
Changing Widgets
Wordpress allows you to change the design and look of your page. There are several ways in which this is done. The most obvious way to affect your design is to change the Theme you are using. You can also add Widgets which are small pieces of code to add sections to the sidebars of your site.
Widgets
A Widget is a bit of text, a calendar, some links to other sites or other general stuff that you include in your blog that aren't blog posts or pages themselves.
By default Wordpress adds some widgets for you. If you haven't changed your theme you might see the following things in your second column.

The sections about Pages, Archive, Categories etc, are all your default Widgets. When you add your first Widget these default ones dissappear.
To add widgets to your Wordpress blog you must be using a theme which has at least one column, as this is where widgets live. This tutorial outlines how to use widgets on a theme with 2 columns. If you chose a theme with 3 columns then things get a bit more tricky.
Adding a Simple Widget
From your Dashboard select the Appearance link.
Then click on the link named "Widget".

You will see a list of available Widgets on the left of the page (see below).

On the right, the darker column Sidebar represents the different element that you will see in your side column. You need to drag and drop different widgets to this sidebar. When they appear in the list the changes to your layout have been made. You should view the front end of the site to see if you are happy with them.
This set up is dependent on the theme you use. In this case we are using a theme with two columns. If you use a three column theme you may see a different arrangement.
Some useful Widgets
One of the more simple widgets you can add is the Pages Widget. This will display a list of the Pages that you have created for your blog in the second column.
Links are a vital widget to add if you have been using the default Wordpress system to add links (see other chapter).
The Flickr and Twitter plugins are useful if you use those services. And if you use Categories for your posts then you should make sure that that Widget gets included too. A sample setting for Twitter is shown below.

Below, you can see a sample list of widgets in a Sidebar.

There is a really good resources page on Wordpress.com which lists different Widgets and what they do, which can be accessed if you click on the Help tab on the top right of the page.

Promote your Podcast Widget
You can get tricky with your widgets, we will try sometting a little more advanced. A more advanced use of a Widget could be to include an Image which links to your RSS feed. This is especially useful if you are linking to media files, as it will act as your podcast subscribe button. To do this you would add a Text Widget.
The Text Widget is very flexible and allows you to add text and HTML code to your sidebar.
This is very useful as it allows you to add a HTML text like a link to an image. We will use it to add a link to your Podcast in the form of an image.
To do this you should do the following.
Click on "Add" next to "Text" on the Widgets page.

Find an image which represents your podcast. For example I did a search for "RSS icon" and selected the following.

You need to know the URL of this image, in this case it is : 'http://hartstoneideas.com/rss-img.jpg'
Click on "Edit" next to the "Text" link that has appeared on the right of your Widgets screen.

Next add the image to the Text Widget by entering the following code
<img src ="http://hartstoneideas.com/rss-img.jpg">

Then you should make that image into a link. You can do that by adding the following code around the code for the image.
<a href="http://moorsideradio.wordpress.com/rss">
<img src ="http://hartstoneideas.com/rss-img.jpg">
</a>

You will notice that the link is to your Wordpress RSS feed - this is used by players like iTunes or Songbird to download and play the file.
Note : You can find your RSS feed if you have a Wordpress blog by adding /rss to the URL of your blog. For example if your blog is here
http://moorsideradio.wordpress.com
Then your RSS feed will be : "http://moorsideradio.wordpress.com/rss
That is all you have to do. Now publish the entry and check it in your browser. If you click on the image link you should be directed to the RSS Feed which may look something like this :

Status.net
There is a useful plugin which allows you to cross post from a Wordpress blog to Status.net interfaces. This Plugin is currently only available for the hosted Wordpress set up.
To quote from the maintainers description;
Every time you make a new blog post this plugin will post a status update to the Status.net servers, facebook, Ping.fm, Google Buzz and Twitter accounts you have specified. You can set as many acounts on as many servers you like.
The Plugin is called WP-Status.net and has it's own page on the Wordpress.org site here - http://wordpress.org/extend/plugins/wp-statusnet/
For more information about how to install and enable plugins see help elsewhere in this manual.
Configuring WP-Status.net
Navigate to the Dashboard of your blog and click on the Settings link at the bottom of the left column menu. Then click on the link WP-Status.net that appears.

You'll then get a list of boxes which allow you to cross post your blog posts to a number of different services. There is also a help text to explain the process.
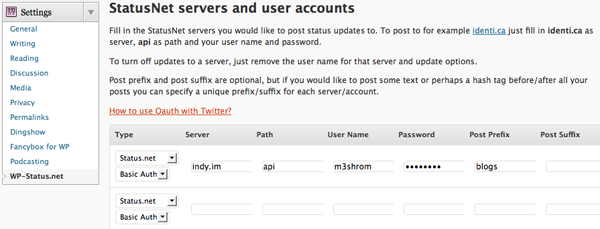
Fill in the StatusNet servers you would like to post status updates to. To post to for example identi.ca just fill in identi.ca as server, api as path and your user name and password.
To turn off updates to a server, just remove the user name for that server and update options.
Post prefix and post suffix are optional, but if you would like to post some text or perhaps a hash tag before/after all your posts you can specify a unique prefix/suffix for each server/account.
There is also a link to tell you how to link your blog with Twitter. This process is a bit more complicated as you have to apply to Twitter for a key.
How to use Oauth with Twitter?
1. Register a new application at dev.twitter.com/apps/new
* Application Type must be set to Browser
* The Callback URL should be the URL of your blog
* Default Access type MUST be set to Read & Write
2. Fill in the Consumer Key and Consumer Secret in the correct fields (will show up as soon as you select Server Type "Twitter" and "Oauth" in the server list (user name column))
3. Click on the link called "My Access Tokens" at http://dev.twitter.com (right menu)
4. Fill in your Access Token and the Access Token Secret in the correct fields (password column)
5. Now you should be able to post to Twitter
When you have finished adding your details then be sure to click on the blue Update Options button. Every time you make a new post now that information and a link should be added to your micro-blogging accounts.
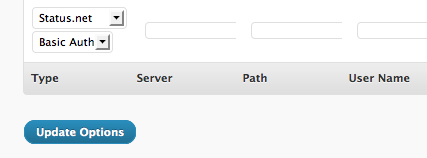
Podcasting PlugIn
When you have installed the Podcast Plug in which is available here - http://wordpress.org/extend/plugins/podcasting/ -
You can activate it from the Plugins page by clicking on Activate under the listing of the Pocasting Plugin by TSG.

Then you should navigate to its settings page to add some details about your plug in and where you want your audio player to appear on the page.
Configuring your Podcasting Settings
From your dashboard select Settings > Podcasting.
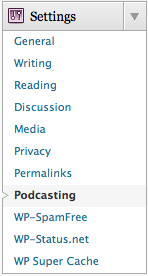
Then you can fill in the basic details about your podcast including its name, an associated image and so on.
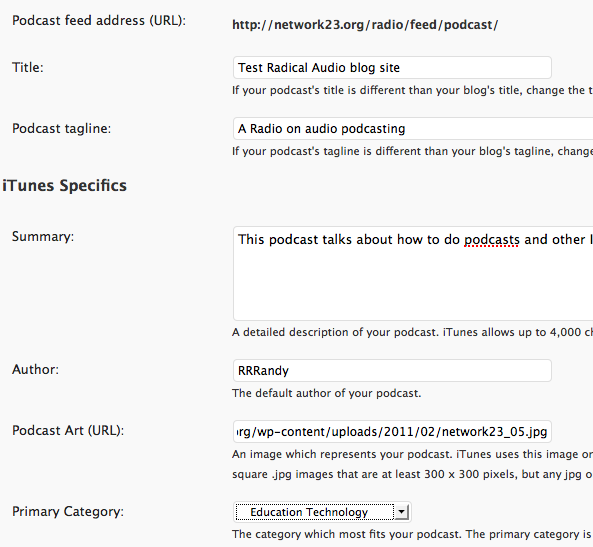
You can then set up how you want the audio player to look on your page. I use the following settings which work well for me. Try them out and alter them if you need to.
Player Location: Before Content
Text Below the Player: Download the audio file
Download Link Text: Below
Player width: 290
Use Video Player: no
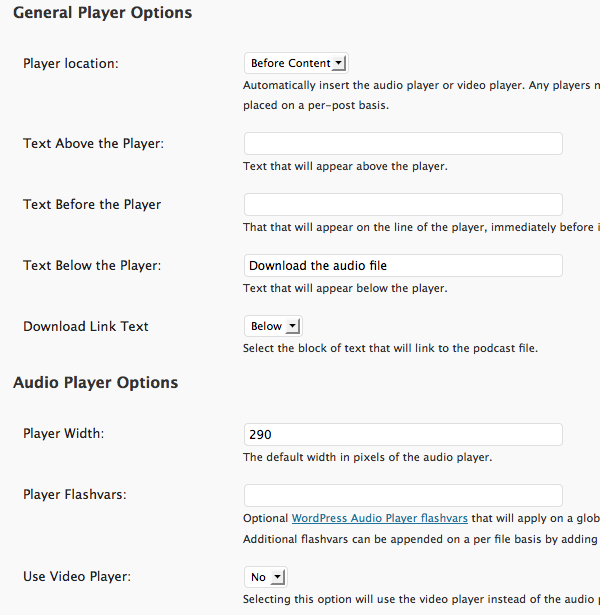
Adding Audio to your page
To add an audio player to your page and include an audio file in your podcast you need to add the URL of your audio file to the Podcasting box at the bottom of your page when you Add a Post.
Navigate to your new post page in your usual way and look to the bottom of the middle of the page.
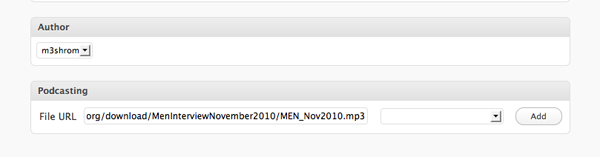
Enter the location of your mp3 file in the File URL box of the Podcasting section. Some Blogs will let you upload audio files, others may ask you to upload large files to other services like the Internet Archive (archive.org).
You can then add other information to the podcast by filling out the boxes that you are offered.
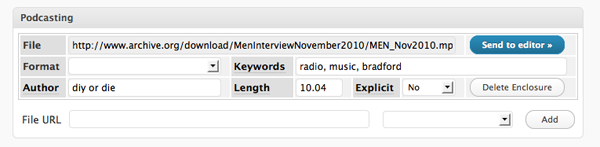
When you save the page you should see a result like the following.
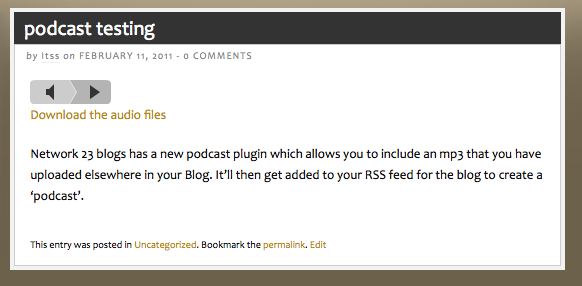
License
All chapters copyright of the authors (see below). Unless otherwise stated all chapters in this manual licensed with GNU General Public License version 2
This documentation is free documentation; you can redistribute it and/or modify it under the terms of the GNU General Public License as published by the Free Software Foundation; either version 2 of the License, or (at your option) any later version.
This documentation is distributed in the hope that it will be useful, but WITHOUT ANY WARRANTY; without even the implied warranty of MERCHANTABILITY or FITNESS FOR A PARTICULAR PURPOSE. See the GNU General Public License for more details.
You should have received a copy of the GNU General Public License along with this documentation; if not, write to the Free Software Foundation, Inc., 51 Franklin Street, Fifth Floor, Boston, MA 02110-1301, USA.
Authors
ADD A POST
© mick fuzz 2009
EMBED VIDEO YOUTUBE
© mick fuzz 2009
ADDING IMAGES
© mick fuzz 2009
ADDING LINKS
© mick fuzz 2009
FREE AUDIO PODCASTING
© mick fuzz 2008, 2009
Modifications:
adam hyde 2008
CREATE A STREAMING AUDIO PLAYER
© mick fuzz 2009
CREATING AND IMAGE GALLERY
© mick fuzz 2009
CREDITS
© adam hyde 2006, 2007
Modifications:
mick fuzz 2008
THEMES
© mick fuzz 2008, 2009
Modifications:
adam hyde 2008
EMBED VIDEO BLIP.TV
© Andrew Lowenthal 2008
Modifications:
mick fuzz 2009
INSTALLLING ON A SERVER
© Queen Victoria 2008
Modifications:
adam hyde 2008
Andrew Lowenthal 2008
Becky Faith 2008
Christopher Lynch 2009
mick fuzz 2008
INTRODUCTION
© adam hyde 2006, 2007, 2008
Modifications:
Christopher Lynch 2009
Jason Owen 2010
Jay MP 2009
mick fuzz 2008
Queen Victoria 2008
Robert Hammer 2007
PODCASTING
© Queen Victoria 2008
Modifications:
adam hyde 2008
Andrew Lowenthal 2008
Becky Faith 2008
mick fuzz 2008
SIGN UP FOR WORDPRESS.COM
© Queen Victoria 2008
Modifications:
adam hyde 2008
Andrew Lowenthal 2008
Becky Faith 2008
Kim Murray 2009
mick fuzz 2008, 2009
FREE VIDEO PODCASTING
© mick fuzz 2007, 2008
Modifications:
adam hyde 2007, 2008
Andrew Lowenthal 2008
Hadrian Bnin Bninski 2007
Queen Victoria 2008
szczy m 2009
WIDGETS
© mick fuzz 2008, 2009
Modifications:
adam hyde 2008
WHAT IS A BLOG
© adam hyde 2007, 2008
Modifications:
Jason Owen 2010
mick fuzz 2008
Queen Victoria 2008
Robert Hammer 2007

Free manuals for free software
General Public License
Version 2, June 1991
Copyright (C) 1989, 1991 Free Software Foundation, Inc.
51 Franklin Street, Fifth Floor, Boston, MA 02110-1301, USA
Everyone is permitted to copy and distribute verbatim copies
of this license document, but changing it is not allowed.
Preamble
The licenses for most software are designed to take away your freedom to share and change it. By contrast, the GNU General Public License is intended to guarantee your freedom to share and change free software--to make sure the software is free for all its users. This General Public License applies to most of the Free Software Foundation's software and to any other program whose authors commit to using it. (Some other Free Software Foundation software is covered by the GNU Lesser General Public License instead.) You can apply it to your programs, too.
When we speak of free software, we are referring to freedom, not price. Our General Public Licenses are designed to make sure that you have the freedom to distribute copies of free software (and charge for this service if you wish), that you receive source code or can get it if you want it, that you can change the software or use pieces of it in new free programs; and that you know you can do these things.
To protect your rights, we need to make restrictions that forbid anyone to deny you these rights or to ask you to surrender the rights. These restrictions translate to certain responsibilities for you if you distribute copies of the software, or if you modify it.
For example, if you distribute copies of such a program, whether gratis or for a fee, you must give the recipients all the rights that you have. You must make sure that they, too, receive or can get the source code. And you must show them these terms so they know their rights.
We protect your rights with two steps: (1) copyright the software, and (2) offer you this license which gives you legal permission to copy, distribute and/or modify the software.
Also, for each author's protection and ours, we want to make certain that everyone understands that there is no warranty for this free software. If the software is modified by someone else and passed on, we want its recipients to know that what they have is not the original, so that any problems introduced by others will not reflect on the original authors' reputations.
Finally, any free program is threatened constantly by software patents. We wish to avoid the danger that redistributors of a free program will individually obtain patent licenses, in effect making the program proprietary. To prevent this, we have made it clear that any patent must be licensed for everyone's free use or not licensed at all.
The precise terms and conditions for copying, distribution and modification follow.
TERMS AND CONDITIONS FOR COPYING, DISTRIBUTION AND MODIFICATION
0. This License applies to any program or other work which contains a notice placed by the copyright holder saying it may be distributed under the terms of this General Public License. The "Program", below, refers to any such program or work, and a "work based on the Program" means either the Program or any derivative work under copyright law: that is to say, a work containing the Program or a portion of it, either verbatim or with modifications and/or translated into another language. (Hereinafter, translation is included without limitation in the term "modification".) Each licensee is addressed as "you".
Activities other than copying, distribution and modification are not covered by this License; they are outside its scope. The act of running the Program is not restricted, and the output from the Program is covered only if its contents constitute a work based on the Program (independent of having been made by running the Program). Whether that is true depends on what the Program does.
1. You may copy and distribute verbatim copies of the Program's source code as you receive it, in any medium, provided that you conspicuously and appropriately publish on each copy an appropriate copyright notice and disclaimer of warranty; keep intact all the notices that refer to this License and to the absence of any warranty; and give any other recipients of the Program a copy of this License along with the Program.
You may charge a fee for the physical act of transferring a copy, and you may at your option offer warranty protection in exchange for a fee.
2. You may modify your copy or copies of the Program or any portion of it, thus forming a work based on the Program, and copy and distribute such modifications or work under the terms of Section 1 above, provided that you also meet all of these conditions:
- a) You must cause the modified files to carry prominent notices stating that you changed the files and the date of any change.
- b) You must cause any work that you distribute or publish, that in whole or in part contains or is derived from the Program or any part thereof, to be licensed as a whole at no charge to all third parties under the terms of this License.
- c) If the modified program normally reads commands interactively when run, you must cause it, when started running for such interactive use in the most ordinary way, to print or display an announcement including an appropriate copyright notice and a notice that there is no warranty (or else, saying that you provide a warranty) and that users may redistribute the program under these conditions, and telling the user how to view a copy of this License. (Exception: if the Program itself is interactive but does not normally print such an announcement, your work based on the Program is not required to print an announcement.)
These requirements apply to the modified work as a whole. If identifiable sections of that work are not derived from the Program, and can be reasonably considered independent and separate works in themselves, then this License, and its terms, do not apply to those sections when you distribute them as separate works. But when you distribute the same sections as part of a whole which is a work based on the Program, the distribution of the whole must be on the terms of this License, whose permissions for other licensees extend to the entire whole, and thus to each and every part regardless of who wrote it.
Thus, it is not the intent of this section to claim rights or contest your rights to work written entirely by you; rather, the intent is to exercise the right to control the distribution of derivative or collective works based on the Program.
In addition, mere aggregation of another work not based on the Program with the Program (or with a work based on the Program) on a volume of a storage or distribution medium does not bring the other work under the scope of this License.
3. You may copy and distribute the Program (or a work based on it, under Section 2) in object code or executable form under the terms of Sections 1 and 2 above provided that you also do one of the following:
- a) Accompany it with the complete corresponding machine-readable source code, which must be distributed under the terms of Sections 1 and 2 above on a medium customarily used for software interchange; or,
- b) Accompany it with a written offer, valid for at least three years, to give any third party, for a charge no more than your cost of physically performing source distribution, a complete machine-readable copy of the corresponding source code, to be distributed under the terms of Sections 1 and 2 above on a medium customarily used for software interchange; or,
- c) Accompany it with the information you received as to the offer to distribute corresponding source code. (This alternative is allowed only for noncommercial distribution and only if you received the program in object code or executable form with such an offer, in accord with Subsection b above.)
The source code for a work means the preferred form of the work for making modifications to it. For an executable work, complete source code means all the source code for all modules it contains, plus any associated interface definition files, plus the scripts used to control compilation and installation of the executable. However, as a special exception, the source code distributed need not include anything that is normally distributed (in either source or binary form) with the major components (compiler, kernel, and so on) of the operating system on which the executable runs, unless that component itself accompanies the executable.
If distribution of executable or object code is made by offering access to copy from a designated place, then offering equivalent access to copy the source code from the same place counts as distribution of the source code, even though third parties are not compelled to copy the source along with the object code.
4. You may not copy, modify, sublicense, or distribute the Program except as expressly provided under this License. Any attempt otherwise to copy, modify, sublicense or distribute the Program is void, and will automatically terminate your rights under this License. However, parties who have received copies, or rights, from you under this License will not have their licenses terminated so long as such parties remain in full compliance.
5. You are not required to accept this License, since you have not signed it. However, nothing else grants you permission to modify or distribute the Program or its derivative works. These actions are prohibited by law if you do not accept this License. Therefore, by modifying or distributing the Program (or any work based on the Program), you indicate your acceptance of this License to do so, and all its terms and conditions for copying, distributing or modifying the Program or works based on it.
6. Each time you redistribute the Program (or any work based on the Program), the recipient automatically receives a license from the original licensor to copy, distribute or modify the Program subject to these terms and conditions. You may not impose any further restrictions on the recipients' exercise of the rights granted herein. You are not responsible for enforcing compliance by third parties to this License.
7. If, as a consequence of a court judgment or allegation of patent infringement or for any other reason (not limited to patent issues), conditions are imposed on you (whether by court order, agreement or otherwise) that contradict the conditions of this License, they do not excuse you from the conditions of this License. If you cannot distribute so as to satisfy simultaneously your obligations under this License and any other pertinent obligations, then as a consequence you may not distribute the Program at all. For example, if a patent license would not permit royalty-free redistribution of the Program by all those who receive copies directly or indirectly through you, then the only way you could satisfy both it and this License would be to refrain entirely from distribution of the Program.
If any portion of this section is held invalid or unenforceable under any particular circumstance, the balance of the section is intended to apply and the section as a whole is intended to apply in other circumstances.
It is not the purpose of this section to induce you to infringe any patents or other property right claims or to contest validity of any such claims; this section has the sole purpose of protecting the integrity of the free software distribution system, which is implemented by public license practices. Many people have made generous contributions to the wide range of software distributed through that system in reliance on consistent application of that system; it is up to the author/donor to decide if he or she is willing to distribute software through any other system and a licensee cannot impose that choice.
This section is intended to make thoroughly clear what is believed to be a consequence of the rest of this License.
8. If the distribution and/or use of the Program is restricted in certain countries either by patents or by copyrighted interfaces, the original copyright holder who places the Program under this License may add an explicit geographical distribution limitation excluding those countries, so that distribution is permitted only in or among countries not thus excluded. In such case, this License incorporates the limitation as if written in the body of this License.
9. The Free Software Foundation may publish revised and/or new versions of the General Public License from time to time. Such new versions will be similar in spirit to the present version, but may differ in detail to address new problems or concerns.
Each version is given a distinguishing version number. If the Program specifies a version number of this License which applies to it and "any later version", you have the option of following the terms and conditions either of that version or of any later version published by the Free Software Foundation. If the Program does not specify a version number of this License, you may choose any version ever published by the Free Software Foundation.
10. If you wish to incorporate parts of the Program into other free programs whose distribution conditions are different, write to the author to ask for permission. For software which is copyrighted by the Free Software Foundation, write to the Free Software Foundation; we sometimes make exceptions for this. Our decision will be guided by the two goals of preserving the free status of all derivatives of our free software and of promoting the sharing and reuse of software generally.
NO WARRANTY
11. BECAUSE THE PROGRAM IS LICENSED FREE OF CHARGE, THERE IS NO WARRANTY FOR THE PROGRAM, TO THE EXTENT PERMITTED BY APPLICABLE LAW. EXCEPT WHEN OTHERWISE STATED IN WRITING THE COPYRIGHT HOLDERS AND/OR OTHER PARTIES PROVIDE THE PROGRAM "AS IS" WITHOUT WARRANTY OF ANY KIND, EITHER EXPRESSED OR IMPLIED, INCLUDING, BUT NOT LIMITED TO, THE IMPLIED WARRANTIES OF MERCHANTABILITY AND FITNESS FOR A PARTICULAR PURPOSE. THE ENTIRE RISK AS TO THE QUALITY AND PERFORMANCE OF THE PROGRAM IS WITH YOU. SHOULD THE PROGRAM PROVE DEFECTIVE, YOU ASSUME THE COST OF ALL NECESSARY SERVICING, REPAIR OR CORRECTION.
12. IN NO EVENT UNLESS REQUIRED BY APPLICABLE LAW OR AGREED TO IN WRITING WILL ANY COPYRIGHT HOLDER, OR ANY OTHER PARTY WHO MAY MODIFY AND/OR REDISTRIBUTE THE PROGRAM AS PERMITTED ABOVE, BE LIABLE TO YOU FOR DAMAGES, INCLUDING ANY GENERAL, SPECIAL, INCIDENTAL OR CONSEQUENTIAL DAMAGES ARISING OUT OF THE USE OR INABILITY TO USE THE PROGRAM (INCLUDING BUT NOT LIMITED TO LOSS OF DATA OR DATA BEING RENDERED INACCURATE OR LOSSES SUSTAINED BY YOU OR THIRD PARTIES OR A FAILURE OF THE PROGRAM TO OPERATE WITH ANY OTHER PROGRAMS), EVEN IF SUCH HOLDER OR OTHER PARTY HAS BEEN ADVISED OF THE POSSIBILITY OF SUCH DAMAGES.
END OF TERMS AND CONDITIONS
COMMENTS
Comments are a really important part of why WordPress has become successful. WordPress started life as a blogging software and the ability to get and give public feedback and additional information through comments is the life-blood of blogging.
The ability to add comments to every page and post is the default behaviour of an installation of WordPress. This may be perfect for your needs, or it could be an unwelcome distraction. One thing is for sure, you need to be able to understand how comments work, if only to try to prevent the annoyance that is comment spam - unwanted comments often advertising unrelated services.
In this chapter we will look at how to control who can comment on your blog, how to disable comments, and how to prevent unwanted comments. We'll also look at pingbacks which is a system that lets you know if other people have mentioned your posts on their blog or site.
Introduction to comments
To leave a comment, users fill in the comment form at the bottom of your posts and pages. Here is an example of a comment section that is open to visitors of the site to post:

The fields Name and Email are required here, which you can tell by the red asterisk. Clicking the Post Comment button will bring you to a page which shows your comment.
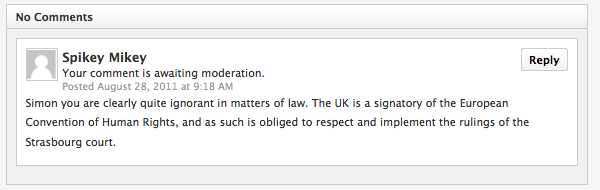
This example shows the message "Your comment is awaiting moderation". This means that the comment is not visible to other visitors of the site until it has been approved by a site moderator. It's likely they will receive an email similar to the following.
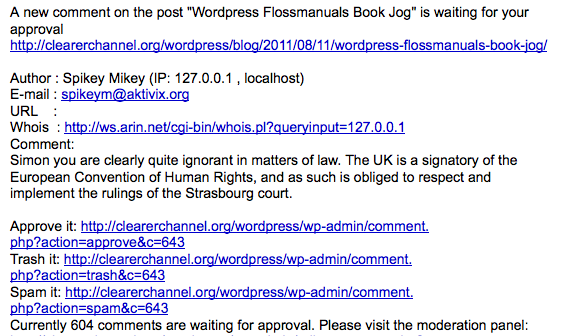
We can see that the email is a notification that there has been a new comment on the post and offers links to Approve it, Trash it or Spam it.
This email also shows another aspect of comments: if you leave your settings so that unregistered users can post comments, you may well end up with hundreds of spam comments. On the above blog the moderator needs to either disable this kind of open comment making in the Discussion Settings or install some anti-spam plugins. There is another chapter detailing anti-spam plugins.
Approving, trashing or spamming comments
If you want to take action on a comment that is posted to the site or held for moderation you should visit your Comments page on the Dashboard. Navigate there by clicking the Comments link in the lefthand menu of the Dashboard.
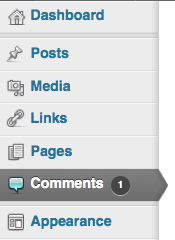
If you have comments that have been previously approved or are awaiting moderation, they will be listed on this page.
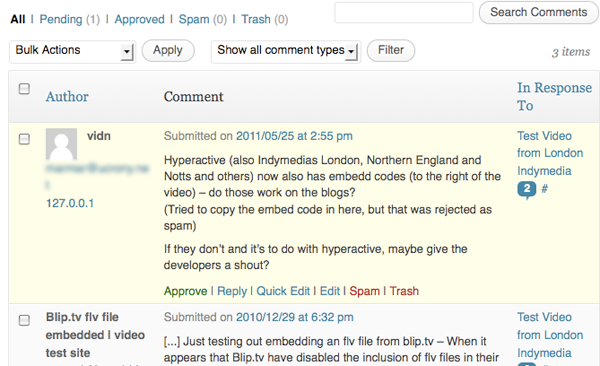
On the above image you can see that the comment waiting for approval has a pale yellow background. When you hover over the comment you are presented with the following options: Approve, Reply, Quick Edit, Edit, Spam or Trash.
Approve is used if you want to publish the comment on the post. Reply allows you to respond and then approve the post easily. Quick Edit and Edit allow you to alter the comment before approving it.
You may not be sure on the difference between Trash and Spam. If the comment is not appropriate but clearly written about your post, rather than an automated commercial message, then you should use Trash. If it is spam and you have the Akismet plugin, using the Spam command here will help Akismet become more effective at recognising future spam.
Discussion Settings
To change how comments are managed across the whole of your site you need to make changes to your Discussion Settings. Navigate there by clicking on Settings link on the left hand menu of your Dashboard.

Then click the Discussion link to view a summary of settings for Comments and Pingbacks (we will explain that more in a bit).
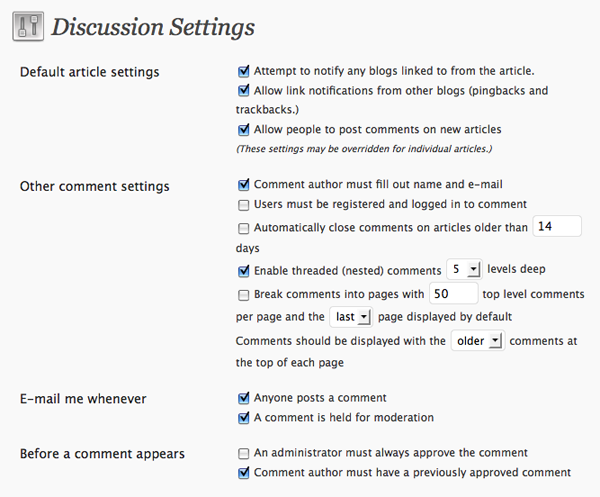
Here you can see a breakdown of the settings which determine who is allowed to post, whether or not email notification is sent and what has to happen before a comment appears on the live site. The above settings seem pretty good if you have some kind of protection against comment spam and are able to check you site fairly regularly. See the section on anti-spam plugins for more information.
Disable comments across your whole site
This can be useful if you want to use your WordPress website as a static website to showcase a project or to share information that doesn't need public feedback. It may be that you prefer visitors to contact you privately via email or are unable to check your site regularly to moderate comments.
If this is the case simply untick Allow people to post comments on new articles.

Then click Save Changes at the foot of the page.

Enable or Disable comments on individual posts
Discussion Settings on each individual post can be overridden if you need to. The Discussion box can be found towards the bottom of the screen when you add a post or page.

If the Discussion box is not visible, then click the 'screen options' tab near the top right of that page, and tick the appropriate tick box.

Pingbacks and Trackbacks
Both Pingbacks and the older system of Trackbacks are ways of letting other bloggers know that you have linked to their posts and made a comment about it. Posts can display these pingbacks as a way of showing the waves your post is making on the internet.
When this is working well, it is a great way of seeing conversation about the ideas in your post spread. However this process can be abused creating pingback spam. Sites which have no interest in your content may link to your site in order to generate a pingback message on your post and in your Dashboard.
If this becomes a problem and you are not very interested in pingbacks then the easiest solution is simply to disable them.
This can be done on a site wide basis by unticking Allow link notifications from other blogs (pingbacks and trackbacks):
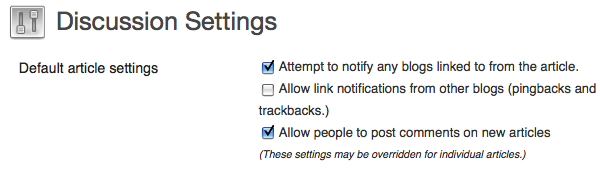
You can also override your default settings by altering the Discussion settings of individuals posts. To do this, untick the setting Allow trackbacks and pingbacks on this page.
In the Discussion box the trackbacks and pingbacks links to a page with more information about comments, trackbacks and pingbacks on the Wordpress Codex site:
http://codex.wordpress.org/Introduction_to_Blogging#Managing_Comments
Podcasting and Media-rich RSS
This chapter focuses on how the podcasting plug in affects the output of your RSS feed. If you are looking for information on how to get a media player to work, please see the earlier chapters.
What is a podcast?
A podcast can be understood as two things: one is a series of audio files published on the internet. The other is a feed of content as an RSS feed which contains media files as enclosures. Often these meanings are used interchangeably because of the history of the term.
Podcasting first became very popular through a powerful concept. This was the ability for people to subscribe to podcasts to automatically download audio to their iPod or other similar device. For example, iTunes functions as a directory for free and pay content, and there are now many similar podcast directories.
What can Podcasts / Media Rich RSS feeds do for me?
The technology that made this possible was RSS feeds with media enclosures. As this is an open standard, many tools appeared using the same technology for different purposes. The common thread is the use of RSS feed to automatically pull media content from the internet to the home user or to other websites or internet tools.
An example of a tools using RSS
Miro is a Video podcast player which searches for and plays video podcasts in a player that acts like a TV channel browser.
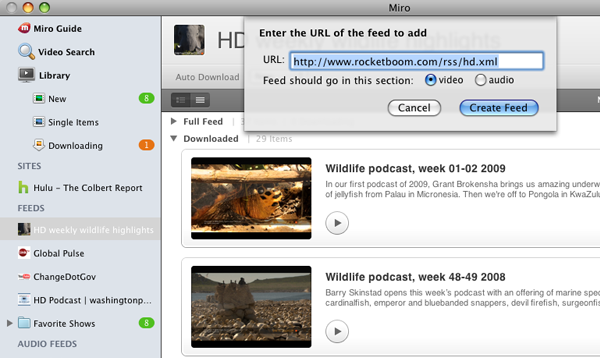
Image aggregation
If you have an RSS feed of your images, those images can be aggregated (displayed) on other websites. WordPress has a special theme that can do this, called Aggregator. The Drupal content management system is also able to do this.
For example we can see here images pulled in from various sites including WordPress blogs all brought together on one site and arranged as a grid.

So we can see that having a website with a RSS feed with media information - be it images, audio or video - is a great way to get your work out there into the network to be seen and re-posted. But what do we have to do to make sure that our RSS feed contains the media that we want it to.
Using the MediaRSS Images plug in
One way of automatically including images in the RSS feed of a site is to use the MediaRSS plug-in for WordPress. Install the plug-in normally and activate the plugin through the Plugins menu. There is more information on the MediaRSS plugin home page. 1
The end result of installing the plug-in can be see in your browser if you point it to the RSS feed of your site, eg - http://yoursite.com/feed. An example is shown below:
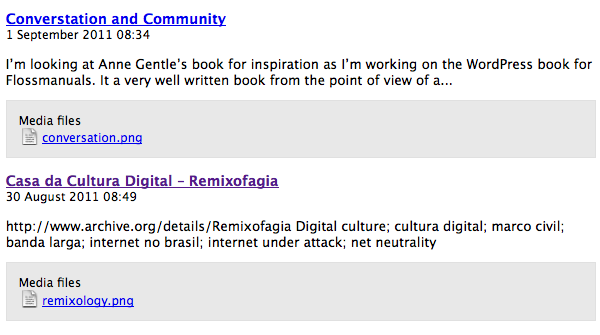
The plug-in looks for media files associated with the post and adds them to the feed using the feed specification called Media RSS.2
<media:content url="http://clearerchannel.org/wordpress/wp-content/uploads/2011/09/conversation.png" medium="image">
  <media:title type="html">conversation</media:title>
  <media:thumbnail url="http://clearerchannel.org/wordpress/wp-content/conversation-150x150.png" />
</media:content>
Audio and video podcasting
Audio and video podcasting is now in built to WordPress. Just link to an audio or video file in one of your posts and WordPress will automatically add the necessary enclosure tag to your RSS2 feed to make it useable as a podcast.
Important: use a complete, absolute URI when linking to the audio file. Otherwise WordPress will not make an enclosure for it.
Wrong: <a href="my-podcast.mp3">My podcast</a>

Right: <a href="http://example.com/my-podcast.mp3">My podcast</a>
If you publish this post and then navigate your browser to the RSS feed of your site, you should see the media file mentioned.
If you look at the source of the page and inspect the RSS code, you will see the following in each entry with a media file enclosed. This is the code needed to make our RSS feed into a podcast.
<enclosure url="http://www.archive.org/download/DissidentIslandRadio03December2010/DissidentIslandRadio03-12-10.mp3" length="0" type="audio/mpeg" />
If you have installed the MediaRSS plug-in then your code will be different. Don't worry. It's just using another way of making a podcast. Is worth mentioning as it can add a little bit of functionality to your feed. If you link to a video or audio file in this way, and there is an image associated with your post, then the MediaRSS plugin will add the image as a media:thumbnail element to your feed. It will look like the screenshot below if you examine your feed in a broswer:

This 'rich' feed contains advanced podcast reading tools like Miro and aggregating websites use to be able to display images and other useful bits of information.
Using the Podcasting plug-in
The Podcasting plug-in is a solution you can use on your own site to creating a video or audio podcast. The players used by the plug-in play the following formats: FLV, H.264, MP4, MP3 and AAC.
The plugin does three important things easily:
- inserts a media player into your post
- offers a link to download the media file
- inserts the media file into your RSS feed, thus creating a podcast feed.
Download and install the Podcast plug-in in the normal way.3
You can activate it from the plug-ins page by clicking Activate under the listing of the Pocasting Plugin by TSG.
Then you should navigate to its settings page to add some details about your plug-in and where you want your audio player to appear on the page.
Adding audio to your page
To add an audio player to your page and include an audio file in your podcast you need to add the URL of your audio file to the podcasting box at the bottom of your page when you Add a Post.
Navigate to your new post page in your usual way and look to the bottom of the middle of the page.
Enter the location of your mp3 file in the File URL box of the Podcasting section. Some blogs will let you upload audio files, others may ask you to upload large files to other services like the Internet Archive (archive.org).
You can then add other information to the podcast by filling out the boxes that you are offered.
Choosing where your player appears
You can place the audio player in specific places by using the Send to editor button after entering the URL of your audio file.

Place your cursor where you want the player to appear in your text and then click Send to editor. This means that you can insert multiple players of different audio files in specific places in your post.
When you save the page you should see a result like the following:
Configuring your Podcasting plug-in settings
You can change the podcasting settings to automatically put a player in the page above or below your posts, and to add a download link as well.
From your Dashboard select Settings > Podcasting.
Then you can fill in the basic details about your podcast including its name, an associated image and so on.
You can then set up how you want the audio player to look on your page. I use the following settings which work well for me. Try them out and alter them if you need to.
Player Location: Before Content
Text Below the Player: Download the audio file
Download Link Text: Below
Player width: 290
Use Video Player: no
- http://wordpress.org/extend/plugins/mrss/ ^
- http://www.rssboard.org/media-rss^
- http://wordpress.org/extend/plugins/podcasting/^
Creating an Image Gallery
You can create an image gallery in a number of ways, including installing a theme that is customised to include image galleries, installing a plug-in, or the simplest way is to create a default image gallery.
Creating a default Image Gallery
You can create a simple image gallery without having to install any plug-ins, and this will work on Wordpress.com sites as well as your own hosted site.
First upload the images you want in a gallery to a particular post or page. You are able to decide how many images you want to display per row, and decide what happens when your visitors click on an image. A sample image gallery is shown below:
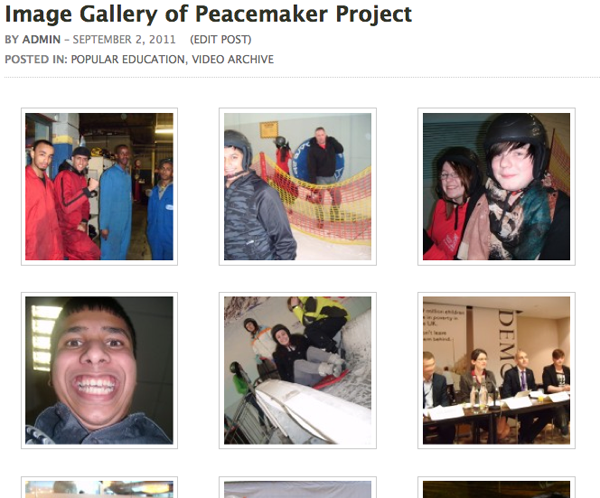
To create a gallery in a post, open the Add Image dialogue box as if you were adding a single image to add your first image (see the chapter Adding Images for more information on this). If you are using the Flash uploader you can upload several images at once. If you upload one image at a time, rather than clicking Insert Into Post you should click Select Files and repeat the process by browsing for another image.
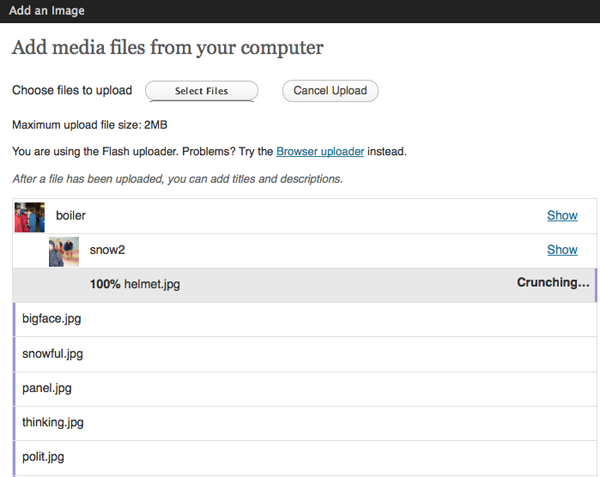
Click Save All Changes.
As you do this you will see the Gallery tab appear and a number will appear next to it. This shows that you have added your images successfully:
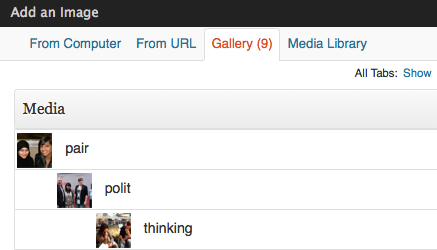 .
.
Click the Gallery tab; you will see all of your added images there. You have the chance to add a caption and description, by clicking Show on the right of the screen.
There are options for adding your Gallery to this post, for example you can choose how many columns to display. This may depend on the theme you are using and you may want to experiment with this.
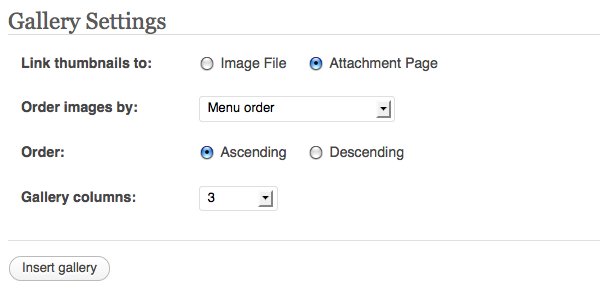
You can also choose if you want your visitors to see only the image itself when they click on it, or a page with the image within the look of your site. Experiment with both settings for a comparison. I would recommend keeping the Attachment Page setting, as it makes it easier for your readers to navigate to different parts of the site.
When you click on Insert Gallery you should see a yellow block appear within the body of the post. If you want to add text to the post as well you should click after the yellow box and type there.
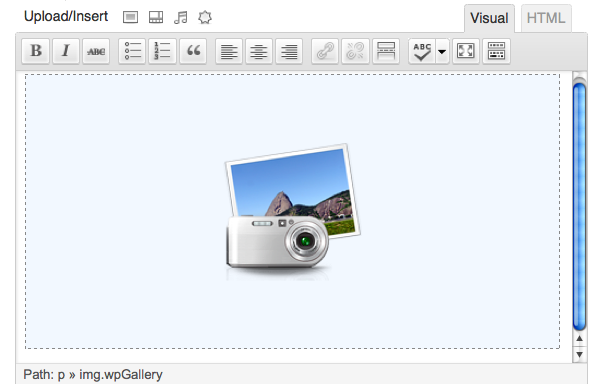
Click Publish, and then View post to see the result of your image gallery, as shown in the first image of this chapter.
Gallery Short Codes
The following is a summary adapted from the Wordpress Codex page on Gallery short codes. 1
The [gallery] shortcode is used in a Post or Page to display a thumbnail gallery of images attached to that post. It can be used in its simplest form like this:
[gallery]
The following basic options are supported:
- columns
- specify the number of columns. The gallery will include a break tag at the end of each row, and calculate the column width as appropriate. The default value is 3. If columns is set to 0, no row breaks will be included. For example, to display a 4 column gallery:
[gallery columns="4"]
- id
- specify the post ID. The gallery will display images which are attached to that post. The default behaviour if no ID is specified is to display images attached to the current post. For example, to display images attached to post 123:
[gallery id="123"]
- size
- specify the image size to use for the thumbnail display. Valid values include "thumbnail", "medium", "large" and "full". The default is "thumbnail". The size of the images for "thumbnail", "medium" and "large" can be configured in WordPress admin panel under Settings > Media. For example, to display a gallery of medium sized images:
[gallery size="medium"]
- http://codex.wordpress.org/Gallery_Shortcode^
Importing and Exporting
Users of a site may want to import content from past blogs on which they have worked. They may be migrating from popular free services like WordPress.com or Blogger.com to a hosted WordPress site over which they have more control. They may also want to export their content as a back-up to to move elsewhere.
WordPress provides good support to do this through the Import and Export functions included in the Tools section.
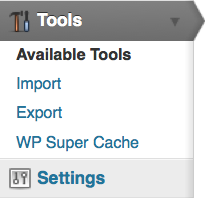
Importing Content
On the Import page of the Dashboard you will see the names of common Blogging software and services listed. You cannot import content immediately: you have to install the relevant plugin for each service.
On the screenshot below you can see a WordPress system where two plugins have been installed: one for importing from other WordPress sites and the other one for importing from Blogger.com sites. You can see that next to those entries it says Import Posts, comments, (and so on) but next to the other choices you are prompted to Install the X importer.
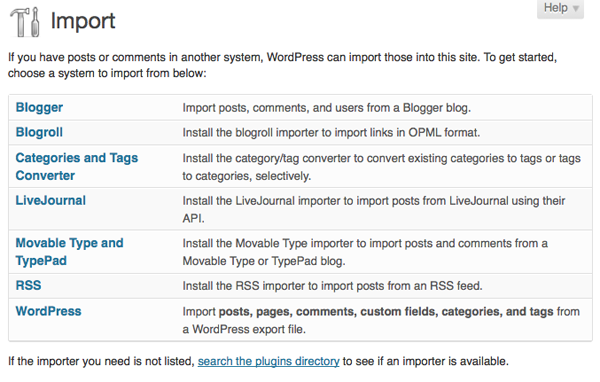
Clicking on Import > WordPress bring you to a screen that prompts you to browse for a WordPress eXtended RSS (WXR) file which has a .xml extension. Here's a screenshot:

If you already have one of these files then browse to it and click Upload file and import. If not, see the Export Content section.
You may see that there is a limit for the size of file you can upload, and you may also run into problems with the memory limit of your server. There is extensive information about solving these problems in the WordPress Codex. 1
In the next screen you can decide which user these imported posts are attributed to:
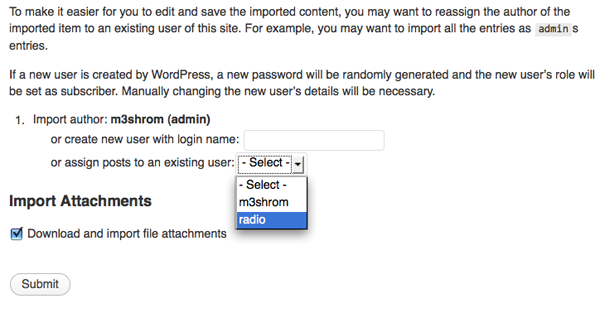
The default option is the username you are logged in with, but you can also create a new user or attribute them to one of the existing users of the site. In this case the User radio is chosen.
There is also the option to Download and import file attachments. If you want to make the posts you are importing self sufficient and not link out to external content, you should tick this option.
Exporting Content
To export content from your WordPress site to somewhere else, navigate to the Export page in the Tools part of the Dashboard.
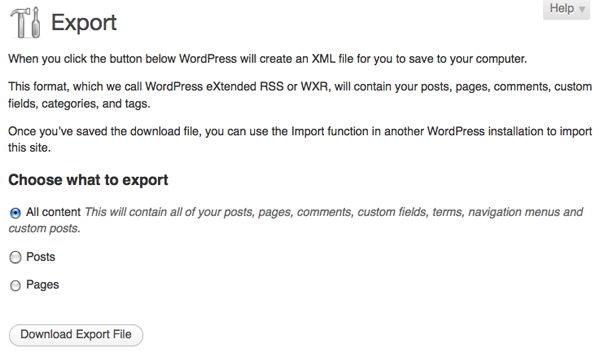
Select how much of your content you wish to export; in the example above, I've selected All Content. Click Download Export File. Save the .xml file somewhere safe and you can then import it to another WordPress site or similar system.
- http://codex.wordpress.org/Importing_Content#Before_Importing^
WHY CREATE A WORDPRESS NETWORK
If you are part of a group that feels able to foster an online community that values free speech, then you can do this in a very practical way by providing reliable and secure hosting to groups and individuals who share your aims.
Although WordPress in built on free software, the installation of it at WordPress.com can be seen as a centralized network service. The "Open Web" is built on a decentralized approach to hosting and as such has inbuilt resilience to censorship. Reliance on huge network services as the arbiters of free speech is a very weak position. Such services come under daily pressures from authorities for disclosure. As such, they often opt for an easy life by handing over personal details and suspending accounts, websites and blogs with little in the way of an appeal process.

Even if you are running a small network of 20 church websites, if you and a couple of others want to get together to run a WordPress network instead of using WordPress.com you are helping the resilience of the Open Web. If you run this network well, then its users will be able to interact without using more centralized services like Facebook.
Part of this chapter is adapted from a chapter in a book about the Open Web, which goes into more depth on these issues: http://new.flossmanuals.net/an-open-web/
Technical considerations of running a network
WordPress is free software: you can download it and install it on your own server. As such, you are not bound by the take-down and privacy policies of WordPress.com. If you have website creation skills, it is relatively easy to install a WordPress network. This allows you to host many blogs, install extra functionality for them and makes it easy to keep the software updated. WordPress blogs are a great entry point into the social media maze as they have RSS feeds, publicly vetted APIs and useful plugins to allow cross posting. With the BuddyPress functionallity you can also create a very usable social network.
You can anonymize blogs and services by not logging IP addresses. The process of not logging IP addresses on a server using Apache is relatively simple. Use the removeip Apache module. Rather than trying to remove all logs of IP addresses it replaces them with an arbitrary IP number.
Avoid the cloud
Hosting your blogs or networks in the "cloud" may offer technical advantages, but at the cost of reducing your control over your resources. If possible, choose a smaller provider who can offer more support and options. If they receive a take down order, they may be able to discuss this with you to help develop a joint approach to the problem and may help you fight your corner.
Don't over reach yourself. If you are an individual or a small group setting up a network to help people escape from services like Facebook, try out a limited service first with a small number of essential plugins and well tested themes. You can always add more later when users request them.
Be responsible. With the best will in the world, setting up a network of hundreds of sites as an individual is putting yourself and the users of those sites in a very weak position. You may lose interest, get a full time job, go a bit mad or have new personal commitments.
Social considerations of running a WordPress network
Here are some tips for running a hosting collective as part of your project.
Acceptable Usage Policy
Take time as a group to make sure you are agreed on what/who you are prepared to host or not. Then make this agreement public as your AUP (Acceptable Usage Policy). You may want to support free speech but that does not mean that you have to support everyone. The internet is a big place and they will find a home somewhere else.
Create a clear (and perhaps automated) process for applying for a website or blog where people have to agree to these terms. You should also develop a clear and fair way of taking down websites that you no longer feel you can support and suggest alternative hosting options for users you have to disconnect
Create good help resources
You should to try to ensure that when your users have signed up for their site that they get a welcome message which directs them towards place they can get help on using the site. You can create a help page on your network which sign-posts people to existing help and adds any help specific to the set up of your network. This may point people towards forums and email lists.
There is a lot of good help that you can link to that is already out there and much that is written in an open licence which means that you can adapt it for your site. There are also video tutorials that help people who best learn in this way. Seek them out and put them on the support pages of your network.
For an example of a help page for a network you can see one here: https://network23.org/help-and-faq
Encourage interaction between network sites
One of things about social networking that makes it hard to beat is the immediate response from a community that users can quickly build up. In Facebook they work hard to make it easy to make links with people and to share information with them and for people to comment on each others content. This is something that is not as intuitive in a WordPress network but there are things that can be done.
BuddyPress is a plugin which is specifically set up to try to achieve this aim. See the later chapter on how to set up and use BuddyPress.
Installing a WordPress Network
A WordPress Network is an installation of WordPress with many sites hosted in one place. The same code is used for all the different sites hosted on the network, thus reducing the time it takes to keep the code updated. This used to be called a Multi User set up, so you may still see references to WordPress MU when researching this subject.
This chapter is partly adapted from the the official WordPress documentation on creating a WordPress multi-user network. There are two ways to install a network: one is to use sub-directories, the other is to use sub-domains.
Sub-directory: http://wpnetwork.org/examplesite/
Sub-domain: http://examplesite.wpnetwork.org
In this chapter we are only going to look at sub-directories. For information on how to set up a network with sub-domains and more in depth information about WordPress networks, have a look at the Create a Network page on the Wordpress Codex site. 1
Summary of how to install a network
Back up your system before starting this process. There is information on how to do this in the Securing Your Installation chapter.
Then alter the wp-config.php file in the root directory of your set up. Add this line above the part where it says /* That's all, stop editing! Happy blogging. */:
define('WP_ALLOW_MULTISITE', true);
This will bring up some new settings in your Dashboard. Point your browser to Settings > Network Setup.

This page presents you with the correct settings to complete the configuration of your network.

The text in the boxes that you see may be different to the screenshot above, depending on your set-up.
- Now, back up your existing
wp-config.php and .htaccess files.
- Create a
blogs.dir directory under /wp-content/
This directory is used to stored uploaded media for your additional sites and must be writable by the web server. 2
- Add the extra lines your WordPress installation generates into your
wp-config.php file. 3
These lines are dynamically generated for you based on your configuration. Edit the wp-config.php file while you are logged in to your sites admin panel. Then paste the generated lines immediately above /* That's all, stop editing! Happy blogging. */.
- Add the generated mod_rewrite rules to your
.htaccess file, replacing other WordPress rules. (If there isn't an .htaccess file, then create it.) These lines are dynamically generated for you based on your configuration.
- Log in again. Once the above steps are completed and the new wp-config.php & .htaccess files are saved, your network is enabled and configured. You will have to log in again. Click Log In to refresh your Adminstration Panel. If you have problems logging back in, clear your browser's cache and cookies first, then try again.
More information on .htaccess and mod_rewrite
Unlike Single Site WordPress, which can work with "ugly" Permalinks
4 and thus do not need mod_rewrite, MultiSite requires its use to format URLs for your subsites. This necessitates the use of an .htaccess file, the format of which will be slightly different if you're using sub-directories or sub-domains.
To enable mod_rewrite to work within an Apache Virtual host you may need to set some options on the DocumentRoot. The code below is an example which you can alter to suit your system.
<VirtualHost *:80>
  DocumentRoot /var/www/vhosts/wordpress
  <Directory /var/www/vhosts/wordpress>
    AllowOverride Fileinfo Options
  </Directory>
Altering your Network Settings
To change settings to the whole network, navigate to Settings > Network Settings.
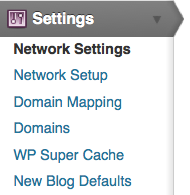
At the Network Settings page you can change the name of the network, the admin email, how people can register, whether or not site administrators can add users to their sites themselves, and other settings. Have a look at these settings and fill them out as you see fit.
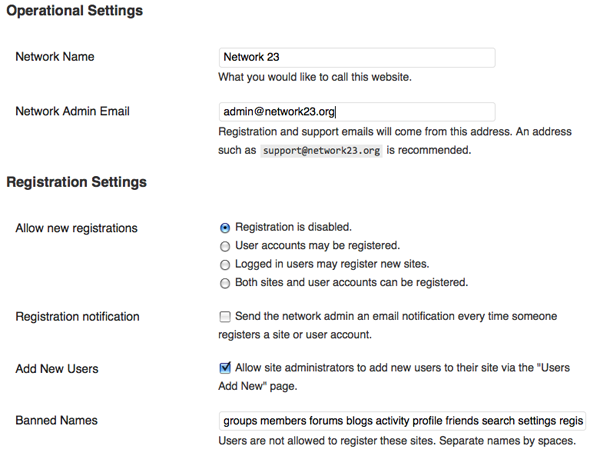
Upload Settings
You can also determine which file types users of the network are allowed to upload at Settings > Network Settings.
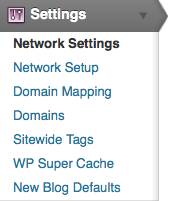
Scroll down the page and you will see various options under
Upload Settings including
Media upload buttons,
Site upload space,
Upload file types and
Max upload file size.
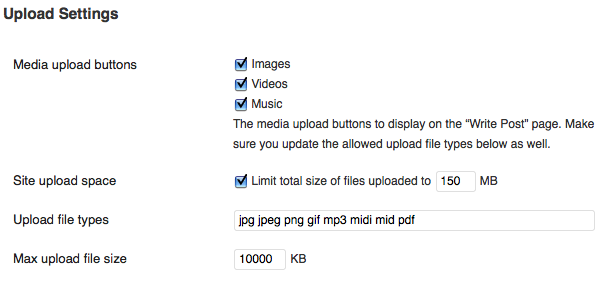
The Media upload buttons refer to the buttons above the WYSIWYG editor which are used to add text to posts and pages.
It may be a good idea to enable the Video button even if you are not allowing your users to add Video files. This is because it will enable different options for embedding video files from external websites.
You can decide how much space and what kinds of files your users may upload. Make sure you provide help for your network's users to find other solutions (such as Vimeo, Soundcloud, Flickr, etc) if you want to run a minimal file hosting service.
Menu Settings
There is a check box on the Network Settings page which allows you to decide if users of the network get to see the Plugins menu settings or not.

This allows you to create a more generic and potentially easier to user service, but with a bit less flexibility for its users.
More help and information
There is more help and information on the Codex pages and the WordPress.org Support forums.5
- http://codex.wordpress.org/Create_A_Network^
- http://codex.wordpress.org/Changing_File_Permissions^
- http://codex.wordpress.org/Editing_wp-config.php^
- http://codex.wordpress.org/Using_Permalinks^
- http://wordpress.org/support/^
INSTALLING WITH SUBVERSION
If you have shell access to your web server, you can use a different technique for installing and updating WordPress. This technique uses a tool called Subversion to automatically download and install the WordPress files on your web server.
The really useful part is that you can use Subversion to seamlessly upgrade your WordPress installation to the latest version, which helps to keep your copy of WordPress secure. This technique will just install or update the core Wordpress files. Use the built-in WordPress system for installing and updating themes and plugins.
From The Wikipedia Subversion Page:
"Apache Subversion (often abbreviated SVN, after the command name svn) is a software versioning and a revision control system founded and sponsored in 2000 by CollabNet Inc. Developers use Subversion to maintain current and historical versions of files such as source code, web pages, and documentation. Its goal is to be a mostly-compatible successor to the widely used Concurrent Versions System (CVS)."
Although Subversion is mostly used by developers, it can also come in handy for normal users who need to keep their files up to date with a remote repository. In this case, it makes installing and updating a WordPress site really quite simple.
Getting started with Subversion
The first step is to check that you have command line (or shell) access to your website.
You should be familiar with the Secure Shell (or SSH) command. To connect to your web server you would issue a command like:
$ ssh -v -C you@yourdomain.com
In the example above, you should substitute your own username and the correct domain you use for accessing your web server.
The "-v" switch tells SSH to print messages so you can see what is happening, and the "-C" turns on compression to speed things up over slow connections.
For more useful information on SSH, see :
http://en.wikibooks.org/wiki/Internet_Technologies/SSH
Once you are connected to your web server, you need to check to see if Subversion is installed. To check, issue the following command:
$ which svn
If Subversion is installed, you should see something like:
$ /usr/bin/svn
If you don't see anything, it means that Subversion is not installed on the web server. In that case you need to contact an administrator and ask them to install it for you. If you have the administrator (or root) password for your Debian GNU/Linux based web server you can install Subversion by issuing the following command (as root):
$ apt-get install svn
We will now assume that you have successfully connected to your web server with SSH and have Subversion installed.
Installing WordPress with Subversion
The first thing you need to do is decide where you want to install WordPress.
WordPress needs to be installed into a directory on the web server machine that the web server software has access to. On GNU/Linux servers running Debian based distributions, it is common for the directory to be named 'public_html'.
If you need to, create the directory:
$ mkdir public_html
Now change into the new directory:
$ cd public_html
You are now almost ready to use Subversion to install WordPress - but first you need to choose which version to install. There are two main options - "trunk" or "stable". In WordPress parlance, "trunk" represents the very latest "bleeding edge" version of the software. For our purposes, you will probably want to install the "stable" version instead.
To find the latest version, check http://core.svn.wordpress.org/tags/
At the time of writing, the latest stable version is 3.2.1
To install a fresh copy of WordPress 3.2.1 using Subversion:
$ svn co http://core.svn.wordpress.org/tags/3.2.1 .
Let's have a closer look at the command above. The first part, "svn", is the subversion command itself; "co" stands for "check out". "http://core.svn.wordpress.org/tags/3.2.1" is the URL of the version of WordPress we are checking out, and finally the "." fullstop (or period) tells Subversion to install the files into the current working directory. Don't forget the fullstop or the command won't work!
Once you run this command, you will see a lot of information scroll past as Subversion connects to the remote hosts and copies all of the necessary files to your web server. When finished, you will see a message like:
Checked out revision 18636.
This means that the Subversion Checkout process has completed successfully. You now need to finish the installation by editing wp-config-sample.php to add to your database details. Save the file as:
wp-config.php
Now visit your blog URL to finish the install, just a like a standard WordPress install.
Updating WordPress with Subversion
Subversion makes updating WordPress really straightforward. To update your WordPress installation (once connected to your web server with SSH):
Check the latest available version of Wordpress here:
http://core.svn.wordpress.org/tags/
Change to the WordPress directory:
$ cd public_html
Instead of "Checkout", we use the Subversion switch (sw) command when updating.
Issue the following command, substituting "3.2.1" for the version you wish to upgrade to:
$ svn sw http://core.svn.wordpress.org/tags/3.2.1/ .
This will automatically upgrade WordPress while leaving custom or edited files like wp-config.php and your plugins untouched.
Once Subversion has done it's thing, visit:
http://www.yourdomain.com/wp-admin/upgrade.php
Converting a traditional WordPress install
If you have a pre-existing WordPress install that you would like to update using Subversion, you will first need to convert it by following these steps:
- Make a backup of your files and database and disable all plugins first.
- Create a new temporary directory.
- Use the Subversion commands from above to checkout WordPress (trunk or stable version) into it.
- Copy all your custom files from the existing WordPress location to the temporary directory. This includes config files, plugins and images or media files.
- Rename the temporary directory to match the old directory name.
- Run the WordPress update script (by going to your admin page - /wp-admin/) and test everything.
Installing WordPress
If you have no experience with installing software on servers and do not want to learn, then this process may not be for you. You may wish instead to visit a site which gives out free WordPress installs and create a blog there. Some examples are http://wordpress.com, http://network23.org, http://blogsport.eu.
However, if you have time, and access to a webspace, then it can be well worth installing your own version - to increase privacy and control over your set-up.
Pre-requisites
You need some basic system administrations skills and the following to install WordPress on your server (it is beyond the scope of this guide to walk you through each technology, so a high level of prior understanding is assumed):
- MySQL 5.2.4 or better (other SQL variants will require additional configuration not covered by this chapter)
- PHP 5.0 or better
- The mod_rewrite module for Apache webserver.
You will also need the following skills:
- familiarity with FTP/FTPS including setting directory permissions
- OR confidence with decompressing archives and changing file ownership in shell.
Quick Guide to Installing WordPress
Here's the quick version of the instructions, for those that are already comfortable with performing such installations. This guide is from the WordPress codex pages. More detailed instructions1 are also on the WordPress codex pages.
If you are not comfortable with renaming files, Steps 3 and 4 are optional and you can skip them as the install program will create wp-config.php file.
- Download and unzip the WordPress package if you haven't already.
- Create a database for WordPress on your web server, as well as a MySQL2 user who has all privileges for accessing and modifying it.
- Rename the wp-config-sample.php file to wp-config.php.
- Open wp-config.php in a text editor3 and fill in your database details4 as explained in Editing wp-config.php5 to generate and use your secret key password.
- Upload the WordPress files in the desired location on your web server:
- If you want to integrate WordPress into the root of your domain (e.g. http://example.com/), move or upload all contents of the unzipped WordPress directory (but excluding the directory itself) into the root directory of your web server.
- If you want to have your WordPress installation in its own subdirectory on your web site (e.g. http://example.com/blog/), create the blog directory on your server and upload WordPress to the directory via FTP.
- Run the WordPress installation script by accessing wp-admin/install.php in a web browser.
- If you installed WordPress in the root directory, you should visit: http://example.com/wp-admin/install.php
- If you installed WordPress in its own subdirectory called blog, for example, you should visit: http://example.com/blog/wp-admin/install.php
That's it! WordPress should now be installed.
Configuring WordPress
Adding Users
The initial administrator user name is "admin" (without the quotes). Type that in the user field and paste the password in the password field. If you are working on a shared computer, do not check the "Remember me" box.
The first thing that should be done upon logging in is to create a new user for yourself with a memorable password.
- Click the Users tab towards the right side of the top menu bar.
- Scroll down the page until you see the Add New User heading.
- Enter your username, your email address and your new password. Set the Role drop down menu to Administrator and click Add User.
File Permissions
After finishing the WordPress install you should change the permissions of the web root directory to something more secure. There is more information on this in the section Securing Your Installation.
Media Upload Settings
Before getting started with adding media to your website you may need to have a look at the limits imposed by your server. The default settings of your server may mean that you have a fairly small limit set to upload files. This may be come clear when you try to upload a file that is over the Maximum upload file size.
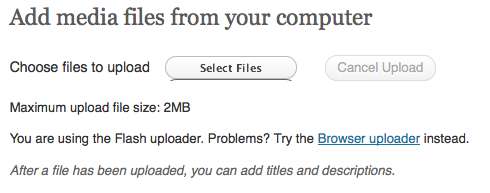
You to change this limit you need to overwrite those configurations by adding the following into your .htaccess file. The #Change upload limits is just a comment. You can put these lines before or after any other script in you .htaccess file. Save it and upload. That's it! Hope this helps!
#Change upload limits
php_value memory_limit 34M
php_value post_max_size 33M
php_value upload_max_filesize 32M
php_value max_execution_time 600
#Change upload limits end
There other ways to change this setting that are listed in a support thread on the WordPress support site.6
Keeping Wordpress Updated
Now you have successfully installed Wordpress, you need to make sure that you keep it (and all the themes and plugins) updated. Failure to keep Wordpress updated will expose you to an increased risk that your blog or website could become compromised by a malicious attacker.
More information on this topic can be found in the section Securing Your Installation of the Advanced Admin chapter of this book.
- http://codex.wordpress.org/Installing_WordPress#Detailed_Instructions^
- http://codex.wordpress.org/Glossary#MySQL^
- http://codex.wordpress.org/Glossary#Text_editor^
- http://codex.wordpress.org/Installing_WordPress#Step_3:_Set_up_wp-config.php^
- http://codex.wordpress.org/Editing_wp-config.php^
- http://wordpress.org/support/topic/increasing-upload-max-file-size-in-phpini^
Introduction to Plugins
A Plugin is literally something you "plug in" to your WordPress site to extend its functionality to allow it to do something new. There are thousands of these tiny features that can be added. If you want visitor statistics you can choose from dozens of statistics plugins. If you want to create a testimonial page for your site there are plugins to help you do this. The list of available plugins is vast, and any summary of it will always fall short since new plugins become available every day.
WordPress.com comes with a limited functionalilty and you can't add plugins if your site or blog is hosted there. You need to have a privately hosted site to use plugins.
You can add these little extra pieces of functionality from within WordPress itself. You can browse them from the admin section of your site. You can read about them, install them, configure them, and remove them all without leaving your Dashboard.
Activating Plugins
You can activate plugins that are already installed in the following way.
Navigate to the Plugins page from your Dashboard:
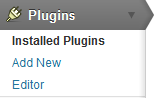
You can read the description of the various plugins you can install there.

To activate a plugin, just click on the Activate link.

Find and install plugins
Finding plugins
The "official" source for WordPress Plugins is: http://wordpress.org/extend/plugins/
Not all WordPress Plugins make it into the above repositories. Try searching the web for "WordPress Plugin" and the keywords for the type of functionality you are seeking.
If you are worried about the security and stability of your WordPress site, you should probably only use the official plugins. These are also easier to find from inside the Dashboard.
To start, click Plugins from your Dashboard.
Click Add New and you will see the following screen which allows you to search or browse plugins from the official repository:

Things to think about before installing plugins
Always ask yourself, do you really need this plugin on your site? The more plugins you add, the more complex your code becomes. The code may need frequent updating and it may break other parts of your site.
Make sure you read the instructions that come with the plugin and do make a backup of your site and your database before installing plugins.
Check out this page on the WordPress Codex: things to know before you install: http://codex.wordpress.org/Managing_Plugins#Manual_Plugin_Installation
Installing plugins
There are two ways to install WordPress plugins. The traditional way involves transfering the plugin code to your server via FTP or via the command line, and unzipping it to the wp-content/plugins directory of your WordPress installation.
Increasingly, you can install and upgrade plugins directly from your site's Dashboard.
More Information
There is more information about plugins on the WordPress codex site:
http://codex.wordpress.org/Managing_Plugins
Using the Dashboard and Settings
When you have logged into your site, you should see what is called your Dashboard. This is the control panel where you can add new content to your blog, manage users and change settings.

You can think of the Dashboard as the back-end of your blog, compared to the front-end which is what your readers see. The key to using WordPress is to understand your Dashboard.
Tip: Why not try opening a new tab in your Internet browser so you can see both the front-end (your publicly visible blog) and your Dashboard at the same time. This will make it easier when you are working on your blog to see the changes. When you have done this, click on the new tab to see the front-end of your blog. It will be available at the URL in the address bar of your browser.
The Side Menu of the Dashboard
Just about everything you need to do can be accessed through the side menu of the Dashboard.
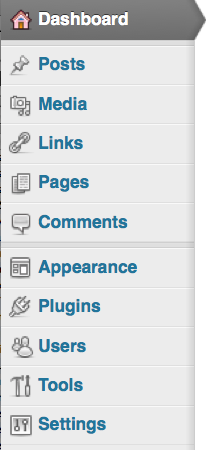
It is divided in two two sections. The first includes Posts, Media, Links, Pages and Comments. This section is for adding and managing the content of your site.
The second section lists Appearance, Plugins, Users, Tools and Settings. This is where you can alter the appearance and functionality of your site.
Clicking on any of these sections give you a page of key options and additional subsections. For example, clicking on Appearance takes you to a page where you can choose a new theme and also shows links to the options Widgets, Menus, Background and Header.
Introduction to WordPress Settings
There are some settings that are important to check before you start using your site. Navigate to Settings > General and check that the settings there are correct.
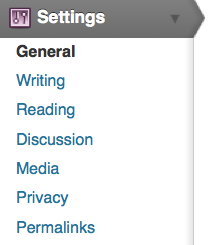
Here you can change the name of your site which appears on all of your pages.
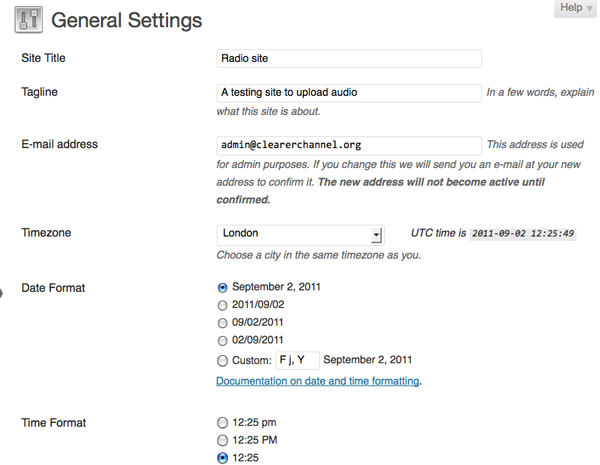
The default Tagline is often something like "Just another WordPress site", which makes your site look at bit unloved, so it is a good idea to put something more descriptive.
Do check that the time settings are what you want them to be, as the time is shown on posts. When you are happy with the settings click on Save Changes.
Writing Settings
From the Dashboard, go to Settings > Writing Settings. Here you can change the settings for how many posts appear on each page, and what the default category for each post is.
There is a section on the Writing Settings page about Remote Publishing. This may be useful if you want to publish to WordPress from your phone, iPad or other similar platforms or tools. Make sure to tick these options if you want to publish in this way.
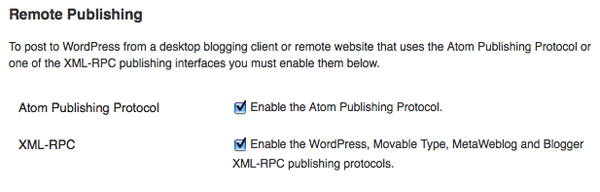
When you are happy with the Writing Settings click on Save Changes.
Reading Settings
Next, it is good to check your Reading Settings. Here you have options to change what is displayed on your site's front page, including how many posts to show on each page and to include in your RSS feeds. 
If you are using your WordPress install mostly as a static website containing information that doesn't change much, you may want to point visitors to an About page when they first visit your WordPress site.
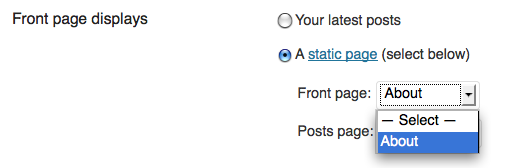
You'll get to learn more about other areas of the Dashboard and Settings in the other chapters of this manual.
Logging In
The first thing you need to log in is a username and password. If you have set up your own WordPress site then you should have them. If someone else set up the site, they may have notified you in an automatically generated email from WordPress with the title "Your Username and Password". If you are setting up your site on a server yourself then progress to the Installing on a Server section.
There are several ways to find the log-in page to your WordPress site. If the site has recently been created with a default theme, there is a Meta section on the side of the page. Find the Meta section in the sidebar and then click the Log in link.
On the next screen, enter your username and password and click Log In. If you have forgotten your password then you can get a reminder by clicking on Lost your Password?
Troubleshooting
Sometimes, as in the following example, if the site's theme has been modified there may be no link to the log-in page. But all is not lost, read on ...
To get to the log in screen, go to the home address of the site. In this case: http://network23.org/photo
Now add /wp-admin to the address bar of the browser and press Enter / Return or click on the green Go button on the address bar.

If you are not logged in this will bump you to the log-in screen where you can enter your username and password then click the Log In button.
You should then see your Dashboard. There is more information on how to use the Dashboard in another chapter.
MAKING A WEBSITE INSTEAD OF A BLOG
If you don't want a list of posts displayed in chronological order on your home page, if you don't want to show any kind of blog but you just want to create a fairly static website, then dive into this chapter!
We have seen already that you can install WordPress and create some pages, and have these page names appear as menu items in a menu that appears on all of the pages. But what do you want to appear on your home page? If you just want a static page, you can create a new page called Home.
Look down the lefthand column of your Dashboard, to the tab area named Settings, and click the little arrow next to it to expand ...
... and then you will be able to see the various Settings options.
Choose Reading, and change the "Front page displays" setting from "Your llatest posts" to "A static page", as below:
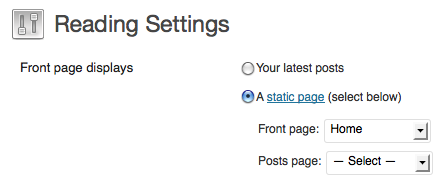
If you already have made a new page called Home, you can choose that page to display as the landing page to your website. As you can see above, you also have the option of choosing which of the pages you have created will display your blog posts (just in case you still want to have a blog somewhere in your site!).
So why not make a blog page at this point, by clicking on Add New under Pages on the Dashboard.
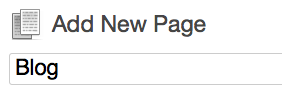
Now you can go back to the Settings > Reading options, and choose your Blog page as the page which will display your posts:
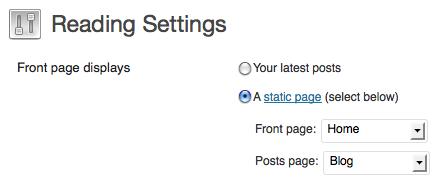
NOTE: You don't need to change any options other than these to make your home page static (no posts) and your blog page display your posts, WordPress figures it out and makes it happen. Thanks, WordPress!
Optimization
Optimizing your site can involve several aims. One is to make sure that it is as quick to use as possible for the people viewing it and posting to it. We can call this optimizing performance. Another may involve Search Engine Optimization (SEO) which makes your site easier to find on search engines and will increase the amount of visitors to your site.1
Optimizing Performance
There are many ways of increasing the performance of your system which are detailed on the WordPress Codex pages. 2
A minimal approach to plugins and themes
If you are having problems with the amount of time that your pages take to load this may be caused by a plugin or a theme that is coded in an inefficient way. Try restoring your default theme and then disabling plugins one by one this may well allow you to find out which plugin or theme is causing you problems.
Generally, it is a good idea to only install the plugins and themes that you really need. If you don't need it, then deactivate it and delete it from your system.
Caching plugins
The easiest way to make sure that your pages load quickly in a browser for the people viewing your site it to use a plugin to enable caching. A caching plugin such as WP Super Cache or W3 Total Cache can be easily installed and will cache your WordPress posts and pages as static files. This reduces the load on the server and improves performance dramatically, especially on a busy site.
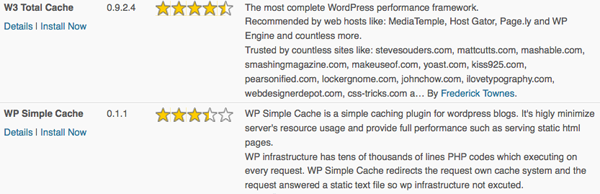
Let's look at WP Simple Cache as an example of how to use this kind of plugin. Download and activate the plugin in the normal way. If you see an error like the following you will need to adjust some of your systems file permissions (see the File Permissions section in the Securing your Installation chapter):
Warning: WP Simple Cache plugin was not able to write cache
directory
"/srv/wordpress/wp-content/plugins/wp-simple-cache/cache/".
 Please make the cache dir is writable.
When this is corrected you should point your browser to Settings > WP Simple Cache in our Dashboard.
In the Easy tab, make sure that the Caching On radio button is selected.
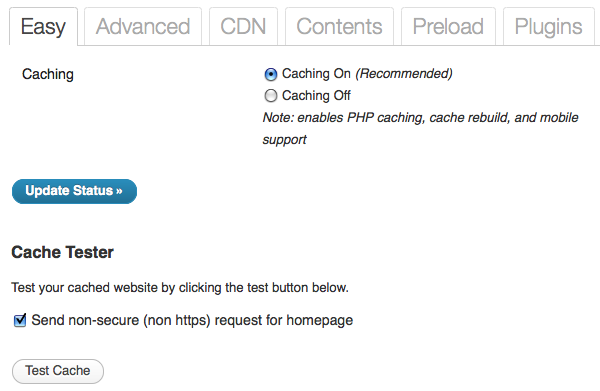
To test the system is working, click Test Cache. This process also shows us a little about how caching works.
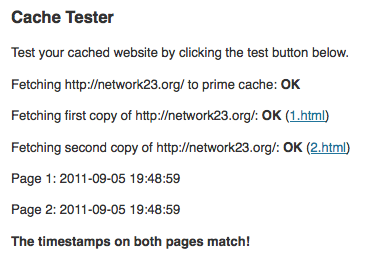
The process of testing is listed when we get the results of the test. Two copies of the front page of the site being testing are fetched. There is a delay between when the copies are requested. If caching isn't working then the timestamps will be different as the page will be generated fresh each time. If you see the result, "The timestamps on both pages match!" this means that caching is working.
For more information on setting up the plugin via the advanced settings, visit the home page of the WP Super Cache plugin. 3
Search Engine Optimization within WordPress
WordPress, straight out of the box, comes ready to embrace search engines. Its features and functions guide a search engine through the posts, pages, and categories to help the search engine crawl your site and gather the information it needs to include your site within its database.
Permalinks
Permalinks are useful for SEO. The term Permalinks is a way of describing semantic links which have the name of your post, the date, or the category of the post in the URL of the post being displayed.
An example would be the difference between the URL of a post http://mysite.org/2011/09/09/a-face-in-the-crowd/ rather than http://mysite.org/index.php?p=645
To set up "pretty" permalinks you do need to be able to have certain things installed on your server - specifically there is a module in Apache called mod_rewrite. 4
Once the Permalinks set-up is installed, you can control how links look. To do this point your browser to the Settings > Permalinks page in your dashboard.
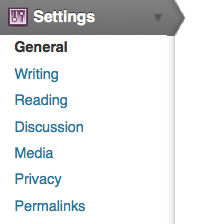
Some common settings are provided for you and you also have the ability to set your own Custom Structure:
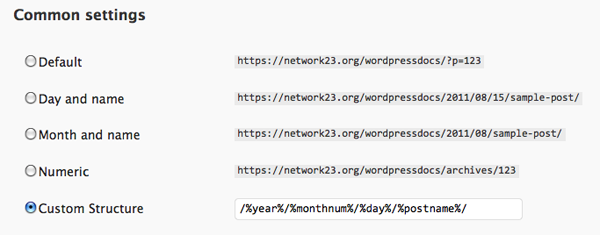
SEO Plugins
You can add to the built-in abilities of WordPress by adding any number of SEO plugins. Search Engine Optimization is all about competing for a better rank. Therefore it only seems suitable that even within the collaborative area of a free software project there is competition between different SEO plugins. Here is a quote from the developer of the Wordpress SEO plugin:
It's not a secret that the author of this plugin, Joost de Valk, aka Yoast, doesn't really like All In One SEO Pack. The main reason is that All in One SEO pack has a default option for auto generating meta descriptions that is actually making it harder for people to rank well in a lot of cases, giving them a false sense of security.
The reason for mentioning this piece of backstabbing, apart from the humour of it, is to point out one of the main tasks of SEO plugins, which is to insert meta tags into the pages and posts of your site. This hidden, "meta" information can be included in the code of your site and helps to give your pages higher ranking on Search Engines.
Examples of the most common meta tags include:5
<meta name="resource-type" content="document" />
<meta http-equiv="content-type" content="text/html; charset=US-ASCII" />
<meta http-equiv="content-language" content="en-us" />
<meta name="author" content="Harriet Smith" />
<meta name="contact" content="harrietsmith@harrietsmith.us" />
<meta name="copyright" content="Copyright (c)1997-2004
Harriet Smith. All Rights Reserved." />
<meta name="description" content="Story about my dog
giving birth to puppies." />
<meta name="keywords" content="stories, tales, harriet, smith,
harriet smith, storytelling, day, life, dog, birth, puppies, happy" />
While WordPress does a lot of thing out of the box, it does not try to guess these tags.
The quote above also points out the main difference between various SEO plugins. Some will try to guess this meta data and automatically insert it, and others will make it easy for you to get into the detail of it and write your own meta tags for best results.
The choice is up to you - whether you want a plugin that does some of the work for you or allows you to add lots of fine tuning. There are several well written articles comparing different SEO solutions on the web. 6
- http://codex.wordpress.org/Search_Engine_Optimization_for_WordPress^
- http://codex.wordpress.org/WordPress_Optimization and http://codex.wordpress.org/WordPress_Optimization/Cheat_Sheet^
- http://wordpress.org/extend/plugins/wp-super-cache/^
- http://codex.wordpress.org/Using_Permalinks^
- Example taken from http://codex.wordpress.org/Meta_Tags_in_WordPress^
- http://perishablepress.com/wpseo-vs-aioseo/ http://sixrevisions.com/wordpress/seo-plugins/^
Podcasting Plugin
This chapter focuses on how the podcasting plugin affects the output of your RSS feed. If you are looking for information on how to get a media player to work, please see the earlier chapters.
What is a podcast?
A podcast can be understood as two things: one is a series of audio files published on the internet. The other is a feed of content as an RSS feed which contains media files as enclosures. Often these meanings are used interchangeably because of the history of the term.
Podcasting first became popular through a powerful concept. This was the ability for people to subscribe to podcasts that automatically downloaded audio to their iPod or other similar device. For example, iTunes functions as a directory for free and pay content, and there are now many similar podcast directories.
Audio podcasting
Audio and video podcasting is now built-in to WordPress. Just link to an audio or video file in one of your posts, and WordPress will automatically add the necessary enclosure tag to your RSS2 feed to make it useable as a podcast.
Important: use a complete, absolute URI when linking to the audio file. Otherwise WordPress will not make an enclosure for it.
Wrong:
<a href="my-podcast.mp3">My podcast</a>
Right:
<a href="http://example.com/my-podcast.mp3">My podcast</a>
If you publish this post and then navigate your browser to the RSS feed of your site, you should see the media file mentioned.
If you look at the source of the page and inspect the RSS code, you will see the following in each entry with a media file enclosed. This is the code needed to make our RSS feed into a podcast.
<enclosure url="http://www.archive.org/download/DissidentIslandRadio03December2010/DissidentIslandRadio03-12-10.mp3" length="0" type="audio/mpeg" />
Using the Podcasting plugin
The Podcasting plugin is a solution you can use on your own site to create a video or audio podcast. The players used by the plugin play the following formats: FLV, H.264, MP4, MP3 and AAC.
The plugin does three important things easily:
- inserts a media player into your post
- offers a link to download the media file
- inserts the media file into your RSS feed, thus creating a podcast feed.
Download and install the Podcast plugin in the normal way.1
You can activate it from the plugins page by clicking Activate under the listing of the Pocasting Plugin by TSG.

Then you should navigate to its settings page to add some details about your plugin and where you want your audio player to appear on the page.
Adding audio to your page
To add an audio player to your page and include an audio file in your podcast, you need to add the URL of your audio file to the podcasting box at the bottom of your page when you Add a Post.
Navigate to your new post page in your usual way, and look to the bottom of the middle of the page.

Enter the location of your mp3 file in the File URL box of the Podcasting section. Some blogs will let you upload audio files, others may ask you to upload large files to other services like the Internet Archive (archive.org) or Soundcloud2 .
You can then add other information to the podcast by filling out the boxes that you are offered.

Choosing where your player appears
You can place the audio player in specific places by using the Send to editor button after entering the URL of your audio file.

Place your cursor where you want the player to appear in your text and then click Send to editor. This means that you can insert multiple players of different audio files in specific places in your post.
When you save the page you should see a result like the following:

Configuring your Podcasting plugin settings
You can change the podcasting settings to automatically put a player in the page above or below your posts, and to add a download link as well.
From your Dashboard select Settings > Podcasting.

Then you can fill in the basic details about your podcast including its name, an associated image and so on.

You can then set up how you want the audio player to look on your page. I use the following settings which work well for me. Try them out and alter them if you need to.
Player Location: Before Content
Text Below the Player: Download the audio file
Download Link Text: Below
Player width: 290
Use Video Player: no

- http://wordpress.org/extend/plugins/podcasting/^
- http://soundcloud.com/^
Posts and Pages - What's the Difference?
This text is adapted from http://learn.wordpress.com
While publishing posts is the primary way to share content on your site, you can also add additional pages to make it look and feel more like a traditional website. In fact, you can make your whole WordPress site a collection of pages, with a static home page for the landing page. See the upcoming chapter Making a Website Instead of a Blog.
So what’s the difference between posts and pages?
Posts are what make a blog a blog — they’re servings of content, similar to journal entries, listed in reverse chronological order. Posts can be as short or as long as you like; some are as brief as Twitter updates, while others are the length of essays.
Pages, on the other hand, are best suited for more timeless content that you want your visitors to be able to easily access, such as your About Me, Gallery or Contact sections.

Creating new pages is just as easy as adding new posts. Simply go to Pages > Add New in your Dashboard.
By default, all posts will appear on your blog’s front page, but you can also display specific posts on category pages (and do other nifty things) with the custom menus feature.
One of your key design decisions will be about what appears on Posts or Pages. How much of your site do you want to keep as relatively static content? How much should be dynamic content that changes frequently? These issues are dealt with in the chapters "Custom Menus" and "Making a Website Instead of a Blog".
If you decide that you’d like to create a Contact page, inserting a contact form is a great way to offer your readers the ability to get in touch, without giving out your personal email address.
Securing your Installation
Security for your WordPress site is something that varies in importance depending on your situation and your perspective. The danger of not being concerned with security is that your site, including the files and the entries of the database, could be corrupted or totally deleted. It could also effect other users and sites on your server. This may seem like a vague and remote possibility - until it happens to you. In this chapter we look at file permissions, how to keep your WordPress system updated and how to make backups.
For a good overview of all of these issues there is a detailed and informative entry on the WordPress codex site called Hardening WordPress. 1
File Permissions
Understanding file permissions on the files uploaded to your server is a very important piece of keeping your WordPress installation secure. There is an excellent guide on permissions on the WordPress Codex site which explains what file permission are, and most importantly how to change them. 2
If you are very restrictive when it comes to file permissions then it means that some of the best functions of WordPress like being able to upload and edit images just don't work. It makes sense to start off being restrictive, but if you find that WordPress and plugins that you have added start complaining with error messages, you can then open up the permissions of the relevant files or directories.
This may sound confusing, but normally any problem that you encounter will have been replicated by someone else. This means that you are likely to find relevant help if you search for the problems you are having in WordPress forums.
Keeping your system updated
New versions of plugins, themes and the core code of WordPress are released regularly. It is important to keep these updated otherwise your system may get cracked. Before updating there are some steps you should perform to make sure things go smoothly - or at least not disastrously. These include checking the server requirements of the update, making backups and disabling plugins. You should check the official docs on the Codex for full information. 3
WordPress now has the ability to perform Automatic Updates.
To be able to perform automatic updates you normally need one of the following situations:
- to have FTP access your server
- to have your WordPress folders given write access by the same user that runs your webserver (eg. www-data for apache on debian)
If you do allow your WordPress files to be owned by your webserver user, automatic updates should just work. If not, you may be prompted for your FTP details as shown in the screenshot below.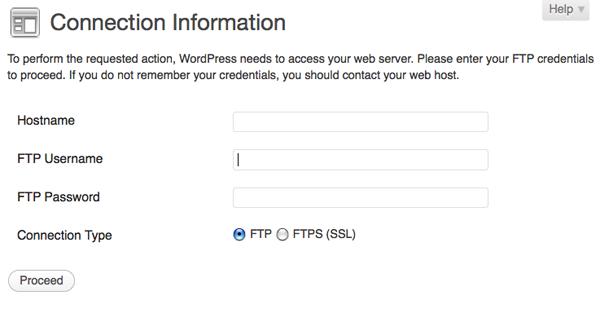
Security Issues of Automatic Updating
Having your folders and files writable by the user that runs your webserver is not ideal for security reasons. If you are on a shared server then it makes your system open to being hacked by the other users on that server, so therefore is not suitable.
FTP updating on the other hand solves the problem of permissions on shared hosts but often FTP is disabled by server admins who are security conscious and prefer their users to log in by more secure means like SSH. 4
You may have to compromise some of your security concerns to be able to update automatically.
Keep back-ups of your WordPress files and databases
One of the most essential approaches to security is to admit that your system is not invulnerable, and make regular back-ups that can be restored. After all, it could even be you that hacks and breaks your system by mistake.
You will need to make back-ups of the files needed for your WordPress site/s and the database/s used. You can do this process yourself manually or if you know a little about scripting and have access to another server then it is possible to set up your system to do this automatically. There is great information on the specifics of making back-ups, both manual and automated, on the WordPress Codex site.5
- http://codex.wordpress.org/Hardening_WordPress^
- http://codex.wordpress.org/Changing_File_Permissions^
- http://codex.wordpress.org/Updating_WordPress^
- http://en.wikipedia.org/wiki/File_Transfer_Protocol#Security^
- http://codex.wordpress.org/WordPress_Backups^
Status.net and Twitter Plugins
There are several useful plugins which allow you to cross-post from a Wordpress blog to Twitter and Status.net (a more open microblogging service).
The information in this chapter is only for self-hosted WordPress sites, but you can achieve much of the same thing using the Publicize function at WordPress.com.1
WP-Status.net Plugin
To quote from the maintainers' description:
Every time you make a new blog post this plugin will post a status update to the Status.net servers, facebook, Ping.fm, Google Buzz and Twitter accounts you have specified. You can set as many acounts on as many servers you like.
The plugin is called WP-Status.net and has its own page on the Wordpress.org site here: http://wordpress.org/extend/plugins/wp-statusnet/
Install and activate the plugin normally. To configure and use the plugin, navigate to Settings > WP-Status.net at the bottom of the left column menu:
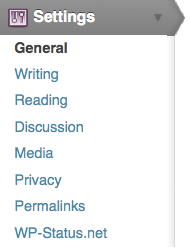
You'll then see a list of boxes which allow you to cross-post your blog posts to a number of different services. There is quite a lot of help text within this page to explain the process. Let's look at the bare minimum you need to get this working. Scroll down to the section StatusNet servers and user accounts:
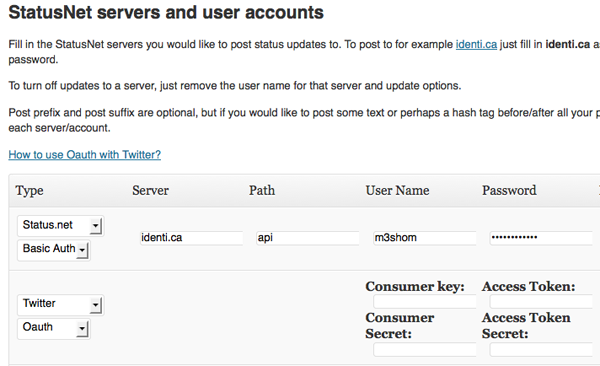
If you would like to post status updates to the StatusNet servers you use, for example
identi.ca, just fill in
identi.ca as server,
api as path and your user name and password.
To turn off updates to a server, just remove the user name for that server and update options.
Post prefix and post suffix are optional, but if you would like to post some text or perhaps a hash tag before/after all your posts you can specify a unique prefix/suffix for each server/account.
If you want to update Twitter, the process is a bit more complicated as first you have to apply to Twitter for a key.
Applying for a Twitter Key
Register a new application at dev.twitter.com/apps/new:
- Application Type must be set to Browser
- the Callback URL should be the URL of your blog
- Default Access type MUST be set to Read & Write
Fill in the Consumer Key and Consumer Secret in the correct fields - these will show up as soon as you select Server Type "Twitter" and "Oauth" in the server list (user name column).
Click My Access Tokens at http://dev.twitter.com (right menu).
Fill in your Access Token and the Access Token Secret in the correct fields (password column). Now you should be able to cross-post to Twitter.
When you have finished adding your details, be sure to click the blue Update Options button:
Now every time you make a new post, that information and a link should be added to your micro-blogging accounts.
Twitter Tools Plugin
Twitter Tools is a plugin that creates a complete integration between your WordPress blog and your Twitter account. It works in much the same way as the WP-Status.net plugin. You should follow the same instructions for applying for a Twitter key. Then navigate to Settings > Twitter Tools and fill in the relevant details there.
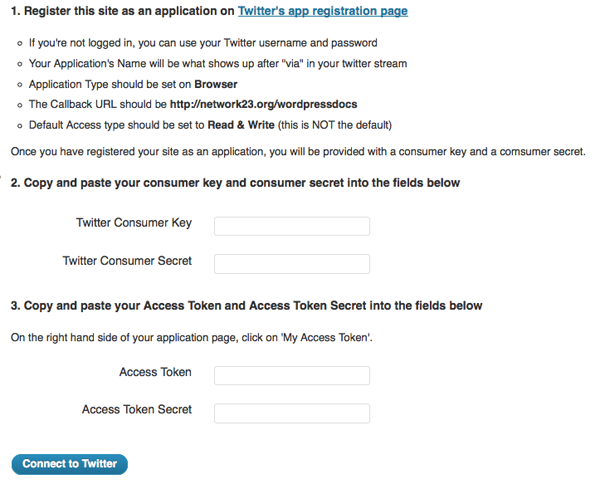
Configuring Twitter Tools
When you have sucessfully connected to Twitter, the same page at Settings > Twitter Tools allows you to set some settings on how your Tweets are cross posted and displayed:
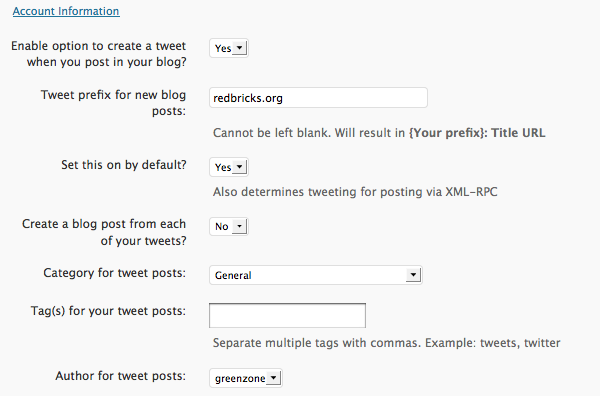
Make sure that Enable option to create a tweet when you post in your blog? is set to Yes. You can tell this has been successful if you the following box appears in your Add Post page:

All of your posts should now be cross-posted to Twitter automatically and draw your many followers to your blog posts.
- http://en.support.wordpress.com/publicize/^
Using Themes
WordPress allows you to change the look of your page by several different methods. The most obvious way is to change the Theme your site is using.
Where do themes come from?
Anyone can write themes for WordPress, it is free software after all. If you do a web search for WordPress themes you will see that there are thousands of them. However, not all of them are going to be useful for you. Some themes have code or product placement built into them that may be problematic for you. Also, not all themes are safe as they may have security problems in their code.
The best place to start looking for themes is http://wordpress.org/extend/themes/. This repository is part of WordPress.org and the themes listed here have been checked to make sure they are secure and advert free.
WordPress.com already comes with a default theme installed. Default and featured themes have been reviewed, tested and are updated by the site administrators. The current default theme for WordPress is called TwentyEleven.
Managing themes
To manage the theme of your WordPress site, log in to your blog and in the Dashboard click Appearance in the lefthand menu:
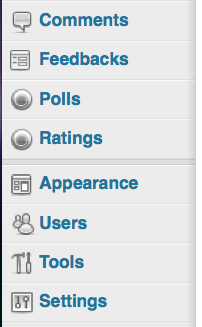
You will then see your current theme displayed at the top of the page, and underneath it a list of available themes that you can choose from, including the name of each theme and a screen shot.
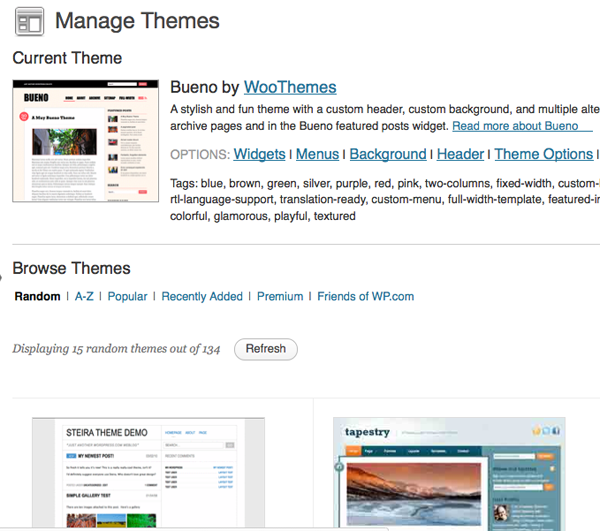
To the right of the Browse Themes text there is a box to search for specific themes if you know their names.

You can filter themes based on certain characteristics; for example, if you wanted to only show themes which have two columns, then you could select that possibility from the grid of options. Click on Feature Filters then use the check boxes to make your selection:
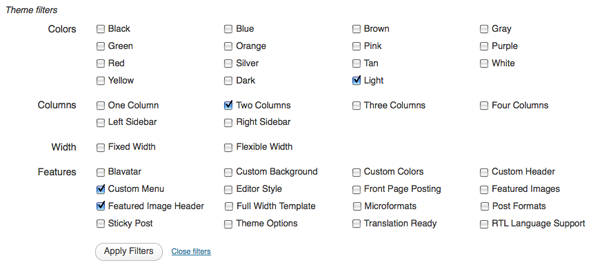
Here we are looking for a theme with two columns in a light colour that allows us to change the menus flexibly and alter the image in the header of the theme. Click on Apply Filters to see the results.
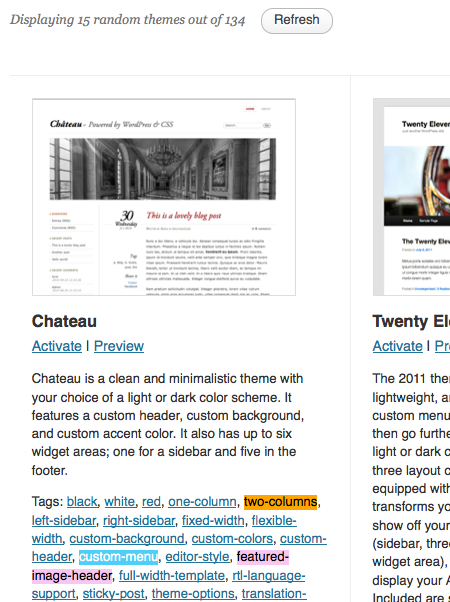
You can see that the results show the themes which are tagged with the features that we asked for.
Changing themes
To change to one of the listed themes, you can either Activate it (if you are sure this is the theme you want) or you can Preview it to see what it would look like with your content. If you are just starting and don't yet have any posts, pages or images on your site, the preview will show some place-holder content.
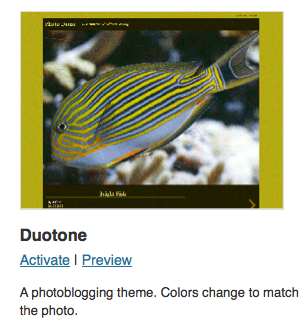
Normally if you are browsing for themes you will click on Preview. You will then see a preview of your own WordPress blog in the style of the theme.
If you don't like the look of the theme or if you are not sure, you can return to the previous page by clicking the "x" in the top left of the preview screen:
If you do like the Theme and want to use it, click the Activate link in the top right of the preview screen:
You can also modify the design of your WordPress blog by adding or changing the contents of additional columns, using Widgets; see the chapter "Using Widgets" for information on this.
Altering header images for themes
With some themes you have the ability to change the header image which appears at the top of your blog.
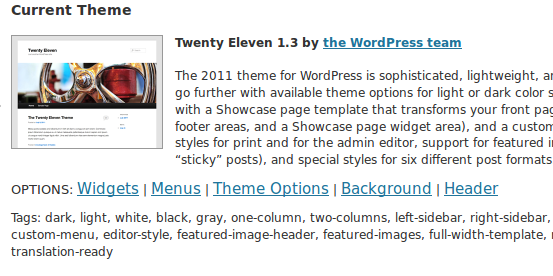
Click Header or Custom Header, depending on the theme you are using. This may offer you several options depending on the theme you are using. This example uses the Twenty Eleven theme. We are going to upload a different image to be at the top of our WordPress site.
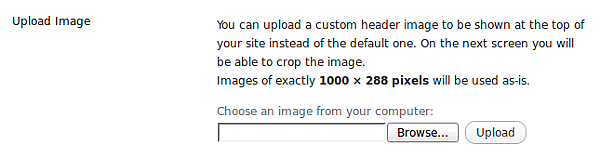
We are going to upload a new header image. If you have access to an image manipulation programme you can make your image be exactly the right size. For this theme, that size is shown as 1000 (wide) x 288 (high) pixels.
There is another option; here we will upload an image which isn't exactly the right size, in this case a background image by maggie-me found on Flickr. WordPress allows you to crop an uploaded header image:
Click Browse and Upload after you have located the image file on your computer.
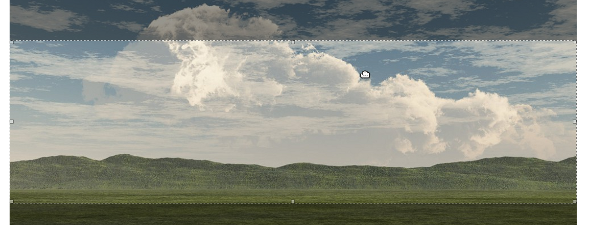
You can adjust the crop area using the mouse pointer to drag and drop the lighter area or by using the selection handles, Click Crop and Publish when you are happy with your selection.
You should see a message saying: "Header updated. Visit your site to see how it looks."
Adding Videos with Subtitles
It is important for your content, and especially videos, to be universally accessible. This chapter outlines some methods to achieve this.
Amara
You will need a self-hosted WordPress installation (as opposed to Wordpress.com hosting) in order to insert Universal Subtitles videos into your content.You will also need to be either an Administrator or Editor as you will need those permissions to add the embed code to your site.
Amara, created by the Participatory Culture Foundation1 , is a toolkit that makes it easy to add subtitles to any video on the web. Universal Subtitles uses only web standard technologies, specifically HTML5 and JavaScript, so it will be accessible in nearly every browser.
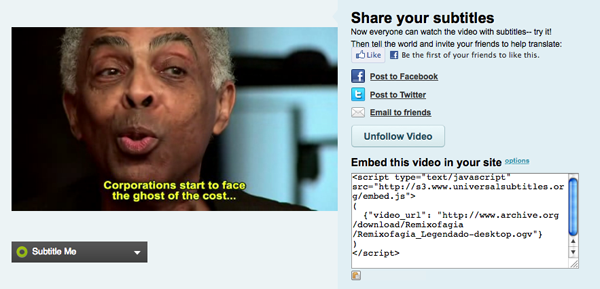
To subtitle a video for Amara, your video first needs to be online. You can upload it to a hosting site such as Youtube, Blip.tv, Dailymotion or Vimeo. Of if you have enough server space you can upload it as a file attachment to the Media part of your WordPress site. Universal Subtitles can work with Ogg, WebM, flv and mp4 video files.
Once the video is uploaded, visit: http://universalsubtitles.org/videos/create

At the Amara site, enter the location of the video and begin the process of transcribing. The interface is designed to simplify the transcription process by breaking it down into small tasks.
Once your video is uploaded and subtitled, it is easy to insert your video into any WordPress page or post2 .
- First, copy the JavaScript code from the video page at http://universalsubtitles.org.
- Next, create or edit a page or post from the Dashboard of your WordPress site.
- Once you are viewing the page or post edit screen, click the HTML tab.
- Paste the JavaScript code into the HTML edit area.
- Publish/update the page or post.
You will now have a subtitled video that is accessible to most, or all, of your visitors!
- http://pculture.org^
- You need a self-hosted WordPress installation in order to insert JavaScript code into a post or page.^
Useful WordPress Network Plugins
This chapter details some of the plugins that could be useful for users of a WordPress network to help create a strong community.
WordPress Sitewide Tags
One of the things that you can do to help create a community is to create a page where all the Tags of the posts of the network are displayed. This can be achieved with the plugin WordPress Sitewide Tags.
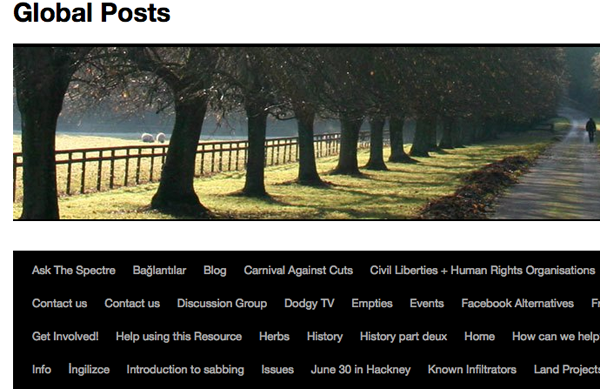
Install the plugin in the normal way and then go to Settings > Sitewide Tags.
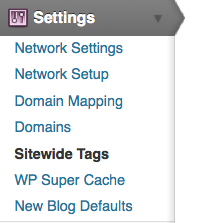
Fill out the settings below. The following are recommended, apart from the setting Include Pages, as this may give you a lot of About tags.
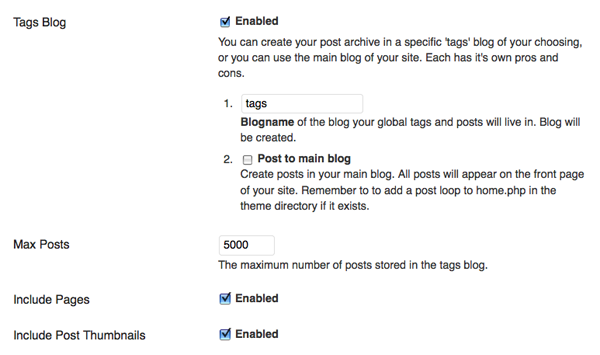
At the foot of this page in the Populate Posts section, tick All blogs and click Populate Posts. After a short time, you should see a tag cloud like the one above at the /tags page.
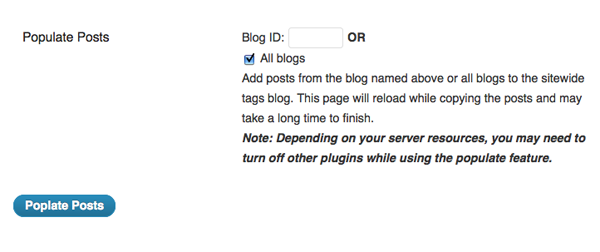
MU Network Domain Mapping
If one of the sites within your WordPress network has registered a domain name and wants to have their own URL for their site, it is possible to "map" that domain onto their site within the network.
The first step is to install a plugin called
WordPress MU Domain Mapping 1. Install the plugin in the normal way, then you will need to do a little tweaking to get it fully working. These instructions are based on the installation notes for the plugin.
Note: do not define COOKIE_DOMAIN in your wp-config.php as it conflicts with log-ins on your mapped domains.
Make sure the default Apache virtual host points at your WordPress MU site or WordPress 3.0 network so that it will handle unknown domains correctly. On some hosts you may be required to have a dedicated IP address. A quick check: in a web broswer, type in the IP address of your install. If you are using cPanel, use the Park a Domain menu to set the mapped domain to your main installation. If this doesn't make sense to you, then this may be something you have to ask your server admin or provider to do.
Install the plugin manually by downloading the zip file and unzipping it in your /wp-content/plugins/ directory, as explained elsewhere in the manual. Then activate and network enable the plugin.
Inside the folder wordpress-mu-domain-mapping there is a file called sunrise.php. Move the sunrise.php file into wp-content/. If there is a sunrise.php there already, you'll just have to merge them as best you can.
As a Super Admin for the network, you should change the settings for the plugin at the Settings > Domain Mapping page of the Network Admin Dashboard.
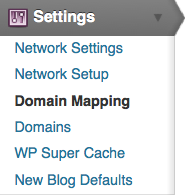
Enter the IP address of your server.
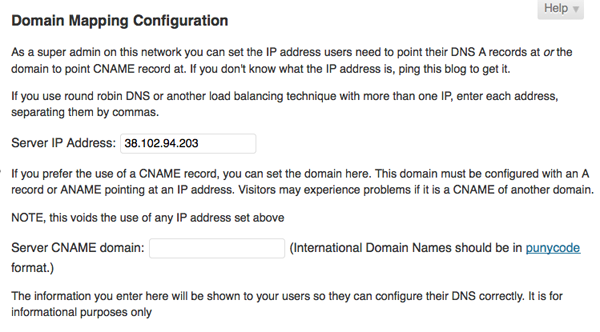
There are also some Domain configuration options which follow. More detailed instructions about these configuration can be found on the installation page of the plugin. 2 It is worth mentioning that the User domain mapping page affects whether the domain mapping is controlled by Super Admins or by Administrators of the individuals sites.
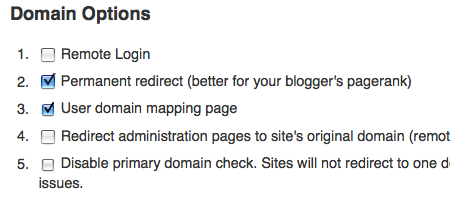
In the above example, domain mapping is controlled on the level of the User / Administrator of the individual site's Dashboard rather than only being controlled in the Network Admin Dashboard.
Settings for each Domain Mapping
When users want to set their own domain mappings, this is done by adding the domain in Tools > Domain Mapping in the Dashboard of the site you wish to map the domain to.
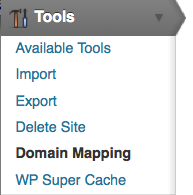
Enter the domain you want to point to the site. Put a tick in the box Primary domain for this blog, then click Add.
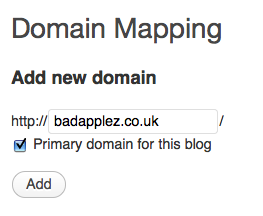
If you want the domain to also work with "www" in the URL, you must enter that into the Add new domain box as well.
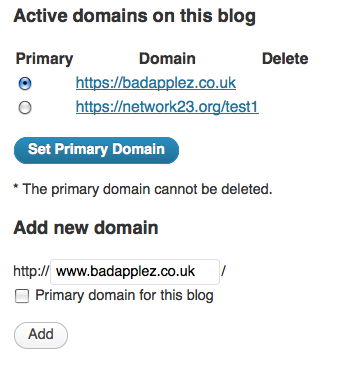
For full information on setting up domain mapping, see the home page of the domain mapping plugin.
- http://wordpress.org/extend/plugins/wordpress-mu-domain-mapping/^
- http://wordpress.org/extend/plugins/wordpress-mu-domain-mapping/installation/^
Adding Users and User Roles
In this chapter we will look at how you can add new users to your site and give different roles to those users.
User roles
User roles are a way of giving people different levels of access to your WordPress site. For example, it may be that you trust someone enough to contribute to the site, but not enough that they won't delete or alter other posts.
There are normally five user roles in WordPress. They are: Subscriber (not in wordpress.com), Administrator, Editor, Author and Contributor.
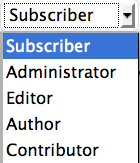
There is also an extra role called Super Admin which is needed when you have a Wordpress multi-user network.
- Subscribers can only manage their own profile (not in Wordpress.com blogs).
- Administrators have access to all the administration features.
- Editors can publish and manage posts and pages as well as manage other users' posts.
- Authors can publish and manage their own posts.
- Contributors are able to write and edit their own posts but can't publish them.
- Super Admins have access to the network administration features if there is a Wordpress network set up (see creating a community).
More Information: For more information on all of these roles and how to set default roles see the following page:
http://codex.wordpress.org/Roles_and_Capabilities
Getting started with Users
Navigate to the Users page by clicking the Users tab of the lefthand menu in the Dashboard.

Clicking on this link will expand the User menu. You will see the following options: All Users, Add New, Your Profile (or Personal Settings in Wordpress.com):
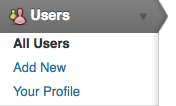
Your Profile allows you to change your public profile on the site by adding a graphical icon and personal details. Under Personal Settings you can change your password, set Twitter settings and other settings such as the colour of your admin screen.
Adding users to your WordPress site
The process of adding users is slightly different for your own installation of WordPress compared to using Wordpress.com (which is discussed later in this chapter) or if you are adding users to a WordPress multi-user network. There is a separate chapter on this in another part of this manual.
Click Users > Add New in the lefthand menu. Fill out the details of your new user, remembering to choose an appropriate role based on what they will do on the site.
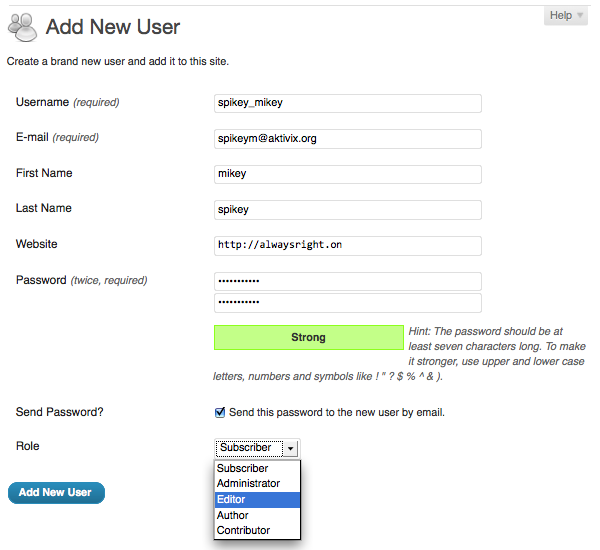
When you have completed the form click the Add New User button.
You should then return to the default users page where you will see the new user in the list of current users:

Adding users in WordPress.com
To add a user who already has a WordPress.com log-in
Click on All Users. On this screen you will see all of the users who currently are allowed to post to the blog. You should be able to see yourself with the role of administrator. This means you are able to add other users to the blog.
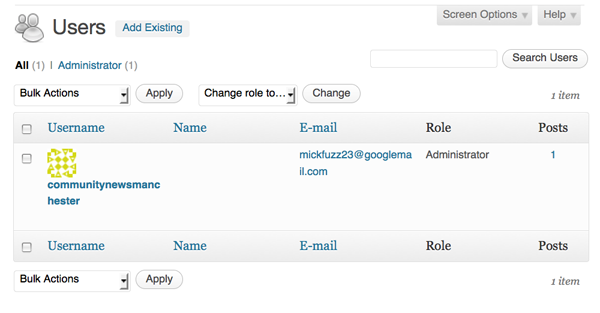
Underneath this part of the page is the section where you are able to add other users from the WordPress community.
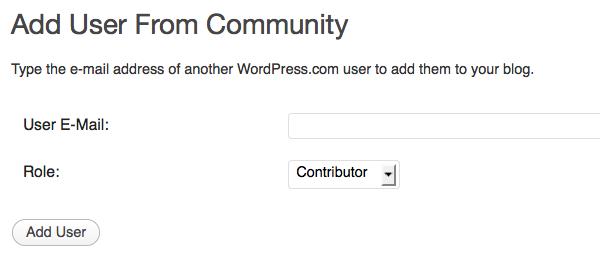
Interestingly, you have to know the email of the user that you want to add. Presumably this is to stop you randomly adding the username of people that you don't really know.
Enter the email address of the person that you want to add, and select the Role you want them to have on your blog, then click Add User.
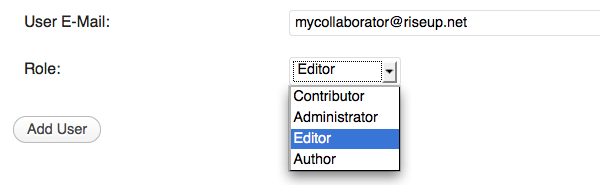
If all goes well you will get the following message:

However, if the person whose email you entered hasn't already signed up to WordPress.com then you will be shown this message when you click on Add User:
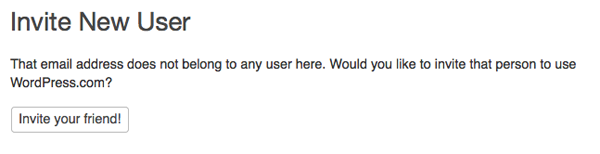
To add a user new to Wordpress.com
Go to Users > Invites:
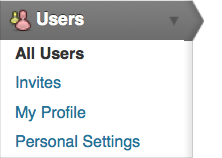
You can then fill out the form to invite the user to sign up to WordPress and be able to contribute to your blog. You should tick the box to add them as a contributor to your blog.
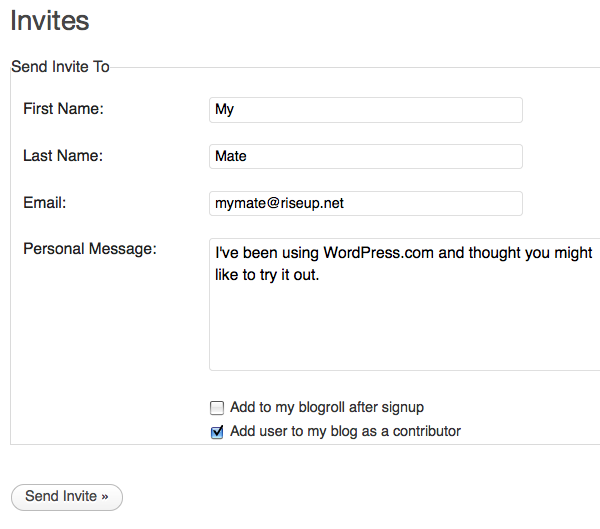
Now click Send Invite. You will get a confirmation message.

Using Categories and Tags
Categories and Tags are two ways to help visitors to your site find the content they want. They are very similar in the way they work. The main difference is that normally categories are set up in a planned and limited way, whereas tags can be added spontaneously and there is no need to limit the number of tags that can be used.
There are several advantages to using categories and tags. For example, when visitors first view your site they can easily see the subject matter of your posts and decide if your site is of general interest to them.
Readers can also navigate to pages which list only posts of a specific tag or category by clicking on the name of the category or tag. This is useful if you want to create menus for your site based on this kind of taxonomy; for more information about how to do this, see the chapter on Menus.
Examples of Categories and Tags
Categories and tags are often shown as widgets in the side column of a site:

Tags are often shown in a "cloud" where the size of the text indicates the popularity of each tag.
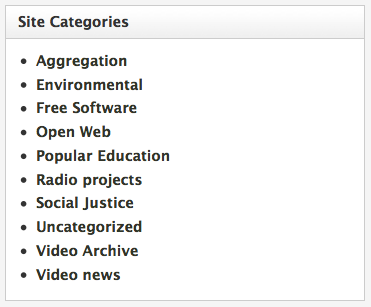
Categories are normally shown as a simple list displayed in alphabetical order.
Clicking on any of the tags or categories will normally take you to a page which has a summary list of the posts. The URL (web address) of the page will include the name of your category.
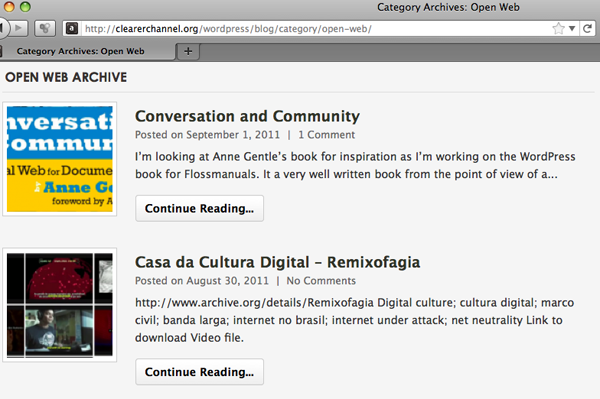
Adding tags to posts and pages
To add tags to posts and pages, you simply enter them in the tags box in the righthand column of the Add Post page.
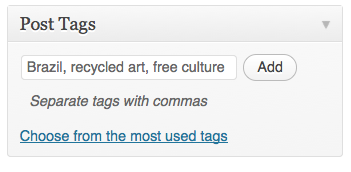
When you click Add, the tag(s) will appear beneath the text box. You can delete them by clicking on on the X, or add more.
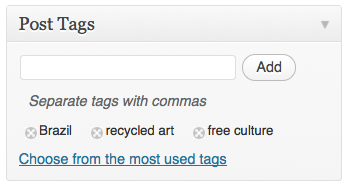
To display tags on your site, add the Tag Cloud widget to your sidebar. There is more help on adding widgets in the chapter Using Widgets.
Setting and adding categories
When you first create your site, you will normally have one catch-all category set up for you called 'Uncategorized'. This will be visible on the page in your Dashboard where you add posts.
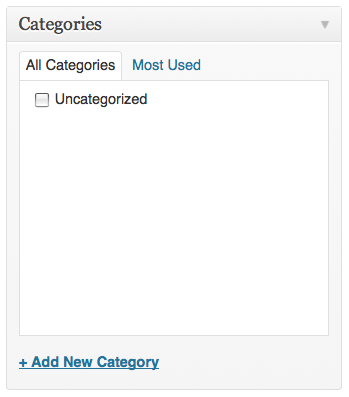
Leaving this unchanged can make your site look very sad. So it is a good idea to add some new categories. Click Add New Category to do this.

Enter the name of your new category and then click on Add New Category to add it. Repeat this until you have included the categories that you think you will need for your site. You can always add more later if necessary.
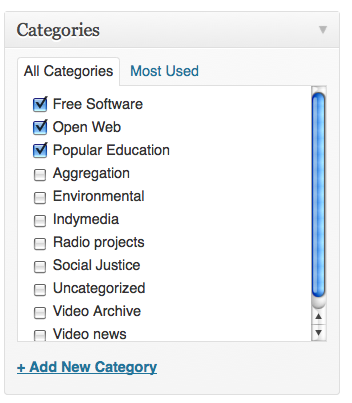
Using Menus
WordPress allows you to create and change menu lists. Menus are something you might need on a website, especially a WordPress website that isn't just a blog. Menus help you navigate to other pages in your website, and also to links outside your website.
You might choose a theme that already has a menu as part of the layout, in which case you can easily add or remove items from the menu. If you are using or creating a 'blank' theme, you can set up your own menu, name it, and specify it in the PHP code in one of the pages in the WordPress theme.
Simple Menus
Let's look at the easy way of creating and changing a navigation menu first. The current default WordPress theme, Twenty Eleven, has a default menu that is based on the structure and order of pages (to add pages click Add New under the Pages heading in the lefthand menu of the Dashboard).
All of your pages should appear as menu items; see below for an example. Here there are five pages listed on the Pages section the Dashboard.
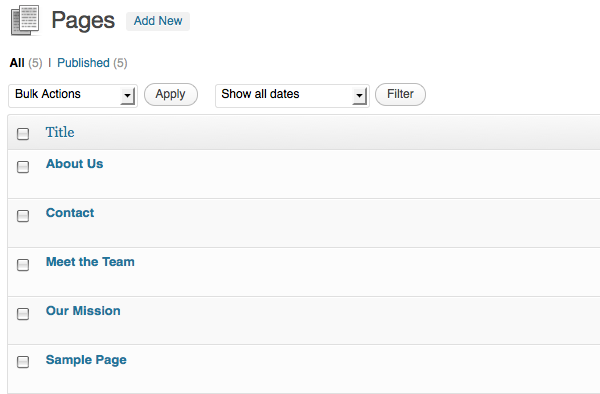
When we navigate to the front page of the site we can see that those pages are listed in the top menu (as mentioned, this is the default behaviour):

Changing menu order
It's possible to change the order of the menu items. As you can see from the example above, by default they are listed in alphabetical order.
Choose Quick Edit to only change the page order:
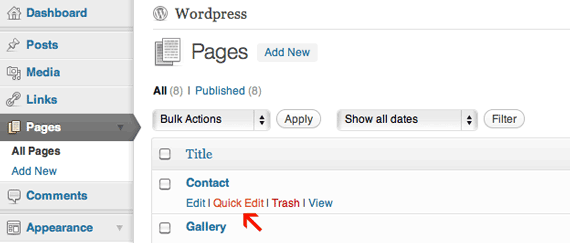
Set the order of one of the pages to be 1 and click Update.
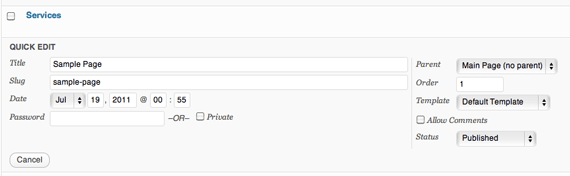
Set another page to an order of 2 and click Update again.

Reloading the front page of the site will show the changes to the order of the menu:

Creating custom menus
This section is adapted from a page on Wordpress.com support.1
If you have a theme that supports the Custom Menus feature, you can customise your navigation menu. This allows you to:
- change the order of pages
- nest pages to create sub-menus
- display posts on multiple pages by creating category pages
- add posts, tag pages, and custom links to your navigation menu.
From the Dashboard, click on the left-hand menu item called Menus, under Appearance:
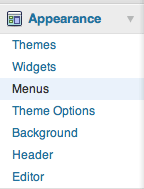
To create a custom navigation menu, type in a name for it (only you will see this) and click Create Menu:

Adding pages to your menu is as simple as checking the proper boxes for the pages you want and then clicking Add to Menu.
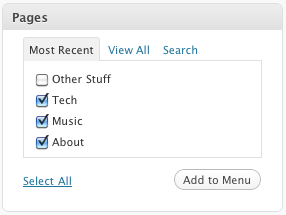
All posts will appear on your main posts page, but you can also create category pages that only display posts that you’ve designated with a specific category.
Simply check the box of the categories for which you want to create a page, and click Add to Menu.

Be sure to click Save Menu each time you make changes to your custom menu.
Adding tag pages and posts to your menu
You can also add your tag pages and posts to your custom menu. To display these options in the custom menu editor, click the Screen Options dropdown menu at the top right of your screen:

Check the boxes for posts and/or post tags, and those modules will appear in the custom menu editor:
Adding custom links
Want a menu tab to link directly to another website? No problem! Type in the URL, the label name, and then Add to Menu.

You can also change the label and the hover-over text of menu items independently from the page name itself. To edit a page or category title, click the down arrow to the right of the item.

Once expanded, enter the new label name and any desired hover-over text. The underlying page will always show its name in the Original section of the menu item:

Your menu item will now look something like this:

Changing the order of menu items and creating sub-menus
At any time, you can change the order and placement of menu items. Drag and drop the items up and down to change the order of menu items. Drag and drop the items left and right (as shown below) to create sub-menu items.
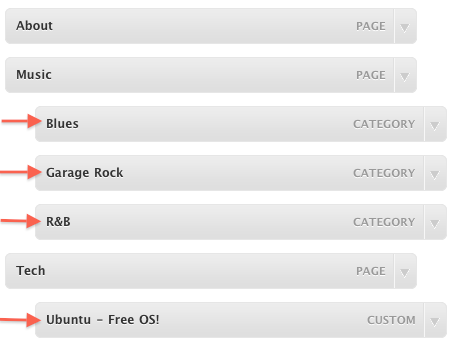
The final product from the customized menu:
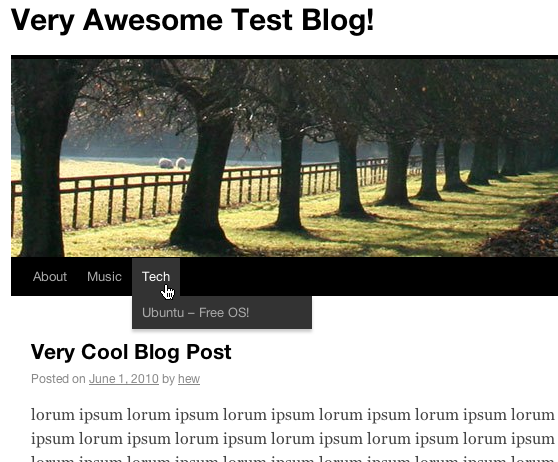
Adding static top-level tabs
Here’s a nifty way to add static top-level tabs that you can use to organize your content. These tabs are basically place holders – they don’t link to any content, but are there to add structure to your menu items.
Check out the screenshot below: the top-level tab Media doesn’t actually link to anything. You can click it, but nothing will happen. It’s solely there to organize links the various media-related menu items.
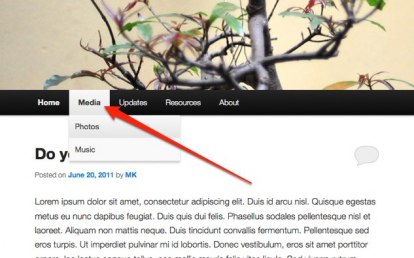
Here’s how you can add static top-level tabs:
- Go to Appearance > Menus
- Add a Custom Link and set the URL as #. Using # will prevent the page from refreshing when you select the tab.
- Label your link and hit the Add to Menu button.
- Organise your menu items as you would normally, click Save Menu, and you’re done!

In the Theme Locations module, under Primary Navigation, select the title of the custom menu you want to activate and click Save.

Most themes have one menu. Some themes, such as the one in the screenshot below, support more than one menu. In both cases, you can create several different menu layouts and independently set the active menu.
If you’ve created more than one custom menu, be sure to activate the right one by selecting it from the dropdown menu and clicking Save.

To edit your various menus or create new ones, click the relevant tab:

- http://en.support.wordpress.com/menus/#creating-a-custom-menu^
Using Widgets
WordPress allows you to modify the design and look of your page in several ways; the most obvious way to affect your design is to change the theme you are using. Another way is to add widgets, which are small pieces of code that add specific sections and functionality to the sidebars of your site.
Note that not all themes are "widget-aware"; if your theme does not define at least one sidebar you will not be able to use widgets on your site.
Widgets
A widget could be a bit of text, a calendar, links to other sites or other content that you can include in your blog that aren't blog posts or pages themselves.
By default, WordPress provides some widgets for you. If you haven't changed your theme you might see the following things in your second column:

The sections headed Recent Posts, Recent Comments, Archives, Categories and Meta are often default widgets.
You can use widgets as a way to add content boxes with additional information about your site, such as is shown in the example below:
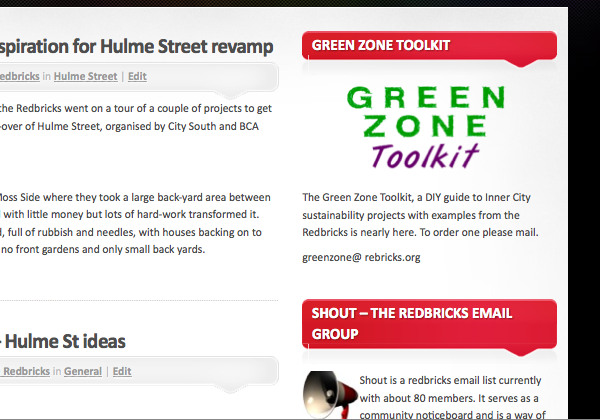
To add widgets to your WordPress blog you must be using a theme which has at least one side column, as this is where widgets are placed. This tutorial outlines how to use widgets on a theme with two columns. If you chose a theme with three columns then the situation will be a bit different but the same principles apply.
Adding a simple Widget
From your Dashboard, navigate to Appearance > Widgets.
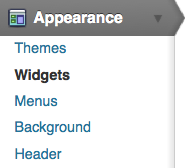
You will see a list of Available Widgets on the left of the page, and on the right there is a column for different widget areas:

In the example above on the righthand side we see the widget areas for the Twenty Ten theme. To add more widgets, drag and drop the ones you want from the main area ("Available Widgets") to relevant widget area on the right. If you are not sure where you want the widget to appear, choose the Primary Widget Area; you can always change it later.
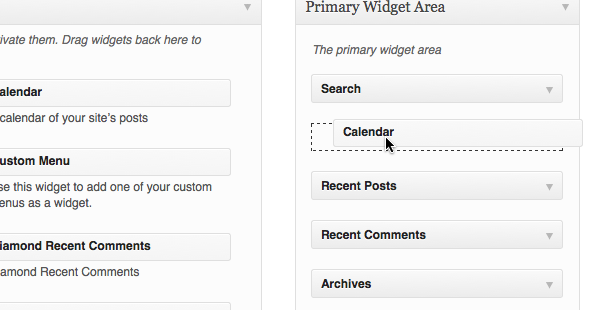
As you drag the widget you have chosen into the relevant area, a dark dotted space will appear and move as you move your cursor. When you are happy with where this is, let go of your mouse to drop the widget there.
When the widget appears in the list, the changes to your layout have been made. You don't need to save anything. However, if you enter settings in the widget itself, you may need to save those.
Some useful widgets
One of the more simple widgets you can add is the Pages widget. This will display a list of pages that you have created for your blog in the second column.
Links are a vital widget to add if you have been using the default WordPress system to add links (see the chapter on Links).
If you use Categories for your posts then you should make sure that that widget gets included to help your visitors find the content you want.
The Flickr and Twitter plugins are useful if you use those services. A sample setting for Twitter is shown below.
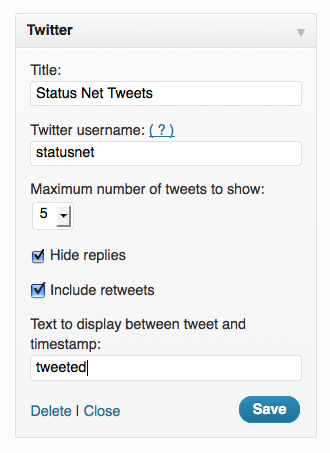
Click on Save and then view the front page of your site to see the changes. In this example you should see the last 5 tweets of the Twitter user you have entered.
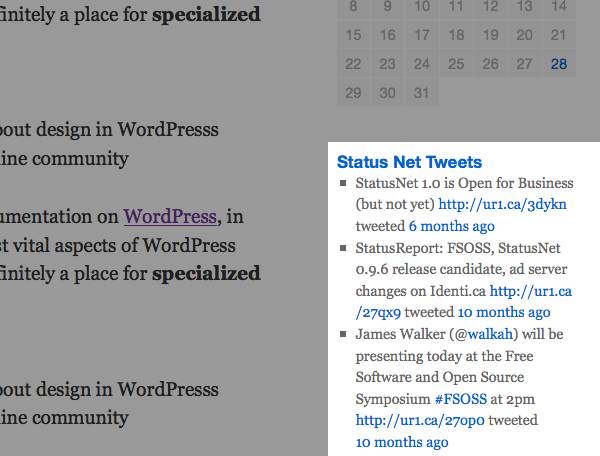
There is a really good resources page on Wordpress.com which outlines how to use widgets and lists the default widgets and what they do.1
Create a custom text and image widget
A more advanced use of a widget is to include text and images. This can be done in many flexible ways to really customise your site. An example is below.
To create a widget with this image which links to your RSS feed and some text underneath to describe what it is, add a text widget. The text widget allows you to include text, images, links and HTML code in your sidebar.
If you already know how to write HTML this next part will be straightforward; in case you don't know HTML, we've provided instructions to create a simple text widget using HTML.
Navigate to the Widgets page and find the Text Widget in the main area of Available Widgets.
Drag and drop this widget into one of the target areas. As you do this, it will expand to allow you to enter text. If for some reason this doesn't happen, you can click on the arrow in the bar to the right of Text.
Now paste some HTML code linking to an image into the text area and add a suitable title.
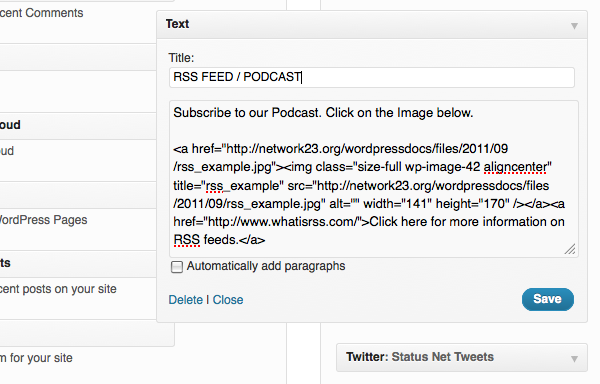
Click Save. View the front page of your site to see if the results are correct. You should see something like the screenshot below:
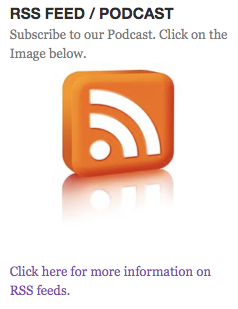
To create some suitable HTML
If you are not used to writing HTML then follow these steps.
Find an image which represents your RSS feed and create a new post in your WordPress site which includes any text, images and links you want to include in your widget. Remember that, depending on your theme, your image should be limited in width to around 200 pixels.
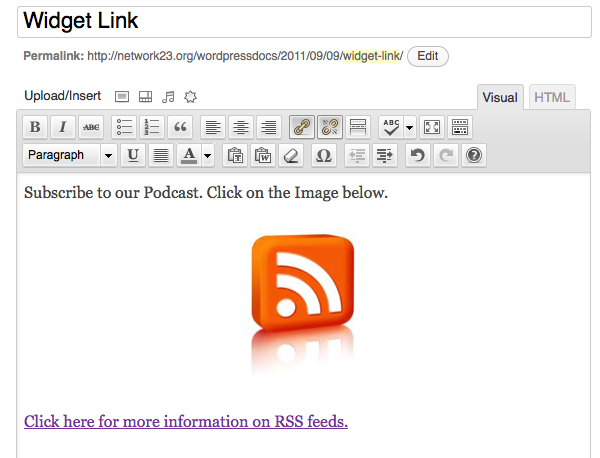
Now click on the HTML tab of the editor (at the top righthand corner). This will show you the HTML code of this post. If you ever need to create some HTML for other reasons then this is a very easy way of doing it.
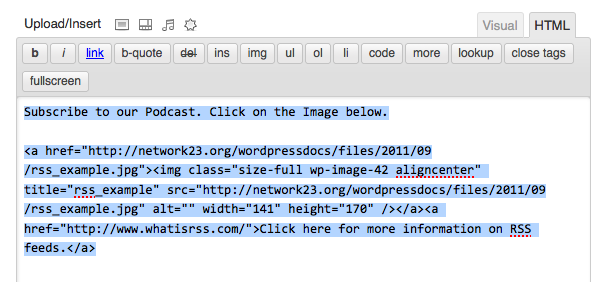
Copy the code you see there to the memory of your computer (by selecting all of the text and then using right-click+C, or apple+C). You may also want to save this post as a draft to come back to later.
- http://en.support.wordpress.com/widgets/^
Using Widgets
WordPress allows you to modify the design and look of your page in several ways; the most obvious way to affect your design is to change the theme you are using. Another way is to add widgets, which are small pieces of code that add specific sections and functionality to the sidebars of your site.
Widgets
A widget could be a bit of text, a calendar, links to other sites or other content that you can include in your blog that aren't blog posts or pages themselves.
By default WordPress provides some widgets for you. If you haven't changed your theme you might see the following things in your second column:
The sections headed Recent Posts, Recent Comments, Archives, Categories and Meta are all default widgets.
If you install a different theme and add your own custom text and images then you can use widgets as a way to add content boxes with additional information about your site, such as is shown in the example below:
To add widgets to your WordPress blog you must be using a theme which has at least one side column, as this is where widgets live. This tutorial outlines how to use widgets on a theme with two columns. If you chose a theme with three columns then things get a bit more tricky.
Adding a simple Widget
From your Dashboard, navigate to Appearance > Widgets.
You will see a list of Available Widgets on the left of the page, and on the right there is a column for different widget areas:
In the example above we see the widget areas for the Twenty Ten theme. To add other widgets you need to drag and drop different widgets from the main area to relevant widget area on the right. If you are not sure then choose the Primary Widget Area.
As you drag the widget you have chosen over the relevant area, a dark dotted space will appear and move as you move your cursor. When you are happy with where this appears, let go of your mouse to drop the widget there.
When the widget appears in the list, the changes to your layout have been made. If you enter settings in the widget you may need to save those, but there isn't a Save Changes button for the widgets page as a whole. View the front end of the site to see if you are happy with the changes you have made.
How many areas and what they are called depends on your theme. In this case we are using a theme with two columns. If you use a three column theme you might see a different arrangement.
Some useful widgets
One of the more simple widgets you can add is the Pages widget. This will display a list of pages that you have created for your blog in the second column.
Links are a vital widget to add if you have been using the default WordPress system to add links (see the chapter on Links).
If you use Categories for your posts then you should make sure that that widget gets included to help your visitors find the content you want.
The Flickr and Twitter plugins are useful if you use those services. A sample setting for Twitter is shown below.
Click on Save and then view the front page of your site to see the changes. In this example you should see the last 5 tweets of Twitter user statusnet.
There is a really good resources page on Wordpress.com which outlines how to use widgets and lists the default widgets and what they do.1
Create a custom text and image widget
A more advanced use of a widget could be to include text and images. This can be used in many flexible ways to really customise your site. An example is below.
So we want to create a widget with this image which links to your RSS feed and some text underneath to describe what it is. To do this you would add a text widget. The text widget is a way to add text and HTML code to your sidebar, this allows you to include links and images.
If you how to write HTML this will make sense but if you don't know how to write code then read on as there are instructions to create some HTML via create a draft post.
Navigate to the Widgets page and find the Text Widget in the main area of Available Widgets.
Drag and drop this widget into one of the target areas. As you do this, it should expand to allow you to enter text. If for some reason this doesn't happen, you can click on the arrow in the bar to the right of Text.
Now paste some HTML code linking to an image into the large box and add a suitable title.
Click Save. View the front page of your site to see if the results are correct. You should see something like the screenshot below:
To create some suitable HTML
If you are not used to writing HTML then follow these steps. Find an image which represents your RSS feed and create a post in your WordPress site which includes any text, images and links you want to include in your widget. Remember that, depending on your theme, your image should be limited in width to around 200 pixels.
Now click on the HTML tab of the editor. You will see the HTML code of this post. If you ever need to create some HTML for other reasons then this is a very easy way of doing it.
Copy the code you see there to the memory of your computer (by selecting all of the text and then using right-click + C). You may also want to save this post as a draft to come back to later.
- http://en.support.wordpress.com/widgets/^
WordPress and Communities
WordPress is a good entry point into the many possible online communities. It is easy to use and it comes from a history of blogging. Bloggers were pioneers in increasing the interaction between writers on the internet. In this chapter we look at some of the things that online communities need to thrive and how you can use WordPress to achieve them.

Low barriers to entry
Members of a community need to be comfortable with the tools they are using. They also need to be able to share knowledge about how these tools work. WordPress offers this in a number of different ways.
Free WordPress sites are great for testing and evaluation
Unlike some other Content Management Systems (CMS) which require you to set them up on a server, you can sign up for a WordPress blog in many places for free - wordpress.com being the most popular - and it only takes a couple of minutes. This allows you to try WordPress out to see if it works for you. There is an easy to use export and import functionality for content, so you can always migrate to your own site later if you wish.
Intuitive and standard user interface
WordPress has an accessible user interface; the forms and tips are fairly intuitive and it certainly compares very favorably with other similar open source tools. There are more 'advanced' community website systems out there which offer more flexibility, however they bring the disadvantage that they are configured in different ways. Having a standard makes it easier to write and provide documentation for WordPress users.
Tools to build community and interaction
WordPress draws on the traditions of bloggers and indeed the very beginnings of the web. By default, WordPress includes comments, pingbacks, blog lists, and links to other related sites. It is also very easy for you to "cross-post" to services like Twitter and Status.net. This means that a post you write can be automatically posted to other communities.
Staying independent and in control
While centralised network services have become dominant, there have always been alternatives. WordPress offers many of the advantages of social media, without the disadvantages of the 'walled-gardens' of centralised services.
Although WordPress in built on free software, the installation of it at WordPress.com can be seen as a centralized network service. The "Open Web" is built on a decentralized approach to hosting and as such has inbuilt resilience to censorship. Reliance on huge network services as the arbiters of free speech is a very weak position. Such services come under daily pressures from authorities for disclosure. As such, they often opt for an easy life by handing over personal details and suspending accounts, websites and blogs with little in the way of an appeal process.
By setting up your own WordPress installation and publishing your content there, you have a big advantage over using a hosted service: you remove the risk involved when relying on a network service that is out of your hands. A community made up of people sharing their content from independent nodes is extremely robust.
Why create a WordPress Network
A WordPress Network is a way of setting up your WordPress installation so that many different blogs can be hosted on it. The website at wordpress.com is one example. Rather than setting up many different sites and maintaining them separately, creating a WordPress Network allows the creation of hundreds of sites with only one set of code to keep up to date.
With only limited webhosting skills, you can offer independently hosted blogs to members of your community. Let's look at how and why you might want to set up network and explore some tools and tactics to help foster communities.

Whether your community is sharing technical discussions, community matters, or political opinions, every community benefits from independence and robustness. A community that is in control of their means of content production is a good thing.
Even if you are managing a small network of, for example, 20 church websites, if you choose to run it as a WordPress network instead of using WordPress.com then you are helping the resilience of the Open Web. If you run this network well, its users will be able to interact without using more centralized services like Facebook.
Part of this chapter is adapted from a chapter in a book about the Open Web, which goes into more depth on these issues: http://en.flossmanuals.net/an-open-web/
Technical considerations of running a network
WordPress is free software: you can download it and install it on your own server. As such, you are not bound by the take-down and privacy policies of WordPress.com. If you have website creation skills, it is relatively easy to install a WordPress network. This allows you to host many blogs, install extra functionality for them and makes it easy to keep the software updated. WordPress blogs are a great entry point into the social media maze as they have RSS feeds, publicly vetted APIs1 and useful plugins to allow cross posting. With the BuddyPress functionality you can also create a very usable social network.
You can anonymize blogs and services by not logging IP addresses. The process of not logging IP addresses on a server using Apache is relatively simple - you can use the removeip Apache module. Rather than trying to remove all logs of IP addresses, it replaces them with an arbitrary IP number.
Avoid the cloud
Hosting your blogs or networks in the "cloud" may offer technical advantages, but it may come at the cost of reducing your control over your resources.2 Not all cloud computing is bad; many independent hosting companies are taking advantage of the open source Open Stack approach to cloud computing.3
If possible, choose a smaller provider who can offer more support and options. If they receive a take-down order, they may be able to discuss this with you to help develop a joint approach to the problem and may help you fight your corner.
Be responsible
Don't over-reach yourself. If you are an individual or a small group setting up a network to help people escape from services like Facebook, try out a limited service first with a small number of essential plugins and well-tested themes. You can always add more later, when users request them.
Work with others as much as possible. If you alone set up a network of hundreds of sites, even if you have the best will in the world, it is a very weak position. You may lose interest, get a full time job, go a bit mad or have new personal commitments that mean you are unable to maintain the network. If you are part of a team then others can share the workload as well as bring their specific skills to the project.
Create your own Acceptable Usage Policy
Take time as a group to make sure you are agreed on what/who you are prepared to host or not. Then make this agreement public as your AUP (Acceptable Usage Policy). You may want to support free speech but that does not mean that you have to support everyone. The internet is a big place and they will find a home somewhere else.
Create a clear (and perhaps automated) process for applying for a website or blog where people have to agree to these terms. You should also develop a clear and fair way of taking down websites that you no longer feel you can support, and suggest alternative hosting options for users you have to disconnect
Create good help resources
You should to try to ensure that when your users have signed up for their site that they get a welcome message which directs them towards a place where they can get help on using the site. You can create a help page on your network which sign-posts people to existing help, and add other help that is specific to the set up of your network. This can point people towards forums and email lists where their questions may have already been answered.
There is a lot of good help that you can link to that is already out there and much that is written in an open license which means that you can adapt it for your site. There are also video tutorials that help people who best learn in this way. Seek them out and put them on the support pages of your network.
For an example of a help page for a network you can see one here: https://network23.org/help-and-faq
Encourage interaction between network sites
One of things about social networking that makes it hard to beat is the immediate response from a community that users can quickly build up. In Facebook they work hard to make it easy to make links with people, share information with them and comment on each others' content. This is something that is not as intuitive in a WordPress network, but there are things that can be done.
BuddyPress is a plugin which is specifically set up to try to achieve this aim; it alters the front page of your network site to show recently posted content and a list of users. You can also enable the use of site-wide tags which create pages listing content tagged with the same term across the whole network of users.4 See later chapters on how to set up and use BuddyPress and site-wide tags.
- API stands for "Application Programming Interface"; it is used by developers when they are writing code to extend an application.^
- http://en.flossmanuals.net/an-open-web/introduction-excisions/^
- http://openstack.org/^
- https://network23.org/tags/tag/cuts/^
WordPress network admin
This chapter looks at some of the things you should know about admin for WordPress networks. The way that networks work is a little bit different than single site installs.
Creating a Site
To create a site you should be logged in to your WordPress network as a user with the Super Admin role. When logged in, navigate to the Network Dashboard by clicking My Sites > Network Admin > Dashboard on your top navigation bar.
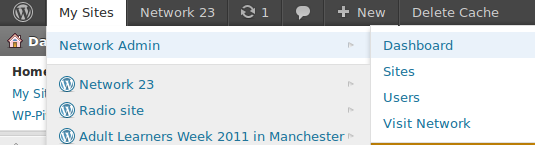
It's important to recognise the difference between the Dashboards of your blogs and the Dashboard of the WordPress Network - otherwise you may end up doing things to the whole network that you only wanted to apply to your own blog.
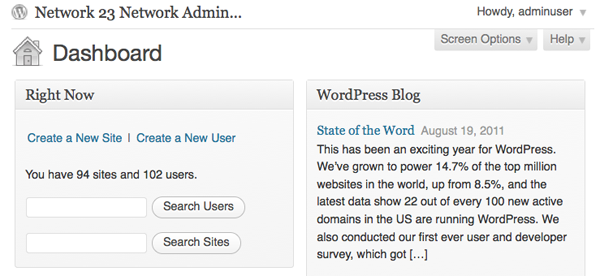
The Network Admin page has a section at the top left of the page where you can:
- Create a New Site
- Create a New User
- Search Users
- Search Sites
It also lets you know how many sites and users you currently have using the system.
To add a new site, click Create a New Site in this panel or click Add New under the Sites Menu on the left of the screen.
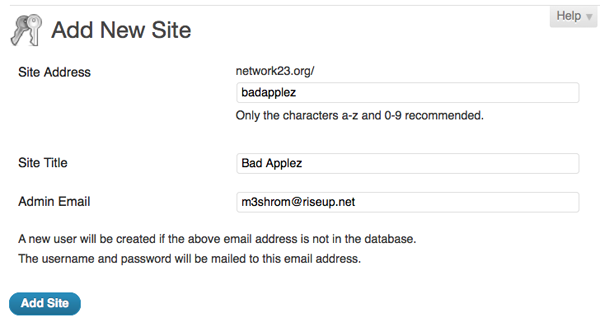
User Access
Creating a WordPress network creates the need for a new user role, Super Admin. A Super Admin can create new sites and make changes to the configuration that affect the whole network. Super Admins can access the Network Admin section, which is a dashboard to control the whole network.
By default, all users who are added to your network will have subscriber access to all sites on your network. To allocate a different default role for users on individual sites, you must use a plugin, such as Multisite User Management.
The capabilities of the site administrator role are also reduced in a WordPress Network. Site admins cannot install new themes or plugins and cannot edit the profiles of users on their site. Only the Network Admin (aka Super Admin) has the ability to perform these tasks in a WordPress network.
Installing Themes and Plugins
Installing themes and plugins to a WordPress network is a similar process to installing them on a WordPress single site. You need to be in the Network Admin part of the site as shown above.
When you have installed the plugin, you then need to perform an additional step which is to Network Enable the new theme or plugin. To do this, navigate to the Themes or Plugins page and search for the plugins you have just installed, then click Network Enable.