Working with Regions
Sections of audio are known as Regions in Ardour. To compose the short rhythmic passage we've been working on, we will need to know how to Select, Move, Split and Trim these Regions, as well as how to Fade In or Fade Out their volume and create Crossfades between them. Some of these options may need to happen at specific Edit Points in the composition, or according to the musical Meter we can define with the Timeline and the Grid as well.
Selecting Regions
The Select/Move Objects (shortcut O) is located just below the Transport Menu in the Editor Window. You will use this tool a lot in your Ardour work.

When it is active, your mouse pointer will look like this:
![]()
Click on the Waveform of the region to select it. You can add individual Regions to an existing selection using Control + Click (Command + Click on OS X). Both the Region itself and the Track containing it will turn blue when you select a Region. You can select sequential regions on one track all at once by holding down the Shift key while selecting the first and the last Regions of the sequence.
When you select a Region, make sure to click on the Waveform section of its rectangle. The lower stripe with the Region name is used for a different action (see Trimming Regions below).
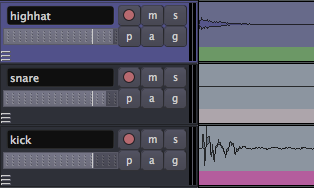
You can also drag a selection box over multiple Regions to select them all.
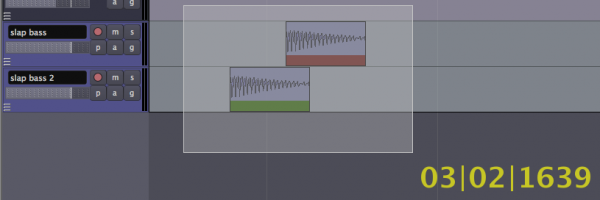
Moving Regions
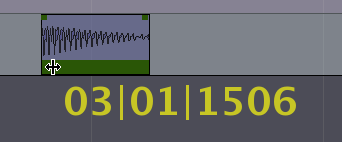
While moving a Region, a Timecode will appear on the screen in yellow numbers. This Timecode is the Region's starting point on the Timeline. You can move Regions horizontally (sideways) to a different point in time on the same Track, or you can move the selected Region vertically (up or down) to a different Track.
When a set of one or more Regions is selected, you can move the whole set by dragging with the mouse.
Note: make sure to select the Region in its Waveform section, because selecting the bottom title bar area is used for a different action (see Trimming Regions below).
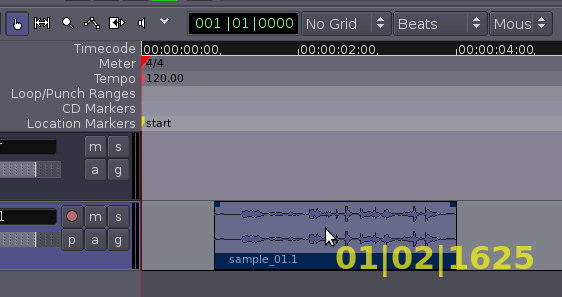
Tip: if you press and hold the Alt key while dragging a Region between Tracks, the Region will be copied to the new Track instead of moved.
Duplicating Regions
Use the Select/Move Objects tool to select a set of Regions, and use the Duplicate function to make a copy of the set (menu Regions > Duplicate Region, shortcut D). The duplicates will appear immediately after (and on the same track as) the originals.
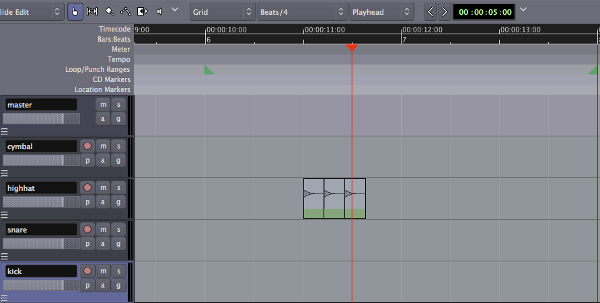
In the following screenshot, a sound has been duplicated twice, creating a simple loop.
Using Edit Points
Another way to copy Regions is by using the standard commands Copy (Control + C or Command + C on a Mac) and Paste (Control + V or Command + V). The exact location where the copied Region will be pasted is determined by the Edit Point drop-down menu.

If Mouse is selected as the Edit Point, the copied Region will be pasted at the current position of the mouse.
If Playhead is selected as the Edit Point, the copied Region will be pasted at red Playhead line on the same Track where the original Region is.
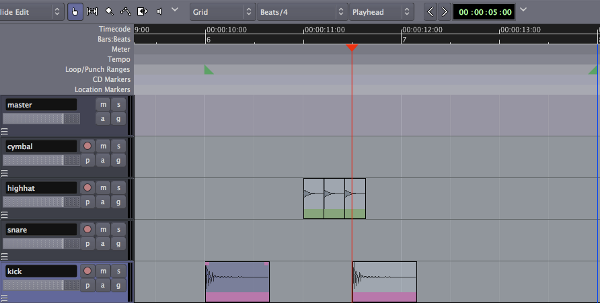
Finally, if Marker is selected as the Edit Point, then the copied Region will be pasted immediately after the currently selected Location Marker.
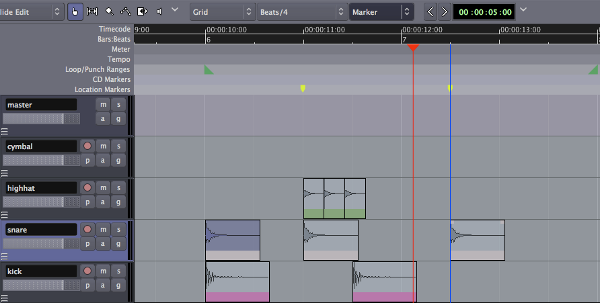
Markers
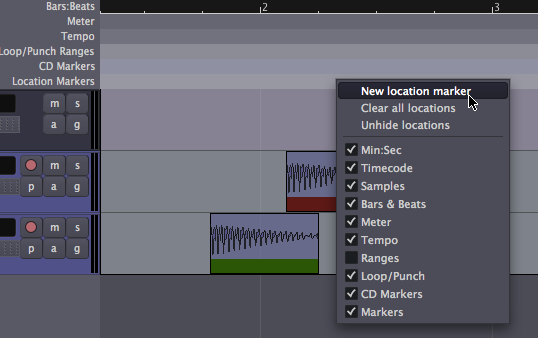
Markers can be added to the Timeline by right-clicking on the Location Markers strip and selecting Add New Location Marker. They can also be selected with the mouse and moved to new positions.
Splitting Regions
To Split a Region simply means to divide a single Region into two independent Regions. This point at which a Region will be split depends on the currently selected Edit Point. If Mouse is selected as your current Edit Point, select a Region and place the cursor at the point you would like to Split. Click on Edit > Split Region (shortcut S).

After being split, the original single Region becomes two independent Regions, with a new name for each:
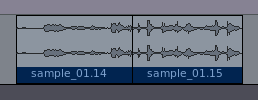
The two new Regions are now entirely independent. You can move and edit them separately.

Regions can also be split by using the Playhead or a Marker as the Edit Point.
Trimming Regions
If you move the cursor to the bottom strip of the Region, where its name appears, you will see that the pointer becomes a double arrow. Click and drag inwards from either end of the Region, and the Region will be shortened accordingly. This is called Trimming the Region. Regions can be trimmed from the start of the Region (drag from left to right at the edge) or from the end (drag from right to left).
This action is non-destructive: no audio is actually being deleted. It is as if you were just "hiding" those portions of the Region that you don't want or don't need anymore. Later on, you can "un-trim" the Region (i.e., extend it back to its original full size), even if it has been moved or copied to a new Track. A trimmed Region will receive a name derived from the original name of its parent Region, and you will see this reflected in your Region List. For example, in the images above, a single original region named sample_01 has its trimmed versions named as sample_01.1, sample_01.2, (...) sample_01.15, and so forth.
Removing a Region
A Region can be removed from a Track in four different ways:
- Select the Region and use the Delete key (not the Backspace key) to remove it.
- Select the Region and use the fn (Function) + Backspace key to remove it.
- Select the Region and use the Control + X key (or Apple + X key) to Cut it (for later Pasting).
- Select the Region and use the Edit > Cut option on the main menu to Cut it (for later Pasting).
Again, because Ardour is non-destructive, the Regions are not removed from the Session and can be accessed from the Regions tab on the far right side of the Editor Window.
Creating Fades in Regions
A Fade is a change in the volume of a Region, either as the Region starts or as it ends. A Fade at the start of the Region is a Fade In, and at the end of a Region it is a Fade Out. Each Region has two small handles along the top, which can be dragged inwards from either edge to create a Fade In or Fade Out.

By right-clicking on one of the Fade handles, the speed of the Fade can be adjusted from Slowest to Fastest.

Crossfading Between Two Regions
When one Region Fades Out while another Fades In, this is called a Crossfade. If the two Regions are in different Tracks, you can use the method described above with the Fade handles. However, if both Regions are in the same Track, then Ardour will automatically create a Crossfade when one Region is moved over another one.

The speed of the Crossfade can be edited by right-clicking on Crossfade and selecting Crossfade > Edit.
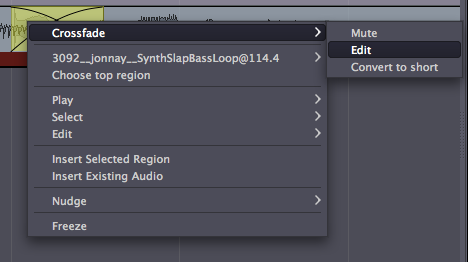
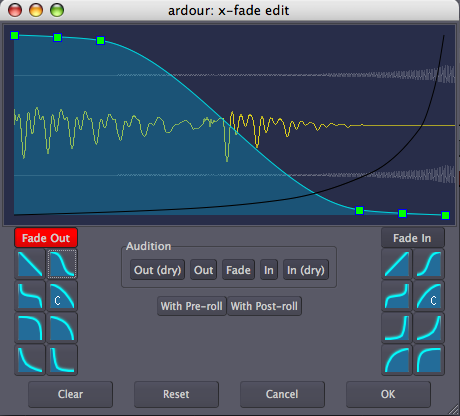
This will bring up the X-Fade Edit menu, where the curves representing the change in volume of each Region in the Crossfade can be selected from a range of options, or redrawn by using edit handles.
Using Grid Settings
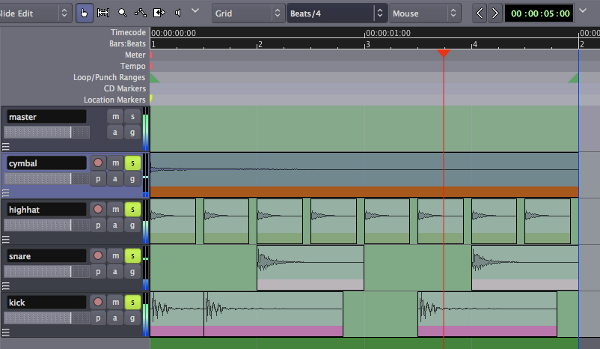
Experiment with the Grid setting, as discussed in the Setting Up the Timeline chapter, to give different kinds of Quantization—in other words, to constrain the boundaries of each Region to certain grid points. Here, the Grid has been activated and set to Beats/4, to quantize the Regions to quarter notes within each bar. You may wish to Trim the endpoints of some of the samples, as discussed above, to fit within the metric structure you have set up (for example, the first kick in the screen below has been trimmed so that it does not overlap with the second kick).
Continuing
In the next chapter, we will explore Further Region Operations.


