
VPN on Ubuntu
If you use Ubuntu as your operating system, you can connect to a VPN by using the built-in NetworkManager. This application is able to set up networks with OpenVPN and PPTP. Unfortunately at the time of writing a L2TP interface is not available in Ubuntu. (It can be done manually, but it goes beyond the scope of this document).
The following example will explain how to connect with a PPTP-server and an OpenVPN-server.
This document is divided in three parts. The first part covers the general installation of required elements and is necessary for both types of VPN-tunnels. The second and third part describe the configuration for PPTP and OpenVPN parts.
Under all situations we assume you already have a VPN account as described earlier in this section.
1. Preparing Network Manager for VPN networks
For Ubuntu there is an excellent network utility: Network Manager. This is the same utility you use to set up your Wireless (or wired) network and is normally in the upper right corner of your screen (next to the clock). This tools is also capable of managing your VPNs, but before it can do so, it's necessary to install some extensions.
Installing PPTP and OpenVPN extension for Network Manager
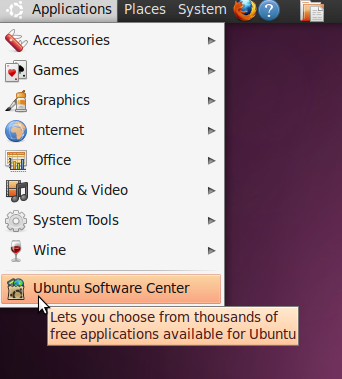
To install the plugins for Network Manager we will use the Ubuntu Software Center.- Open the Ubuntu Software Center from the Applications menu located at the top left of your screen
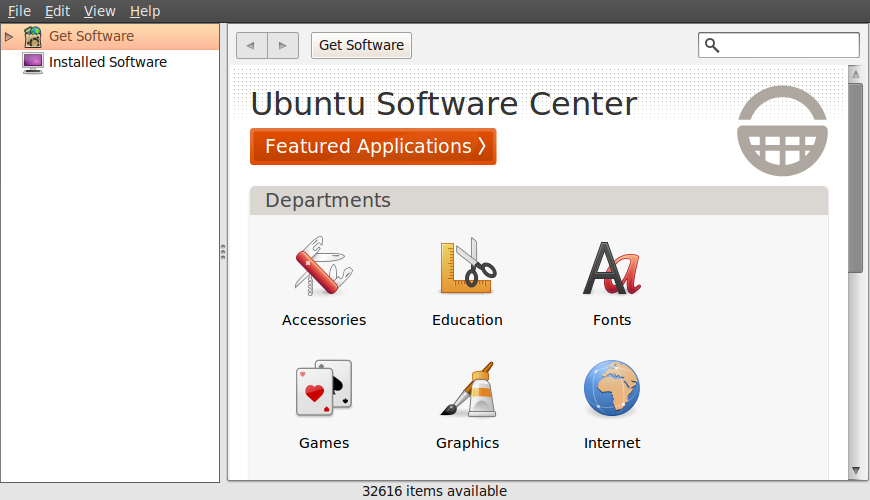
- The Ubuntu Software Center enables you to search, install and remove software on your computer. Click on the search box at the top right of the window.
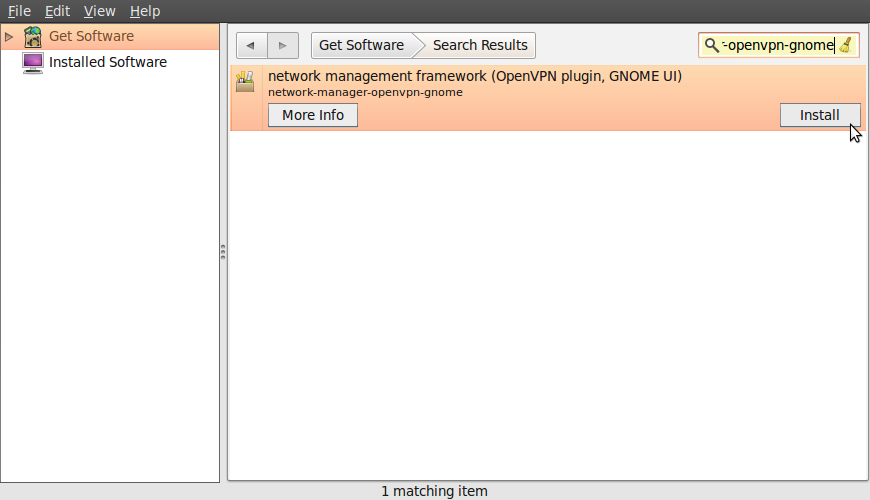
- In the search box, type in "network-manager-openvpn-gnome" (which is the extension that will enable OpenVPN) and/or "network-manager-pptp-gnome" (which is the extension for PPTP). It's necessary to type the full names because the packages are classified as "technical" and don't pop-up earlier.
These packages include all the files you need to establish a VPN connection successfully. You can decide to install both extensions or only the one you need.
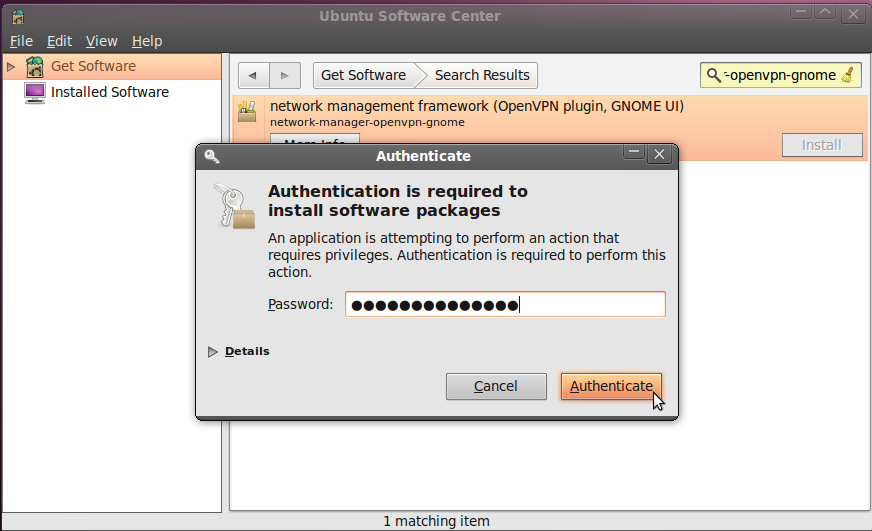
- Ubuntu may ask you for additional permissions to install the program. If that is the case, type in your password and click Authenticate. Once the package is installed, you can close the Software Center window.
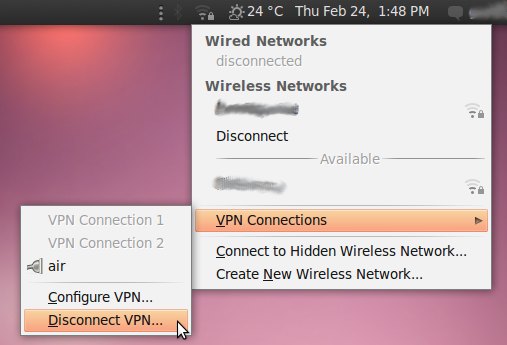
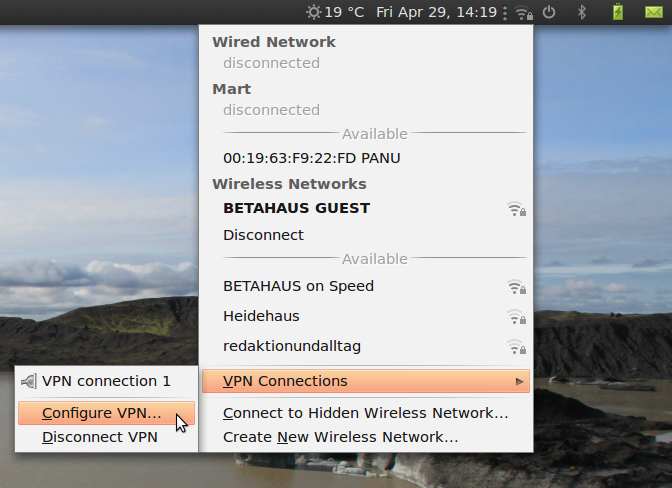
- To check if the extensions are correctly installed, click on the NetworkManager (the icon at the left of your system clock) and select VPN Connections > Configure VPN.

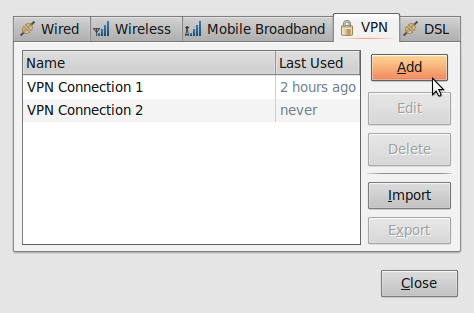
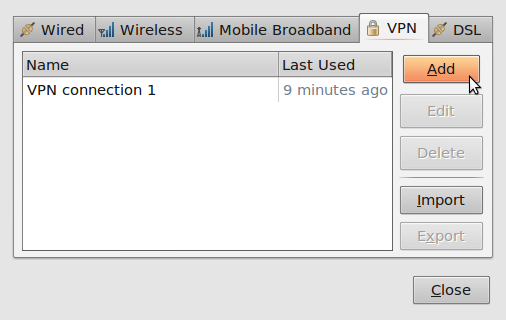
- Click Add under the VPN tab.
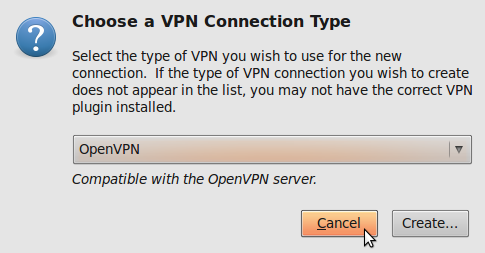
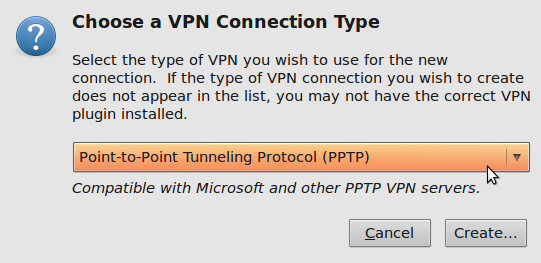
- If you see a pop-up asking for the type of VPN and the tunnel technology (OpenVPN or PPTP) option is available, this means that you have installed the VPN extension in Ubuntu correctly. If you have your VPN login information ready, you can continue right away, else you first have to get a VPN account from a VPN-provider. If this is the case, click cancel to close the Network Manager.
2. Configuring a PPTP network on Ubuntu
If you want to set up OpenVPN, you skip this section and jump to "3. Set up OpenVPN on Ubuntu"
Let's assume have your credentials from your VPN provider for PPTP ready. This information should contain the following:
- Username, ex. bill
- Password, ex. verysecretpassword
- VPN server, ex. tunnel.greenhost.nl
- Before getting started, please be sure you have read the paragraph "testing before and after account set up". In this way you will be able to validate if your connection is actually working after set up.
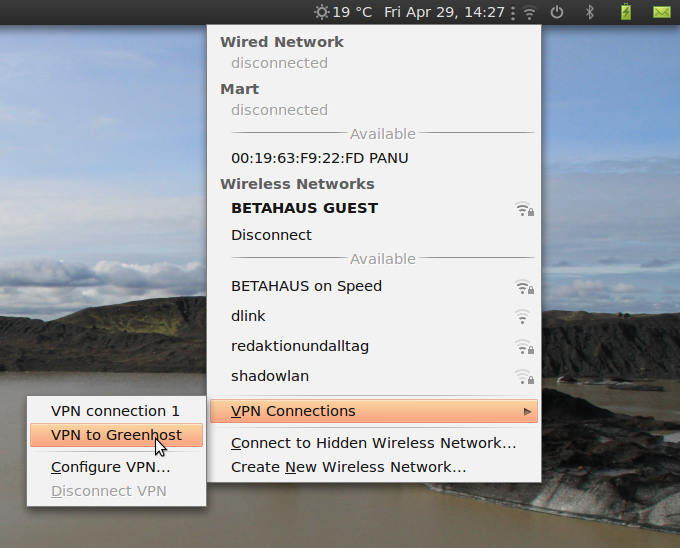
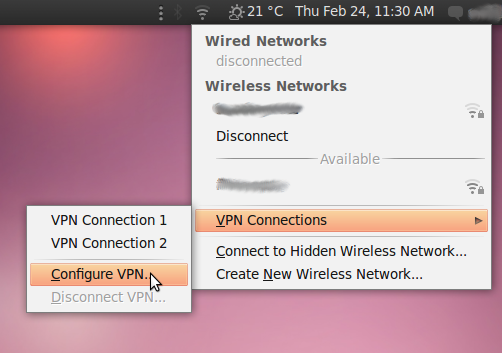
- If you have installed all software in the previous chapter, we are now ready to go. Setting up PPTP is very simple in Ubuntu: first we open the VPN network setting, by using the NetworkManager Utility. Just next to your system clock (were you also set your WiFi setting), just click on it and the following menu pops up. Choose Configure VPN (under VPN Connections).
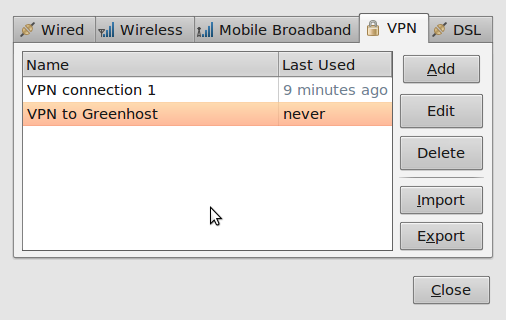
- A new window will pop-up, showing your VPN connection. This list is empty if you have not configured a VPN before. Simple choose: Add
- The next window will show you the available options. In This case make sure you choose Point-to_point Tunneling Protocol (PPTP). If you have selected this protocol choose "Create ..."
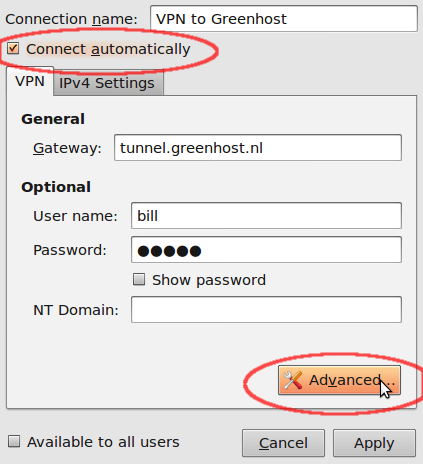
- In the next pop-up fill out the required information. The connectname is just the name to identify this connection with. The gateway is the server address of the VPN provider, in this case "tunnel.greenhost.nl" are self explanatory., the fields "User name" and "Password"
Please pay special attention to the "Connect Automatically" option. If enabled, the VPN will be always online (if available). This setting is recommended if you have an unlimited dataplan with you VPN provider.
Also it's needed to enable encryption. This can be done with the advanced options, so choose "Advanced..."
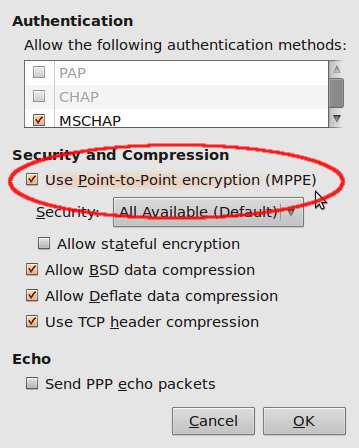
- In the advanced options screen enable: "Use Point-to-Point encryption (MPPE)". The utility will give you a warning that some authentication methods are not possible with MPPE. This is the expected behaviour. You can confirm the settings with "OK" to return to the previous window. Please "Apply" this window, and we nearly ready to go.
- Now you will return to the overview. If everything went fine, you will have a new connection now. Here it's called "VPN to Greenhost". You can close this window now, your settings are complete.
- Now, let's activate the VPN. Hit the Network Utility Tool again, browse to "VPN Connections" and next "Click on VPN to Greenhost"
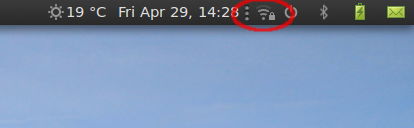
- If everything went fine, look at the small change in the notification icon: this should now give you a "lock" icon next to the WiFi signal.
3. Configuring an OpenVPN network
Let's assume you received your configuration files and credentials from your VPN provider. This information should contain the following
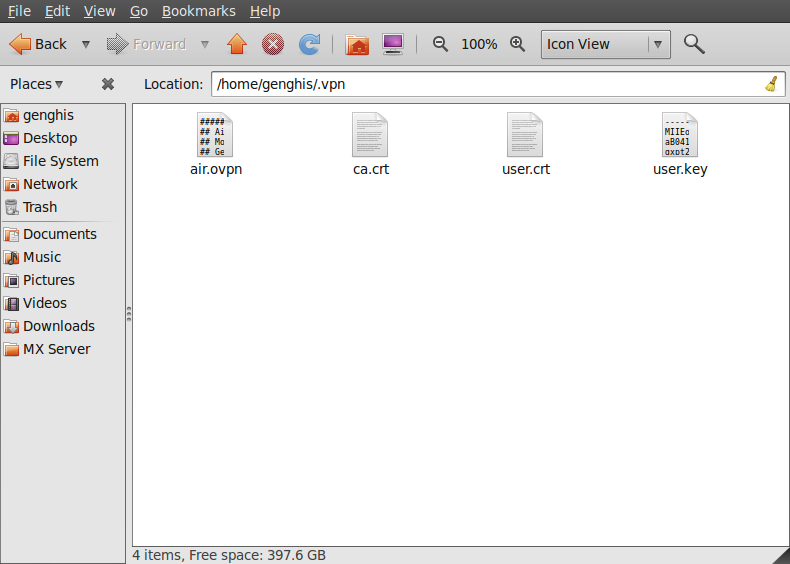
- an *.ovpn file, ex. air.ovpn
- The file: ca.crt (this file is specific for every OpenVPN provider)
- The file: user.crt (this file is your personal certificate, used for encryption of data)
- The file: user.key (this file contains your private key. It should be protected in a good manner. Loosing this file will make your connection insecure)
In most cases your provider will send these files to you in a zip file.
- Before getting started, please be sure you've read the paragraph "testing before and after account set up", this way you will be able to validate if your connection is actually working after set up.
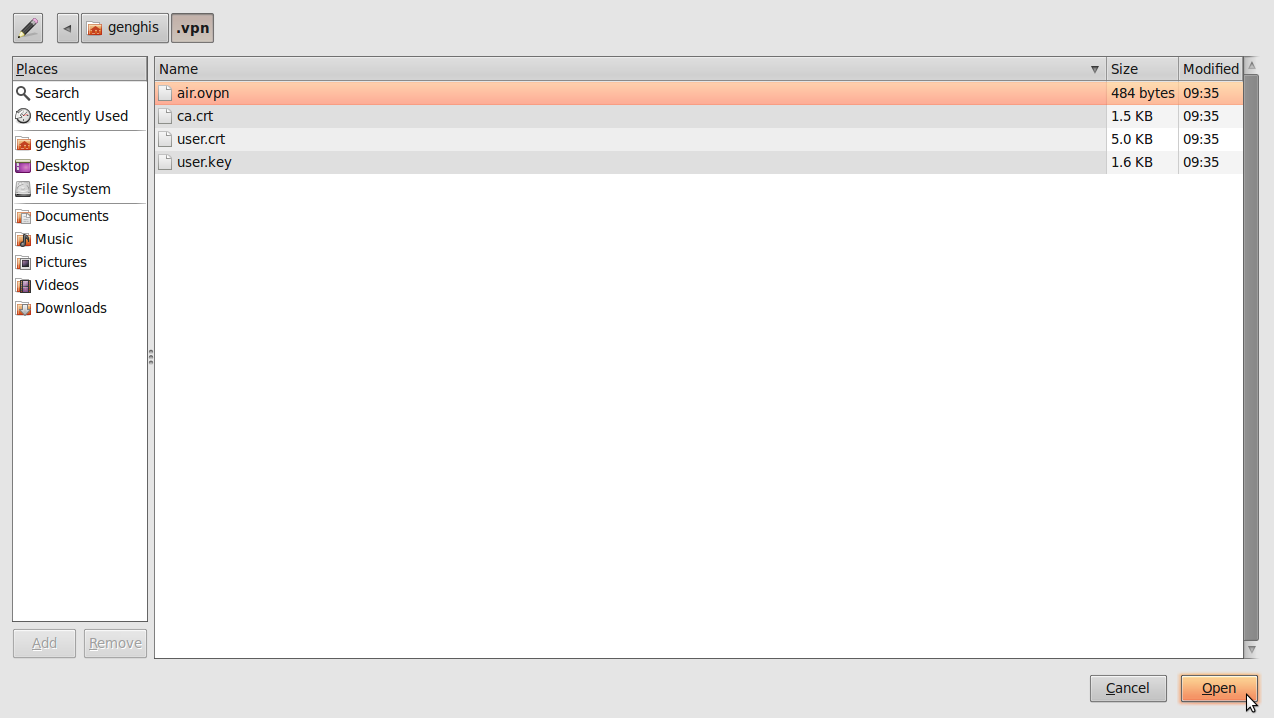
- Unzip the file you have downloaded to a folder on your hard drive (e.g.: "/home/[yourusername]/.vpn"). You should now have four files. The file "air.ovpn" is the configuration file that you need to import into NetworkManager.
- To import the configuration file, open NetworkManager and go to VPN Connections > Configure VPN.
- Under the VPN tab, click Import.

- Locate the file air.ovpn that you have just unzipped. Click Open.
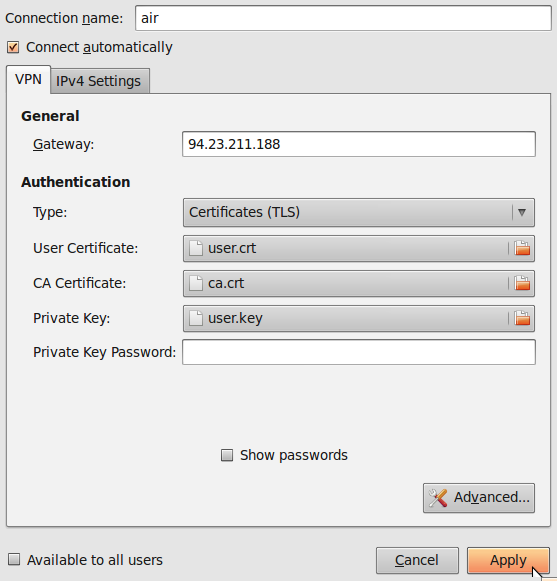
- A new window will open. Leave everything as it is and click Apply.
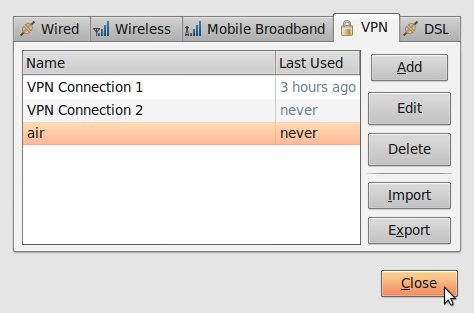
- Congratulations! Your VPN connection is ready to be used and should appear on the list of connections under the VPN tab. You can now close NetworkManager.
Using your new VPN connection
Now that you configured NetworkManager to connect to a VPN service using the OpenVPN client, you can use your new VPN connection to circumvent Internet censorship. To get started, follow these steps:
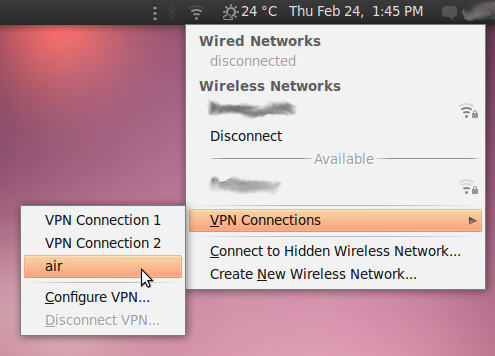
- In the NetworkManager menu, select your new connection from VPN Connections.
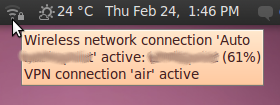
- Wait for the VPN connection to be established. When connected, a small padlock should appear right next to your NetworkManager icon, indicating that you are now using a secure connection. Move your cursor over the icon to confirm that the VPN connection is active.
- Test your connection, using the described method earlier.
- To disconnect from your VPN, select VPN Connections > Disconnect VPN in the NetworkManager menu. You are now using your normal (filtered) connection again.