


VPN on Android phones
Setting up VPN with L2TP or PPTP is very simple in Android, although there are some ceaveats. Before starting, you need server and login information from your VPN provider. Normally you need at least these items:
- username
- password
- vpn servername, eg. tunnel.greenhost.nl
optional:
- pre-shared-key (PSK), this is general password. Most providers will use a certificate instead
- type of the VPN service, PPTP or L2TP/Ipsec
In this example we explain L2TP with a Pre-Shared-Key (PSK). This is one of the most complicated versions. All other configurations are less complicated.
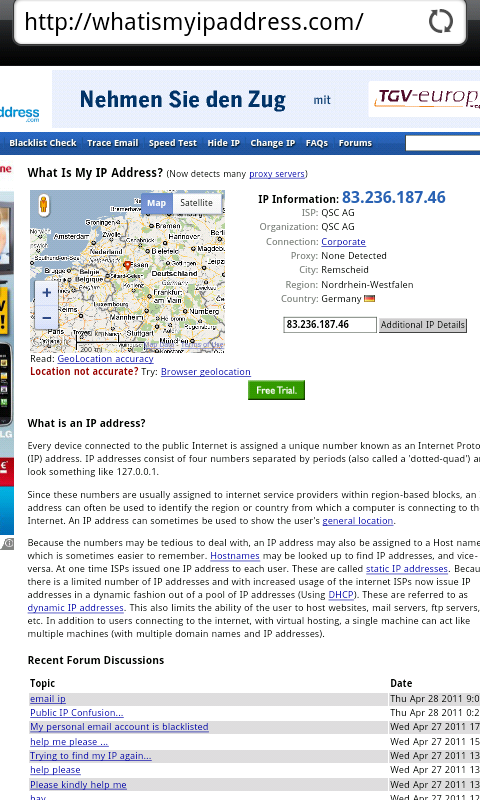
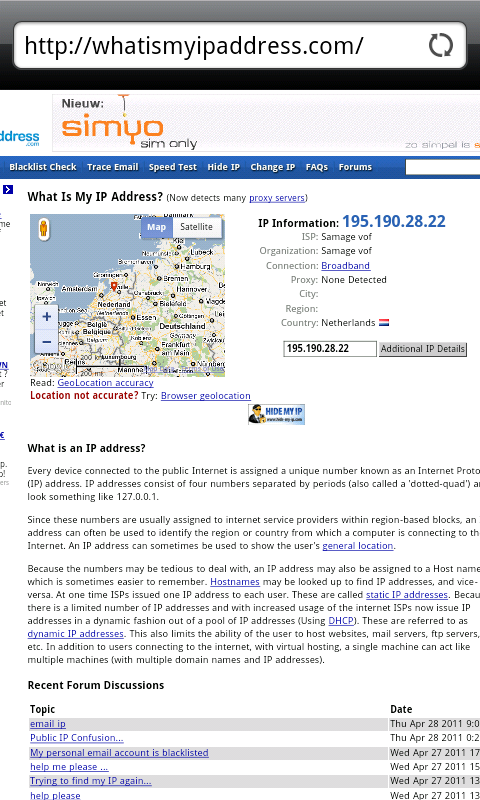
1. If you go to "whatismyipaddress.com" with a browser, you will see your current external IP address, and the location where this IP is registered. This is mostly not exactly on your current location, but often at least in the country where you are. In the example the IP is in Germany
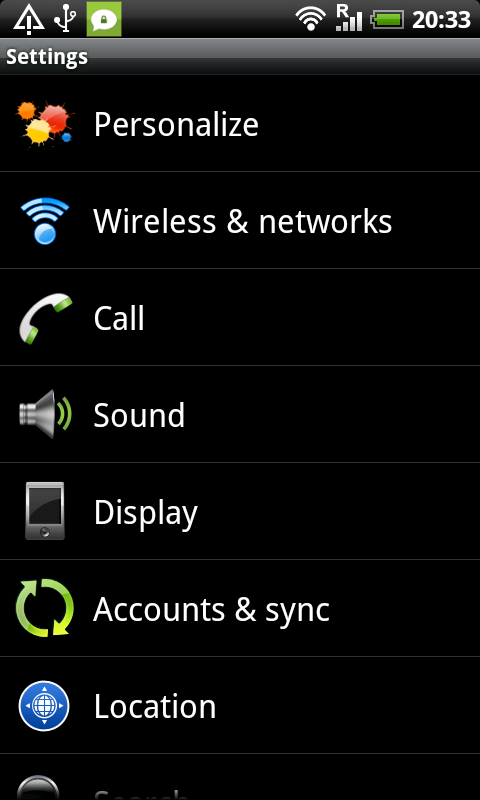
2. To setup your VPN, open the android menu and choose 'Settings'

3. In the settings menu choose 'Wireless & networks'
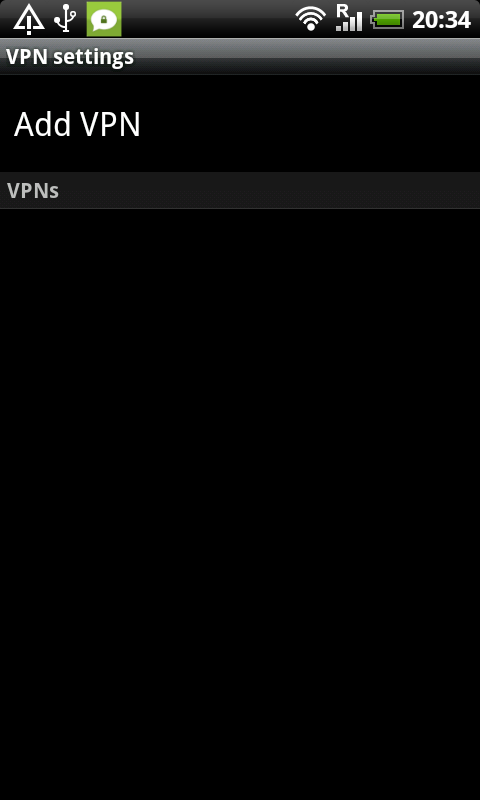
4. Scroll down a bit, here you will found a VPN settings option, choose this option

5. On the top you will be able to choose to add an VPN
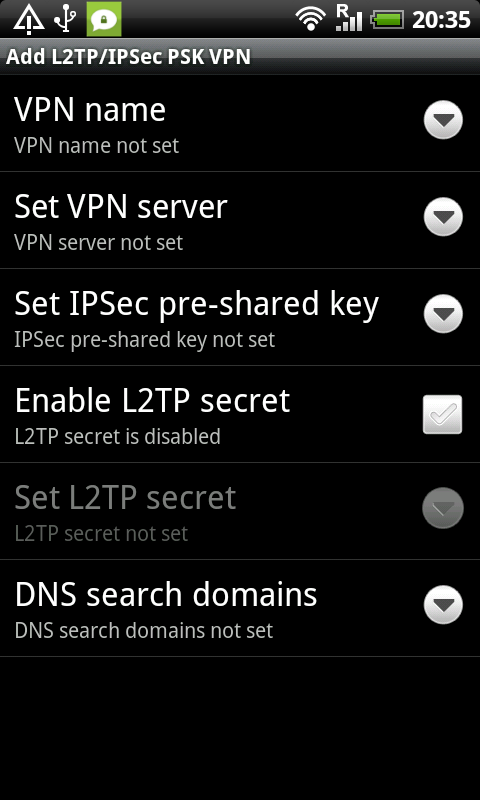
6. Next you need to choose the correct type of VPN. This is a vital step as VPN types are not interchangeable. Most common types are PPTP of L2TP/IpSsec. The L2TP/IpSec can be combined with a PSK or CRT option. The first is "Pre-Shared-Key", the option common in smaller company VPN networks. The other options is used with some large networks. In this example we will use the "L2TP/IPSec PSK VPN", choose this option

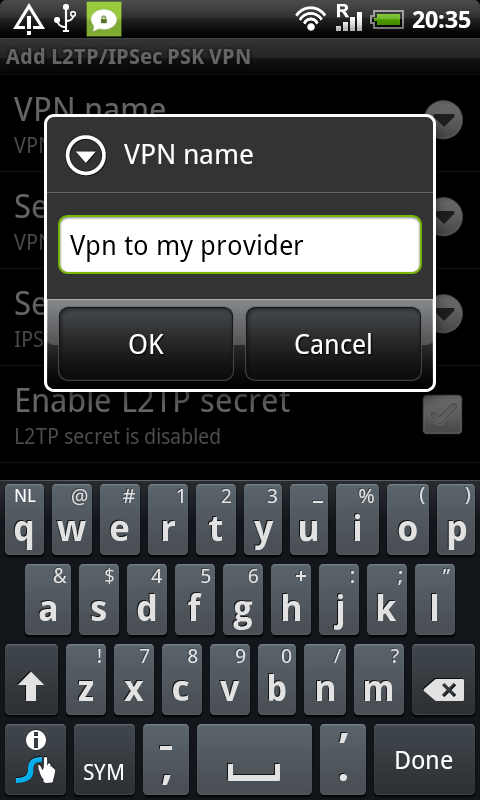
7. Next is setting up the parameters for your network. Choose 'VPN name' to setup a name for this connection
8. Type a name for your connection. This can be whatever you like to identify this connection with. Confirm with OK.
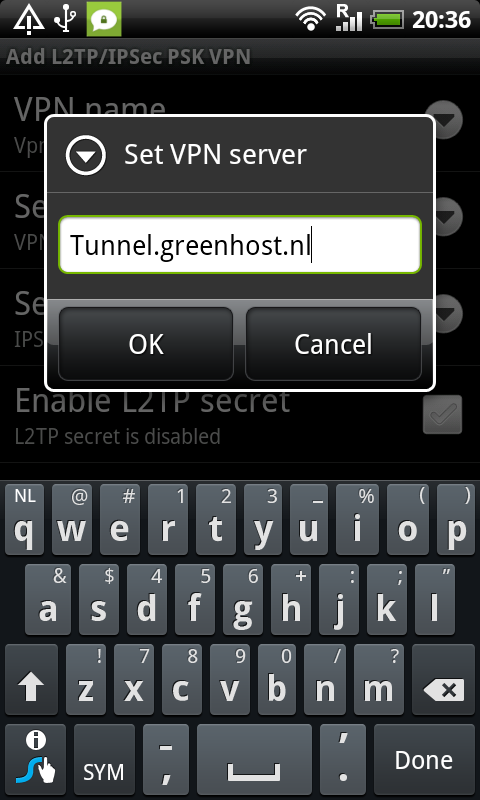
9. Next choose "VPN Server", and fill in the server name. This name is provided when your received your connection and login information. We use the tunnel server of Greenhost in this example "tunnel.greenhost.nl". Once again confirm with "OK"
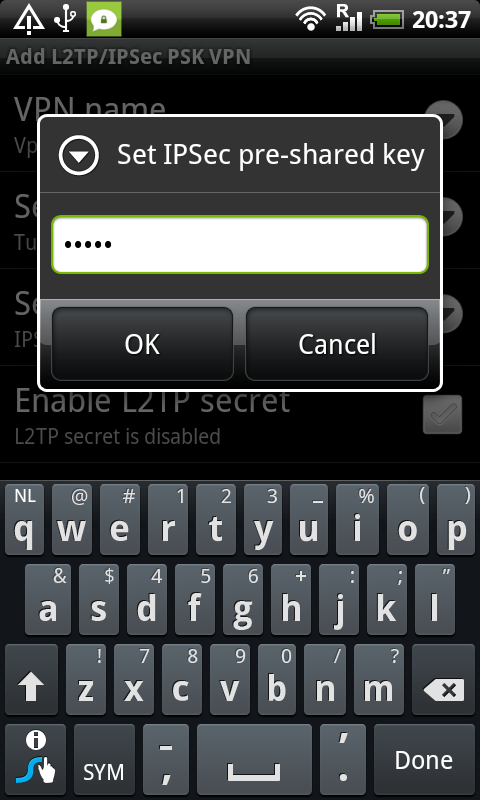
10. Next is the pre-shared-key. If you use a certificated based connection, this option does not exists. You should have received your pre-shared key from your VPN provider
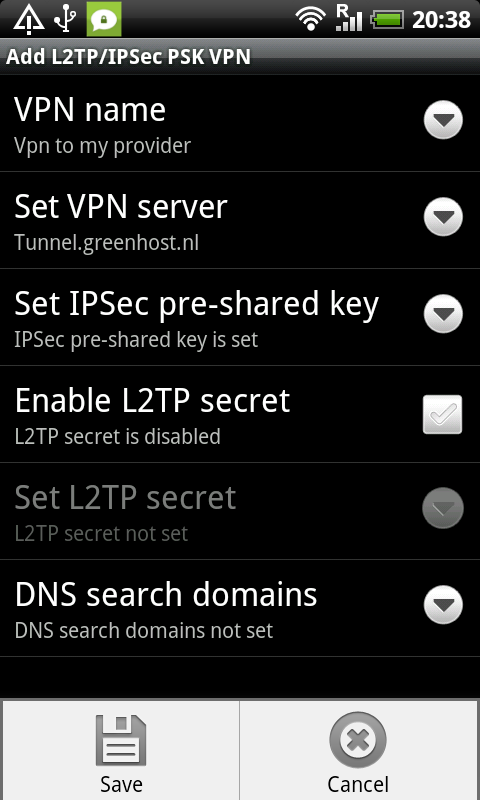
11. The rest of the options are normally not used. Hit the menu & save button of your phone to confirm the settings.
12. After saving you will return to the VPN overview. Now just click on the newly created connection.
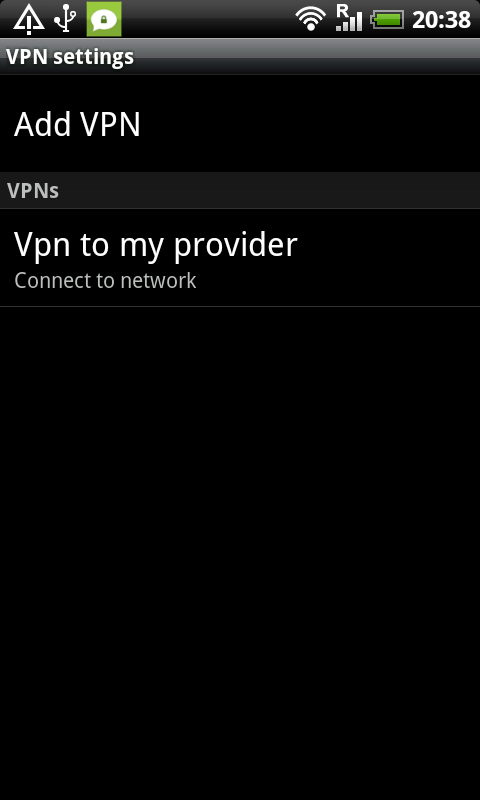
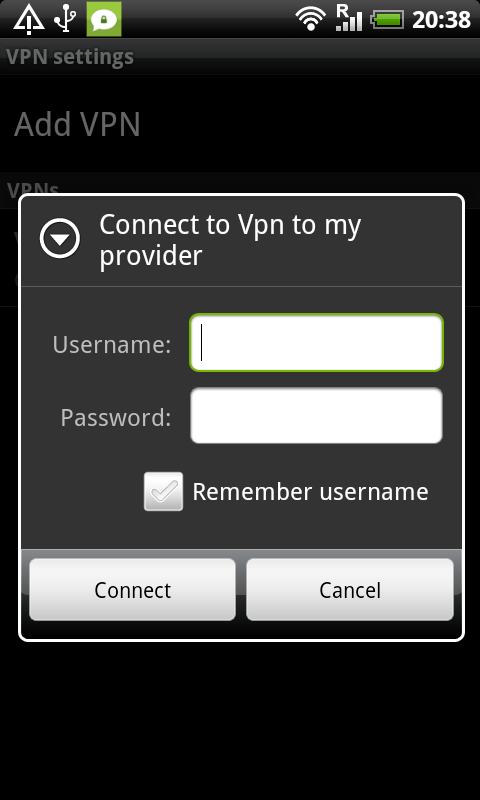
13. The system will ask for your credentials, type them as you received them from your provider.
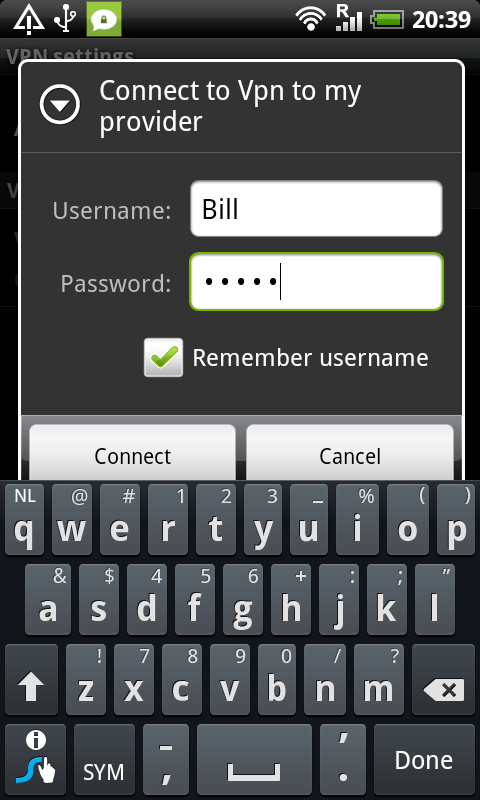
14. We use Bill and a password in our example. Press 'Connect' to connect.
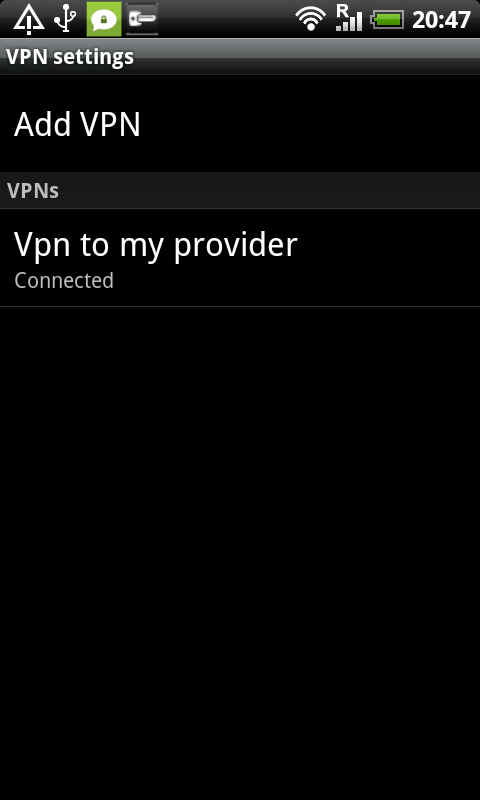
15. If everything goes smoothly, you will get a "connected" status after a few seconds. Notice also the new "key" icon in the top bar. Here you will see if your VPN connection is active.
16. Now, lets return to whatismyipaddress.com: Yeah, we moved, we are located in the Netherlands now. Wow! That's fast travelling ;)
Warning: Losing connectivity
When you lose connectivity your VPN will get disconnected automatically. If you have internet connectivity again, your VPN connection will not be enabled automatically. This means you internet connection is unsafe and you will have to reactivate the VPN manually.
It's currently not possible to force the VPN and disallow normal traffic if now VPN is active.