Camouflage
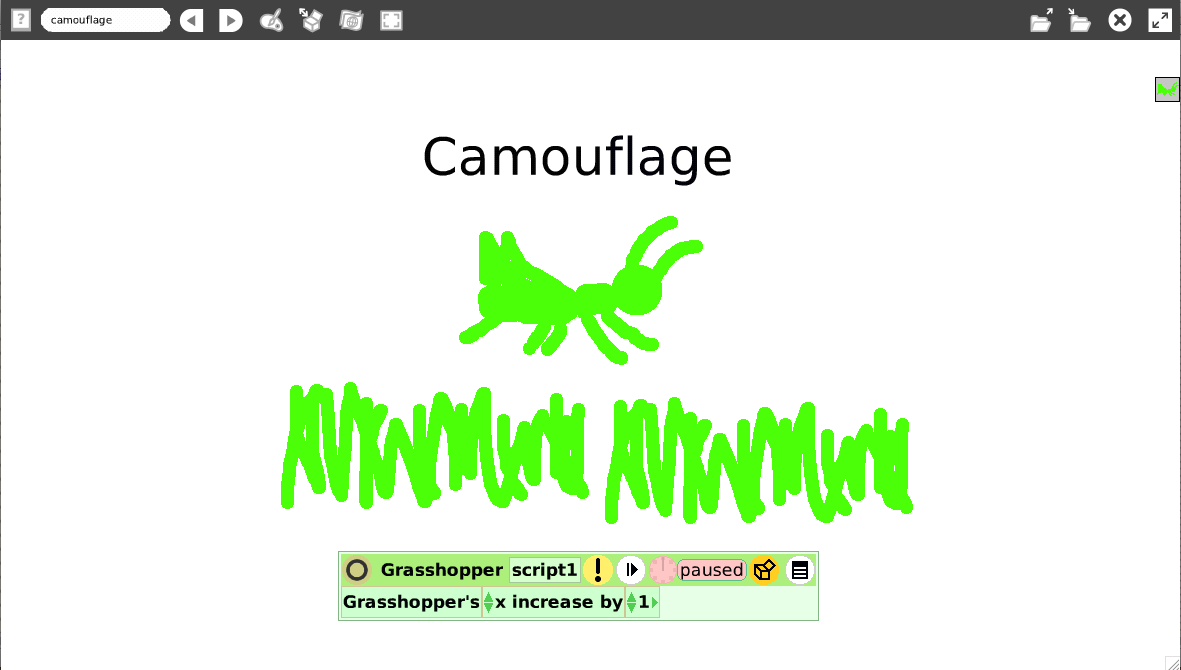
Camouflage is found everywhere in nature, as it is the tendency for many animals to stop still when alarmed. This project will help students to see a plausible explanation of why animals “freeze” when threatened. Can you Imagine how animals behave when in danger? To get an understanding of this, you will Invent an animal and it's environment, so that it can camouflage and describe it's behavior and watch. Let this project Inspire you to create puzzles or moving illustrations.
In this project we use:
Halo, Naming, Painting Tool, Scripting, increase by
Project
(original idea by Alan Kay)
First, open a new project. You can do so by opening Etoys and clicking on the lilac cloud that says "Make a new project". Now you have the whole Etoys world at your disposal. Let’s start with painting some grass and then a grasshopper, using the same shade of green for both.

How to paint
To paint objects in Etoys, there is the painting tool in the navigation bar at the top of your window. Click on the icon shown above and you will get a new sheet of paper and the tools to paint on it.
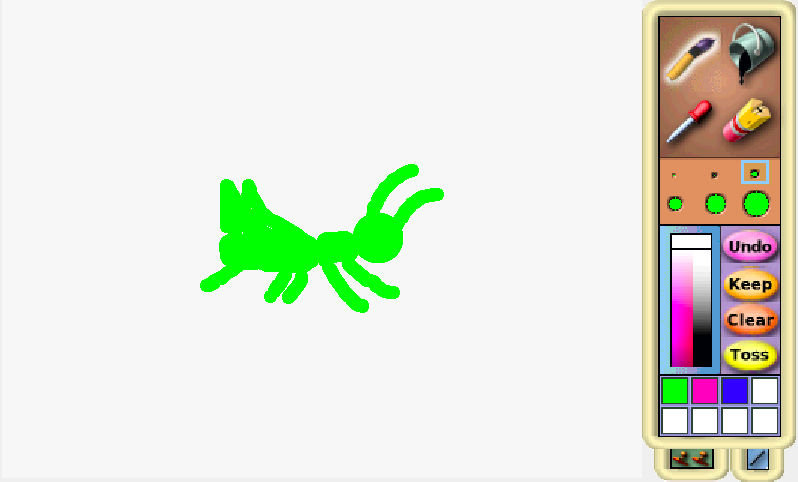
Every time you click on the icon, you will open a new sheet and start a new painting. You need to make two paintings here, one for the grasshopper and one for the grass. Make sure you quit the painting tool when you finish a drawing.
You can find out how to use all the elements of the painting tool in the Etoys Quick Guides - Paint Tools and get an overview in the Getting Help chapter of this book.
The drawings you made are in fact objects you can pick up and move around. They will be called "sketch" until you give it another name.
How to bring up the Halo and name a sketch
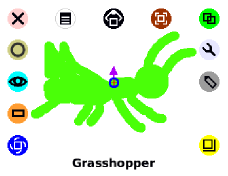
To give your drawing another name, you need to bring up the Halo for this object. You can do this by right-clicking on this object (cmd-click on a Mac). Now you see a number of colored icons around the object and the name of the object on the bottom. Click on "sketch" and type the name you want.
Now put the grasshopper in the grass, and you can see right away why its green color might help it escape from birds and other predators that might want to eat it.

Now let’s write the simplest of scripts for the grasshopper to get it to move sideways in the left-right direction (the official name for this direction is x). The world in Etoys is a two-dimensional coordinate system with x being the value of the horizontal position of an object (starting with 0 at the left side).
How to write a script
In Etoys, writing a script actually means to compose a script using the tiles available for the objects. You find the tiles for each object in it's Viewer. Bring up the Viewer for an object by clicking on the blue eye icon on the halo. The viewer for the grasshopper will look like this:
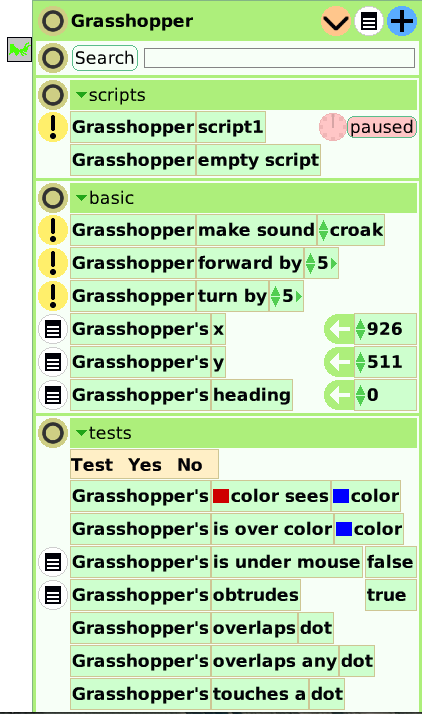
You'll see the "Grasshopper's x tile" under the heading "basic" (which stands for category basic) in the upper half of the viewer.

Drag the tile onto the Etoys world, using the white arrow, and it will create a script editor around it the moment you drop it. If that doesn't happen, try again and make sure, you grab it at the white arrow shown in the image above.
Now you can change the command to let it perform the action you want. Clicking on the white arrow in the command tile will bring up a menu of operations where you choose "increase by" to move the grasshopper from left to right. You can change the value for "increase by" by clicking on the number and typing in another one. Find more help in the Quick Guides - Script Tiles - X and Y Tiles.

Now run the script by clicking on the clock in the top line of the script editor. The script will repeatedly execute the command until you click the clock again to stop it.
All of a sudden you can see where the grasshopper is, and so can most other animals. Now you have a little insight into why animal vision is almost always better at detecting motion than in seeing fine details – and also, why animals might want to keep still when threatened.
When you are finished, you'll want to save your work for later use or to show it to your friends and family. You can also make different versions based on the ideas you have.
How to save and load
![]()
The button you see above is the "publish" button. Find it in the navigation bar and click it. A dialogue box will open. It asks you to put in a name for your project (to make it easier to find it again later). You can put in your name in the author field, a description and other information if you want. Click "Ok" and you will get another dialog box where you can choose the destination for your project. The default location is the Etoys folder on your computer. It is strongly recommended to save all your projects there, because this is the folder which will be presented by default when you are going to load a project.

To get a project out of your folder, click the "find" button on the navigator bar. It will present all the projects you have saved so far in your Etoys folder. Select the one you want and click "Ok". The new project will open in Etoys. To get back to the previous project, use the white arrows in the navigator bar.
For more information about loading and saving from different locations etc., look at the Quick Guides Navigator Bar - Keep Find Projects.
More Inspiration
You can find the project used in this chapter here: http://etoysillinois.org/library?sl=2147
If a creature like a grasshopper lived in a desert environment, what color would you expect it to be? Can you create a project for that?
With the things you learned in this chapter, you can do many wonderful paintings with moving objects in it.
Or you can create a puzzle as you can see here in Avigail Snir's projects for students from 1st grade and up http://etoysillinois.org/library?sl=760


