


Using the Web Calendar
This section is called Using Web Calendars, as it is possible to access ownCloud calendars in other ways – via desktop synch applications or on mobile devices. This section concentrates only on using your web browser to use calendars.
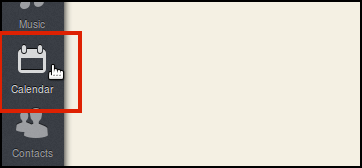
To start using web calendars, Select the Calendar button in the navigation bar.
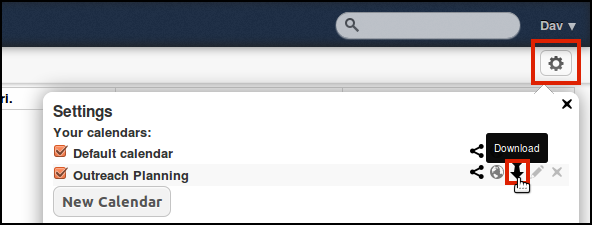
When you use the calendar the first time, there will be already a calendar called Default calendar. To alter the settings click on the image of the cog in the top right.
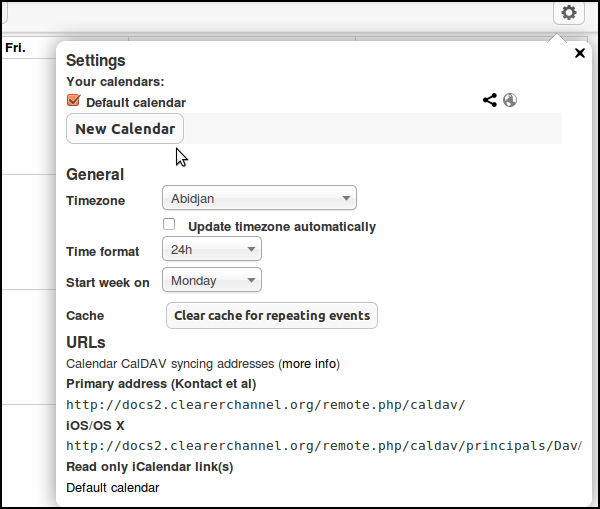
In this Settings area you can add, edit, export, enable, share and delete your calendars. You can also configure the right timezone. Without the correct timezone there will be a time offset between the events on the server and on your desktop when using ownCloud's synchronization functionality. You may be asked to set your timezone automatically so it is a good idea to accept this request to help ownCloud keep all the devices in sync.
The URLs listed in the Settings area are for CalDAV access. CalDAV is a way of syncing your calendar with other applications on your phone or desktop computer. This process is covered in another chapter.
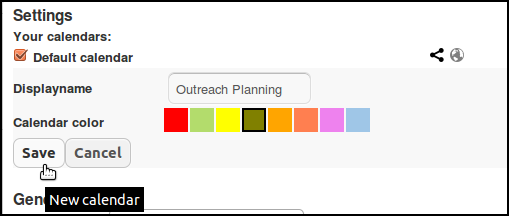
To start we will add a new calendar for a project. Click on the New Calendar button and fill in the details and choose a color for this calendar.
Creating events
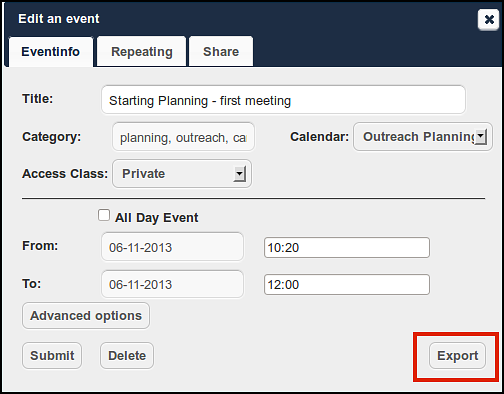
To create an event just click on the date in the month view and enter the event details.We can see an option to choose between our Default calendar and any new calendars we have created.
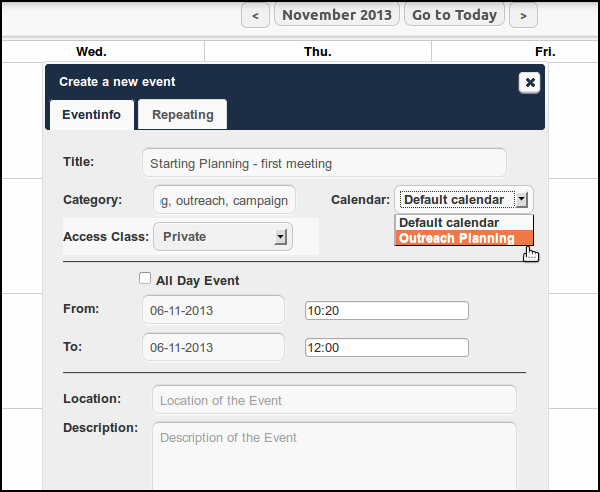
Click on the Advanced Options to set the description and the location of the event. There is also an option to create repeating events in the Repeating tab.
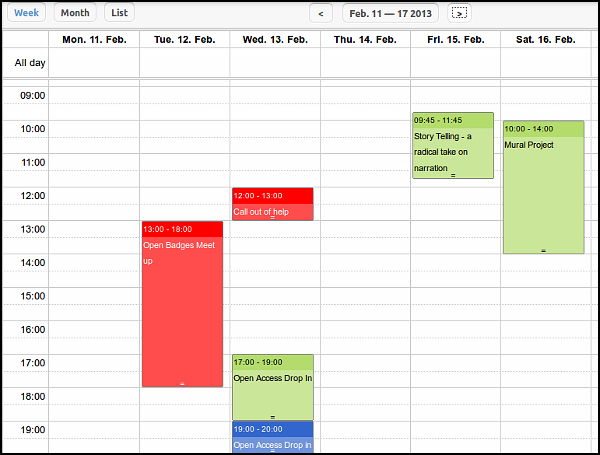
Viewing events can be done by Week, Month or as a List of upcoming dates.
Sharing calendars
To share a calendar with other users on your ownCloud set up, first go the the Calendar settings area.

Click on the Share icon shown above. Then enter the name of the person you want to share with.
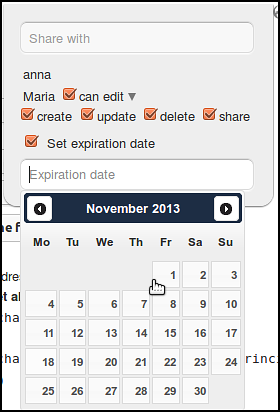
We can see that if we allow the user to edit our calendar there are different options available for us to control their level of access and set an expiry date too.
Exporting / importing events
Exporting
You can export either a single event or a whole calendar. If you want to export a single event click on it and press the Export button in the bottom right corner.
If you want to export a whole calendar click on the Settings cog, and then click the Download link arrow of the calendar you want to export.
ownCloud generates an .ics file when exporting an event or calendar. The iCalendar format must not be confused with Apple's old email application which was called iCal. iCalendar is build on the previous vCalendar format which generates .vcs files.
iCalendar files can be understood by nearly all email or calendar applications.
Importing
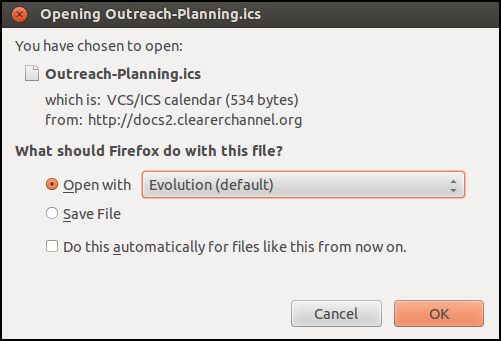
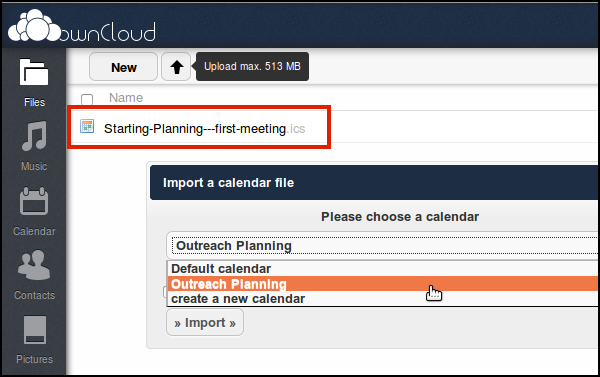
Imagine the case in which a colleague has done some planning in their own calendar for the coming months. They want to share this planning with you and have mailed the calendar file to you. You save it to your computer and need to import into your ownCloud now.
Click on the calendar file you've saved and follow the instructions to import it into a new calendar or into an already existing calendar.
Syncing calendars between computers and devices
Importing and exporting is a good way of moving calendars between devices. However, it would be better if they were automatically synchronized so that when altered or added to in one place they are updated automatically everywhere we access the calendar. You can find out how to do this in another section of this guide.