Image Acquisition and Resolution
There are several ways to bring an image into the computer. The two most common are photographic in nature, that is, both methods involve exposing sensors to an item or scene in the real world. The camera or scanner then writes digital data to display that image on the screen. While the sensor technology is essentially the same, a camera is made to capture scenes with depth of field, while a scanner is made to focus on and capture just one flat plane.
Photograms are made by placing objects on sensitized paper, exposing the objects and paper to light, and then processing the paper to reveal the print. A camera is not necessary for the production of this type of graphic image. The first photograms were made by photographic pioneers William Henry Fox Talbot and Anna Atkins in the mid-1800s. This type of contact print can have an uncanny life-like presence that, like an x-ray, reduces three-dimensional information onto a two-dimensional plane without the perspective that a camera lens introduces. This overall focus and flattening of visual information results in a poetic and magical image.
A scanogram is the digital method of producing something like a photogram. It is the image made by placing objects directly on the scanner.
Photograms have been made by photographers, artists, and designers. Anna Atkins created early renderings of natural elements. The avant-garde formal experiments of Man Ray, El Lissitzky, and László Moholy-Nagy are central works of 1920s art and design. Commercial designers such as Paul Rand used the technique for package design and book jackets. The process is fun to explore, and the results are always surprising.
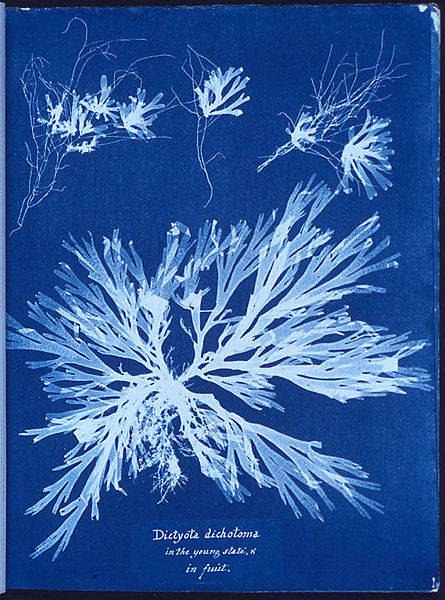
A photogram of algae, from the book British Algae, Anna Atkins, 1843. This is the first book composed entirely of photographic images.
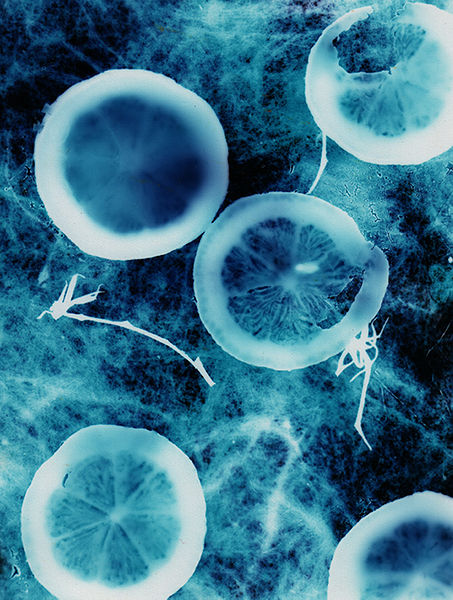
A photogram of lemons, uploaded to Wikimedia Commons in August 2005 by user name Cormaggio.
Results of Chapter 7 Exercises
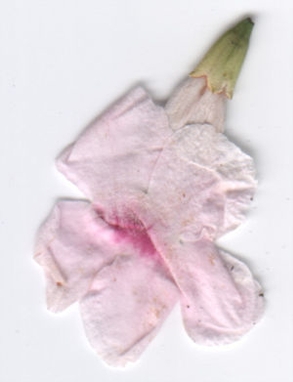
Actually, you will probably make something a bit different, provided you scan your own materials. This is a scanned image that we will use as a work file starting in Exercise 2.
Exercise 1: Creating a scanogram and understanding file resolution
Scanners are optical input devices that use software to send the captured image from the scanning bed to the computer. Though scanning software varies among brands, all scanners operate in the same manner, and all scanning software has the same essential functions. Typically, a scanner is used to create a digital image of something two-dimensional. In this exercise, you will scan a three-dimensional object.
1. Place your object on the scanning bed. If the lid does not close, put a dark piece of cloth around the scanner so ambient light doesn't leak in and interfere with the exposure during scanning (a jacket or dark sweater will work.) We are scanning a flower that fell to the ground - it lies flat, so it will be easy to close the lid on the scanner.
2. Open the scanning application. We will use XSane which can be accessed through GIMP. Choose File > Acquire > XSane > Device Dialog.
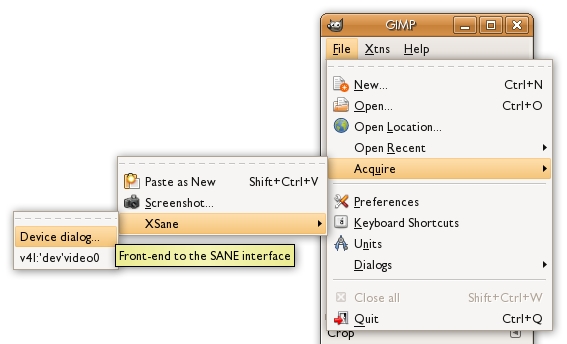
3. Choose your scanner from the listed options, then press the OK button. We chose the Epson scanner.
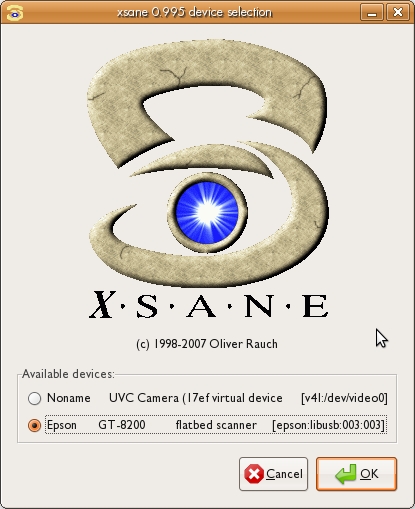
4. The scanner may automatically create a preview of whatever is placed on the scan bed. If it does not, a preview of the last item scanned may be visible. Click on the Acquire preview button to see the contents of your scanning bed in the scanning software.
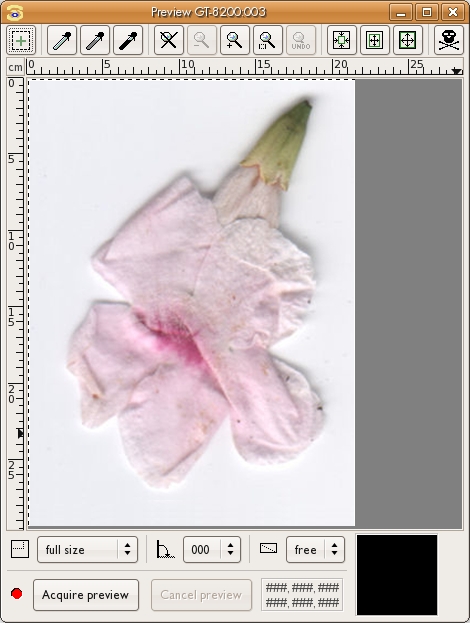
5. If your object is smaller than the scan bed, you should select just the area that you intend to digitize by marqueeing over the image area. Click the Plus (+) button in the top left corner of XSane and then click and drag over the preview without changing to a tool. At this point, your selection marks the location of the object on the scan bed. If you lift the lid and move the object, you will have to re-preview and select the scan area again in order to tell the scanner where to locate your object.
6. Choose your resolution. This is the crucial step. Before scanning, the artist must decide upon the file's input resolution.
Different output devices require different resolutions to produce quality output. Resolution is the number of pixels displayed per inch (PPI), also called dots per inch (DPI). In 1984, when Apple pioneered consumer WYSIWYG text, a way was needed to translate font sizes on screen to printed output dimensioned in inches. The early Macintosh computer screen used a logical inch made of 72 pixels, or 72 dots per inch. Most modern Operating Systems assume a monitor displays 96 dots per inch. Printers can easily squeeze 300 dots into an inch, and some go much higher. Knowing what kinds of resolution the intended output device has will help you decide what input resolution to use.
Resolution for printed images Resolution is measured in dots or pixels per inch (dpi or ppi). The resolution of the scanned image is a necessary factor in the final print or on-screen output. In consumer or prosumer situations, such as personal ink jet printers or laser printers at stores like Kinkos or Costco, the print will look fine at a resolution of 200 to 300 dots per inch. In professional print environments, the rule is simple: ask the printer for the print specifications including file resolution and color space.
Resolution for screen presentations Any image that will be used on-screen, for instance on a website or in a video, will need to be saved only at screen resolution, or 72 dots per inch. The file size is directly connected to the amount of pixels saved in each inch of the bitmap or raster file. Image files saved at screen resolution are much smaller in file size than images that are saved for printing.
To determine the resolution to enter into the scanner software, simply acknowledge the size of the object on the flatbed, then decide how large you want the object to print on the page. If the object is, for example, 4 by 5 inches and the objective is to make a 4 by 5 inch print, scan the object at 200 - 300 dots per inch. If you want to make an 8 by 10 inch print, either scan the object at 300 dpi and increase the scale to 200 percent, or scan the object at 600 dpi at 100 percent scale.
7. Using the guidelines above, choose a resolution and be sure that the color mode is appropriate (black and white line art, grayscale, or color).
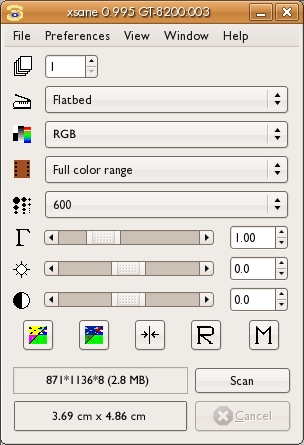
We are scanning at 600 dots per inch. We know that we can make a high quality print on an ink jet printer at 300 dots per inch. Since 300 multiplied by 2 is 600, we will be able to print this scan at twice the size of the scanning area. In this case, the scan area is a little less than 4 by 5 cm (or nearly 1.5 by 2 inches), so the resulting print could be made at nearly 8 by 10 cm (3 by 4 inches) at 300 DPI..
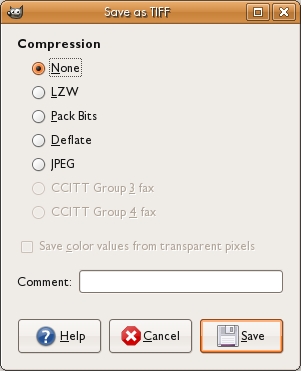
8. Once the image is scanned it will automatically open in GIMP. Choose File > Save. Create a name and add .tif to the end of the file name. Adding a file extension such as .tif forces GIMP to save the file as a TIFF file. File formats such as JPEG, PNG, and PDF compress the size of the file, and may result in a loss of digital information. File formats such as TIFF and PSD are not lossy, and are therefore better format choices for high quality scans. GIMP will then ask you for a compression option. Click the radio button None and press the Save button.
Exercise 2: A tour of tools and dialogs in Gimp
In this exercise, our screen shots show the image of a different scanogram we made at an earlier time of writing. It doesn't matter, though, because the tools and dialogs are the focus of these exercises.
1. Look at the image in Gimp. On the left is the Main Toolbox. The image opens in its own Image Window. Dialogs and palettes will be explored further throughout this exercise.
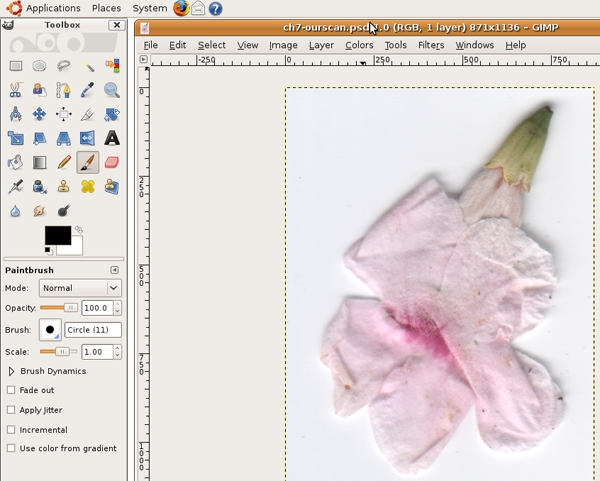
2. Click once on any of the Tool icons and notice the Tool Options dialog underneath the Main Toolbox. All tools have flexible options that can be used to determine how the tool functions. Click on a variety of Tool icons and watch the Tool Options dialog change according to the selected tool.

The Rectangle Select tool was active in the Main Toolbox. This is an image of the Tool Options. When a different tool is selected, its options are shown in this dialog.
3. The Navigation dialog can be used to explore various areas of an image. To view this dialog, choose View > Navigation menu. The larger the resolution or file size, the more likely it is that the whole image will not be viewable on the screen at 100 percent. The navigator can be used to move around within a large image, but you will soon learn short-cut keys to avoid this dialogue. This is worthwhile because the fewer palettes that you need to keep open on your screen results in more screen space for viewing image details! Push the slider on the bottom of the Navigator dialog all the way to the right to zoom all the way in to the image.
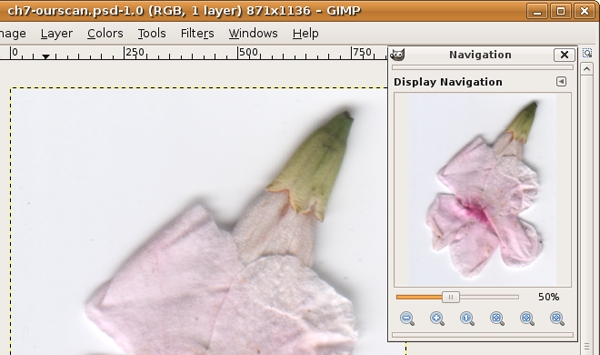
The small clear square with a white stroke in the Navigation dialog indicates which part of the image is viewable on screen. Notice the slider is pushed all the way to the right, and in the bottom left corner we are zoomed in to 25600 percent.
4. Enlarge the view of the image by zooming in and the individual pixels that comprise the image are in plain view.
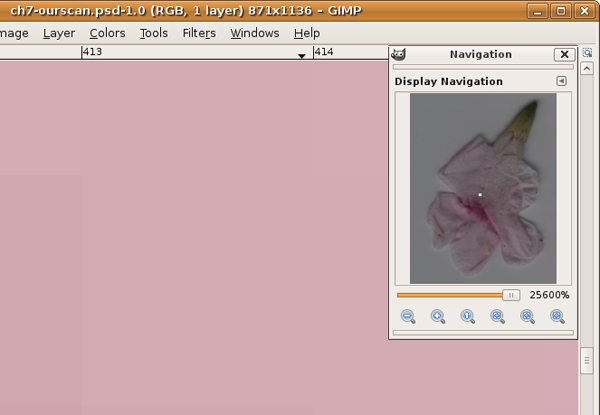
A pixel is the most basic picture element, or a single color unit of the bitmapped digital image file. That last sentence was full of jargon, let's revisit those words:
Pixel
The word pixel is a combination of two words: picture and element. A pixel is the smallest unit of color information in a digital image. If the real world is captured digitally, it is converted into pixels.
Bitmap or Raster images
A digital file is considered bitmap or raster (two words used interchangeably) if it is composed of a grid of pixels. Raster is the German word for "grid." Inkscape is a vector-based application, while Gimp is primarily used to work on photographic images. Gimp is commonly thought of as a bitmap or raster application.
5. It is important to view digital images at 100% as this is the "true" representation of the file. This is as good as it gets on the screen.
| Hot key: Shift+ Control + E will change the viewing percentage so the image is as large as it can be on your screen. |
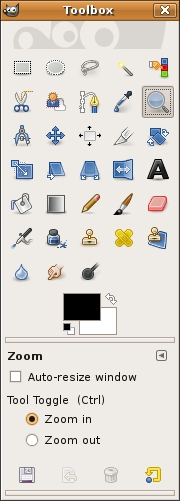
Notice that the Zoom Tool Options include a Zoom out button (Zoom tool with a minus sign). Click on the Zoom out button and then click anywhere within the image. Keep clicking and you will continue to zoom out of the image.
6. Press Shift+Control+E to see the image as large as it can be within your particular monitor settings. Now we'll try more key commands. Zoom in more than 100% by using Command+= and then use the Spacebar key to access the Hand tool. Press the Spacebar key and use the mouse to click and drag on the image. This moves the image around within the workspace, much like using the scroll bars at the edges of the document. In Gimp you will never use the scroll bars because you will always use the Hand tool.
Exercise 3: Image Size, file size, and resolution
1. When an image or object is scanned or input from a digital camera, it appears in the Layers dialog with the name of the file. Look in the Layers dialog (Windows > Dockable Dialogues > Layers) and notice that the layer is locked. Double-click on the name of the layer in the Layers dialog to use the Rename Layer dialog box. When you rename the layer it is automatically unlocked.
A layer is like a single sheet of transparency paper. A "blank" or empty layer is transparent. When a scan or digital photograph is first opened, it appears on the "Background" layer. Layers can be added and deleted using this dialog. Unlocking the background layer is a good habit, as it encourages the user to rename the layer (which is always a good idea) and enables the layer to be affected by tools and effects that can be "locked out" when the layer is locked.
| Tip: Double-clicking on the icon of the layer will open the Layer Attributes window. If this happens, press Cancel, then try again by double-clicking specifically on the name of the layer. |
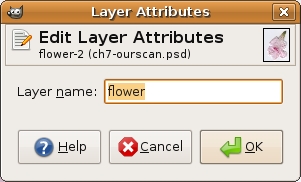
2. The Status Bar runs along the bottom of the file. Click on the area of the Status Bar, followed by a number in kilobytes or megabytes. This area reports the file size. The page size is determined by the page size set in File > Page Set Up. By default it is A4 size or 8.26 by 11.69 inches.
![]()
3. Choose Image > Scale Image to view and modify the image resolution.
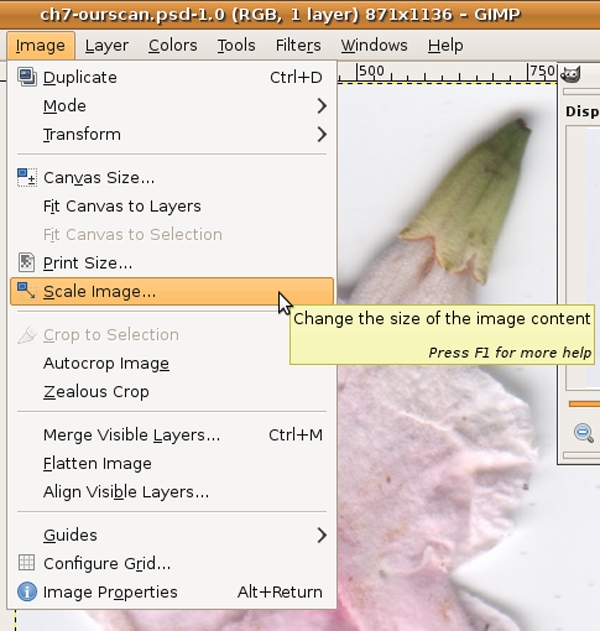
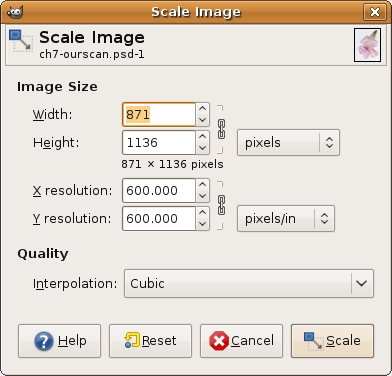
4. Our file is about 871 x 1136 pixels per inch at 600 dots (on the screen) or inches (on the print).
5. We changed our units of measurement to inches using the pull-down menu to the right of the Width and Height area then we set our height at 4 inches. This resulted in a width of 3.08 inches. A print made on a personal ink jet printer will look good, that is, it will not be blurry or pixelated, because our resolution is 600 DPI. This resolution is about twice as large as we need it to be in order to make a fine print on a personal ink jet printer.
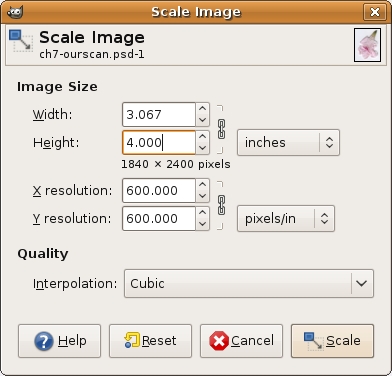
Using the Scale Image dialog box enables the user to change the dimensions of the printed image or the resolution (dpi). This is a good thing - you would never want to change the amount of pixels within the image, unless you simply want to delete some pixels in order to make the file size smaller. Pixels are created during the scanning process, on a scan bed or within the digital camera. The only way to make "new" pixels is to rescan or re-capture the digital file using a higher resolution. It is not possible to create new pixels inside Gimp after the fact. OK, that's actually a lie. You can make new pixels, but you never want to. If Gimp resamples the image (or, makes new pixels based on the surrounding pixels) the result is a blurry or pixelated image.
6. Click OK. Notice the Scaling Bar on the Status Bar in our screen shot. This indicates that something is being changed in the file, a result of changing the size of the image.
7. Choose File > Save As to change the format of the file from Tiff to Gimp XCF file. The name of the file does not have to change, as a new format will create a new file. Always save using the native native or master format.
Exercise 4: From the camera to the computer
Digital cameras use memory cards to store file information within the camera. To send the images from the storage device within the camera to the computer, the camera is connected to the computer via a USB cable. Alternatively, a card reader can be used to connect the memory card to the computer and read it like a small hard drive (similar to a jump drive). When using a card reader, simply drag and drop the folder of image files from the card reader (it will appear on the desktop as an external hard drive) to the desktop or documents folder. Once images are copied to the desktop, it is safe to delete them from the card.
1. If you connect your camera to the computer through the USB cable, then you will use an application to read the images. On Ubuntu, F-Spot Photo Manager may automatically launch. To transfer files from the camera to the computer with F-Spot, connect your camera to the computer (USB or Firewire), the program will launch and display all the photos to be imported.
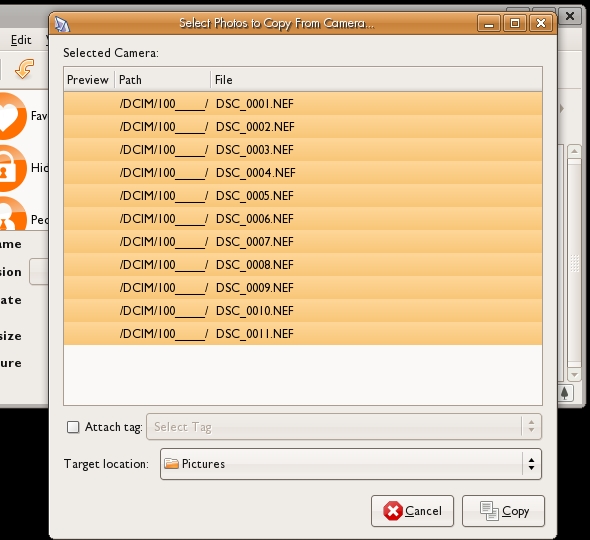
2. By default, images will be downloaded and saved to the "Pictures" folder on the hard drive. Press the Copy button to start the process.


