


Repetition and Cloning
Digital tools empower content producers to parody graphic content both on and off of the screen. Media-makers have the ability to change the appearance of virtually anything with tools such as copy, paste, mask and clone. So the question is: given the opportunity to change any image, message, or text, where would you begin? Your answer depends upon your interests, but usually emerges from political tension. In other words, the oppressed can reclaim messages of the dominant paradigm by altering the symbolism embedded in words or images in the physical and/or digital world. These messages might appear in museums, on city streets or in cyberspace. The "subversive" part of the message-making is the way in which the aesthetics of the altered media rely upon the viewer's visual and intellectual understanding of the dominant culture prior to media confrontation. The Billboard Liberation Front and The Anti-Advertising Agency create work that illustrate this idea. Not too surprisingly, this counter-cultural, playful method of protest has already been co-opted by the advertising industry. In No Logo, Naomi Klein illustrates how advertisers are utilizing methods common to contemporary artists to create brand awareness. She writes, "Pepsi's on-going threat to project its logo onto the moon's surface hasn't yet materialized, but Mattel did paint an entire street in Salford, England, 'a shriekingly bright bubblegum hue' of pink - houses, porches, trees, road, sidewalk, dogs, and cars were all accessories in the televised celebrations of Barbie Pink Month. Barbie is but one small part of the ballooning billion 'experiential communication' industry, the phrase now used to encompass the staging of such branded pieces of corporate performance art and other 'happenings.'" (See No Logo, Naomi Klein, New York: Picador 9-12.)
From The Billboard Liberation Front Manifesto: "And so we see, the Ad defines our world, creating both the focus on 'image' and the culture of consumption that ultimately attract and inspire all individuals desirous of communicating to their fellow man in a profound fashion. It is clear that He who controls the Ad speaks with the voice of our Age." (Jack Napier and John Thomas) Read the entire manifesto at: http://www.billboardliberation.com/manifesto.html
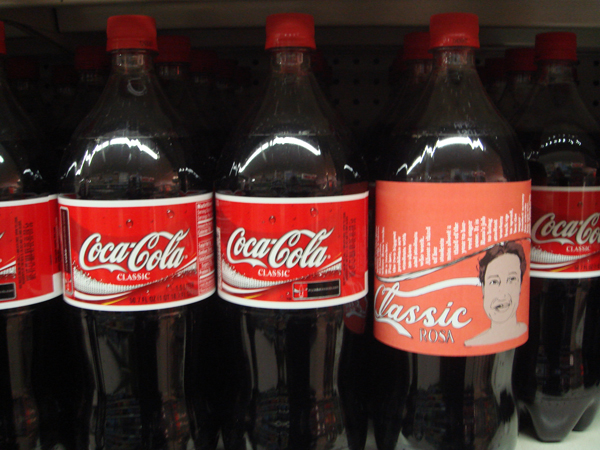
IMAGE: People Products 123, The Anti-Advertising Agency
The Anti-Advertising Agency creates subversive media in opposition to the role of advertising in contemporary society. Many of their projects are participatory, which means that viewers become "doers" or art-makers. In People Products 123, participants download package designs that feature images and information about the workers responsible for producing the consumable product. The package designs are to be printed by the participant, repackaged around the product, and "shop-dropped" in the store where an unassuming shopper would purchase the product contained in the newly informative packaging.
Results of Chapter 10 Exercises

We begin with a group image of the first all female crew that NASA sent to space.

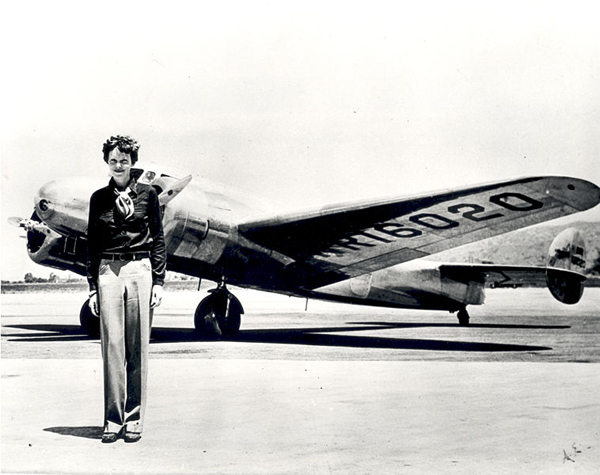
Also, we'll use a cropped image of Amelia Earhart.

em>In the final image, Amelia Earhart's head replaces the head on the center figure of the NASA crew and the image is rendered in black and white.
Before You Start:
Download the following files from Wikimedia Commons:
http://commons.wikimedia.org/wiki/File:C-130_-_First_all_female_crew.jpg
http://commons.wikimedia.org/wiki/File:Amelia_Earhart_1937_GPN-2002-000211.jpg
(We cropped the Amelia photo and used just her head shot.)
Exercise 1: Replace part of one image using the Clone tool
In this exercise, we will use two images in the public domain from the US government: a historic image of Amelia Earhart and a picture of the first all-female flight crew.
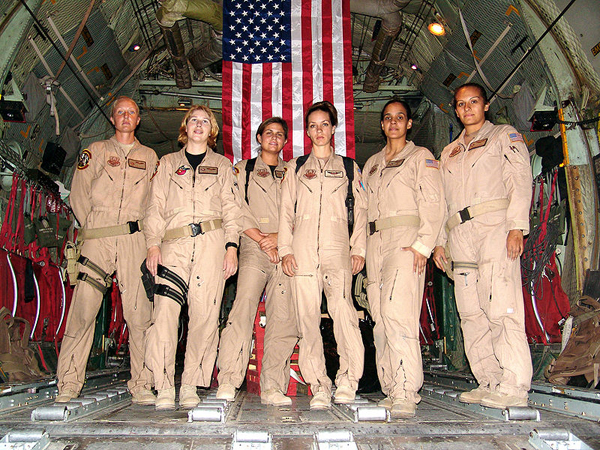
1. Open the file C-130_-_First_all_female_crew.jpg in Gimp. Zoom in on the central figure of the crew. We will start by replacing her head with a sample of the flag. Create a rectangular selection around her head with the Rectangle Selection tool.

2. As long as any selection tool is active, when you place the cursor inside the selected area the tool changes into a white arrow with a small rectangular selection icon. Click and drag the rectangular selection straight above the figure's head - you are only moving the selection. No part of the image is moving.

3. Copy the flag from the background layer and paste it to a new layer. Choose Edit > Copy followed by Edit > Paste to create a new layer. Name the new layer, "flag."

4. The head has been replaced by a sample of the flag on a new layer. The Clone tool is used to replace small areas of a layer with a sample of an image. The Clone tool is applied with a brush. Using a soft brush will make the cloned sample appear to blend into the original image, even though we will do all of our cloning on a new layer. Be careful with your application of the Clone tool. The soft brush creates a little bit of a blur on the image. A small amount of blur is necessary in order for the sample to blend in, but clicking with the soft brush repeatedly will result in a blurry area in your image. The purpose of cloning is to create an unidentifiable image hoax. Creating a blurry area on the image will be draw attention to that area. In order to achieve the hoax, the clone must be made in such a way that the viewer is deceived!
Choose the Clone tool from the Toolbox. Set the brush to about 10 to 20 pixels. Check the Image button in the Source area of the Options. Then create a new layer called clone.

5. Now for the most important part of this exercise - sample parts of the flag in order to blend the areas around the edges where the copy and pasted image is an obvious manipulation. The Clone tool requires that part of an image is sampled before it is applied to another part of the document. Sample part of the flag near the edge between white and red by pressing the Control key and clicking in that area (this could be referred to as Control-clicking). Then position the mouse on top of the corner where the pasted flag needs to be blended and click once to cover it with a soft, brushed sample. Pay close attention to the brush work. Determine if the first click is blended or not by looking at the surrounding values. Decide if your new sample is blending in. If it is not, move on to the next area. Always Control-click to create a new sample before brushing. If the first click did not blend perfectly (it probably did not - this takes some getting used to), use Control+Z to undo the last step and try it again.
Work around all of the edges by creating a new sample of the flag (Control-click) and then clicking with the brush to apply the clone. Control+Z will be used often in this process! We finished the clone in about 30 precise mouse clicks.

6. View the clone layer by turning the eyeball icons off of all of the other layers. Here is what ours looked like when we were finished:

Exercise 2: Add Amelia Earhart to the image of the crew
1. Since the image of Amelia Earhart was originally a black and white photograph, we should change the image of the Air Force crew into grayscale. Select the Background layer in the Layers dialog. Select Layers > Desaturate. Click OK in the dialog that opens. Then select the Flag and Clone layers and repeat this process.

2. Open the image of Amelia Earhart, select her head and neck with the Rectangle Select tool and choose Edit > Copy. Toggle back to the image of the soldiers and choose Edit > Paste. Use the Scale tool while pressing the Control key to resize Amelia Earhart's head so it is in proportion with the body. Name the new layer Amelia.

Exercise 3: Add a layer mask
Add a mask over an image to hide part of it. Masks do not delete or alter image data, they simply hide or show parts of images. Masks operate in black (hidden), white (revealed), and shades of gray (transparent, partially hidden). We will use a layer mask on the Amelia layer to blend her into the new background.
1. Create a layer mask on the Amelia layer. Right-click on the Amelia layer and select Add Layer Mask from the contextual menu that opens. This mask will be used to hide parts of the image around Amelia's head. Notice that the layer now holds an icon for the image and an icon for the mask. The mask is currently active - there is a frame around the mask icon.
2. Choose the Paintbrush tool in the Toolbox and make sure that the default colors are loaded into the foreground/background color chips (black is the foreground color and white is the background color) by clicking on the small black/white color chip icon at the center of the Toolbox.
3. Notice that the icon for the mask is white in the Layers dialog. Since everything on the layer is revealed, the entire mask is white. Use the Paintbrush tool with black paint on the mask in order to hide the background. If you make a mistake, switch to white paint to retrieve hidden parts of the image. Practice painting with black and white paint. Paint with different sized brushes and notice what happens with a soft or hard brush, or with the brush set at various levels of opacity.
We used a soft brush for the background area and kept it far away from Amelia's head. As we brushed closer to her hair, we reduced the opacity of the brush in the Toolbox Options to about 40%. At a reduced opacity, clicking a few times near her head with black paint removes the background while keeping her hair from being cut to an unnatural shape.

Exercise 4: Burning and dodging
The last step is to correct Amelia's skin tones. Before you can do that, you will have to click back on the content portion - leaving the mask - of the Amelia layer. GIMP indicates which part of the layer you are working on by outlining its icon in the Layers dialog. The document title bar also reflects the area that is currently active. If the mask is active, the Burn tool used in the next step will affect only the mask, so make sure Amelia's layer content is active!
1. Notice that Amelia's photograph was taken outdoors, while the Air Force crew was indoors at the time of the photograph. The harsh light on Amelia's face is noticeably different from the light on the Airmen’s faces. We will make a quick adjustment to Amelia's skin tone in order to create a more realistic collage with the Burn tool. Burning and dodging are photographic manipulations native to traditional darkroom practices. In the darkroom, additional exposure time increases the amount of light hitting the paper. This can be done selectively, resulting in a "burned" area of the image. Burning darkens the value of that portion of the print. Light can also be blocked during the exposure by dodging over image areas where the tonal values are too dark with a small tool, resulting in a lightened area of the print.
Use the Burn tool with a soft brush set at an exposure of about 10%. Quickly brush over Amelia's face with the Burn tool. Each time you click the mouse, the tones will darken.

2. Repeat Step 1 two times, once with the Tool Options set to shadows and once as the Burn tool works on the highlights.