A Booki Of Your Own
Reasons For Having Your Own Booki
For most it will not be necessary to have their own Booki software, and every reason not to. Setting up your own Booki and backing up the data on a regular basis is a significant amount of work, and if you're going to share your work with the world there is really no reason not to use the shared Booki as well.
If you're not going to share, then having your own Booki makes sense. If you don't have reliable access to the Internet having your own Booki might make sense as well. A school with XO laptops that can connect to each other on a network but not to the Internet might find a local copy of Booki quite valuable. In my own case I set up Booki on a computer at home and another at the office.
My day job involves teaching people how to use software I have written. Teaching people can be a challenge, and teaching people who live and work on the other side of the Earth is a greater challenge. We had been using articles on a website, plus a Wiki, to contain the training materials, but after writing two FLOSS Manuals I came to the conclusion that what my company needed was an honest to gosh Manual. I got permission to investigate using Booki for that purpose.
I installed the software at home because:
- I wanted the work install to go as quickly and smoothly as possible
- I want, eventually, to write a book that I will not share with the world. After self-publishing my first FLOSS Manual on Lulu I honestly felt that it would be easier to use Booki to lay out this book (working title: Jim's Oprah Book) than to do the same thing with Open Office or MS Word.
If your reasons are like mine, then let's set up our own Booki!
Getting The Software
You will need a recent version of Linux to run Booki on. Windows or a Mac will not run Booki. You won't need much of a computer to run it on. The computer I used at home was a refurbished IBM NetVista which I had bought online for about a hundred dollars. The computer at work was a discarded desktop model which was even older. I would not recommend trying to install this software on an XO laptop, but any desktop computer made in the last few years should be fine.
I used Fedora 13 for these Booki installs, but I don't recommend it. Fedora is used on the XO laptops, and since I write software for that platform I use it on my desktop computers as well. The downside of Fedora is that, so far, every time I've upgraded to a new version of Fedora I've had to back up all my data and do a complete reinstall. Other than this, the different brands of Linux are more or less the same. If I was going to recommend a Linux for Booki my choices in order would be:
- Whatever Linux you already have
- Ubuntu. If you've never used Linux, this is probably the easiest, and I have had good experiences with it.
The rest of these instructions will assume that you have Linux installed and have become comfortable running it. Getting comfortable with Linux is the subject for another book, so if you've never used Linux it would be a good idea to find someone who has to help.
Often the install program for Linux will ask if you intend to use it as a web server or if you are doing programming or if you want office software. Answering "Yes" to all three will save some time.
There are actually two parts to Booki, and you'll need both:
- Booki itself
- OBJAVI 2, the part that creates PDF's, EPUBs, etc from your Book.
installing most software on Linux is no more difficult than checking a check box on an Add/Remove Software dialog, but when software is still under development like Booki is you'll need to get the source code and work with that. The source code for both is kept in a Git repository, so you'll want to have Git installed. Once you do, you can create a "src" directory in your home directory and from in that directory run these commands:
git clone git://booki-dev.flossmanuals.net/git/booki.git
git clone git://booki-dev.flossmanuals.net/git/objavi2.git
This will create two directories under "src": booki and objavi2, which will contain the source code for these products.
It is also possible to get the code without using Git, which may be necessary if your company firewall doesn't let you access the repository. To do that go to this URL:
http://booki-dev.flossmanuals.net/git?p=booki.git;a=tree
In the upper left of the page is a link named "snapshot". Click on this link to get the latest code in a tar.gz archive and unpack it into your "src" directory, then rename the directory this gives you to "booki". Then use this URL and the same procedure to get the code for OBJAVI:
http://booki-dev.flossmanuals.net/git?p=objavi2.git;a=tree
Before you can continue, you'll need to check the README.txt file in Booki and the INSTALL file in OBJAVI 2 to find out what other software you'll need to install. For Booki the list is:
- django
- django south
- wsgi
- apache2
- php5
- python-simplejson
- sqlite
- redis
- aspell plus dictionaries for the languages you will use.
If you're lucky the latest redis will be included as a package in your distribution. Fedora users so far are not so lucky. They will need to download the latest source code from http://code.google.com/p/redis/ and compile it using the Makefile in the time honored manner:
make
sudo make install
If you installed it from a package in your distribution you should check the Services to see that it is enabled and running. If you compiled from source you can start it up like this (running as root):
redis-server &
You'll want to run this command every time your computer boots up. For Fedora 13 you can put this command in /etc/rc.d/rc.local.
For OBJAVI the list is:
- lxml
- pdfedit (4.1+)
- xvfb
- fontconfig
- pdftk
- psutils
- poppler-utils or xpdf-utils
- wkhtmltopdf
- open office 3
- some fonts
You can get everything from your distribution's packages except wkhtmltopdf. That you'll need to download from http://code.google.com/p/wkhtmltopdf/. You should get a precompiled binary and copy it to the /usr/local/bin directory as user root.
When you set up Linux you should get fonts as part of the basic install, but it would be a good idea to install more. In Fedora the Add/Remove Programs dialog has a section for Fonts that has over a hundred free fonts that you can install. If you use the Roman alphabet only you can limit yourself to the Latin fonts.
Disable SELinux
Fedora 12 and later has SELinux. SELinux is to Linux is as Aunt Polly is to Huckleberry Finn. Its job is to keep programs, including the Apache Web Server, from doing things they should not. Even without SELinux Linux is pretty secure. The web server runs as a user (in Fedora's case the user is named "apache") and it is only allowed to do what that user is allowed to do. On a personal or corporate network this is generally enough.
What SELinux does is add an extra layer of protection. Programs are expected to do certain things. If a program tries to do something that SELinux is not expecting, then SELinux stops it. To get around this you have to tell SELinux to expect this behavior from this specific program. Then it will be allowed. This extra layer of protection makes it more difficult for a malicious programmer to break the system. Sooner or later he will have to do something SELinux is not expecting. He will be stopped and his actions will be logged.
As commendable as this is, if you have a program that does more than a few unusual things SELinux will be a real challenge. OBJAVI falls into that category. It would be a great deal of work to get SELinux to tolerate all the things that OBJAVI is likely to do, and if you're running it on a private network there wouldn't be much benefit. We disable SELinux by editing a file /etc/selinux/config as user root. The file should look like this:
# This file controls the state of SELinux on the system.
# SELINUX= can take one of these three values:
#       enforcing - SELinux security policy is enforced.
#       permissive - SELinux prints warnings instead of enforcing.
#       disabled - No SELinux policy is loaded.
SELINUX=disabled
# SELINUXTYPE= can take one of these two values:
#       targeted - Targeted processes are protected,
#       mls - Multi Level Security protection.
SELINUXTYPE=targeted
Change the value of SELINUX to disabled, save the file and reboot your computer.
Configure Booki and OBJAVI 2
Booki recently got a much improved setup script. This will install most of booki under the directory /var/www/mybooki, which is as good a place as any. The rest of it will run out of whatever directory you put the source code in. In my case this was /home/jds/src/b ooki-HEAD-9db92a6, because I downloaded a snapshot and unpacked it. You might want to rename the directory to be simply booki, but you don't have to.
You'll need to create a directory named /var/www/mybooki to copy everything into. Chances are you'll need to be the root user to do this. However, you need to change the ownership of this directory so that you, as yourself, can copy things into it and so the apache web server can write to it. I did this with this command:
 chown jds:apache /var/www/mybooki
 chmod 664 /var/www/mybooki
jds is my own account, and apache is the group the apache web server belongs to in Fedora. (It may be different in other Linux distributions). The chmod 664 means that both jds and members of the group apache may modify the contents of this directory.
It is important when creating content in this directory to make sure all of it is group owned by apache.
As yourself, change to the scripts directory within the directory where you have your booki source code and run this:
./createbooki --database sqlite /var/www/mybooki/
This will copy a bunch of stuff to /var/www/mybooki. Now change to that directory and you'll see that it contains a file named settings.py. There are several places you'll need to modify in this file. First is the doc root:
BOOKI_ROOT = '/var/www/mybooki' # edit this
Next you need to set up some URL's:
# use this objavi server
OBJAVI_URL = "http://127.0.0.1/objavi.cgi"
ESPRI_URL = "http://127.0.0.1/espri.cgi"
TWIKI_GATEWAY_URL = "http://127.0.0.1/booki-twiki-gateway.cgi"

#the name of the booki server (comment out to use os.environ['HTTP_HOST'])
THIS_BOOKI_SERVER = '127.0.0.1:8000'
IP Address 127.0.0.1 is of course the localhost IP address. It is likely that you will want to change this to the IP address of your computer so that you can use Booki on the network. You can of course use a DNS name rather than an IP address.
Notice that we have Booki running on port 8000. We need to set up virtual hosts for both Booki and OBJAVI. If you can give each one its own IP address or DNS name there is no reason you can't run both on port 80 like a normal web application. If everything has to use the same IP address then you can distinguish your virtual hosts from each other using a port number. Note that OBJAVI has to run on port 80, but Booki can use any port. There is nothing magic about the number 8000. It just needs to be a port that nothing else is using. In the office I use port 86.
Next we have to set up the database entries:
DATABASE_ENGINE = 'sqlite3'
DATABASE_NAME = '/var/www/mybooki/database.sqlite' # Or path to database
# file if using sqlite3.
DATABASE_USER = ''             # Not used with sqlite3.
DATABASE_PASSWORD = ''         # Not used with sqlite3.
DATABASE_HOST = 'localhost'             # Set to empty string for localhost. Not used with sqlite3.
DATABASE_PORT = ''             # Set to empty string for default. Not used with sqlite3.
Booki can be used with Sqlite3 or Postgres. If you are willing to tinker with the code you could get it to run with just about any database. Sqlite3 is the easiest to set up and is completely adequate for Booki on a small private network. The only entry you need to be concerned with is DATABASE_NAME, which is set to put the database in a directory that can be read and written to by user apache. There is no need to create the database file. Booki will create it.
Now from the command line, as yourself, run this:
. ./booki.env
Notice that there are two periods on that line, separated by a space. If you just use one the environment variables needed by the next step will NOT be set.
Now run this:
django-admin syncdb
This will create your database tables. In the middle of doing this it will ask you if you want to create a superuser account. You do not. If you answer "yes" it will prevent the rest of the database initialization from happening. Reply "no" when asked.
To finish up the database initialization you need to run this:
django-admin migrate
Now you can create the superuser you skipped creating before:
django-admin createsuperuser
After that you can run Booki itself and check it out. First run this as yourself:
./manage.py runserver
Once this is running you should be able to point your web browser to http://127.0.0.1:8000 and see Booki in operation. You should also go to http://127.0.0.1:8000/admin and add a license like this (after signing in as the superuser you created):
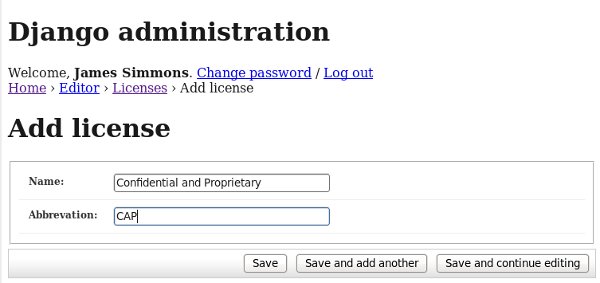
You can fool around with Booki some more if you like, but be aware that this is not an adequate way to run Booki. You really need to run it under a virtual host in Apache. manage.py only supports one user at a time, and is only good as a quick sanity check to make sure everything is set up correctly. When you're done looking at Booki you can kill manage.py by pressing Ctrl-C in the terminal where you started it.
Next we need to configure OBJAVI. You'll probably want to run objavi out of a directory like /var/www/objavi. This means you'll want to set up this directory similarly to the one you created for booki, with the same permissions, and you'll copy the objavi source code there. Before you do, be aware that the objavi/tests directory may contain subdirectories with epub examples that take up over 100 megabytes! You'll have no use for these, so be sure and delete the files before you copy the files to /var/www/objavi.
OBJAVI has its own configuration file, objavi2/objavi/config.py. You'll need to change some settings in this file, create some new directories, and make the directories readable and writable by the apache group. The first setting to change is this one:
WKHTMLTOPDF = '/usr/local/bin/wkhtmltopdf'
When you downloaded the binary for wkhtmltopdf it may have had a name like wkhtmltopdf-static or something else. Change the value of WKHTMLTOPDF to whatever name it has in /usr/local/bin. (In my case I had renamed it to wkhtmltopdf, which hurt nothing).
The biggest change is to add an entry to SERVER_DEFAULTS. The first entry for '127.0.0.1:8000' is my own new entry. Use the actual IP address (or the DNS name) of your machine if you're going to use it over the network.
SERVER_DEFAULTS = {
    '127.0.0.1:8000': {
        'css-book': '/static/simmons.css',
        'css-web': '/static/en.flossmanuals.net-web.css',
        'css-newspaper': '/static/en.flossmanuals.net-newspaper.css',
        'css-openoffice': '/static/en.flossmanuals.net-openoffice.css',
        'lang': 'en',
        'dir': 'LTR',
        'toc-encoding': None,
        'display': True,
        'interface': 'Booki',
        'toc_header': 'Table of Contents',
        },
    'booki.flossmanuals.net': {
        'css-book': '/static/en.flossmanuals.net.css',
        'css-web': '/static/en.flossmanuals.net-web.css',
        'css-newspaper': '/static/en.flossmanuals.net-newspaper.css',
        'css-openoffice': '/static/en.flossmanuals.net-openoffice.css',
        'lang': 'en',
        'dir': 'LTR',
        'toc-encoding': None,
        'display': False,
        'interface': 'Booki',
        'toc_header': 'Table of Contents',
        },
}
The entries that I changed are in bold. I use my own style sheet when creating PDFs for books, and you may wish to do that too. I indicate that I want to display this server in OBJAVI's list of servers and that I don't want to display the other entries. You'll see why in a minute.
You need to create some directories under objavi2/htdocs and make certain they can be read and written to by the apache group:
- books
- booki-books
- progress
- tmp
You'll also need to make certain that the static directory already in objavi2/htdocs is writable by the apache group. Finally, you'll need to set up a log directory under objavi2 and make sure that apache can create files there too.
Setting Up Apache Virtual Hosts
The simplest way to get Booki and OBJAVI 2 running under the Apache web server is to set up virtual hosts. What I did was to edit the /etc/httpd/conf/httpd.conf file as the root user using gedit. It is also possible to make configuration files outside of httpd.conf that will be loaded by Apache automatically. For Fedora 13 you could make separate files for each virtual host and put them in directory /etc/httpd/conf.d. (When I got everything working on my Booki install I moved the virtual host entries to files named booki_vh.conf and objavi_vh.conf respectively).
The entries I put at the end of httpd.conf looked like this:
Listen 8000

<VirtualHost *:8000>
     # CHANGE THIS
     ServerName booki.myhost.com
     SetEnv HTTP_HOST "booki.myhost.com"

     SetEnv LC_TIME "en_GB.UTF-8"
     SetEnv LANG "en_GB.UTF-8"

     WSGIScriptAlias / /var/www/mybooki/booki.wsgi

     <Location "/">
       Allow from all
       Options FollowSymLinks
     </Location>

     Alias /static/ "/var/www/mybooki/static/"
     <Directory "/var/www/mybooki/static/">
       Order allow,deny
       Options Indexes
       Allow from all
       IndexOptions FancyIndexing
     </Directory>

     Alias /site_static/ "/home/jds/src/booki/lib/booki/site_static/"
     <Directory "/home/jds/src/booki/lib/booki/static/">
       Order allow,deny
       Options Indexes
       Allow from all
       IndexOptions FancyIndexing
     </Directory>

     Alias /media/
     "/usr/lib/python2.6/site-packages/django/contrib/admin/media/"
     <Directory
     "/usr/lib/python2.6/site-packages/django/contrib/admin/media">
       Order allow,deny
       Options Indexes
       Allow from all
       IndexOptions FancyIndexing
     </Directory>

     <Location
     "/site_media/xinha/plugins/SpellChecker/spell-check-logic.php">
         SetHandler application/x-httpd-php
     </Location>
     <Location
     "/site_media/xinha/plugins/SpellChecker/spell-check-savedicts.php">
         SetHandler application/x-httpd-php
     </Location>
     <Location "/site_media/xinha/plugins/SpellChecker/aspell-setup.php">
         SetHandler application/x-httpd-php
     </Location>

     ErrorLog /var/log/apache2/booki-error.log
     LogLevel warn
     CustomLog /var/log/apache2/booki-access.log combined

</VirtualHost>

<VirtualHost *:80>
        ServerAdmin myname@gmail.com
        # limit MEM to 800 million bytes
        RLimitMEM 800000000

        #Sometimes it takes a while. Wait.
        TimeOut 600

        DocumentRoot /var/www/objavi/htdocs
        <Directory />
                Options FollowSymLinks
                AllowOverride None
        </Directory>
        <Directory /var/ww/objavi/>
                Options +All +ExecCGI
                AllowOverride None
                Order allow,deny
                Allow from all
                AddHandler cgi-script .cgi
                # Remove output filters in case mod_deflate is being used.
                RemoveOutputFilter .cgi
        </Directory>

        DirectoryIndex index.html objavi.cgi
        ErrorLog /var/log/apache2/objavi-error.log

        # Possible values include: debug, info, notice, warn, error, crit,
        # alert, emerg.
        LogLevel warn

        CustomLog /var/log/apache2/objavi-access.log combined
        #ScriptLog /tmp/objavi-cgi.log

</VirtualHost>
A Virtual Host is a way of making Apache act like more than one web server. We have one Virtual Host for Booki, and one for OBJAVI 2. When you set up a Virtual Host you need some way for Apache to know which host is needed for a given request. You can do this by giving your server more than one IP address, more than one DNS name, or in my case more than one port. The Listen directive at the top says that we will be listening at port 8000 in addition to the normal HTTP port 80. When a request comes in on port 8000 it will go to Booki and when it comes in on 80 it will go to OBJAVI 2. Again, OBJAVI 2 must run on port 80.
For Booki we're using the wsgi plugin for Apache, so make sure it's installed.
The createbooki script will make two files you can use for your virtual host, and you'll find them in /var/www/mybooki. The first one is booki.wsgi, and you can see we refer to it in the virtual host entry above. The second file is wsgi.apache. This contains the entry for the virtual host itself. You can use this as the virtual host entry, but you'll need to make some modifications. My example virtual host entries should give you some idea of what you'll need to modify. Pay attention to the lines in bold in the example. They should be in your booki virtual hosts entry. If the wsgi.apache file doesn't have them, add them. They are responsible for the spell check function of the Booki web page editor.
Using OBJAVI 2
If you've done everything right you should be able to go to http://127.0.0.1:8000 and see Booki running, and go to http://127.0.0.1 and see OBJAVI 2 running. OBJAVI 2 looks like this:
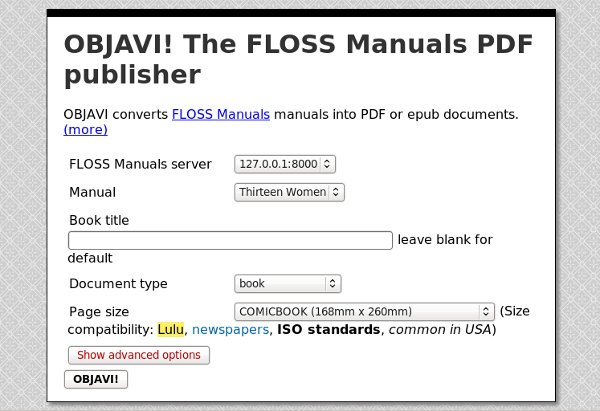
OBJAVI is run from within Book from the Export tab when you're editing a book. If all you want to do is create PDF's and EPUBs you may never need to look at this page. There is one thing you can do from here that you can't do from Booki's Export tab, and that is to create output as Templated HTML. To do that you choose Templated HTML as the Document Type.
Templated HTML is not a kind of e-book, but it is worthy of a brief mention. One of the ways that Booki is different from Wikis like Media Wiki (used for Wikipedia) is that with a normal Wiki anyone can edit any document and the edit is available to the readers of the Wiki instantly. A normal static website makes it easy to control who can update the content, but this control means that updating the content is more work. What Booki introduces is the idea of generating a static website from a Wiki. The Wiki is used by the book authors but is not seen by the book's audience. When the authors have something ready to publish to the world they use OBJAVI to generate a static website and copy it to the public web server.
By default the HTML looks like the FLOSS Manuals website. Because it is generated using templates, you can easily add your own stylesheets, corporate logos, and the like to make the generated site look the way you want it to.
You should definitely think about creating a templated HTML version of your book if the contents are likely to be updated frequently. The website version of your book can then act as a supplement to the e-book version. The stable content will be in the e-book and the latest minor tweaks and corrections will be on the website.
About The Authors
James Simmons has been an avid reader since his childhood, in spite of being placed in the lowest reading group in every grade because of his August birth date. (The teachers generally moved him to the middle group a month later). In the second grade he achieved recognition for being the only student in his class who knew what "porridge" was. His favorite reading was science fiction and books on science. In the sixth grade he discovered the books of Alfred Powell Morgan and began a love affair with radio and electronics that would continue well into the seventh grade. In the eighth grade he discovered the works of Ray Bradbury, Robert A. Heinlein, and Arthur C. Clarke. By the time he was assigned to read The Martian Chronicles in high school he had already read it three times and felt that he understood that book better than his teacher ever would. In retrospect he would have done well to keep this opinion to himself.
A friend he made in college encouraged him to try his hand at writing science fiction stories. He had no talent for fiction writing, but he did manage to write a fan letter to Galaxy magazine demanding more stories by Howard L. Myers. James did not know it at the time, but the story he had admired so much had been published two years after the author's death.
While James did not fare well writing fiction, he would eventually do better writing computer programs. He wrote three e-book related Activities for the One Laptop Per Child project: Read Etexts, View Slides, and Get Internet Archive Books. He used what he learned doing this to write Make Your Own Sugar Activities!, a manual on creating Activities for the Sugar platform that is considered the definitive book on the subject, pretty much by default.
James' mother really did tell him that "The readers are the leaders." This was a slogan used by a woman trying to sell his mother a set of encyclopedias. His mother did not buy the encyclopedias.
Oceana Rain Fields is a visual artist and creative spirit with a flair for the unexpected and the desire to support worthy causes with her art. She graduated in 2010 from Pacific High School, earning several notable scholarships. In 2010, her painting “Malaria” won first in show in the Vision 2010 high school art competition at the Coos Art Museum in Coos Bay, Oregon. Oceana plans to continue her art education at Southwestern Oregon Community College in Fall 2010. As a Rural Design Collective mentee she did the art featured in this book, including the pictures at the top of each chapter and front and back cover illustrations for a limited edition printing done by the Collective for their backers.
Rebecca Hargrave Malamud, founder of the Rural Design Collective, is an award-winning designer, creative director, open source advocate and artist. She has a proven track record in advancing large-scale Internet projects, and has contributed her talents to several meaningful open source initiatives that have an ongoing impact on the future of technology and society: http://sixes.net/rdcHQ/about/rebecca-hargrave-malamud/
Before We Begin 
There is a lot of information in this section, so before you start reading it I want you to think about what kind of e-book you're making and why you're making it. The answers to these two questions will determine what material you need to understand and what you can safely skip. Some answers I can think of are:
- You have some handouts that you have created in MS Office and rather than printing them off and getting them photocopied you'd like to make PDF's out of them and distribute those to your students.
- You have some students with reading problems. You'd like to make Plain Text files from your handouts so these students can use Read Etexts, which supports Text To Speech with word highlighting.
- You have textbooks that you'd like to convert to e-books so your students don't have to lug them around. You don't care if the e-book is laid out exactly the same way on the screen as it is on the page, as long as the words and pictures are all there.
- You want to make Plain Text versions of your textbooks for your students with reading problems.
- You own some lavishly illustrated children's books and you'd like to make e-books out of them for your students. It is important that the e-book pages look exactly like the book pages.
- You own some lavishly illustrated children's books and you would like to make e-books from them to donate to the Internet Archive.
- You own some lavishly illustrated children's books older than 1923 and would like to donate the books themselves to the Internet Archive so the experts there could make e-books out of them.
- You own some books copyrighted before 1923 and you'd like to make Plain Text e-books to donate to Project Gutenberg.
- You own a copy of White Shadows In The South Seas, published 1919, which you willing to scan and OCR for Project Gutenberg if only you could get some help with all the proofreading that would require.
- You've written a textbook yourself and you'd like to make an EPUB out of it.
- You want to collaborate with other teachers to create a textbook, and hope to get it translated into several languages.
- You teach a class where the students all have XO laptops and nothing else and you'd like to have the students make some simple e-books using just those computers.
From a technical standpoint, converting a document you created yourself into an e-book is trivial. It is no more difficult than saving a document made in one word processor into the format used by a different brand of word processor.
The website Booki provides a way to create e-books in collaboration with other authors and get those books translated into multiple languages. This very book you are reading was created using Booki.
Making an e-book out of a printed book is more difficult and more work than converting your own work into an e-book. You need to turn printed pages into images, turn images of text into text, proofread everything and correct several kinds of errors that will inevitably come up. Making an e-book to donate to Project Gutenberg or the Internet Archive is more work than making one for your own use. However, the results can be well worth the effort.
Every kind of e-book can be made with free software that is easy to use. In the chapters that follow I begin with the easiest possibilities (creating an e-book from a document you made) and finish with the more difficult ones. If you aren't planning to create an e-book from a printed book the first chapters may be the only ones you need to read.
I will explain how to do every task using Windows and Linux. Much of the software I'll talk about is available for the Macintosh as well, so if you have one you should be able to figure out how to do things there too. Most of the software we will use was originally written for Linux and later adapted to the other platforms. It is no more difficult to use than other Windows software. Sometimes I will explain tricks that only work in Linux, but I will always provide an alternate method for Windows. Linux is an operating system for those who like to open the hood and tinker. If you are a teacher some of your more difficult students may one day fall into this category. These tricks are for them, and may safely be ignored by others.
If you have a Macintosh and want to install and run software described here you may need to use Mac Ports, which you can learn more about here:
http://www.macports.org/index.php
I'm not a Mac user so I won't be able to give detailed advice on installing these programs on a Macintosh.
Don't be intimidated by the amount of information in the chapter on scanning books. In the end all you're doing is taking pictures of the book pages with a digital camera, then rotating, cropping, and cleaning up those pictures. The detailed information in this chapter will make that process as painless as possible.
Python Programs
Some of the chapters have very short Python programs in them. Don't be put off by these. Like all other computer programs they are meant to save you work, and they will if you give them a chance.
Python programs can be run on Windows, the Macintosh, or Linux. Linux is the simplest, because Python is used so much on that platform. A typical Linux install will have Python installed by default. For Windows and the Mac you can download Python here:
http://www.python.org/download/
The version you want will be Python 2.7.1. Python versions starting with 3 probably will not work. Don't be concerned that you aren't using the latest version of Python. At this time Python 3 is not widely used. When it is more mature I'll rewrite these programs to use it.
The proofer.py utility requires PyGTK. While there is a PyGTK download for Windows, you'll need to use Mac Ports to get it on the Macintosh. PyGTK is included with every Linux distribution.
To download and install PyGTK for Windows you'll need to follow the instructions here:
http://www.pygtk.org/downloads.html
On Windows a version of GTK+ is included with The GIMP install, but is not adequate for running PyGTK. You'll need to uninstall it, install the new GTK+ bundle, and replace the PATH entry for GTK to point to the new one. If that sounds like a lot more work than you normally go through to install a Windows program, it is. You may find running proofer.py on Windows more trouble than its worth. The other Python programs should still be useful on Windows.
The Python programs themselves can be downloaded here:
http://git.sugarlabs.org/e-book-making-scripts/mainline/trees/master
One trick for downloading them is to click on the program name on this page, which will give you a formatted listing of the code. When you get that look to the upper right of that listing for a link named Raw blob data. Click on that to download the program.
To download all of the programs look for a link named Download master as tar.gz. That will give you an archive file that you can open with 7-Zip.
A simple way to run these programs is to put Python in your system path (see http://www.computerhope.com/issues/ch000549.htm for instructions for Windows), put the program in the directory where the files you'll be working on live, make that your current directory, and run a command line like this:
python programname.py arguments
Booki
Booki is a website used to create e-books. The URL is:
http://www.booki.cc
Most Internet users have encountered Wikis before. Everyone has at least heard of Wikipedia, the encyclodepia written and edited entirely by volunteers. Essentially, a Wiki is software that enables people to edit a website from within the website. Many free software projects use Wikis for documentation purposes, and both the One Laptop Per Child project and Sugar Labs have their own Wikis. While Wikipedia is an example of what this approach can achieve, very few Wikis are as well maintained as Wikipedia.
Some people involved with the free software movement felt that what was needed was not Wikis, but free manuals. A Wiki tends to branch off in all directions. However, a manual needs to be more formally structured, with a Table of Contents and attributed authors, and ideally should be something that you can copyright, print and bind, give an ISBN number, and sell on Amazon.
The website FLOSS Manuals was created to meet this need. The letters FLOSS stand for Free and Libre Open Source Software. If you've been paying attention you probably realize that the book you are now reading came from that very site. This book and the others on the site are not just articles on the web. You can create a PDF from them and read it as an e-book, and quite a few books on the site can be ordered as bound and printed books from a publish-on-demand service like Lulu (http://lulu.com/).
FLOSS Manuals originally used a modified version of Wiki software called TWiki, and a good part of this book was written with that version of the software. The longer-term goal was to create a web-based platform specifically for making books. That software, you've probably guessed, is Booki.
One key difference between FLOSS Manuals and Booki is that the FLOSS Manuals website is only for manuals for free software, nothing else. You need to propose a topic for a manual on the site mailing list, and if it is approved someone will create the book for you. When you are ready to publish your book on the site you'd need to send another request to the list to ask for that to be done.
Booki is different. Anyone can create a book on Booki, on any subject. Where you publish the book is up to you. The software will let you generate your book in a variety of formats, including HTML, PDF, and EPUB. You can take this output and host it wherever you like. The PDF and EPUB could be donated to the Internet Archive as a Community Text, and you could publish the HTML on your own website. FLOSS Manuals will continue to be hosted on the FLOSS Manuals website.
This is what Booki looks like when editing a book (in fact this very book, under its original title). You will notice that I'm using the Sugar Browse Activity, which is completely adequate for the purpose:
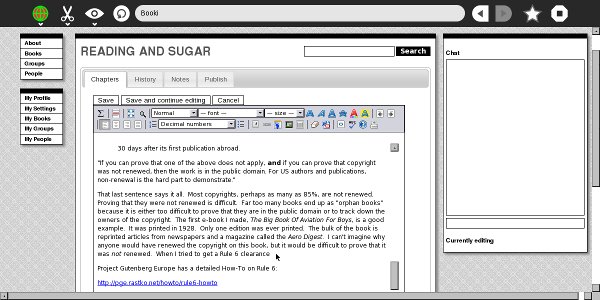
Booki is one of the best tools available for Sugar users to create e-books. It can be used on the XO or from Sugar on a Stick. It supports many authors collaborating on a single book. It supports translating books into many languages. It can create PDFs and EPUBs. It can create books formatted for print-on-demand services. It can create documents in Open Office ODT format (which Open Office can convert to MS Word format). It can even be used to download, proofread, and correct EPUBs created by the Internet Archive.
Booki is an excellent option for teachers preparing textbooks, but it can be used by students for their own projects too. Here is another screen shot showing how you can upload Journal entries containing images to the image directory for a Booki project:
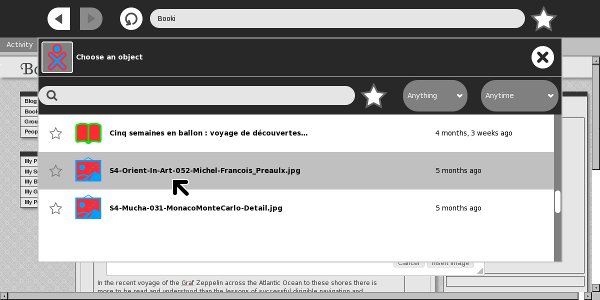
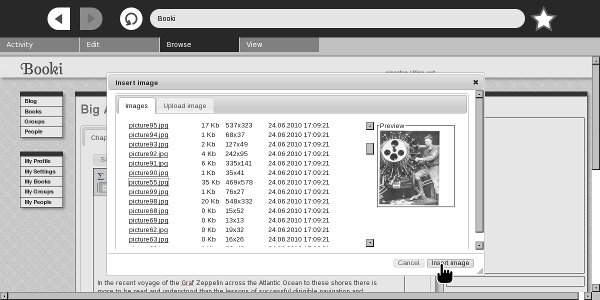
Here's another one showing how you can select an image and insert it into your book:
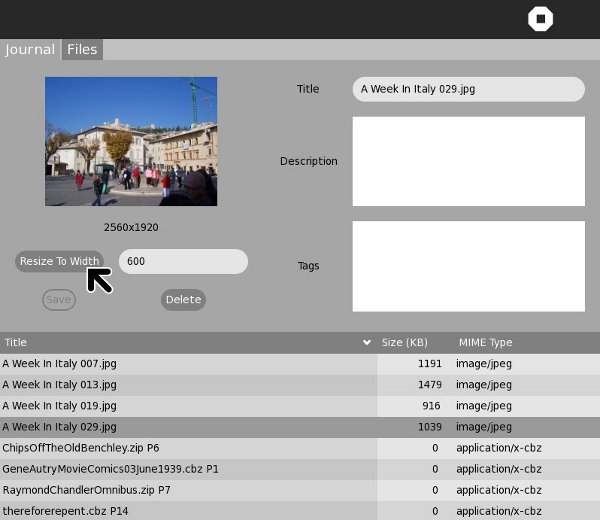
In addition to Browse you'll want to get the Sugar Commander Activity which has a number of useful functions that involve creating and updating Journal entries. The latest of these is a button to resize image files to any width. Booki needs images to be 600 pixels wide or less, and Sugar Commander can do the resize with the push of a button:
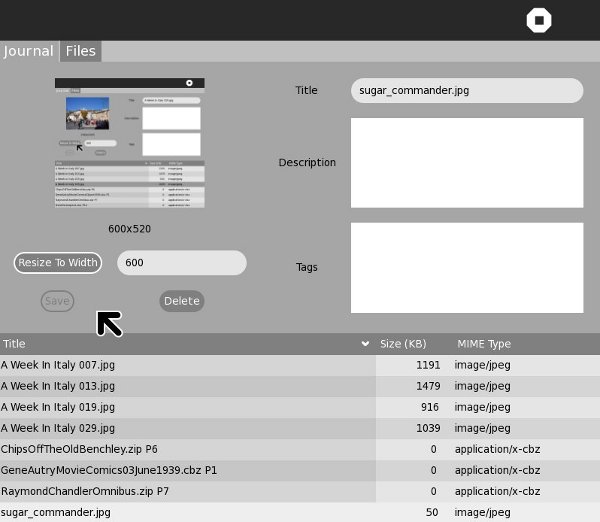
I even used Sugar Commander to resize the screen capture above for this book:
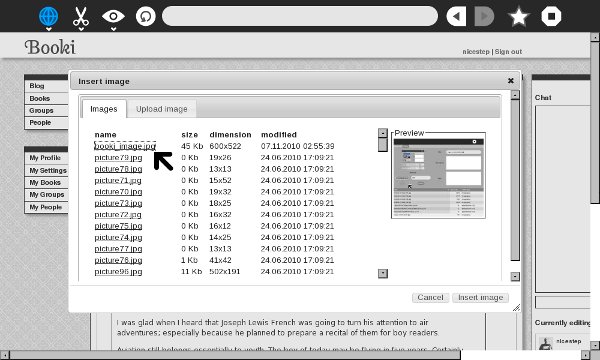
After this, I uploaded the resized screen capture into the book:
A complete description of how to use Booki is outside the scope of this book. If you want to learn more, check out the Booki User's Guide:
http://www.booki.cc/booki-user-guide/how-can-i-use-booki/
A Few Thoughts On Collaboration
The main reason to use Booki rather than a word processor to write a book is to effectively collaborate with other authors. The book you are reading is my second attempt to do this (and the Spanish translation of my first FLOSS Manual would definitely qualify as a third) so my opinions on this might be worth something.
The first thing is that there are good reasons to collaborate and not so good. A good one is that your collaborator can bring expertise to the book that you don't have. A bad one is that you think there will be less work for you if you have a collaborator. There are many human activities where "Many hands make light labor". Writing a book isn't one of them.
Many successful software manuals have been written using the "Book Sprint" method. This involves getting a small group of people in the same physical location for about a week and having them write the whole manual together in that one week. I had a coworker of mine involved in the Book Sprint to update the manual for CiviCRM, a software package used by non-profits. She had done some work on the software to support the Jewish calendar because her synagogue needed it, and this work had impressed the developers of CiviCRM enough that they invited her to participate in their Book Sprint. They had a grant, so they paid her traveling expenses to Lake Tahoe and put her up at someone's home for a week. She took a week's vacation to work on it. Others worked on the book remotely. Nobody got paid for their work.
If you're interested in doing a Book Sprint there is a FLOSS Manual on the subject, plus another FLOSS Manual on "Collaborative Futures" which is itself the product of a Book Sprint.
My books were not written using the Book Sprint method. My books were more of a slog than a sprint, and I didn't get a bunch of people to commit to working on my book full time for a week. What collaboration there was was informal and spread over months. My first FLOSS Manual was a book on creating Activities for the Sugar platform; in other words how to write programs that would run on the XO laptops used by the One Laptop Per Child project. There is no way a Book Sprint could have produced that book. I had to create a bunch of short programs to demonstrate everything that can be done on that platform and how to do it simply. I needed to be test and debug them. I had to set up several versions of test environments.
You might not think of that book as a collaborative effort, since I wrote every word in it, but in a very real sense it was. I got lots of feedback from other developers, help debugging my examples, help resolving problems with the test environments, and many useful suggestions. Writing the book on the web made that kind of collaboration much easier.
There were a couple of people who offered to write chapters for the book, but this did not come to pass. In the end this didn't matter; the book ended up doing what it needed to do.
After this first book was published there was interest in creating a Spanish version. Some of the most successful OLPC projects have been in South America, so I definitely wanted there to be a Spanish version. Unfortunately, I don't speak any Spanish, so I didn't feel qualified to do it. I explained on our mailing lists that it would be very simple to request a book project to be set up on the site for a translation, and that the site offered an interface where you could view the original chapter while writing the translation (when we started this we used the original TWiki software for the translation. Booki doesn't have a side by side translation view yet). Several people offered assistance, but nobody requested the project to be set up. I decided to do this myself, even though I couldn't translate anything.
After the project got set up a couple of people got accounts on FM and looked over the book, and one of them translated a few paragraphs. Several of the people who had offered to help were concerned that they did not have the technical knowledge to translate the book, and for several days it looked like nobody was going to work on it.
A friend suggested using Google translate to create a base translation that native speakers could correct. I ended up using Babel Fish instead because the HTML generated by Google Translate had a lot of extra stuff in it like JavaScript and the original English text being translated. After I started doing this a retired teacher who was fluent in Spanish started to correct the text, and I went through and untranslated things that should not be translated, like code examples. It really needed native speakers to get it into shape. The retired teacher sent out an email on some lists explaining that we had a translation going that needed to be corrected. After that several native speakers got accounts on the site and started to correct the text.
What I learn from this is that starting a book from nothing is intimidating. However, once the book reaches a critical mass and there is no doubt that there will be a finished book you'll find that getting help and feedback is easier, almost inevitable.
This was not the end of the problems getting the book translated. While we had several people willing to polish up the Spanish in the earlier chapters, none of them were confident in their ability to update the more technical chapters later on. We were fortunate enough to have someone come along who did have a technical background, but she wanted to start the whole translation over again, using no automated translation at all.
She felt very strongly that while a machine translated book might be tolerable for adults, for students still mastering their native language it needed to be much better. The Spanish teacher in her school often pointed out the relationship between mastering your first native language and mastering of formal languages, including mathematics. Adults can deal with a poorly translated book but children should not have to.
I was not sure this was a good idea, but she did manage to recruit a large team to do a complete translation that way. Since she was starting over the whole job was done in Booki and the old Twiki version was abandoned.
The work her team did was absolutely terrific, but I still believe that if we didn't start with the awful machine translated version we would never have gotten the good one.
This second translation involved a twelve native speakers with technical skills. It was practically a Book Sprint. The leader of the project, Ana Cichero, recruited the volunteers and made them responsible for individual chapters. They put footnotes at the end of each chapter to indicate who translated what, in addition to the "Credits" chapter at the end. She also set a deadline to get the book published (the Winter solstice). She came up with an interesting way to assign chapters to translators: In the name of the chapter in the main page the translator would put his name and the percentage complete of the translation. For chapters with no translator there would be question marks. This allowed everyone to see the progress of the book at a glance:
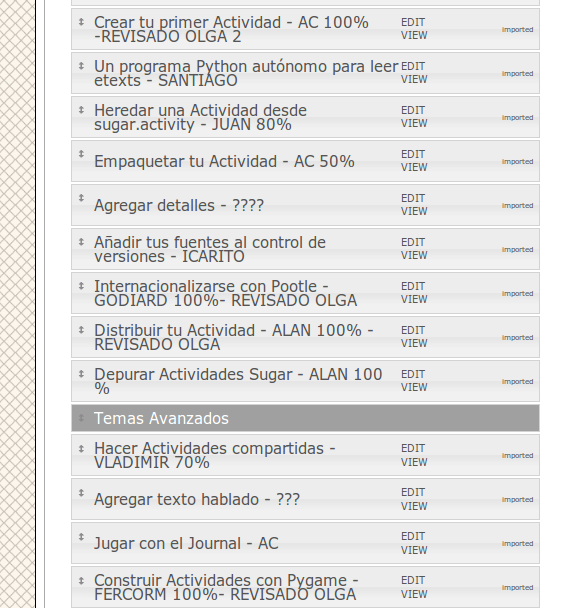
Instead of publishing the book several times as it was being worked on Ana wanted to publish it only once when it was completely finished. (She tells me that in retrospect publishing several times might have been better). She reached a point where the translation was ready to go but it turned out that there were still problems with the book:
- When you create a book with Booki every picture in the book must be contained within the book. You cannot link to a picture elsewhere and have the picture show up in the published book. Unfortunately, the HTML editor Booki uses does show the picture if the URL is outside the book, so even though the picture is not put in correctly it looks like it is there, both in the editor and in the View page. This makes this kind of problem difficult to detect.
- Some of the team members preferred to use Word to edit their chapters rather than the Booki editor. This can cause problems, because Word produces HTML that is poorly formatted and which contains extra style information that can cause problems when making a PDF. Again, the Booki HTML editor makes the page look just fine. You need to activate the HTML mode to see the problems. Some used word processors to do spell checking. (The web page editor in Booki actually offers spell checking, but it wasn't working at the time).
- Some team members used Google Translate to create a starting point for their own translation. Unfortunately this creates HTML with a lot of extra tags, including the original text alongside the translation. If you want to do an automated translation Babel Fish HTML is much cleaner, although the translation may not be as good as Google's.
- In a couple of cases team members used plain text with a large font instead of h1, h2, h3, etc. tags. This looks fine but hides the structure of the book from OBJAVI, so it can't do as good a job of generating tables of contents.
There was a lot of unexpected work at the end, but I can't argue with the results. The translation team did an outstanding job!
The best motivation to collaborate on writing a book is a desire for the book to exist. To quote Antoine de Saint-Exupery:
“If you want to build a ship, don't drum up people together to collect wood and don't assign them tasks and work, but rather teach them to long for the endless immensity of the sea”
If you can sell people on the idea of the book you'll get collaborators. That's another reason you may have to write a substantial chunk of the book before collaborators show up. A partial book is easier to sell than an idea for a book.
With the book you are now reading I got collaborators in the conventional sense of the word. Before I had worked on Make Your Own Sugar Activities! I had written the Get Internet Archive Books Activity described in an earlier chapter. In the process of doing that I met some people from an organization in Oregon called the Rural Design Collective. This is a group that has done work for both the Internet Archive and the One Laptop Per Child project. They have a summer mentoring program where talented students get involved with an Internet project and learn skills that may lead to a future career.
When I announced that Make Your Own Sugar Activities! was finished I got an email from Rebecca Malamud of the RDC congratulating me. The book you are now reading was in the thinking stages and knowing of her work with the IA I told her about my plans for the new book and asked if she'd like to contribute.
At that point the RDC was contemplating what to do for their summer mentoring program and they decided that working on my book might be just what they were looking for.
We all wanted the book to exist, but for different reasons. The RDC is focused on training young people to create websites, and so they chose to focus on the graphic design of the book more than the content. They did provide some content: the chapter on publishing e-books with gCI is mostly theirs (the RDC created that software).
The RDC found a talented young artist who did some terrific cover and interior illustrations (the small ones at the top of each chapter). The cover illustration that everyone liked didn't really go with the title I had proposed, so I ended up changing the title. (The same artist also did new cover art for the printed Make Your Own Sugar Activities!) Another of their mentees created style sheets which they used to create a really beautiful bound and printed edition of the book. The page layouts he came up with were fancier than anything Booki could create, for instance having multiple columns on some of the pages.
One of the best ways that Booki can help you collaborate is to send you emails when anything in the book has been changed. The emails have links that let you compare the previous and current versions of changed chapters side by side. Booki also lets you add notes to each chapter.
In addition to the RDC's work I also got much help and encouragement from the forums of
DIY Book Scanning and
Distributed Proofreaders. Again, this is not collaboration in the way the word is normally used, but it was a vital contribution to the book. I would post a link to the book on the FLOSS Manuals website and ask for comments. The comments I got often contained valuable information and suggestions.
So in summary I'd say that even if you can't afford to send a bunch of people to Lake Tahoe for a week you'll still find Booki is a good way to collaborate on writing a book!
Using Booki To Correct Internet Archive EPUBs
In the chapter on e-book formats I was a little harsh describing the EPUBs distributed by the Internet Archive. Actually, I am at the same time full of admiration for them. IA books are submitted as PDFs containing only page images, without text. From this IA's software does OCR on the pages, formats the text into paragraphs, figures out where illustrations are on the pages then crops them to size and puts them into the e-book reasonably close to where they would be in the original book. As a professional computer programmer, I consider this no less miraculous than transforming sausages into a live pig.
Having said this, the fact remains that these books need lots of proof reading and correcting. If the book is one you donated yourself, it is possible to download the generated EPUB from IA, correct it using an EPUB editor like Sigil, and then replace the original EPUB on the IA website with your corrected version. Booki lets you do the same thing on the web with collaboration.
You can easily copy any IA EPUB into Booki using this page:
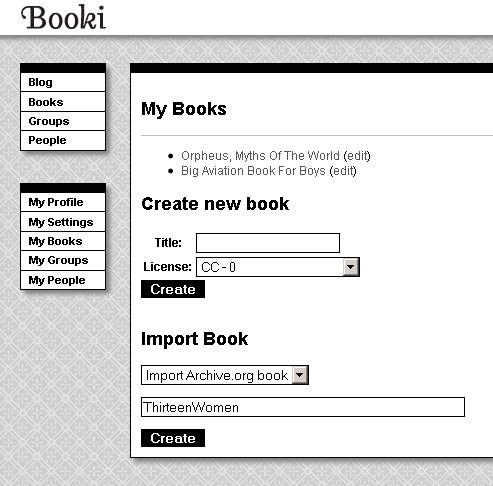
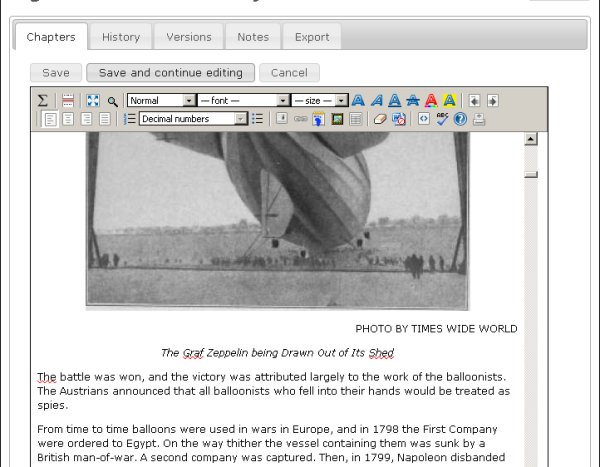
The Identifier "ThirteenWomen" is from the IA website page for a book I donated, Thirteen Women by Tiffany Thayer. Click Create and the book will be downloaded from the IA website as an EPUB and imported into Booki. Once there anyone can work on it just like any other Booki project. This is the Big Aviation Book For Boys being edited in Booki:
Using the example of the Big Aviation Book For Boys, suppose your school has a club for model aviation enthusiasts and they wanted to fix up this book and others like it as a club project. One thing they'll want to do is set up a Group for all the books they plan to work on:
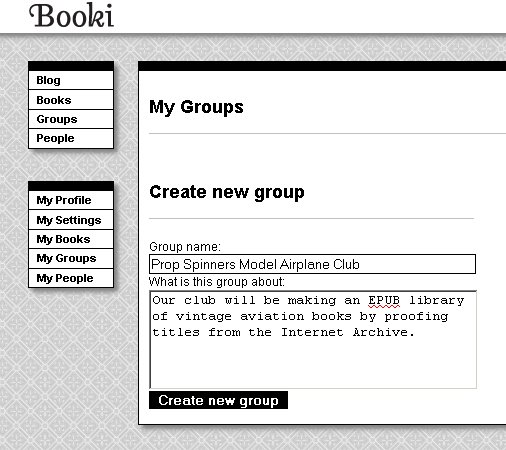
Any books they import can be added to this Group.
Most of the proofreading for this book can be done without referencing the original book. There will be things like page headers and footers to remove, paragraphs split across two pages that need to be re-joined, illustrations that need to be moved to between paragraphs that currently are stuck in the middle of a paragraph, formatting chapter headings and correcting obvious misspellings. In this book several numbers are garbled, and the only way to correct those and errors like them will be to refer to the original book in PDF or DjVu format. Rather than do that every time they see such an error, our club members might prefer to use the Notes tab to list all such errors that they find so they can be corrected at the same time:
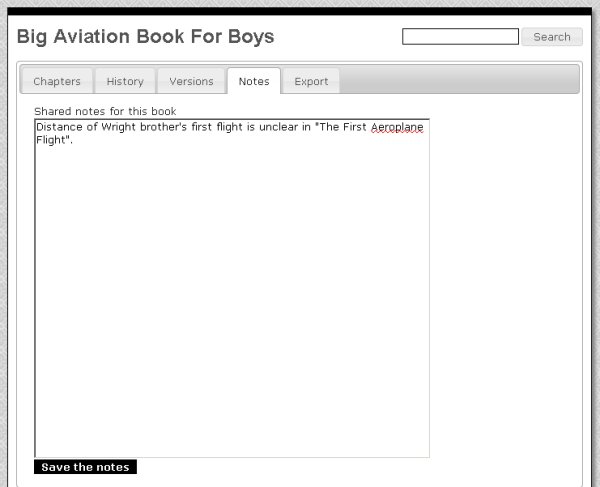
When the Prop Spinners are satisfied that the EPUB is in good shape they can send it to the Internet Archive using the Export tab:
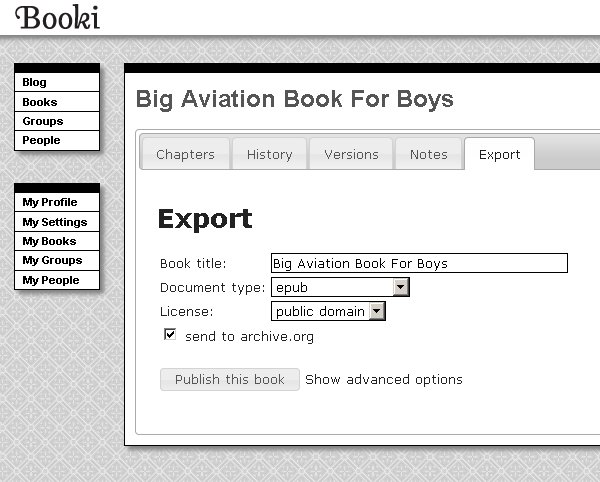
It is likely that the Prop Spinners would be correcting books they did not donate themselves, so replacing the original generated EPUB will not be an option for them. What they can do is to create a new entry in the catalog containing just their corrected EPUB.
The Replacing Textbooks Project
Sugar Labs has begun a project to create Open Educational Resources to replace ordinary textbooks. This project will have its own installation of Booki. If this sounds like something you'd like to participate in you can read about it here:
http://wiki.sugarlabs.org/go/Replacing_Textbooks
calibre
calibre (always spelled lower case) is a tool to manage your e-book collection. It can organize your e-books, convert them to different formats (for instance EPUB to MOBI), and copy them to an e-reader like the Kindle.
You can get versions of calibre for Windows, Linux, and the Macintosh. calibre comes with many Linux distributions. If you're using Windows or the Mac you can download it here:
http://calibre-ebook.com/
The most useful thing calibre can do for us is to create a quick and easy website for publishing an e-book collection.
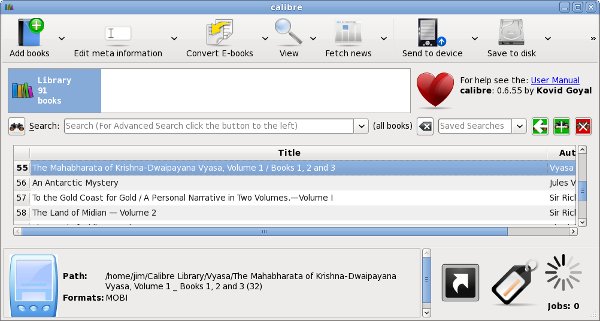
To do this all you need to do is add all your e-books to calibre using the Add button, correct the Author and Title information as needed, and open the Preferences dialog shown below:
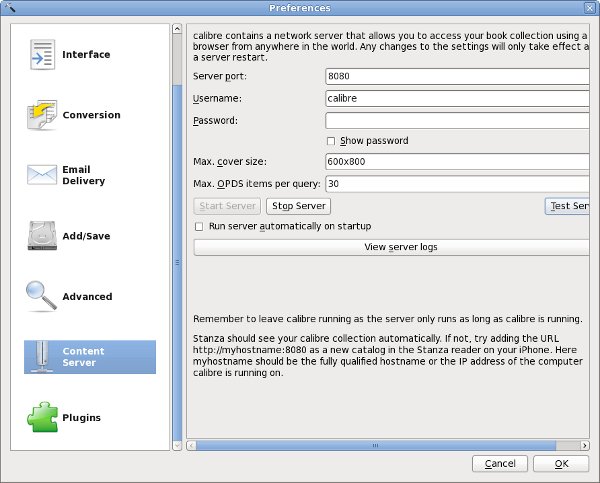
Push the Start Server button on this dialog and you're in business. The website will be at your computer's IP Address, port 8080 (or whatever port you choose). The website will look like this:
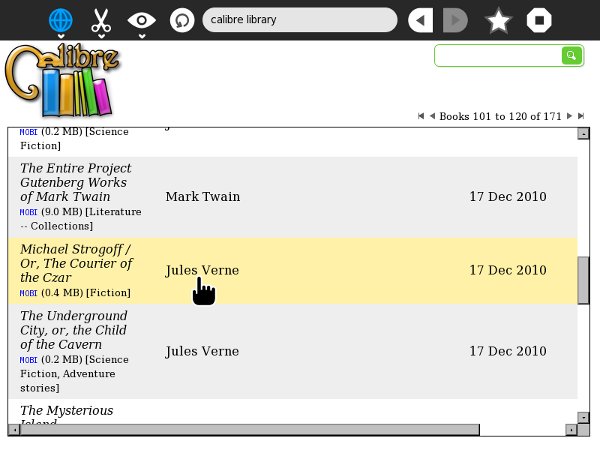
The e-books in the illustration are all MOBI, because I'm using calibre for my Amazon Kindle. However, the book server of calibre can serve any book format that Sugar supports, including Plain Text files, EPUB's, PDF's, DjVu's, RTF's and CBZ's.
calibre2opds
While calibre by itself can create a website and serve up pages, there is a better way. calibre2opds is a software package that reads the calibre database and generates static web pages from it that include everything you need for a website. It also includes an OPDS directory, although not one that Get Books can make use of.
You can download the software here:
https://launchpad.net/calibre2opds
There is a .exe installer for Windows users. For Linux and the Macintosh all you need to do is install Java and run the all platform installer like this:
java -jar calibre2opds-2.4-beta4.jar
That will launch a GUI installer that will put the software in your home directory. You'll need to tell it where calibre is installed and give it a directory to create your website in.
Once you have the web pages created you have several options:
- Copy the files to a thumb drive for an offline e-book library.
- Copy the files to a Dropbox directory for a free website that can be accessed over the Internet.
- Copy the files to the webroot of an Apache or other web server for a website that can be accessed on a private network.
An important note about using the site from a thumb drive: Sugar will mount the drive at a location called /media/VolumeName where VolumeName is the label of the drive. It is important that you give your thumb drive a short and meaningful volume name, like books. You may need to format your drive to give it this name, so do that before you copy the data into it. If you do everything right, you'll be able to use the website from the Sugar Browse Activity using the following URL:
file:///media/books/_catalog/index.html
This is what the website looks like running from Dropbox:
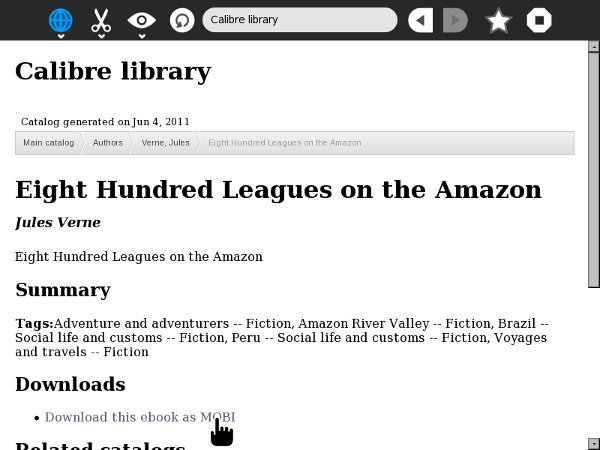
If all you need to do is publish an e-book library on a local network calibre is the only software you need to look at. In the next two chapters we'll look at some other options that require more technical expertise but may be better suited for advanced needs.
Sources For Free E-Books
Project Gutenberg
Project Gutenberg is the oldest source of free e-books and still one of the best. It is mostly known for its Plain Text files but other formats are available as well. There are three Project Gutenberg sites that you can get books from:
Project Gutenberg at http://www.gutenberg.org/wiki/Main_Page
Project Gutenberg Australia at http://gutenberg.net.au/
Project Gutenberg Canada at http://www.gutenberg.ca/
There are other affiliated sites but any books they provide should also be available at the main site.
The reason Project Gutenberg Australia is different is that copyright laws in Australia are different than in the United States so they can host titles that the United States cannot. (There are also some titles that are in the public domain in the U.S. but still under copyright in Australia).
The website explains, "As a general rule the works of authors who died before 1955 are in the public domain in Australia. Works by George Orwell (died 1950), Virginia Woolf (died 1941), and James Joyce (died 1941), just to name a few authors, are in the public domain in Australia.
"Of course, works which are in the public domain in Australia may remain copyrighted in other Countries, even for several decades. People may not download, or read online, such works if they are in a country where they are still under copyright. That still leaves a lot of readers out there to enjoy etexts of some of the greatest literary works of the twentieth century."
Project Gutenberg Canada is in a similar situation to its Australian sister site. Canadian copyright law puts books in the public domain 50 years after the author's death. Australia used to do that, but now is a life + 70 country, except for books where the author died before 1955. Canada is under some pressure to change its copyright laws, but for now Canada can host more recent books than Australia can.
This is a typical book listing from the main website showing the formats that are available for the Jules Verne book Les Cinq Cents Millions De La Bégum (The Begum's Fortune):
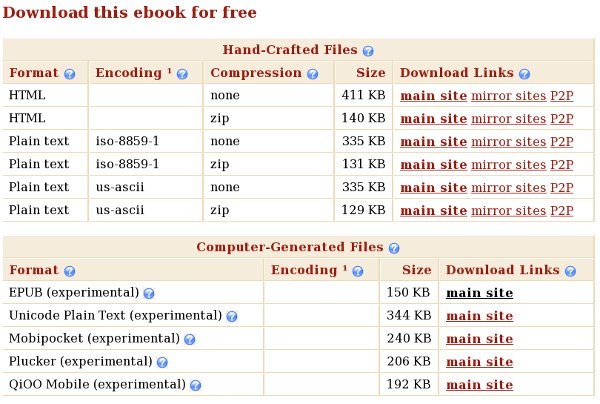
Encoding is the character set used for the Plain Text file. Nearly all books have a us-ascii version. Books in languages other than English will in addition have an iso-8859 version or a UTF-8 version. These encodings allow for things like accents and other diacritical marks. As the site explains:
"Plain text files often come in more than one encoding. us-ascii encoding is supported on virtually any device but has a very limited choice of characters. It is not suitable for any language except English. iso-8859-1 (also known as Latin1) is supported on any Windows-class machine or better. It is suitable for most Western European languages. utf-8 is suitable for any language but needs a display program that knows utf-8 and you have to install appropriate fonts for the language you are trying to display."
The HTML version is suitable for reading online and may or may not have illustrations. The EPUB version will be generated from the HTML version. EPUBs from Project Gutenberg may or may not have illustrations, but they are some of the highest quality EPUBs available.
Project Gutenberg has many titles to offer to children old enough to appreciate books without pictures. These include all the Oz books, Sherlock Holmes, all of Jules Verne, Alice in Wonderland, classic science fiction from E.E. Smith, Stanley G. Weinbaum, and many others, plus juvenile novels like the Tom Swift books, The Girl Aviators series, and much more.
Students and teachers of History will find that Project Gutenberg has much to offer as well.
The Internet Archive
The Internet Archive is a site devoted to preserving the public domain. In addition to books they have movies, music, and even some software that is in the public domain. There are over a million and a half e-books available from this site. The URL for e-books is:
http://www.archive.org/details/texts
Internet Archive books are created by scanning page images, including the covers of the books. When you read one of them the visual experience is very much like reading the original book. The website lets you read the book online in "flipbook" format, which is very much like paging through the original book:
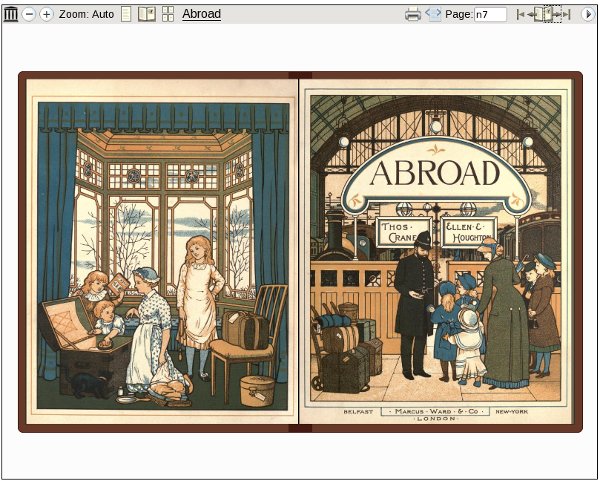
The formats offered by IA are PDF, Black and White PDF (for some of the more colorful books, to create a smaller file), DjVu, and EPUB. DjVu offers color pages with smaller file sizes than either of the PDF formats. EPUB files from IA are at the moment not the best quality, but over time this should improve. Right now they combine badly proofread text with only a few illustrations.
There is a Children's Book Collection at the Internet Archive at this URL:
http://www.archive.org/details/iacl
Quite a few of the books are from the 1800's and more of interest to children's book collectors than actual children, but you can find the Oz books, books by Edgar Rice Burroughs (Tarzan), Jules Verne, Andrew Lang's Fairy Books, The Wind In The Willows, etc. all with illustrations.
The Internet Archive is one of the few places you can download public domain comic books, although there aren't many and most are in the .cbr format instead of .cbz.
The simplest way to find the books you want from the Internet Archive is to use the Book Server page at this URL:
http://www.archive.org/bookserver
Just type in author, title or subject words in the text field on this page and you'll get a list of all the titles available and the formats they can be had in:
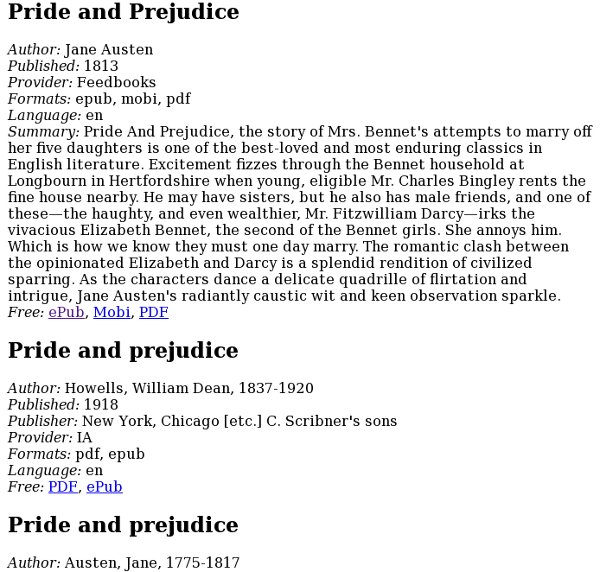
This page will show results not just for the Internet Archive but also for Feedbooks and other sources.
Feedbooks
Feedbooks offers public domain titles from Project Gutenberg converted from Plain Text to PDF format. This gives them nicer fonts, fancy chapter headings, bold and italicized text where needed, and introductory material usually from Wikipedia. They also have some original books of their own for download. They are located at:
http://www.feedbooks.com/
The Rural Design Collective
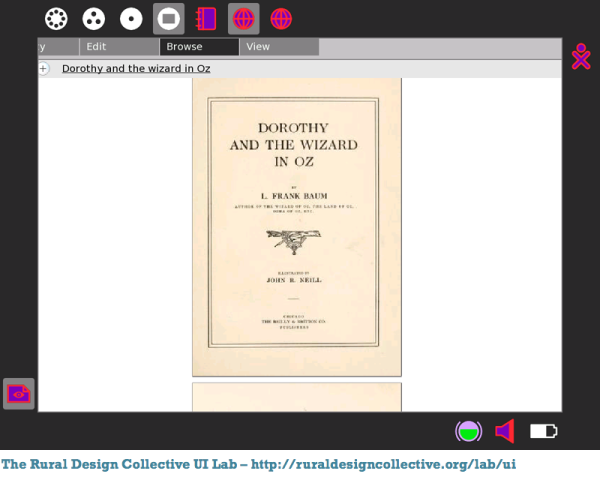
The Rural Design Collective (@rdcHQ) is a not-for-profit professional mentoring organization which furthers the education and experience of residents of rural Southern Coastal Oregon who are interested in working with web and/or media technology by involving them in real development projects. They devote a portion of their program to continued exploration of technology surrounding digital books. In 2009, they built an interface for approximately 2000 digital books using a subset from the Internet Archive Children's Library. The Internet Archive Bookreader was modified to view the books online in a single page format to enhance functionality on OLPC XO gen-1 computers.
A web demonstration of that project is available at: http://www.ruraldesigncollective.org/lab/ui/
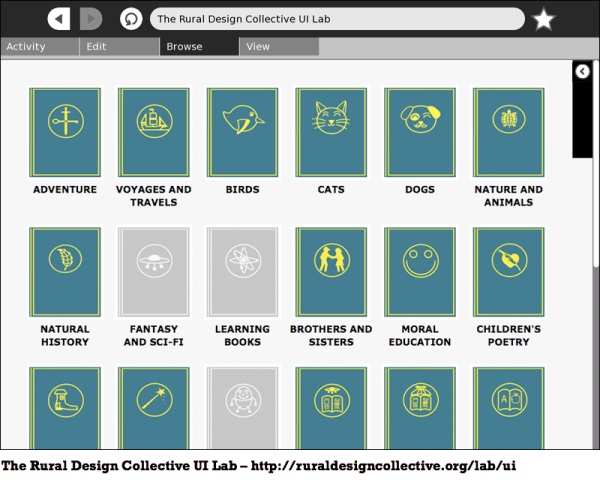
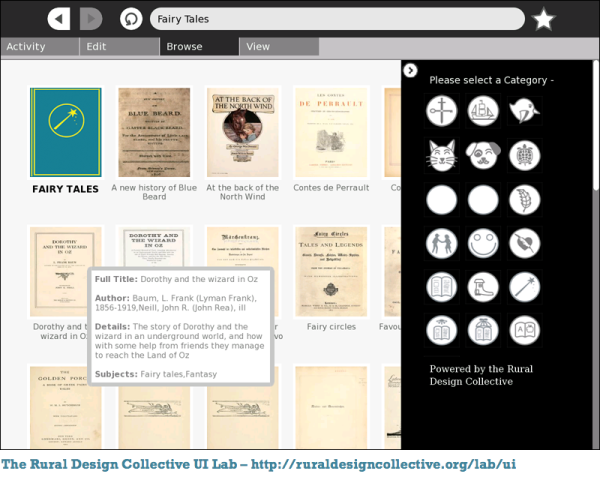
The books are only available in "flipbook" format via the web interface. Strictly speaking,
RDC is not so much a source of free e-books as a handy way to browse through the Children's Book Collection at the
Internet Archive. Once the child finds the book he wants he can download it using the
Get Books or
Get Internet Archive Books Activities.
ManyBooks.net
ManyBooks.net is located at this URL:
http://manybooks.net/
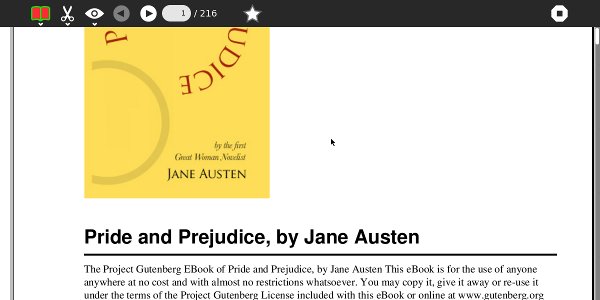
They offer over 27,000 titles, mostly converted from Project Gutenberg Plain Text files. They offer several formats for each title, including PDF, large print PDF, EPUB, Plain Text and RTF. Their PDFs are different from Feedbooks PDFs because they generally include a book cover image (but no other illustrations) at the beginning of the document.
The Baen Free Library
The Baen Free Library is different from the rest of these sites because it deals with titles that are still copyrighted. Baen Books gives away free e-book downloads of some of their titles, with the author's permission, to encourage sales of the printed books they publish.
Baen publishes science fiction titles, including books by James P. Hogan, Larry Niven, Jerry Pournelle, and many other well known authors. They offer the books in several formats, but the closest thing to an open format they offer is Rich Text Format. You can load this into your favorite word processor, but a word processor is not an e-book reader. Your best options with these titles are to use Open Office to convert the RTF to a PDF, or to use an e-book reader like Read Etexts that can convert an RTF to a Plain Text file.
Most of these books are suitable for younger readers and are much more current than anything in the public domain.
free literature
This site contains links to over 600 sites that are sources of free e-books in many languages.
http://www.freeliterature.org/
Free E-Book Formats

For the purposes of this book I consider an e-book to be in a file that can be downloaded to the computer and read when the computer is not connected to the network. There are many websites where you can read a book online, but I don't consider websites to be e-books.
I'm also going to limit the list to formats that can be read on a computer without dealing with Digital Rights Management. Free e-books are likely to be the only ones without DRM.
Plain Text
This is the oldest format and the simplest. A plain text file just contains letters, numbers, punctuation, and spaces. There may be a newline character (the character you make when you press Enter to start a new line) at the end of each line, or newlines may be just used to separate paragraphs. There are no changes in font, no bold, no italics, no underlines. By convention a word is considered to be bold if it has asterisks (*) before and after it. A word is considered italicized if it has underline characters (_) before and after.
Advantages
Plain text produces the smallest files by far. It is the simplest format to create a reader for, so it is supported on the most devices. While all the text needs to be displayed in the same font, you can make the font as large or small as you need it to be and the text will wrap itself to fit in the available space, making it a good choice for readers that can benefit from a larger font. Because it is so simple to support in a reader program the program might have features that are not supported for other formats. In the case of Sugar, plain text files are the only ones (so far) that have support for text to speech with highlighting.
Disadvantages
No illustrations. This makes it a poor format for children's books.
Portable Document Format (PDF)
This is one of the most popular formats. It is a compressed version of the PostScript language used to format pages for printers. What you see on the screen looks exactly like the page printed using the original PostScript.
Advantages
This is an attractive format that can support having illustrations.
Disadvantages
A PDF is designed to show exactly what a printed page will look like, and not every printed page works on the screen. Multiple columns, tiny fonts and landscape page orientation can make a PDF unusable on the screen.
Another issue with a PDF is that the text cannot be reformatted. You can zoom in on a PDF but unlike plain text you can't make the text larger and have it wrap to fit on the page.
Image Container PDF's
Image Container PDF is a term used by the Internet Archive to describe a PDF that is composed entirely of images of book pages. This format gives the reader an experience as much as possible like reading the original book. PDFs created this way can have a "text layer" created by Optical Character Recognition, making these e-books searchable.
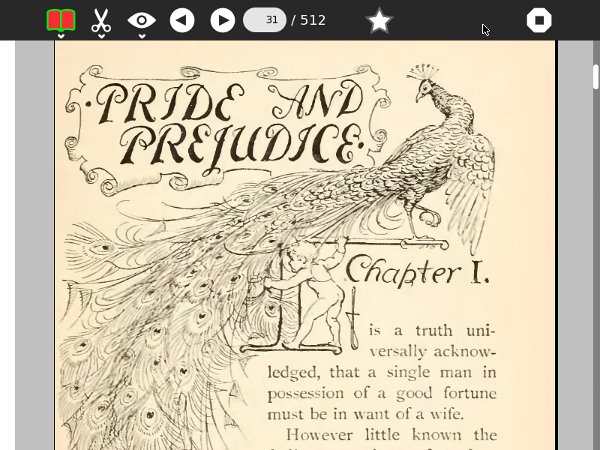
Advantages
An excellent format for children's books, which often have pictures and other decorations on every page.
Disadvantages
PDFs composed of images have huge file sizes (20 megabytes or more is common for Internet Archive PDF's, 50 megabytes and up is common for PDF's like this you create yourself) and highly decorated books can use a lot of memory to read, in extreme cases causing out of memory errors.
Comic Book Zip (CBZ)
A CBZ file is simply a bunch of sequentially named images stored in a Zip archive file. Generally the suffix on the archive is renamed from .zip to .cbz.
There is a related format Comic Book RAR (CBR) which is used more often than CBZ. This uses a RAR archive file rather than a Zip file, so you need to have a commercial program to create RAR archives. This may give a slightly smaller file size than a CBZ, but in my opinion not enough to make it preferable to CBZ.
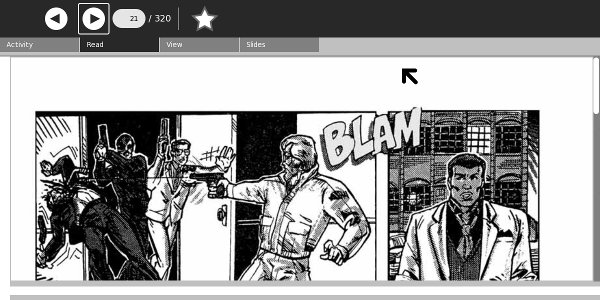
Advantages
Smaller file size than a PDF created with the same images. Very easy to create.
Disadvantages
No support for text to make the pages searchable like PDF has.
DjVu
DjVu is an alternative to PDF's created with book page images. DjVu is a method of compressing these images that is optimized for documents and book pages. As a result .djvu files are smaller than the equivalent PDF and can take less memory to read.

Advantages
Noticeably smaller file size than PDF's composed of page images. Also smaller than CBZ's.
Disadvantages
Only supported by the later versions of the Read Activity which requires a newer version of Sugar than .82. Most XO laptops run .82 or older.
Rich Text Format (RTF)
This is a file format invented by Microsoft to simplify sharing documents between different brands of word processor. Most word processors can read and write this format as well as their own format.
It may seem like a stretch to consider RTF as a format for e-books, but in fact there are e-books that use this format. Of all the e-book formats distributed by the Baen Free Library website only RTF is usable in Sugar .82. (If you have a version of Sugar that supports EPUB the Baen Free Library now offers that format).
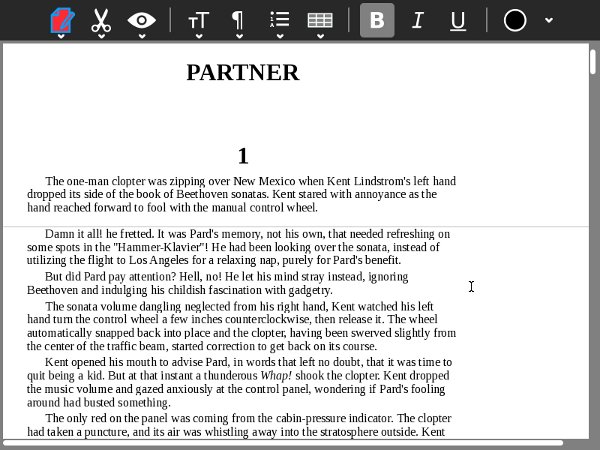
Advantages
I can't think of any.
Disadvantages
Really there are only two ways to use an RTF file as an e-book: load it into a word processor and convert it to a PDF, then read that file, or use an e-book reader like Read Etexts that will convert the RTF to a plain text file when it first loads it.
EPUB
EPUB is a format specifically meant for e-books, unlike all the other formats discussed so far. It is based on XHTML and Cascading Style Sheets like a web page, and can include image files, but the various files are stored in a single Zip archive file. There is special XML file called an NCX that provides a table of contents for the document.
This is The Big Book of Aviation for Boys as an EPUB with illustrations. I created the EPUB for this book.
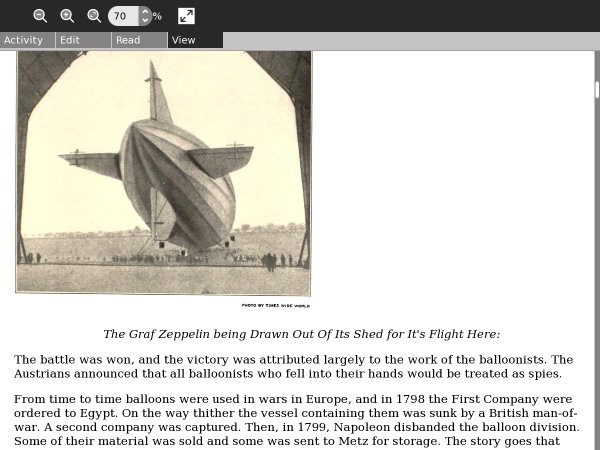
Advantages
Like PDFs an EPUB can contain formatted text and illustrations.
Like a plain text file the text can be made larger or smaller and the text will re-wrap to fit in the visible space.
The file size is small.
The format is supported on many devices as well as on computers. It may become the most popular e-book format.
Disadvantages
Like DjVu, it is only supported by the latest versions of the Read Activity that will not run on Sugar .82.
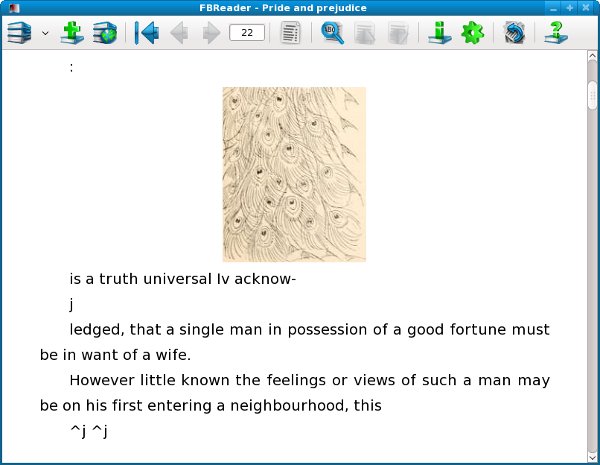
While many free e-books are available that use the EPUB format, few make full use of what the format has to offer. Project Gutenberg EPUBs may or may not have illustrations, and EPUB's from the Internet Archive are made from OCR'd text that has often not been proofed and corrected.
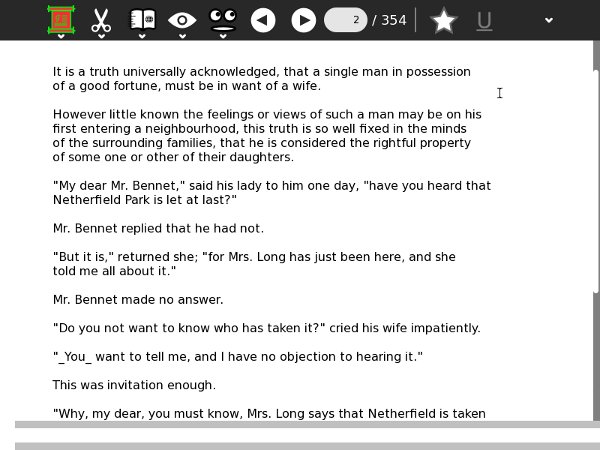
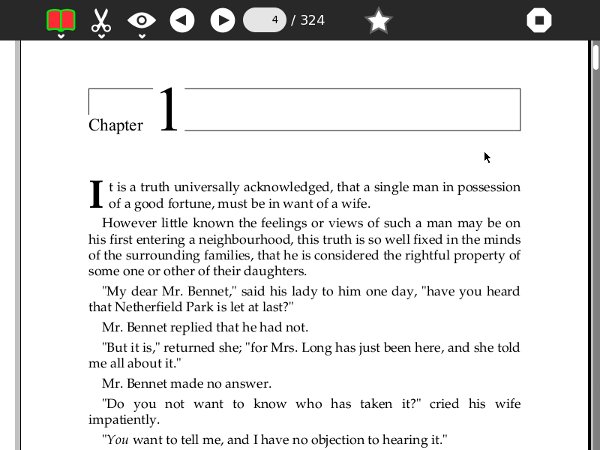
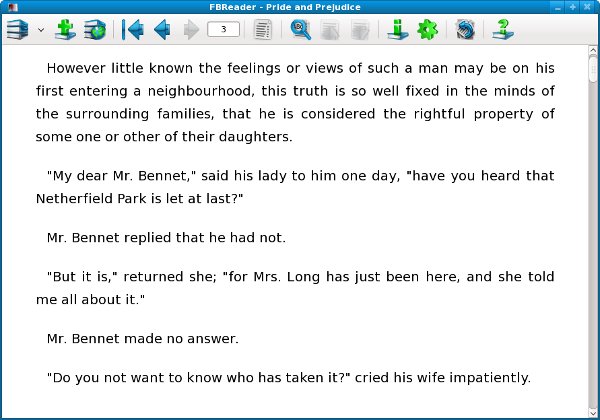
This is Pride and Prejudice from Project Gutenberg as an EPUB, without illustrations:
Here is the same book from the Internet Archive, with illustrations but badly needing proofreading:
Sugar Activities For Finding E-Books

Introduction
The Sugar environment uses a Journal to keep all the student's work in, instead of using files and directories. Every e-book you read will have its own entry in the Journal. In addition to the file for the book the entry will have metadata about the book, including a meaningful Title, a Description of the book, and Keywords.
If you download all your books using the Browse Activity you'll find that the file you download will have a meaningless name and the Title it will have in the Journal will be long but still meaningless. You would need to correct the Title and perhaps add a Description for the book yourself.
There is a better alternative to using Browse for most of your e-book downloading needs. In fact, there are three of them.
Get Books
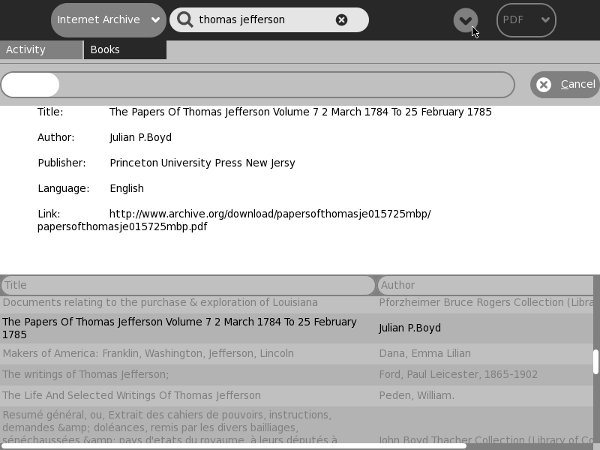
The Get Books Activity is the newest of the three. It lets users search for books from multiple online sources such as the Internet Archive and Feedbooks. It also provides support for removable devices ("Library on a Stick") which have OPDS catalogs in the root directory. OPDS (Open Publication Distribution System) is a kind of book catalog that anyone who publishes e-books can create. Currently the Internet Archive and Feedbooks have such catalogs, so Get Books can download titles from their catalogs. Feedbooks has titles from Project Gutenberg converted to PDFs. This means that the majority of free e-books available can be found and downloaded to your Journal using this Activity.
This is what the Activity looks like downloading a book about Thomas Jefferson:
OPDS is part of the BookServer ecosystem which has been described as follows:
"The BookServer is a growing open architecture for vending and lending digital books over the Internet. Built on open catalog and open book formats, the BookServer model allows a wide network of publishers, booksellers, libraries, and even authors to make their catalogs of books available directly to readers through their laptops, phones, netbooks, or dedicated reading devices. BookServer facilitates pay transactions, borrowing books from libraries, and downloading free, publicly accessible books."
Get Internet Archive Books
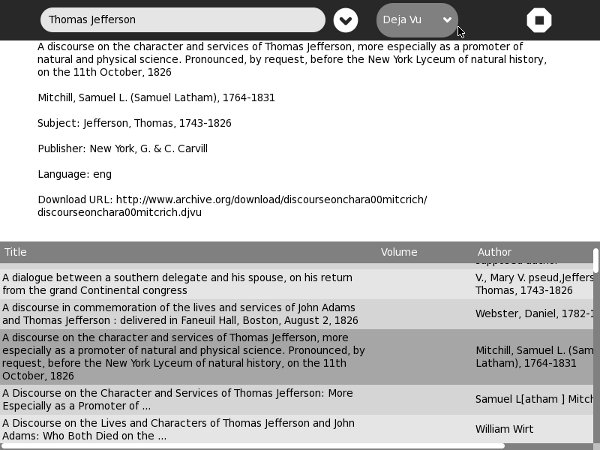
If OPDS represents the future of searching for and downloading e-books it is reasonable to say that the other two Activities represent the less than perfect present. Get Internet Archive Books is based on the Advanced Search provided by the Internet Archive. Because of this it will never work with anything other than the Internet Archive. On the other hand, because it restricts itself to just one source of books it can do things that Get Books can't do. For instance, it can download e-books in all four formats that IA offers: PDF, B/W PDF, Deja Vu, and EPUB. Second, in the search results listing you will see Title, Volume, Author, and Language where Get Books only shows title and author.
Read Etexts
Read Etexts is an Activity meant to read the Plain Text files produced by Project Gutenberg and Project Gutenberg Australia. These sites do not yet support OPDS but they do both provide text files that can be used as a catalog of what books are available and how the files are named and stored on their systems. PG began in the days when MS-DOS was the most popular operating system for personal computers, so all of their files have eight character file names. In the first few years they were in operation they tried to make these short names somewhat meaningful, but they later changed to a new system which gave every book a completely meaningless number. Some of the old books have been renamed to the new format, others have not. Also, while just about every book has a 7-bit ascii format file available many have and need another encoding that can represent the diacritical marks used by languages other than English.
When you download a book using Read Etexts it tries to make sense of all this for you. It looks for an 8-bit encoded file first, and if it doesn't find one it downloads the 7-bit version. It gives the Journal entry it creates a meaningful title, like Pride and Prejudice by Jane Austen rather than 56436.zip.
Another difference between the Read Etexts book search and the other two is that the book catalog is included in the Activity, so you can search for books when you are not connected to the network. The PG offline catalog is not updated often enough to justify downloading it and converting it every time you search for a book.
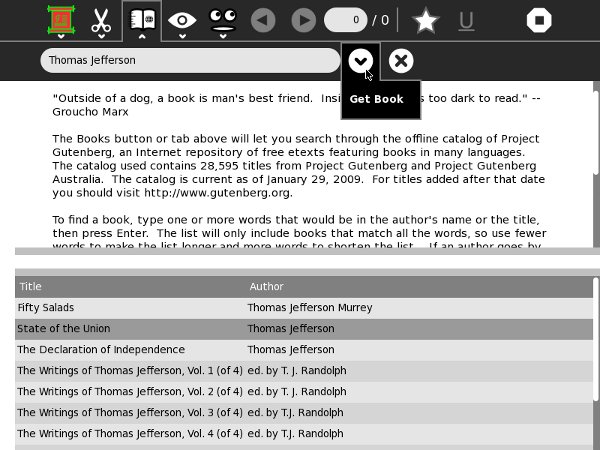
Read Etexts looks like this in action:
The Read Activity
The Read Activity is one of the core Activities of Sugar, and will already be installed in whatever version of Sugar you are using. Although it is available at http://activities.sugarlabs.org you generally will not upgrade to a newer version of Read than the one you were given because Read is not fully self contained, so the version of Read that works with the latest Sugar will not work with Sugar .82, for instance.
The newest versions of Read use a different kind of toolbar than the older versions. Since the XO laptop currently only supports Sugar .82 the screenshots will show the older version of Read. I'll switch to showing the latest Read to demonstrate features only supported on that version.
You will usually start Read by resuming a book that you have downloaded to the Journal. The PDF format is supported by all versions of Read. If you are using a later version of Sugar than .82 then Read will also support these formats:
- DjVu
- Comic Book Zip (CBZ)
- EPUB
This is what Read looks like when you resume a PDF. The
Read toolbar is selected by default.
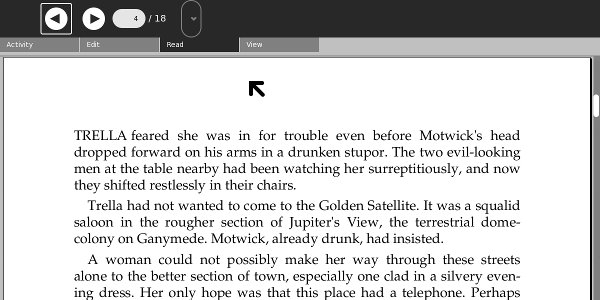
The arrow buttons let you page pack and forth through the document. Normally this is not the way you would navigate. The normal way is to use the Page Up and Page Down keys or the arrow keys. When the XO laptop is in tablet orientation you can use the game controls to navigate through the document.
The text field with the current page number in it can also be used to navigate. Enter the page number you wish to go to and press the Enter key to skip to that page.
The dropdown control is for PDFs that have a table of contents that lets you skip to a chapter. Very few PDFs have this, and PDFs from Feedbooks for example do not have them.
The Read Activity remembers what page you left off on when you close it and will return to that page automatically when you resume the book later. Unfortunately this does not work if you turn off or reboot your computer between ending the Activity and resuming it if you are using Sugar .82. The problem is with that version of Sugar (and older ones), not with the Read Activity. Sugar .84 and later fix this.
The next screen shot shows the Activity toolbar. This is where you can close the Activity, rename the Journal entry, and share the book with others on the network.
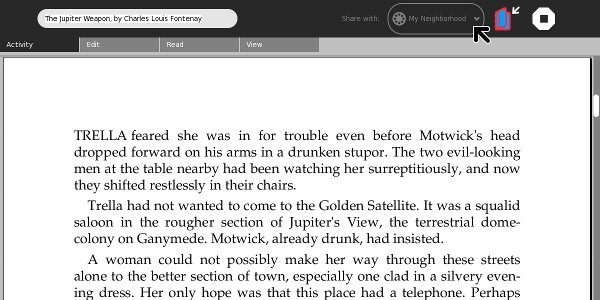
In the screenshot above we have changed the Share with option from Private to My Neighborhood. This makes your book available for copying by anyone on the network. In the Neighborhood view this is what everyone will see:
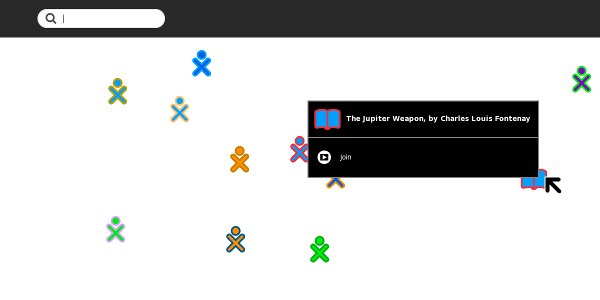
If the person seeing this clicks on Join he will get the book copied to his own Journal.
Next we'll look at the Edit toolbar:
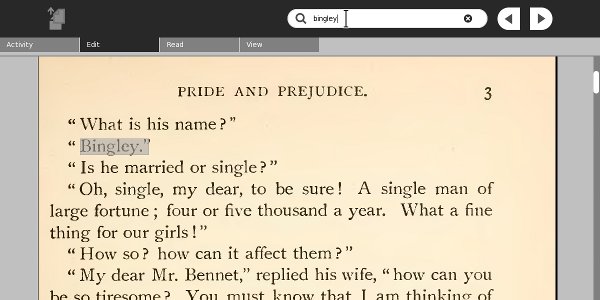
The Edit toolbar lets you search for text strings in your book, plus copy text selections to the clipboard. What may surprise you is that it can do this even for the books from the Internet Archive, which are made from scanned page images. This is because behind the page image is a text representation of the text on the page. In the screen shot above someone is searching for the word "Bingley" in Pride and Prejudice. Note that the search only works as well as the quality of the text representation allows it to. The text is created by OCR and generally is not proofread afterwards.
Copying a passage to the clipboard from this kind of book works too, as this screen shot shows:
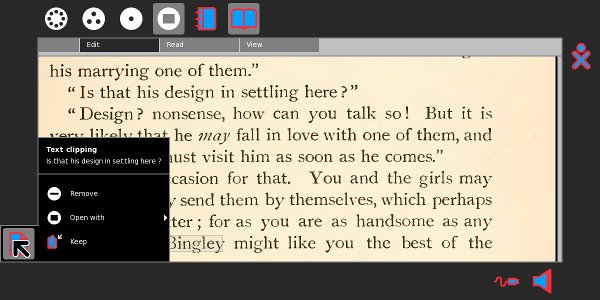
As you can see, the words "Is that his design in settling here?" have been successfully copied to the clipboard. Regrettably the words do not get highlighted on the page when you select them in this kind of book. They do get highlighted in a conventional PDF.
Next, the View toolbar:
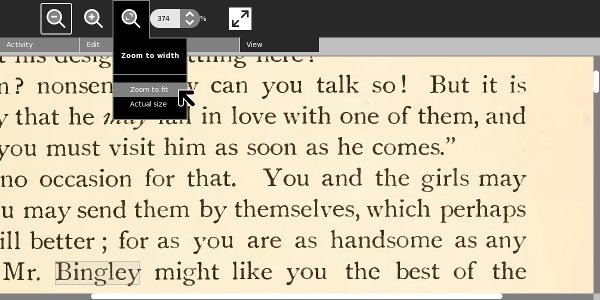
The first four controls on this toolbar adjust the size of the page. They can only zoom in and out on the page for PDFs, CBZs, and DjVus. They cannot simply make the font larger and reflow the text on the page for these formats, although that is possible for EPUBs.
Now we come to a function of Read that is only supported on the latest versions of that Activity: multiple annotated bookmarks. The star button shown in the toolbar below creates a bookmark and opens up a dialog where you may give the bookmark a Title and a Description.
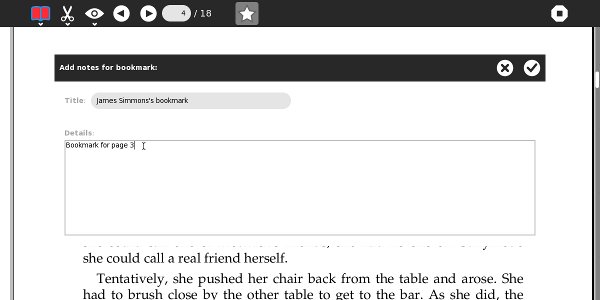
When you close the dialog you'll see that the book has had a star placed to the left of the page. You can use the arrow buttons on the toolbar not only to move between pages but also between bookmarks, as shown here:
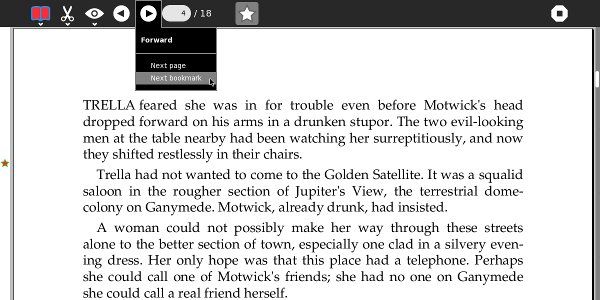
The Read Etexts Activity
The Read Etexts Activity can be used to read e-books in Plain Text and RTF formats, the two formats that the core Read Activity cannot handle. It was originally written as a stopgap Activity for reading Project Gutenberg etexts until such time as the core Read Activity could be enhanced to read them. However, Read Etexts has grown to be something more. Because Plain Text files are so simple, it was easy to add features to the Activity that Read does not provide. These features include:
- Text To Speech with word highlighting.
- A built in offline book catalog that allows searching for and downloading books from Project Gutenberg and Project Gutenberg Australia.
- Text passages may be highlighted and underlined. Pages may be annotated, and multiple bookmarks may be set. All of these are stored in the book file itself, so when you share a book either over the network or by copying it to a thumb drive your annotations, bookmarks, and highlights go with it.
- When the book's font size is changed the text wraps to fit within the margins.
- The latest version of Read Etexts supports every version of Sugar from .82 onwards. On newer versions of Sugar it uses the new style toolbar.
- On Sugar .82 it can return to the page number you left off on, even if you shut down or rebooted since you closed the book.
The Read Toolbar
When you start Read Etexts by resuming a Journal entry the Read toolbar is the first thing you see:
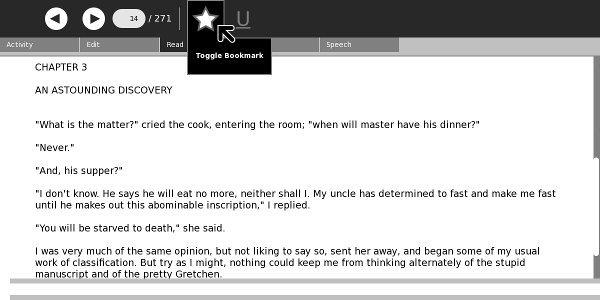
This is similar to the Read toolbar in the core Read Activity, with the addition of a Bookmark button (the star) and an Underline button. Clicking on the Bookmark button sets and unsets the bookmark for the page, just like it does in the latest Read. The difference is that in Read bookmarks have attached titles and descriptions. In Read Etexts bookmarks are simply bookmarks.
Here is an example of a highlighted passage.
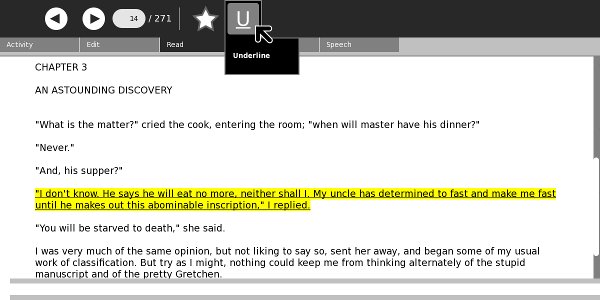
You can highlight multiple passages on a page, and they are shown with a yellow background and underlined. On the XO laptop the underlines will be visible in the monochrome mode the screen uses when the backlight is turned off.
Bookmarks look the same as they do in the latest Read and you can use the menus under the arrow buttons on the toolbar to navigate between them.

You can add annotations to any page, like this:
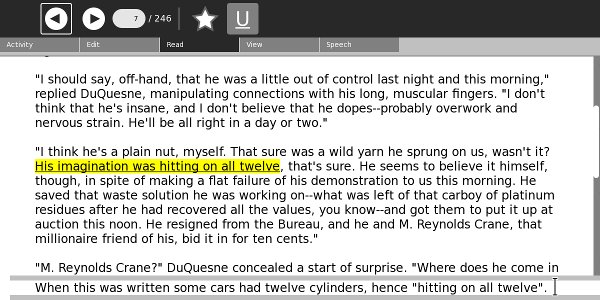
The Activity Toolbar
The Activity toolbar is the same as Read has, and you can share books just like you can with Read. One small difference is in the Title of the book. Read puts the page number in a place that goes away when the computer shuts down or reboots if you're using Sugar .82 or older. Read Etexts puts the page number at the end of the title with a "P" in front of it. Thus even when using older versions of Sugar Read Etexts will not forget what page you stopped reading on.
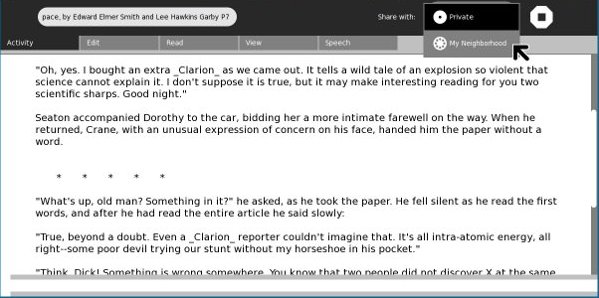
The Edit Toolbar
The Edit toolbar is the same as for Read and supports text searches and copying selected text to the clipboard.

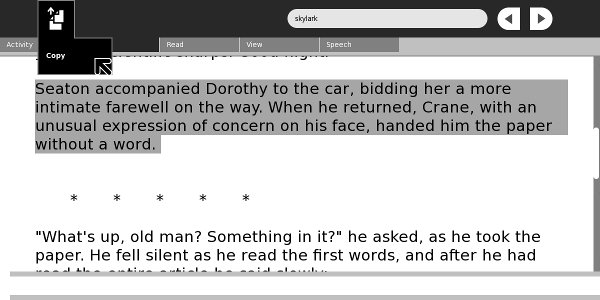
The View Toolbar
The View toolbar lets you make the font larger and smaller. The text will wrap to fit within the margins, and the font size you choose will be saved and applied to all etextrs you read until you change it again. The third control hides the toolbar so you can use the full screen for reading. You can also make the font larger with the + key, smaller with the - key, and toggle full screen mode with Alt-Enter.
When you increase the font size most books will re-flow nicely, but a few will not. The ones that don't have at least one really, really long paragraph. When Read Etexts gets a book from Project Gutenberg it attempts to remove the line endings from the text so it can flow naturally. Read Etexts breaks pages on paragraph boundaries. When you have really long paragraphs this becomes unworkable, so when the conversion function encounters such a paragraph it gives up on the conversion and the original text with breaks at the end of each line is used instead.
Relatively few books will have this issue, but its important to know when you encounter one why it is happening.
The Speech Toolbar
Read Etexts supports Text To Speech for one page at a time. The controls from left to right start and pause speech, let you select a voice appropriate to the text, adjust pitch, and adjust rate of speech. Pitch and Rate settings are saved and used for all etexts until you change them again.
In Sugar .82 the needed supporting files to use TTS are not provided by default, but you can add them yourself with the following command:
yum install gstreamer-plugins-espeak
You may be disappointed with the highlighting of text on an XO laptop. Speech will sound fine, but the highlighting may lag behind the words being spoken. On a more powerful computer this will not be a problem.
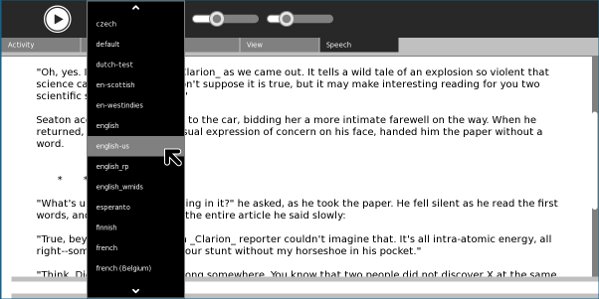
The Books Toolbar
The Books toolbar is only available when you start Read Etexts from the Activity ring without resuming an existing book. It lets you search an offline catalog of books from Project Gutenberg and Project Gutenberg Australia, then download them to the Journal. A special feature of this download is that it will automatically choose the best available format for a book. It will always look for a book in ISO-8859 format first and will only download the ASCII version if there is nothing better.

While the Books toolbar is the easiest way to copy books to the Journal for use by Read Etexts, it is not the only way. You can also use the Browse Activity to download books from Project Gutenberg. When you do, choose the Zip version of the book, not the text version. The reason is simple: when you select the Text version Browse will display it as if it was a web page and give you no way to download it. Browse will be able to download the Zip version.
When downloading books from the Baen Free Library you can download the RTF format. There is also a Zipped RTF that Read Etexts would be able to read, but for some reason Browse has difficulty downloading that one.
The View Slides Activity
View Slides is an Activity for viewing collections of image files stored in Zip archives. Since this is identical to the CBZ format (with the CBZ format using a .cbz suffix on the file instead of .zip) View Slides can be used as a reading Activity for comic books. The latest Read also supports the CBZ format so if you're using Sugar on a Stick you don't need View Slides to read comic books, but those running Sugar .82 will need it.
There are no large repositories of public domain comic books. Most of the CBZ's and CBR's you'll find on the Internet violate someone's copyright, although there are a few legal ones on the Internet Archive that you can find by searching for "CBZ" or "CBR", such as the Gunsmoke comic shown in the screen shots. Gunsmoke was in the CBR format so I needed to convert it to CBZ. In Windows you can do that with the free 7Zip utility that you can download here:
http://www.7-zip.org/
What you need to do is unpack the .cbr file to get the individual images, then zip them up and rename the .zip suffix of the new file to .cbz.
While there are not many legal free comic books, the CBZ format is an easy one to create and is a good choice for children who want to make their own e-books. In addition to being a reader for this format, View Slides can create and edit files in this format.
Like Read Etexts, View Slides supports most versions of Sugar and will use a new-style toolbar if the version of Sugar supports it. The screen shots in this chapter are a mix of old and new.
The Read toolbar is the same as Read Etexts without the Underline button:
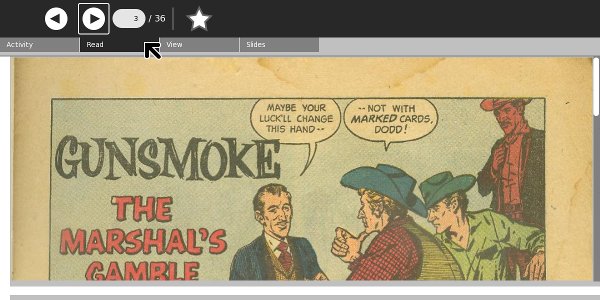
Using the new style toolbar the most commonly used controls are always visible:
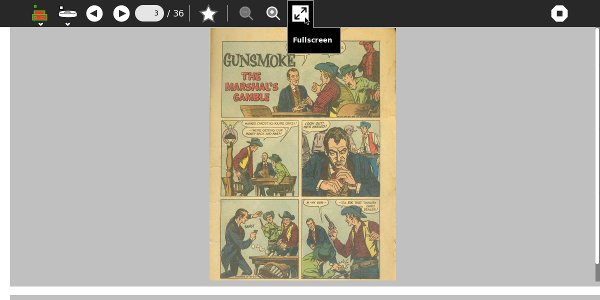
Like the other reading Activities you can hide the toolbar and view images full screen:
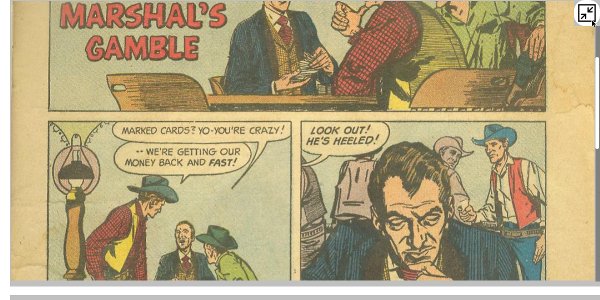
The Slides toolbar is used to organize the images in a .cbz file. You can add images, delete them, rename them, and extract images to create entries in the Journal. The Available Images column shows image files in the Journal as well as images on removable media like thumb drives and SD cards. The Slideshow Image column shows the images in your .cbz. When you select an entry in either column it will be previewed in the area above the image lists.
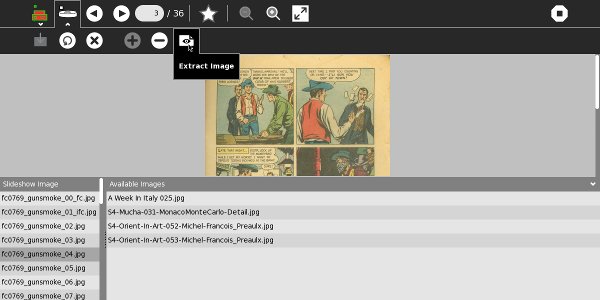
Read SD Comics
The Read SD Comics Activity is like a stripped down version of View Slides which is designed specifically for the XO-1 laptop. The XO-1 has 1 gigabyte of internal storage, which it uses for the operating system as well as the Journal. CBZ files can be very large. A graphic novel can easily take up 60 megabytes or more, and the Journal has perhaps 600 megabytes of available disk space. When you consider all the things that students will use their XO's for that doesn't leave room for a serious comic book collection.
Every XO laptop also has a slot for an SD card. The slot is designed to make it difficult to remove the card once it is inserted. An SD card is a reasonably cheap way to add up to 8 gigabytes of storage to your XO. The problem is, Sugar can't really use it for much. The Journal is limited to internal storage.
What Read SD Comics does is simple. You copy your comics onto the SD card. Next you launch Read SD Comics from the Activity ring and you'll see something like this:
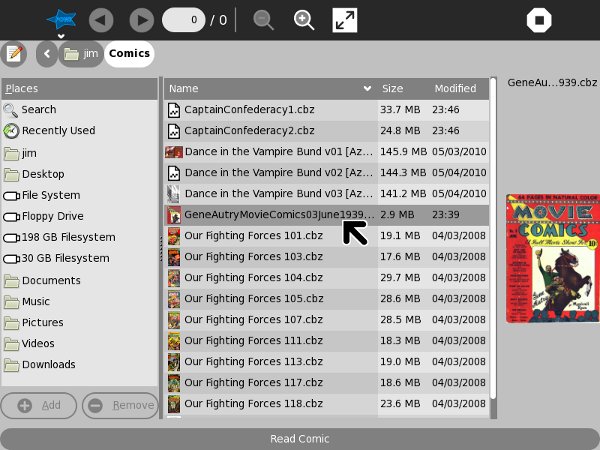
This lets you navigate to your SD card (or USB thumb drive) and select a CBZ or Zip file. When you do you'll see a preview of the first page of the comic to the right. Press the Read Comic button and a new Journal entry will be created that links to the comic and the comic will be loaded for reading:
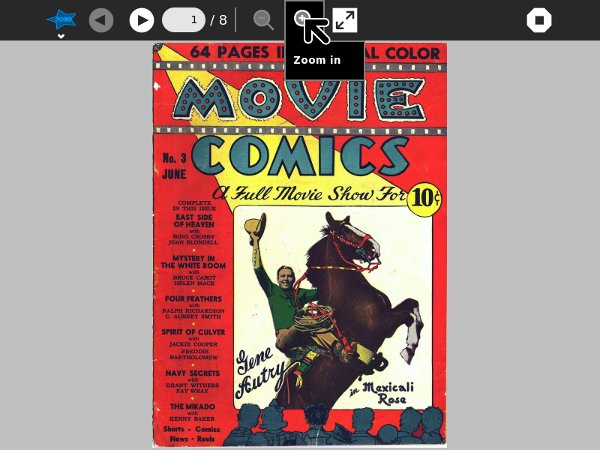
You can zoom in and out, view full screen, etc. just like with View Slides:
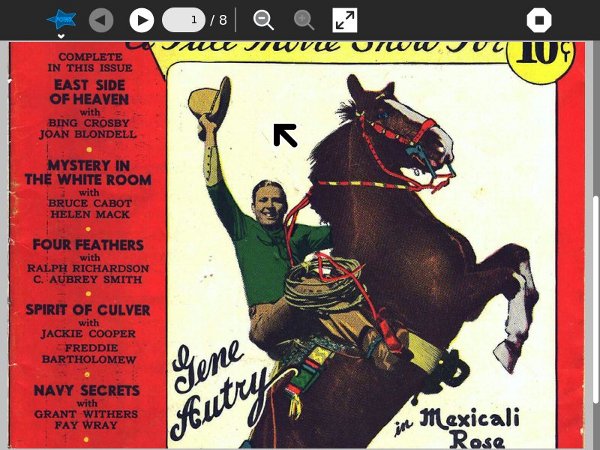
There are some features missing from Read SD Comics that are in View Slides:
- Annotations
- Multiple bookmarks
- Book sharing
However, you do get the full benefit of having a Journal entry. The last book you read will be at the top of the list, you can rename the entry and add descriptive text to it, and it will remember the page you left off on.
Read SD Comics is intended to be used on an XO-1 with an SD card but it may be useful with Sugar on a Stick as well. If you have a bunch of comics on a CD or DVD Read SD Comics will let you create links to them from the Journal and treat them as if they too were stored in the Journal. Of course, when you delete a Journal entry for Read SD Comics that does not delete the comic from the SD card; it just deletes the Journal entry that links to it.
Read SD Comics may be useful for other things than comics. For instance, if you've created a bunch of page scans for Project Gutenberg and put them in a Zip file you can use this Activity to check them over:
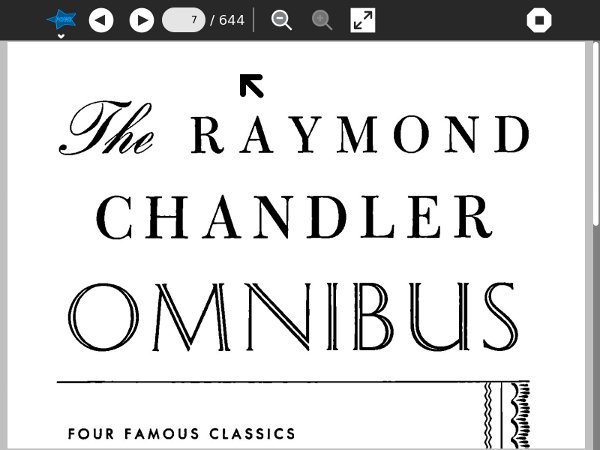
This is a collection of page scans for four Raymond Chandler detective novels. Raymond Chandler has been sleeping The Big Sleep since 1959, making his books public domain in Canada. I created this set of scans for Distributed Proofreaders Canada.
Before We Begin 
There is a lot of information in this section, so before you start reading it I want you to think about what kind of e-book you're making and why you're making it. The answers to these two questions will determine what material you need to understand and what you can safely skip. Some answers I can think of are:
- You have some handouts that you have created in MS Office and rather than printing them off and getting them photocopied you'd like to make PDF's out of them and distribute those to your students.
- You have some students with reading problems. You'd like to make Plain Text files from your handouts so these students can use Read Etexts, which supports Text To Speech with word highlighting.
- You have textbooks that you'd like to convert to e-books so your students don't have to lug them around. You don't care if the e-book is laid out exactly the same way on the screen as it is on the page, as long as the words and pictures are all there.
- You want to make Plain Text versions of your textbooks for your students with reading problems.
- You own some lavishly illustrated children's books and you'd like to make e-books out of them for your students. It is important that the e-book pages look exactly like the book pages.
- You own some lavishly illustrated children's books and you would like to make e-books from them to donate to the Internet Archive.
- You own some lavishly illustrated children's books older than 1923 and would like to donate the books themselves to the Internet Archive so the experts there could make an e-book out of it.
- You own some books copyrighted before 1923 and you'd like to make Plain Text e-books to donate to Project Gutenberg.
- You own a copy of White Shadows In The South Seas, published 1919, which you willing to scan and OCR for Project Gutenberg if only you could get some help with all the proofreading that would require.
- You've written a textbook yourself and you'd like to make an EPUB out of it.
- You want to collaborate with other teachers to create a textbook, and hope to get it translated into several languages.
- You teach a class where the students all have XO laptops and nothing else and you'd like to have the students make some simple e-books using just those computers.
From a technical standpoint, converting a document you created yourself into an e-book is trivial. It is no more difficult than saving a document made in one word processor into the format used by a different brand of word processor.
The website Booki provides a way to create e-books in collaboration with other authors and get those books translated into multiple languages. This very book you are reading was created using Booki.
Making an e-book out of a printed book is more difficult and more work than converting your own work into an e-book. You need to turn printed pages into images, turn images of text into text, proofread everything and correct several kinds of errors that will inevitably come up. Making an e-book to donate to Project Gutenberg or the Internet Archive is more work than making one for your own use. However, the results can be well worth the effort.
Every kind of e-book can be made with free software that is easy to use. In the chapters that follow I begin with the easiest possibilities (creating an e-book from a document you made) and finish with the more difficult ones. If you aren't planning to create an e-book from a printed book the first chapters may be the only ones you need to read.
I will explain how to do every task using Windows, Linux and the Macintosh. Most of the software we will use was originally written for Linux and adapted to the other platforms. It is no more difficult to use than other Windows software. Sometimes I will explain tricks that only work in Linux, but I will always provide an alternate method for Windows and the Macintosh. Linux is an operating system for those who like to open the hood and tinker. If you are a teacher some of your more difficult students may one day fall into this category. These tricks are for them, and may safely be ignored by others.
Don't be intimidated by the amount of information in the chapter on scanning books. In the end all you're doing is taking pictures of the book pages with a digital camera, then rotating, cropping, and cleaning up those pictures. The detailed information in this chapter will make that process as painless as possible.
Python Programs
Some of the chapters have very short Python programs in them. Don't be put off by these. Like all other computer programs they are meant to save you work, and they will if you give them a chance.
Python programs can be run on Windows, the Macintosh, or Linux. Linux is the simplest, because Python is used so much on that platform. A typical Linux install will have Python installed by default. For Windows and the Mac you can download Python here:
http://www.python.org/download/
The version you want will be Python 2.7.1. Python versions starting with 3 probably will not work. Don't be concerned that you aren't using the latest version of Python. At this time Python 3 is not widely used. When it is more mature I'll rewrite these programs to use it.
The proofer.py utility requires PyGTK. While there is a PyGTK download for Windows, there is none for the Macintosh. PyGTK is included with every Linux distribution.
To download and install PyGTK for Windows you'll need to follow the instructions here:
http://www.pygtk.org/downloads.html
On Windows a version of GTK+ is included with The GIMP install, but is not adequate for running PyGTK. You'll need to uninstall it, install the new GTK+ bundle, and replace the PATH entry for GTK to point to the new one. If that sounds like a lot more work than you normally go through to install a Windows program it is. You may find running proofer.py on Windows more trouble than its worth. The other Python programs should still be useful on Windows.
The Python programs themselves can be downloaded here:
http://git.sugarlabs.org/e-book-making-scripts/mainline/trees/master
The trick to downloading them is to click on the program name on this page, which will give you a formatted listing of the code. When you get that look to the upper right of that listing for a link named Raw blob data. Click on that to download the program.
A simple way to run these programs is to put Python in your system path (see http://www.computerhope.com/issues/ch000549.htm for instructions for Windows), put the program in the directory where the files you'll be working on live, make that your current directory, and run a command line like this:
python programname.py arguments
Converting Your Own Documents
PDF's
PDF's are useful for class handouts as well as e-books, and they're surprisingly easy to create. You have a couple of options in MS Windows:
- CutePDF Writer
- Open Office
CutePDF Writer
PostScript is a programming language used to send formatted pages to PostScript printers for printing. A PDF is a compressed version of a PostScript file. Any program that can print can create a PostScript file, which can then be converted to a PDF. CutePDF Writer does this in one step. When you install CutePDF Writer it is listed as one of your available printers, like this Print dialog for Windows shows:
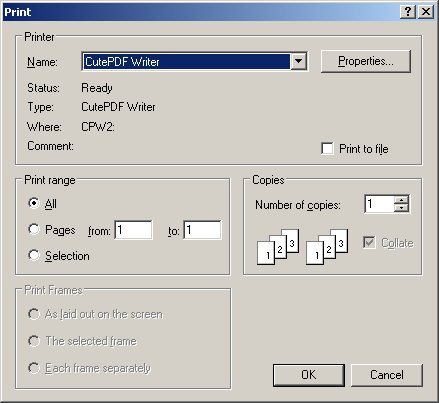
If you select this as your printer when you print your document, nothing will be sent to your printer. Instead, you will be prompted to supply a filename and directory for a PDF. Anything you can print can become a PDF. Excel spreadsheets and charts, Word documents, Powerpoint slides, and anything else that you can print can be turned into PDF's.
You can download CutePDF Writer here:
http://www.cutepdf.com/products/cutepdf/writer.asp
CutePDF Writer is only available for Windows.
Open Office
Open Office is a free office suite that does everything that Microsoft Office does and one thing MS Office does not do: it can create PDFs from any document. From the File menu choose Export as PDF as shown here:
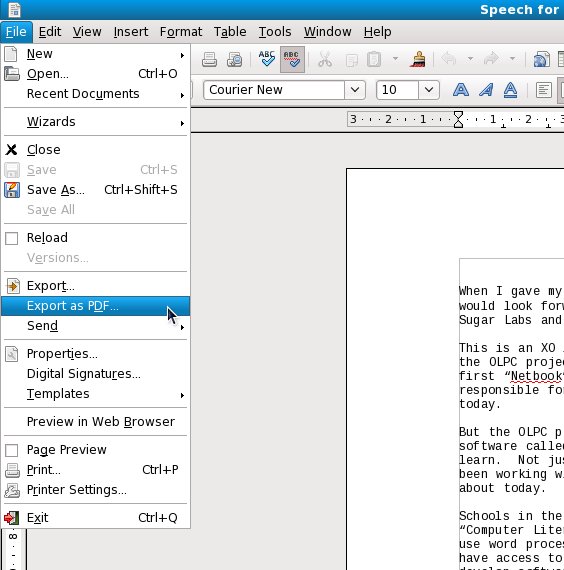
You'll see this dialog:
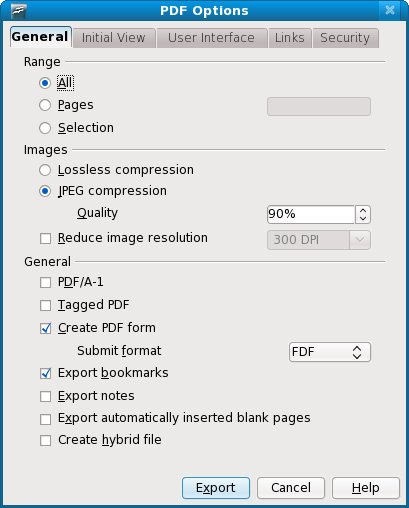
Notice that this dialog has several tabs worth of options for creating PDFs. While the PDFs created by CutePDF Writer are perfectly adequate for most uses, Open Office lets you add bookmarks and other features to your PDFs. Another advantage of Open Office is that it is available for Windows, Linux, and the Macintosh. It reads and writes MS Office files as well as its own formats.
You can download it for free here:
http://www.openoffice.org/
Creating PDFs On The Macintosh
Mac OS has PDF support built into its Print dialog. Any time you print anything on the Mac you have the option of making a PDF instead. You can read how to do this here:
http://www.apple.com/pro/tips/saving_as_pdf.html
Plain Text Files
Creating Plain Text Files From Word Processed Documents
If you have a document created in any word processor it should be simple to make a Plain Text document out of it. In MS Word there is a Save As... option in the File menu. The dialog that comes up lets you choose to save the document in the formats used by various word processors, plus there is an option for Text File. If you choose that you'll get this dialog:
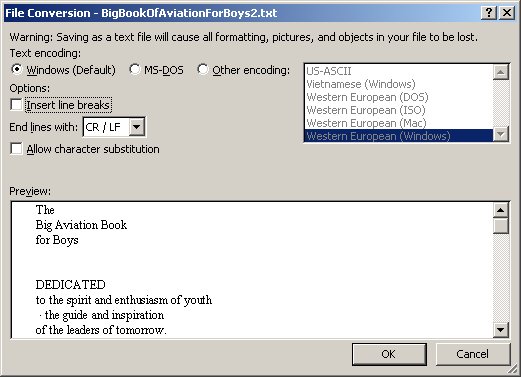
Taking the default values for these options should give you a usable document. One option you may consider using is the checkbox for Insert line breaks. This puts a line break at the end of each line of text, which is how your document would be formatted if you hit the Enter key after typing in each line rather than just letting the text wrap. About the only time you'll ever want to do that is if you're working on a text file to submit to Project Gutenberg, because they put a line break at the end of each line. (Be sure and specify that you want to end lines with CR/LF too. That's another requirement Project Gutenberg has). If you want to create a file for the Sugar Read Etexts Activity or any other plain text reader you should not insert these line breaks. (In the case of Read Etexts if you did put in the breaks the Activity would reformat the file to remove them, and may produce a file that is less well formatted than what you would get if you left off the breaks to begin with).
Booki

Booki is a website used to create e-books. The URL is:
http://www.booki.cc
Most Internet users have encountered Wikis before. Everyone has at least heard of Wikipedia, the encyclodepia written and edited entirely by volunteers. Essentially, a Wiki is software that enables people to edit a website from within the website. Many free software projects use Wikis for documentation purposes, and both the One Laptop Per Child project and Sugar Labs have their own Wikis. While Wikipedia is an example of what this approach can achieve, very few Wikis are as well maintained as Wikipedia.
Some people involved with the free software movement felt that what was needed was not Wikis, but free manuals. A Wiki tends to branch off organically in all directions. However, a manual needs to be more formally structured, with a Table of Contents and attributed authors, and ideally should be something that one can copyright, print and bind, give an ISBN number, and sell on Amazon.
The website FLOSS Manuals was created to meet this need. The letters FLOSS stand for Free and Libre Open Source Software. If you've been paying attention you probably realize that the book you are now reading came from that very site. This book and the others on the site are not just articles on the web. You can create a PDF from them and read it as an e-book, and quite a few books on the site can be ordered as bound and printed books from a publish-on-demand service like Lulu (http://lulu.com/).
FLOSS Manuals originally used a modified version of Wiki software called TWiki, and a good part of this book was written with that version of the software. The longer-term goal was to create a web-based platform specifically for making books. That software, you've probably guessed, is Booki.
One key difference between FLOSS Manuals and Booki is that the FLOSS Manuals website is only for manuals for free software, nothing else. You need to propose a topic for a manual on the site mailing list, and if it is approved someone will create the book for you. When you are ready to publish your book on the site you'd need to send another request to the list to ask for that to be done.
Booki is different. Anyone can create a book on Booki, on any subject. Where you publish the book is up to you. The software will let you generate your book in a variety of formats, including HTML, PDF, and EPUB. You can take this output and host it wherever you like. The PDF and EPUB could be donated to the Internet Archive as a Community Text, and you could publish the HTML on your own website. FLOSS Manuals will continue to be hosted on the FLOSS Manuals website.
This is what Booki looks like when editing a book (in fact this very book). You will notice that I'm using the Sugar Browse Activity, which is completely adequate for the purpose:

Booki is one of the best tools available for Sugar users to create e-books. It can be used on the XO or from Sugar on a Stick. It supports many authors collaborating on a single book. It supports translating books into many languages. It can create PDFs and EPUBs. It can create books formatted for print-on-demand services. It can create documents in Open Office ODT format (which Open Office can convert to MS Word format). It can even be used to download, proofread, and correct EPUBs created by the Internet Archive.
Booki is an excellent option for teachers preparing textbooks, but it can be used by students for their own projects too. Here is another screen shot showing how you can upload Journal entries containing images to the image directory for a Booki project:

Here's another one showing how you can select an image and insert it into your book:

In addition to Browse you'll want to get the Sugar Commander Activity which has a number of useful functions that involve creating and updating Journal entries. The latest of these is a button to resize image files to any width. Booki needs images to be 600 pixels wide or less, and Sugar Commander can do the resize with the push of a button:

I even used Sugar Commander to resize the screen capture above for this book:

Finally, I upload the resized screen capture into the book:

A complete description of how to use Booki is outside the scope of this book. If you want to learn more, check out the Booki User's Guide:
http://www.booki.cc/booki-user-guide/how-can-i-use-booki/
A Few Thoughts On Collaboration
The main reason to use Booki rather than a word processor to write a book is to effectively collaborate with other authors. The book you are reading is my second attempt to do this (and the Spanish translation of my first FLOSS Manual could be considered a third attempt) so my opinions on this might be worth something.
The first thing is that there are good reasons to collaborate and not so good. A good one is that your collaborator can bring expertise to the book that you don't have. A bad one is that you think there will be less work for you if you have a collaborator. There are many human activities where "Many hands make light labor". Writing a book isn't one of them.
Many successful software manuals have been written using the "Book Sprint" method. This involves getting a small group of people in the same physical location for about a week and having them write the whole manual together in that one week. I had a coworker of mine involved in the Book Sprint to update the manual for CiviCRM, a software package used by non-profits. She had done some work on the software to support the Jewish calendar because her synagogue needed it, and this work had impressed the developers of CiviCRM enough that they invited her to participate in their Book Sprint. They had a grant, so they paid her traveling expenses to Lake Tahoe and put her up at someone's home for a week. She took a week's vacation to work on it. Others worked on the book remotely. Nobody got paid for their work.
If you're interested in doing a Book Sprint there is a FLOSS Manual on the subject, plus another FLOSS Manual on "Collaborative Futures" which is itself the product of a Book Sprint.
My books were not written using the Book Sprint method. My books were more of a slog than a sprint, and I didn't get a bunch of people to commit to working on my book full time for a week. What collaboration there was was informal and spread over months. My first FLOSS Manual was a book on creating Activities for the Sugar platform; in other words how to write programs that would run on the XO laptops used by the One Laptop Per Child project. There is no way a Book Sprint could have produced that book. I had to create a bunch of short programs to demonstrate everything that can be done on that platform and how to do it simply. The programs needed to be tested and debugged. Several versions of test environments had to be set up.
You might not think of that book as a collaborative effort, since I wrote every word in it, but in a very real sense it was. I got lots of feedback from other developers, help debugging my examples, help resolving problems with the test environments, and many useful suggestions. Writing the book on the web made that kind of collaboration much easier.
There were a couple of people who offered to write chapters for the book, but this did not come to pass. In the end this didn't matter; the book ended up doing what it needed to do. I suggested that people who had helped me along the way put their bios in the About The Authors chapter. Only one took me up on it, but at least six more could have with no objection from me.
After this first book was published there was interest in creating a Spanish version. Some of the most successful OLPC projects have been in South America, so I definitely wanted there to be a Spanish version. Unfortunately, I don't speak any Spanish, so I didn't feel qualified to do it. I explained on our mailing lists that it would be very simple to request a book project to be set up on the site for a translation, and that the site offered an interface where you could view the original chapter while writing the translation. Several people offered assistance, but nobody requested the project to be set up. I decided to do this myself, even though I couldn't translate anything.
After the project got set up a couple of people got accounts on FM and looked over the book, and one of them translated a few paragraphs. Several of the people who had offered to help were concerned that they did not have the technical knowledge to translate the book, and for several days it looked like nobody was going to work on it.
A friend suggested using Google translate to create a base translation that native speakers could correct. I ended up using Babel Fish instead because the HTML generated by Google Translate had a lot of extra stuff in it like JavaScript and the original English text being translated. After I started doing this a retired teacher who was fluent in Spanish started to correct the text, and I went through and untranslated things that should not be translated, like code examples. It started looking like something Lou Dobbs would disapprove of, but we knew that it would take native speakers to get it into shape. The retired teacher sent out an email on some lists explaining that we had a translation going that needed to be corrected. After that several native speakers got accounts on the site and started to correct the text.
What I learn from this is what I call the Modified Little Red Hen Principle. The Little Red Hen, you will recall, asked the other animals for help in making bread. None of them wanted to help until the very end, when she asked who wanted to help her eat the bread. With books it isn't quite that bad, which is where the modified part comes in. Starting a book from nothing is intimidating. However, once the book reaches a critical mass and there is no doubt that there will be a finished book you'll find that getting help and feedback is easier, almost inevitable.
The best motivation to collaborate on writing a book is a desire for the book to exist. To quote Antoine de Saint-Exupery:
“If you want to build a ship, don't drum up people together to collect wood and don't assign them tasks and work, but rather teach them to long for the endless immensity of the sea”
If you can sell people on the idea of the book you'll get collaborators. That's another reason you may have to write a substantial chunk of the book before collaborators show up. A partial book is easier to sell than an idea for a book.
With the book you are now reading I got collaborators in the conventional sense of the word. Before I had worked on Make Your Own Sugar Activities! I had written the Get Internet Archive Books Activity described in an earlier chapter. In the process of doing that I met some people from an organization in Oregon called the Rural Design Collective. This is a group that has done work for both the Internet Archive and the One Laptop Per Child project. They have a summer mentoring program where talented students get involved with an Internet project and learn skills that may lead to a future career.
When I announced that Make Your Own Sugar Activities! was finished I got an email from Rebecca Malamud of the RDC congratulating me. The book you are now reading was in the thinking stages and knowing of her work with the IA I told her about my plans for the new book and asked if she'd like to contribute.
At that point the RDC was contemplating what to do for their summer mentoring program and they decided that working on my book might be just what they were looking for.
We all wanted the book to exist, but for different reasons. The RDC is focused on training young people to create websites, and so their focus is on the graphic design of the book more than the content. They did provide content, of course. The chapter on publishing e-books with gCI is all theirs (the RDC created that software), and they agreed to provide screen shots of the software used in the book from a Macintosh. (Teachers have a higher rate of Mac usage than the general population, so I wanted some Mac screen shots). However, most of their work has been in designing style sheets and illustrations for the cover and the interior.
You may not need to create style sheets and illustrations to make a FLOSS Manual. The first printing of Make Your Own Sugar Activities! used the default style sheet and the cover illustration was just a crop of a screen shot. As it happened that first printing had text that was too small for easy reading, especially the code samples, so I did end up making a style sheet for it.
For this book the RDC did manage to find a talented young artist who did some terrific cover and interior illustrations (the small ones at the top of each chapter). The cover illustration that everyone liked didn't really go with the title I had proposed, so I ended up changing the title.
One of the best ways that Booki can help you collaborate is to send you emails when anything in the book has been changed. The emails have links that let you compare the previous and current versions of changed chapters side by side. Booki also lets you add notes to each chapter.
In addition to the RDC's work I also got much help and encouragement from the forums of
DIY Book Scanning and
Distributed Proofreaders. Again, this is not collaboration in the way the word is normally used, but it was a vital contribution to the book. I would post a link to the book on the FLOSS Manuals website and ask for comments. The comments I got often contained valuable information and suggestions.
So in summary I'd say that even if you can't afford to send a bunch of people to Lake Tahoe for a week you'll still find Booki is a good way to collaborate on writing a book!
Using Booki To Correct Internet Archive EPUBs
In the chapter on e-book formats I was a little harsh describing the EPUBs distributed by the Internet Archive. Actually, I am at the same time full of admiration for them. IA books are submitted as PDFs containing only page images, without text. From this IA's software does OCR on the pages, formats the text into paragraphs, figures out where illustrations are on the pages then crops them to size and puts them into the e-book reasonably close to where they would be in the original book. As a professional computer programmer, I consider this no less miraculous than transforming sausages into a live pig.
Having said this, the fact remains that these books need lots of proof reading and correcting. It is possible to download an EPUB from IA, correct it using an EPUB editor like Sigil, and then replace the original EPUB on the IA website with your corrected version. Booki lets you do the same thing on the web with collaboration.
You can easily copy any IA EPUB into Booki using this page:

The Identifier "ThirteenWomen" is from the IA website page for a book I donated, Thirteen Women by Tiffany Thayer. Click Create and the book will be downloaded from the IA website as an EPUB and imported into Booki. Once there anyone can work on it just like any other Booki project. This is the Big Aviation Book For Boys being edited in Booki:

Using the example of the Big Aviation Book For Boys, suppose your school has a club for model aviation enthusiasts and they wanted to fix up this book and others like it as a club project. One thing they'll want to do is set up a Group for all the books they plan to work on:

Any books they import can be added to this Group.
Most of the proofreading for this book can be done without referencing the original book. There will be things like page headers and footers to remove, paragraphs split across two pages that need to be re-joined, illustrations that need to be moved to between paragraphs that currently are stuck in the middle of a paragraph, formatting chapter headings and correcting obvious misspellings. In this book several numbers are garbled, and the only way to correct those and errors like them will be to refer to the original book in PDF or DjVu format. Rather than do that every time they see such an error, our club members might prefer to use the Notes tab to list all such errors that they find so they can be corrected at the same time:

When the Prop Spinners are satisfied that the EPUB is in good shape they can send it to the Internet Archive using the Export tab:

Scanning Book Pages
I like going to used book sales and one of the things I generally pick up at these sales are interesting older books. I'm not talking about first editions of well known books, but obscure books that will probably never be printed again but which have something neat about them. It's kind of fun owning books that nobody else has, but I think it would be more fun to share my collection with the world in e-book format. To do that I need to create images of the book pages.
Flatbed Scanner Or Digital Camera?
You might think you need a flatbed scanner to create book page images. While you could do it that way, it isn't the only method. Flatbed scanners are very, very slow. When scanning printed material (as opposed to photos) you need to scan at a very high rate (300 DPI or more) to get a clear image. Putting a book on a flatbed scanner can damage the binding too. There is an alternative, which is to take pictures of the pages with a digital camera.
Using Digital Cameras
Libraries and other institutions use machines like the Atiz Book Drive, which uses two digital cameras to digitize books. You can read about it here:
http://www.atiz.com/
There are no prices on the website, which suggests that these are really, really expensive.
Many amateurs have built their own book scanners, and the place to read about their work is here:
http://diybookscanner.org
These book scanners go from bare bones to professional quality. Here is an elaborate one designed and built by Daniel Reetz, who runs the site and has given permission to use these pictures:
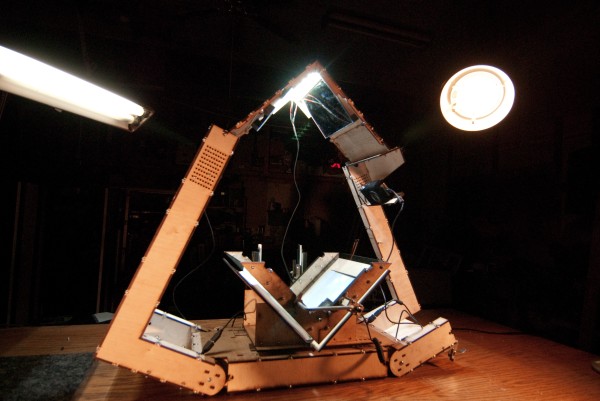
The basic idea is that the book is held open at a 90 degree angle in a cradle. Two pieces of glass, also at a 90 degree angle and called a platen, hold the pages flat so they can be photographed by two digital cameras. Bright lights shine down on the book from above. Here is a view of the book in the cradle held flat by the platen:
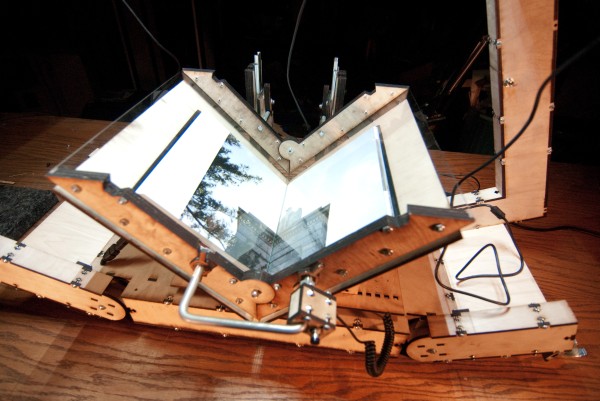
If I didn't value my marriage so much I would build something like this. Fortunately for me there is an alternative. The very simplest book scanner you can make is described in an article at www.instructables.com:
http://www.instructables.com/id/Bargain-Price-Book-Scanner-From-A-Cardboard-Box/
I built one of these myself one Friday evening and spent most of that Sunday scanning my first book. Here it is, the Simmons Home Book Scanner Mark I:
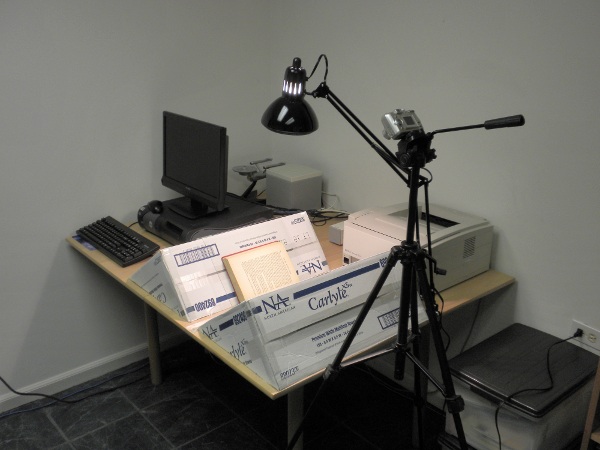
If you could see it up close you'd find it even less impressive than the picture. It consists of the following parts:
- One cardboard box, salvaged from a dumpster at work, sealed shut with strapping tape and sliced diagonally to create two wedges. The wedges are taped with strapping tape to the table. The distance between the wedges is the thickness of the book's spine. The purpose of the wedges is to cradle the book so that the pages can be photographed.
- One desk lamp, cost $30 without bulb. The lamp should shine straight downwards onto the book as shown. If there are other lights in the room turn them off.
- One 100 watt incandescent bulb, saved from when we converted to Compact Fluorescents because I never throw out anything that might be useful.
- One piece of glass from a picture frame bought at Walgreen's. The glass needs to be bigger than the book page. You will use the glass to hold the page you are photographing flat.
- One tripod originally bought for use with a video camera. It is vitally important to have something to hold the camera steady and pointed at the page in such a way that the camera is parallel to the page and the image of the page is an untilted rectangle. If you don't get it completely perfect you may be able to fix some problems with software, but you definitely do not want a hand held camera for this!
- One Kodak 5 Megapixel camera which we already had. You might want a better camera for books with larger pages, but for the books I'm doing the Kodak was fine.
- One computer with free software to post-process the images taken by the camera. Whatever computer you already have should be fine.
I used the setup in the picture to scan my first two books. That experience convinced me that I really needed a proper platen, so I made the one shown here:
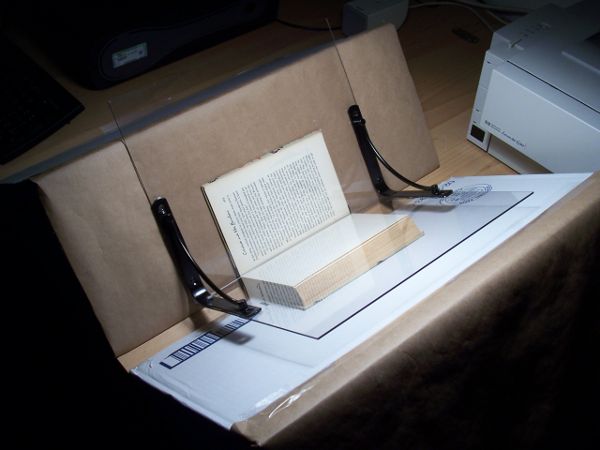
There are many designs for platens, and they are all cheap to make, but what I was looking for was something easy to make. The design I came up with consists of:
- Two Lexan sheets, 10" x 11", eight dollars apiece at Menard's
- Two metal brackets meant for mounting shelves, a little under seven dollars apiece at Do It Best Hardware. I have seen similar brackets at a local Dollar Store for a dollar apiece.
- Epoxy glue and a set of small clamps to hold everything in place while the Epoxy cured. I could have drilled holes in the Lexan and used nuts and bolts instead of epoxy, and if I was going to make another one I'd do it that way..
The procedure to scan books with this setup is as follows:
- Put the book between the two wedges with the front cover facing the camera.
- Remove all existing pictures from the camera's memory. This is important!
- Using the glass (or platen) to hold down the pages, start photographing the book from front to back getting the front cover and all the right-hand pages all the way to the end of the book. Zoom in so the book doesn't quite fill the frame. Use a close-up setting if your camera has one. Set white balance to Incandescent or Tungsten. Try very hard not to photograph a page more than once or miss a page.
- When you're done connect the camera to your computer and download all the images to their own directory named something like "Book Title Right Pages". Have the computer delete the images from the camera afterwords.
- Plug the camera into the charger and take a nap.
- Repeat the process for the left side pages, being sure to go from front to back. You will very much regret going the other way. Download the pictures into a different directory than you used for the right side pages.
- The scanning process proper is complete. What remains is post-processing.
Using A Flatbed Scanner
At this point you might think that the digital camera method is definitely the way to go and that you should never use a flatbed scanner at all. It isn't that simple. There will be times when the flatbed scanner will do a better job with less work than using cameras.
- If your book is small enough to scan two pages at a time, you might save enough time not having to find and replace missing or duplicated pages to make up for the additional time scanning the pages.
- If you plan to submit the book to Distributed Proofreaders they'll want black and white PNG files for all the pages for OCR and proofing purposes. A scanner can produce output like that directly and give better results than converting photos for that purpose.
- There are a whole host of problems like keystoning, white balance, and skewing that are easier to avoid on a flatbed scanner than they are when using a digital camera.
When using a scanner use a DPI of 300 for text pages, and 600 for illustrations. On Windows you can use the Scanner and Camera Wizard to make the scans. Use the Back button after each scan rather than going to Finish each time. The scanner wizard will automatically name your scans with a sequence number (except for the first one, which will have the name you give it with no number afterwards. You can rename it to have the sequence number "000" when you are finished scanning).
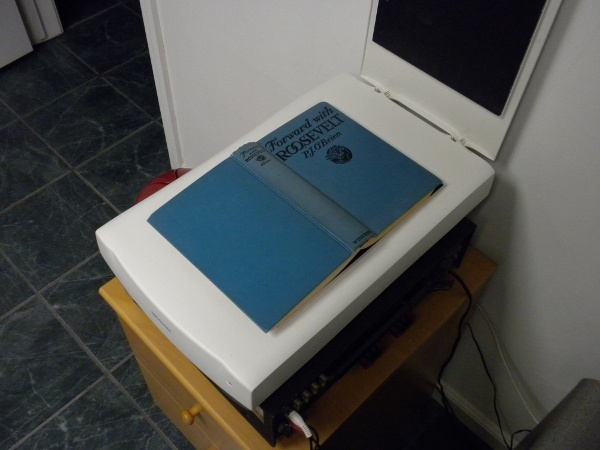
The Post Processing Fork In The Road
There are two ways you can take the images you have made and make an e-book out of it. One way is easy, mostly automated, and produces pages that are readable and attractive. The downside is that the pages don't look exactly like the pages in the book. ⁞ The margins will be different, and the text will be black on a white background no matter what the page color was originally. However, the result will be a nice, compact e-book.
The other way strives to preserve the original look of the pages as much as possible, and is largely manual. It is more work, and may give results that are less than perfect. The file size of the e-book may be larger. In the scans the Internet Archive does itself they try to preserve the look of the original book, and if you want to follow their example this method is the way to go. (There is no requirement to do this. You can use Scan Tailor to prepare submissions to the Internet Archive if you wish). If you have a book that is lavishly illustrated (children's books are a good example) you'll want to use this manual method. For example, consider this book from the Internet Archive:

You can't get results like that automatically.
The steps in both methods are the same, but in the mostly automated method the computer does most of the work. To make the whole process understandable it makes sense to describe the manual method first. I will call this method ...
The Road Less Traveled
Trimming The Pages
If you've done everything right when scanning the book you'll have a bunch of images that look like this:
Granted, that doesn't look too promising but it will get better. The book I scanned was published in 1928 and is titled The Big Aviation Book For Boys. It is filled with true stories of aerial heroism and will appeal to any boy with red blood in his veins and the sort of girl who is not put off by books with Boys in the title.
The first thing we need to do is rotate all the images. In Windows you can open the directory in an Explorer window, do a Select All, then right-click on one of the images and choose one of the Rotate options. In Linux the gThumb Image Viewer will let you do the same thing. In this example right-side pages are rotated clockwise, left side pages counter-clockwise. Doing it this way will rotate every image in the window, giving results like this:
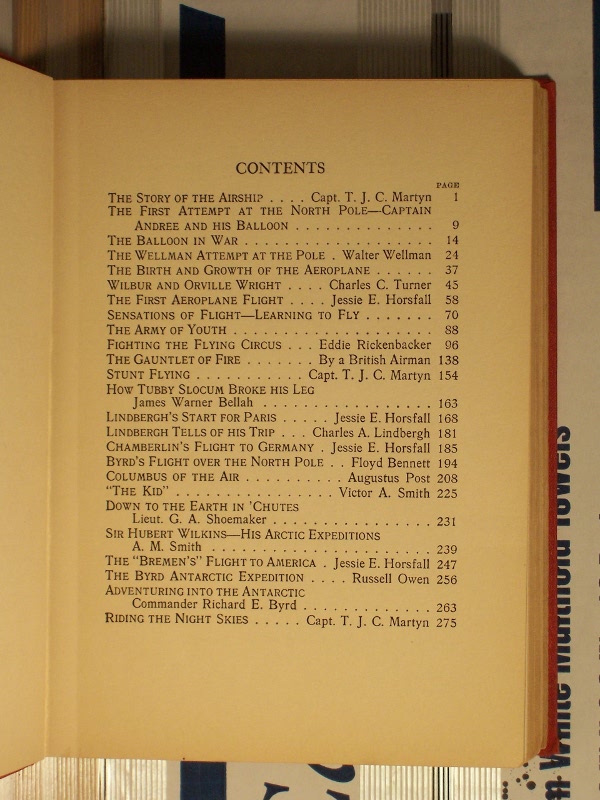
Next we need to crop the image so all that is visible is the page. We do this with a free program called The GIMP (GNU Image Manipulation Program). The GIMP is like a free version of Adobe Photoshop. You can download it here:
http://www.gimp.org/
There are versions for Windows, Linux, and the Macintosh.
A more elaborate book scanner than the Mark I might hold pages in place consistently enough that you could crop the page images automatically. As it is I probably moved my camera on the tripod several times when photographing the pages, so I decided to crop the pages by hand. I did this by loading each picture into The GIMP, selecting the boundaries of the page with the Select tool, then choosing Crop Image from the Image menu. This created an image like the one below, which I then saved.
You'll notice that the text on the pages is a little cockeyed (the technical term is skewed) and if the book is as old as the one I'm scanning here the pages look old and dirty. Actually, the real book pages are not as brown as this image would suggest. I could not find the white balance setting on my camera when I took these pictures, so I used the normal setting. Since then I found how to change the setting and why it's needed. When a camera takes an indoor picture without a flash the color in the picture is distorted a bit depending on what kind of light is in the room. If the light is incandescent you get an orange tint to the picture. You can set the white balance to Incandescent (on my Kodak camera it's called Tungsten) to correct for this.
Correcting Skewed Pages Manually
When I scanned my second book, an Illustrated Junior Library version of The Arabian Nights, I managed to set the white balance to Tungsten and figure out a way to de-skew the pages. Here is a page image that has been rotated.
The page looks great, but it's skewed. Under the Layer menu of The GIMP is a sub menu called Transform which has a menu option Arbitrary Rotation. Select that and you'll get this dialog:
By moving the slider to the left and right we can rotate the entire image so that the page within the image is reasonably vertical. Tip: when the focus is on the slider you can use the arrow keys on your keyboard to get a more precise control than is possible with the mouse. Second tip: you can use the edges of the dialog to line up the edges of the page. When they are parallel the page is correctly aligned.
Now we do our final crop to get the page, ready to save:
If I had the opportunity to re-scan the Boy's Aviation book I would definitely do it this way. (Some would argue that I do have this opportunity, since I still own the book. What is lacking is the desire to re-scan the book. Soon you'll see how I was able to avoid re-scanning it and still have a usable e-book).
Correcting Keystoned Pages
If you didn't line up your camera exactly parallel to the page your page images won't be perfectly square. The borders of illustrations make this problem quite noticeable:
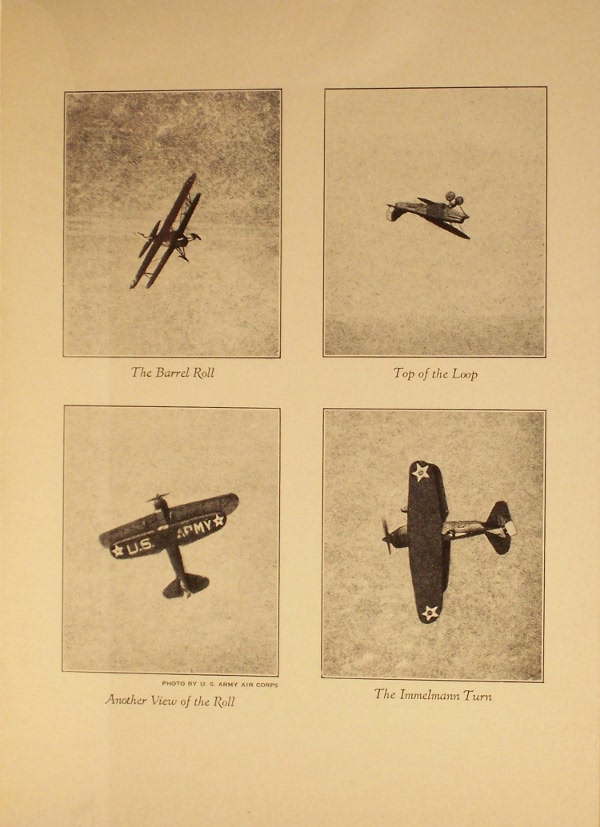
In the original book the four pictures were rectangular with square corners. If you have some pages that are noticeably like that you can use the Perspective Tool in The GIMP to try and fix it. Select the area that needs fixing and the tool will give you four corners you can move around to try and square things up:
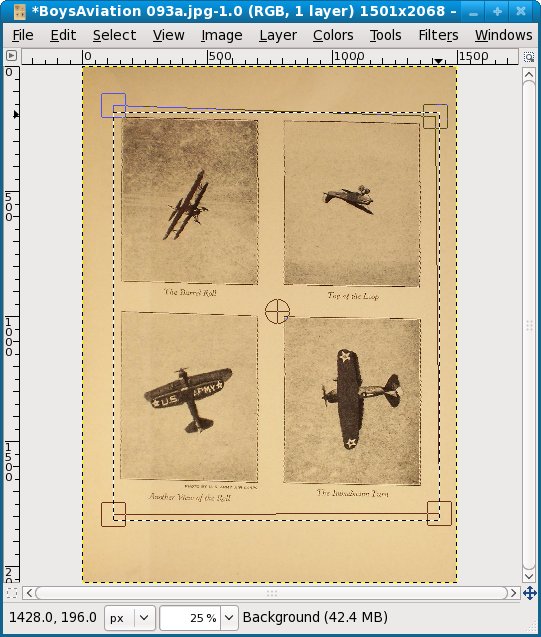
It is of course better to attempt this before cropping the page.
Image Magick
If there is one indispensable program for making e-books out of scanned page images that program is Image Magick. It is free software that runs on Windows, Linux, or the Macintosh. Every Linux distribution includes it. For Windows and the Mac you can download it here:
http://www.imagemagick.org/script/index.php
Image Magick needs software called Ghostscript to create PDF's and you should install that software first. Ghostscript comes with every Linux distribution and should be installed by default. For Windows and the Mac you can download the install programs here:
http://pages.cs.wisc.edu/~ghost/
Click on the latest version and look for the installer for your operating system.
Image Magick is a little different from other graphics software because it does most of its functions from the command line. It may seem odd that a program that works with images does not have a graphical user interface, but there is a reason for that. Image Magick does its most useful functions on groups of images, and the command line suits that kind of work better than a GUI. Among the things Image Magick can be used for is rotating a group of images, cropping a group of images, and making PDFs from a group of images. These functions can all be done with the
mogrify command.
Batch Cropping
If you did a good (or reasonably good) job of keeping your book and camera in the same position when you photographed the pages you may be able to do batch cropping, which will save you a great deal of time and tedium. Batch cropping is a way to apply the same cropping dimensions to many pages. Even if your photos are not perfectly aligned all the way through you might still be able to batch crop them in multiple passes. I did this with my second book. Here is what some pages looked like before cropping:
I copied a bunch of uncropped images to another directory which I called TestCropping. Next I loaded the first picture in that directory into The GIMP and used the rectangle selection tool on the Toolbox to select the area I wanted to crop the image to. I did not crop the image. Instead, I had a look at the dimensions of the selected rectangle in the toolbox:
You should read these dimensions as:
- Upper left corner of the rectangle has an X offset of 344 pixels
- That corner has a Y offset of 400 pixels
- The selected rectangle is 1268 pixels wide
- The rectangle is 1940 pixels in height
If I want to apply the same crop to every image in the directory I can use the Image Magick mogrify command, which updates a file in place:
mogrify -crop 1268x1940+344+400 *.jpg
When I did this I got these results:
The first few pages came out OK, so I copied them back to the original directory, overlaying the uncropped files. Then I copied the remainder of the uncropped pictures to the TestCropping directory and repeated the process. The images where batch cropping didn't work showed a bit of the facing page so when I selected the rectangle for the rest of the pages I moved the left side of the rectangle a bit away from the left edge of the page to avoid this. This time mogrify did well on all the rest of the pages, with the exception of the inside of the right cover, which had a beautiful illustration that really demanded manual de-skewing and cropping with The GIMP. If you do batch cropping you can spend time on manual tweaking like that when it makes a real difference to the end product.
Batch Rotation
If your pages are skewed you can do a batch rotation with mogrify as well. The time to do this is before you combine left and right pages, because the pages on the same side of the book are likely to be skewed the same amount or close to it. Use The GIMP to figure out how much rotation you need, but don't actually do the rotation on the image. Instead, use a mogrify command like this:
mogrify -rotate .9 *.jpg
This with rotate every JPEG in a directory .9 degrees clockwise. Just like when you rotate with The GIMP, you want to rotate the complete image first, then crop.
Dealing with Focus Issues
More likely than not your digital camera will auto focus, with no option for manual focus. This works just fine if the center of the page you're photographing has something the camera can focus on. If the center of the page is blank the camera can't focus properly. Now if the whole page is blank, no problem, because a cropped out of focus page does not look much different than it would in focus. However, you may find yourself with a few pages that look like this:
You're going to have to photograph those pages again. This time, cut out a paragraph of text from something you've printed out and put that slip of paper in the middle of the page, between the page and the glass. This will give your camera something to focus on:
Well, that solved the focus problem. Now we have to use The Gimp to get rid of that slip of paper. The first thing we do is to use the Select tool to select a blank area of the page just above where the paper is. Then we copy the selection to the clipboard using the Copy option on the Edit menu:
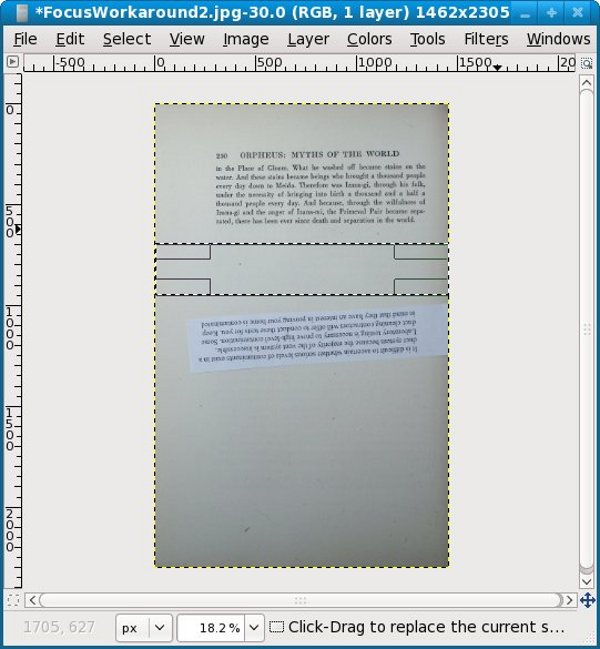
Now we do a Paste from the Edit menu. What that does is create a Layer which we can move around with the Move tool. We can cover the slip of paper with this layer, then save the image. This shows moving the layer in progress:
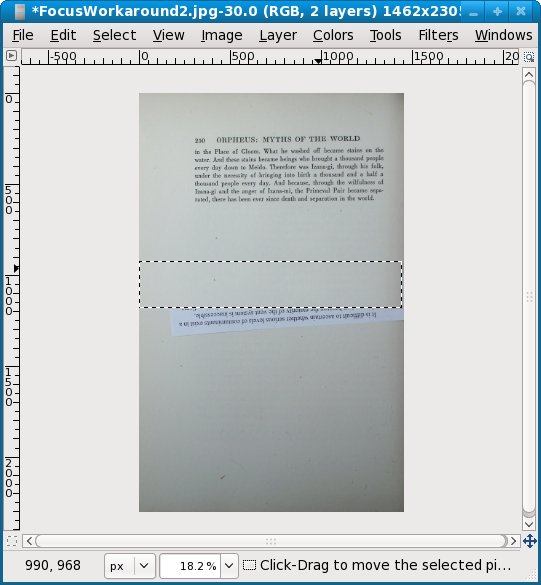
Combining Left And Right Pages
When you have all the pages in both left-hand and right-hand directories cropped it's time to bring the pages together. If you paid attention to my warnings to clear your camera's memory of pictures and photograph both sets of pages front to back you should have two directories with pictures named something like
BoysAviation 001.jpg, BoysAviation 002.jpg ... BoysAviation nnn.jpg
What you need to do now is rename the right side pages to
BoysAviation 001a.jpg, BoysAviation 002a.jpg ... BoysAviation nnna.jpg
and the left side pages to
BoysAviation 001b.jpg, BoysAviation 002b.jpg ... BoysAviation nnnb.jpg
In Linux and probably on the Macintosh too there is a command rename which will do this quite easily:
rename .jpg a.jpg *.jpg
This can be read as "for every file named ending with .jpg change the .jpg in the name to be a.jpg".
For Windows you can try the Renamer utility which can be downloaded from:
http://www.albert.nu/programs/renamer/main.htm
This is what the Renamer utility looks like in action:
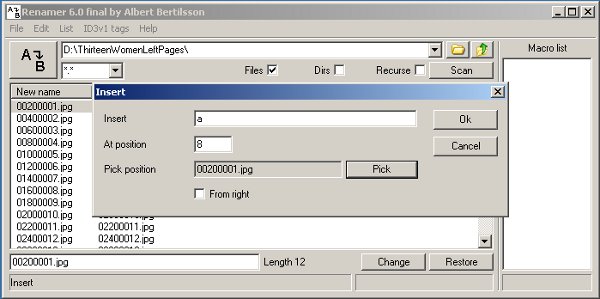
The Insert operation in the program allows you to insert text at a relative position in the file name, and is just what we need.
Be aware that there are two versions of Renamer: the original and the unfortunately named RenamerNG. You want the original. RenamerNG has some bugs, the most important of which is that when you select files to be renamed they are not listed in ascending sequence. This makes that version of the program useless for our purposes.
When you have the files in both directories renamed you can copy (not move) them into one new directory. Before you do that, check to see if both original directories have the same number of files in them. If they do, chances are you didn't miss or duplicate any pages when you photographed them. If not, you'll need to figure out which pages are missing or duplicated, correct that and rename files so that you have a complete set of pages in sequence from front to back. There is no painless way to do this. As it happened, I missed three pages when I scanned the left pages of my first book. The only way I could think of to make things right was to rename each and every page with its page number, then see which ones were missing.
If you need to do this, the Windows Renamer program can help. It can do a great deal more than simply insert a character in a file name. It can also remove the existing sequence number from a file and replace it with a new one. You can start the number at any value and increment it by any amount. If you use this on your left and right pages before combining them you should be able to give each page a sequence number that matches its page number.
On Linux there are krename and pyrename. These should be included in your distribution.
When you have a complete set of pages in sequence back up your work to a CD. You've done a lot of work and you don't want to lose any of it.
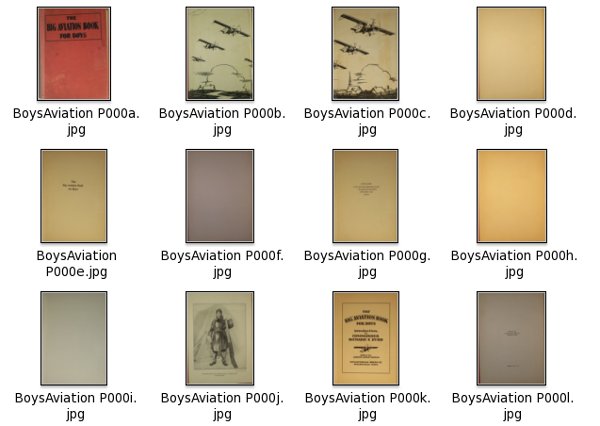
Cleaning Up Page Images
The pages of the Boy's Aviation book are showing signs of age (and a lack of white balance), and it would be nice to clean them up a bit. As you can see in the illustration, some are dirty brown and some are dirty gray.
I asked for suggestions on cleaning up the pages in the sugar-devel mailing list and got several, plus I figured out a method on my own. My first thought was I wanted some sort of filter that takes the darkest color on the page and makes it black and makes everything else white. It turns out that The GIMP has such a filter, called Threshold, which is found on the Tools menu. Running Threshold on the Table of Contents page gives this result:
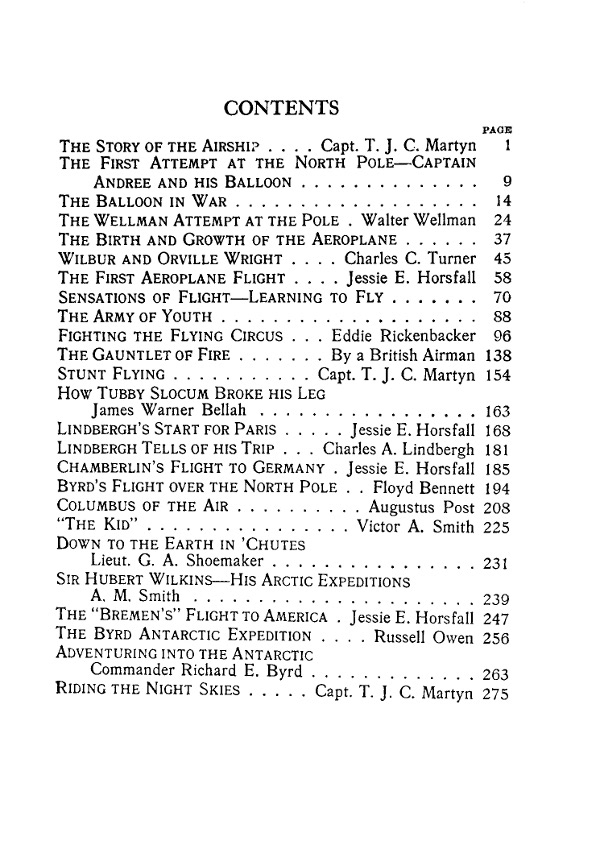
This might do for some uses, especially if you're preparing pages for OCR (Optical Character Recognition). It isn't much good for illustrations. Several people suggested that I convert the image to Grayscale (Mode under the Image menu) and use the Brightness-Contrast dialog (found in the Tools menu) to lighten the page and darken the text to come up with a cleaned up page image.
You do not need to edit each page with The GIMP to pretty it up. Once you figure out what you want to do you can change the pictures as a group from the command line using Image Magick. The changes you do with Image Magick's mogrify command cannot be undone, so before you use it copy all your images into another directory and work with that.
I ran the following command on my images:
mogrify -modulate 150,0,0 *.jpg
This cranked away for about an hour and produced the following results:
The command as shown converts the file to grayscale and increases the brightness to 150%. After it's done some pages are still darker than others, but all are quite readable:
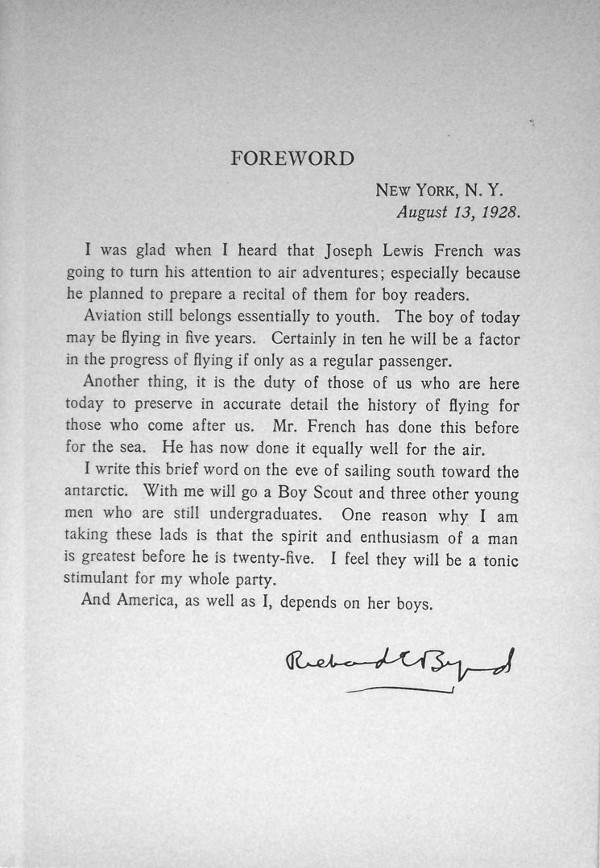
Other than some tolerable skewing the pages look good. I would be entirely justified in making a PDF with these images and considering my work done. Of course, if we're going to submit to the Internet Archive we'll want to replace the now grayscaled images of our front and back covers with the original full color versions.
If you look at these images closely you'll see that part of the page is brighter than the rest of it. This is where the desk lamp I used shined brightest on the page. To get a good quality image you really need to have more than one light shining on the page. After I had done a few books and had grown frustrated with the dingy color of my photographed pages I invested in a couple of clamp-on desk lamps to shine light on the either side of the page, as well as directly from above. This seems to have helped, and the lamps were only about five dollars apiece at Menard's. If post-processing does not give you the page color you want, consider investing in improved lighting.
The Easier Road: Scan Tailor
You can use Scan Tailor on Windows or on Linux. For Windows there is the usual install program. For Linux you will need to compile from source. You can get both here:
http://scantailor.sourceforge.net/
Scan Tailor is an amazing program that can do all of the following to the images you originally captured with your camera:
- Rotate the images clockwise or counter clockwise
- If you use a flatbed scanner, split 2-up scans into separate pages.
- Calculate the skew of your page so it can be corrected
- Identify the content of your page, whether it be a block of text or an illustration or both
- Clean up the content portion of the page. For blocks of text it will do the equivalent of the Threshold filter in The GIMP. For photos it will brighten the image.
- De-skew the content portion of the page.
- Place the content of the page in a new, empty page with the margins you specify.
- Create .tiff files in an output directory with all these corrections made, leaving the original images untouched.
In other words, you start with unrotated pictures of a book resting against a cardboard box and in one operation you get pages that look like this:
Here is a sample page for comparison purposes:
The biggest difference between the two methods is that with the manual method you try to identify the boundaries of the page in the photo and crop to that. Scan Tailor doesn't care about the boundaries of the page; it's more interested in the boundaries of the
content on the page. Once it knows that it can de-skew that content and place it on a new page.
In the screen shot below you can see that there are six tasks that Scan Tailor performs in sequence. Split Pages doesn't apply in my situation; it would make sense if I was using a flatbed scanner to scan two pages at a time, for instance. Select Content must be run before you can generate output pages. As you can see in the screen shot it can easily find the content area on a page. It occasionally messes up a picture, but you can use the Manual button to correct this.
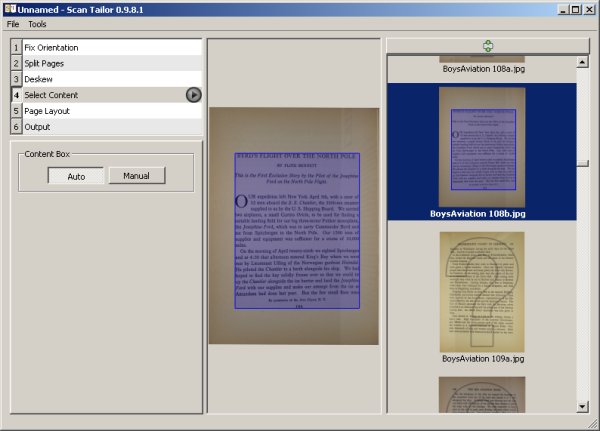
Page Layout is used to specify the margins of the page where content will be placed. The important thing to remember here is that Scan Tailor assumes that all pages given to it will have these margins. If the inside lining of the book cover has illustrations that go to the edge of the page that can mess up the way the rest of the pages are formatted, so it is best not to give such pages to Scan Tailor. Instead, you can do these pages by hand or simply don't include them in your e-book.
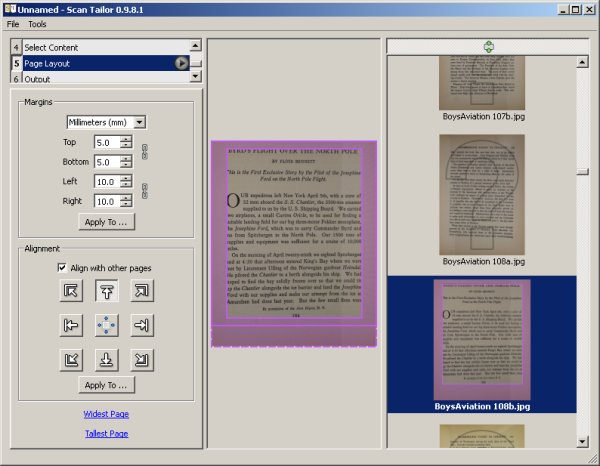
Output creates the pages as TIFF files in a separate directory. When you create output you have a choice of three formats:
- Black and White
- Grayscale/Color
- Mixed
If your book is a combination of text and images choose Mixed. This will detect which pages are just text and make them black and white, and make the rest color as needed.
Some examples will give you an idea of what to expect. This is a page rendered in Black and White.
This is the same page in color with White Margins selected. You can choose not to have white margins but you would not like the result. This is a good choice if the paper the book is printed on is acid-free and a nice color, clearly not the case here:
If you check the "Equalize Illumination" check box in Color mode you'll get this:
"Mixed" will try to give you a color or grayscale image with white borders and equalized illumination when it needs to and black and white for pure text pages. This is a reasonably good option, but for the book shown above (Thirteen Women by Tiffany Thayer) Black and White is clearly the best choice.
Scan Tailor has a User Guide here:
http://sourceforge.net/apps/mediawiki/scantailor/index.php?title=User_Guide
Making PDF's

Creating PDFs From Page Images
Suppose you have a book published in 1922 or earlier that you want to donate to the Internet Archive. They require that submissions be in PDF format. For now, assume that you have created images in JPG format for all the pages and they are named sequentially. You can make a PDF out of them using Image Magick.
This is the command to create a PDF from a set of sequentially named images:
convert -verbose *.jpg my_e-bookname.pdf
This will take all the JPEG files in the current working directory and put them into a PDF. If you have a very short book, like a children's book, this is all you need. ⁞ If you try to run this on a book with hundreds of pages it will fail with an out of memory error (or on Linux a segmentation fault). The way around that is to make a PDF out of each page image, then join those PDFs together. We use a different Image Magick command to make the PDFs:
mogrify -verbose -format pdf *.jpg
To join the PDFs together we need another piece of software, called pdftk. You can download that here:
http://www.pdfhacks.com/pdftk/
The command you use to join the PDFs is this:
pdftk *.pdf cat output BookTitle.pdf
When you run this you may see many warning messages about the possibility of memory leaks. These messages should be safe to ignore.
Here is a PDF I made this way, viewed in Acrobat Reader:
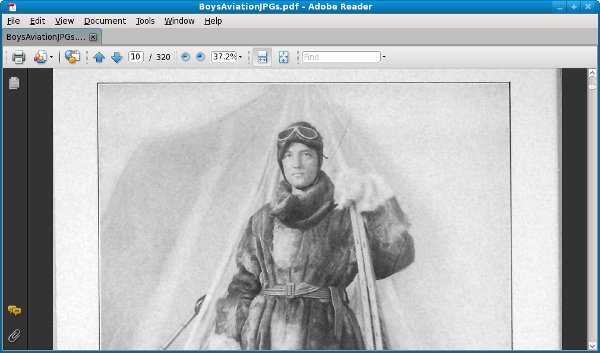
Making Your PDF's Smaller
If you created a PDF from page images you may be a bit dismayed at how large the file is. One hundred and fifty megabytes for a three hundred page book is not uncommon.
If you look at the files available for each book at the Internet Archive, you'll see entries like this:
Index of /0/items/worksofjulesvern02vern/
../
worksofjulesvern02vern.djvu                        12-Apr-2008 05:58             9686664
worksofjulesvern02vern.pdf                         12-Apr-2008 07:05            21892098
worksofjulesvern02vern_bw.pdf                      12-Apr-2008 08:42            17715851
worksofjulesvern02vern_jp2.zip                     12-Apr-2008 00:17           170943817 begin_of_the_skype_highlighting              17 170943817      end_of_the_skype_highlighting
worksofjulesvern02vern_orig_jp2.tar                11-Apr-2008 20:40           253030400
We can interpret this as follows:
- The uncropped images from the book scanner take up about 253 megabytes.
- The cropped images take up about 170 megabytes.
- The finished PDF takes up about 21 megabytes.
- A black and white version of the same PDF is a little under 18 megabytes.
- The DjVu version is smallest of all, at 9.6 megabytes.
How is this possible? I couldn't figure it out myself so I sent an email to the authors of the software the Internet Archive uses and it got forwarded on to the person who developed the PDF creating software. He was kind enough to explain the whole process, which I will paraphrase and simplify here.
The main secret of the process is that it divides each page image into three separate images which are combined to create the page you see in the PDF. These images are:
- The text in the book, stored as a black and white image at high quality. Since there are only two colors used even a high quality image takes up little space.
- The image layer, which is "downsampled" to a lower resolution than the original photograph to save space. On a computer screen the difference between the original image and the downsampled image is not noticeable.
- The page background, which is the bulk of the page area, is stored very highly compressed. The effect of this is to make the page background a more uniform color than the original book had, but that is not a problem.
If you read a PDF like the book Abroad which has highly decorated pages you can actually see the three layers coming into view separately.
This process is more complex than anything the home e-book maker would attempt. That does not mean that we cannot make our e-books dramatically smaller without losing an objectionable amount of quality, but we'll have to use simpler techniques. The key is to make the original page images smaller and more highly compressed. Once you do that you can make a PDF much smaller than the ones we can create with the original images.
If you're preparing the e-book for donation to the Internet Archive they're going to want the full sized PDF. They will of course prepare a new PDF which is smaller and has OCR'd text behind each page.
If the book is not going to the Internet Archive, you'll need to shrink the pages images yourself.
Optimizing Page Sizes
One thing you can and should do when creating e-books from images is to first resize the pages so they are no larger than your screen can display. On an XO laptop the screen width is 1200 pixels. The page images I created with a Kodak 5 megapixel camera are a little over 1200 pixels wide once the images are rotated and trimmed. The difference is probably not worth bothering with. Pictures taken with an 8 megapixel camera are a different story.
The width of the screen is the important factor when choosing what size your images should be, since pages scroll vertically. Load one of your images into The GIMP or Picasa to see how wide it is in pixels. Figure out what width in pixels you want your images to be (the screen width of the XO laptop is 1200 pixels), then run the mogrify command from Image Magick on them like this:
mogrify -resize 1200 -format jpg -quality 80% -verbose *.jpg
Note that mogrify will update your images in place, so you definitely want to back up the originals to CD first as well as copy them to a new directory. You may want to experiment with the -quality setting. The JPEG format does what is known as "lossy" compression. This means it gets a smaller file size by removing detail from the picture.
This might be hard to imagine, but suppose you have a photograph. JPEG's can display 16.7 million colors but the human eye can't always distinguish them. If there is a blue sky in the photograph the sky won't be all the same color. Say there are 1,000 shades of blue in the sky. If you averaged out the colors so that only 256 shades were used you might not be able to tell the difference, but the amount of information in the picture would go down noticeably, resulting in a much smaller image.
80% quality will generally give good results, but you should experiment. You might experiment with image sizes too. Comic book zips rarely contain images wider than 900 pixels, yet they look good enlarged.
Space savings can be significant. The original files for this book took up 173.9 megabytes. The resized files take up 69.3 megabytes. That's not as good as the Internet Archive does, but it's a decent improvement. You can experiment with different quality levels to see how much you can compress your JPEG's without hurting quality. You might use a lower quality for text pages and a higher one for color illustrations, or vice versa.
The resized PDF looks as good as the original:
If you want to make your book still smaller you can make a DjVu document out of the resized images.
Of course if you are really serious about making smaller PDF's you'll want to do OCR on the scanned pages to get plain text, then use your word processor to make a PDF out of that text. Doing that will be covered in the chapter on Plain Text files.
Correcting Page Sizes
It is very likely that your cropped page images will not all be the same size. Quite often this is not a problem, but sometimes your PDF's will look like this when you try to read them:
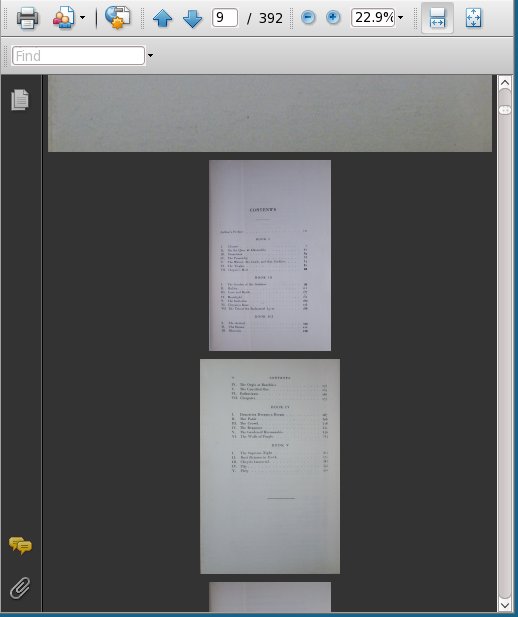
Some of the books scanned by Microsoft and Google and uploaded to the Internet Archive have this problem. You can fix it by making all your page images the same width and re-creating the PDF. The mogrify command used to resize images in this chapter can be used for this, with some simple modifications. You need to change the -resize parameter to something slightly smaller than your page images. If most of your pages are 1295 or so, make the width 1200. You can leave off the -quality parameter (which will leave the original quality of the image unchanged). This will make all your pages the same width, and the PDF you make from those images should not have the problem shown above.
Making CBZ'S

Creating The Archive
The CBZ format format is the easiest one of all to create. All you need to do is name your image files in sequence and put them in a Zip archive using a program like WinZip or 7-Zip. I recommend 7-Zip because it is free to download and use, plus it can do things that WinZip cannot, like extract files from RAR archives. If you want to convert Comic Books in CBR format to CBZ 7-Zip can do it.
You can download 7-Zip here:
http://www.7-zip.org/
Here is 7-Zip in action. As you can see I'm giving my Zip archive the .cbz suffix.
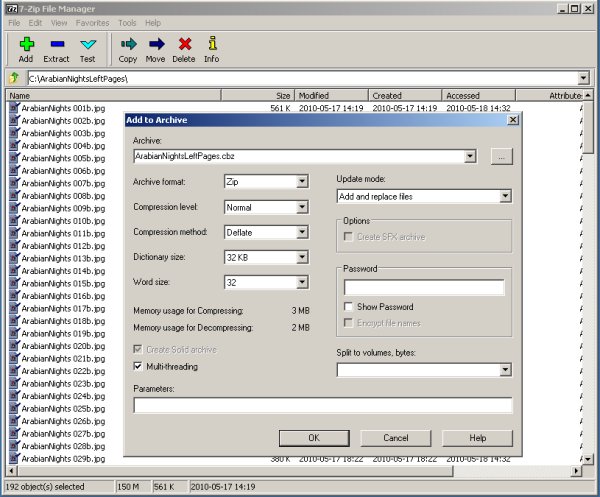
In Linux you can create CBZ's from the command line using the zip command:
zip ArabianNights.cbz *.jpg
Making DJVU's
Introduction
Writing this book has been a real education for me, and I learned a few things I did not expect to learn. The most surprising thing I learned is that DjVu does not always give a smaller file size than PDF! Since the only reason to prefer DjVu to PDF is to get a smaller file that uses less memory, it is important to understand when PDF will give the smaller file size. Making a DjVu is more work than making a PDF, so you need to know when it is a waste of your time.
In the chapter on creating book scans, I talk about two methods of doing them. The first method (entitled "The Road Less Travelled") preserves the look of the original page, including the color of the paper, the margins used, etc. The second method (entitled "The Easier Road: Scan Tailor") looks for pages with nothing but text and makes these pages have pure black letters on a pure white background.
If you do the first method, DjVu can help give you smaller file sizes. Here is a comparison:
-rw-rw-r--. 1 jim jim  87606063 2010-05-15 14:08 BoysAviationJPGs.djvu
-rw-rw-r--. 1 jim jim 182866779 2010-05-15 16:36 BoysAviationJPGs.pdf
This is a Linux directory listing showing a PDF of a book made with the method that preserves the look of the original pages. The .djvu file is less than half as large as the PDF. Now let's look at files created with the Scan Tailor method, which preserves the content of the pages but changes their look:
-rw-rw-r--. 1 jim jim 121069444 2010-05-15 13:14 BoysAviationScanTailor.djvu
-rw-rw-r--. 1 jim jim  56796427 2010-05-15 13:11 BoysAviationScanTailor.pdf
A couple of surprising things here. The .djvu file is considerably larger than the PDF (but still smaller than the other PDF). What's really surprising is that the PDF made using the Scan Tailor method is the smallest file of the four, by a significant amount.
How to explain this? Compression looks for redundant information and replaces the raw information with a description of that information. In "lossy" encoding schemes compression looks for information that would not be missed and discards it to make the file smaller. When you have pages with pure black text on pure white backgrounds that are already compressed, an attempt to compress such a file even further might make the file larger than it was to begin with.
On the other hand, a book that has lots of illustrations may produce a larger file using Scan Tailor than using the other method. The third book I scanned had illustrations on almost every page, mixed in with the text. Because Scan Tailor could not save such pages as pure black and white images the resulting PDF was twice the size of the version made the other way. (It must be said that Scan Tailor did a beautiful job of laying out the pages. Smaller file sizes are not the only reason to use Scan Tailor).
If this explanation doesn't make sense to you, just remember that if you use the Scan Tailor method of preparing your page images and your book has only a few illustrations don't bother with making a DjVu file. A PDF will do just fine.
If you resize and compress pages not created with Scan Tailor to create a PDF you can still get a smaller file using DjVu. Here is an example:
-rw-rw-r--. 1 jim jim 49519200 2010-05-30 08:25 ArabianNights.djvu
-rw-rw-r--. 1 jim jim 69192729 2010-05-30 07:29 ArabianNights.pdf
The DjVu version is 20 megabytes smaller.
DjVu Libre
To make DjVu files you need to install DjVu Libre. This software comes with every Linux distribution. Users of Windows and Macintosh may download their versions here:
http://djvu.sourceforge.net/index.html
There are two command line programs in this package we need to use. The first is named c44, and it's job is to convert our .jpg files into .djvu files with improved compression. You can run it on a single file like this:
c44 filename.jpg
Regrettably there is no way to run c44 on a group of JPEG's; each invocation of the program converts just one file. Fortunately, there is a way to run c44 on every JPEG in a directory without typing in the command over and over. You can use a simple Python program like this one, which should be put in a file named makedjvus.py:
#! /usr/bin/env python
import glob
import getopt
import sys
import subprocess

def make_djvus(filename):
    """This function is called
    for each image file."""

    subprocess.call(["c44", filename])
    print 'filename', filename
    return

if __name__ == "__main__":
    try:
        opts, args = getopt.getopt(sys.argv[1:], "")
        if len(args) == 1:
            print 'using glob'
            args = glob.glob(args[0])
            args.sort()
        i = 0
        while i < len(args):
            make_djvus(args[i])
            i = i + 1
    except getopt.error, msg:
        print msg
        print "This program has no options"
        sys.exit(2)
When you have this installed on your system, run it like this:
python makedjvus.py *.jpg
The program should be in your system PATH and your current directory should be the one with the JPEG's to convert.
When you have all the files converted it's time to use the second command line program, djvm, to combine the .djvu's into a complete document, also with the suffix .djvu:
djvm -c BookTitle.djvu *.djvu
The -c option specifies the document file to create and everything after that is file names to include in the document.
Here is my .djvu file, being viewed with DJView3 in Linux:
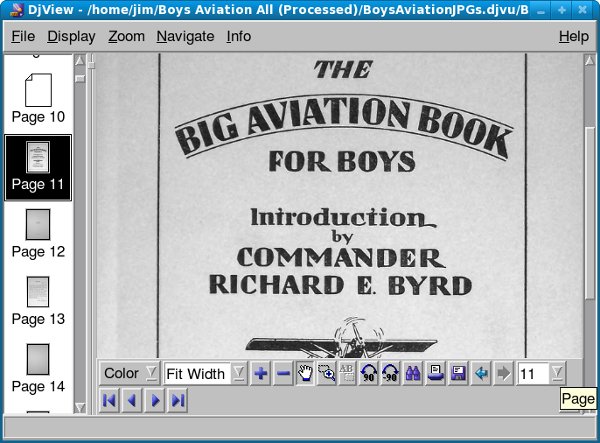
Making Plain Text Files

Options For Creating Plain Text Files From Scanned Book Pages
Some teachers have expressed an interest in scanning in textbook pages and creating text files from them. Sugar users may wish to do this because plain text files support Text To Speech with word highlighting, which may be an aid to students with reading problems. You may also wish to create texts to donate to Project Gutenberg, or make an EPUB out of the book.
There is more than one way to create a plain text file from a book, and which one will be the least work will depend on how quickly you need the book and how you plan to distribute it. One option you have is to donate a physical copy of a public domain book to Distributed Proofreaders. They will saw the spine off the book, scan it with a sheet-feed scanner, do OCR on it, proof read it, and submit it to PG. The whole process will take several months and will destroy the book.
You could also scan the book yourself and submit the scanned page images to the Distributed Proofreaders Scanning Pool, where one of their volunteers will do OCR on the page images and submit it for proofreading, again by volunteers. This will also take many months but the book won't be destroyed.
You can also do the OCR yourself, then submit your page images plus the text files created by OCR (one text file per page), plus high quality images of any illustrations in the book, to the Distributed Proofreaders FTP server, where it will wait in the queue to be proofread. Proofreading will take a few months, but your contribution will get in the queue sooner.
Finally, you may have a public domain book that you do want to donate to PG, but you don't want to wait the months that DP will take to thoroughly proofread it. This means that you'll want to prepare page images and text files like you would for the DP site but use them to do you own proofreading to create something that can be submitted to PG directly. This is the most work of the lot, but this chapter will show you how to minimize the effort.
OCR Software
The most commonly used program for doing Optical Character Recognition is a commercial product called ABBYY Fine Reader. A version of this comes with many flatbed scanners. The Professional version has features that make it easier to do OCR on a complete book. The Internet Archive uses this product, and Distributed Proofreaders uses and recommends it. It is, however, not cheap. The current Professional edition will run you $400. For that reason I will not be recommending it. I think you can get results every bit as good with free software. ABBYY Fine Reader does have a free 15 day trial for its products; the program stops working after 15 days or 50 pages. That should be more than enough to let you decide if it's worth the money. The Distributed Proofreaders site has many suggestions on how to use this product.
If you're a Windows user I recommend FreeOCR. You can download it here:
http://www.paperfile.net/
It looks like this:
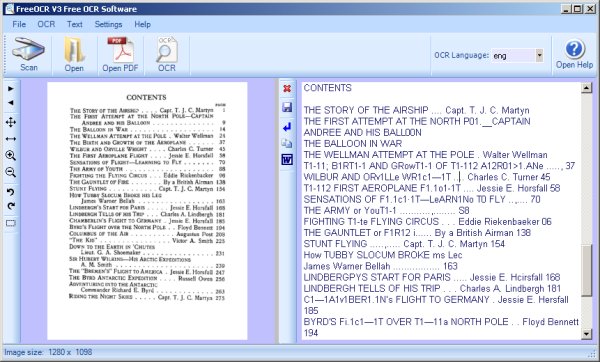
The procedure to use this is to open a PDF or a JPEG file for a single book page. Press the OCR button and text for the page will be copied to the window on the right, where you can correct it. If you open a PDF you can navigate from page to page and do OCR on each one. As you do each page the text will be appended to the window on the right. When you're done you can save your work to a text file or copy it to the clipboard.
Depending on the font used in the book, OCR can be quite accurate:

There is no way to OCR some pages of a PDF, save your work, exit, restart the program and pick up where you left off. Since that's exactly what you need to do to make a plain text file out of an entire book you will want to have a word processor open so you can copy text from the clipboard to the word processor and save it as a text document. That way you can resume FreeOCR, resume your word processor, load the PDF into Free OCR, find the page where you left off, then continue.
Another possibility is to create a separate text file for every page. If you do this, there are tools that can help you with proofing and correcting those pages.
FreeOCR is not available for Linux, but the OCR engine that it uses, called Tesseract, can be used in Linux from the command line. It should be included with your Linux distribution or you can get it here:
http://code.google.com/p/tesseract-ocr/
Tesseract only works on individual, uncompressed TIFF files, and they must be named with the suffix .tif. If the book pages you need to OCR are JPEG's you can use Image Magick mogrify to create TIFFs from them:
mogrify -format tiff *.jpg
will create TIFFs for every JPEG in the current working directory. Tesseract does not like these files to have the suffix .tiff, which is what Image Magick will give them. You can change this to .tif with the following command:
rename .tiff .tif *.tiff
Then you can run tesseract on each one with the command:
tesseract filename.tiff basefilename
for example:
tesseract BoysAviation\ P135.tif BoysAviation\ P135
will create a file named BoysAviation P135.txt which should have the OCR'd text in it. When I tried this on Fedora 10 I just got a file full of gibberish. I did better with Fedora 11:
$ tesseract BoysAviation\ P135.tif BoysAviation\ P135
Tesseract Open Source OCR Engine
$ less BoysAviation\ P135.txt
FIGHTING THE FLYING CIRCUS 135
heads and exploded with their soft ’plonks, releasing varicolored
lights which floated softly through this epochal night until they
withered away and died. Star shells, parachute llares, and
streams of Very lights continued to light our way through
an aerodrome seemingly thronged with madmen. Everybody
was laughing-—drunk with the outgushing of their long p€¤t—up
emotions. "1’ve lived through the war!" I heard one whirling
Dervish of a pilot shouting to himself as he pirouetted alone
in the center of a mud hole. Regardless of who heard the
inmost secret of his soul, now that the war was over, he had
retired off to one side to repeat this fact over and over to
himself until he might make himself sure of its truth.
Another pilot, this one an Ace of 27 Squadron, grasped
me securely by the arm and shouted almost incredulously,
"We won’t be shot at any m0re!" Without waiting for a reply `
he hastened on to another friend and repeated this important
bit of information as though he were doubtful of a complete
understanding on this trivial point. What sort of a new world
will this be without the excitement of danger in it? How
queer it will be in future to fly over the dead line of the silent
Meuse—that significant boundary line that was marked by
Arch shells to warn the pilot of his entrance into danger.
How can one enjoy life without this highly spiced sauce of
danger? What else is there left to living now that the zest
and excitement of lighting aeroplanes is gone? Thoughts such
as these held me entranced for the moment and were after-
wards recalled to illustrate how tightly strung were the nerves
of these boys, of twenty who had for continuous months been
living on the very peaks of mental excitement.
You can run tesseract for each page in the book (or use a Python program to do it) then combine them all together with this command (in Linux or the Macintosh):
cat *.txt > BookTitle.txt
or this command for Windows:
type *.txt > BookTitle.text
Note that in Windows you don't want the concatenated file to have the same suffix as the files you are concatenating. If you do then the type command will try and append your target file to itself. This is not a problem with cat on Linux. Once the file is created you can rename it as you like.
Here is the code for a Python program named runtesseract.py that will run Tesseract for every TIFF image in a directory:
#! /usr/bin/env python

import glob
import getopt
import sys
import subprocess

def run_tesseract(filename):

    filename_tuple = filename.split('.')
    filename_base = filename_tuple[0]
    subprocess.call(["tesseract", filename, filename_base])
    print 'filename', filename
    return

if __name__ == "__main__":
    try:
        opts, args = getopt.getopt(sys.argv[1:], "")
        if len(args) == 1:
            print 'using glob'
            args = glob.glob(args[0])
            args.sort()
        i = 0
        while i < len(args):
            run_tesseract(args[i])
            i = i + 1
    except getopt.error, msg:
        print msg
        print "This program has no options"
        sys.exit(2)
You run this program like this:
python runtesseract.py *.tif
Automatically Fixing Common Problems With guiprep
Before you combine all your separate one-page text files into one large file you might want to use the guiprep utility on them. Guiprep is a program used by the Distributed Proofreaders project to prepare texts and page images for use on their website. It can find "scannos" (common scanning errors) in your files and fix them. It can also do things like deleting the first line in each file, which could be a page heading, and join hyphenated words split across lines.
Scannos are mistakes that OCR software make consistently. For instance, OCR software will confuse a "W" with "V/". Guiprep can identify lots of such patterns and fix them. You can get the program here:
http://home.comcast.net/~thundergnat/guiprep.html
This is what the program looks like:
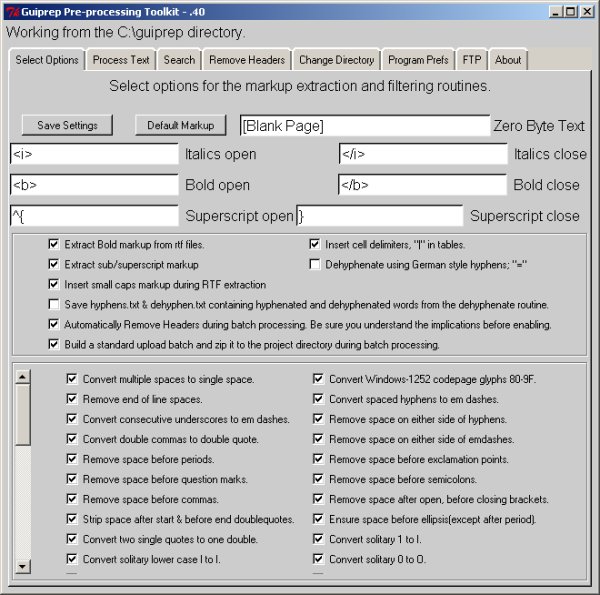
If you use this program you should be aware that some of its options expect that the files will be prepared by ABBYFineReader, and you'll need to avoid those options. ABBYY Fine reader can do a couple of things that Tesseract cannot:
- It can tell the difference between bold text, italicized text, and normal text and save scanned text in Rich Text Format files, which have special markup for that formatting.
- It can figure out where paragraphs begin and end, which makes it easier for Guiprep to figure out how to de-hyphenate text.
Tesseract just saves plain text files with no attempt to preserve text formatting or paragraphs. As a result of this when you run Guiprep you want to have your text files in a subdirectory named text, and you want to avoid the options to extract formatting and do de-hyphenating.
One way Guiprep can do de-hyphenating is to create two separate directories for your text files: textw and textwo. The first one contains text files with line breaks and the second contains text files without line breaks (but with paragraph breaks). Guiprep compares these two versions of your files and does de-hyphenating.
Tesseract cannot produce text files without line breaks, so don't bother creating textw and textwo directories. Just put your text files in a directory named text.
Even without these functions Guiprep still has much to offer.
Proof Reading Individual Pages
There are a couple of approaches to proofing your text. You can make one big text file and proof it with the book close by, or you can proof individual pages, then combine them. The advantage to proofing one page at a time is that you can use a utility program to view the OCR'd text and the page image it came from on the same screen, like this:
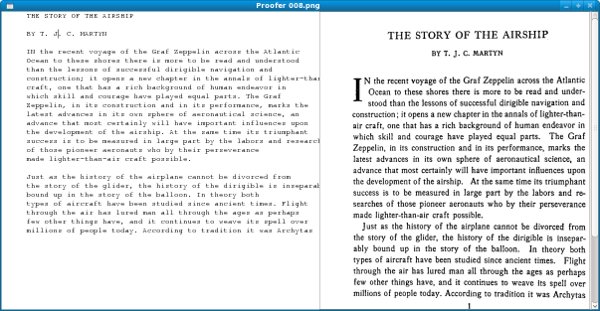
The OCR'd text is shown in the Courier font because that font avoids the problem of letters that look similar to each other. In some fonts, for instance, the first three letters of the word "Illustration" (where the "i" is capitalized) look very similar. The text can't just look right, it has to be right.
When you move from page to page, the page you came from is saved to disk.
Where can you get such a massively useful utility? Glad you asked. This is another one of my Python scripts, which I like to call proofer.py. The code is here:
#! /usr/bin/env python
# proofer.py

import glob
import sys
import os
import gtk
import getopt
import pango

page=0
IMAGE_WIDTH = 600
ARBITRARY_LARGE_HEIGHT = 10000

class Proofer():

    def keypress_cb(self, widget, event):
        keyname = gtk.gdk.keyval_name(event.keyval)
        if keyname == 'F10':
            self.font_increase()
            return True
        if keyname == 'F9':
            self.font_decrease()
            return True
        if keyname == 'Page_Up' :
            self.page_previous()
            return True
        if keyname == 'Page_Down':
            self.page_next()
            return True
        return False

    def font_decrease(self):
        font_size = self.font_desc.get_size() / 1024
        font_size = font_size - 1
        if font_size < 1:
            font_size = 1
        self.font_desc.set_size(font_size * 1024)
        self.textview.modify_font(self.font_desc)

    def font_increase(self):
        font_size = self.font_desc.get_size() / 1024
        font_size = font_size + 1
        self.font_desc.set_size(font_size * 1024)
        self.textview.modify_font(self.font_desc)

    def page_previous(self):
        global page
        self.save_current_file(self.filenames[page])
        page=page-1
        if page < 0: page=0
        self.read_file(self.filenames[page])
        self.show_image(self.filenames[page])

    def page_next(self):
        global page
        self.save_current_file(self.filenames[page])
        page=page+1
        if page >= len(self.filenames): page=0
        self.read_file(self.filenames[page])
        self.show_image(self.filenames[page])

    def read_file(self, filename):
        "Read the text file"
        text_filename = self.find_text_file(filename)
        self.window.set_title("Proofer " + filename)
        etext_file = open(text_filename,"r")
        textbuffer = self.textview.get_buffer()
        text = ''
        line = ''
        while etext_file:
            line = etext_file.readline()
            if not line:
                break
            print line
            text = text + unicode(line, 'iso-8859-1')
        text = text.replace("'I`",  'T')
        text = text.replace("'|`",  'T')
        text = text.replace("l`",  'f')
        text = text.replace("I`",  'f')
        text = text.replace("t`",  'f')
        text = text.replace(" ll",  ' H')
        textbuffer.set_text(text)
        self.textview.set_buffer(textbuffer)
        etext_file.close()

    def find_text_file(self, filename):
        filename_tuple = filename.split('.')
        text_filename = filename_tuple[0] + '.txt'
        return text_filename

    def save_current_file(self, filename):
        text_filename = self.find_text_file(filename)
        f = open(text_filename, 'w')
        textbuffer = self.textview.get_buffer()
        text =  textbuffer.get_text(textbuffer.get_start_iter(),
                                    textbuffer.get_end_iter())
        try:
            f.write(text)
        finally:
            f.close
        return True


    def show_image(self, filename):
        "display a resized image in a full screen window"
        scaled_pixbuf = gtk.gdk.pixbuf_new_from_file_at_size(filename,
                            IMAGE_WIDTH, ARBITRARY_LARGE_HEIGHT)
        self.image.set_from_pixbuf(scaled_pixbuf)
        self.image.show()

    def destroy_cb(self, widget, data=None):
        self.save_current_file(self.filenames[page])
        gtk.main_quit()

    def main(self, args):
        self.filenames = args
        self.window = gtk.Window(gtk.WINDOW_TOPLEVEL)
        self.window.connect("destroy", self.destroy_cb)
        self.window.set_title("Proofer " + args[0])
        self.window.set_size_request(1200, 600)
        self.window.set_border_width(0)
        self.scrolled_window = gtk.ScrolledWindow(
            hadjustment=None,
            vadjustment=None)
        self.scrolled_window.set_policy(gtk.POLICY_NEVER,
                                        gtk.POLICY_AUTOMATIC)
        self.textview = gtk.TextView()
        self.textview.set_editable(True)
        self.textview.set_wrap_mode(gtk.WRAP_WORD)
        self.textview.set_cursor_visible(True)
        self.textview.connect("key_press_event",
                              self.keypress_cb)
        self.font_desc = pango.FontDescription("monospace 12")
        self.textview.modify_font(self.font_desc)
        self.scrolled_window.add(self.textview)
        self.read_file(args[0])
        self.textview.show()
        self.scrolled_window.show()
        self.window.show()

        self.scrolled_image = gtk.ScrolledWindow()
        self.scrolled_image.set_policy(gtk.POLICY_NEVER,
                                       gtk.POLICY_AUTOMATIC)
        self.image = gtk.Image()
        self.image.show()
        self.show_image(args[0])
        self.scrolled_image.add_with_viewport(self.image)

        self.hbox = gtk.HBox()
        self.hbox.add(self.scrolled_window)
        self.hbox.add(self.scrolled_image)
        self.hbox.show()

        self.window.add(self.hbox)
        self.scrolled_window.show()
        self.scrolled_image.show()
        self.window.show()

        gtk.main()

if __name__ == "__main__":
    try:
        opts, args = getopt.getopt(sys.argv[1:], "")
        if len(args) == 1:
            print 'using glob'
            args = glob.glob(args[0])
            args.sort()
        Proofer().main(args)
    except getopt.error, msg:
        print msg
        print "This program has no options"
        sys.exit(2)
This program runs on Windows, but is somewhat troublesome to install because it needs PyGTK (http://www.pygtk.org/downloads.html). The Macintosh does not have a PyGTK download, so for now proofer.py is Linux and Windows only.
You can use FreeOCR to do pretty much the same kind of side-by-side proofing on Windows, and it is easier to install.
This program assumes that you have just run Guiprep on the files, and that your text files are in the same directory as your image files. You make this directory your current working directory and run proofer.py like this:
python proofer.py *.png
If your image files are JPEG's of TIFF's you would change the argument accordingly. proofer.py does not care what kind of image files you have. It will load the first file in the directory into the right pane, then load the matching text file into the left pane. You can navigate from page to page using the Page Up and Page Down keys. You can make the text font smaller or larger by using F9 and F10. When you move to a new page or quit the program the text of the page you were working on gets saved.
Proofer also has code to correct "scannos" I have found in my own books that guiprep doesn't handle. If you know a little Python you can easily add your own correction logic.
Formatting A Plain Text File
When you have loaded your OCR text file into a word processor what you have is the lines of text on each page, with line endings at the end of each line. What you would like to have is text word-wrapped into paragraphs, with line endings used only to separate paragraphs. It is possible to remove all of the line endings in the document, but to do that you need to give your word processor a way to tell the difference between the end of a line and the end of a paragraph. If you don't, you'll just put all the text in the book into one enormous paragraph.
The way you can do that is by putting a blank line between paragraphs and also between anything you don't want to wrap together. Consider this table of contents:
CONTENTS

THE STORY OF THE A1RSHIP .... Capt. T. J. C. Martin

THE FIRST ATTEMPT AT THE NORTH POLE——CAPTAIN
    ANDREE AND HIS BALLOON

THE BALLOON IN WAR

THE WELLMAN ATTEMPT AT THE POLE . Walter Wellman

THE BIRTH AND GROWTH OF THE AEROPLANE

WILBUR AND ORVILLE WRIGHT .... Charles C. Turner

THE FIRST AEROPLANE FLIGHT .... Jessie E. Horsfall

SENSATIONS OF FLIGHT—LEARN1NG TO FLY

THE ARMY OF YOUTH

FIGHTING THE FLYING CIRCUS . . . Eddie Riekenbacker

THE GAUNTLET or FIRE ....... By a British Airman

STUNT FLYING ........... Capt. T. J. C. Martyn

How TUBBY SLOCUM BROKE HIS LEG
    James Warner Bellah

L1NDBERG’S START FOR PARIS ..... Jessie E. Horsfall

LINDBERGH TELLS OF HIS TRIP . . . Charles A. Lindbergh

CHAMBERLAIN'S FLIGHT TO GERMANY . Jessie E. Horsfall

BYRD’S FLIGHT OVER THE NORTH POLE . . Floyd Bennett

COLUMBUS OF THE AIR .......... Augustus Post

"THE KID`, ................ Victor A. Smith

DOWN TO THE EARTH IN ’CHUTEs
    Lieut. G. A. Shoemaker

SIR HUBERT WILKINS—-—HIS ARCTIC EXPEDITIONS
    A. M. Smith

THE "BREMEN’s" FLIGHT TO AMERICA . Jessie E. Horsfall
Before I reformatted it, there were no blank lines between each entry, and text that wrapped to the second line was not indented. While on the subject of tables of contents, remember to remove any page numbers from the contents. It's a safe bet that those numbers will not correspond to the pages in your new document.
The other things you should do are remove any text representing page headers or footers, plus any gibberish resulting from attempting to OCR an illustration.
One thing that will make your work go much faster is to use a text editor instead of a word processor for this formatting, then use the word processor only for those functions where it is really needed. In Windows Notepad is a text editor but it can't handle files as large as a whole book. On Linux I use gedit, and you can get Windows and Macintosh versions of that editor here:
http://projects.gnome.org/gedit/screenshots.html
The reason to prefer a text editor over a word processor for this work is that a text editor uses less memory and will respond quickly to any editing you do. A word processor doing the same work will feel sluggish.
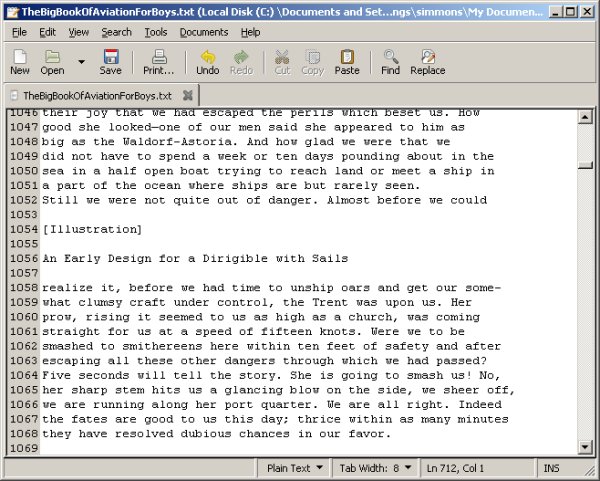
Another possibility for a text editor is guiguts, which was created by the author of guiprep. It's a text editor that can run external utilities like spell checkers, gutcheck (a utility used to check Project Gutenberg e-texts for proper formatting), etc. It can run on Windows or Linux. Guiguts is especially useful for preparing submissions to Project Gutenberg. It can rewrap selected paragraphs to the line size that PG uses, rewrap blocks of text to create indented block quotes, insert HTML tags into plain text files to give you a starting point for making an HTML version of a Plain Text file, and more. You can download guiguts here:
http://home.comcast.net/~thundergnat/guiguts.html
This is what it looks like in action:
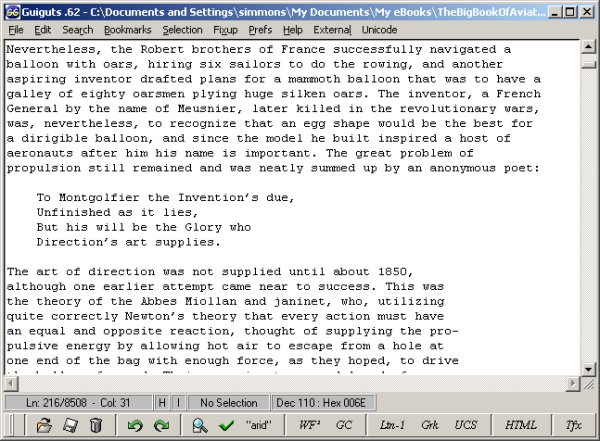
Once you have the blank lines between paragraphs and the worst of the gibberish removed, it's time to convert text with line endings at the end of each line into text in paragraphs. If you have MS Word you can try this suggestion from the Project Gutenberg website:
- Edit / Replace / Special and choose Paragraph Mark twice (or, from replace, you can type in ^p^p to get two Paragraph Marks) and replace with @@@@. Replace All. This saves off real paragraph ends by marking them with a nonsense sequence.
- Now Replace one Paragraph Mark (^p) with a space. Replace All. This removes the line-ends.
- Finally, replace @@@@ with one Paragraph Mark. Replace All. This brings back the Paragraph Ends.
If you do not have MS Word, you can run a simple Python script against the text file to remove the extra line endings. This script, called pgconvert.py, is similar to the one built into the Read Etexts Activity that converts Project Gutenberg files into files without extra line endings. The key difference is that Tesseract creates text files where the line ending is a single character, whereas Project Gutenberg uses two characters at the end of each line. The script below would need to be modified to work with Project Gutenberg texts.
#! /usr/bin/env python

import getopt
import sys

# This is a script to take the a file in PG format and convert it to a text
# file that does not have newlines at the end of each line.

def convert(file_path,  output_path):

    pg_file = open(file_path,"r")
    out = open(output_path, 'w')
    previous_line_length = 0
    paragraph_length = 0
    conversion_rejected = False

    while pg_file:
        line = pg_file.readline()
        outline = ''
        if not line:
            break
        if len(line) == 1 and not previous_line_length  == 1:
            # Blank line separates paragraphs
            outline = line + '\r'
            paragraph_length = 0
        elif len(line) == 1 and previous_line_length == 1:
            outline = line
            paragraph_length = 0
        elif line[0] == ' ' or (line[0] >= '0' and line[0] <= '9'):
            outline = '\r' + line[0:len(line)-1]
            paragraph_length = 0
        else:
            outline = line[0:len(line)-1] + ' '
            paragraph_length = paragraph_length + len(outline)
        out.write(outline)
        previous_line_length = len(line)
    pg_file.close()
    out.close()
    print "All done!"
    if conversion_rejected:
        return False
    else:
        return True

if __name__ == "__main__":
    try:
        opts, args = getopt.getopt(sys.argv[1:], "")
        convert(args[0],  args[1])
    except getopt.error, msg:
        print msg
        print "This program has no options"
        sys.exit(2)
You run this script like this:
python pgconvert.py filename.txt newfile.txt
The new file will be converted, and the file you use as input will be left alone. The next thing you'll want to do is load the new file into gedit and use Search and Replace to change a hyphen followed by a space into nothing. This will fix all the hyphenated words that are now no longer at the end of a line:
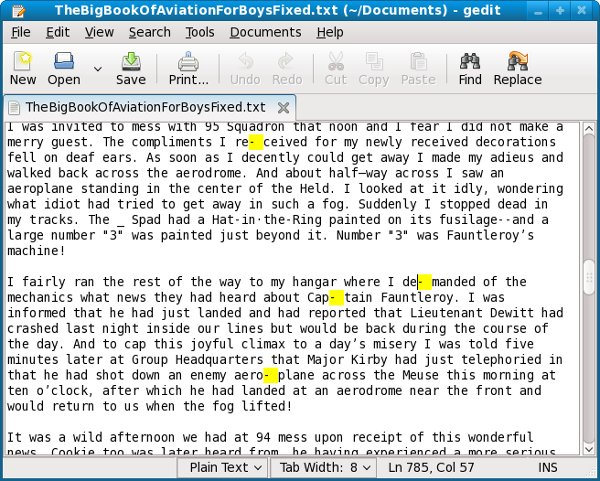
After conversion you can load the file into any word processor and use your spell checker to find and fix problems. Then you can proofread it against the original book, add formatting and make a PDF out of it, or save it as HTML and make an EPUB out of it.
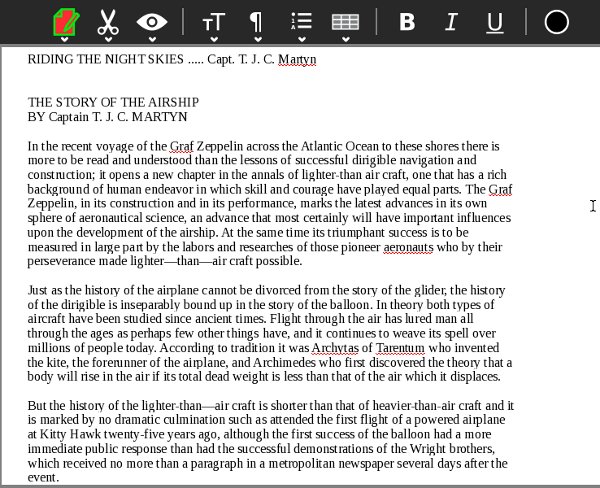
In my own case, Open Office had no problems with my text file before I removed the line endings, but was convinced it had become a spreadsheet afterwords and could not be persuaded otherwise. Fortunately, the Sugar Write Activity was able to open it without incident and is an excellent choice for proofing and correcting your e-book.
Finally you can load the book into
Read Etexts and read it:
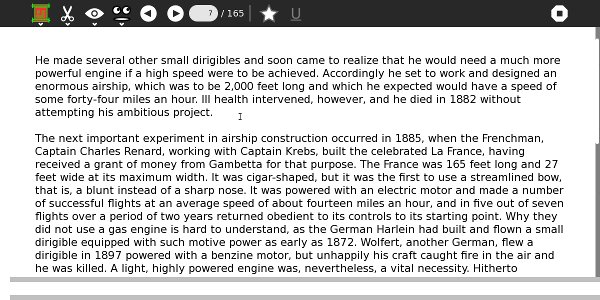
Making EPUBs

Of all the formats for e-books only EPUB combines small file sizes with the ability to do formatted text and illustrations. An EPUB is like a website contained in a Zip file, with a Table of Contents attached. It is also in one important way different from a website. A website is made with HTML (usually) but an EPUB is made with XHTML.
The difference is small but crucial. HTML is meant to be forgiving. If you make a web page you can leave out some tags, fail to close tags, or close tags in a different order than you opened them in. A web browser is supposed to forgive that, as much as possible. XHTML, on the other hand, is like HTML that is not forgiving. You can't leave out a tag or put in a tag where the XHTML browser does not expect it. If an XHTML browser discovers an error in your page it can simply refuse to display it.
The end result is that an XHTML browser is easier to make than an HTML browser. A lot easier. It does put a burden on the e-book author to get his tags right, but in practice you'll never create an XHTML file by hand. Instead, I recommend that you use the free e-book editor Sigil, shown here editing The Galaxy Primes by Edward E. Smith:
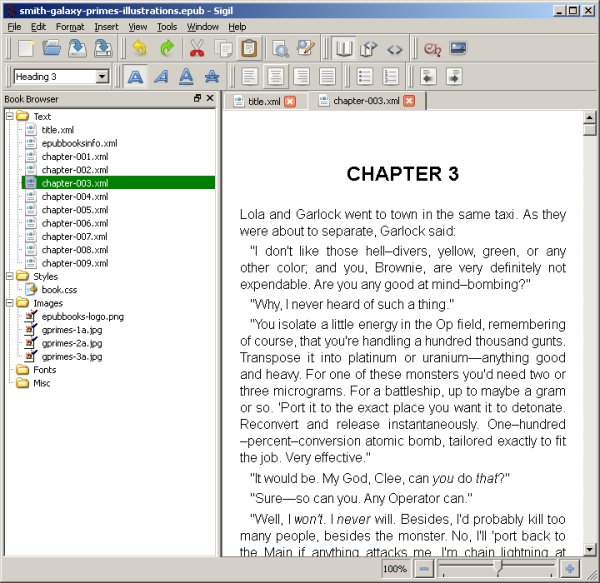
Sigil is available for Windows, Linux, and the Macintosh. You can download it here:
http://code.google.com/p/sigil/
There are installers for all three platforms. On Windows the installer can be a little flaky. It is supposed to install a Visual C++ runtime component if it is needed but it doesn't always do that. If you have problems check the FAQ on the website, which explains how to work around the problem. The installer on Linux worked fine, and I would recommend using that instead of compiling Sigil from the source code.
To create your EPUB you'll start by creating an HTML file with your word processor using the Save As... option from the File menu. As before, I recommend Open Office but MS Word will do. When you add this HTML file to Sigil under the Text folder it will run a piece of code called HTML Tidy that will convert your HTML into XHTML automatically. After that you can split your book into multiple chapters, create table of contents entries, add images, etc. Here is the Boy's Aviation book being edited using Sigil. The Ch button on the toolbar is used to split the file containing the entire book into separate files for each chapter. When you make the title of a chapter have the Heading 1 style Sigil puts the chapter in the Table of Contents for the book.
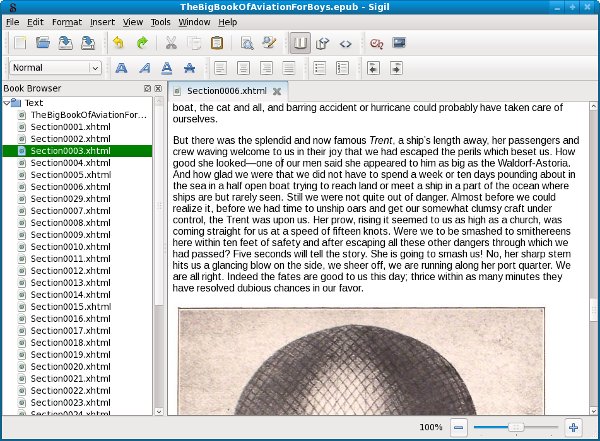
You can easily add pictures to the book by cropping them out of the original page images, but they should probably be resized to be 600 pixels wide for best results.
Here are a couple more screen shots of the EPUB I made with Sigil being read in the Read Activity:
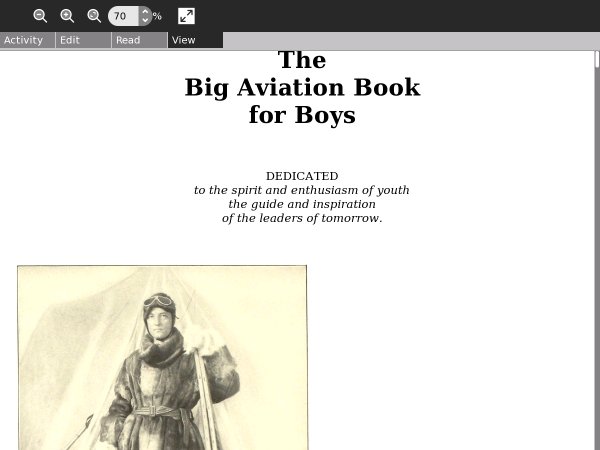
In the Read Activity you can change the size of the text using the View tab, but the illustrations stay the same size.
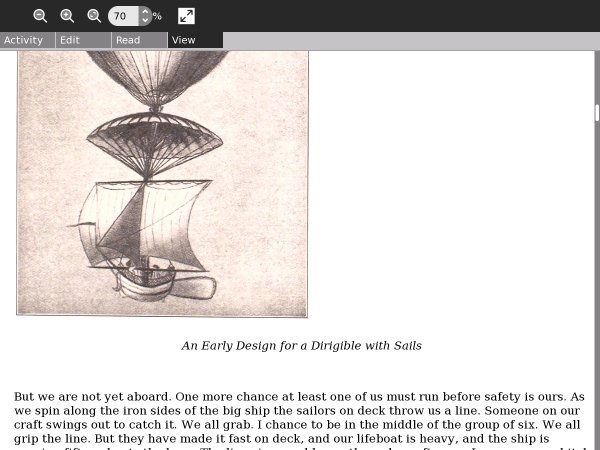
Introduction

Publishing your e-book can be simple or it can be complicated, depending on what it is you are publishing. The simplest thing to publish is your own work. You can pick a Creative Commons license for it and upload it to the Internet Archive and you'll be as good as done.
If you have someone else's book published before 1923 you can publish it as an e-book either on Project Gutenberg or on the Internet Archive. Each site has rules you need to follow, and I'll give you some idea of what the process is.
If you have a book published 1923 or later you might still be able to publish it on either site, but the process will be more difficult. By "or later" I mean "not much later". I hope you will have the good sense not to make an e-book out of Harry Potter or some other living author's work.
The last option you have is to put the e-book on a server and distribute it yourself. There are several good reasons to do this:
- Some OLPC deployments have special permission to distribute the works of living authors to their students. This means there needs to be a way to make certain that only those students can download the books.
- The Internet Archive and Project Gutenberg have thousands of books, only a fraction of which are of interest to children. You might want to set up a more focused collection of books that are specifically for children, or that are in your native language.
Setting up a server to publish e-books generally means setting up your own website, which may only be accessible from your own network. There are a couple of software packages available specifically designed to create a website for hosting e-books, and I'll have chapters on each.
Copyrights, Licenses And Fair Use
Copyrights And The Public Domain
"It does look as if Massachusetts were in a fair way to embarrass me with kindnesses this year. In the first place, a Massachusetts judge has just decided in open court that a Boston publisher may sell, not only his own property in a free and unfettered way, but also may as freely sell property which does not belong to him but to me; property which he has not bought and which I have not sold. Under this ruling I am now advertising that judge's homestead for sale, and, if I make as good a sum out of it as I expect, I shall go on and sell out the rest of his property."
Mark Twain, Letter of acceptance of membership to Concord Free Trade Club (March 28, 1885)
Copyrights give authors the exclusive right to determine how their works may be used, and they ensure that authors get compensated for their work. No serious person has ever suggested eliminating copyrights. Copyright protection does not last forever, though. At some point copyrights expire, and when they do the work goes into the public domain. At that point anyone can do anything they want with it.
It is the public domain that makes sites like Project Gutenberg and the Internet Archive possible. Most of the content they provide is in the public domain, and the rest is copyrighted but licensed in a way that allows free distribution.
The important question is just when do copyrights expire? The answer depends on what country you live in, and if you want to publish your work on the Internet, what country the server is in. The Internet Archive and Project Gutenberg both have servers in the United States. Project Gutenberg also has sister sites in Australia and Canada. Therefore it is important to understand the copyright laws of these countries. By "understand" I mean "know what you're up against, mostly." My grandfather, when watching me set up a VCR in his home, told me "You have to be a Philadelphia lawyer to figure that out!" I am not a lawyer, Philadelphia or otherwise, and nothing in this chapter should be taken as legal advice.
This is a picture of some of the older books that I own:
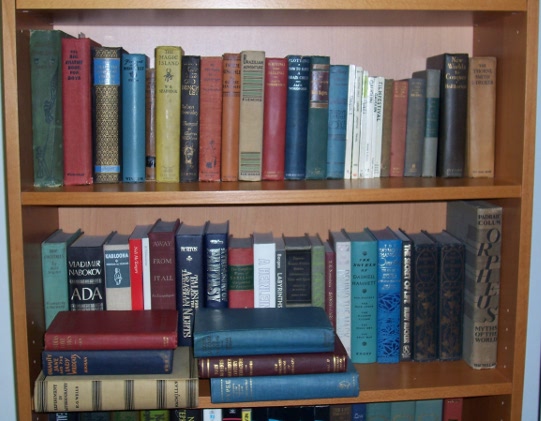
The books shown include titles from the 1920's, 1930's, and 1940's. How many of these books are old enough to be in the public domain? The answer may surprise you.
United States Copyright Law
"Reader, suppose you were an idiot. And suppose you were a member of Congress. But I repeat myself."
Mark Twain, from a draft manuscript (c.1881), quoted by Albert Bigelow Paine in Mark Twain: A Biography (1912).
For most of its history the United States has had reasonable copyright laws. According to the Project Gutenberg website the 1909 Copyright Act gave works a copyright term of 28 years. If the author was still living, he could apply for a renewal for another 28 years, otherwise the work would pass into the public domain. Since then the copyright term has been extended twice, first to 75 years and then to 95 years. The end result of this is that only works published before 1923 are definitely in the public domain in the United States. Other works might be in the public domain, but finding out if they are can be very difficult.
If the copyright term was still 56 years a lot of worthwhile books would be in the public domain and the vast majority of authors would not be affected. Very few books remain in print for 28 years, let alone 56 years. As a result of the latest copyright extension, there is a twenty year period where nothing new enters the public domain, and there is no guarantee that the same misanthropes who got the last extension won't try to get another one at the end of that period. I am hopeful, though. Maybe when it comes time to ask for another extension, enough of the public will understand just what has been stolen from them to make it difficult to do again.
Not everything published after 1922 is copyrighted. In fact, quite a bit of it is not. The trick is figuring out which books are in the public domain and being able to prove it.
There are several rules regarding what works published after 1922 are in the public domain. They are summarized in the Gutenberg Copyright How-To:
http://www.gutenberg.org/wiki/Gutenberg:Copyright_How-To
In practice, only two of the rules apply to a significant number of books. Rule 8 says that publications of the United States Government cannot be copyrighted. This is why you can get free e-books of the 9/11 Commission Report, the CIA World Factbook, etc.
Then there is Rule 6. I quote the Project Gutenberg website:
"Works published before 1964 needed to have their copyrights renewed in their 28th year, or they'd enter into the public domain. Some books originally published outside of the US by non-Americans are exempt from this requirement, under GATT. Works from before 1964 were automatically renewed if all of these apply:
- At least one author was a citizen or resident of a foreign country (outside the US) that's a party to the applicable copyright agreements. (Almost all countries are parties to these agreements.)
- The work was still under copyright in at least one author's "home country" at the time the GATT copyright agreement went into effect for that country (January 1, 1996 for most countries).
- The work was first published abroad, and not published in the United States until at least 30 days after its first publication abroad.
"If you can prove that one of the above does not apply, and if you can prove that copyright was not renewed, then the work is in the public domain. For US authors and publications, non-renewal is the hard part to demonstrate."
That last sentence says it all. Most copyrights, perhaps as many as 85%, are not renewed. Proving that they were not renewed is difficult. Far too many books end up as "orphan books" because it is either too difficult to prove that they are in the public domain or to track down the owners of the copyright. The first e-book I made, The Big Book Of Aviation For Boys, is a good example. It was printed in 1928. Only one edition was ever printed. The bulk of the book is reprinted articles from newspapers and a magazine called the Aero Digest. I can't imagine why anyone would have renewed the copyright on this book, but it would be difficult to prove that it was not renewed.
PG does have materials that have cleared Rule 6. Much of the science fiction in PG was originally published in magazines and never reprinted, or not reprinted in the same form. As an example, when Edward E. Smith originally wrote
Triplanetary it was a standalone novel published in a magazine as a serial. Later he rewrote parts of it to make it the first volume of the
Lensman series. This second version is copyrighted and still in print. The earlier version is available on PG.
The Stanford University website has a useful search for finding out if a copyright has been renewed and when. By itself it may not be enough to tell you if a book has fallen into the public domain, but at least it can keep you from wasting time on books that haven't:
http://collections.stanford.edu/copyrightrenewals/bin/search/simple
Using this database I found out that several books I thought were too obscure to be renewed in fact had been renewed. The database did not show my Big Book Of Aviation For Boys being renewed, and it did show several renewals for the same author, Joseph Lewis French, so it might be a safe book to donate to PG. One other observation on this database: I bought a fair number of books at a used book sale that I thought had "Rule 6" potential. After looking up those books and all the books from the thirties and forties that I already owned only seven looked like their copyrights had not been renewed. While it may be true that 85% of these copyrights are not renewed, if the book is good enough to end up at a used book sale (rather than a landfill) the odds of non-renewal go down considerably.
Even if it looks like copyright has not been renewed on a book you're still not out of the woods. Much of the material from my Boy's Aviation book was reprinted from other books, and I'd need to prove that all those sources were in the public domain before PG would accept it. I tried to submit another book, Orpheus, Myths Of The World by Padraic Colum, and had to deal with the fact that Padraic Colum did not become a U.S. citizen until 1945 and as a result I would have to prove that the book was not published abroad more than 30 days before it was published in the United States. The book is published by Macmillan and if there is no reason to believe it was not published in the United States first, but how could you prove it? For that reason Project Gutenberg rejected it.
PG does have an official HOWTO for doing Rule 6 submissions, which you can find here:
http://copy.pglaf.org/rule6-new.txt
Australian Copyright Law
"I was sorry to have my name mentioned as one of the great authors, because they have a sad habit of dying off. Chaucer is dead, Spencer is dead, so is Milton, so is Shakespeare, and I’m not feeling so well myself."
Mark Twain
There is really only one thing worth knowing about Australian copyright law, which is that it is based not on publication date but on the date the author died. If an author died before 1956 and his books were published in his lifetime then his works are in the public domain. According to Wikipedia:
- Any work that was published in the lifetime of the author who died in 1956 or earlier, is out of copyright.
- Any work that was published in the lifetime of the author who died after 1956, will be out of copyright seventy (70) years after the author's death.
This works well for well-known authors, but would not help The Big Book Of Aviation For Boys much. That book has many authors, most obscure.
There are several resources for finding out when an author died. Wikipedia is fine for famous authors. For the less famous you might try looking up the book in the Open Library:
http://openlibrary.org
This is a site operated by the Internet Archive that plans to create a web page for every book ever printed. I contributed to the entry for my Boy's Aviation book here:
http://openlibrary.org/works/OL6729449W/The_big_aviation_book_for_boys
It shows me that the editor of the book, Joseph Lewis French, died in 1936. It also tells me that Robert Benchley died in 1945 and that Thorne Smith died in 1934. Project Gutenberg Australia has all of my Thorne Smith novels already, but only My Ten Years In A Quandary for Benchley. I have some of Benchley's books, plus Experiment In Autobiography from H.G. Wells, which PGA doesn't have yet.
The requirement to publish within the life of the author would prevent me from making some donations, For instance, Chips Off The Old Benchley was published after Benchley's death, and my copy of The Autobiography of Will Rogers was published after Rogers' death.
Canadian Copyright Law
Canadian copyrights expire 50 years after the end of the calendar year when the author dies. It does not make any difference whether the work was published in the author's lifetime. Thus Canada will be a suitable home for Chips Off The Old Benchley and The Autobiography of Will Rogers, (with the introductions removed). As I write this I have received copyright clearance for all three of the Robert Benchley books I own from Project Gutenberg Canada, and I am in the process of preparing scans and OCR'd text files for them for Distributed Proofreaders Canada. Project Gutenberg Canada already has Experiment in Autobiography.
Creative Commons Licenses
There are two factors that determine what you can do with a book: whether the book is copyrighted, and what license the book has. By default all copyrights have an "All Rights Reserved" license. This means that when you buy a book you can read it, but you can't copy it, make a play or a movie based on it, etc. You can give the book away, loan it out, or sell it and that's about it. This kind of license is so common it might be surprising to learn that other kinds of licenses exist.
creativecommons.org has licenses that anyone can apply to his work at no cost. These licenses give rights to the readers of your book that they would not normally have. There are several licenses available and they let you control just what rights you allow to your readers. For instance, you can allow others to freely distribute your work and make derivative works (like translations) as long as those works are non-commercial.
Why would you want to do this? Well, if you're hoping to write something that will be accepted by Oprah's Book Club you wouldn't and I wouldn't either. But not every book has commercial possibilities, and there are some books that are needed and you'd be happy if you could just break even publishing them. Creative Commons licenses are good for those kind of books. If you write a book using one of the CC licenses you can publish it as an e-book for free on the Internet Archive website.
One author, Cory Doctorow, has actually used Creative Commons licenses on his books and still managed to get them published by a regular publisher. This means that you can read his books for free as e-books but his publisher is the only one who can sell you a printed copy. You can read about his experiences with these licenses at his website:
http://craphound.com/
You can learn more about the licenses that are available at http://creativecommons.org/about/licenses.
Fair Use
"Fair Use" is defined as the rights you have to a published work that you don't have to ask the publisher's permission to get. The usual examples include quoting short passages of a work in a book review, plus making a parody of a work. There is no hard and fast rule as to how much of a work you can quote before it stops being Fair Use, and not all parodies are protected. The usual criteria is if your use of a work affects the value of the original work in the marketplace.
There are several page images from the Junior Illustrated Library book The Arabian Nights in this book. I found out after I had gone through the work of making an e-book out of it that the book is still in print! The few page images from that book I've included in this book should qualify as Fair Use. These pages are not in any way a substitute for buying the book, and the amazon.com website actually has more page images for this book than I use. Distributing my e-book to anyone else would not be Fair Use. My own personal use should be OK, since I still possess the original book.
I have heard from teachers who want to make e-books out of the textbooks they use in class, often to help children with reading problems (since some kinds of e-books support text to speech). Is this Fair Use? From what I've read about it, it is probably dangerous to assume that it is. It would be safer to try and get permission from the publisher.
The U.S. Copyright Office has an article on Fair Use here:
http://www.copyright.gov/fls/fl102.html
Note that while they do mention non-profit and educational uses as possibilities, the example they give is short excerpts, not the whole book.
Donating E-Books To The Internet Archive
The Internet Archive is attempting to create an electronic version of the Library of Alexandria, preserving the public domain including books, audio recordings, movies, and even websites. Most of the books on the site they scanned in themselves, using custom built book scanning machines called Scribe workstations. The easiest way to donate an e-book to their collection would be to send them the actual book and let them do the scanning. You might not be able to get the book back afterwords, though. In addition to scanning public domain texts they also do copyrighted titles. These are not available for download by the general public, but they can be gotten in a format known as DAISY (used to support text to speech) if you are "print disabled". You need to be vetted by the Library of Congress to get access to these copyrighted works.
If you prefer you can scan your own book and submit it. I have gone through this process with several books, so I can tell you what to expect if you go this route.
The first thing you need to do is go to the Internet Archive website and apply for a "virtual library card", by clicking on the Patron Info tab and following the instructions. This is a different kind of library card, because you don't need one to download books from the site but you do need one to donate books.
Once you've gotten your card and logged into the site you can donate materials using the Upload/Share button in the upper right corner of the site. You will be donating your book to the Community Texts collection. Other collections are possible, but unless you represent a library you won't need to have your own collection.
Generally your text donations will be one of two possibilities, although other options are available. The possibilities are:
Whichever one you have, you should pay attention to how you name the file if you want it to be downloadable by Get Books or Get Internet Archive Books. You want to name your PDF the name you want to use as your identifier on the site, but without spaces. For example:
- You want to use the title "Big Aviation Book For Boys" as your title on IA.
- IA will create an identifier for your entry named "BigAviationBookForBoys".
- Your content will be posted in a sub directory named "BigAviationBookForBoys".
- If you want your items to be downloadable by Get Internet Archive Books you'll want to follow the standard used internally by IA and name your PDF "BigAviationBookForBoys.pdf".
On one of my submissions I didn't do that. I named my file "AncientMannersOriginalPages.pdf", so all the file names that were created were based on that file name. I was able to rename most of them afterwords, but not the EPUB file. As a result you can't download that EPUB with Get Internet Archive Books.
When you upload your submission the website will run a derive job which will convert your PDF into several other formats:
Index of /17/items/BigAviationBookForBoys/
../
BigAviationBookForBoys.djvu                        17-Jun-2010 01:10             4036000
BigAviationBookForBoys.gif                         16-Jun-2010 23:39              319668
BigAviationBookForBoys.pdf                         25-May-2010 01:27           182866779
BigAviationBookForBoys_abbyy.gz                    17-Jun-2010 00:45             6944391
BigAviationBookForBoys_djvu.txt                    17-Jun-2010 01:18              456551
BigAviationBookForBoys_djvu.xml                    17-Jun-2010 00:51             4319378
BigAviationBookForBoys_files.xml                   17-Jun-2010 01:18                3235
BigAviationBookForBoys_jp2.zip                     16-Jun-2010 23:38            83198619
BigAviationBookForBoys_meta.xml                    17-Jun-2010 01:18                1473
BigAviationBookForBoys_scandata.xml                17-Jun-2010 01:10               96124
BigAviationBookForBoys_text.pdf                    17-Jun-2010 01:18            29897117
BigAviationBookForBoys.pdf is my original submission, and all the others were derived. You can ignore the .xml files. The website has its own uses for these, but they are not something you are likely to want to download. The rest of the files are:
- BigAviationBookForBoys.djvu: A DjVu version of the book. This e-book is only 3.8 megabytes yet it looks as good as my original 174 megabyte PDF!
- BigAviationBookForBoys.gif: An animated GIF file that shows sample pages from the book and is shown on the web page for the book.
- BigAviationBookForBoys.pdf: My original monster PDF.
- BigAviationBookForBoys_abbyy.gz: A zipped up XML file created by or for ABBYY Fine Reader which you can ignore.
- BigAviationBookForBoys_djvu.txt: A text file created by ABBYY Fine Reader out of the PDF. With a little proofreading this could be used as the basis for a Project Gutenberg E-text.
- BigAviationBookForBoys_jp2.zip: A zip archive containing page images extracted from your PDF and saved in the JPEG2000 format. You're not likely to use this for your own submissions, but if you wanted to do a Project Gutenberg submission of a text in the Internet Archive this might be helpful.
- BigAviationBookForBoys_text.pdf: The PDF that the Internet Archive created from my original 174 megabyte monster. 28.5 megabytes -- quite an improvement! The word text in the name refers to the layer of OCR'd text in the PDF that makes it searchable and supports copying text to the clipboard.
In addition to these there is an EPUB file that you can download from the main page. It looks like this:
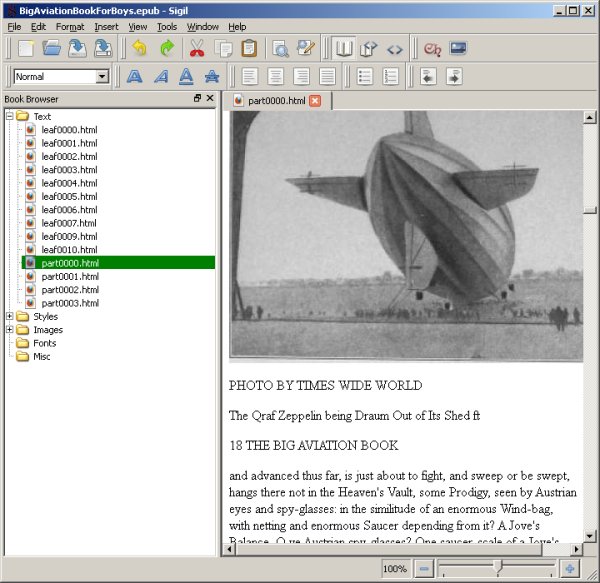
If you're a glass half-empty kind of person you'll note that the EPUB needs a lot of proofreading before you could really give it to anyone. If you're a glass half-full you'll note that 90% of the text is right and the program that generated the EPUB has done a great job with the illustrations. It has found them, cropped and resized them, and placed them in the EPUB nearly where you'd like for them to be. You can use this EPUB as the basis for a hand-crafted version and save yourself some work.
The first thing you're going to want to do after your book has "derived" is rename BigAviationBookForBoys.pdf to BigAviationBookForBoysLarge.pdf and rename BigAviationBookForBoys_text.pdf to BigAviationBookForBoys.pdf. The Get Internet Archive Books Activity will download the BigAviationBookForBoys.pdf file when you specify that you want to download a PDF, so it's important that that name points to the smaller file.
It sometimes happens that the derive job fails. You'll know this because a day later your original posting is the only file available for download on the page. There are only two ways to deal with this that I know of. The first is to post in the Community Texts forum on the website. As it happens the first two books I donated to the Internet Archive did not derive successfully. My post on the forum was never answered. The second thing I tried was to send an email to info@archive.org. I didn't get immediate action, but one of the staff did rerun the derive job for both books and both were processed successfully.
In the case of the two books where the "derive" job did not run the first time I was uploading the PDF from a Linux box and on Linux the normal "Share" button does not work. You need to use an alternate method of uploading texts that does not use Flash in the web browser. For my other books I used Internet Explorer on MS Windows with the normal Flash-using "Share" button. For these books the "derive" jobs ran just fine. If you are a Linux user you may find it worthwhile to use a Windows box or a Macintosh to upload your donations to the Internet Archive.
Examples
When considering how you will create your submission to the Internet Archive you might find it useful to look at my submissions first. For reasons I will not attempt to explain my user id on the Internet Archive website is nicestep. If you enter that in the Search box on the website it will list out all my donations. Some of these donations were done twice. The first version was done using manual cropping and clean up, and the second was done with Scan Tailor. Some of my more recent submissions were only done with Scan Tailor.
It is a natural impulse when seeing a beautifully crafted e-book like Abroad to want to try and do something just as well. There's nothing wrong with wanting this, but getting results like that is not easy. You need well-lit pages when taking the photos and lots and lots of patience. Your first attempts will probably look worse than what you get with Scan Tailor, and will be a great deal more work. Not every book is worth that kind of effort, and not every book will benefit from that effort.
The books Thirteen Women and Out Of This World are not masterpieces of the book maker's art. They were cheaply made and showing signs of wear. The e-books I made of them using Scan Tailor look better than the originals.
My newer submissions are in the public domain because of Rule 6, at least as far as I am able to determine. IA does not require copyright clearance before posting, but they will remove copyrighted material from the index when they find it. They do distribute copyrighted works in DAISY format to qualified persons, so even if your donation turns out to not be in the public domain it is not necessarily lost. I look up my submissions in the Stanford copyright renewal database to verify that they are eligible.
Donating Texts To Project Gutenberg

If I was to sum up my impressions of the Internet Archive versus Project Gutenberg I would have to say that the Internet Archive focuses more on preserving as many books as possible, whereas Project Gutenberg is more focused on quality. Not only does PG require extensive proofreading for their texts, they also require a copyright clearance before they will even consider accepting a book. It is much less work to create a submission to the Internet Archive than it is to submit a text to Project Gutenberg. If you donated the same book to both organizations when your Image Container PDF is ready to submit to the Internet Archive the work of creating a text for Project Gutenberg would have only just begun.
Copyright Clearance
The first thing you need to do to create a submission to Project Gutenberg is to get a copyright clearance for the book by submitting a TP & V to the website using a form on the site. TP & V refers to the Title Page and Verso of your book. You'll need to scan both and submit the image files. Either one or the other should show a publication date before 1923 (unless you think you can get a Rule 6 clearance because the copyright was not renewed). Here is a title page for a book that I bought recently:
Here is the Verso, which is just the back of the Title Page. Both give a publication date of 1916.
I bought this book in case my first submission was rejected. Happily it wasn't, so I am able to avoid proofreading a geography textbook from 1916. The text I have submitted is an English translation of the Pierre Louys novel Ancient Manners published in Paris as a limited edition for subscribers in 1906. Project Gutenberg already has the novel in French under the title Aphrodite, but does not yet have an English translation.
My TP & V for Ancient Manners did not show a publication date, but the Open Library website gave a publication date of 1906. The woman who processed my request told me that the Open Library website was not a good enough authority for this purpose, but she had checked the Library of Congress website and had concluded that 1906 was a plausible publication date for the book.
When you submit a book to PG that was published after 1922 but did not have its copyright renewed you must follow the procedures in the Rule 6 HOWTO:
http://copy.pglaf.org/rule6-new.txt
If your submission is cleared, the email you get from Project Gutenberg should look like this:
Project Gutenberg copyright clearance submission
automated status update notification.

Title:  Ancient Manners
Author1: Pierre Louys
Status:  Cleared OK
Clearance OK key=20100611081931louys
You're going to need to use the clearance key (shown in bold above) to submit your book.
The next step is to do OCR on the page images you created for your books, which will create a separate text file for each page. In the chapter on Plain Text files I suggested that you could concatenate these files into one file and reformat and proofread that. If you are making a text for your own use (that is, not for Project Gutenberg) this is a reasonable thing to do. For PG you'll want to keep the text files separate so you can submit them to Distributed Proofreaders.
Distributed Proofreaders
To meet the standards of Project Gutenberg a Plain Text file will need a lot of proofreading, preferably by more than one person. Distributed Proofreaders is a website where hundreds of volunteers proofread and correct individual text pages by comparing the text to an image file showing the page it corresponds to. There are several "rounds" of proofreading, and when those are finished a Project Manager combines the individual pages, does some final checks, and adds the current Project Gutenberg license text. It may be offered to DP volunteers for "Smooth Reading", where the volunteer reads the book for pleasure and identifies any problems he spots. It then gets submitted to Project Gutenberg. The Distributed Proofreaders site is at:
http://www.pgdp.net/c/
You don't need to submit your book to DP to get the book submitted to Project Gutenberg, but I think it's a good idea. As a computer programmer I know all too well that it is difficult to find flaws in your own work, and much easier to spot flaws in the work of others. As a practical matter, it isn't really necessary to remove the beam from your own eye before you look for motes in other people's eyes. If we all check each other's eyes everything will ultimately get cleaned out.
To submit your work to DP you'll need a copyright clearance from Project Gutenberg first. When you get that contact the DP website using the email address from the Content Provider's FAQ:
http://www.pgdp.net/c/faq/cp.php
You need to let them know your intention to submit a text for proofreading. Provide the copyright clearance information you got from Project Gutenberg in the email.
Once you have that, prepare individual text files corresponding to the page images in your book. DP wants blank pages to be included in the page images, starting from the inside of the front book cover and continuing to the inside of the back cover. The text files should have MS-DOS style line endings, which means that every line of text ends with two characters, called a carriage return and a line feed, not just a line feed. You can verify that your text files have the correct line endings by trying to edit them with Notepad in Windows. If the file doesn't have the right kind of line ending Notepad will show the file as having no line endings at all and funny characters where the line endings should be. If you find yourself with text files like this, one way to fix them is to load them into Word Pad and save them back out again. Word Pad can handle Unix-style line endings and will change them to MS-DOS style when you save.
If you're using Linux a less labor-intensive way of doing the line ending conversion is to use the unix2dos command:
unix2dos *.txt
The page images should be in PNG or JPEG format and should be 1000 pixels wide. You can convert your TIFFs or JPEGs to PNG's using Image Magick's mogrify command like this:
mogrify -resize 1000 -monochrome -format png *.jpg
Both images and text files should be named as three digit numbers followed by the suffix. If you use the guiprep utility mentioned in the chapter on creating Plain Text files it will do the renaming of the files for you, and will run a program pngcrush which will reduce the disk space required for your PNG files without affecting the quality of the image.
While guiprep assumes you will be submitting PNG's, JPEG's are also acceptable and will take much less disk space. There is no real advantage to using PNG's for your submission to Distributed Proofreaders.
If your book is illustrated DP will ask you to provide high quality JPEGs of the illustrations, named to correspond to the page they appear on. These illustrations may be used to create an HTML version of the book. It is likely that you will be asked to use a flatbed scanner to create these illustrations, to avoid problems like inadequate lighting and keystoning. They will ask for color scans, even if the original is grayscale, because they want the color of the paper to come through. You should also not crop the images yourself. Leave the cropping to the person who will create the HTML version of the book.
When you have all this the text files will go into a directory named text, the page images can go in a directory named pages, and the illustrations go in a third directory which you can name illustrations or something similar. When you have these directories created you need to put them all in a Zip file named
DPusername_ShortTitle.zip
where DPusername is the account you have on the DP site and ShortTitle is a shortened version of the book title with no spaces. You will also need to prepare a separate text file named
DPusername_ShortTitle_README.txt
which will contain notes on the book. For my own submission to Distributed Proofreaders I included the following information:
- The copyright clearance number I was given by Project Gutenberg. This is the most important piece of information in the README and must be provided.
- The pages of the original book are not correctly numbered. There are many full page illustrations and after each one the page numbering skips a page or two. I have verified that no pages are missing from my submission.
- There are several places in the text where Greek words are used in the original alphabet (as in the illustration above). Having these words rendered in the Roman alphabet or simply replaced with "(Greek words)" should not hurt the book much.
- I have made an attempt to hand correct most of the text files before submitting them.
Until recently the next step would be to use an FTP client to copy these files to a directory on DP's FTP server. Just before I was ready to submit my own work DP shut down their FTP server because of problems with computer viruses. As of this writing an ordinary Content Provider cannot upload content. You need to be a Project Manager, a privilege only granted to those who have proofread hundreds of pages. The current method to get your content uploaded is to place it on a server where a Project Manager can download it. One method popular with DP users is called DropBox:
http://www.dropbox.com
This gives you a free website where you can post files for downloading by others. After that have your files on DropBox, go the wiki page at:
http://www.pgdp.net/wiki/Content_Providers_seeking_Project_Managers
and start a new section for yourself and list your project. There is a special Wiki template you'll be required to copy and fill in.
When I did this, someone on the site suggested making a posting to the "Books I'd Like To See In PG" Forum topic describing my book to potential Project Managers. Proofreading books is not necessarily first-in, first-out. If your book sounds more interesting than the next one in the queue it might get a Project Manager sooner. I did this, and did manage to get a Project Manager interested. He warned me that it might still be over a year before the book made it to PG. I told him I was OK with that, and I was. I can always make a reasonably good version of the text for my own use.
After you've done all that you might consider doing some proofreading of other people's books. Information on how to do that is on the site.
If your native language is not English or if the book you're submitting is not in English you'll want to work with Distributed Proofreaders Europe:
http://dp.rastko.net/
This is also the place to submit books that are meant for Project Gutenberg Australia.
If you have books in English or French where the author has been dead fifty years or more you could donate them to Project Gutenberg Canada. They, too, have their own Distributed Proofreaders site:
http://www.pgdpcanada.net/c/default.php
This is the place where I submitted my Robert C. Benchley collection. You also need a copyright clearance before you can submit a book to PG Canada, but it is generally easier to get because the only thing that needs to be verified is the author's death date. For my Benchley books this meant that the author's words, drawings, and stills from some comedy shorts he appeared in were all clearable. Regrettably, his illustrator Gluyas Williams outlived him by many years so his charming illustrations could not be included in my submissions.
Making A Web Page From A Plain Text File
If you're going to make a submission to Project Gutenberg directly (rather than going through Distributed Proofreaders) you'll need to create a Plain Text and an HTML version of your submission. The PG website has a pretty good article on how to convert your Plain Text file to a web page by hand. What they don't tell you, unfortunately, is that there is really no need to do that. Guiguts, the editor I recommended for creating your Plain Text file, has a dialog that will automatically insert HTML markup into your page. You'll find it under the Fixup menu, option HTML Fixup, and it looks like this:
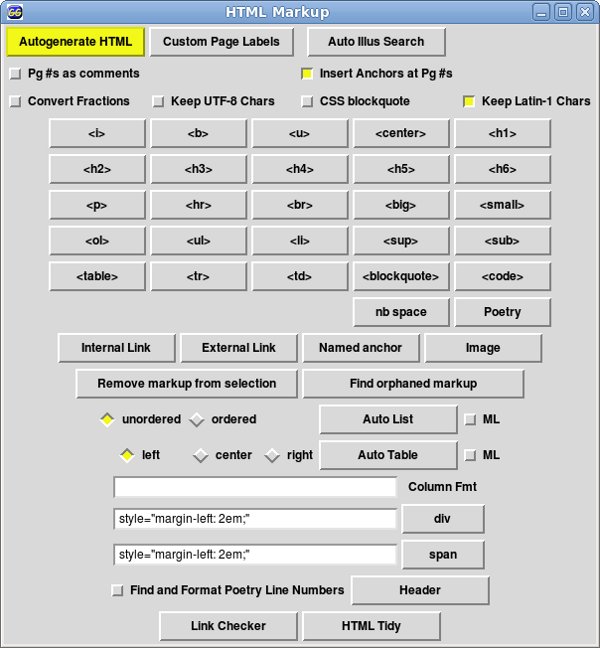
It really is as simple as making a copy of your Plain Text file with a .html suffix, loading it into guiguts, and pressing the Autogenerate HTML button. When I did that with The Big Sleep it generated HTML that included a nice style sheet:
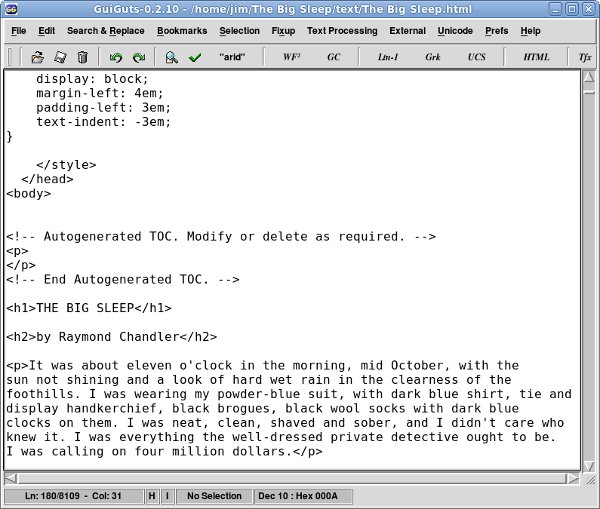
The resulting web page looks like this:
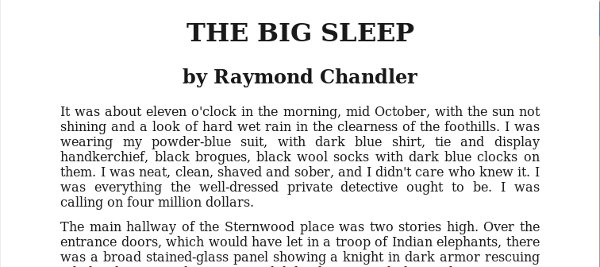
Notice that the style sheet justifies the text so both left and right margins are a straight line, just like so many printed books do. The first line of text automatically becomes the title and the second line is automatically the author.
While this is a great time saver, you'll still need to do two things by hand:
- Text that is bold or italicized in the original will need to have <i> and </i> tags added.
- Chapter headings will need to have <h2> and </h2> tags added.
For
The Big Sleep I was able to do the whole conversion in about 10 minutes.
Examples
As of now I have completed two submissions to Project Gutenberg, the first of which was Benchley Beside Himself for PG Canada. It went in on November 26, 2010 and you can check it out by looking on the site for books by Robert C. Benchley. The Big Sleep, my second submission to PG Canada, went in on January 11, 2011. The site announced the availability of The Big Sleep like this:
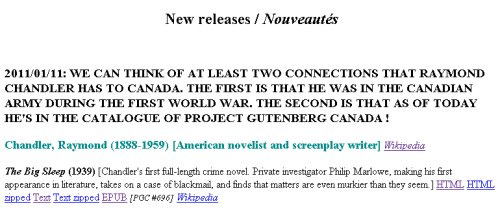
I have donated several other texts to Distributed Proofreaders and DP Canada. Ancient Manners went to DP, and DP Canada got two more Benchley books plus three more Raymond Chandler novels. There is a substantial queue of books waiting to be proofed ahead of these.
On my first submission to PG (Ancient Manners) I did two things right and everything else wrong. The two things I did right were:
- I chose a book published before 1923. Rule 6 clearances are very difficult to get. I have submitted several TP&V's to PG in hopes of getting Rule 6 clearance. None were cleared.
- I put the book on the Internet Archive. Granted, the book pages were dingy from insufficient lighting but having the book there did attract the interest of a Project Manager.
As for the things I did wrong:
- My original page images were poorly lit, and could not easily be converted into readable black and white PNGs.
- I did my own OCR. This is not necessarily a mistake, but since my original page images were of poor quality (due to the age of the book and inadequate lighting) it was difficult to convince anyone that ABBYY Fine Reader would not have done a better job on the OCR than Tesseract did. It is possible that it would have.
- I spent many hours correcting my text files before submitting them. Because of this my PM felt obligated to use them, whereas if I had just given him the scans he would have tossed out my text files and put the scans in the OCR Pool.
- I left out blank pages that were in the original book. I had also chosen a book where the page numbering was faulty, where missing page numbers did not always mean missing pages.
Eventually I scanned all the illustrations in color at 600 DPI using a flatbed scanner, and my PM was able to clean up my original JPEG's enough to make usable page images out of them. He also added blank pages to correspond to page numbers that did not exist.
My PM suggested the following:
"James, being the one who is working on your current project I strongly request you leave the OCR to the person that will be PMing the project.
"JPEG is the perfect format to send the person, make no changes to the photographed images. Text should be in 300 DPI color and illustrations need to be at least 600 DPI color. Do not save anything in B&W. Grayscale is ok for text pages but always use color for illustrations even if the illustration is in B&W.
"Include EVERY blank page from the first page of print to the last page of print. This is a DP requirement.
"... I ask (that) you do nothing more than scan the pages of the book in the future. I/the PM have tools that will make good use of the scans and create what is needed by DP. With a good set of scans I can do most the image work within an hour and have the text prepped and the project checked by the end of a second hour based on an average sized project. Special attention to illustrations is the only thing that takes longer."
The moral of this is to find out what your PM wants before you do the work. Creating page images and text files is not that difficult or time consuming, and if your originals are not of the best quality the PM may prefer to do this himself.
For my first submission to DP Canada I did better. I picked a book (Inside Benchley) where the author (Robert C. Benchley) had been dead more than 50 years. I used a flatbed scanner to scan the pages 2-up, 300 DPI in black and white, PNG format, then used Scan Tailor to create page images from them. I did OCR on the TIFF's that Scan Tailor had created and the text files came out needing very little correction. (The original book was in excellent condition). I made black and white PNG's 1000 pixels wide out of the TIFF's using Image Magick mogrify. I scanned pages with the illustrations that Benchley had done himself as 600 DPI color JPEG's.
My PM for DP Canada turned out to be a Benchley fan with no objection to Tesseract.
While this submission was more successful than Ancient Manners turned out to be, I can't just say to always use the approach I used with the Benchley book. Ancient Manners is too large to be scanned 2-up, and when you scan it as 300 DPI black and white PNGs you get pages that are not easily read by humans or OCR. Color scans would be fine, but would take days to do, and the book had some defective pages where the inner margin was so small as to make scanning impossible. Digital pictures with good lighting are what the book really needed. If I was doing everything over again I would create good digital pictures with bright and even lighting, use Scan Tailor to create page images with content in the original colors and white borders, and submit these as high quality JPEG's to the OCR pool. I would also create extra blank pages to make up for the missing page numbers. I would still do color scans at 600 DPI for the illustrations.
For Benchley Beside Himself, I decided to do the proofreading myself and create my own Plain Text and HTML files. This book is filled with short humorous articles that are easy and enjoyable to proofread.
My next submission to DP Canada was Chips Off The Old Benchley. For that one I did 2-up scans in greyscale on a flatbed scanner, used Scan Tailor to create pages with white borders, then used Image Magick to make JPEGs out of these. I submitted the JPEGs in a Zip file to DP Canada without doing any OCR on them. My PM was perfectly happy to do the OCR on these using ABBYY Fine Reader.
My latest submission to PG Canada was The Raymond Chandler Omnibus, which contains the first four Raymond Chandler novels. I gave all the page scans to DP Canada, but informed them that I would be doing The Big Sleep myself. When a book is that good, you don't need help to proofread it.
In the future I will likely only do OCR on books I intend to submit directly to PG.
calibre
calibre (always spelled lower case) is a tool to manage your e-book collection. It can organize your e-books, convert them to different formats (for instance EPUB to MOBI), and copy them to an e-reader like the Kindle.
You can get versions of calibre for Windows, Linux, and the Macintosh. calibre comes with many Linux distributions. If you're using Windows or the Mac you can download it here:
http://calibre-ebook.com/
The most useful thing calibre can do for us is to create a quick and easy website for publishing an e-book collection.

To do this all you need to do is add all your e-books to calibre using the Add button, correct the Author and Title information as needed, and open the Preferences dialog shown below:

Push the Start Server button on this dialog and you're in business. The website will be at your computer's IP Address, port 8080 (or whatever port you choose). The website will look like this:
 The e-books in the illustration are all MOBI, because I'm using calibre for my Amazon Kindle. However, the book server of calibre can serve any book format that Sugar supports, including Plain Text files, EPUB's, PDF's, DjVu's, RTF's and CBZ's.
If all you need to do is publish an e-book library on a local network calibre is the only software you need to look at. In the next two chapters we'll look at some other options that require more technical expertise but may be better suited for advanced needs.
The Pathagar Book Server

The Pathagar Book Server is a project of developers from Sugar Labs specifically made to publish e-books to computers running Sugar. It is a work in progress and should be judged as such. It does two things:
- It creates an attractive website that you can use with the Browse Activity to look for books and download them to the Journal. (Of course computers not running Sugar can download the books too). The website is maintained using web forms.
- It creates an OPDS (Open Publication and Distribution System) feed that can be searched by a future version of the Get Books Activity.
This is what the website looks like:
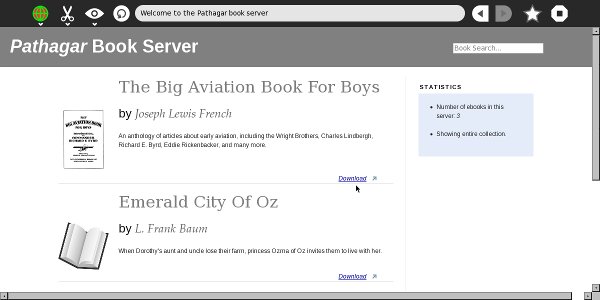
As of this writing Pathagar is missing some important features:
- The site lists out books in the order that they were entered into the system. You can search the books, but there is no way to simply list them out by author, title or subject.
- You can easily add books to the site, but there is no way to remove books or update existing book entries.
- The OPDS feed works, but the current Get Books Activity only works with OPDS feeds from the Internet Archive and from Feedbooks. There is no way to add a new OPDS feed to the Activity.
This software has a lot of potential, but isn't ready for actual use yet. If you'd like to play with it anyway, you'll need to install the following on your computer:
All of these things can be installed on Windows and on the Macintosh, but for the easiest setup you'll want to use Linux. Any recent Linux distribution includes all of the above software, much of it installed by default and the rest available with no more work than checking a checkbox. An old, discarded PC with a 14 inch monitor that has seen better days will work just fine as a book server, and Linux is very simple to install these days.
Assuming that you have all of the above ready the next step is to use Git to download the source code for pathagar. Open a terminal, make the directory where you want to put the software your current directory, and issue this command:
git clone http://github.com/sayamindu/pathagar.git
This will copy pathagar to the current directory. One of the files will be named settings.py. You'll need to change some lines in that file before you can run pathagar. This is what my settings.py looks like, with the lines you might want to modify in bold:
# Django settings for pathagar project.

ITEMS_PER_PAGE = 5      # Number of books shown per page in the OPDS catalog and in the HTML page

DEBUG = False
TEMPLATE_DEBUG = DEBUG

ADMINS = (
    ('James Simmons', 'nicestep@gmail.com'),
)

MANAGERS = ADMINS

DATABASE_ENGINE = 'sqlite3'           # 'postgresql_psycopg2', 'postgresql', 'mysql', 'sqlite3' or 'oracle'.
DATABASE_NAME = 'database.db'             # Or path to database file if using sqlite3.
DATABASE_USER = ''             # Not used with sqlite3.
DATABASE_PASSWORD = ''         # Not used with sqlite3.
DATABASE_HOST = ''             # Set to empty string for localhost. Not used with sqlite3.
DATABASE_PORT = ''             # Set to empty string for default. Not used with sqlite3.

# Local time zone for this installation. Choices can be found here:
# http://en.wikipedia.org/wiki/List_of_tz_zones_by_name
# although not all choices may be available on all operating systems.
# If running in a Windows environment this must be set to the same as your
# system time zone.
TIME_ZONE = 'America/Chicago'

# Language code for this installation. All choices can be found here:
# http://www.i18nguy.com/unicode/language-identifiers.html
LANGUAGE_CODE = 'en-us'

SITE_ID = 1

# If you set this to False, Django will make some optimizations so as not
# to load the internationalization machinery.
USE_I18N = True

# Absolute path to the directory that holds media.
# Example: "/home/media/media.lawrence.com/"
MEDIA_ROOT = './static_media'

# URL that handles the media served from MEDIA_ROOT. Make sure to use a
# trailing slash if there is a path component (optional in other cases).
# Examples: "http://media.lawrence.com", "http://example.com/media/"
MEDIA_URL = 'http://127.0.0.1:8000/e-books'

# URL prefix for admin media -- CSS, JavaScript and images. Make sure to use a
# trailing slash.
# Examples: "http://foo.com/media/", "/media/".
ADMIN_MEDIA_PREFIX = '/media/'

# Make this unique, and don't share it with anybody.
SECRET_KEY = '7ks@b7+gi^c4adff)6ka228#rd4f62v*g_dtmo*@i62k)qn=cs'

# List of callables that know how to import templates from various sources.
TEMPLATE_LOADERS = (
    'django.template.loaders.filesystem.load_template_source',
    'django.template.loaders.app_directories.load_template_source',
#     'django.template.loaders.eggs.load_template_source',
)

MIDDLEWARE_CLASSES = (
    'django.middleware.common.CommonMiddleware',
    'django.contrib.sessions.middleware.SessionMiddleware',
    'django.contrib.auth.middleware.AuthenticationMiddleware'
    # 'debug_toolbar.middleware.DebugToolbarMiddleware',
)

ROOT_URLCONF = 'pathagar.urls'

INTERNAL_IPS = ('127.0.0.1',)

TEMPLATE_DIRS = (
    # Put strings here, like "/home/html/django_templates" or "C:/www/django/templates".
    # Always use forward slashes, even on Windows.
    # Don't forget to use absolute paths, not relative paths.
    '/home/jim/olpc/pathagar/pathagar/templates'
)

INSTALLED_APPS = (
    'django.contrib.auth',
    'django.contrib.contenttypes',
    'django.contrib.sessions',
    'django.contrib.sites',
    'django.contrib.admin',
    # 'debug_toolbar',
    'pathagar.books'
)


DEBUG_TOOLBAR_PANELS = (
    'debug_toolbar.panels.version.VersionDebugPanel',
    'debug_toolbar.panels.timer.TimerDebugPanel',
    'debug_toolbar.panels.settings_vars.SettingsVarsDebugPanel',
    'debug_toolbar.panels.headers.HeaderDebugPanel',
    'debug_toolbar.panels.request_vars.RequestVarsDebugPanel',
    'debug_toolbar.panels.template.TemplateDebugPanel',
    'debug_toolbar.panels.sql.SQLDebugPanel',
    'debug_toolbar.panels.signals.SignalDebugPanel',
    'debug_toolbar.panels.logger.LoggingPanel',
)
The reason for modifying most of these lines should be apparent, except for the ones involving debugging. In Python lines that begin with '#' are comments, and you can remove a line of code from a program by making it a comment. The developers of Pathagar use a Python package called debug_toolbar for debugging purposes. This package is not included with every Linux distribution, and if you aren't intending to debug the code there is no need to have it. Comment out the lines as I have shown and you'll be fine without debug_toolbar.
Next you'll need to run this from the command line:
python manage.py syncdb
This creates database tables and only needs to be done once. Now you can try running the server:
python manage.py runserver
This starts a server going on port 8000. You can open up a web browser on the same machine and point it to http://localhost:8000 and it should bring up the Pathagar Book Server. When you're done looking at Pathagar you can go back to the terminal and quit out of the server command by holding down the Ctrl key and typing 'c'.
This is not the normal way you would run Pathagar. Normally the sever does not run by itself. Instead it runs under the Apache web server using mod_wsgi. You can set up Pathagar to run that way using instructions found here:
http://docs.djangoproject.com/en/1.2/howto/deployment/modwsgi/#howto-deployment-modwsgi
One final tip: when you create images for your e-books, use The GIMP to resize them to 100 pixels wide. If you don't do this your web browser will try to display your images as if they were 100 pixels wide, and the results will be noticeably less readable than if you had resized the image yourself. It is not necessary to have an image for every book. Pathagar supplies a default image for books that don't provide their own.
genCollectionInterface (gCI)

Introduction:
genCollectionInterface (gCI) is a set of templates and HTML generation tools written in Python which produce a web browser-based interface to a book collection. These tools were created during the summer and fall of 2009 as part of the Rural Design Collective's Summer Mentoring Program [1]. The goal of the project was to enable and/or enhance access to the Children's Book Collection of the Internet Archive [2] on the OLPC/XO laptop platform. The chosen solution was based on consideration of the state of the OLPC platform and XO hardware, as well as usability and "fun factor" for the end users (presumably children aged 5-15).
Interface design:
The collection interface is designed to be very accessible to children at low reading levels while also providing a feature-rich capability for readers. Books are organized and presented in topical "categories" so that it is easy to find material on a topic of interest. Any number of categories are supported by the tools, and the initial page of the interface displays these (see Fig.1):
FIG.1 - The Top-Level Page

NOTE: the initial category list page is NOT generated by the tools, it is hand-edited to reflect what the tool generates. However the tool DOES output a category list that references the generated pages and which is a good starting point for creating the category page. The icons displayed with each category are part of the template design and must be developed for each new category added. The RDC design team spent considerable effort crafting the icons to be intuitive as well as to emulate the "look and feel" of the XO/Sugar OS interface so that it would be familiar and friendly to the users. The sidebar widget is also hand coded to reflect the tool output.
Browsing a category, the titles are presented as icons derived from a scan of the book cover or title page (see Fig.2).
FIG.2 - A Category Page

This is in support of the way children are attracted to books by the colorful covers and illustrations. The titles are displayed below the icons, and the author, date, description and other "meta data" are displayed as a "tool tip" when hovering over the icon. Clicking the icon will allow the book to be read, by various means depending on whether the laptop is being used in an Internet-connected or stand-alone environment (see "Interface Adaptability" below). While browsing the category, another category can be selected using a navigation widget which is available on the upper right of the page.
Interface adaptability:
The interface is adaptable depending on whether the laptop accessing the collection is connected to the Internet. In the case of a connected laptop, the user may read a book by either a) using an embedded book reader which displays the books by downloading one jpg image of a page at a time (see Fig.3), or b) downloading a DJVU copy of the book in it's entirety, which is then stored on the system for reading at any later time including when the laptop is not connected. With option b) the Read activity displays the book.
FIG.3 - The Embeddable Bookreader

When an Internet connection is not available, an alternative interface is provided which allows the books to be stored on an attached device such as a memory drive. In this case the interface allows the books to be downloaded off the attached device and stored on the system as DJVU files, which are read with the Read Activity. Additional tools are supplied to download the books and covers files for the collection, after which they are copied to the attached storage device. See section 5.1 for details on how to create the attached storage solution.
NOTE: The DJVU file support on the XO platform and Read activity is not fully tested, but problems were observed with versions of Sugar less than .84. The attached storage solution was lightly tested using Sugar .84 running in a virtual machine in Sun VirtualBox and worked correctly.
The adaptable interface ensures that the collection is fully accessible on any platform with a web browser. Furthermore, if a DJVU reader such as Evince is installed, the books can be read offline on any platform as well. Finally, although the current version requires some minor code modification to support it, any book format may be easily supported for download by changing filenames and links either at generation time or afterward.
The Public Domain Icon Set:
The icons for our collection were designed specifically for the Sugar user interface and dedicated to the public domain. The goal of the design was to develop a pictograph for each category that could be understood without the aid of text much like the icons in the Sugar OS. This eliminates the need for translation of the user interface, and ideally provides a universal visual language. The first set of icons are in beta and will be refined based on user feedback, or users can submit revisions as a patch. You can download the icons here [link]:
Javascript Libraries:
The user interface utilizes a suite of JavaScript libraries, each with their own documentation effort:
- prototype.js - Core JavaScript framework.
- prototip.js - Prototip2 tooltip generator (requires Prototype).
- scriptaculous.js - Library of visual and Ajax effects (requires Prototype).
- effects.js - An effects module in the script.aculo.us Library.
- side-bar.js - Sliding tab for category sidebar (requires script.aculo.us).
- reset.js - Resets icons when category page is loaded.
gCI Design and Architecture:
gCI is designed as a single Python program which uses a category decription file, a CSV file obtained from a search on an Internet Archive collection, and an ID mapping file, along with several templates, to generate an HTML and JavaScript interface file for each category. These may be accessed from a server over the Internet or locally depending on connectivity and/or attached storage availablity. The templates and data files are described below.
Template Design
The template consists of several HTML fragment files and included JavaScript libraries. There are three "permanent" parts to the template: headtmpl.html.tmpl, divtmpl.html.tmpl, and foottmpl.html.tmpl. These files must be present in the directory where the tool is run.
Header Template File
The header template file consists of the HTML code for the final output, including the collapsible panel containing the book icons. The necessary JavaScript libraries and CSS files are all specified in this section. When the interface is installed on a server the libraries and CSS files must all be in the correct location. If the interface is installed on an attached storage device, the libraries are installed on the same relative path structure. When the interface is generated, the $header keyword in the template is replaced by the proper category name.
Div Template File
The divtmpl.html.tmpl file consists of a single div which will contain the icon, the link to the book or bookreader, the title, and the JavaScript code to invoke the tooltip when the icon is hovered over. For each book in the category the keywords in the template are replaced with the appropriate data which is taken from the input CSV file. These are as follows:
- $idstr: the book id, used to complete a link to the book
- $iaclid: the IACL id, used to attach the tooltip, DOM id for the link
- $coverstr: the cover file name, to display image of cover
- $title: the book title, display the book title
Footer Template File
The footer template contains the code for the sidebar, and terminating tags for the document.
CSV Meta data search result file
The input CSV file supplies the metadata used for text replacement of keywords in the div template to create links to the books and the cover files, and also to sort the search results into categories for the interface. In addition, tooltips describing the books are built using the CSV information and JavaScript.
The CSV file may be produced by a search using Advanced Search supplied by Internet Archive. The search results used for the IACL collection are included with the generator, but any other search results may be used. When producing the CSV, the following fields should be included IN THE ORDER SPECIFIED (unused fields should be present but may be blank in the CSV). This order may seem strange until you realize this CSV file came from a search on the Internet Archive using the advanced search utility - to generate a different collection interface you could get a different CSV file using a different search; we searched for "collection=iacl". When you set up a search, you specify which fields to include in the output. Make sure you get at least the following fields, or there will be problems when the interface is generated:
- Id (field 6): this field gets assigned as the div id and is used to attach the tooltip, must be unique.
- Title (field 8): this field will be used as the title, displayed in full in the tool tip, truncated to eight words in the category display
- Author (field 2): this field is displayed only in the tooltip, when setting up IA search specify "creator"
- Description (field 4): This field is displayed as "details" in the tooltip only
- Subjects (field 7): this field is displayed in the tooltip. It is also searched for a match to an entry in the categories.txt input file during interface generation, and if it matches, this book will be entered in that category's output file.
Our search used more fields, and they came out in the order below, but you could easily play with the result in a spreadsheet program and remove unneeded fields or add them in.
Categories file
The category description file contains the categories to be generated as HTML files for the collection interface. It is up to the user to determine the categories list and create the categories.txt file. You must have a categories file even if it is empty. The format is one category per line. We created ours by selecting categories from the IACL that had a fair number of books, or that seemed most appealing to our target audience. We further refined these categories throughout the course of the project, and added categories when additional books were contributed to our program (these books are represented by gray icons in our user interface, and will be added in the future). Anything not matched from categories.txt will go into a catchall file "other.html", so there will always be at least one category. For every category, an icon must be created to display in the sidebar widget (if a suitable one is not found in our public domain collection), and another to display on the opening page list of categories.
ID Mapping file
The ID mapping file contains a mapping from the Internet Archive identifier to the Open Library Identifier. This is used in accessing the covers for the books display, which are accessed via the Open Library covers interface. A link to the cover is created by mapping the IA identifier contained in the search result CSV file to the OLID, then accessing the cover using the Open Library covers API. The IACL collection mapping was supplied to the project through prior involvement with another open source project [3]. To determine how to create such a mapping, refer to the Open Library API documentation. The mapping file is formatted as follows: <OLID field> <IAID field>, one entry per line. This file should be named iaclBookList.txt and is included in the run directory.
Installation
Install the tools by downloading and unzipping the distribution archive. It's recommended you do this in a dedicated directory to avoid overwriting files.
Usage
As packaged, the tool will generate the collection interface for web-based access. To generate an attached storage-based collection interface, see section 5.1 below. Each time the tool is run, delete *.html and *.js in the run directory, because the tool appends to the output files if they exist. The usage is:
Python genCollectionInterface.py <CSVfile> <categoryfile>
To ensure the tool is working, you can make a run using our data as follows:
genCollectionInterface.py search.CSV categories.txt
You will see numerous messages as the files are parsed and output is generated, when the process is completed, there will be a directory full of HTML and JavaScript files. The ones used for the interface are called <Category>Category.html, for example "Adventure and AdventurersCategory.html", or for JavaScript files, <Category>ToolTip.js, for example "Adventure and AdventurersToolTip.js" There's also a "catchall" category: "Other", where anything not in the categories.txt will go. Lastly, there's an "index.html" which is simply a list of links to the other files and may be used as a starting point for building a "category list" page, as that is not autogenerated.
Generating the attached storage interface
To generate the attached storage solution so that the collection may be accessed without a web connection, run the tool with the "-attached-storage" option. This will generate output files with the links set to download the books off the attached storage, which must be mounted on /media/LIB. On the XO, this means that you are using a USB flash drive for the attached storage and have named the volume LIB when you created it. The DJVU files should be in a /djvu subdirectory on the attached storage. There is a downloader tool that will download all the books in the collection, bookdownload.py, and another that will download all the covers, coverdownload.py. Once the downloads are completed copy all the books to the attached storage /media/LIB/djvu, and the covers to /media/lib/covers.
This solution would probably work on many installations of Linux, but very likely you'd have to change the code to reflect other storage naming conventions on other platforms, especially Windows where the paths have drive letters.
About The Collection
The Internet Archive Children's Library is a digital repository of over 3,300 digital public domain books for children from around the world. The Rural Design Collective selected a subset of these books and created a child-friendly user interface for the OLPC XO as part of their 2009 Summer Mentoring Program.
Making A Book Scanner
The first three e-books I made I used the cardboard box book scanner shown in the chapter on scanning book pages. After three books it became clear that a better book scanner would save me much work and improve the quality of the finished product. It was also obvious that I would have to find a way to make a book scanner without sawing, painting, or anything else that would need a real home workshop. It would have to be made by someone who could be handy mending a fuse...and that's about it. The last time I did any serious woodworking was in Junior High, and it isn't an experience I look back on fondly.
On the other hand, I was able to put up some curtain rods awhile back and they turned out all right, so I figured that if the project only involved measuring, drilling and screwing I'd be fine. I began designing my scanner by wandering around various hardware stores waiting for the items on the shelves to speak to me. In retrospect I should have done this at the Dollar Store. The items there speak to me too, and they're cheaper.
This is the book scanner I ended up building:
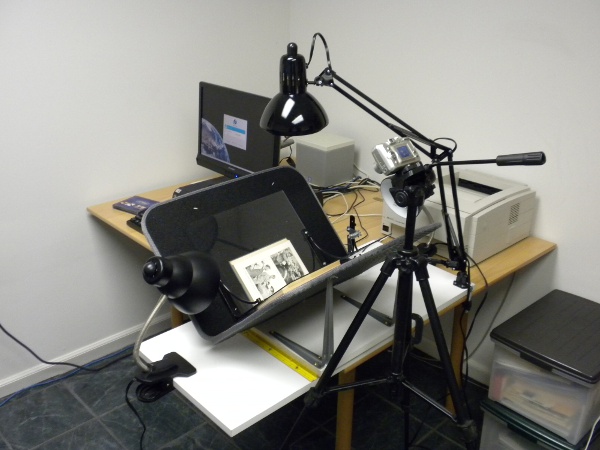
A book scanner consists of a cradle that holds a book open at a 90 degree angle, plus two sheets of glass or plastic mounted at right angles to each other that press down on the book pages and hold them flat so they may be photographed. The part that holds the pages flat is called a platen.
The platen is generally mounted on a hinge or a column so it can be moved out of the way when you flip the pages. This also keeps the platen in the same position relative to the camera. In the cardboard box book scanner the position of the book was fixed, so you needed to adjust the camera from time to time while you photograph the pages. With a proper book scanner you don't move the camera; you move the book. Therefore the book cradle is placed on a track so you can slide the pages of the book to where the platen needs them to be.
This view shows the platen resting on the book. The platen is made from two sheets of Lexan precut to 11" x 14" which I found at Menard's. I got two shelf mounting brackets and used epoxy to glue the Lexan sheets to them. The glue came undone when I tried to attach a hinge, so I ended up using #6-32 stove bolts and nuts (1/2" long, 1/8" diameter round head) to attach the sheets to the brackets. If I was doing it over again I would skip the epoxy and just use the stove bolts. The brackets already had holes in the right place, and Lexan is easy to drill. I found Lexan works as well as glass would for photographing book pages, and is much easier to deal with.
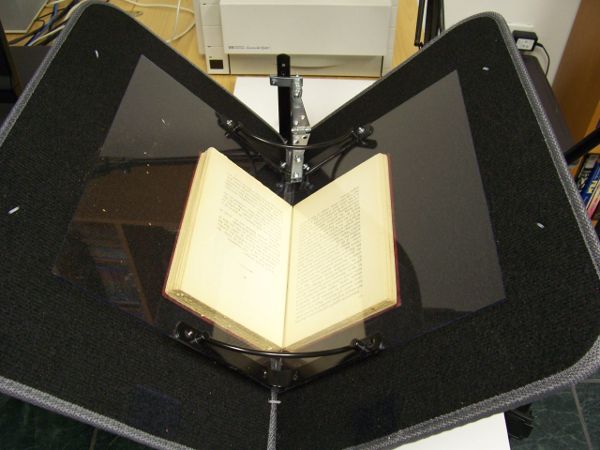
This shows the detail of the platen hinge. I use another shelf mounting bracket to hang the hinge on. The hinge is attached to the bracket with stove bolts screwed through 2" mending plates I found at the Dollar Store. Mending plates are just small rectangles of metal with two holes. I used a 2" long bolt with a wing nut to provide a means of adjusting the vertical position of the platen so it fits nicely in the book. I had a package of washers left over from fixing the windshield wipers on a car I used to have so I used a bunch of them as spacers. As you can see I used more stove bolts and mending plates to attach the hinge to the platen bracket.
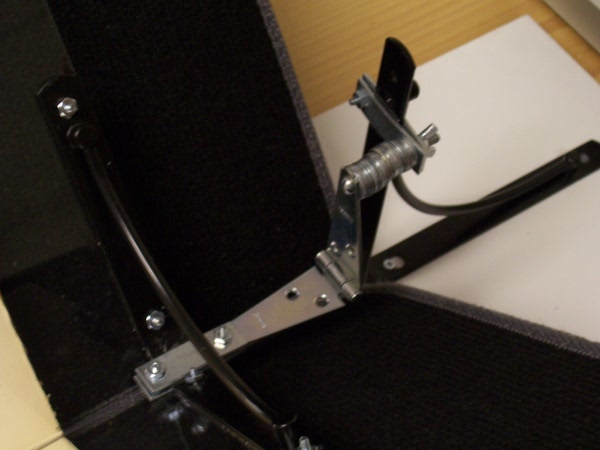
The book cradle is made from a couple of car floor mats I found at the Dollar Store. It is supported by four 8x10 shelf brackets screwed into an 3/4" x 11 3/4" x 24" white shelf I found at Menard's. I used #8 x 3/4" brass round head wood screws. You need to position the shelf brackets 4" apart so that when the floor mats rest on them each one is at a 45 degree angle. Also, not every floor mat is suitable for this purpose. You need something stiff that can hold a book without sagging. These mats have a stiff plastic backing. If you can't find floor mats like this use something else, as long as it is stiff. As you can see, I stuck some small shelf brackets underneath the mats for extra support.
The mats are stitched together with plastic tie-downs like you use to hold wires in place. Additional tie-downs are used to attach the mats to the shelf brackets.
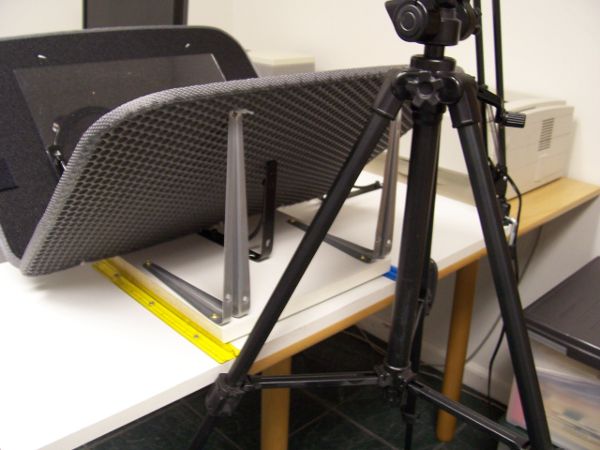
I use another white shelf for the base, this one 3/4" x 15 3/4" x 36". I use a desk lamp with an incandescent bulb, 100 watts, and I screw the base of the lamp into the book scanner base. I use the clamp for the desk lamp to hold the book scanner base to the table, and use a small C-clamp for more stability.
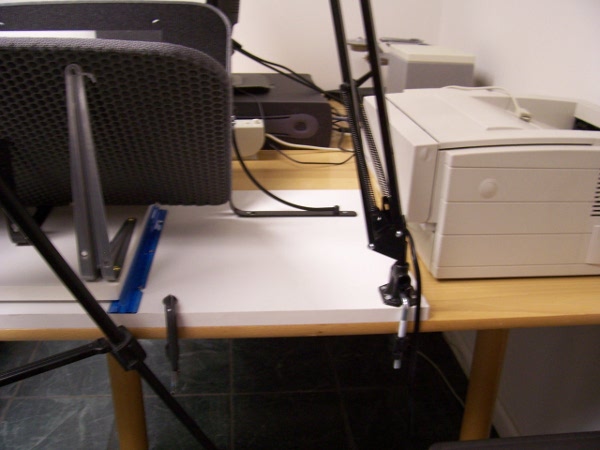
This shows what the platen looks like in the up position.
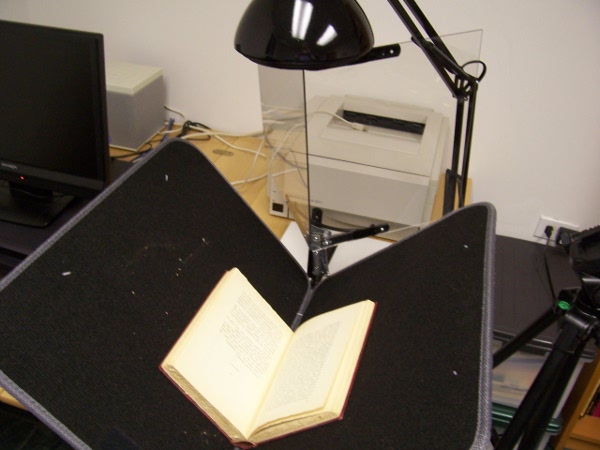
You need to have some kind of track for the book cradle base to slide back and forth on. Most of the designs at diybookscanner.org use drawer sliders for this purpose, but one design I saw there just used two pieces of plastic to hold the cradle base in a straight line and plastic furniture sliders to provide easy low friction movement. I liked this idea a lot, and I found some plastic rulers with a ridge down the middle of them at the Dollar Store that would make a nice track for the cradle. I attached them to the base with wood screws. You probably won't be able to find the rulers I found, so just improvise.
I use a 5 megapixel camera on a tripod to photograph the book pages. If I found a suitable table I could use two cameras on tripods to do all the pages in one pass. Digital cameras and tripods are pretty cheap these days.
Last, but not least, you need a flat platform at the bottom of the cradle to hold the spine of the book level, like this:
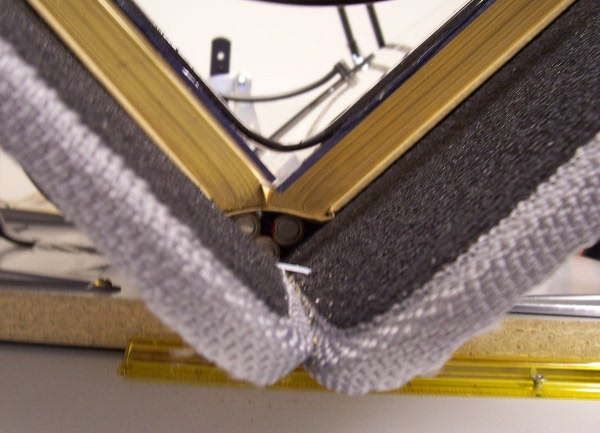
As you can see, I just stuck a few batteries in the bottom of the "V". I may come up with something more presentable in the future, but for now the batteries are doing fine.

Here is a view showing the clip-on desk lamps I added to the scanner. Having just one overhead lamp creates a bright spot in the middle of the page which the camera uses to adjust the exposure, resulting in pages that are dingy. Adjusting the exposure compensation on the camera just washes out the middle of the page. What you really need is a page that is evenly lit, which having three light sources like this should provide. The clip-on lamps are cheap, about five dollars at Menard's. The lamps are supposed to use 60 watt bulbs to minimize the risk of fire, but I put 75 watters in because I like to live dangerously.
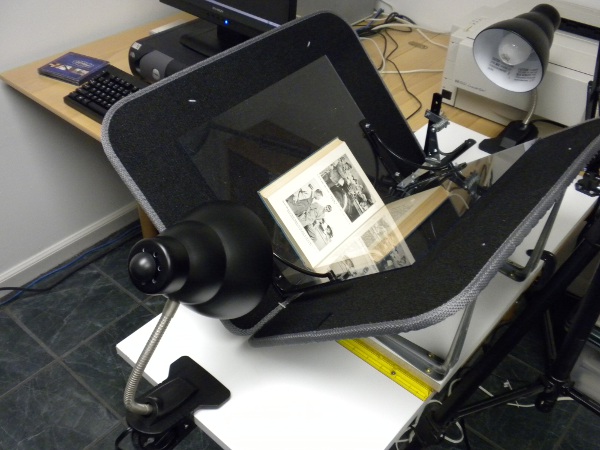
Here is the Bill Of Materials:
| Qty |
Description |
Unit Cost |
| 1 |
white shelf 3/4" x 15 3/4" x 36" |
5.00 |
| 1 |
white shelf 3/4" x 11 3/4" x 24" |
3.97 |
4
|
8x10 shelf brackets
|
.78 |
1 package
|
#8 x 3/4" brass round head wood screws
|
.78 |
1 package of 4
|
24mm x 100 mm (5/16" x 4") furniture sliders
|
6.98 |
1 package
|
3" strap hinge, light
|
2.49 |
1 package
|
plastic wire tie-downs
|
1.00 |
1 package
|
#6-32 stove bolts, round head with nuts
|
1.00 |
1 package of 4
|
2" mending plates (Dollar Store)
|
1.00 |
1 set
|
black floor mats (Dollar Store)
|
14.00 |
1
|
desk lamp with adjustable arm
|
30.00 |
2
|
clip-on desk lamps
|
5.00 |
1 package of 3
|
plastic rulers (Dollar Store)
|
1.00 |
2
|
Lexan sheets, 11" x 14"
|
8.00 |
4
|
black shelf supports, 6" x 6"
|
1.00 |
1
|
black shelf support, 8" x 8"
|
1.00 |
1
|
C-clamp
|
1.00 |
Getting A Rule 6 Copyright Clearance
If you have a book published after 1922 and you want to know if it is in the public domain somewhere (not necessarily where you live) there are really only two possibilities:
- In Canada, a book becomes public domain 50 years after the year of the author's death. Thus you could donate the book to PG Canada and it could be legally downloaded in countries with similar copyright laws.
- In the U.S. books published 1923-1963 and authored by U.S. citizens must have their copyrights renewed in their 28th year. If the book isn't renewed it goes into the public domain in the U.S. and may be donated to Project Gutenberg or the Internet Archive. When you attempt to prove to PG that this has happened for a book you are requesting a "Rule 6" clearance.
The Project Gutenberg Rule 6 HOWTO says:
"Based on our review of the US Library of Congress' historical renewal records, we estimate that over 85% of all registered books are never renewed, yet it is still quite important to follow all the procedures below to make a safe judgment about a book's copyright status."
A Rule 6 clearance is a fair amount of work to prepare, and will take longer to get approved. There are currently two people checking copyright clearance requests, and the person who checks Rule 6 clearances generally does it only once a month, so a clearance will take longer to get. The person who checks Rule 6 clearances will have to do the same work you do to prepare the submission, so it is important that you do a careful job yourself. It would be a good idea to do several pre-1923 submissions before your first Rule 6 submission.
If the author has been dead 50 years it would make sense to donate the book to PG Canada instead. Those clearances go quickly because checking when an author died is not as difficult.
As a matter of policy PG will not do a Rule 6 clearance for a book by an author who was not a U.S. Citizen when the book was written. Technically Rule 6 would apply if the book was published in the U.S. before or at the same time it was published elsewhere, but that's pretty much impossible to verify so PG will reject clearance requests for such authors. One of the first things you should do is find out if the author was a U.S. citizen.
The second thing you should do is check either the Stanford copyright renewal database or the Rutgers one, or both. The Stanford database is at:
http://collections.stanford.edu/copyrightrenewals/bin/search/simple
and the Rutgers one is at:
http://comminfo.rutgers.edu/~lesk/copyrenew.html
The Stanford database is considered to be the more reliable of the two. If the renewal shows up in either of these databases then you can't do a Rule 6 clearance. In an ideal world if your author is a U.S. citizen and the renewal does not show up in either of these searches you'd be set to go. The world is not ideal. If you get past these hurdles you still have a lot of checking to do. The requirements for doing a Rule 6 submission change from time to time, so you should check the latest articles on the PG and DP websites for the current requirements.
The official Rule 6 HOWTO is here:
http://copy.pglaf.org/rule6-new.txt
Some other resources are at the Distributed Proofreaders website:
http://www.pgdp.net/wiki/PGRule6
http://www.pgdp.net/wiki/PGRule6/DetailedRule6Procedure
http://www.pgdp.net/wiki/PGRule6/Rule6Template
The last link is a template of the wording that you can paste into the form you use to submit your TP&V. It refers to stories published in magazines then later published as a book, which is probably more complex than most submissions, so you can remove parts which are not applicable. (A large percentage of Rule 6 submissions are stories from Science Fiction magazines).
Here is the template in its entirety:
"This is boilerplate for reporting Rule 6 research for a story first published in a magazine, then later published in a book which we plan to use as the source to clear. Only use LOC website if needed. Only use 11800 if needed. The claimed copyright dates control this.
"Rule 6 clearance.
"[TITLE] by [AUTHOR]
"Originally published in [VENUE AND DATE OF FIRST PUBLICATION].
"[AUTHOR'S FULL NAME] born on [AUTHOR'S BIRTHDATE & YEAR], in [AUTHOR'S BIRTH LOCATION] and was therefore a U.S. citizen. [CITE SOURCES, e.g. Both Contemporary Authors and St. James Guide to Science Fiction Writers have entries for him.]
"The edition I want to clear is a [CURRENT PUBLISHER] reprint from [YEAR OF PUBLICATION] with a [YEAR OF COPYRIGHT] copyright notice. [TITLE] was first published in the [MONTH AND YEAR] edition of [MAGAZINE TITLE] with the author as [PSEUDONYM NAME]. It's first book printing was in the [YEAR OF BOOK PUBLICATION] [BOOK PUBLISHER] of [BOOK TITLE].
"I have searched the Copyright Renewal Records at the library of congress web site for the following words as a title search: [TITLE] [ALTERNATE TITLE OR SUBTITLE] and the following words as an author search [LAST, FI], [LAST, FIRST], [PSEUDONYM LAST, FIRST], [PSEUDONYM LAST, FI] and the following words as a claimants search: [ORIGINAL PUBLISHER] and have found no indication that this story's copyright in [YEAR OF FIRST PUBLICATION] was renewed. I have also searched "The catalog of Copyright Entries" periodicals volume in the years [YEAR + 26], [YEAR + 27], [YEAR + 28] and [YEAR + 29] for a renewal of [MAGAZINE OF FIRST PUBLICATION] and have searched 11800-8.txt for the words [RARE WORD FROM TITLE], [AUTHOR'S FIRST NAME] near [AUTHOR'S LAST NAME] and have found no indication that this book's copyright in [DATE OF FIRST PUBLICATION] was renewed.
"I have also reviewed the materials in the book relating to the nationality of the author and have found no reason to believe that any of the authors was a foreign national."
A Booki Of Your Own
Reasons For Having Your Own Booki

For most it will not be necessary to have their own Booki software, and every reason not to. Setting up your own Booki and backing up the data on a regular basis is a significant amount of work, and if you're going to share your work with the world there is really no reason not to use the shared Booki as well.
If you're not going to share, then having your own Booki makes sense. If you don't have reliable access to the Internet having your own Booki might make sense as well. A school with XO laptops that can connect to each other on a network but not to the Internet might find a local copy of Booki quite valuable. In my own case I set up Booki on a computer at home and another at the office.
My day job involves working on an application framework and teaching people how to use it. An application framework is to software what a chassis is to a car, more or less, and just as a factory can build many different cars on the same chassis you can have many applications using the same application framework. Teaching people to use this framework is a challenge, and teaching people who live and work on the other side of the Earth is a greater challenge. We had been using articles on a website, plus a Wiki, to contain the training materials, but after writing two FLOSS Manuals I came to the conclusion that what my company needed was an honest to gosh Manual.
I installed the software at home because:
- I wanted the work install to go as quickly and smoothly as possible
- I want, eventually, to write a book that I will not share with the world. After self-publishing my first FLOSS Manual on Lulu I honestly felt that it would be easier to use Booki to lay out this book (working title: Jim's Oprah Book) than to do the same thing with Open Office or MS Word.
If your reasons are like mine, then let's set up our own Booki!
Getting The Software
You will need a recent version of Linux to run Booki on. Windows or a Mac will not run Booki. You won't need much of a computer to run it on. The computer I used at home was a refurbished IBM NetVista which I had bought online for about a hundred dollars. The computer at work was a discarded desktop model which was even older. I would not recommend trying to install this software on an XO laptop, but any desktop computer made in the last few years should be fine.
I used Fedora 13 for these Booki installs, but I don't recommend it. Fedora is used on the XO laptops, and since I write software for that platform I use it on my desktop computers as well. The downside of Fedora is that, so far, every time I've upgraded to a new version of Fedora I've had to back up all my data and do a complete reinstall. Other than this, the different brands of Linux are more or less the same. If I was going to recommend a Linux for Booki my choices in order would be:
- Whatever Linux you already have
- Ubuntu. If you've never used Linux, this is probably the easiest, and I have had good experiences with it.
The rest of these instructions will assume that you have Linux installed and have become comfortable running it. Getting comfortable with Linux is the subject for another book, so if you've never used Linux it would be a good idea to find someone who has to help.
Often the install program for Linux will ask if you intend to use it as a web server or if you are doing programming or if you want office software. Answering "Yes" to all three will save some time.
There are actually two parts to Booki, and you'll need both:
- Booki itself
- OBJAVI 2, the part that creates PDF's, EPUBs, etc from your Book.
installing most software on Linux is no more difficult than checking a check box on an Add/Remove Software dialog, but when software is still under development like Booki is you'll need to get the source code and work with that. The source code for both is kept in a Git repository, so you'll need to have Git installed. Once you do, you can create a "src" directory in your home directory and from in that directory run these commands:
git clone git://booki-dev.flossmanuals.net/git/booki.git
git clone git://repo.or.cz/objavi2.git
This will create two directories under "src": booki and objavi2, which will contain the source code for these products.
Before you can continue, you'll need to check the README.txt file in Booki and the INSTALL file in OBJAVI 2 to find out what other software you'll need to install. For Booki the list is:
- django
- mod_python
- apache2
- php5
- python-simplejson
- sqlite
- redis
- aspell plus dictionaries for the languages you will use.
If you're lucky the latest redis will be included as a package in your distribution. Fedora users so far are not so lucky. They will need to download the latest source code from http://code.google.com/p/redis/ and compile it using the Makefile in the time honored manner:
make
sudo make install
If you installed it from a package in your distribution you should check the Services to see that it is enabled and running. If you compiled from source you can start it up like this (running as root):
redis-server &
You'll want to run this command every time your computer boots up. For Fedora 13 you can put this command in /etc/rc.d/rc.local.
For OBJAVI the list is:
- lxml
- pdfedit (4.1+)
- xvfb
- fontconfig
- pdftk
- psutils
- poppler-utils or xpdf-utils
- wkhtmltopdf
- open office 3
- some fonts
You can get everything from your distribution's packages except wkhtmltopdf. That you'll need to download from http://code.google.com/p/wkhtmltopdf/. You should get a precompiled binary and copy it to the /usr/local/bin directory as user root.
When you set up Linux you should get fonts as part of the basic install, but it would be a good idea to install more. In Fedora the Add/Remove Programs dialog has a section for Fonts that has over a hundred free fonts that you can install. If you use the Roman alphabet only you can limit yourself to the Latin fonts.
Disable SELinux
Fedora 12 and later has SELinux. SELinux is to Linux is as Aunt Polly is to Huckleberry Finn. Its job is to keep programs, including the Apache Web Server, from doing things they should not. Even without SELinux Linux is pretty secure. The web server runs as a user (in Fedora's case the user is named "apache") and it is only allowed to do what that user is allowed to do. On a personal or corporate network this is generally enough.
What SELinux does is add an extra layer of protection. Programs are expected to do certain things. If a program tries to do something that SELinux is not expecting, then SELinux stops it. To get around this you have to tell SELinux to expect this behavior from this specific program. Then it will be allowed. This extra layer of protection makes it more difficult for a malicious programmer to break the system. Sooner or later he will have to do something SELinux is not expecting. He will be stopped and his actions will be logged.
As commendable as this is, if you have a program that does more than a few unusual things SELinux will be a real challenge. OBJAVI falls into that category. It would be a great deal of work to get SELinux to tolerate all the things that OBJAVI is likely to do, and if you're running it on a private network there wouldn't be much benefit. We disable SELinux by editing a file /etc/selinux/config as user root. The file should look like this:
 # This file controls the state of SELinux on the system.
# SELINUX= can take one of these three values:
#       enforcing - SELinux security policy is enforced.
#       permissive - SELinux prints warnings instead of enforcing.
#       disabled - No SELinux policy is loaded.
SELINUX=disabled
# SELINUXTYPE= can take one of these two values:
#       targeted - Targeted processes are protected,
#       mls - Multi Level Security protection.
SELINUXTYPE=targeted
Change the value of SELINUX to disabled, save the file and reboot your computer.
Configure Booki and OBJAVI 2
If you've ever installed anything written in Python on a Linux system you're familiar with the setup.py program, which copies the Python code where it needs to go in the system. Eventually both Booki and OBJAVI will have these, but since they are still being developed they don't have them yet. We will be running the programs out of our home directory for now.
The configuration file for Booki is booki/lib/booki/settings.py. There is a file named settings.py.original which you need to copy to the name settings.py. There are several places you'll need to modify in this file. First is the doc root:
STATIC_DOC_ROOT = '/home/jim/src/booki/site_media'
This points to the site_media directory in the Booki source you got from Git. You'll need to make certain that this directory has a group ownership of apache (or whatever user apache runs as in your distribution) and that the group is allowed to read and create files in this directory. Next you need to set up some URL's:
# use this objavi server
OBJAVI_URL = "http://127.0.0.1/objavi.cgi"
ESPRI_URL = "http://127.0.0.1/espri.cgi"
TWIKI_GATEWAY_URL = "http://127.0.0.1/booki-twiki-gateway.cgi"

#the name of the booki server (comment out to use os.environ['HTTP_HOST'])
THIS_BOOKI_SERVER = '127.0.0.1:8000'
IP Address 127.0.0.1 is of course the localhost IP address. It is likely that you will want to change this to the IP address of your computer so that you can use Booki on the network. You can of course use a DNS name rather than an IP address.
Notice that we have Booki running on port 8000. We need to set up virtual hosts for both Booki and OBJAVI. If you can give each one its own IP address or DNS name there is no reason you can't run both on port 80 like a normal web application. If everything has to use the same IP address then you can distinguish your virtual hosts from each other using a port number. Note that OBJAVI has to run on port 80, but Booki can use any port. There is nothing magic about the number 8000. It just needs to be a port that nothing else is using. In the office I use port 86.
Next we have to set up the database entries:
DATABASE_ENGINE = 'sqlite3'
# DATABASE_NAME = 'booki'             # Or path to database file if using sqlite3.
DATABASE_NAME = '/home/jim/booki/booki.db'             # Or path to database file if using sqlite3.
DATABASE_USER = ''             # Not used with sqlite3.
DATABASE_PASSWORD = ''         # Not used with sqlite3.
DATABASE_HOST = 'localhost'             # Set to empty string for localhost. Not used with sqlite3.
DATABASE_PORT = ''             # Set to empty string for default. Not used with sqlite3.
Booki can be used with Sqlite3 or Postgres. If you are willing to tinker with the code you could get it to run with just about any database. Sqlite3 is the easiest to set up and is completely adequate for Booki on a small private network. The only entry you need to touch is DATABASE_NAME, which is set to put the database in a directory that can be read and written to by user apache. There is no need to create the database file. Booki will create it.
Now from the command line, as yourself, run this:
export PYTHONPATH=$PYTHONPATH:/home/jim/booki/lib
where /home/jim is your own home directory. Then change to the booki/lib/booki directory and run this:
./manage.py syncdb
This will create your database tables. Now you can run Booki itself and check it out. First run this as yourself:
./manage.py runserver
Once this is running you should be able to point your web browser to http://127.0.0.1:8000 and see Booki in operation. You should also go to http://127.0.0.1:8000/admin and set up an admin user, plus you'll need to add a license like this:

You can fool around with Booki some more if you like, but be aware that this is not an adequate way to run Booki. You really need to run it under a virtual host in Apache. manage.py only supports one user at a time, and is only good as a quick sanity check to make sure everything is set up correctly. When you're done looking at Booki you can kill manage.py by pressing Ctrl-C in the terminal where you started it.
Next we need to configure OBJAVI. OBJAVI has its own configuration file, objavi2/objavi/config.py. You'll need to change some settings in this file, create some new directories, and make the directories readable and writable by the apache group. The first setting to change is this one:
WKHTMLTOPDF = '/usr/local/bin/wkhtmltopdf'
When you downloaded the binary for wkhtmltopdf it may have had a name like wkhtmltopdf-static or something else. Change the value of WKHTMLTOPDF to whatever name it has in /usr/local/bin. (In my case I had renamed it to wkhtmltopdf, which hurt nothing).
The biggest change is to add an entry to SERVER_DEFAULTS. The first entry for '127.0.0.1:8000' is my own new entry. Use the actual IP address of your machine if you're going to use it over the network.
SERVER_DEFAULTS = {
    '127.0.0.1:8000': {
        'css-book': '/static/simmons.css',
        'css-web': '/static/en.flossmanuals.net-web.css',
        'css-newspaper': '/static/en.flossmanuals.net-newspaper.css',
        'css-openoffice': '/static/en.flossmanuals.net-openoffice.css',
        'lang': 'en',
        'dir': 'LTR',
        'toc-encoding': None,
        'display': True,
        'interface': 'Booki',
        'toc_header': 'Table of Contents',
        },
    'booki.flossmanuals.net': {
        'css-book': '/static/en.flossmanuals.net.css',
        'css-web': '/static/en.flossmanuals.net-web.css',
        'css-newspaper': '/static/en.flossmanuals.net-newspaper.css',
        'css-openoffice': '/static/en.flossmanuals.net-openoffice.css',
        'lang': 'en',
        'dir': 'LTR',
        'toc-encoding': None,
        'display': False,
        'interface': 'Booki',
        'toc_header': 'Table of Contents',
        },
}
The entries that I changed are in bold. I use my own style sheet when creating PDFs for books, and you may wish to do that too. I indicate that I want to display this server in OBJAVI's list of servers and that I don't want to display the other entries. You'll see why in a minute.
You need to create some directories under objavi2/htdocs and make certain they can be read and written to by the apache group:
- books
- booki-books
- progress
- tmp
You'll also need to make certain that the static directory already in objavi2/htdocs is writable by the apache group. Finally, you'll need to set up a log directory under objavi2 and make sure that apache can create files there too.
Setting Up Apache Virtual Hosts
The simplest way to get Booki and OBJAVI 2 running under the Apache web server is to set up virtual hosts. What I did was to edit the /etc/httpd/conf/httpd.conf file as the root user using gedit. It is also possible to make configuration files outside of httpd.conf that will be loaded by Apache automatically. For Fedora 13 you could make separate files for each virtual host and put them in directory /etc/httpd/conf.d. (When I got everything working on my Booki install I moved the virtual host entries to files named booki_vh.conf and objavi_vh.conf respectively).
The entries I put at the end of httpd.conf looked like this:
Listen 8000

<VirtualHost *:8000>
        ServerAdmin nicestep@gmail.com

        DocumentRoot /home/jim/src/booki/

        <Directory /usr/share/pyshared/django/contrib/admin/media/>
        Order allow,deny
        Allow from all
        </Directory>

        <Location "/">

            SetHandler python-program
            PythonHandler django.core.handlers.modpython
            SetEnv DJANGO_SETTINGS_MODULE booki.settings
            PythonDebug On
            PythonPath "['/home/jim/src/booki/lib'] + sys.path"

        </Location>

        <Location "/favicon.ico">
            SetHandler None
        </Location>
        <Location "/media">
            SetHandler None
        </Location>
        <Location "/site_media/xinha/plugins/SpellChecker/spell-check-logic.php">
            SetHandler application/x-httpd-php
        </Location>
        <Location "/site_media/xinha/plugins/SpellChecker/spell-check-savedicts.php">
            SetHandler application/x-httpd-php
        </Location>
        <Location "/site_media/xinha/plugins/SpellChecker/aspell-setup.php">
            SetHandler application/x-httpd-php
        </Location>

        Alias /favicon.ico /home/jim/src/booki/favicon.ico
        Alias /media/ /usr/share/pyshared/django/contrib/admin/media/

        ErrorLog /var/log/apache2/booki-error.log

        # Possible values include: debug, info, notice, warn, error, crit,
        # alert, emerg.
        LogLevel warn

        CustomLog /var/log/apache2/booki-access.log combined
        ServerSignature On

</VirtualHost>

<VirtualHost *:80>
        ServerAdmin nicestep@gmail.com
        #XXX set server name
        #ServerName objavi.halo.gen.nz
        # limit MEM to 800 million bytes
        RLimitMEM 800000000

        #Sometimes it takes a while. Wait.
        TimeOut 600

        DocumentRoot /home/jim/src/objavi2/htdocs
        <Directory />
                Options FollowSymLinks
                AllowOverride None
        </Directory>
        <Directory /home/jim/olpc/objavi2/>
                Options +All +ExecCGI
                AllowOverride None
                Order allow,deny
                Allow from all
                AddHandler cgi-script .cgi
                # Remove output filters in case mod_deflate is being used.
                RemoveOutputFilter .cgi
        </Directory>

        DirectoryIndex index.html objavi.cgi
        ErrorLog /var/log/apache2/objavi-error.log

        # Possible values include: debug, info, notice, warn, error, crit,
        # alert, emerg.
        LogLevel warn

        CustomLog /var/log/apache2/objavi-access.log combined
        #ScriptLog /tmp/objavi-cgi.log

</VirtualHost>
A Virtual Host is a way of making Apache act like more than one web server. We have one Virtual Host for Booki, and one for OBJAVI 2. When you set up a Virtual Host you need some way for Apache to know which host is needed for a given request. You can do this by giving your server more than one IP address, more than one DNS name, or in my case more than one port. The Listen directive at the top says that we will be listening at port 8000 in addition to the normal HTTP port 80. When a request comes in on port 8000 it will go to Booki and when it comes in on 80 it will go to OBJAVI 2. Again, OBJAVI 2 must run on port 80.
For Booki we're using the mod_python plugin for Apache, so make sure it's installed.
Using OBJAVI 2
If you've done everything right you should be able to go to http://127.0.0.1:8000 and see Booki running, and go to http://127.0.0.1 and see OBJAVI 2 running. OBJAVI 2 looks like this:

OBJAVI is run from within Book from the Export tab when you're editing a book. If all you want to do is create PDF's and EPUBs you may never need to look at this page. There is one thing you can do from here that you can't do from Booki's Export tab, and that is to create output as Templated HTML. To do that you choose Templated HTML as the Document Type.
Templated HTML is not a kind of e-book, but it is worthy of a brief mention. One of the ways that Booki is different from Wikis like Media Wiki (used for Wikipedia) is that with a normal Wiki anyone can edit any document and the edit is available to the readers of the Wiki instantly. A normal static website makes it easy to control who can update the content, but this control means that updating the content is more work. What Booki introduces is the idea of generating a static website from a Wiki. The Wiki is used by the book authors but is not seen by the book's audience. When the authors have something ready to publish to the world they use OBJAVI to generate a static website and copy it to the public web server.
By default the HTML looks like the FLOSS Manuals website. Because it is generated using templates, you can easily add your own stylesheets, corporate logos, and the like to make the generated site look the way you want it to.
You should definitely think about creating a templated HTML version of your book if the contents are likely to be updated frequently. The website version of your book can then act as a supplement to the e-book version. The stable content will be in the e-book and the latest minor tweaks and corrections will be on the website.
About The Authors

James Simmons has been an avid reader since his childhood, in spite of being placed in the lowest reading group in every grade because of his August birth date. (The teachers generally moved him to the middle group a month later). In the second grade he achieved recognition for being the only student in his class who knew what "porridge" was. His favorite reading was science fiction and books on science. In the sixth grade he discovered the books of Alfred Powell Morgan and began a love affair with radio and electronics that would continue well into the seventh grade. In the eighth grade he discovered the works of Ray Bradbury, Robert A. Heinlein, and Arthur C. Clarke. By the time he was assigned to read The Martian Chronicles in high school he had already read it three times and felt that he understood that book better than his teacher ever would. In retrospect he would have done well to keep this opinion to himself.
A friend he made in college encouraged him to try his hand at writing science fiction stories. He had no talent for fiction writing, but he did manage to write a fan letter to Galaxy magazine demanding more stories by Howard L. Myers. James did not know it at the time, but the story he had admired so much had been published two years after the author's death.
While James did not fare well writing fiction, he would eventually do better writing computer programs. He wrote three e-book related Activities for the One Laptop Per Child project: Read Etexts, View Slides, and Get Internet Archive Books. He used what he learned doing this to write Make Your Own Sugar Activities!, a manual on creating Activities for the Sugar platform that is considered the definitive book on the subject, pretty much by default.
James' mother really did tell him that "The readers are the leaders." This was a slogan used by a woman trying to sell his mother a set of encyclopedias. His mother did not buy the encyclopedias.
Oceana Rain Fields is a visual artist and creative spirit with a flair for the unexpected and the desire to support worthy causes with her art. She graduated in 2010 from Pacific High School, earning several notable scholarships. In 2010, her painting “Malaria” won first in show in the Vision 2010 high school art competition at the Coos Art Museum in Coos Bay, Oregon. Oceana plans to continue her art education at Southwestern Oregon Community College in Fall 2010. At the Rural Design Collective, she will be supporting another worthy cause by leading the visual aesthetic on “An E-Book Revolution: Reading and Leading with One Laptop Per Child,” a collaborative book with author James Simmons about how to make digital books to enhance learning in the classroom.
Rebecca Hargrave Malamud, founder of the Rural Design Collective, is an award-winning designer, creative director, open source advocate and artist. She has a proven track record in advancing large-scale Internet projects, and has contributed her talents to several meaningful open source initiatives that have an ongoing impact on the future of technology and society: http://sixes.net/rdcHQ/about/rebecca-hargrave-malamud/
License

All chapters copyright of the authors (see below). Unless otherwise stated all chapters in this manual licensed with GNU General Public License version 2
This documentation is free documentation; you can redistribute it and/or modify it under the terms of the GNU General Public License as published by the Free Software Foundation; either version 2 of the License, or (at your option) any later version.
This documentation is distributed in the hope that it will be useful, but WITHOUT ANY WARRANTY; without even the implied warranty of MERCHANTABILITY or FITNESS FOR A PARTICULAR PURPOSE. See the GNU General Public License for more details.
You should have received a copy of the GNU General Public License along with this documentation; if not, write to the Free Software Foundation, Inc., 51 Franklin Street, Fifth Floor, Boston, MA 02110-1301, USA.
Authors
A BOOKI OF YOUR OWN
© James Simmons 2010
ABOUT THE AUTHORS
© James Simmons 2010
Modifications:
Christopher garcia 2010
Oceana Fields 2010
Rebecca Malamud 2010
BEFORE WE BEGIN
© James Simmons 2010
Modifications:
Christopher garcia 2010
Oceana Fields 2010
Rebecca Malamud 2010
BOOKI
© James Simmons 2010
Modifications:
Christopher garcia 2010
Oceana Fields 2010
Rebecca Malamud 2010
CONVERTING YOUR OWN DOCUMENTS
© James Simmons 2010
Modifications:
Christopher garcia 2010
Oceana Fields 2010
Rebecca Malamud 2010
GETTING A RULE 6 COPYRIGHT CLEARANCE
© James Simmons 2010
Modifications:
Christopher garcia 2010
Oceana Fields 2010
COPYRIGHTS, LICENSES, AND FAIR USE
© James Simmons 2010
Modifications:
Christopher garcia 2010
Oceana Fields 2010
Rebecca Malamud 2010
CREDITS
© adam hyde 2006, 2007
Modifications:
James Simmons 2010
Oceana Fields 2010
DONATING E-BOOKS TO THE INTERNET ARCHIVE
© James Simmons 2010
Modifications:
Christopher garcia 2010
Oceana Fields 2010
DONATING TEXTS TO PROJECT GUTENBERG
© James Simmons 2010
Modifications:
Christopher garcia 2010
Oceana Fields 2010
Rebecca Malamud 2010
FREE E-BOOK FORMATS
© James Simmons 2010
Modifications:
Christopher garcia 2010
Oceana Fields 2010
GEN COLLECTION INTERFACE GCI
© Rebecca Malamud 2010
Modifications:
Christopher garcia 2010
James Simmons 2010
Oceana Fields 2010
READING AND LEADING WITH ONE LAPTOP PER CHILD
© adam hyde 2006, 2007
Modifications:
Christopher garcia 2010
James Simmons 2010
John Curwood 2010
Oceana Fields 2010
Rebecca Malamud 2010
MAKING A BOOK SCANNER
© James Simmons 2010
Modifications:
Christopher garcia 2010
Oceana Fields 2010
MAKING CBZ'S
© James Simmons 2010
Modifications:
Christopher garcia 2010
Oceana Fields 2010
MAKING DJVU'S
© James Simmons 2010
Modifications:
Christopher garcia 2010
Oceana Fields 2010
Rebecca Malamud 2010
MAKING EPUBS
© James Simmons 2010
Modifications:
Christopher garcia 2010
Oceana Fields 2010
MAKING PDF'S
© James Simmons 2010
Modifications:
Christopher garcia 2010
Oceana Fields 2010
Rebecca Malamud 2010
MAKING PLAIN TEXT FILES
© James Simmons 2010
Modifications:
Christopher garcia 2010
Oceana Fields 2010
Rebecca Malamud 2010
THE PATHAGAR BOOK SERVER
© James Simmons 2010
Modifications:
Christopher garcia 2010
Oceana Fields 2010
INTRODUCTION
© James Simmons 2010
Modifications:
Christopher garcia 2010
Oceana Fields 2010
SCANNING BOOK PAGES
© James Simmons 2010
Modifications:
Christopher garcia 2010
Oceana Fields 2010
Rebecca Malamud 2010
SOURCES FOR FREE E-BOOKS
© James Simmons 2010
Modifications:
Christopher garcia 2010
Oceana Fields 2010
Rebecca Malamud 2010
SUGAR ACTIVITIES FOR FINDING E-BOOKS
© James Simmons 2010
Modifications:
Christopher garcia 2010
John Curwood 2010
Oceana Fields 2010
Rebecca Malamud 2010
THE READ ACTIVITY
© James Simmons 2010
Modifications:
Christopher garcia 2010
Oceana Fields 2010
Rebecca Malamud 2010
THE READ ETEXTS ACTIVITY
© James Simmons 2010
Modifications:
Christopher garcia 2010
Oceana Fields 2010
Rebecca Malamud 2010
THE VIEW SLIDES ACTIVITY
© James Simmons 2010
Modifications:
Christopher garcia 2010
Oceana Fields 2010

Free manuals for free software
General Public License
Version 2, June 1991
Copyright (C) 1989, 1991 Free Software Foundation, Inc.
51 Franklin Street, Fifth Floor, Boston, MA 02110-1301, USA
Everyone is permitted to copy and distribute verbatim copies
of this license document, but changing it is not allowed.
Preamble
The licenses for most software are designed to take away your freedom to share and change it. By contrast, the GNU General Public License is intended to guarantee your freedom to share and change free software--to make sure the software is free for all its users. This General Public License applies to most of the Free Software Foundation's software and to any other program whose authors commit to using it. (Some other Free Software Foundation software is covered by the GNU Lesser General Public License instead.) You can apply it to your programs, too.
When we speak of free software, we are referring to freedom, not price. Our General Public Licenses are designed to make sure that you have the freedom to distribute copies of free software (and charge for this service if you wish), that you receive source code or can get it if you want it, that you can change the software or use pieces of it in new free programs; and that you know you can do these things.
To protect your rights, we need to make restrictions that forbid anyone to deny you these rights or to ask you to surrender the rights. These restrictions translate to certain responsibilities for you if you distribute copies of the software, or if you modify it.
For example, if you distribute copies of such a program, whether gratis or for a fee, you must give the recipients all the rights that you have. You must make sure that they, too, receive or can get the source code. And you must show them these terms so they know their rights.
We protect your rights with two steps: (1) copyright the software, and (2) offer you this license which gives you legal permission to copy, distribute and/or modify the software.
Also, for each author's protection and ours, we want to make certain that everyone understands that there is no warranty for this free software. If the software is modified by someone else and passed on, we want its recipients to know that what they have is not the original, so that any problems introduced by others will not reflect on the original authors' reputations.
Finally, any free program is threatened constantly by software patents. We wish to avoid the danger that redistributors of a free program will individually obtain patent licenses, in effect making the program proprietary. To prevent this, we have made it clear that any patent must be licensed for everyone's free use or not licensed at all.
The precise terms and conditions for copying, distribution and modification follow.
TERMS AND CONDITIONS FOR COPYING, DISTRIBUTION AND MODIFICATION
0. This License applies to any program or other work which contains a notice placed by the copyright holder saying it may be distributed under the terms of this General Public License. The "Program", below, refers to any such program or work, and a "work based on the Program" means either the Program or any derivative work under copyright law: that is to say, a work containing the Program or a portion of it, either verbatim or with modifications and/or translated into another language. (Hereinafter, translation is included without limitation in the term "modification".) Each licensee is addressed as "you".
Activities other than copying, distribution and modification are not covered by this License; they are outside its scope. The act of running the Program is not restricted, and the output from the Program is covered only if its contents constitute a work based on the Program (independent of having been made by running the Program). Whether that is true depends on what the Program does.
1. You may copy and distribute verbatim copies of the Program's source code as you receive it, in any medium, provided that you conspicuously and appropriately publish on each copy an appropriate copyright notice and disclaimer of warranty; keep intact all the notices that refer to this License and to the absence of any warranty; and give any other recipients of the Program a copy of this License along with the Program.
You may charge a fee for the physical act of transferring a copy, and you may at your option offer warranty protection in exchange for a fee.
2. You may modify your copy or copies of the Program or any portion of it, thus forming a work based on the Program, and copy and distribute such modifications or work under the terms of Section 1 above, provided that you also meet all of these conditions:
- a) You must cause the modified files to carry prominent notices stating that you changed the files and the date of any change.
- b) You must cause any work that you distribute or publish, that in whole or in part contains or is derived from the Program or any part thereof, to be licensed as a whole at no charge to all third parties under the terms of this License.
- c) If the modified program normally reads commands interactively when run, you must cause it, when started running for such interactive use in the most ordinary way, to print or display an announcement including an appropriate copyright notice and a notice that there is no warranty (or else, saying that you provide a warranty) and that users may redistribute the program under these conditions, and telling the user how to view a copy of this License. (Exception: if the Program itself is interactive but does not normally print such an announcement, your work based on the Program is not required to print an announcement.)
These requirements apply to the modified work as a whole. If identifiable sections of that work are not derived from the Program, and can be reasonably considered independent and separate works in themselves, then this License, and its terms, do not apply to those sections when you distribute them as separate works. But when you distribute the same sections as part of a whole which is a work based on the Program, the distribution of the whole must be on the terms of this License, whose permissions for other licensees extend to the entire whole, and thus to each and every part regardless of who wrote it.
Thus, it is not the intent of this section to claim rights or contest your rights to work written entirely by you; rather, the intent is to exercise the right to control the distribution of derivative or collective works based on the Program.
In addition, mere aggregation of another work not based on the Program with the Program (or with a work based on the Program) on a volume of a storage or distribution medium does not bring the other work under the scope of this License.
3. You may copy and distribute the Program (or a work based on it, under Section 2) in object code or executable form under the terms of Sections 1 and 2 above provided that you also do one of the following:
- a) Accompany it with the complete corresponding machine-readable source code, which must be distributed under the terms of Sections 1 and 2 above on a medium customarily used for software interchange; or,
- b) Accompany it with a written offer, valid for at least three years, to give any third party, for a charge no more than your cost of physically performing source distribution, a complete machine-readable copy of the corresponding source code, to be distributed under the terms of Sections 1 and 2 above on a medium customarily used for software interchange; or,
- c) Accompany it with the information you received as to the offer to distribute corresponding source code. (This alternative is allowed only for noncommercial distribution and only if you received the program in object code or executable form with such an offer, in accord with Subsection b above.)
The source code for a work means the preferred form of the work for making modifications to it. For an executable work, complete source code means all the source code for all modules it contains, plus any associated interface definition files, plus the scripts used to control compilation and installation of the executable. However, as a special exception, the source code distributed need not include anything that is normally distributed (in either source or binary form) with the major components (compiler, kernel, and so on) of the operating system on which the executable runs, unless that component itself accompanies the executable.
If distribution of executable or object code is made by offering access to copy from a designated place, then offering equivalent access to copy the source code from the same place counts as distribution of the source code, even though third parties are not compelled to copy the source along with the object code.
4. You may not copy, modify, sublicense, or distribute the Program except as expressly provided under this License. Any attempt otherwise to copy, modify, sublicense or distribute the Program is void, and will automatically terminate your rights under this License. However, parties who have received copies, or rights, from you under this License will not have their licenses terminated so long as such parties remain in full compliance.
5. You are not required to accept this License, since you have not signed it. However, nothing else grants you permission to modify or distribute the Program or its derivative works. These actions are prohibited by law if you do not accept this License. Therefore, by modifying or distributing the Program (or any work based on the Program), you indicate your acceptance of this License to do so, and all its terms and conditions for copying, distributing or modifying the Program or works based on it.
6. Each time you redistribute the Program (or any work based on the Program), the recipient automatically receives a license from the original licensor to copy, distribute or modify the Program subject to these terms and conditions. You may not impose any further restrictions on the recipients' exercise of the rights granted herein. You are not responsible for enforcing compliance by third parties to this License.
7. If, as a consequence of a court judgment or allegation of patent infringement or for any other reason (not limited to patent issues), conditions are imposed on you (whether by court order, agreement or otherwise) that contradict the conditions of this License, they do not excuse you from the conditions of this License. If you cannot distribute so as to satisfy simultaneously your obligations under this License and any other pertinent obligations, then as a consequence you may not distribute the Program at all. For example, if a patent license would not permit royalty-free redistribution of the Program by all those who receive copies directly or indirectly through you, then the only way you could satisfy both it and this License would be to refrain entirely from distribution of the Program.
If any portion of this section is held invalid or unenforceable under any particular circumstance, the balance of the section is intended to apply and the section as a whole is intended to apply in other circumstances.
It is not the purpose of this section to induce you to infringe any patents or other property right claims or to contest validity of any such claims; this section has the sole purpose of protecting the integrity of the free software distribution system, which is implemented by public license practices. Many people have made generous contributions to the wide range of software distributed through that system in reliance on consistent application of that system; it is up to the author/donor to decide if he or she is willing to distribute software through any other system and a licensee cannot impose that choice.
This section is intended to make thoroughly clear what is believed to be a consequence of the rest of this License.
8. If the distribution and/or use of the Program is restricted in certain countries either by patents or by copyrighted interfaces, the original copyright holder who places the Program under this License may add an explicit geographical distribution limitation excluding those countries, so that distribution is permitted only in or among countries not thus excluded. In such case, this License incorporates the limitation as if written in the body of this License.
9. The Free Software Foundation may publish revised and/or new versions of the General Public License from time to time. Such new versions will be similar in spirit to the present version, but may differ in detail to address new problems or concerns.
Each version is given a distinguishing version number. If the Program specifies a version number of this License which applies to it and "any later version", you have the option of following the terms and conditions either of that version or of any later version published by the Free Software Foundation. If the Program does not specify a version number of this License, you may choose any version ever published by the Free Software Foundation.
10. If you wish to incorporate parts of the Program into other free programs whose distribution conditions are different, write to the author to ask for permission. For software which is copyrighted by the Free Software Foundation, write to the Free Software Foundation; we sometimes make exceptions for this. Our decision will be guided by the two goals of preserving the free status of all derivatives of our free software and of promoting the sharing and reuse of software generally.
NO WARRANTY
11. BECAUSE THE PROGRAM IS LICENSED FREE OF CHARGE, THERE IS NO WARRANTY FOR THE PROGRAM, TO THE EXTENT PERMITTED BY APPLICABLE LAW. EXCEPT WHEN OTHERWISE STATED IN WRITING THE COPYRIGHT HOLDERS AND/OR OTHER PARTIES PROVIDE THE PROGRAM "AS IS" WITHOUT WARRANTY OF ANY KIND, EITHER EXPRESSED OR IMPLIED, INCLUDING, BUT NOT LIMITED TO, THE IMPLIED WARRANTIES OF MERCHANTABILITY AND FITNESS FOR A PARTICULAR PURPOSE. THE ENTIRE RISK AS TO THE QUALITY AND PERFORMANCE OF THE PROGRAM IS WITH YOU. SHOULD THE PROGRAM PROVE DEFECTIVE, YOU ASSUME THE COST OF ALL NECESSARY SERVICING, REPAIR OR CORRECTION.
12. IN NO EVENT UNLESS REQUIRED BY APPLICABLE LAW OR AGREED TO IN WRITING WILL ANY COPYRIGHT HOLDER, OR ANY OTHER PARTY WHO MAY MODIFY AND/OR REDISTRIBUTE THE PROGRAM AS PERMITTED ABOVE, BE LIABLE TO YOU FOR DAMAGES, INCLUDING ANY GENERAL, SPECIAL, INCIDENTAL OR CONSEQUENTIAL DAMAGES ARISING OUT OF THE USE OR INABILITY TO USE THE PROGRAM (INCLUDING BUT NOT LIMITED TO LOSS OF DATA OR DATA BEING RENDERED INACCURATE OR LOSSES SUSTAINED BY YOU OR THIRD PARTIES OR A FAILURE OF THE PROGRAM TO OPERATE WITH ANY OTHER PROGRAMS), EVEN IF SUCH HOLDER OR OTHER PARTY HAS BEEN ADVISED OF THE POSSIBILITY OF SUCH DAMAGES.
END OF TERMS AND CONDITIONS
Converting Your Own Documents
PDF's

PDF's are useful for class handouts as well as e-books, and they're surprisingly easy to create. You have a couple of options in MS Windows:
- CutePDF Writer
- Open Office
CutePDF Writer
PostScript is a programming language used to send formatted pages to PostScript printers for printing. A PDF is a compressed version of a PostScript file. Any program that can print can create a PostScript file, which can then be converted to a PDF. CutePDF Writer does this in one step. When you install CutePDF Writer it is listed as one of your available printers, like this Print dialog for Windows shows:

If you select this as your printer when you print your document, nothing will be sent to your printer. Instead, you will be prompted to supply a filename and directory for a PDF. Anything you can print can become a PDF. Excel spreadsheets and charts, Word documents, Powerpoint slides, and anything else that you can print can be turned into PDF's.
You can download CutePDF Writer here:
http://www.cutepdf.com/products/cutepdf/writer.asp
CutePDF Writer is only available for Windows.
Open Office
Open Office is a free office suite that does everything that Microsoft Office does and one thing MS Office does not do: it can create PDFs from any document. From the File menu choose Export as PDF as shown here:

You'll see this dialog:

Notice that this dialog has several tabs worth of options for creating PDFs. While the PDFs created by CutePDF Writer are perfectly adequate for most uses, Open Office lets you add bookmarks and other features to your PDFs. Another advantage of Open Office is that it is available for Windows, Linux, and the Macintosh. It reads and writes MS Office files as well as its own formats.
You can download it for free here:
http://www.openoffice.org/
Creating PDFs On The Macintosh
Mac OS has PDF support built into its Print dialog. Any time you print anything on the Mac you have the option of making a PDF instead. You can read how to do this here:
http://www.apple.com/pro/tips/saving_as_pdf.html
Plain Text Files
Creating Plain Text Files From Word Processed Documents
If you have a document created in any word processor it should be simple to make a Plain Text document out of it. In MS Word there is a Save As... option in the File menu. The dialog that comes up lets you choose to save the document in the formats used by various word processors, plus there is an option for Text File. If you choose that you'll get this dialog:

Taking the default values for these options should give you a usable document. One option you may consider using is the checkbox for Insert line breaks. This puts a line break at the end of each line of text, which is how your document would be formatted if you hit the Enter key after typing in each line rather than just letting the text wrap. About the only time you'll ever want to do that is if you're working on a text file to submit to Project Gutenberg, because they put a line break at the end of each line. (Be sure and specify that you want to end lines with CR/LF too. That's another requirement Project Gutenberg has). If you want to create a file for the Sugar Read Etexts Activity or any other plain text reader you should not insert these line breaks. (In the case of Read Etexts if you did put in the breaks the Activity would reformat the file to remove them, and may produce a file that is less well formatted than what you would get if you left off the breaks to begin with).
Copyrights, Licenses And Fair Use

Copyrights And The Public Domain
"It does look as if Massachusetts were in a fair way to embarrass me with kindnesses this year. In the first place, a Massachusetts judge has just decided in open court that a Boston publisher may sell, not only his own property in a free and unfettered way, but also may as freely sell property which does not belong to him but to me; property which he has not bought and which I have not sold. Under this ruling I am now advertising that judge's homestead for sale, and, if I make as good a sum out of it as I expect, I shall go on and sell out the rest of his property."
Mark Twain, Letter of acceptance of membership to Concord Free Trade Club (March 28, 1885)
Copyrights give authors the exclusive right to determine how their works may be used, and they ensure that authors get compensated for their work. No serious person has ever suggested eliminating copyrights. Copyright protection does not last forever, though. At some point copyrights expire, and when they do the work goes into the public domain. At that point anyone can do anything they want with it.
It is the public domain that makes sites like Project Gutenberg and the Internet Archive possible. Most of the content they provide is in the public domain, and the rest is copyrighted but licensed in a way that allows free distribution.
The important question is just when do copyrights expire? The answer depends on what country you live in, and if you want to publish your work on the Internet, what country the server is in. The Internet Archive and Project Gutenberg both have servers in the United States. Project Gutenberg also has sister sites in Australia and Canada. Therefore it is important to understand the copyright laws of these countries. By "understand" I mean "know what you're up against, mostly." My grandfather, when watching me set up a VCR in his home, told me "You have to be a Philadelphia lawyer to figure that out!" I am not a lawyer, Philadelphia or otherwise, and nothing in this chapter should be taken as legal advice.
This is a picture of some of the older books that I own:

The books shown include titles from the 1920's, 1930's, and 1940's. How many of these books are old enough to be in the public domain? The answer may surprise you.
United States Copyright Law
"Reader, suppose you were an idiot. And suppose you were a member of Congress. But I repeat myself."
Mark Twain, from a draft manuscript (c.1881), quoted by Albert Bigelow Paine in Mark Twain: A Biography (1912).
For most of its history the United States has had reasonable copyright laws. According to the Project Gutenberg website the 1909 Copyright Act gave works a copyright term of 28 years. If the author was still living, he could apply for a renewal for another 28 years, otherwise the work would pass into the public domain. Since then the copyright term has been extended twice, first to 75 years and then to 95 years. The end result of this is that only works published before 1923 are definitely in the public domain in the United States. Other works might be in the public domain, but finding out if they are can be very difficult.
If the copyright term was still 56 years a lot of worthwhile books would be in the public domain and the vast majority of authors would not be affected. Very few books remain in print for 28 years, let alone 56 years. As a result of the latest copyright extension, there is a twenty year period where nothing new enters the public domain, and there is no guarantee that the same misanthropes who got the last extension won't try to get another one at the end of that period. I am hopeful, though. Maybe when it comes time to ask for another extension, enough of the public will understand just what has been stolen from them to make it difficult to do again.
Not everything published after 1922 is copyrighted. In fact, quite a bit of it is not. The trick is figuring out which books are in the public domain and being able to prove it.
There are several rules regarding what works published after 1922 are in the public domain. They are summarized in the Gutenberg Copyright How-To:
http://www.gutenberg.org/wiki/Gutenberg:Copyright_How-To
In practice, only two of the rules apply to a significant number of books. Rule 8 says that publications of the United States Government cannot be copyrighted. This is why you can get free e-books of the 9/11 Commission Report, the CIA World Factbook, etc.
Then there is Rule 6. I quote the Project Gutenberg website:
"Works published before 1964 needed to have their copyrights renewed in their 28th year, or they'd enter into the public domain. Some books originally published outside of the US by non-Americans are exempt from this requirement, under GATT. Works from before 1964 were automatically renewed if all of these apply:
- At least one author was a citizen or resident of a foreign country (outside the US) that's a party to the applicable copyright agreements. (Almost all countries are parties to these agreements.)
- The work was still under copyright in at least one author's "home country" at the time the GATT copyright agreement went into effect for that country (January 1, 1996 for most countries).
- The work was first published abroad, and not published in the United States until at least 30 days after its first publication abroad.
"If you can prove that one of the above does not apply, and if you can prove that copyright was not renewed, then the work is in the public domain. For US authors and publications, non-renewal is the hard part to demonstrate."
That last sentence says it all. Most copyrights, perhaps as many as 85%, are not renewed. Proving that they were not renewed is difficult. Far too many books end up as "orphan books" because it is either too difficult to prove that they are in the public domain or to track down the owners of the copyright. The first e-book I made, The Big Book Of Aviation For Boys, is a good example. It was printed in 1928. Only one edition was ever printed. The bulk of the book is reprinted articles from newspapers and a magazine called the Aero Digest. I can't imagine why anyone would have renewed the copyright on this book, but it would be difficult to prove that it was not renewed.
PG does have materials that have cleared Rule 6. Much of the science fiction in PG was originally published in magazines and never reprinted, or not reprinted in the same form. As an example, when Edward E. Smith originally wrote
Triplanetary it was a standalone novel published in a magazine as a serial. Later he rewrote parts of it to make it the first volume of the
Lensman series. This second version is copyrighted and still in print. The earlier version is available on PG.
The Stanford University website has a useful search for finding out if a copyright has been renewed and when. By itself it may not be enough to tell you if a book has fallen into the public domain, but at least it can keep you from wasting time on books that haven't:
http://collections.stanford.edu/copyrightrenewals/bin/search/simple
Using this database I found out that several books I thought were too obscure to be renewed in fact had been renewed. The database did not show my Big Book Of Aviation For Boys being renewed, and it did show several renewals for the same author, Joseph Lewis French, so it might be a safe book to donate to PG. One other observation on this database: I bought a fair number of books at a used book sale that I thought had "Rule 6" potential. After looking up those books and all the books from the thirties and forties that I already owned only seven looked like their copyrights had not been renewed. While it may be true that 85% of these copyrights are not renewed, if the book is good enough to end up at a used book sale (rather than a landfill) the odds of non-renewal go down considerably.
Even if it looks like copyright has not been renewed on a book you're still not out of the woods. Much of the material from my Boy's Aviation book was reprinted from other books, and I'd need to prove that all those sources were in the public domain before PG would accept it. I tried to submit another book, Orpheus, Myths Of The World by Padraic Colum, and had to deal with the fact that Padraic Colum did not become a U.S. citizen until 1945 and as a result I would have to prove that the book was not published abroad more than 30 days before it was published in the United States. The book is published by Macmillan and there is no reason to believe it was not published in the United States first, but how could you prove it? For that reason Project Gutenberg rejected it.
If you want to publish a public domain book on the Kindle Store they have the same requirements. I wanted to publish The Big Book of Boys Aviation on the Kindle Store and they asked for the original publication date for every article in the book, the full name of each author, plus the date each author died (and online resources they could use to verify my information). There is no way I could satisfy that requirement. I pointed out to them that they already sold reprints of that book by Kessenger Publishing, and that Kessenger had no rights to the book that I didn't have. I didn't expect this argument to sway them, but apparently it did, and they agreed to publish my e-book.
PG does have an official HOWTO for doing Rule 6 submissions, which you can find here:
http://copy.pglaf.org/rule6-new.txt
Australian Copyright Law
"I was sorry to have my name mentioned as one of the great authors, because they have a sad habit of dying off. Chaucer is dead, Spencer is dead, so is Milton, so is Shakespeare, and I’m not feeling so well myself."
Mark Twain
There is really only one thing worth knowing about Australian copyright law, which is that it is based not on publication date but on the date the author died. If an author died before 1956 and his books were published in his lifetime then his works are in the public domain. According to Wikipedia:
- Any work that was published in the lifetime of the author who died in 1956 or earlier, is out of copyright.
- Any work that was published in the lifetime of the author who died after 1956, will be out of copyright seventy (70) years after the author's death.
This works well for well-known authors, but would not help The Big Book Of Aviation For Boys much. That book has many authors, most obscure.
There are several resources for finding out when an author died. Wikipedia is fine for famous authors. For the less famous you might try looking up the book in the Open Library:
http://openlibrary.org
This is a site operated by the Internet Archive that plans to create a web page for every book ever printed. I contributed to the entry for my Boy's Aviation book here:
http://openlibrary.org/works/OL6729449W/The_big_aviation_book_for_boys
It shows me that the editor of the book, Joseph Lewis French, died in 1936. It also tells me that Robert Benchley died in 1945 and that Thorne Smith died in 1934. Project Gutenberg Australia has all of my Thorne Smith novels already, but only My Ten Years In A Quandary for Benchley. I have some of Benchley's books, plus Experiment In Autobiography from H.G. Wells, which PGA doesn't have yet.
The requirement to publish within the life of the author might prevent me from making some donations, For instance, Chips Off The Old Benchley was published after Benchley's death, and my copy of The Autobiography of Will Rogers was published after Rogers' death.
Canadian Copyright Law
Canadian copyrights expire 50 years after the end of the calendar year when the author dies. It does not make any difference whether the work was published in the author's lifetime. Thus Canada will be a suitable home for Chips Off The Old Benchley and The Autobiography of Will Rogers, (with the introductions removed). As I write this I have received copyright clearance for all three of the Robert Benchley books I own from Project Gutenberg Canada, and I am in the process of preparing scans and OCR'd text files for them for Distributed Proofreaders Canada. Project Gutenberg Canada already has Experiment in Autobiography.
Creative Commons Licenses
There are two factors that determine what you can do with a book: whether the book is copyrighted, and what license the book has. By default all copyrights have an "All Rights Reserved" license. This means that when you buy a book you can read it, but you can't copy it, make a play or a movie based on it, etc. You can give the book away, loan it out, or sell it and that's about it. This kind of license is so common you might be surprised to learn that other kinds of licenses exist.
creativecommons.org has licenses that anyone can apply to his work at no cost. These licenses give rights to the readers of your book that they would not normally have. There are several licenses available and they let you control just what rights you allow to your readers. For instance, you can allow others to freely distribute your work and make derivative works (like translations) as long as those works are non-commercial.
Why would you want to do this? Well, if you're hoping to write something that will be accepted by Oprah's Book Club you wouldn't and I wouldn't either. But not every book has commercial possibilities, and there are some books that are needed and you'd be happy if you could just break even publishing them. Creative Commons licenses are good for those kind of books. If you write a book using one of the CC licenses you can publish it as an e-book for free on the Internet Archive website.
One author, Cory Doctorow, has actually used Creative Commons licenses on his books and still managed to get them published by a regular publisher. This means that you can read his books for free as e-books but his publisher is the only one who can sell you a printed copy. You can read about his experiences with these licenses at his website:
http://craphound.com/
You can learn more about the licenses that are available at http://creativecommons.org/about/licenses.
Fair Use
"Fair Use" is defined as the rights you have to a published work that you don't have to ask the publisher's permission to get. The usual examples include quoting short passages of a work in a book review, plus making a parody of a work. There is no hard and fast rule as to how much of a work you can quote before it stops being Fair Use, and not all parodies are protected. The usual criteria is if your use of a work affects the value of the original work in the marketplace.
There are several page images from the Junior Illustrated Library book The Arabian Nights in this book. I found out after I had gone through the work of making an e-book out of it that the book is still in print! The few page images from that book I've included in this book should qualify as Fair Use. These pages are not in any way a substitute for buying the book, and the amazon.com website actually has more page images for this book than I use. Distributing my e-book to anyone else would not be Fair Use. My own personal use should be OK, since I still possess the original book.
I have heard from teachers who want to make e-books out of the textbooks they use in class, often to help children with reading problems (since some kinds of e-books support text to speech). Is this Fair Use? From what I've read about it, it is probably dangerous to assume that it is. It would be safer to try and get permission from the publisher.
The U.S. Copyright Office has an article on Fair Use here:
http://www.copyright.gov/fls/fl102.html
Note that while they do mention non-profit and educational uses as possibilities, the example they give is short excerpts, not the whole book.
Credits

All chapters copyright of the authors (see below). Unless otherwise stated all chapters in this manual licensed with GNU General Public License version 2
This documentation is free documentation; you can redistribute it and/or modify it under the terms of the GNU General Public License as published by the Free Software Foundation; either version 2 of the License, or (at your option) any later version.
This documentation is distributed in the hope that it will be useful, but WITHOUT ANY WARRANTY; without even the implied warranty of MERCHANTABILITY or FITNESS FOR A PARTICULAR PURPOSE. See the GNU General Public License for more details.
You should have received a copy of the GNU General Public License along with this documentation; if not, write to the Free Software Foundation, Inc., 51 Franklin Street, Fifth Floor, Boston, MA 02110-1301, USA.
Authors
A BOOKI OF YOUR OWN
© James Simmons 2010
ABOUT THE AUTHORS
© James Simmons 2010
Modifications:
Christopher garcia 2010
Oceana Fields 2010
Rebecca Malamud 2010
BEFORE WE BEGIN
© James Simmons 2010
Modifications:
Christopher garcia 2010
Oceana Fields 2010
Rebecca Malamud 2010
BOOKI
© James Simmons 2010
Modifications:
Christopher garcia 2010
Oceana Fields 2010
Rebecca Malamud 2010
CONVERTING YOUR OWN DOCUMENTS
© James Simmons 2010
Modifications:
Christopher garcia 2010
Oceana Fields 2010
Rebecca Malamud 2010
GETTING A RULE 6 COPYRIGHT CLEARANCE
© James Simmons 2010
Modifications:
Christopher garcia 2010
Oceana Fields 2010
COPYRIGHTS, LICENSES, AND FAIR USE
© James Simmons 2010
Modifications:
Christopher garcia 2010
Oceana Fields 2010
Rebecca Malamud 2010
CREDITS
© adam hyde 2006, 2007
Modifications:
James Simmons 2010
Oceana Fields 2010
DONATING E-BOOKS TO THE INTERNET ARCHIVE
© James Simmons 2010
Modifications:
Christopher garcia 2010
Oceana Fields 2010
DONATING TEXTS TO PROJECT GUTENBERG
© James Simmons 2010
Modifications:
Christopher garcia 2010
Oceana Fields 2010
Rebecca Malamud 2010
FREE E-BOOK FORMATS
© James Simmons 2010
Modifications:
Christopher garcia 2010
Oceana Fields 2010
GEN COLLECTION INTERFACE GCI
© Rebecca Malamud 2010
Modifications:
Christopher garcia 2010
James Simmons 2010
Oceana Fields 2010
READING AND LEADING WITH ONE LAPTOP PER CHILD
© James Simmons 2006, 2007
Modifications:
Christopher garcia 2010
James Simmons 2010
John Curwood 2010
Oceana Fields 2010
Rebecca Malamud 2010
MAKING A BOOK SCANNER
© James Simmons 2010
Modifications:
Christopher garcia 2010
Oceana Fields 2010
MAKING CBZ'S
© James Simmons 2010
Modifications:
Christopher garcia 2010
Oceana Fields 2010
MAKING DJVU'S
© James Simmons 2010
Modifications:
Christopher garcia 2010
Oceana Fields 2010
Rebecca Malamud 2010
MAKING EPUBS
© James Simmons 2010
Modifications:
Christopher garcia 2010
Oceana Fields 2010
MAKING PDF'S
© James Simmons 2010
Modifications:
Christopher garcia 2010
Oceana Fields 2010
Rebecca Malamud 2010
MAKING PLAIN TEXT FILES
© James Simmons 2010
Modifications:
Christopher garcia 2010
Oceana Fields 2010
Rebecca Malamud 2010
THE PATHAGAR BOOK SERVER
© James Simmons 2010
Modifications:
Christopher garcia 2010
Oceana Fields 2010
INTRODUCTION
© James Simmons 2010
Modifications:
Christopher garcia 2010
Oceana Fields 2010
SCANNING BOOK PAGES
© James Simmons 2010
Modifications:
Christopher garcia 2010
Oceana Fields 2010
Rebecca Malamud 2010
SOURCES FOR FREE E-BOOKS
© James Simmons 2010
Modifications:
Christopher garcia 2010
Oceana Fields 2010
Rebecca Malamud 2010
SUGAR ACTIVITIES FOR FINDING E-BOOKS
© James Simmons 2010
Modifications:
Christopher garcia 2010
John Curwood 2010
Oceana Fields 2010
Rebecca Malamud 2010
THE READ ACTIVITY
© James Simmons 2010
Modifications:
Christopher garcia 2010
Oceana Fields 2010
Rebecca Malamud 2010
THE READ ETEXTS ACTIVITY
© James Simmons 2010
Modifications:
Christopher garcia 2010
Oceana Fields 2010
Rebecca Malamud 2010
THE VIEW SLIDES ACTIVITY
© James Simmons 2010
Modifications:
Christopher garcia 2010
Oceana Fields 2010

Free manuals for free software
General Public License
Version 2, June 1991
Copyright (C) 1989, 1991 Free Software Foundation, Inc.
51 Franklin Street, Fifth Floor, Boston, MA 02110-1301, USA
Everyone is permitted to copy and distribute verbatim copies
of this license document, but changing it is not allowed.
Preamble
The licenses for most software are designed to take away your freedom to share and change it. By contrast, the GNU General Public License is intended to guarantee your freedom to share and change free software--to make sure the software is free for all its users. This General Public License applies to most of the Free Software Foundation's software and to any other program whose authors commit to using it. (Some other Free Software Foundation software is covered by the GNU Lesser General Public License instead.) You can apply it to your programs, too.
When we speak of free software, we are referring to freedom, not price. Our General Public Licenses are designed to make sure that you have the freedom to distribute copies of free software (and charge for this service if you wish), that you receive source code or can get it if you want it, that you can change the software or use pieces of it in new free programs; and that you know you can do these things.
To protect your rights, we need to make restrictions that forbid anyone to deny you these rights or to ask you to surrender the rights. These restrictions translate to certain responsibilities for you if you distribute copies of the software, or if you modify it.
For example, if you distribute copies of such a program, whether gratis or for a fee, you must give the recipients all the rights that you have. You must make sure that they, too, receive or can get the source code. And you must show them these terms so they know their rights.
We protect your rights with two steps: (1) copyright the software, and (2) offer you this license which gives you legal permission to copy, distribute and/or modify the software.
Also, for each author's protection and ours, we want to make certain that everyone understands that there is no warranty for this free software. If the software is modified by someone else and passed on, we want its recipients to know that what they have is not the original, so that any problems introduced by others will not reflect on the original authors' reputations.
Finally, any free program is threatened constantly by software patents. We wish to avoid the danger that redistributors of a free program will individually obtain patent licenses, in effect making the program proprietary. To prevent this, we have made it clear that any patent must be licensed for everyone's free use or not licensed at all.
The precise terms and conditions for copying, distribution and modification follow.
TERMS AND CONDITIONS FOR COPYING, DISTRIBUTION AND MODIFICATION
0. This License applies to any program or other work which contains a notice placed by the copyright holder saying it may be distributed under the terms of this General Public License. The "Program", below, refers to any such program or work, and a "work based on the Program" means either the Program or any derivative work under copyright law: that is to say, a work containing the Program or a portion of it, either verbatim or with modifications and/or translated into another language. (Hereinafter, translation is included without limitation in the term "modification".) Each licensee is addressed as "you".
Activities other than copying, distribution and modification are not covered by this License; they are outside its scope. The act of running the Program is not restricted, and the output from the Program is covered only if its contents constitute a work based on the Program (independent of having been made by running the Program). Whether that is true depends on what the Program does.
1. You may copy and distribute verbatim copies of the Program's source code as you receive it, in any medium, provided that you conspicuously and appropriately publish on each copy an appropriate copyright notice and disclaimer of warranty; keep intact all the notices that refer to this License and to the absence of any warranty; and give any other recipients of the Program a copy of this License along with the Program.
You may charge a fee for the physical act of transferring a copy, and you may at your option offer warranty protection in exchange for a fee.
2. You may modify your copy or copies of the Program or any portion of it, thus forming a work based on the Program, and copy and distribute such modifications or work under the terms of Section 1 above, provided that you also meet all of these conditions:
- a) You must cause the modified files to carry prominent notices stating that you changed the files and the date of any change.
- b) You must cause any work that you distribute or publish, that in whole or in part contains or is derived from the Program or any part thereof, to be licensed as a whole at no charge to all third parties under the terms of this License.
- c) If the modified program normally reads commands interactively when run, you must cause it, when started running for such interactive use in the most ordinary way, to print or display an announcement including an appropriate copyright notice and a notice that there is no warranty (or else, saying that you provide a warranty) and that users may redistribute the program under these conditions, and telling the user how to view a copy of this License. (Exception: if the Program itself is interactive but does not normally print such an announcement, your work based on the Program is not required to print an announcement.)
These requirements apply to the modified work as a whole. If identifiable sections of that work are not derived from the Program, and can be reasonably considered independent and separate works in themselves, then this License, and its terms, do not apply to those sections when you distribute them as separate works. But when you distribute the same sections as part of a whole which is a work based on the Program, the distribution of the whole must be on the terms of this License, whose permissions for other licensees extend to the entire whole, and thus to each and every part regardless of who wrote it.
Thus, it is not the intent of this section to claim rights or contest your rights to work written entirely by you; rather, the intent is to exercise the right to control the distribution of derivative or collective works based on the Program.
In addition, mere aggregation of another work not based on the Program with the Program (or with a work based on the Program) on a volume of a storage or distribution medium does not bring the other work under the scope of this License.
3. You may copy and distribute the Program (or a work based on it, under Section 2) in object code or executable form under the terms of Sections 1 and 2 above provided that you also do one of the following:
- a) Accompany it with the complete corresponding machine-readable source code, which must be distributed under the terms of Sections 1 and 2 above on a medium customarily used for software interchange; or,
- b) Accompany it with a written offer, valid for at least three years, to give any third party, for a charge no more than your cost of physically performing source distribution, a complete machine-readable copy of the corresponding source code, to be distributed under the terms of Sections 1 and 2 above on a medium customarily used for software interchange; or,
- c) Accompany it with the information you received as to the offer to distribute corresponding source code. (This alternative is allowed only for noncommercial distribution and only if you received the program in object code or executable form with such an offer, in accord with Subsection b above.)
The source code for a work means the preferred form of the work for making modifications to it. For an executable work, complete source code means all the source code for all modules it contains, plus any associated interface definition files, plus the scripts used to control compilation and installation of the executable. However, as a special exception, the source code distributed need not include anything that is normally distributed (in either source or binary form) with the major components (compiler, kernel, and so on) of the operating system on which the executable runs, unless that component itself accompanies the executable.
If distribution of executable or object code is made by offering access to copy from a designated place, then offering equivalent access to copy the source code from the same place counts as distribution of the source code, even though third parties are not compelled to copy the source along with the object code.
4. You may not copy, modify, sublicense, or distribute the Program except as expressly provided under this License. Any attempt otherwise to copy, modify, sublicense or distribute the Program is void, and will automatically terminate your rights under this License. However, parties who have received copies, or rights, from you under this License will not have their licenses terminated so long as such parties remain in full compliance.
5. You are not required to accept this License, since you have not signed it. However, nothing else grants you permission to modify or distribute the Program or its derivative works. These actions are prohibited by law if you do not accept this License. Therefore, by modifying or distributing the Program (or any work based on the Program), you indicate your acceptance of this License to do so, and all its terms and conditions for copying, distributing or modifying the Program or works based on it.
6. Each time you redistribute the Program (or any work based on the Program), the recipient automatically receives a license from the original licensor to copy, distribute or modify the Program subject to these terms and conditions. You may not impose any further restrictions on the recipients' exercise of the rights granted herein. You are not responsible for enforcing compliance by third parties to this License.
7. If, as a consequence of a court judgment or allegation of patent infringement or for any other reason (not limited to patent issues), conditions are imposed on you (whether by court order, agreement or otherwise) that contradict the conditions of this License, they do not excuse you from the conditions of this License. If you cannot distribute so as to satisfy simultaneously your obligations under this License and any other pertinent obligations, then as a consequence you may not distribute the Program at all. For example, if a patent license would not permit royalty-free redistribution of the Program by all those who receive copies directly or indirectly through you, then the only way you could satisfy both it and this License would be to refrain entirely from distribution of the Program.
If any portion of this section is held invalid or unenforceable under any particular circumstance, the balance of the section is intended to apply and the section as a whole is intended to apply in other circumstances.
It is not the purpose of this section to induce you to infringe any patents or other property right claims or to contest validity of any such claims; this section has the sole purpose of protecting the integrity of the free software distribution system, which is implemented by public license practices. Many people have made generous contributions to the wide range of software distributed through that system in reliance on consistent application of that system; it is up to the author/donor to decide if he or she is willing to distribute software through any other system and a licensee cannot impose that choice.
This section is intended to make thoroughly clear what is believed to be a consequence of the rest of this License.
8. If the distribution and/or use of the Program is restricted in certain countries either by patents or by copyrighted interfaces, the original copyright holder who places the Program under this License may add an explicit geographical distribution limitation excluding those countries, so that distribution is permitted only in or among countries not thus excluded. In such case, this License incorporates the limitation as if written in the body of this License.
9. The Free Software Foundation may publish revised and/or new versions of the General Public License from time to time. Such new versions will be similar in spirit to the present version, but may differ in detail to address new problems or concerns.
Each version is given a distinguishing version number. If the Program specifies a version number of this License which applies to it and "any later version", you have the option of following the terms and conditions either of that version or of any later version published by the Free Software Foundation. If the Program does not specify a version number of this License, you may choose any version ever published by the Free Software Foundation.
10. If you wish to incorporate parts of the Program into other free programs whose distribution conditions are different, write to the author to ask for permission. For software which is copyrighted by the Free Software Foundation, write to the Free Software Foundation; we sometimes make exceptions for this. Our decision will be guided by the two goals of preserving the free status of all derivatives of our free software and of promoting the sharing and reuse of software generally.
NO WARRANTY
11. BECAUSE THE PROGRAM IS LICENSED FREE OF CHARGE, THERE IS NO WARRANTY FOR THE PROGRAM, TO THE EXTENT PERMITTED BY APPLICABLE LAW. EXCEPT WHEN OTHERWISE STATED IN WRITING THE COPYRIGHT HOLDERS AND/OR OTHER PARTIES PROVIDE THE PROGRAM "AS IS" WITHOUT WARRANTY OF ANY KIND, EITHER EXPRESSED OR IMPLIED, INCLUDING, BUT NOT LIMITED TO, THE IMPLIED WARRANTIES OF MERCHANTABILITY AND FITNESS FOR A PARTICULAR PURPOSE. THE ENTIRE RISK AS TO THE QUALITY AND PERFORMANCE OF THE PROGRAM IS WITH YOU. SHOULD THE PROGRAM PROVE DEFECTIVE, YOU ASSUME THE COST OF ALL NECESSARY SERVICING, REPAIR OR CORRECTION.
12. IN NO EVENT UNLESS REQUIRED BY APPLICABLE LAW OR AGREED TO IN WRITING WILL ANY COPYRIGHT HOLDER, OR ANY OTHER PARTY WHO MAY MODIFY AND/OR REDISTRIBUTE THE PROGRAM AS PERMITTED ABOVE, BE LIABLE TO YOU FOR DAMAGES, INCLUDING ANY GENERAL, SPECIAL, INCIDENTAL OR CONSEQUENTIAL DAMAGES ARISING OUT OF THE USE OR INABILITY TO USE THE PROGRAM (INCLUDING BUT NOT LIMITED TO LOSS OF DATA OR DATA BEING RENDERED INACCURATE OR LOSSES SUSTAINED BY YOU OR THIRD PARTIES OR A FAILURE OF THE PROGRAM TO OPERATE WITH ANY OTHER PROGRAMS), EVEN IF SUCH HOLDER OR OTHER PARTY HAS BEEN ADVISED OF THE POSSIBILITY OF SUCH DAMAGES.
END OF TERMS AND CONDITIONS
Donating E-Books To The Internet Archive

The Internet Archive is attempting to create an electronic version of the Library of Alexandria, preserving the public domain including books, audio recordings, movies, and even websites. Most of the books on the site they scanned in themselves, using custom built book scanning machines called Scribe workstations. The easiest way to donate an e-book to their collection would be to send them the actual book and let them do the scanning. You might not be able to get the book back afterwords, though. In addition to scanning public domain texts they also do copyrighted titles. These are not available for download by the general public, but they can be gotten in a format known as DAISY (used to support text to speech) if you are "print disabled". You need to be vetted by the Library of Congress to get access to these copyrighted works.
If you prefer you can scan your own book and submit it. I have gone through this process with several books, so I can tell you what to expect if you go this route.
The first thing you need to do is go to the Internet Archive website and apply for a "virtual library card", by clicking on the Patron Info tab and following the instructions. This is a different kind of library card, because you don't need one to download books from the site but you do need one to donate books.
Once you've gotten your card and logged into the site you can donate materials using the Upload/Share button in the upper right corner of the site. You will be donating your book to the Community Texts collection. Other collections are possible, but unless you represent a library you won't need to have your own collection.
Generally your text donations will be one of two possibilities, although other options are available. The possibilities are:
Whichever one you have, you should pay attention to how you name the file if you want it to be downloadable by Get Books or Get Internet Archive Books. You want to name your PDF the name you want to use as your identifier on the site, but without spaces. For example:
- You want to use the title "Big Aviation Book For Boys" as your title on IA.
- IA will create an identifier for your entry named "BigAviationBookForBoys".
- Your content will be posted in a sub directory named "BigAviationBookForBoys".
- If you want your items to be downloadable by Get Internet Archive Books you'll want to follow the standard used internally by IA and name your PDF "BigAviationBookForBoys.pdf".
On one of my submissions I didn't do that. I named my file "AncientMannersOriginalPages.pdf", so all the file names that were created were based on that file name. I was able to rename most of them afterwords, but not the EPUB file. As a result you can't download that EPUB with Get Internet Archive Books.
When you upload your submission the website will run a derive job which will convert your PDF into several other formats:
Index of /17/items/BigAviationBookForBoys/
BigAviationBookForBoys.djvu               4036000
BigAviationBookForBoys.gif                 319668
BigAviationBookForBoys.pdf              182866779
BigAviationBookForBoys_abbyy.             6944391
BigAviationBookForBoys_djvu.txt            456551
BigAviationBookForBoys_djvu.xml           4319378
BigAviationBookForBoys_files.xml             3235
BigAviationBookForBoys_jp2.zip           83198619
BigAviationBookForBoys_meta.xml              1473
BigAviationBookForBoys_scandata.xml         96124
BigAviationBookForBoys_text.pdf          29897117
BigAviationBookForBoys.pdf is my original submission, and all the others were derived. You can ignore the .xml files. The website has its own uses for these, but they are not something you are likely to want to download. The rest of the files are:
- BigAviationBookForBoys.djvu: A DjVu version of the book. This e-book is only 3.8 megabytes yet it looks as good as my original 174 megabyte PDF!
- BigAviationBookForBoys.gif: An animated GIF file that shows sample pages from the book and is shown on the web page for the book.
- BigAviationBookForBoys.pdf: My original monster PDF.
- BigAviationBookForBoys_abbyy.gz: A zipped up XML file created by or for ABBYY Fine Reader which you can ignore.
- BigAviationBookForBoys_djvu.txt: A text file created by ABBYY Fine Reader out of the PDF. With a little proofreading this could be used as the basis for a Project Gutenberg E-text.
- BigAviationBookForBoys_jp2.zip: A zip archive containing page images extracted from your PDF and saved in the JPEG2000 format. You're not likely to use this for your own submissions, but if you wanted to do a Project Gutenberg submission of a text in the Internet Archive this might be helpful.
- BigAviationBookForBoys_text.pdf: The PDF that the Internet Archive created from my original 174 megabyte monster. 28.5 megabytes -- quite an improvement! The word text in the name refers to the layer of OCR'd text in the PDF that makes it searchable and supports copying text to the clipboard.
In addition to these there is an EPUB file that you can download from the main page. It looks like this:

If you're a glass half-empty kind of person you'll note that the EPUB needs a lot of proofreading before you could really give it to anyone. If you're a glass half-full you'll note that 90% of the text is right and the program that generated the EPUB has done a great job with the illustrations. It has found them, cropped and resized them, and placed them in the EPUB nearly where you'd like for them to be. You can use this EPUB as the basis for a hand-crafted version and save yourself some work.
The first thing you're going to want to do after your book has "derived" is rename BigAviationBookForBoys.pdf to BigAviationBookForBoysLarge.pdf and rename BigAviationBookForBoys_text.pdf to BigAviationBookForBoys.pdf. The Get Internet Archive Books Activity will download the BigAviationBookForBoys.pdf file when you specify that you want to download a PDF, so it's important that that name points to the smaller file.
It sometimes happens that the derive job fails. You'll know this because a day later your original posting is the only file available for download on the page. There are only two ways to deal with this that I know of. The first is to post in the Community Texts forum on the website. As it happens the first two books I donated to the Internet Archive did not derive successfully. My post on the forum was never answered. The second thing I tried was to send an email to info@archive.org. I didn't get immediate action, but one of the staff did rerun the derive job for both books and both were processed successfully.
In the case of the two books where the "derive" job did not run the first time I was uploading the PDF from a Linux box and on Linux the normal "Share" button does not work. You need to use an alternate method of uploading texts that does not use Flash in the web browser. For my other books I used Internet Explorer on MS Windows with the normal Flash-using "Share" button. For these books the "derive" jobs ran just fine. For this reason, if you are a Linux user you may find it worthwhile to use a Windows box or a Macintosh to upload your donations to the Internet Archive.
EPUBs and MOBIs
When you look at the list of derived files you won't see any files with the suffix of .mobi or .epub. Yet the Internet Archive does support downloading books in those formats, and you may well want to replace the automatically generated MOBI and EPUB files with versions that you have corrected and improved by hand. I wanted to do this with my own book, Make Your Own Sugar Activities! If you can't see files named .epub and .mobi in the file list, how is it possible to delete the automatically generated versions and replace them with your own?
It turns out that the EPUB and MOBI versions are not generated as part of the "derive" job. Instead, they are generated on the fly when you click on the download link. If the program that generates the EPUB or MOBI sees that a file with the correct name has been uploaded to the server it will give that file to the person doing the download instead of generating one.
Here is the file list for Ancient Manners, another book where I donated both a PDF and hand crafted EPUB and MOBI versions:
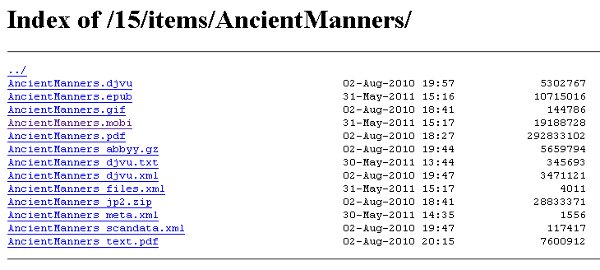
As you can see, on May 31st I uploaded my EPUB and MOBI, making sure that the filename was consistent with the PDF I uploaded originally. As a result of this anyone who requests an EPUB or Kindle version will get my beautifully handcrafted version, not the generated version.
You can only update books that you have created the entries for yourself, so you might wonder what happens if you use Booki to create a corrected EPUB of a book you did not donate. The answer so far is that you'll need to submit the corrected EPUB as a brand new book. There is no way to replace the uncorrected version in this case.
It makes a lot of sense to handcraft EPUBs and MOBIs for the books you donate to the Internet Archive. There are books like The Big Book Of Aviation For Boys that should be in the public domain (because there is no evidence that its copyright was renewed), but which Project Gutenberg would not accept because they felt that the copyright status was still in doubt. The Internet Archive is a good home for books like that.
If you do donate corrected EPUBs, make sure you change the description of your book to call attention to it.
Examples
When considering how you will create your submission to the Internet Archive you might find it useful to look at my submissions first. For reasons I will not attempt to explain my user id on the Internet Archive website is nicestep. If you enter that in the Search box on the website it will list out all my donations. Some of these donations were done twice. The first version was done using manual cropping and clean up, and the second was done with Scan Tailor. Some of my more recent submissions were only done with Scan Tailor.
It is a natural impulse when seeing a beautifully crafted e-book like Abroad to want to try and do something just as well. There's nothing wrong with wanting this, but getting results like that is not easy. You need well-lit pages when taking the photos and lots and lots of patience. Your first attempts will probably look worse than what you get with Scan Tailor, and will be a great deal more work. Not every book is worth that kind of effort, and not every book will benefit from that effort.
The books Thirteen Women and Out Of This World are not masterpieces of the book maker's art. They were cheaply made and showing signs of wear. The e-books I made of them using Scan Tailor look better than the originals.
My newer submissions are in the public domain because of Rule 6, at least as far as I am able to determine. IA does not require copyright clearance before posting, but they will remove copyrighted material from the index when they find it. They do distribute copyrighted works in DAISY format to qualified persons, so even if your donation turns out to not be in the public domain it is not necessarily lost. I look up my submissions in the Stanford copyright renewal database to verify that they are eligible.
The Internet Archive And The Nook Store
After I had published several books on the Kindle Store I decided to check out the Nook Store, only to find that most of the books I had donated to the Internet Archive had already found their way to the Nook Store. Barnes and Noble had taken the automatically generated, unproofed EPUBs from the Internet Archive and was offering them as free books in the Nook Store. I can't figure out why they took some and not others. There definitely is a human element involved, although nobody is correcting the texts.
Another outfit called Kessenger Publishing has taken Image Container PDFs from the Internet Archive and will create paperback books on demand with them. Both Barnes and Noble and Amazon sell these books, and a couple of them might be based on page images I made. These reprinted books are not cheap either!
None of this is illegal. I only mention it so you'll know that most of the "free" books for the Nook and Kindle are free on the XO laptop as well, and you don't need to have a credit card to get them!
Donating Texts To Project Gutenberg

If I was to sum up my impressions of the Internet Archive versus Project Gutenberg I would have to say that the Internet Archive focuses more on preserving as many books as possible, whereas Project Gutenberg is more focused on quality. Not only does PG require extensive proofreading for their texts, they also require a copyright clearance before they will even consider accepting a book. It is much less work to create a submission to the Internet Archive than it is to submit a text to Project Gutenberg. If you wanted to donate the same book to both organizations when your Image Container PDF is ready to submit to the Internet Archive the work of creating a text for Project Gutenberg would have only just begun.
Copyright Clearance
The first thing you need to do to create a submission to Project Gutenberg is to get a copyright clearance for the book by submitting a TP & V to the website using a form on the site. TP & V refers to the Title Page and Verso of your book. You'll need to scan both and submit the image files. Either one or the other should show a publication date before 1923 (unless you think you can get a Rule 6 clearance because the copyright was not renewed). Here is a title page for a book that I bought recently:

Here is the Verso, which is just the back of the Title Page. Both give a publication date of 1916.

I bought this book in case my first submission was rejected. Happily it wasn't, so I am able to avoid proofreading a geography textbook from 1916. The text I did submit is an English translation of the Pierre Louys novel Ancient Manners published in Paris as a limited edition for subscribers in 1906. Project Gutenberg already had the novel in French under the title Aphrodite, but did not yet have an English translation.
My TP & V for Ancient Manners did not show a publication date, but the Open Library website gave a publication date of 1906. The woman who processed my request told me that the Open Library website was not a good enough authority for this purpose, but she had checked the Library of Congress website and had concluded that 1906 was a plausible publication date for the book.
When you submit a book to PG that was published after 1922 but did not have its copyright renewed you must follow the procedures in the Rule 6 HOWTO:
http://copy.pglaf.org/rule6-new.txt
If your submission is cleared, the email you get from Project Gutenberg should look like this:
Project Gutenberg copyright clearance submission
automated status update notification.

Title:  Ancient Manners
Author1: Pierre Louys
Status:  Cleared OK
Clearance OK key=20100611081931louys
You're going to need to use the clearance key (shown in bold above) to submit your book.
The next step is to do OCR on the page images you created for your books, which will create a separate text file for each page. If you want to do all the work yourself use the proofer.py utility from the chapter on creating text files to proof one page at a time before combining them. Format the text page as best you can and run gutcheck, jeebies, and a spell checker (like the one built into guiguts) on the text. Make the file as error-free as you can before submitting it to PG. PG has volunteers known as whitewashers (after the best known passage in Tom Sawyer) who check over submitted texts. The first thing they'll do is run gutcheck, jeebies, and gutspell on your file. If these utilities show lots of errors they won't even look at your submission, so be considerate of their time and run these tests yourself.
Creating a submission to PG can be a lot of work, but if you want the donation to happen as quickly as possible its the only way. If you aren't in a hurry you can donate page images to Distributed Proofreaders instead.
Distributed Proofreaders
To meet the standards of Project Gutenberg a Plain Text file will need a lot of proofreading, preferably by more than one person. Distributed Proofreaders is a website where hundreds of volunteers proofread and correct individual text pages by comparing the text to an image file showing the page it corresponds to. There are several "rounds" of proofreading, and when those are finished a Project Manager combines the individual pages, does some final checks, and adds the current Project Gutenberg license text. It may be offered to DP volunteers for "Smooth Reading", where the volunteer reads the book for pleasure and identifies any problems he spots. It then gets submitted to Project Gutenberg. The Distributed Proofreaders site is at:
http://www.pgdp.net/c/
You don't need to submit your book to DP to get the book submitted to Project Gutenberg, but I think it's a good idea. As a computer programmer I know all too well that it is difficult to find flaws in your own work, and much easier to spot flaws in the work of others. As a practical matter, it isn't really necessary to remove the beam from your own eye before you look for motes in other people's eyes. If we all check each other's eyes everything will ultimately get cleaned out.
To submit your work to DP you'll need a copyright clearance from Project Gutenberg first. When you get that contact the DP website using the email address from the Content Provider's FAQ:
http://www.pgdp.net/c/faq/cp.php
You need to let them know your intention to submit a text for proofreading. Provide the copyright clearance information you got from Project Gutenberg in the email.
Once you have that, prepare individual text files corresponding to the page images in your book. DP wants blank pages to be included in the page images, starting from the inside of the front book cover and continuing to the inside of the back cover. The text files should have MS-DOS style line endings, which means that every line of text ends with two characters, called a carriage return and a line feed, not just a line feed. You can verify that your text files have the correct line endings by trying to edit them with Notepad in Windows. If the file doesn't have the right kind of line ending Notepad will show the file as having no line endings at all and funny characters where the line endings should be. If you find yourself with text files like this, one way to fix them is to load them into Word Pad and save them back out again. Word Pad can handle Unix-style line endings and will change them to MS-DOS style when you save.
If you're using Linux a less labor-intensive way of doing the line ending conversion is to use the unix2dos command:
unix2dos *.txt
The page images should be in PNG or JPEG format and should be 1000 pixels wide. You can convert TIFFs to JPEG's using Image Magick's mogrify command like this:
mogrify -resize 1000 -monochrome -format jpeg *.tif
Both images and text files should be named as three digit numbers followed by the suffix. If you use the guiprep utility mentioned in the chapter on creating Plain Text files it will do the renaming of the files for you, and will run a program pngcrush which will reduce the disk space required for your PNG files without affecting the quality of the image.
While guiprep assumes you will be submitting PNG's, JPEG's are also acceptable and will take much less disk space. There is no real advantage to using PNG's for your submission to Distributed Proofreaders.
If your book is illustrated DP will ask you to provide high quality JPEGs of the illustrations, named to correspond to the page they appear on. These illustrations may be used to create an HTML version of the book. It is likely that you will be asked to use a flatbed scanner to create these illustrations, to avoid problems like inadequate lighting and keystoning. They will ask for color scans, even if the original is grayscale, because they want the color of the paper to come through. You should also not crop the images yourself. Leave the cropping to the person who will create the HTML version of the book.

When you have all this the text files will go into a directory named text, the page images can go in a directory named pages, and the illustrations go in a third directory which you can name illustrations or something similar. When you have these directories created you need to put them all in a Zip file named
DPusername_ShortTitle.zip
where DPusername is the account you have on the DP site and ShortTitle is a shortened version of the book title with no spaces. You will also need to prepare a separate text file named
DPusername_ShortTitle_README.txt
which will contain notes on the book. For my own submission to Distributed Proofreaders I included the following information:
- The copyright clearance number I was given by Project Gutenberg. This is the most important piece of information in the README and must be provided.
- The pages of the original book are not correctly numbered. There are many full page illustrations and after each one the page numbering skips a page or two. I have verified that no pages are missing from my submission.
- There are several places in the text where Greek words are used in the original alphabet (as in the illustration above). Having these words rendered in the Roman alphabet or simply replaced with "(Greek words)" should not hurt the book much.
- I have made an attempt to hand correct most of the text files before submitting them.
Until recently the next step would be to use an FTP client to copy these files to a directory on DP's FTP server. Just before I was ready to submit my own work DP shut down their FTP server because of problems with computer viruses. As of this writing an ordinary Content Provider cannot upload content. You need to be a Project Manager, a privilege only granted to those who have proofread hundreds of pages. The current method to get your content uploaded is to place it on a server where a Project Manager can download it. One method popular with DP users is called DropBox:
http://www.dropbox.com
This gives you a free website where you can post files for downloading by others. After that have your files on DropBox, go the wiki page at:
http://www.pgdp.net/wiki/Content_Providers_seeking_Project_Managers
and start a new section for yourself and list your project. There is a special Wiki template you'll be required to copy and fill in.
When I did this, someone on the site suggested making a posting to the "Books I'd Like To See In PG" Forum topic describing my book to potential Project Managers. Proofreading books is not necessarily first-in, first-out. If your book sounds more interesting than the next one in the queue it might get a Project Manager sooner. I did this, and did manage to get a Project Manager interested. He warned me that it might still be over a year before the book made it to PG. I told him I was OK with that, and I was at the time. Less than a year later I decided to create the PG submission myself.
After you've done all that you might consider doing some proofreading of other people's books. Information on how to do that is on the site.
If your native language is not English or if the book you're submitting is not in English you'll want to work with Distributed Proofreaders Europe:
http://dp.rastko.net/
This is also the place to submit books that are meant for Project Gutenberg Australia.
If you have books in English or French where the author has been dead fifty years or more you could donate them to Project Gutenberg Canada. They, too, have their own Distributed Proofreaders site:
http://www.pgdpcanada.net/c/default.php
This is the place where I submitted my Robert C. Benchley collection. You also need a copyright clearance before you can submit a book to PG Canada, but it is generally easier to get because the only thing that needs to be verified is the author's death date. For my Benchley books this meant that the author's words, drawings, and stills from some comedy shorts he appeared in were all clearable1 . Regrettably, his illustrator Gluyas Williams outlived him by many years so those charming illustrations could not be included in my submissions.
Making A Web Page From A Plain Text File
If you're going to make a submission to Project Gutenberg directly (rather than going through Distributed Proofreaders) you'll need to create a Plain Text and an HTML version of your submission. The PG website has a pretty good article on how to convert your Plain Text file to a web page by hand. What they don't tell you, unfortunately, is that there is really no need to do that. Guiguts, the editor I recommended for creating your Plain Text file, has a dialog that will automatically insert HTML markup into your page. You'll find it under the Fixup menu, option HTML Fixup, and it looks like this:

It really is as simple as making a copy of your Plain Text file with a .html suffix, loading it into guiguts, and pressing the Autogenerate HTML button. When I did that with The Big Sleep it generated HTML that included a nice style sheet:

The resulting web page looks like this:

Notice that the style sheet justifies the text so both left and right margins are a straight line, just like so many printed books do. The first line of text automatically becomes the title and the second line is automatically the author.
While this is a great time saver, you'll still need to do two things by hand:
- Text that is bold or italicized in the original will need to have <i> and </i> tags added.
- Chapter headings will need to have <h2> and </h2> tags added.
For
The Big Sleep I was able to do the whole conversion in about 10 minutes.
Examples
As of now I have completed two submissions to Project Gutenberg, the first of which was Benchley Beside Himself for PG Canada. It went in on November 26, 2010 and you can check it out by looking on the site for books by Robert C. Benchley. The Big Sleep, my second submission to PG Canada, went in on January 11, 2011. The site announced the availability of The Big Sleep like this:

I have donated several other texts to Distributed Proofreaders and DP Canada. Ancient Manners went to DP, and DP Canada got two more Benchley books plus three more Raymond Chandler novels. There is a substantial queue of books waiting to be proofed ahead of these.
On my first submission to PG (Ancient Manners) I did two things right and everything else wrong. The two things I did right were:
- I chose a book published before 1923. Rule 6 clearances are very difficult to get. I have submitted several TP&V's to PG in hopes of getting Rule 6 clearance. None were cleared.
- I put the book on the Internet Archive. Granted, the book pages were dingy from insufficient lighting but having the book there did attract the interest of a Project Manager.
As for the things I did wrong:
- My original page images were poorly lit, and could not easily be converted into readable black and white PNGs.
- I did my own OCR. This is not necessarily a mistake, but since my original page images were of poor quality (due to the age of the book and inadequate lighting) it was difficult to convince anyone that ABBYY Fine Reader would not have done a better job on the OCR than Tesseract did. It is possible that it would have.
- I spent many hours correcting my text files before submitting them. Because of this my PM felt obligated to use them, whereas if I had just given him the scans he would have tossed out my text files and put the scans in the OCR Pool.
- I left out blank pages that were in the original book. I had also chosen a book where the page numbering was faulty, where missing page numbers did not always mean missing pages.
Eventually I scanned all the illustrations in color at 600 DPI using a flatbed scanner, and my PM was able to clean up my original JPEG's enough to make usable page images out of them. He also added blank pages to correspond to page numbers that did not exist.
My PM suggested the following:
"James, being the one who is working on your current project I strongly request you leave the OCR to the person that will be PMing the project.
"JPEG is the perfect format to send the person, make no changes to the photographed images. Text should be in 300 DPI color and illustrations need to be at least 600 DPI color. Do not save anything in B&W. Grayscale is ok for text pages but always use color for illustrations even if the illustration is in B&W.
"Include EVERY blank page from the first page of print to the last page of print. This is a DP requirement.
"... I ask (that) you do nothing more than scan the pages of the book in the future. I/the PM have tools that will make good use of the scans and create what is needed by DP. With a good set of scans I can do most the image work within an hour and have the text prepped and the project checked by the end of a second hour based on an average sized project. Special attention to illustrations is the only thing that takes longer."
The moral of this is to find out what your PM wants before you do the work. Creating page images and text files is not that difficult or time consuming, and if your originals are not of the best quality the PM may prefer to do this himself.
For my first submission to DP Canada I did better. I picked a book (Inside Benchley) where the author (Robert C. Benchley) had been dead more than 50 years. I used a flatbed scanner to scan the pages 2-up, 300 DPI in black and white, PNG format, then used Scan Tailor to create page images from them. I did OCR on the TIFF's that Scan Tailor had created and the text files came out needing very little correction. (The original book was in excellent condition). I made black and white PNG's 1000 pixels wide out of the TIFF's using Image Magick mogrify. I scanned pages with the illustrations that Benchley had done himself as 600 DPI color JPEG's.
My PM for DP Canada turned out to be a Benchley fan with no objection to Tesseract.
While this submission was more successful than Ancient Manners turned out to be, I can't just say to always use the approach I used with the Benchley book. Ancient Manners is too large to be scanned 2-up, and when you scan it as 300 DPI black and white PNGs you get pages that are not easily read by humans or OCR. Color scans would be fine, but would take days to do, and the book had some defective pages where the inner margin was so small as to make scanning impossible. Digital pictures with good lighting are what the book really needed. If I was doing everything over again I would create good digital pictures with bright and even lighting, use Scan Tailor to create page images with content in the original colors and white borders, and submit these as high quality JPEG's to the OCR pool. I would also create extra blank pages to make up for the missing page numbers. I would still do color scans at 600 DPI for the illustrations.
For Benchley Beside Himself, I decided to do the proofreading myself and create my own Plain Text and HTML files. This book is filled with short humorous articles that are easy and enjoyable to proofread.
My next submission to DP Canada was Chips Off The Old Benchley. For that one I did 2-up scans in greyscale on a flatbed scanner, used Scan Tailor to create pages with white borders, then used Image Magick to make JPEGs out of these. I submitted the JPEGs in a Zip file to DP Canada without doing any OCR on them. My PM was perfectly happy to do the OCR on these using ABBYY Fine Reader.
My latest submission to PG Canada was The Raymond Chandler Omnibus, which contains the first four Raymond Chandler novels. I gave all the page scans to DP Canada, but informed them that I would be doing The Big Sleep myself. When a book is that good, you don't need help to proofread it.
In the future I will likely only do OCR on books I intend to submit directly to PG.
This brings me back to Ancient Manners. After almost a year had passed since I submitted the pages to DP I looked on their site and could see no evidence that the book was even in the queue to be worked on. I decided to take the work I had prepared and finish it myself. The book was very difficult to work on. It had 90 illustrations, footnotes, Greek citations that needed to be transliterated, plus accents, umlauts, ligatures, and lots of OCR errors that I could only find by repeated readings of the text. Project Gutenberg estimates that it takes forty hours of work to prepare an e-book for their site. I think I took twice that long. On Saturday, June 12, 2011 the book was finally accepted. On its first day it was downloaded 21 times. By Monday it was number 19 on the Top 100 Downloads, coming in just ahead of War and Peace. It had been downloaded 405 times by then.
I created a custom EPUB with separated chapters, resized images, and other tweaks to create something that could be converted to a Kindle Store-worthy MOBI file and posted it to the Kindle Store. To date I have sold only one. A couple of weeks later I found that Amazon itself had taken my original donation to Project Gutenberg and created a book for the Kindle Store with it. Their book has no illustrations, but does have the captions for the illustrations. There is no visual cue that these are captions for missing illustrations. They just look like ordinary paragraphs, so you'll be reading along and some text you read previously is mysteriously repeated.
The e-book is free on the Kindle Store, so at least they priced it correctly. I put in a comment explaining the problem with the book and telling customers where they could get a nicely formatted version of the book. The comment was accepted. That comment may have led to my one sale.
In any case, be aware that any donations you make to Project Gutenberg may wind up on the Kindle Store as a free book.
- We ended up omitting the stills from the short subjects. Canadian copyright law is clear on photographs, but not so clear on stills from movies published in books.^
Free E-Book Formats

For the purposes of this book I consider an e-book to be in a file that can be downloaded to the computer and read when the computer is not connected to the network. There are many websites where you can read a book online, but I don't consider websites to be e-books.
I'm also going to limit the list to formats that can be read on a computer without dealing with Digital Rights Management. Free e-books are likely to be the only ones without DRM.
Plain Text
This is the oldest format and the simplest. A plain text file just contains letters, numbers, punctuation, and spaces. There may be a newline character (the character you make when you press Enter to start a new line) at the end of each line, or newlines may be just used to separate paragraphs. There are no changes in font, no bold, no italics, no underlines. By convention a word is considered to be bold if it has asterisks (*) before and after it. A word is considered italicized if it has underline characters (_) before and after.

Advantages
Plain text produces the smallest files by far. It is the simplest format to create a reader for, so it is supported on the most devices. While all the text needs to be displayed in the same font, you can make the font as large or small as you need it to be and the text will wrap itself to fit in the available space, making it a good choice for readers that can benefit from a larger font. Because it is so simple to support in a reader program the program might have features that are not supported for other formats. In the case of Sugar, plain text files are the only ones (so far) that have support for text to speech with highlighting.
If you make your own e-book using the methods described in this book chances are good your book will at some point be a Plain Text file, which you will want to proofread before creating an EPUB or MOBI out of it. For this reason it is useful to have Activities that work with Plain Text.
Disadvantages
No illustrations. This makes it a poor format for children's books.
Portable Document Format (PDF)
This is one of the most popular formats. It is a compressed version of the PostScript language used to format pages for printers. What you see on the screen looks exactly like the page printed using the original PostScript.

Advantages
This is an attractive format that can support having illustrations.
Disadvantages
A PDF is designed to show exactly what a printed page will look like, and not every printed page works on the screen. Multiple columns, tiny fonts and landscape page orientation can make a PDF unusable on the screen.
Another issue with a PDF is that the text cannot be reformatted. You can zoom in on a PDF but unlike plain text you can't make the text larger and have it wrap to fit on the page.
Image Container PDF's
Image Container PDF is a term used by the Internet Archive to describe a PDF that is composed entirely of images of book pages. This format gives the reader an experience as much as possible like reading the original book. PDFs created this way can have a "text layer" created by Optical Character Recognition, making these e-books searchable.

Advantages
An excellent format for children's books, which often have pictures and other decorations on every page.
Disadvantages
PDFs composed of images have huge file sizes (20 megabytes or more is common for Internet Archive PDF's, 50 megabytes and up is common for PDF's like this you create yourself) and highly decorated books can use a lot of memory to read, in extreme cases causing out of memory errors.
Comic Book Zip (CBZ)
A CBZ file is simply a bunch of sequentially named images stored in a Zip archive file. Generally the suffix on the archive is renamed from .zip to .cbz.
There is a related format Comic Book RAR (CBR) which is used more often than CBZ. This uses a RAR archive file rather than a Zip file, so you need to have a commercial program to create RAR archives. This may give a slightly smaller file size than a CBZ, but in my opinion not enough to make it preferable to CBZ.

Advantages
Smaller file size than a PDF created with the same images. Very easy to create.
Disadvantages
No support for text to make the pages searchable like PDF has.
DjVu
DjVu is an alternative to PDF's created with book page images. DjVu is a method of compressing these images that is optimized for documents and book pages. As a result .djvu files are smaller than the equivalent PDF and can take less memory to read.

Advantages
Noticeably smaller file size than PDF's composed of page images. Also smaller than CBZ's.
Disadvantages
Only supported by the later versions of the Read Activity which requires a newer version of Sugar than .82. Many XO laptops still run .82 or older.
Rich Text Format (RTF)
This is a file format invented by Microsoft to simplify sharing documents between different brands of word processor. Most word processors can read and write this format as well as their own format.
It may seem like a stretch to consider RTF as a format for e-books, but in fact there are e-books that use this format. Of all the e-book formats distributed by the Baen Free Library website only RTF is usable in Sugar .82. (If you have a later version of Sugar that supports EPUB the Baen Free Library now offers that format).

Advantages
I can't think of any.
Disadvantages
Really there are only two ways to use an RTF file as an e-book: load it into a word processor and convert it to a PDF, then read that file, or use an e-book reader like Read Etexts that will convert the RTF to a plain text file when it first loads it.
EPUB
EPUB is a format specifically meant for e-books, unlike all the other formats discussed so far. It is based on XHTML and Cascading Style Sheets like a web page, and can include image files, but the various files are stored in a single Zip archive file. There is special XML file called an NCX that provides a table of contents for the document.
This is The Big Book of Aviation for Boys as an EPUB with illustrations. I created the EPUB for this book.

Advantages
Like PDFs an EPUB can contain formatted text and illustrations.
Like a plain text file the text can be made larger or smaller and the text will re-wrap to fit in the visible space.
The file size is small.
The format is supported on many devices as well as on computers. It may become the most popular e-book format.
Disadvantages
Like DjVu, it is only supported by the latest versions of the Read Activity that will not run on Sugar .82.
While many free e-books are available that use the EPUB format, few make full use of what the format has to offer. Project Gutenberg EPUBs may or may not have illustrations, and EPUB's from the Internet Archive are made from OCR'd text that has often not been proofed and corrected.
This is Pride and Prejudice from Project Gutenberg as an EPUB, without illustrations:

Here is the same book from the Internet Archive, with illustrations but badly needing proofreading:

MOBI
The MOBI format is used by the Amazon Kindle. It is not readable by any Sugar Activity at this time. This is not a problem, because any free e-book in MOBI format will generally be available in EPUB format as well. In fact, the best way to create a MOBI file is to make an EPUB and then convert it to MOBI with a utility program.
The MOBI format can't do anything that EPUB can't do as well or better, but while Sugar users won't be consumers of MOBI content there is nothing stopping them from creating content in that format and putting it in the Kindle Store. If you want to do that the chapter on creating EPUBs will show you how.
genCollectionInterface (gCI)

Introduction
genCollectionInterface (gCI) is a set of templates and HTML generation tools written in Python which produce a static website for a book collection. You can install the generated pages on a web server, serve then using Dropbox, or put everything on a thumb drive and browse them using the Browse Activity. The website serves the same purpose as what you could generate from calibre+OPDS, but it is more visually appealing.
These tools were created during the summer and fall of 2009 as part of the Rural Design Collective's Summer Mentoring Program. The goal of the project was to enable and/or enhance access to the Children's Book Collection of the Internet Archive on the OLPC/XO laptop platform, especially where internet access was not available. The developers considered the state of Sugar and the XO hardware and tried to create a usable and fun site that would appeal to children aged 5-15.
The tool is intended to create a subset of the Internet Archive collection that can be used when an internet connection is not available (although you will of course need an internet connection to get the books to begin with). It is not something you can use for your own collection of books. For that calibre is the best option.
If you want to make the Children's Book Collection available to your students you'll need a thumb drive that can hold six gigabytes of data (or a local web server with that much disk space available). Before you start, go to
http://ruraldesigncollective.org/lab/ui/
and check out the collection of books to see if it is something you want. The books are in the public domain, so they are quite old and some will not find favor with a modern child. The website at this URL is similar to, but not exactly the same as, the one you would be setting up, so make sure you want it before continuing.
The Website
The website is accessible to children who have just started reading while also providing features for experienced readers. Books are organized into categories as shown below:

When you click on the icon for a category you'll see the titles in it presented as icons:

The titles are displayed below the icons, and the author, date, description of the book are displayed in a "tool tip" when the mouse pointer is over the icon. When you click the icon the book is shown in an online book reader page (see below). That is a key difference between what is on the RDC website and what you will be creating locally. In your local version clicking on a book will download it and copy it to the Journal.

The books are in the DjVu format, which is supported by any version of Sugar later than .82.
Installation
Install the tools by downloading and unzipping the distribution archive. Do this in a dedicated directory to avoid overwriting files. You can download the distribution archive here:
https://github.com/scottyrdc/GenCollectionInterface
On the right side of this page is a Downloads button. Choose the Download .zip option that appears after you click on the Downloads button. Unzip the archive.
The archive contains everything you need with the exception of the books themselves. To get those you will need to run a Python script, and before you can do that you'll need a program called wget.
wget is installed or available for any Linux distribution. If you're using Linux then it is probably installed already. You can also download a version of wget for Windows here:
http://gnuwin32.sourceforge.net/packages/wget.htm
The script is named dl.py and it will be found in the directory you just unzipped. It will create directories named djvu and covers and download the e-books and their cover images into these directories. There is over five gigabytes to download so it should take a few hours on even a fast connection. To run the script just do this:
python dl.py
When this is finished running look for a file named index.hand-edited-example.html.txt and copy it to the name index.html. Try loading this file into a web browser. It should bring up your website ready to go, with all the book links pointing to your local directory. If it doesn't you'll need to generate some pages yourself, but don't do these next steps unless you're sure you have to.
There is another script called genCollectionInterface.py which generates HTML pages and JavaScript. Before you can run it you'll need to delete all the files ending in .html and .js from the directory you unzipped to (but NOT the subdirectories). Once you've deleted the files you can run the command like this (all on one line):
python genCollectionInterface.py -attached-storage search.CSV
categories.txt
You will see numerous messages as the files are parsed and output is generated, and when the process is completed there will be a directory full of HTML and JavaScript files. The ones used for the interface are called <Category>Category.html, for example Adventure and AdventurersCategory.html, or for JavaScript files, <Category>ToolTip.js, for example Adventure and AdventurersToolTip.js There's also a catch all category: Other, where anything not in categories.txt will go.
Recreate your index.html file if you deleted it, and your site should be ready to copy to a web server or thumb drive. An important note about the thumb drive: Sugar will mount the drive at a location called /media/VolumeName where VolumeName is the label of the drive. It is important that you give your thumb drive a short and meaningful volume name, like books. You may need to format your drive to give it this name, so do that before you copy the data into it. If you do everything right, you'll be able to use the website from the Sugar Browse Activity using the following URL:
file:///media/books/index.html
About The Collection
The Internet Archive Children's Library is a digital repository of over 3,300 digital public domain books for children from around the world. The Rural Design Collective selected a subset of these books and created a child-friendly user interface for the OLPC XO as part of their 2009 Summer Mentoring Program.
If you want to try creating a collection from the Internet Archive other than the Children's Library you can read more about genCollectionInterface at:
http://ruraldesigncollective.org/lab/docs/
Getting A Rule 6 Copyright Clearance

If you have a book published after 1922 and you want to know if it is in the public domain somewhere (not necessarily where you live) there are really only two possibilities:
- In Canada, a book becomes public domain 50 years after the year of the author's death. Thus you could donate the book to PG Canada and it could be legally downloaded in countries with similar copyright laws.
- In the U.S. books published 1923-1963 and authored by U.S. citizens must have their copyrights renewed in their 28th year. If the book isn't renewed it goes into the public domain in the U.S. and may be donated to Project Gutenberg or the Internet Archive. When you attempt to prove to PG that this has happened for a book you are requesting a "Rule 6" clearance.
The Project Gutenberg Rule 6 HOWTO says:
"Based on our review of the US Library of Congress' historical renewal records, we estimate that over 85% of all registered books are never renewed, yet it is still quite important to follow all the procedures below to make a safe judgment about a book's copyright status."
A Rule 6 clearance is a fair amount of work to prepare, and will take longer to get approved. There are currently two people checking copyright clearance requests, and the person who checks Rule 6 clearances generally does it only once a month, so a clearance will take longer to get. The person who checks Rule 6 clearances will have to do the same work you do to prepare the submission, so it is important that you do a careful job yourself. It would be a good idea to do several pre-1923 submissions before your first Rule 6 submission.
If the author has been dead 50 years it would make sense to donate the book to PG Canada instead. Those clearances go quickly because checking when an author died is not as difficult.
As a matter of policy PG will not do a Rule 6 clearance for a book by an author who was not a U.S. Citizen when the book was written. Technically Rule 6 would apply if the book was published in the U.S. before or at the same time it was published elsewhere, but that's pretty much impossible to verify so PG will reject clearance requests for such authors. One of the first things you should do is find out if the author was a U.S. citizen.
The second thing you should do is check either the Stanford copyright renewal database or the Rutgers one, or both. The Stanford database is at:
http://collections.stanford.edu/copyrightrenewals/bin/search/simple
and the Rutgers one is at:
http://comminfo.rutgers.edu/~lesk/copyrenew.html
The Stanford database is considered to be the more reliable of the two. If the renewal shows up in either of these databases then you can't do a Rule 6 clearance. In an ideal world if your author is a U.S. citizen and the renewal does not show up in either of these searches you'd be set to go. The world is not ideal. If you get past these hurdles you still have a lot of checking to do. The requirements for doing a Rule 6 submission change from time to time, so you should check the latest articles on the PG and DP websites for the current requirements.
The official Rule 6 HOWTO is here:
http://copy.pglaf.org/rule6-new.txt
Some other resources are at the Distributed Proofreaders website:
http://www.pgdp.net/wiki/PGRule6
http://www.pgdp.net/wiki/PGRule6/DetailedRule6Procedure
http://www.pgdp.net/wiki/PGRule6/Rule6Template
The last link is a template of the wording that you can paste into the form you use to submit your TP&V. It refers to stories published in magazines then later published as a book, which is probably more complex than most submissions, so you can remove parts which are not applicable. (A large percentage of Rule 6 submissions are stories from Science Fiction magazines).
Here is the template in its entirety:
"This is boilerplate for reporting Rule 6 research for a story first published in a magazine, then later published in a book which we plan to use as the source to clear. Only use LOC website if needed. Only use 11800 if needed. The claimed copyright dates control this.
"Rule 6 clearance.
"[TITLE] by [AUTHOR]
"Originally published in [VENUE AND DATE OF FIRST PUBLICATION].
"[AUTHOR'S FULL NAME] born on [AUTHOR'S BIRTHDATE & YEAR], in [AUTHOR'S BIRTH LOCATION] and was therefore a U.S. citizen. [CITE SOURCES, e.g. Both Contemporary Authors and St. James Guide to Science Fiction Writers have entries for him.]
"The edition I want to clear is a [CURRENT PUBLISHER] reprint from [YEAR OF PUBLICATION] with a [YEAR OF COPYRIGHT] copyright notice. [TITLE] was first published in the [MONTH AND YEAR] edition of [MAGAZINE TITLE] with the author as [PSEUDONYM NAME]. It's first book printing was in the [YEAR OF BOOK PUBLICATION] [BOOK PUBLISHER] of [BOOK TITLE].
"I have searched the Copyright Renewal Records at the library of congress web site for the following words as a title search: [TITLE] [ALTERNATE TITLE OR SUBTITLE] and the following words as an author search [LAST, FI], [LAST, FIRST], [PSEUDONYM LAST, FIRST], [PSEUDONYM LAST, FI] and the following words as a claimants search: [ORIGINAL PUBLISHER] and have found no indication that this story's copyright in [YEAR OF FIRST PUBLICATION] was renewed. I have also searched "The catalog of Copyright Entries" periodicals volume in the years [YEAR + 26], [YEAR + 27], [YEAR + 28] and [YEAR + 29] for a renewal of [MAGAZINE OF FIRST PUBLICATION] and have searched 11800-8.txt for the words [RARE WORD FROM TITLE], [AUTHOR'S FIRST NAME] near [AUTHOR'S LAST NAME] and have found no indication that this book's copyright in [DATE OF FIRST PUBLICATION] was renewed.
"I have also reviewed the materials in the book relating to the nationality of the author and have found no reason to believe that any of the authors was a foreign national."
One final note: if you can't get a Rule 6 clearance from Project Gutenberg but have reason to believe the book deserves one, you can still donate it to the Internet Archive, and you should.
Introduction

Publishing your e-book can be simple or it can be complicated, depending on what it is you are publishing. The simplest thing to publish is your own work. You can pick a Creative Commons license for it and upload it to the Internet Archive and you'll be as good as done.
If you have someone else's book published before 1923 you can publish it as an e-book either on Project Gutenberg or on the Internet Archive. Each site has rules you need to follow, and I'll give you some idea of what the process is.
If you have a book published 1923 or later you might still be able to publish it on either site, but the process will be more difficult. By "or later" I mean "not much later". I hope you will have the good sense not to make an e-book out of Harry Potter or some other living author's work.
The last option you have is to put the e-book on a server and distribute it yourself. There are several good reasons to do this:
- Some OLPC deployments have special permission to distribute the works of living authors to their students. This means there needs to be a way to make certain that only those students can download the books.
- The Internet Archive and Project Gutenberg have thousands of books, only a fraction of which are of interest to children. You might want to set up a more focused collection of books that are specifically for children, or that are in your native language.
Setting up a server to publish e-books generally means setting up your own website, which may only be accessible from your own network. There are a couple of software packages available specifically designed to create a website for hosting e-books, and I'll have chapters on each.
Making A Book Scanner

The first three e-books I made I used the cardboard box book scanner shown in the chapter on scanning book pages. After three books it became clear that a better book scanner would save me much work and improve the quality of the finished product. It was also obvious that I would have to find a way to make a book scanner without sawing, painting, or anything else that would need a real home workshop. It would have to be made by someone who could be handy mending a fuse...and that's about it. The last time I did any serious woodworking was in Junior High, and it isn't an experience I look back on fondly.
On the other hand, I was able to put up some curtain rods awhile back and they turned out all right, so I figured that if the project only involved measuring, drilling and screwing I'd be fine. I began designing my scanner by wandering around various hardware stores waiting for the items on the shelves to speak to me. In retrospect I should have done this at the Dollar Store. The items there speak to me too, and they're cheaper.
This is the book scanner I ended up building:

A book scanner consists of a cradle that holds a book open at a 90 degree angle, plus two sheets of glass or plastic mounted at right angles to each other that press down on the book pages and hold them flat so they may be photographed. The part that holds the pages flat is called a platen.
The platen is generally mounted on a hinge or a column so it can be moved out of the way when you flip the pages. This also keeps the platen in the same position relative to the camera. In the cardboard box book scanner the position of the book was fixed, so you needed to adjust the camera from time to time while you photograph the pages. With a proper book scanner you don't move the camera; you move the book. Therefore the book cradle is placed on a track so you can slide the pages of the book to where the platen needs them to be.
This view shows the platen resting on the book. The platen is made from two sheets of Lexan precut to 11" x 14" which I found at Menard's. I got two shelf mounting brackets and used epoxy to glue the Lexan sheets to them. The glue came undone when I tried to attach a hinge, so I ended up using #6-32 stove bolts and nuts (1/2" long, 1/8" diameter round head) to attach the sheets to the brackets. If I was doing it over again I would skip the epoxy and just use the stove bolts. The brackets already had holes in the right place, and Lexan is easy to drill. I found Lexan works as well as glass would for photographing book pages, and is much easier to deal with.

This shows the detail of the platen hinge. I use another shelf mounting bracket to hang the hinge on. The hinge is attached to the bracket with stove bolts screwed through 2" mending plates I found at the Dollar Store. Mending plates are just small rectangles of metal with two holes. I used a 2" long bolt with a wing nut to provide a means of adjusting the vertical position of the platen so it fits nicely in the book. I had a package of washers left over from fixing the windshield wipers on a car I used to have so I used a bunch of them as spacers. As you can see I used more stove bolts and mending plates to attach the hinge to the platen bracket.

The book cradle is made from a couple of car floor mats I found at the Dollar Store. It is supported by four 8x10 shelf brackets screwed into an 3/4" x 11 3/4" x 24" white shelf I found at Menard's. I used #8 x 3/4" brass round head wood screws. You need to position the shelf brackets 4" apart so that when the floor mats rest on them each one is at a 45 degree angle. Also, not every floor mat is suitable for this purpose. You need something stiff that can hold a book without sagging. These mats have a stiff plastic backing. If you can't find floor mats like this use something else, as long as it is stiff. As you can see, I stuck some small shelf brackets underneath the mats for extra support.
The mats are stitched together with plastic tie-downs like you use to hold wires in place. Additional tie-downs are used to attach the mats to the shelf brackets.

I use another white shelf for the base, this one 3/4" x 15 3/4" x 36". I use a desk lamp with an incandescent bulb, 100 watts, and I screw the base of the lamp into the book scanner base. I use the clamp for the desk lamp to hold the book scanner base to the table, and use a small C-clamp for more stability.

This shows what the platen looks like in the up position.

You need to have some kind of track for the book cradle base to slide back and forth on. Most of the designs at diybookscanner.org use drawer sliders for this purpose, but one design I saw there just used two pieces of plastic to hold the cradle base in a straight line and plastic furniture sliders to provide easy low friction movement. I liked this idea a lot, and I found some plastic rulers with a ridge down the middle of them at the Dollar Store that would make a nice track for the cradle. I attached them to the base with wood screws. You probably won't be able to find the rulers I found, so just improvise.

I use a 5 megapixel camera on a tripod to photograph the book pages. If I found a suitable table I could use two cameras on tripods to do all the pages in one pass. Digital cameras and tripods are pretty cheap these days.
Last, but not least, you need a flat platform at the bottom of the cradle to hold the spine of the book level, like this:

As you can see, I just stuck a few batteries in the bottom of the "V". I may come up with something more presentable in the future, but for now the batteries are doing fine.

Here is a view showing the clip-on desk lamps I added to the scanner. Having just one overhead lamp creates a bright spot in the middle of the page which the camera uses to adjust the exposure, resulting in pages that are dingy. Adjusting the exposure compensation on the camera just washes out the middle of the page. What you really need is a page that is evenly lit, which having three light sources like this should provide. The clip-on lamps are cheap, about five dollars at Menard's. The lamps are supposed to use 60 watt bulbs to minimize the risk of fire, but I put 75 watters in because I like to live dangerously.

Here is the Bill Of Materials:
| Qty |
Description |
Unit Cost |
| 1 |
white shelf 3/4" x 15 3/4" x 36" |
5.00 |
| 1 |
white shelf 3/4" x 11 3/4" x 24" |
3.97 |
4
|
8x10 shelf brackets
|
.78 |
1 package
|
#8 x 3/4" brass round head wood screws
|
.78 |
1 package of 4
|
24mm x 100 mm (5/16" x 4") furniture sliders
|
6.98 |
1 package
|
3" strap hinge, light
|
2.49 |
1 package
|
plastic wire tie-downs
|
1.00 |
1 package
|
#6-32 stove bolts, round head with nuts
|
1.00 |
1 package of 4
|
2" mending plates (Dollar Store)
|
1.00 |
1 set
|
black floor mats (Dollar Store)
|
14.00 |
1
|
desk lamp with adjustable arm
|
30.00 |
2
|
clip-on desk lamps
|
5.00 |
1 package of 3
|
plastic rulers (Dollar Store)
|
1.00 |
2
|
Lexan sheets, 11" x 14"
|
8.00 |
4
|
black shelf supports, 6" x 6"
|
1.00 |
1
|
black shelf support, 8" x 8"
|
1.00 |
1
|
C-clamp
|
1.00 |
Making CBZ'S

Creating The Archive
The CBZ format format is the easiest one of all to create. All you need to do is name your image files in sequence and put them in a Zip archive using a program like WinZip or 7-Zip. I recommend 7-Zip because it is free to download and use, plus it can do things that WinZip cannot, like extract files from RAR archives. If you want to convert Comic Books in CBR format to CBZ 7-Zip can do it.
You can download 7-Zip here:
http://www.7-zip.org/
Here is 7-Zip in action. As you can see I'm giving my Zip archive the .cbz suffix.

In Linux you can create CBZ's from the command line using the zip command:
zip ArabianNights.cbz *.jpg
Making DjVu's

Introduction
Writing this book has been a real education for me, and I learned a few things I did not expect to learn. The most surprising thing I learned is that DjVu does not always give a smaller file size than PDF! Since the only reason to prefer DjVu to PDF is to get a smaller file that uses less memory, it is important to understand when PDF will give the smaller file size. Making a DjVu is more work than making a PDF, so you need to know when it is a waste of your time.
In the chapter on creating book scans, I talk about two methods of doing them. The first method (entitled "The Road Less Travelled") preserves the look of the original page, including the color of the paper, the margins used, etc. The second method (entitled "The Easier Road: Scan Tailor") looks for pages with nothing but text and makes these pages have pure black letters on a pure white background.
If you do the first method, DjVu can help give you smaller file sizes. Here is a comparison:
 87606063 BoysAviationJPGs.djvu
182866779 BoysAviationJPGs.pdf
This is from a Linux directory listing showing a PDF of a book made with the method that preserves the look of the original pages. The .djvu file is less than half as large as the PDF. Now let's look at files created with the Scan Tailor method, which preserves the content of the pages but changes their look:
121069444 BoysAviationScanTailor.djvu
 56796427 BoysAviationScanTailor.pdf
A couple of surprising things here. The .djvu file is considerably larger than the PDF (but still smaller than the other PDF). What's really surprising is that the PDF made using the Scan Tailor method is the smallest file of the four, by a significant amount.
How to explain this? Compression looks for redundant information and replaces the raw information with a description of that information. In "lossy" encoding schemes compression looks for information that would not be missed and discards it to make the file smaller. When you have pages with pure black text on pure white backgrounds that are already compressed, an attempt to compress such a file even further might make the file larger than it was to begin with.
On the other hand, a book that has lots of illustrations may produce a larger file using Scan Tailor than using the other method. The third book I scanned had illustrations on almost every page, mixed in with the text. Because Scan Tailor could not save such pages as pure black and white images the resulting PDF was twice the size of the version made the other way. (It must be said that Scan Tailor did a beautiful job of laying out the pages. Smaller file sizes are not the only reason to use Scan Tailor).
If this explanation doesn't make sense to you, just remember that if you use the Scan Tailor method of preparing your page images and your book has only a few illustrations don't bother with making a DjVu file. A PDF will do just fine.
If you resize and compress pages not created with Scan Tailor to create a PDF you can still get a smaller file using DjVu. Here is an example:
49519200 ArabianNights.djvu
69192729 ArabianNights.pdf
The DjVu version is 20 megabytes smaller.
DjVu Libre
To make DjVu files you need to install DjVu Libre. This software comes with every Linux distribution. Users of Windows and Macintosh may download their versions here:
http://djvu.sourceforge.net/index.html
There are two command line programs in this package we need to use. The first is named c44, and it's job is to convert our .jpg files into .djvu files with improved compression. You can run it on a single file like this:
c44 filename.jpg
Regrettably there is no way to run c44 on a group of JPEG's; each invocation of the program converts just one file. Fortunately, there is a way to run c44 on every JPEG in a directory without typing in the command over and over. You can use a simple Python program like this one, which should be put in a file named makedjvus.py:
#! /usr/bin/env python
import glob
import getopt
import sys
import subprocess

def make_djvus(filename):
    """This function is called
    for each image file."""

    subprocess.call(["c44", filename])
    print 'filename', filename
    return

if __name__ == "__main__":
    try:
        opts, args = getopt.getopt(sys.argv[1:], "")
        if len(args) == 1:
            print 'using glob'
            args = glob.glob(args[0])
            args.sort()
        i = 0
        while i < len(args):
            make_djvus(args[i])
            i = i + 1
    except getopt.error, msg:
        print msg
        print "This program has no options"
        sys.exit(2)
When you have this installed on your system, run it like this:
python makedjvus.py *.jpg
The program should be in your system PATH and your current directory should be the one with the JPEG's to convert.
When you have all the files converted it's time to use the second command line program, djvm, to combine the .djvu's into a complete document, also with the suffix .djvu:
djvm -c BookTitle.djvu *.djvu
The -c option specifies the document file to create and everything after that is file names to include in the document.
Here is my .djvu file, being viewed with DJView3 in Linux:

Making EPUBs

Of all the formats for e-books only EPUB combines small file sizes with the ability to do formatted text and illustrations. An EPUB is like a website contained in a Zip file, with a Table of Contents attached. It is also in one important way different from a website. A website is made with HTML (usually) but an EPUB is made with XHTML.
The difference is small but crucial. HTML is meant to be forgiving. If you make a web page you can leave out some tags, fail to close tags, or close tags in a different order than you opened them in. A web browser is supposed to forgive that, as much as possible. XHTML, on the other hand, is like HTML that is not forgiving. You can't leave out a tag or put in a tag where the XHTML browser does not expect it. If an XHTML browser discovers an error in your page it can simply refuse to display it.
The end result is that an XHTML browser is easier to make than an HTML browser. A lot easier. It does put a burden on the e-book author to get his tags right, but in practice you'll never create an XHTML file by hand. Instead, I recommend that you use the free e-book editor Sigil, shown here editing The Galaxy Primes by Edward E. Smith:

Sigil is available for Windows, Linux, and the Macintosh. You can download it here:
http://code.google.com/p/sigil/
There are installers for all three platforms. On Windows the installer can be a little flaky. It is supposed to install a Visual C++ runtime component if it is needed but it doesn't always do that. If you have problems check the FAQ on the website, which explains how to work around the problem. The installer on Linux worked fine, and I would recommend using that instead of compiling Sigil from the source code.
To create your EPUB you'll start by creating an HTML file with your word processor using the Save As... option from the File menu. As before, I recommend Open Office but MS Word will do. When you add this HTML file to Sigil under the Text folder it will run a piece of code called HTML Tidy that will convert your HTML into XHTML automatically. After that you can split your book into multiple chapters, create table of contents entries, add images, etc. Here is the Boy's Aviation book being edited using Sigil. The Ch button on the toolbar is used to split the file containing the entire book into separate files for each chapter. When you make the title of a chapter have the Heading 1 style Sigil puts the chapter in the Table of Contents for the book.

You can easily add pictures to the book by cropping them out of the original page images, but they should probably be resized to be 600 pixels wide for best results.
Here are a couple more screen shots of the EPUB I made with Sigil being read in the Read Activity:

In the Read Activity you can change the size of the text using the View tab, but the illustrations stay the same size.

Making A MOBI For The Kindle Store
If all you want to do is convert an EPUB you have made to read on a Kindle it is quite simple. All you need to do is download the free kindlegen utility (available for Windows, Linux, and the Mac) from Amazon.com and run it against your file like this:
kindlegen BigBookOfAviationForBoys.epub
While this will give you a perfectly usable .mobi file for your Kindle it will not be in the format required by the Kindle Store. If you've created a book as a class project and want to have a Kindle format available for parents, this may be sufficient. However, with only a bit more work you can sell your book to the world.
What your book is lacking that the Kindle Store requires is:
- A cover image
- A linked table of contents page
The cover image is simply a JPEG file that looks like the front cover of a book. You can easily create a nice book cover image with The GIMP. Here is one I made for another book:
Note that because the image has a white background I put a gray border around it. You'll need this image for the Kindle Store page as well as for the book itself, and the grey border is needed to make the book cover stand out against the white page background.
You can then insert this image into the EPUB without actually showing it on any page.
The table of contents is simply a page that links to the chapters in your book. Neither Booki or Sigil supports creating a page like that, but that's easily solved. What you need to do is extract your EPUB files into a directory with any utility that supports Zip files. When you have everything unzipped you'll see a bunch of files with .xhtml suffixes. As you might expect, these are simply web pages, which you can edit with any HTML editor.
The Mozilla project has a product called Seamonkey which combines a web browser, an HTML editor, and an email client. This can be downloaded for free from mozilla.org in versions for Windows, Linux, and Mac OS, and it's perfectly adequate for creating your table of contents page.
Look for a file named content.opf. Using a text editor add the entries in bold to the top of the file to be like this:
 <metadata>
   <dc:publisher>FLOSS Manuals</dc:publisher>
   <dc:rights scheme="License">GPLv2+</dc:rights>
   <dc:language>en</dc:language>
   <dc:title>Make Your Own Sugar Activities!</dc:title>
   <dc:creator>James D. Simmons</dc:creator>
   <dc:date>2010-11-28</dc:date>
   <dc:date scheme="start">2010.12.09-07.20</dc:date>
   <dc:date scheme="last-modified">2011.05.13-00.00</dc:date>
   <dc:date scheme="published">2011.05.13-18.25</dc:date>
   <dc:identifier id="primary_id">ActivitiesGuideSugar/2010.11.28
   </dc:identifier>
   <dc:identifier scheme="booki.cc">make-your-own-sugar-activities
   </dc:identifier>
   <meta name="cover" content="att000_MYOSA_Cover" />
 </metadata>
 <guide>
       <reference type="toc" title="Table Of Contents"
           href="table_of_contents.xhtml" />
 </guide>
The toc entry point to another entry in the file that should look like this:
<item href="table_of_contents.xhtml" media-type="application/xhtml+xml" id="table_of_contents"/>
If you created a new page with your HTML editor (instead of editing a page that was already in the EPUB) you'll need to add an entry like this yourself. There should be a similar entry for your cover image if the image is included in the EPUB.
If everything looks good you can use your Zip utility to create a new archive with all these files in it. Change the suffix from .zip to .epub and you'll have a file you can run kindlegen against to create a MOBI file that the Kindle store will accept.
When you run kindlegen, do pay attention to the messages it gives you. If it cannot find your table of contents or cover image it will tell you. Also, be sure to try out your file with the free Kindle Previewer program. There are versions of this for Windows and the Macintosh, and the Windows version will run under WINE on Linux. This program will show you what your book will look like on a real Kindle. The formatting that a Kindle will support is a subset of what HTML supports, so it is likely you'll need to modify some pages to make them look right on the Kindle. The web page version of this book has beautiful drawings with transparent backgrounds at the top of each chapter. They looked quite awful on the Kindle version so I had to remove them.
Having a book on the Kindle Store is not an easy path to riches. The first two weeks my book Make Your Own Sugar Activities! was available it sold seven copies. These meager sales were enough to make my book ranked 60,425 out of over 750,000 books, making me one of the top sellers on the Store!
The Kindle Store will let you publish public domain works as well as your own writings. I have created e-books from a couple of books in my personal collection: Ancient Manners by Pierre Louÿs and The Big Book of Aviation for Boys. I decided to sell them on the Kindle Store as well as donate them to the Internet Archive and Project Gutenberg. While Ancient Manners did quite well its first week on Project Gutenberg it has yet to sell a single copy on the Kindle Store.
The Big Aviation Book for Boys almost ended up getting rejected by the Kindle Store because I could not prove conclusively that it was in the public domain. I had also posted the EPUB and MOBI files on the Internet Archive, so the work would not have been totally wasted.
Making PDF's

Creating PDFs From Page Images
Suppose you have a book published in 1922 or earlier that you want to donate to the Internet Archive. They require that submissions be in PDF format. For now, assume that you have created images in JPG format for all the pages and they are named sequentially. You can make a PDF out of them using Image Magick.
This is the command to create a PDF from a set of sequentially named images:
convert -verbose *.jpg my_e-bookname.pdf
This will take all the JPEG files in the current working directory and put them into a PDF. If you have a very short book, like a children's book, this is all you need. If you try to run this on a book with hundreds of pages it will fail with an out of memory error (or on Linux a segmentation fault). The way around that is to make a PDF out of each page image, then join those PDFs together. We use a different Image Magick command to make the PDFs:
mogrify -verbose -format pdf *.jpg
To join the PDFs together we need another piece of software, called pdftk. You can download that here:
http://www.pdfhacks.com/pdftk/
The command you use to join the PDFs is this:
pdftk *.pdf cat output BookTitle.pdf
When you run this you may see many warning messages about the possibility of memory leaks. These messages should be safe to ignore.
Here is a PDF I made this way, viewed in Acrobat Reader:

Making Your PDF's Smaller
If you created a PDF from page images you may be a bit dismayed at how large the file is. One hundred and fifty megabytes for a three hundred page book is not uncommon.
If you look at the files available for each book at the Internet Archive, you'll see entries like this:
worksofjulesvern02vern.djvu                9686664
worksofjulesvern02vern.pdf                21892098
worksofjulesvern02vern_bw.pdf             17715851
worksofjulesvern02vern_jp2.zip           170943817
worksofjulesvern02vern_orig_jp2.tar      253030400
We can interpret this as follows:
- The uncropped images from the book scanner take up about 253 megabytes.
- The cropped images take up about 170 megabytes.
- The finished PDF takes up about 21 megabytes.
- A black and white version of the same PDF is a little under 18 megabytes.
- The DjVu version is smallest of all, at 9.6 megabytes.
How is this possible? I couldn't figure it out myself so I sent an email to the authors of the software the Internet Archive uses and it got forwarded on to the person who developed the PDF creating software. He was kind enough to explain the whole process, which I will paraphrase and simplify here.
The main secret of the process is that it divides each page image into three separate images which are combined to create the page you see in the PDF. These images are:
- The text in the book, stored as a black and white image at high quality. Since there are only two colors used even a high quality image takes up little space.
- The image layer, which is "downsampled" to a lower resolution than the original photograph to save space. On a computer screen the difference between the original image and the downsampled image is not noticeable.
- The page background, which is the bulk of the page area, is stored very highly compressed. The effect of this is to make the page background a more uniform color than the original book had, but that is not a problem.
If you read a PDF like the book Abroad which has highly decorated pages you can actually see the three layers coming into view separately.
This process is more complex than anything the home e-book maker would attempt. That does not mean that we cannot make our e-books dramatically smaller without losing an objectionable amount of quality, but we'll have to use simpler techniques. The key is to make the original page images smaller and more highly compressed. Once you do that you can make a PDF much smaller than the ones we can create with the original images.
If you're preparing the e-book for donation to the Internet Archive they're going to want the full sized PDF. They will of course prepare a new PDF which is smaller and has OCR'd text behind each page.
If the book is not going to the Internet Archive, you'll need to shrink the pages images yourself.
Optimizing Page Sizes
One thing you can and should do when creating e-books from images is to first resize the pages so they are no larger than your screen can display. On an XO laptop the screen width is 1200 pixels. The page images I created with a Kodak 5 megapixel camera are a little over 1200 pixels wide once the images are rotated and trimmed. The difference is probably not worth bothering with. Pictures taken with an 8 megapixel camera are a different story.
The width of the screen is the important factor when choosing what size your images should be, since pages scroll vertically. Load one of your images into The GIMP or Picasa to see how wide it is in pixels. Figure out what width in pixels you want your images to be (the screen width of the XO laptop is 1200 pixels), then run the mogrify command from Image Magick on them like this:
mogrify -resize 1200 -format jpg -quality 80% -verbose *.jpg
Note that mogrify will update your images in place, so you definitely want to back up the originals to CD first as well as copy them to a new directory. You may want to experiment with the -quality setting. The JPEG format does what is known as "lossy" compression. This means it gets a smaller file size by removing detail from the picture.
This might be hard to imagine, but suppose you have a photograph. JPEG's can display 16.7 million colors but the human eye can't always distinguish them. If there is a blue sky in the photograph the sky won't be all the same color. Say there are 1,000 shades of blue in the sky. If you averaged out the colors so that only 256 shades were used you might not be able to tell the difference, but the amount of information in the picture would go down noticeably, resulting in a much smaller image.
80% quality will generally give good results, but you should experiment. You might experiment with image sizes too. Comic book zips rarely contain images wider than 900 pixels, yet they look good enlarged.
Space savings can be significant. The original files for this book took up 173.9 megabytes. The resized files take up 69.3 megabytes. That's not as good as the Internet Archive does, but it's a decent improvement. You can experiment with different quality levels to see how much you can compress your JPEG's without hurting quality. You might use a lower quality for text pages and a higher one for color illustrations, or vice versa.
The resized PDF looks as good as the original:

If you want to make your book still smaller you can make a DjVu document out of the resized images.
Of course if you are really serious about making smaller PDF's you'll want to do OCR on the scanned pages to get plain text, then use your word processor to make a PDF out of that text. Doing that will be covered in the chapter on Plain Text files.
Correcting Page Sizes
It is very likely that your cropped page images will not all be the same size. Quite often this is not a problem, but sometimes your PDF's will look like this when you try to read them:

Some of the books scanned by Microsoft and Google and uploaded to the Internet Archive have this problem. You can fix it by making all your page images the same width and re-creating the PDF. The mogrify command used to resize images in this chapter can be used for this, with some simple modifications. You need to change the -resize parameter to something slightly smaller than your page images. If most of your pages are 1295 or so, make the width 1200. You can leave off the -quality parameter (which will leave the original quality of the image unchanged). This will make all your pages the same width, and the PDF you make from those images should not have the problem shown above.
Making Plain Text Files

Options For Creating Plain Text Files From Scanned Book Pages
Some teachers have expressed an interest in scanning in textbook pages and creating text files from them. Sugar users may wish to do this because plain text files support Text To Speech with word highlighting, which may be an aid to students with reading problems. You may also wish to create texts to donate to Project Gutenberg, or make an EPUB out of the book.
There is more than one way to create a plain text file from a book, and which one will be the least work will depend on how quickly you need the book and how you plan to distribute it. One option you have is to donate a physical copy of a public domain book to Distributed Proofreaders. They will saw the spine off the book, scan it with a sheet-feed scanner, do OCR on it, proof read it, and submit it to PG. The whole process will take several months and will destroy the book.
You could also scan the book yourself and submit the scanned page images to the Distributed Proofreaders Scanning Pool, where one of their volunteers will do OCR on the page images and submit it for proofreading, again by volunteers. This will also take many months but the book won't be destroyed.
You can also do the OCR yourself, then submit your page images plus the text files created by OCR (one text file per page), plus high quality images of any illustrations in the book, to the Distributed Proofreaders FTP server, where it will wait in the queue to be proofread. Proofreading will take a few months, but your contribution might get in the queue sooner. (Then again it might not. See the chapter on donating books to Project Gutenberg to understand better why you might not want to do this).
Finally, you may have a public domain book that you do want to donate to PG, but you don't want to wait the months that DP will take to thoroughly proofread it. This means that you'll want to prepare page images and text files like you would for the DP site but use them to do you own proofreading to create something that can be submitted to PG directly. This is the most work of the lot, but this chapter will show you how to minimize the effort.
OCR Software
The most commonly used program for doing Optical Character Recognition is a commercial product called ABBYY Fine Reader. A version of this comes with many flatbed scanners. The Professional version has features that make it easier to do OCR on a complete book. The Internet Archive uses this product, and Distributed Proofreaders uses and recommends it. It is, however, not cheap. The current Professional edition will run you $400. For that reason I will not be recommending it. I think you can get results every bit as good with free software. ABBYY Fine Reader does have a free 15 day trial for its products; the program stops working after 15 days or 50 pages. That should be more than enough to let you decide if it's worth the money. The Distributed Proofreaders site has many suggestions on how to use this product.
If you're a Windows user I recommend FreeOCR. You can download it here:
http://www.paperfile.net/
It looks like this:

The procedure to use this is to open a PDF or a JPEG file for a single book page. Press the OCR button and text for the page will be copied to the window on the right, where you can correct it. If you open a PDF you can navigate from page to page and do OCR on each one. As you do each page the text will be appended to the window on the right. When you're done you can save your work to a text file or copy it to the clipboard.
Depending on the font used in the book, OCR can be quite accurate:

There is no way to OCR some pages of a PDF, save your work, exit, restart the program and pick up where you left off. Since that's exactly what you need to do to make a plain text file out of an entire book you will want to have a word processor open so you can copy text from the clipboard to the word processor and save it as a text document. That way you can resume FreeOCR, resume your word processor, load the PDF into Free OCR, find the page where you left off, then continue.
Another possibility is to create a separate text file for every page. If you do this, there are tools that can help you with proofing and correcting those pages.
FreeOCR is not available for Linux, but the OCR engine that it uses, called Tesseract, can be used in Linux from the command line. It should be included with your Linux distribution or you can get it here:
http://code.google.com/p/tesseract-ocr/
Tesseract only works on individual, uncompressed TIFF files, and they must be named with the suffix .tif (not .tiff!). If the book pages you need to OCR are JPEG's you can use Image Magick mogrify to create TIFFs from them:
mogrify -format tiff *.jpg
will create TIFFs for every JPEG in the current working directory. Again, Tesseract does not like these files to have the suffix .tiff, which is what Image Magick will give them. You can change this to .tif with the following command:
rename .tiff .tif *.tiff
Then you can run tesseract on each one with the command:
tesseract filename.tiff basefilename
for example:
tesseract BoysAviation\ P135.tif BoysAviation\ P135
will create a file named BoysAviation P135.txt which should have the OCR'd text in it. When I tried this on Fedora 10 I just got a file full of gibberish. I did better with Fedora 11:
$ tesseract BoysAviation\ P135.tif BoysAviation\ P135
Tesseract Open Source OCR Engine
$ less BoysAviation\ P135.txt
FIGHTING THE FLYING CIRCUS 135
heads and exploded with their soft ’plonks, releasing varicolored
lights which floated softly through this epochal night until they
withered away and died. Star shells, parachute llares, and
streams of Very lights continued to light our way through
an aerodrome seemingly thronged with madmen. Everybody
was laughing-—drunk with the outgushing of their long p€¤t—up
emotions. "1’ve lived through the war!" I heard one whirling
Dervish of a pilot shouting to himself as he pirouetted alone
in the center of a mud hole. Regardless of who heard the
inmost secret of his soul, now that the war was over, he had
retired off to one side to repeat this fact over and over to
himself until he might make himself sure of its truth.
Another pilot, this one an Ace of 27 Squadron, grasped
me securely by the arm and shouted almost incredulously,
"We won’t be shot at any m0re!" Without waiting for a reply `
he hastened on to another friend and repeated this important
bit of information as though he were doubtful of a complete
understanding on this trivial point. What sort of a new world
will this be without the excitement of danger in it? How
queer it will be in future to fly over the dead line of the silent
Meuse—that significant boundary line that was marked by
Arch shells to warn the pilot of his entrance into danger.
How can one enjoy life without this highly spiced sauce of
danger? What else is there left to living now that the zest
and excitement of lighting aeroplanes is gone? Thoughts such
as these held me entranced for the moment and were after-
wards recalled to illustrate how tightly strung were the nerves
of these boys, of twenty who had for continuous months been
living on the very peaks of mental excitement.
You can run tesseract for each page in the book (or use a Python program to do it) then combine them all together with this command (in Linux or the Macintosh):
cat *.txt > BookTitle.txt
or this command for Windows:
type *.txt > BookTitle.text
Note that in Windows you don't want the concatenated file to have the same suffix as the files you are concatenating. If you do then the type command will try and append your target file to itself. This is not a problem with cat on Linux. Once the file is created you can rename it as you like.
Here is the code for a Python program named runtesseract.py that will run Tesseract for every TIFF image in a directory:
#! /usr/bin/env python

import glob
import getopt
import sys
import subprocess

def run_tesseract(filename):

    filename_tuple = filename.split('.')
    filename_base = filename_tuple[0]
    subprocess.call(["tesseract", filename, filename_base])
    print 'filename', filename
    return

if __name__ == "__main__":
    try:
        opts, args = getopt.getopt(sys.argv[1:], "")
        if len(args) == 1:
            print 'using glob'
            args = glob.glob(args[0])
            args.sort()
        i = 0
        while i < len(args):
            run_tesseract(args[i])
            i = i + 1
    except getopt.error, msg:
        print msg
        print "This program has no options"
        sys.exit(2)
You run this program like this:
python runtesseract.py *.tif
Automatically Fixing Common Problems With guiprep
Before you combine all your separate one-page text files into one large file you might want to use the guiprep utility on them. Guiprep is a program used by the Distributed Proofreaders project to prepare texts and page images for use on their website. It can find "scannos" (common scanning errors) in your files and fix them. It can also do things like deleting the first line in each file, which could be a page heading, and join hyphenated words split across lines.
Scannos are mistakes that OCR software make consistently. For instance, OCR software will confuse a "W" with "V/". Guiprep can identify lots of such patterns and fix them. You can get the program here:
http://home.comcast.net/~thundergnat/guiprep.html
This is what the program looks like:

If you use this program you should be aware that some of its options expect that the files will be prepared by ABBYFineReader, and you'll need to avoid those options. ABBYY Fine reader can do a couple of things that Tesseract cannot:
- It can tell the difference between bold text, italicized text, and normal text and save scanned text in Rich Text Format files, which have special markup for that formatting.
- It can figure out where paragraphs begin and end, which makes it easier for Guiprep to figure out how to de-hyphenate text.
Tesseract just saves plain text files with no attempt to preserve text formatting or paragraphs. As a result of this when you run Guiprep you want to have your text files in a subdirectory named text, and you want to avoid the options to extract formatting and do de-hyphenating.
One way Guiprep can do de-hyphenating is to create two separate directories for your text files: textw and textwo. The first one contains text files with line breaks and the second contains text files without line breaks (but with paragraph breaks). Guiprep compares these two versions of your files and does de-hyphenating.
Tesseract cannot produce text files without line breaks, so don't bother creating textw and textwo directories. Just put your text files in a directory named text.
Even without these functions Guiprep still has much to offer.
Proof Reading Individual Pages
There are a couple of approaches to proofing your text. You can make one big text file and proof it with the book close by, or you can proof individual pages, then combine them. The advantage to proofing one page at a time is that you can use a utility program to view the OCR'd text and the page image it came from on the same screen, like this:

The OCR'd text is shown in the Courier font because that font avoids the problem of letters that look similar to each other. In some fonts, for instance, the first three letters of the word "Illustration" (where the "i" is capitalized) look very similar. The text can't just look right, it has to be right.
When you move from page to page, the page you came from is saved to disk.
Where can you get such a massively useful utility? Glad you asked. This is another one of my Python scripts, which I like to call proofer.py. The code is here:
#! /usr/bin/env python
# proofer.py

import glob
import sys
import os
import gtk
import getopt
import pango

page=0
IMAGE_WIDTH = 600
ARBITRARY_LARGE_HEIGHT = 10000

class Proofer():

    def keypress_cb(self, widget, event):
        keyname = gtk.gdk.keyval_name(event.keyval)
        if keyname == 'F10':
            self.font_increase()
            return True
        if keyname == 'F9':
            self.font_decrease()
            return True
        if keyname == 'Page_Up' :
            self.page_previous()
            return True
        if keyname == 'Page_Down':
            self.page_next()
            return True
        return False

    def font_decrease(self):
        font_size = self.font_desc.get_size() / 1024
        font_size = font_size - 1
        if font_size < 1:
            font_size = 1
        self.font_desc.set_size(font_size * 1024)
        self.textview.modify_font(self.font_desc)

    def font_increase(self):
        font_size = self.font_desc.get_size() / 1024
        font_size = font_size + 1
        self.font_desc.set_size(font_size * 1024)
        self.textview.modify_font(self.font_desc)

    def page_previous(self):
        global page
        self.save_current_file(self.filenames[page])
        page=page-1
        if page < 0: page=0
        self.read_file(self.filenames[page])
        self.show_image(self.filenames[page])

    def page_next(self):
        global page
        self.save_current_file(self.filenames[page])
        page=page+1
        if page >= len(self.filenames): page=0
        self.read_file(self.filenames[page])
        self.show_image(self.filenames[page])

    def read_file(self, filename):
        "Read the text file"
        text_filename = self.find_text_file(filename)
        self.window.set_title("Proofer " + filename)
        etext_file = open(text_filename,"r")
        textbuffer = self.textview.get_buffer()
        text = ''
        line = ''
        while etext_file:
            line = etext_file.readline()
            if not line:
                break
            print line
            text = text + unicode(line, 'iso-8859-1')
        text = text.replace("'I`",  'T')
        text = text.replace("'|`",  'T')
        text = text.replace("l`",  'f')
        text = text.replace("I`",  'f')
        text = text.replace("t`",  'f')
        text = text.replace(" ll",  ' H')
        textbuffer.set_text(text)
        self.textview.set_buffer(textbuffer)
        etext_file.close()

    def find_text_file(self, filename):
        filename_tuple = filename.split('.')
        text_filename = filename_tuple[0] + '.txt'
        return text_filename

    def save_current_file(self, filename):
        text_filename = self.find_text_file(filename)
        f = open(text_filename, 'w')
        textbuffer = self.textview.get_buffer()
        text =  textbuffer.get_text(textbuffer.get_start_iter(),
                                    textbuffer.get_end_iter())
        try:
            f.write(text)
        finally:
            f.close
        return True


    def show_image(self, filename):
        "display a resized image in a full screen window"
        scaled_pixbuf = gtk.gdk.pixbuf_new_from_file_at_size(filename,
                            IMAGE_WIDTH, ARBITRARY_LARGE_HEIGHT)
        self.image.set_from_pixbuf(scaled_pixbuf)
        self.image.show()

    def destroy_cb(self, widget, data=None):
        self.save_current_file(self.filenames[page])
        gtk.main_quit()

    def main(self, args):
        self.filenames = args
        self.window = gtk.Window(gtk.WINDOW_TOPLEVEL)
        self.window.connect("destroy", self.destroy_cb)
        self.window.set_title("Proofer " + args[0])
        self.window.set_size_request(1200, 600)
        self.window.set_border_width(0)
        self.scrolled_window = gtk.ScrolledWindow(
            hadjustment=None,
            vadjustment=None)
        self.scrolled_window.set_policy(gtk.POLICY_NEVER,
                                        gtk.POLICY_AUTOMATIC)
        self.textview = gtk.TextView()
        self.textview.set_editable(True)
        self.textview.set_wrap_mode(gtk.WRAP_WORD)
        self.textview.set_cursor_visible(True)
        self.textview.connect("key_press_event",
                              self.keypress_cb)
        self.font_desc = pango.FontDescription("monospace 12")
        self.textview.modify_font(self.font_desc)
        self.scrolled_window.add(self.textview)
        self.read_file(args[0])
        self.textview.show()
        self.scrolled_window.show()
        self.window.show()

        self.scrolled_image = gtk.ScrolledWindow()
        self.scrolled_image.set_policy(gtk.POLICY_NEVER,
                                       gtk.POLICY_AUTOMATIC)
        self.image = gtk.Image()
        self.image.show()
        self.show_image(args[0])
        self.scrolled_image.add_with_viewport(self.image)

        self.hbox = gtk.HBox()
        self.hbox.add(self.scrolled_window)
        self.hbox.add(self.scrolled_image)
        self.hbox.show()

        self.window.add(self.hbox)
        self.scrolled_window.show()
        self.scrolled_image.show()
        self.window.show()

        gtk.main()

if __name__ == "__main__":
    try:
        opts, args = getopt.getopt(sys.argv[1:], "")
        if len(args) == 1:
            print 'using glob'
            args = glob.glob(args[0])
            args.sort()
        Proofer().main(args)
    except getopt.error, msg:
        print msg
        print "This program has no options"
        sys.exit(2)
This program runs on Windows, but is somewhat troublesome to install because it needs PyGTK (http://www.pygtk.org/downloads.html). You should be able to install PyGTK using Mac Ports.
You can use FreeOCR to do pretty much the same kind of side-by-side proofing on Windows, and it is easier to install.
This program assumes that you have just run Guiprep on the files, and that your text files are in the same directory as your image files. You make this directory your current working directory and run proofer.py like this:
python proofer.py *.png
If your image files are JPEG's of TIFF's you would change the argument accordingly. proofer.py does not care what kind of image files you have. It will load the first file in the directory into the right pane, then load the matching text file into the left pane. You can navigate from page to page using the Page Up and Page Down keys. You can make the text font smaller or larger by using F9 and F10. When you move to a new page or quit the program the text of the page you were working on gets saved.
Proofer also has code to correct "scannos" I have found in my own books that guiprep doesn't handle. If you know a little Python you can easily add your own correction logic.
Formatting A Plain Text File
When you have loaded your OCR text file into a word processor what you have is the lines of text on each page, with line endings at the end of each line. What you would like to have is text word-wrapped into paragraphs, with line endings used only to separate paragraphs. It is possible to remove all of the line endings in the document, but to do that you need to give your word processor a way to tell the difference between the end of a line and the end of a paragraph. If you don't, you'll just put all the text in the book into one enormous paragraph.
The way you can do that is by putting a blank line between paragraphs and also between anything you don't want to wrap together. Consider this table of contents:
CONTENTS

THE STORY OF THE AIRSHIP .... Capt. T. J. C. Martin

THE FIRST ATTEMPT AT THE NORTH POLE——CAPTAIN
    ANDREE AND HIS BALLOON

THE BALLOON IN WAR

THE WELLMAN ATTEMPT AT THE POLE . Walter Wellman

THE BIRTH AND GROWTH OF THE AEROPLANE

WILBUR AND ORVILLE WRIGHT .... Charles C. Turner

THE FIRST AEROPLANE FLIGHT .... Jessie E. Horsfall

SENSATIONS OF FLIGHT—LEARN1NG TO FLY

THE ARMY OF YOUTH

FIGHTING THE FLYING CIRCUS . . . Eddie Rickenbacker

THE GAUNTLET OF FIRE ....... By a British Airman

STUNT FLYING ........... Capt. T. J. C. Martyn

How TUBBY SLOCUM BROKE HIS LEG
    James Warner Bellah

L1NDBERG’S START FOR PARIS ..... Jessie E. Horsfall

LINDBERGH TELLS OF HIS TRIP . . . Charles A. Lindbergh

CHAMBERLIN'S FLIGHT TO GERMANY . Jessie E. Horsfall

BYRD’S FLIGHT OVER THE NORTH POLE . . Floyd Bennett

COLUMBUS OF THE AIR .......... Augustus Post

"THE KID" ................ Victor A. Smith

DOWN TO THE EARTH IN ’CHUTES
    Lieut. G. A. Shoemaker

SIR HUBERT WILKINS—-—HIS ARCTIC EXPEDITIONS
    A. M. Smith

THE "BREMEN'S" FLIGHT TO AMERICA . Jessie E. Horsfall
Before I reformatted it, there were no blank lines between each entry, and text that wrapped to the second line was not indented. While on the subject of tables of contents, remember to remove any page numbers from the contents. It's a safe bet that those numbers will not correspond to the pages in your new document.
The other things you should do are remove any text representing page headers or footers, plus any gibberish resulting from attempting to OCR an illustration.
One thing that will make your work go much faster is to use a text editor instead of a word processor for this formatting, then use the word processor only for those functions where it is really needed. In Windows Notepad is a text editor but it can't handle files as large as a whole book. On Linux I use gedit, and you can get Windows and Macintosh versions of that editor here:
http://projects.gnome.org/gedit/screenshots.html
The reason to prefer a text editor over a word processor for this work is that a text editor uses less memory and will respond quickly to any editing you do. A word processor doing the same work will feel sluggish.

Another possibility for a text editor is guiguts, which was created by the author of guiprep. It's a text editor that can run external utilities like spell checkers, gutcheck (a utility used to check Project Gutenberg e-texts for proper formatting), jeebies (another utility that specifically looks for "he" when "be" is meant), etc. It can run on Windows or Linux. Guiguts is especially useful for preparing submissions to Project Gutenberg. It can rewrap selected paragraphs to the line size that PG uses, rewrap blocks of text to create indented block quotes, insert HTML tags into plain text files to give you a starting point for making an HTML version of a Plain Text file, and more. You can download guiguts here:
http://home.comcast.net/~thundergnat/guiguts.html
This is what it looks like in action:

When you install guiguts on Windows you'll find that the gutcheck and jeebies utilities are included, compiled and ready to go. For Linux and Mac OS the source code for both utilities is included and you'll need to compile it like this:
gcc -o gutcheck gutcheck.c
gcc -o jeebies jeebies.c
You'll need to use an option in the Prefs menu to tell guiguts where these two programs are installed before you can use them. You can also run them from the command line:
gutcheck BigBookOfAviationForBoys.txt
jeebies BigBookOfAviationForBoys.txt
Once you have the blank lines between paragraphs and the worst of the gibberish removed, you may want to convert text with line endings at the end of each line into text in paragraphs. (Project Gutenberg files must have line endings on each line, but if you aren't planning on donating your texts there you'll find the text without line endings easier to work with). If you have MS Word you can try this suggestion from the Project Gutenberg website:
- Edit / Replace / Special and choose Paragraph Mark twice (or, from replace, you can type in ^p^p to get two Paragraph Marks) and replace with @@@@. Replace All. This saves off real paragraph ends by marking them with a nonsense sequence.
- Now Replace one Paragraph Mark (^p) with a space. Replace All. This removes the line-ends.
- Finally, replace @@@@ with one Paragraph Mark. Replace All. This brings back the Paragraph Ends.
If you do not have MS Word, you can run a simple Python script against the text file to remove the extra line endings. This script, called pgconvert.py, is similar to the one built into the Read Etexts Activity that converts Project Gutenberg files into files without extra line endings. The key difference is that Tesseract creates text files where the line ending is a single character, whereas Project Gutenberg uses two characters at the end of each line. The script below would need to be modified to work with Project Gutenberg texts.
#! /usr/bin/env python

import getopt
import sys

# This is a script to take the a file in PG format and convert it to a text
# file that does not have newlines at the end of each line.

def convert(file_path,  output_path):

    pg_file = open(file_path,"r")
    out = open(output_path, 'w')
    previous_line_length = 0
    paragraph_length = 0
    conversion_rejected = False

    while pg_file:
        line = pg_file.readline()
        outline = ''
        if not line:
            break
        if len(line) == 1 and not previous_line_length  == 1:
            # Blank line separates paragraphs
            outline = line + '\r'
            paragraph_length = 0
        elif len(line) == 1 and previous_line_length == 1:
            outline = line
            paragraph_length = 0
        elif line[0] == ' ' or (line[0] >= '0' and line[0] <= '9'):
            outline = '\r' + line[0:len(line)-1]
            paragraph_length = 0
        else:
            outline = line[0:len(line)-1] + ' '
            paragraph_length = paragraph_length + len(outline)
        out.write(outline)
        previous_line_length = len(line)
    pg_file.close()
    out.close()
    print "All done!"
    if conversion_rejected:
        return False
    else:
        return True

if __name__ == "__main__":
    try:
        opts, args = getopt.getopt(sys.argv[1:], "")
        convert(args[0],  args[1])
    except getopt.error, msg:
        print msg
        print "This program has no options"
        sys.exit(2)
You run this script like this:
python pgconvert.py filename.txt newfile.txt
The new file will be converted, and the file you use as input will be left alone. The next thing you'll want to do is load the new file into gedit and use Search and Replace to change a hyphen followed by a space into nothing. This will fix all the hyphenated words that are now no longer at the end of a line:

After conversion you can load the file into any word processor and use your spell checker to find and fix problems. Then you can proofread it against the original book, add formatting and make a PDF out of it, or save it as HTML and make an EPUB out of it.

In my own case, Open Office had no problems with my text file before I removed the line endings, but was convinced it had become a spreadsheet afterwords and could not be persuaded otherwise. Fortunately, the Sugar Write Activity was able to open it without incident and is an excellent choice for proofing and correcting your e-book.
Finally you can load the book into
Read Etexts and read it:

Scanning Book Pages

I like going to used book sales and one of the things I generally pick up at these sales are interesting older books. I'm not talking about first editions of well known books, but obscure books that will probably never be printed again but which have something neat about them. It's kind of fun owning books that nobody else has, but I think it would be more fun to share my collection with the world in e-book format. To do that I need to create images of the book pages.
Flatbed Scanner Or Digital Camera?
You might think you need a flatbed scanner to create book page images. While you could do it that way, it isn't the only method. Flatbed scanners are very, very slow. When scanning printed material (as opposed to photos) you need to scan at a very high rate (300 DPI or more) to get a clear image. Putting a book on a flatbed scanner can damage the binding too. There is an alternative, which is to take pictures of the pages with a digital camera.
Using Digital Cameras
Libraries and other institutions use machines like the Atiz Book Drive, which uses two digital cameras to digitize books. You can read about it here:
http://www.atiz.com/
There are no prices on the website, which suggests that these are really, really expensive.
Many amateurs have built their own book scanners, and the place to read about their work is here:
http://diybookscanner.org
These book scanners go from bare bones to professional quality. Here is an elaborate one designed and built by Daniel Reetz, who runs the site and has given permission to use these pictures:

The basic idea is that the book is held open at a 90 degree angle in a cradle. Two pieces of glass, also at a 90 degree angle and called a platen, hold the pages flat so they can be photographed by two digital cameras. Bright lights shine down on the book from above. Here is a view of the book in the cradle held flat by the platen:

If I didn't value my marriage so much I would build something like this. Fortunately for me there is an alternative. The very simplest book scanner you can make is described in an article at www.instructables.com:
http://www.instructables.com/id/Bargain-Price-Book-Scanner-From-A-Cardboard-Box/
I built one of these myself one Friday evening and spent most of that Sunday scanning my first book. Here it is, the Simmons Home Book Scanner Mark I:

If you could see it up close you'd find it even less impressive than the picture. It consists of the following parts:
- One cardboard box, salvaged from a dumpster at work, sealed shut with strapping tape and sliced diagonally to create two wedges. The wedges are taped with strapping tape to the table. The distance between the wedges is the thickness of the book's spine. The purpose of the wedges is to cradle the book so that the pages can be photographed.
- One desk lamp, cost $30 without bulb. The lamp should shine straight downwards onto the book as shown. If there are other lights in the room turn them off.
- One 100 watt incandescent bulb, saved from when we converted to Compact Fluorescents because I never throw out anything that might be useful.
- One piece of glass from a picture frame bought at Walgreen's. The glass needs to be bigger than the book page. You will use the glass to hold the page you are photographing flat.
- One tripod originally bought for use with a video camera. It is vitally important to have something to hold the camera steady and pointed at the page in such a way that the camera is parallel to the page and the image of the page is an untilted rectangle. If you don't get it completely perfect you may be able to fix some problems with software, but you definitely do not want a hand held camera for this!
- One Kodak 5 Megapixel camera which we already had. You might want a better camera for books with larger pages, but for the books I'm doing the Kodak was fine.
- One computer with free software to post-process the images taken by the camera. Whatever computer you already have should be fine.
I used the setup in the picture to scan my first two books. That experience convinced me that I really needed a proper platen, so I made the one shown here:

There are many designs for platens, and they are all cheap to make, but what I was looking for was something easy to make. The design I came up with consists of:
- Two Lexan sheets, 10" x 11", eight dollars apiece at Menard's
- Two metal brackets meant for mounting shelves, a little under seven dollars apiece at Do It Best Hardware. I have seen similar brackets at a local Dollar Store for a dollar apiece.
- Epoxy glue and a set of small clamps to hold everything in place while the Epoxy cured. I could have drilled holes in the Lexan and used nuts and bolts instead of epoxy, and if I was going to make another one I'd do it that way..
The procedure to scan books with this setup is as follows:
- Put the book between the two wedges with the front cover facing the camera.
- Remove all existing pictures from the camera's memory. This is important!
- Using the glass (or platen) to hold down the pages, start photographing the book from front to back getting the front cover and all the right-hand pages all the way to the end of the book. Zoom in so the book doesn't quite fill the frame. Use a close-up setting if your camera has one. Set white balance to Incandescent or Tungsten. Try very hard not to photograph a page more than once or miss a page.
- When you're done connect the camera to your computer and download all the images to their own directory named something like "Book Title Right Pages". Have the computer delete the images from the camera afterwords.
- Plug the camera into the charger and take a nap.
- Repeat the process for the left side pages, being sure to go from front to back. You will very much regret going the other way. Download the pictures into a different directory than you used for the right side pages.
- The scanning process proper is complete. What remains is post-processing.
Using A Flatbed Scanner
At this point you might think that the digital camera method is definitely the way to go and that you should never use a flatbed scanner at all. It isn't that simple. There will be times when the flatbed scanner will do a better job with less work than using cameras.
- If your book is small enough to scan two pages at a time, you might save enough time not having to find and replace missing or duplicated pages to make up for the additional time scanning the pages.
- If you plan to submit the book to Distributed Proofreaders they might want black and white PNG files for all the pages for OCR and proofing purposes. A scanner can produce output like that directly and give better results than converting photos for that purpose.
- There are a whole host of problems like keystoning, white balance, and skewing that are easier to avoid on a flatbed scanner than they are when using a digital camera.
- A scanner might do a better job on illustrations than a digital camera. When I make EPUBS I will sometimes create page images for OCR using the camera, then use the scanner on just the images to get the best possible quality.
When using a scanner use a DPI of 300 for text pages, and 600 for illustrations. On Windows you can use the Scanner and Camera Wizard to make the scans. Use the Back button after each scan rather than going to Finish each time. The scanner wizard will automatically name your scans with a sequence number (except for the first one, which will have the name you give it with no number afterwards. You can rename it to have the sequence number "000" when you are finished scanning).

The Post Processing Fork In The Road
There are two ways you can take the images you have made and make an e-book out of it. One way is easy, mostly automated, and produces pages that are readable and attractive. The downside is that the pages don't look exactly like the pages in the book. The margins will be different, and the text will be black on a white background no matter what the page color was originally. However, the result will be a nice, compact e-book.
The other way strives to preserve the original look of the pages as much as possible, and is largely manual. It is more work, and may give results that are less than perfect. The file size of the e-book may be larger. In the scans the Internet Archive does itself they try to preserve the look of the original book, and if you want to follow their example this method is the way to go. (There is no requirement to do this. You can use Scan Tailor to prepare submissions to the Internet Archive if you wish). If you have a book that is lavishly illustrated (children's books are a good example) you'll want to use this manual method. For example, consider this book from the Internet Archive:

You can't get results like that automatically.
The steps in both methods are the same, but in the mostly automated method the computer does most of the work. To make the whole process understandable it makes sense to describe the manual method first. I will call this method ...
The Road Less Travelled
Trimming The Pages
If you've done everything right when scanning the book you'll have a bunch of images that look like this:

Granted, that doesn't look too promising but it will get better. The book I scanned was published in 1928 and is titled The Big Aviation Book For Boys. It is filled with true stories of aerial heroism and will appeal to any boy with red blood in his veins and the sort of girl who is not put off by books with Boys in the title.
The first thing we need to do is rotate all the images. In Windows you can open the directory in an Explorer window, do a Select All, then right-click on one of the images and choose one of the Rotate options. In Linux the gThumb Image Viewer will let you do the same thing. In this example right-side pages are rotated clockwise, left side pages counter-clockwise. Doing it this way will rotate every image in the window, giving results like this:

Next we need to crop the image so all that is visible is the page. We do this with a free program called The GIMP (GNU Image Manipulation Program). The GIMP is like a free version of Adobe Photoshop. You can download it here:
http://www.gimp.org/
There are versions for Windows, Linux, and the Macintosh.
A more elaborate book scanner than the Mark I might hold pages in place consistently enough that you could crop the page images automatically. As it is I probably moved my camera on the tripod several times when photographing the pages, so I decided to crop the pages by hand. I did this by loading each picture into The GIMP, selecting the boundaries of the page with the Select tool, then choosing Crop Image from the Image menu. This created an image like the one below, which I then saved.

You'll notice that the text on the pages is a little cockeyed (the technical term is skewed) and if the book is as old as the one I'm scanning here the pages look old and dirty. Actually, the real book pages are not as brown as this image would suggest. I could not find the white balance setting on my camera when I took these pictures, so I used the normal setting. Since then I found how to change the setting and why it's needed. When a camera takes an indoor picture without a flash the color in the picture is distorted a bit depending on what kind of light is in the room. If the light is incandescent you get an orange tint to the picture. You can set the white balance to Incandescent (on my Kodak camera it's called Tungsten) to correct for this.
Correcting Skewed Pages Manually
When I scanned my second book, an Illustrated Junior Library version of The Arabian Nights, I managed to set the white balance to Tungsten and figure out a way to de-skew the pages. Here is a page image that has been rotated.

The page looks great, but it's skewed. Under the Layer menu of The GIMP is a sub menu called Transform which has a menu option Arbitrary Rotation. Select that and you'll get this dialog:

By moving the slider to the left and right we can rotate the entire image so that the page within the image is reasonably vertical. Tip: when the focus is on the slider you can use the arrow keys on your keyboard to get a more precise control than is possible with the mouse. Second tip: you can use the edges of the dialog to line up the edges of the page. When they are parallel the page is correctly aligned.

Now we do our final crop to get the page, ready to save:

If I had the opportunity to re-scan the Boy's Aviation book I would definitely do it this way. (Some would argue that I do have this opportunity, since I still own the book. What is lacking is the desire to re-scan the book. Soon you'll see how I was able to avoid re-scanning it and still have a usable e-book).
Correcting Keystoned Pages
If you didn't line up your camera exactly parallel to the page your page images won't be perfectly square. The borders of illustrations make this problem quite noticeable:

In the original book the four pictures were rectangular with square corners. If you have some pages that are noticeably like that you can use the Perspective Tool in The GIMP to try and fix it. Select the area that needs fixing and the tool will give you four corners you can move around to try and square things up:

It is of course better to attempt this before cropping the page.
Image Magick
If there is one indispensable program for making e-books out of scanned page images that program is Image Magick. It is free software that runs on Windows, Linux, or the Macintosh. Every Linux distribution includes it. For Windows and the Mac you can download it here:
http://www.imagemagick.org/script/index.php
Image Magick needs software called Ghostscript to create PDF's and you should install that software first. Ghostscript comes with every Linux distribution and should be installed by default. For Windows and the Mac you can download the install programs here:
http://pages.cs.wisc.edu/~ghost/
Click on the latest version and look for the installer for your operating system.
Image Magick is a little different from other graphics software because it does most of its functions from the command line. It may seem odd that a program that works with images does not have a graphical user interface, but there is a reason for that. Image Magick does its most useful functions on groups of images, and the command line suits that kind of work better than a GUI. Among the things Image Magick can be used for is rotating a group of images, cropping a group of images, and making PDFs from a group of images. These functions can all be done with the mogrify command.
Batch Cropping
If you did a good (or reasonably good) job of keeping your book and camera in the same position when you photographed the pages you may be able to do batch cropping, which will save you a great deal of time and tedium. Batch cropping is a way to apply the same cropping dimensions to many pages. Even if your photos are not perfectly aligned all the way through you might still be able to batch crop them in multiple passes. I did this with my second book. Here is what some pages looked like before cropping:

I copied a bunch of uncropped images to another directory which I called TestCropping. Next I loaded the first picture in that directory into The GIMP and used the rectangle selection tool on the Toolbox to select the area I wanted to crop the image to. I did not crop the image. Instead, I had a look at the dimensions of the selected rectangle in the toolbox:

You should read these dimensions as:
- Upper left corner of the rectangle has an X offset of 344 pixels
- That corner has a Y offset of 400 pixels
- The selected rectangle is 1268 pixels wide
- The rectangle is 1940 pixels in height
If I want to apply the same crop to every image in the directory I can use the Image Magick mogrify command, which updates a file in place:
mogrify -crop 1268x1940+344+400 *.jpg
When I did this I got these results:

The first few pages came out OK, so I copied them back to the original directory, overlaying the uncropped files. Then I copied the remainder of the uncropped pictures to the TestCropping directory and repeated the process. The images where batch cropping didn't work showed a bit of the facing page so when I selected the rectangle for the rest of the pages I moved the left side of the rectangle a bit away from the left edge of the page to avoid this. This time mogrify did well on all the rest of the pages, with the exception of the inside of the right cover, which had a beautiful illustration that really demanded manual de-skewing and cropping with The GIMP. If you do batch cropping you can spend time on manual tweaking like that when it makes a real difference to the end product.
Batch Rotation
If your pages are skewed you can do a batch rotation with mogrify as well. The time to do this is before you combine left and right pages, because the pages on the same side of the book are likely to be skewed the same amount or close to it. Use The GIMP to figure out how much rotation you need, but don't actually do the rotation on the image. Instead, use a mogrify command like this:
mogrify -rotate .9 *.jpg
This with rotate every JPEG in a directory .9 degrees clockwise. Just like when you rotate with The GIMP, you want to rotate the complete image first, then crop.
Dealing with Focus Issues
More likely than not your digital camera will auto focus, with no option for manual focus. This works just fine if the center of the page you're photographing has something the camera can focus on. If the center of the page is blank the camera can't focus properly. Now if the whole page is blank, no problem, because a cropped out of focus page does not look much different than it would in focus. However, you may find yourself with a few pages that look like this:

You're going to have to photograph those pages again. This time, cut out a paragraph of text from something you've printed out and put that slip of paper in the middle of the page, between the page and the glass. This will give your camera something to focus on:

Well, that solved the focus problem. Now we have to use The Gimp to get rid of that slip of paper. The first thing we do is to use the Select tool to select a blank area of the page just above where the paper is. Then we copy the selection to the clipboard using the Copy option on the Edit menu:

Now we do a Paste from the Edit menu. What that does is create a Layer which we can move around with the Move tool. We can cover the slip of paper with this layer, then save the image. This shows moving the layer in progress:

Combining Left And Right Pages
When you have all the pages in both left-hand and right-hand directories cropped it's time to bring the pages together. If you paid attention to my warnings to clear your camera's memory of pictures and photograph both sets of pages front to back you should have two directories with pictures named something like
BoysAviation 001.jpg, BoysAviation 002.jpg ... BoysAviation nnn.jpg
What you need to do now is rename the right side pages to
BoysAviation 001a.jpg, BoysAviation 002a.jpg ... BoysAviation nnna.jpg
and the left side pages to
BoysAviation 001b.jpg, BoysAviation 002b.jpg ... BoysAviation nnnb.jpg
In Linux and probably on the Macintosh too there is a command rename which will do this quite easily:
rename .jpg a.jpg *.jpg
This can be read as "for every file named ending with .jpg change the .jpg in the name to be a.jpg".
For Windows you can try the Renamer utility which can be downloaded from:
http://www.albert.nu/programs/renamer/main.htm
This is what the Renamer utility looks like in action:

The Insert operation in the program allows you to insert text at a relative position in the file name, and is just what we need.
Be aware that there are two versions of Renamer: the original and the unfortunately named RenamerNG. You want the original. RenamerNG has some bugs, the most important of which is that when you select files to be renamed they are not listed in ascending sequence. This makes that version of the program useless for our purposes.
When you have the files in both directories renamed you can copy (not move) them into one new directory. Before you do that, check to see if both original directories have the same number of files in them. If they do, chances are you didn't miss or duplicate any pages when you photographed them. If not, you'll need to figure out which pages are missing or duplicated, correct that and rename files so that you have a complete set of pages in sequence from front to back. There is no painless way to do this. As it happened, I missed three pages when I scanned the left pages of my first book. The only way I could think of to make things right was to rename each and every page with its page number, then see which ones were missing.
If you need to do this, the Windows Renamer program can help. It can do a great deal more than simply insert a character in a file name. It can also remove the existing sequence number from a file and replace it with a new one. You can start the number at any value and increment it by any amount. If you use this on your left and right pages before combining them you should be able to give each page a sequence number that matches its page number.
On Linux there are krename and pyrename. These should be included in your distribution.
When you have a complete set of pages in sequence back up your work to a CD. You've done a lot of work and you don't want to lose any of it.

Cleaning Up Page Images
The pages of the Boy's Aviation book are showing signs of age (and a lack of white balance), and it would be nice to clean them up a bit. As you can see in the illustration, some are dirty brown and some are dirty gray.
I asked for suggestions on cleaning up the pages in the sugar-devel mailing list and got several, plus I figured out a method on my own. My first thought was I wanted some sort of filter that takes the darkest color on the page and makes it black and makes everything else white. It turns out that The GIMP has such a filter, called Threshold, which is found on the Tools menu. Running Threshold on the Table of Contents page gives this result:
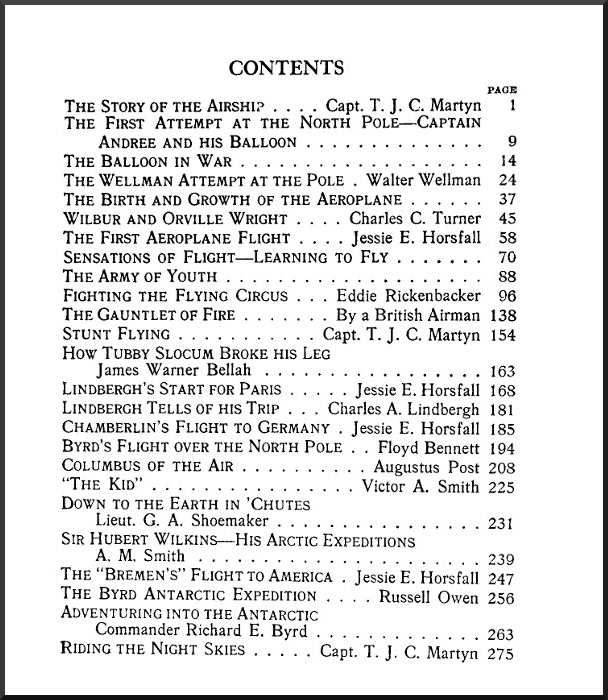
This might do for some uses, especially if you're preparing pages for OCR (Optical Character Recognition). It isn't much good for illustrations. Several people suggested that I convert the image to Grayscale (Mode under the Image menu) and use the Brightness-Contrast dialog (found in the Tools menu) to lighten the page and darken the text to come up with a cleaned up page image.
You do not need to edit each page with The GIMP to pretty it up. Once you figure out what you want to do you can change the pictures as a group from the command line using Image Magick. The changes you do with Image Magick's mogrify command cannot be undone, so before you use it copy all your images into another directory and work with that.
I ran the following command on my images:
mogrify -modulate 150,0,0 *.jpg
This cranked away for about an hour and produced the following results:

The command as shown converts the file to grayscale and increases the brightness to 150%. After it's done some pages are still darker than others, but all are quite readable:
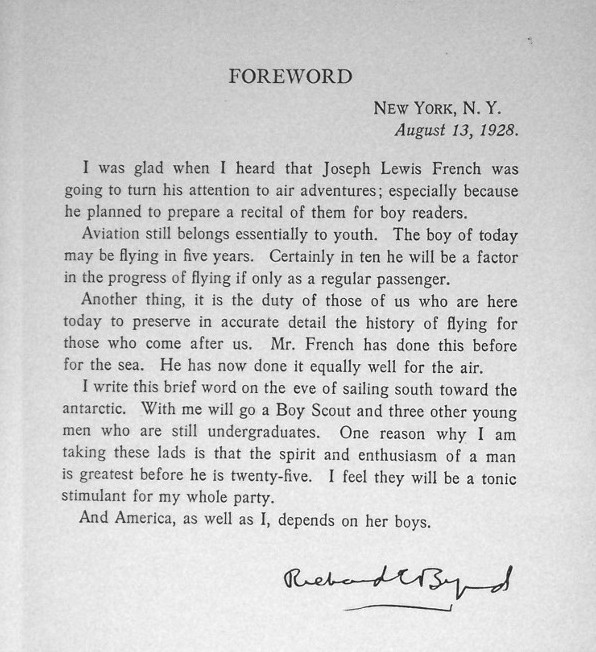
Other than some tolerable skewing the pages look good. I would be entirely justified in making a PDF with these images and considering my work done. Of course, if we're going to submit to the Internet Archive we'll want to replace the now grayscaled images of our front and back covers with the original full color versions.
If you look at these images closely you'll see that part of the page is brighter than the rest of it. This is where the desk lamp I used shined brightest on the page. To get a good quality image you really need to have more than one light shining on the page. After I had done a few books and had grown frustrated with the dingy color of my photographed pages I invested in a couple of clamp-on desk lamps to shine light on the either side of the page, as well as directly from above. This seems to have helped, and the lamps were only about five dollars apiece at Menard's. If post-processing does not give you the page color you want, consider investing in improved lighting.
The Easier Road: Scan Tailor
You can use Scan Tailor on Windows or on Linux. For Windows there is the usual install program. For Linux you will need to compile from source. You can get both here:
http://scantailor.sourceforge.net/
Scan Tailor is an amazing program that can do all of the following to the images you originally captured with your camera:
- Rotate the images clockwise or counter clockwise
- If you use a flatbed scanner, split 2-up scans into separate pages.
- Calculate the skew of your page so it can be corrected
- Identify the content of your page, whether it be a block of text or an illustration or both
- Clean up the content portion of the page. For blocks of text it will do the equivalent of the Threshold filter in The GIMP. For photos it will brighten the image.
- De-skew the content portion of the page.
- Place the content of the page in a new, empty page with the margins you specify.
- Create .tiff files in an output directory with all these corrections made, leaving the original images untouched.
In other words, you start with unrotated pictures of a book resting against a cardboard box and in one operation you get pages that look like this:

Here is a sample page for comparison purposes:

The biggest difference between the two methods is that with the manual method you try to identify the boundaries of the page in the photo and crop to that. Scan Tailor doesn't care about the boundaries of the page; it's more interested in the boundaries of the
content on the page. Once it knows that it can de-skew that content and place it on a new page.
In the screen shot below you can see that there are six tasks that Scan Tailor performs in sequence. Split Pages doesn't apply in my situation; it would make sense if I was using a flatbed scanner to scan two pages at a time, for instance. Select Content must be run before you can generate output pages. As you can see in the screen shot it can easily find the content area on a page. It occasionally messes up a picture, but you can use the Manual button to correct this.

Page Layout is used to specify the margins of the page where content will be placed. The important thing to remember here is that Scan Tailor assumes that all pages given to it will have these margins. If the inside lining of the book cover has illustrations that go to the edge of the page that can mess up the way the rest of the pages are formatted, so it is best not to give such pages to Scan Tailor. Instead, you can do these pages by hand or simply don't include them in your e-book.

Output creates the pages as TIFF files in a separate directory. When you create output you have a choice of three formats:
- Black and White
- Grayscale/Color
- Mixed
If your book is a combination of text and images choose Mixed. This will detect which pages are just text and make them black and white, and make the rest color as needed.
Some examples will give you an idea of what to expect. This is a page rendered in Black and White.

This is the same page in color with White Margins selected. You can choose not to have white margins but you would not like the result. This is a good choice if the paper the book is printed on is acid-free and a nice color, clearly not the case here:

If you check the "Equalize Illumination" check box in Color mode you'll get this:

"Mixed" will try to give you a color or grayscale image with white borders and equalized illumination when it needs to and black and white for pure text pages. This is a reasonably good option, but for the book shown above (Thirteen Women by Tiffany Thayer) Black and White is clearly the best choice.
Scan Tailor has a User Guide here:
http://sourceforge.net/apps/mediawiki/scantailor/index.php?title=User_Guide
Sources For Free E-Books

Project Gutenberg
Project Gutenberg is the oldest source of free e-books and still one of the best. It is mostly known for its Plain Text files but other formats are available as well. There are three Project Gutenberg sites that you can get books from:
Project Gutenberg at http://www.gutenberg.org/wiki/Main_Page
Project Gutenberg Australia at http://gutenberg.net.au/
Project Gutenberg Canada at http://www.gutenberg.ca/
There are other affiliated sites but any books they provide should also be available at the main site.
The reason Project Gutenberg Australia is different is that copyright laws in Australia are different than in the United States so they can host titles that the United States cannot. (There are also some titles that are in the public domain in the U.S. but still under copyright in Australia).
The website explains, "As a general rule the works of authors who died before 1955 are in the public domain in Australia. Works by George Orwell (died 1950), Virginia Woolf (died 1941), and James Joyce (died 1941), just to name a few authors, are in the public domain in Australia.
"Of course, works which are in the public domain in Australia may remain copyrighted in other Countries, even for several decades. People may not download, or read online, such works if they are in a country where they are still under copyright. That still leaves a lot of readers out there to enjoy etexts of some of the greatest literary works of the twentieth century."
Project Gutenberg Canada is in a similar situation to its Australian sister site. Canadian copyright law puts books in the public domain 50 years after the author's death. Australia used to do that, but now is a life + 70 country, except for books where the author died before 1955. Canada is under some pressure to change its copyright laws, but for now Canada can host more recent books than Australia can.
This is a typical book listing from the main website showing the formats that are available for the Jules Verne book Les Cinq Cents Millions De La Bégum (The Begum's Fortune):

Encoding is the character set used for the Plain Text file. Nearly all books have a us-ascii version. Books in languages other than English will in addition have an iso-8859 version or a UTF-8 version. These encodings allow for things like accents and other diacritical marks. As the site explains:
"Plain text files often come in more than one encoding. us-ascii encoding is supported on virtually any device but has a very limited choice of characters. It is not suitable for any language except English. iso-8859-1 (also known as Latin1) is supported on any Windows-class machine or better. It is suitable for most Western European languages. utf-8 is suitable for any language but needs a display program that knows utf-8 and you have to install appropriate fonts for the language you are trying to display."
The HTML version is suitable for reading online and may or may not have illustrations. The EPUB version will be generated from the HTML version. EPUBs from Project Gutenberg may or may not have illustrations, but they are some of the highest quality EPUBs available.
Project Gutenberg has many titles to offer to children old enough to appreciate books without pictures. These include all the Oz books, Sherlock Holmes, all of Jules Verne, Alice in Wonderland, classic science fiction from E.E. Smith, Stanley G. Weinbaum, and many others, plus juvenile novels like the Tom Swift books, The Girl Aviators series, and much more.
Students and teachers of History will find that Project Gutenberg has much to offer as well.
The Internet Archive
The Internet Archive is a site devoted to preserving the public domain. In addition to books they have movies, music, and even some software that is in the public domain. There are over a million and a half e-books available from this site. The URL for e-books is:
http://www.archive.org/details/texts
Internet Archive books are created by scanning page images, including the covers of the books. When you read one of them the visual experience is very much like reading the original book. The website lets you read the book online in "flipbook" format, which is very much like paging through the original book:

The formats offered by IA are PDF, Black and White PDF (for some of the more colorful books, to create a smaller file), DjVu, and EPUB. DjVu offers color pages with smaller file sizes than either of the PDF formats. EPUB files from IA are at the moment not the best quality, but over time this should improve. Right now they combine badly proofread text with only a few illustrations.
There is a Children's Book Collection at the Internet Archive at this URL:
http://www.archive.org/details/iacl
Quite a few of the books are from the 1800's and more of interest to children's book collectors than actual children, but you can find the Oz books, books by Edgar Rice Burroughs (Tarzan), Jules Verne, Andrew Lang's Fairy Books, The Wind In The Willows, etc. all with illustrations.
The Internet Archive is one of the few places you can download public domain comic books, although there aren't many and most are in the .cbr format instead of .cbz.
The simplest way to find the books you want from the Internet Archive is to use the Book Server page at this URL:
http://www.archive.org/bookserver
Just type in author, title or subject words in the text field on this page and you'll get a list of all the titles available and the formats they can be had in:

This page will show results not just for the Internet Archive but also for Feedbooks and other sources.
Feedbooks
Feedbooks offers public domain titles from Project Gutenberg converted from Plain Text to PDF format. This gives them nicer fonts, fancy chapter headings, bold and italicized text where needed, and introductory material usually from Wikipedia. They also have some original books of their own for download. They are located at:
http://www.feedbooks.com/
The Rural Design Collective
The Rural Design Collective (@rdcHQ) is a not-for-profit professional mentoring organization which furthers the education and experience of residents of rural Southern Coastal Oregon who are interested in working with web and/or media technology by involving them in real development projects. They devote a portion of their program to continued exploration of technology surrounding digital books. In 2009, they built an interface for approximately 2000 digital books using a subset from the Internet Archive Children's Library. The Internet Archive Bookreader was modified to view the books online in a single page format to enhance functionality on OLPC XO gen-1 computers.
A web demonstration of that project is available at: http://www.ruraldesigncollective.org/lab/ui/


The books are only available in "flipbook" format via the web interface. Strictly speaking, RDC is not so much a source of free e-books as a handy way to browse through the Children's Book Collection at the Internet Archive. Once the child finds the book he wants he can download it using the Get Books or Get Internet Archive Books Activities.

ManyBooks.net
ManyBooks.net is located at this URL:
http://manybooks.net/
They offer over 27,000 titles, mostly converted from Project Gutenberg Plain Text files. They offer several formats for each title, including PDF, large print PDF, EPUB, Plain Text and RTF. Their PDFs are different from Feedbooks PDFs because they generally include a book cover image (but no other illustrations) at the beginning of the document.

The Baen Free Library
The Baen Free Library is different from the rest of these sites because it deals with titles that are still copyrighted. Baen Books gives away free e-book downloads of some of their titles, with the author's permission, to encourage sales of the printed books they publish.
Baen publishes science fiction titles, including books by James P. Hogan, Larry Niven, Jerry Pournelle, and many other well known authors. They offer the books in several formats, including EPUB. Older versions of Sugar do not support the EPUB format, but they can use Rich Text Format. You can load this into your favorite word processor, but a word processor is not an e-book reader. Your best options with this format is to use Open Office to convert the RTF to a PDF, or to use an e-book reader like Read Etexts that can convert an RTF to a Plain Text file.
Most of these books are suitable for younger readers and are much more current than anything in the public domain.
Munsey's
Lots of books and stories in EPUB and PDF formats, mostly from pulp magazines, and mostly in English. Some are suitable for children, a few are not:
http://www.munseys.com/site/home
free literature
This site contains links to over 600 sites that are sources of free e-books in many languages.
http://www.freeliterature.org/
Sugar Activities For Finding E-Books

Introduction
The Sugar environment uses a Journal to keep all the student's work in, instead of using files and directories. Every e-book you read will have its own entry in the Journal. In addition to the file for the book the entry will have metadata about the book, including a meaningful Title, a Description of the book, and Keywords.
If you download all your books using the Browse Activity you'll find that the file you download will often have a meaningless name and the Title it will have in the Journal will be long but still meaningless. You would need to correct the Title and perhaps add a Description for the book yourself.
There is a better alternative to using Browse for most of your e-book downloading needs. In fact, there are three of them.
Get Books
The Get Books Activity is the newest of the three. It lets users search for books from multiple online sources such as the Internet Archive and Feedbooks. It also provides support for removable devices ("Library on a Stick") which have OPDS catalogs in the root directory. OPDS (Open Publication Distribution System) is a kind of book catalog that anyone who publishes e-books can create. Currently the Internet Archive and Feedbooks have such catalogs, so Get Books can download titles from their catalogs. Feedbooks has titles from Project Gutenberg converted to PDFs. This means that you can find and download the majority of free e-books available to your Journal using this Activity.
This is what the Activity looks like downloading a book about Thomas Jefferson:

OPDS is part of the BookServer ecosystem which has been described as follows:
"The BookServer is a growing open architecture for vending and lending digital books over the Internet. Built on open catalog and open book formats, the BookServer model allows a wide network of publishers, booksellers, libraries, and even authors to make their catalogs of books available directly to readers through their laptops, phones, netbooks, or dedicated reading devices. BookServer facilitates pay transactions, borrowing books from libraries, and downloading free, publicly accessible books."
It is possible to customize Get Books by adding more OPDS feeds to it. One such feed can come from a Pathagar Book server, which I'll describe later in its own chapter. Unfortunately, you'll need some experience with the Unix command line to do this. Use the Terminal Activity and become the root user. In the directory where your Activity is installed, generally named ~/Activities/GetBooks.activity, you'll find a file named get-books.cfg. As root, make a copy of this file in the /etc directory. Anything you put in this file will override what was in the original get-books.cfg file.
Some Sugar deployments don't give their users root access to the computer. If you are in that situation you can make a copy of get-books.cfg in the ~/Activities/GetBooks.activity directory and modify the original. You can revert back to the copy if things go wrong.
The file is organized into sections that look like what Windows .INI files used to have. Add a new section for each OPDS feed you have. You'll need to use the vi editor. Here is a new section for a local Pathagar Book Server:
[Pathagar Book Server]
name = Pathagar Book Server
query_uri = http://pathagar.myschool.edu/feed.atom?q=
opds_cover = http://opds-spec.org/image
To use Get Books with a removable device like a thumb drive you need to create an OPDS catalog with the name catalog.xml and put it in the root directory of the drive. Get Books will look for that file and if it finds it then the drive will be listed as one of the possible ODPS sources in the drop-down list.
Here is Get Books using its new OPDS catalog:
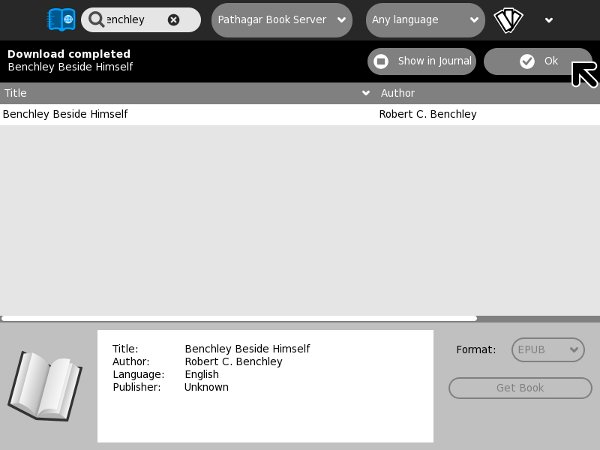
While calibre can create a collection with an OPDS catalog, at this time the catalog it produces is a little fancier than what Get Books is able to use. calibre's catalog is a hirearchy of XML files that allows you to drill down from a list of books down to individual book details. What Get Books needs is a file where the list of books and the book details are all in one file, like this:
<?xml version="1.0" encoding="UTF-8"?>
        <feed xmlns:opds="http://opds-spec.org/"
            xmlns:dcterms="http://purl.org/dc/terms/"
            xmlns="http://www.w3.org/2005/Atom"
            xmlns:opensearch="http://a9.com/-/spec/opensearch/1.1/"
            xmlns:dc="http://purl.org/dc/elements/1.1/">
        <id>pathagar:full-catalog</id>
        <title>Pathagar Bookserver OPDS feed</title>
        <subtitle>OPDS catalog for the Pathagar book server</subtitle>
        <updated>2011-06-13T12:03:26Z</updated>
        <entry>
                <id>0e00c034-95df-11e0-ba86-00096b32bd5b</id>
                <title>Benchley Beside Himself</title>
                <updated>2011-06-13T12:03:26Z</updated>
                <author>
                        <name>Robert C. Benchley</name>
                </author>
                <link href="/book/4/download"
                     type="application/epub+zip"
                     rel="http://opds-spec.org/acquisition"></link>
                <link href="/covers/cover_1.jpg"
                     rel="http://opds-spec.org/cover"></link>
                <content>Bob Benchley delivers the laughs.
                </content>
                <dcterms:language>en</dcterms:language>
        </entry>
        <entry>
                <id>cae190c6-95de-11e0-ba86-00096b32bd5b</id>
                <title>The Big Sleep</title>
                <updated>2011-06-13T12:01:53Z</updated>
                <author>
                        <name>Raymond Chandler</name>
                </author>
                <link href="/book/3/download"
                    type="application/epub+zip"
                    rel="http://opds-spec.org/acquisition"></link>
                <link href="/covers/cover.jpg"
                    rel="http://opds-spec.org/cover"></link>
                <content>Private Eye Philip Marlowe gets
                    involved with dizzy dames with something
                    to hide.</content>
                <dcterms:language>en</dcterms:language>
        </entry>
</feed>
Get Internet Archive Books
Get Internet Archive Books is very similar to Get Books, and in fact Get Books began life as a modified copy of Get Internet Archive Books, and they continue to use the same icon. Before the Internet Archive got behind OPDS they had (and continue to have) something called Advanced Search. OPDS takes a query and returns XML. Advanced Search can return several formats, but the one Get Internet Archive Books uses is comma delimited lines. Because of this it will never work with anything other than the Internet Archive. On the other hand, because it restricts itself to just one source of books it can do things that Get Books can't do. For instance, it can download e-books in all four formats that IA offers: PDF, B/W PDF, Deja Vu, and EPUB. Second, in the search results listing you will see Title, Volume, Author, and Language where Get Books only shows title and author.

Read Etexts
Read Etexts is an Activity meant to read the Plain Text files produced by Project Gutenberg and Project Gutenberg Australia. These sites do not yet support OPDS but they do both provide text files that can be used as a catalog of what books are available and how the files are named and stored on their systems. PG began in the days when MS-DOS was the most popular operating system for personal computers, so all of their files have eight character file names. In the first few years they were in operation they tried to make these short names somewhat meaningful, but they later changed to a new system which gave every book a completely meaningless number. Some of the old books have been renamed to the new format, others have not. Also, while just about every book has a 7-bit ascii format file available many have and need another encoding that can represent the accents, umlauts, and ligatures used by languages other than English.
When you download a book using Read Etexts it tries to make sense of all this for you. It looks for an 8-bit encoded file first, and if it doesn't find one it downloads the 7-bit version. It gives the Journal entry it creates a meaningful title, like Pride and Prejudice by Jane Austen rather than 56436.zip.
Another difference between the Read Etexts book search and the other two is that the book catalog is included in the Activity, so you can search for books when you are not connected to the network. The PG offline catalog is not updated often enough to justify downloading it and converting it every time you search for a book.
Read Etexts looks like this in action:

The Pathagar Book Server

The Pathagar Book Server is a project of developers from Sugar Labs specifically made to publish e-books to computers running Sugar. It is a work in progress and should be judged as such. It does two things:
- It creates an attractive website that you can use with the Browse Activity to look for books and download them to the Journal. (Of course computers not running Sugar can download the books too). The website is maintained using web forms.
- It creates an OPDS (Open Publication and Distribution System) feed that can be searched by the Get Books Activity.
This is what the website looks like:
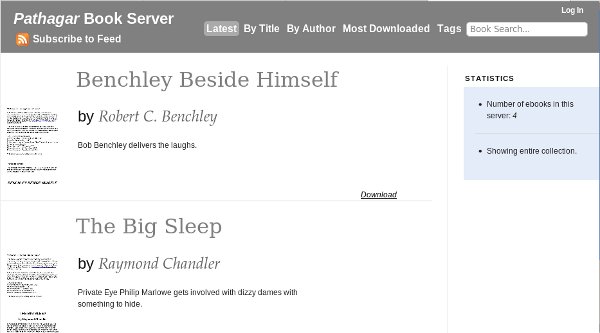
This software has a lot of potential, but isn't ready for actual use yet. If you'd like to play with it anyway, you'll need to install the following on your computer:
All of these things can be installed on Windows and on the Macintosh, but for the easiest setup you'll want to use Linux. Any recent Linux distribution includes most of the above software, much of it installed by default and the rest available with no more work than checking a checkbox. An old, discarded PC with a 14 inch monitor that has seen better days will work just fine as a book server, and Linux is very simple to install these days.
Assuming that you have all of the above ready the next step is to get the source code for Pathagar. Currently this is stored in something called a Git repository. You can find out the location of this repository by looking here:
http://wiki.sugarlabs.org/go/Book_Server
The URL on this page will take you to a site that lets you browse the code and which has a Downloads button that lets you download the code as a Zip file or a tar.gz file. Choose whichever you prefer and unpack it. It will probably unpack into a directory that is not named pathagar. Rename it to pathagar before you continue or it won't work.
One of the files in this directory will be named settings.py. You'll want to change some lines in that file before you can run pathagar. The only lines that really need changing are these:
ADMINS = (
    ('James Simmons', 'your_email@gmail.com'),
)
Next you'll need to run this from the command line:
python manage.py syncdb
This creates database tables and only needs to be done once. Now you can try running the server:
python manage.py runserver
This starts a server going on port 8000. (You can start it on a different port by putting the port number after runserver). You can open up a web browser on the same machine and point it to http://localhost:8000 and it should bring up the Pathagar Book Server. When you're done looking at Pathagar you can go back to the terminal and quit out of the server command by holding down the Ctrl key and typing 'c'.
This is not the normal way you would run Pathagar. Normally the server does not run by itself. Instead it runs under the Apache web server using a virtual host. Here is a virtual host entry I created for my home installation:
<VirtualHost *:9000>
        # ServerName sugarlabs.simmons
        ServerAdmin myemail@gmail.com

        <Location "/">

            SetHandler python-program
            PythonHandler django.core.handlers.modpython
            SetEnv DJANGO_SETTINGS_MODULE pathagar.settings
           PythonDebug On
            PythonPath "['/home/jim/src'] + sys.path"

        </Location>

        ErrorLog /var/log/apache2/pathagar-error.log

        # Possible values include: debug, info, notice, warn, error, crit,
        # alert, emerg.
        LogLevel warn

        CustomLog /var/log/apache2/pathagar-access.log combined
        ServerSignature On

</VirtualHost>
I have chosen to run Pathagar on port 9000 because I have Booki using port 8000 and OBJAVI 2 using port 80. I am using mod_python here. Make sure that everything that needs to be written to can be written to by the apache web server, and make sure that settings.py is executable.
The lines in bold are important. The directory specified in PythonPath must contain the directory named pathagar that contains the code for Pathagar. In my own case I'm running the code from my home directory, in a subdirectory called src which I use for unpacking source code archives. If I wanted to do a more finished installation I would create a directory /var/www/pathagar and copy everything there, and use a PythonPath of /var/www.
I have chosen to define my virtual host as being anything with port 9000, which is a simple solution for a home setup. A better way would be to create separate DNS names for each Virtual Host and run everything on port 80. That way you could use the name pathagar.myschool.edu or something like that for Pathagar.
Should you decide to imitate my own example and use port numbers, remember to specify Listen directives in the Apache conf file for all the ports you're using, like this:
Listen 80
Listen 8000
Listen 9000
One final tip: when you create images for your e-books, use The GIMP to resize them to 100 pixels wide. If you don't do this your web browser will try to display your images as if they were 100 pixels wide, and the results will be noticeably less readable than if you had resized the image yourself. It is not necessary to have an image for every book. Pathagar supplies a default image for books that don't provide their own.
The Read Activity

The Read Activity is one of the core Activities of Sugar, and will already be installed in whatever version of Sugar you are using. Although it is available at http://activities.sugarlabs.org you generally will not upgrade to a newer version of Read than the one you were given because Read is not fully self contained, so the version of Read that works with the latest Sugar will not work with Sugar .82, for instance.
The newest versions of Read use a different kind of toolbar than the older versions. Since most XO laptops currently have the older version of Read, most of the screenshots will show that version. I'll switch to showing the latest Read to demonstrate features only supported on there.
You will usually start Read by resuming a book that you have downloaded to the Journal. The PDF format is supported by all versions of Read. If you are using the very latest version of Sugar then Read will also support these formats:
- DjVu
- Comic Book Zip (CBZ)
- EPUB
- Plain Text
This is what Read looks like when you resume a PDF. The
Read toolbar is selected by default.

The arrow buttons let you page pack and forth through the document. Normally this is not the way you would navigate. The normal way is to use the Page Up and Page Down keys or the arrow keys. When the XO laptop is in tablet orientation you can use the game controls to navigate through the document.
The text field with the current page number in it can also be used to navigate. Enter the page number you wish to go to and press the Enter key to skip to that page.
The dropdown control is for PDFs that have a table of contents that lets you skip to a chapter. Very few PDFs have this, and PDFs from Feedbooks for example do not have them.
The Read Activity remembers what page you left off on when you close it and will return to that page automatically when you resume the book later. Unfortunately this does not work if you turn off or reboot your computer between ending the Activity and resuming it if you are using Sugar .82. The problem is with that version of Sugar (and older ones), not with the Read Activity. Sugar .84 and later fix this.
The next screen shot shows the Activity toolbar. This is where you can close the Activity, rename the Journal entry, and share the book with others on the network.

In the screenshot above we have changed the Share with option from Private to My Neighborhood. This makes your book available for copying by anyone on the network. In the Neighborhood view this is what everyone will see:

If the person seeing this clicks on Join he will get the book copied to his own Journal.
Next we'll look at the Edit toolbar:

The Edit toolbar lets you search for text strings in your book, plus copy text selections to the clipboard. What may surprise you is that it can do this even for the books from the Internet Archive, which are made from scanned page images. This is because behind the page image is a text representation of the text on the page. In the screen shot above someone is searching for the word "Bingley" in Pride and Prejudice. Note that the search only works as well as the quality of the text representation allows it to. The text is created by OCR and is not proofread afterwards.
Copying a passage to the clipboard from this kind of book works too, as this screen shot shows:

As you can see, the words "Is that his design in settling here?" have been successfully copied to the clipboard. Regrettably the words do not get highlighted on the page when you select them in this kind of book. They do get highlighted in a conventional PDF.
Next, the View toolbar:

The first four controls on this toolbar adjust the size of the page. They can only zoom in and out on the page for PDFs, CBZs, and DjVus. They cannot simply make the font larger and reflow the text on the page for these formats, although that is possible for EPUBs.
Now we come to a function of Read that is only supported on the latest versions of that Activity: multiple annotated bookmarks. The star button shown in the toolbar below creates a bookmark and opens up a dialog where you may give the bookmark a Title and a Description.

When you close the dialog you'll see that the book has had a star placed to the left of the page. You can use the arrow buttons on the toolbar not only to move between pages but also between bookmarks, as shown here:

This is the latest Read viewing an EPUB. EPUBs have a built in table of contents which you can access from the toolbar:
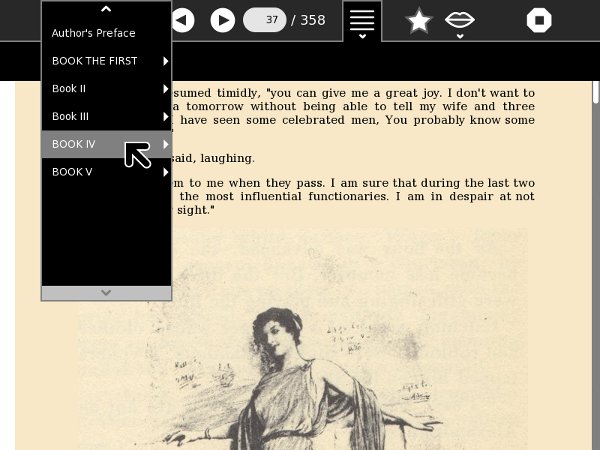
Text to Speech is only supported for EPUBs and Plain Text files so far.
Here is the latest Read viewing a Plain Text file. These can have highlighted passages, and when you use the Text to Speech function the word being spoken gets highlighted:
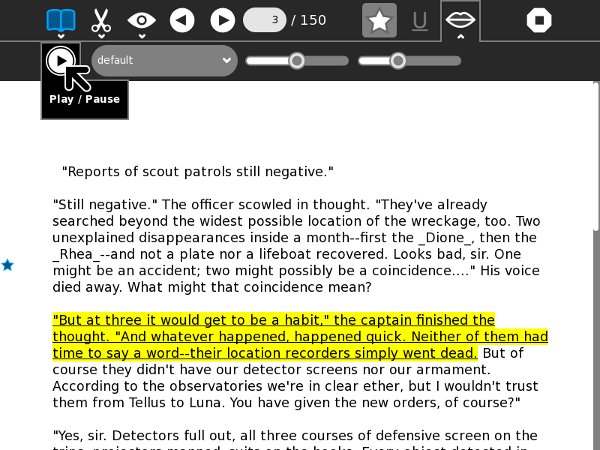
Ultimately, the Read Activity will be what you use for every supported e-book format. Not every Sugar user will be able to use the latest Read, however. It is a lot of work to update Sugar on hundreds of machines in the field, so some children will have to make do with a less powerful Read Activity.
Fortunately there are alternatives to Read that work on older versions of Sugar and can let you read e-books that your version of Read may not support. The next two chapters describe these alternatives.
The Read Etexts Activity

The Read Etexts Activity can be used to read e-books in Plain Text and RTF formats, the two formats that the core Read Activity cannot handle. (Actually Read on the very latest Sugar will support plain text files, but the version of Read most commonly used in the field will not). It was originally written as a stopgap Activity for reading Project Gutenberg etexts until such time as the core Read Activity could be enhanced to read them. However, Read Etexts grew to be something more. Because Plain Text files are so simple, it was easy to add features to the Activity that Read did not provide. These features included:
- Text To Speech with word highlighting.
- A built in offline book catalog that allows searching for and downloading books from Project Gutenberg and Project Gutenberg Australia.
- Text passages may be highlighted and underlined. Pages may be annotated, and multiple bookmarks may be set. All of these are stored in the book file itself, so when you share a book either over the network or by copying it to a thumb drive your annotations, bookmarks, and highlights go with it.
- When the book's font size is changed the text wraps to fit within the margins.
- The latest version of Read Etexts supports every version of Sugar from .82 onwards. On newer versions of Sugar it uses the new style toolbar.
- On Sugar .82 it can return to the page number you left off on, even if you shut down or rebooted since you closed the book. (There is a bug in Sugar .82 that prevents this from working with Read. Read Etexts works around this bug).
The Read Toolbar
When you start Read Etexts by resuming a Journal entry the Read toolbar is the first thing you see:

This is similar to the Read toolbar in the core Read Activity, with the addition of a Bookmark button (the star) and an Underline button. Clicking on the Bookmark button sets and unsets the bookmark for the page, just like it does in the latest Read. The difference is that in Read bookmarks have attached titles and descriptions. In Read Etexts bookmarks are simply bookmarks.
Here is an example of a highlighted passage.

You can highlight multiple passages on a page, and they are shown with a yellow background and underlined. On the XO laptop the underlines will be visible in the monochrome mode the screen uses when the backlight is turned off.
Bookmarks look the same as they do in the latest Read and you can use the menus under the arrow buttons on the toolbar to navigate between them.

You can add annotations to any page, like this:

The Activity Toolbar
The Activity toolbar is the same as Read has, and you can share books just like you can with Read. One small difference is in the Title of the book. Read puts the page number in a place that goes away when the computer shuts down or reboots if you're using Sugar .82 or older. Read Etexts puts the page number at the end of the title with a "P" in front of it. Thus even when using older versions of Sugar Read Etexts will not forget what page you stopped reading on.

The Edit Toolbar
The Edit toolbar is the same as for Read and supports text searches and copying selected text to the clipboard.


The View Toolbar
The View toolbar lets you make the font larger and smaller. The text will wrap to fit within the margins, and the font size you choose will be saved and applied to all etexts you read until you change it again. The third control hides the toolbar so you can use the full screen for reading. You can also make the font larger with the + key, smaller with the - key, and toggle full screen mode with Alt-Enter.

When you increase the font size most books will re-flow nicely, but a few will not. The ones that don't have at least one really, really long paragraph. When Read Etexts gets a book from Project Gutenberg it attempts to remove the line endings from the text so it can flow naturally. Read Etexts breaks pages on paragraph boundaries. When you have really long paragraphs this becomes unworkable, so when the conversion function encounters such a paragraph it gives up on the conversion and the original text with breaks at the end of each line is used instead.
Relatively few books will have this issue, but its important to know when you encounter one why it is happening.
The Speech Toolbar
Read Etexts supports Text To Speech for one page at a time. The controls from left to right start and pause speech, let you select a voice appropriate to the text, adjust pitch, and adjust rate of speech. Pitch and Rate settings are saved and used for all etexts until you change them again.
In Sugar .82 the needed supporting files to use TTS are not provided by default, but you can add them yourself with the following command:
yum install gstreamer-plugins-espeak
You may be disappointed with the highlighting of text on an XO laptop. Speech will sound fine, but the highlighting may lag behind the words being spoken. On a more powerful computer this will not be a problem.

The Books Toolbar
The Books toolbar is only available when you start Read Etexts from the Activity ring without resuming an existing book. It lets you search an offline catalog of books from Project Gutenberg and Project Gutenberg Australia, then download them to the Journal. A special feature of this download is that it will automatically choose the best available format for a book. It will always look for a book in ISO-8859 format first and will only download the ASCII version if there is nothing better.

While the Books toolbar is the easiest way to copy books to the Journal for use by Read Etexts, it is not the only way. You can also use the Browse Activity to download books from Project Gutenberg. When you do, choose the Zip version of the book, not the text version. The reason is simple: when you select the Text version Browse will display it as if it was a web page and give you no way to download it. Browse will be able to download the Zip version.
When downloading books from the Baen Free Library you can download the RTF format. There is also a Zipped RTF that Read Etexts would be able to read, but for some reason Browse has difficulty downloading that one.
The View Slides Activity

View Slides is an Activity for viewing collections of image files stored in Zip archives. Since this is identical to the CBZ format (with the CBZ format using a .cbz suffix on the file instead of .zip) View Slides can be used as a reading Activity for comic books. The latest Read also supports the CBZ format so if you're using Sugar on a Stick you don't need View Slides to read comic books, but those running Sugar .82 will need it.
There are no large repositories of public domain comic books. Most of the CBZ's and CBR's you'll find on the Internet violate someone's copyright, although there are a few legal ones on the Internet Archive that you can find by searching for "CBZ" or "CBR", such as the Gunsmoke comic shown in the screen shots. Gunsmoke was in the CBR format so I needed to convert it to CBZ. In Windows you can do that with the free 7Zip utility that you can download here:
http://www.7-zip.org/
What you need to do is unpack the .cbr file to get the individual images, then zip them up and rename the .zip suffix of the new file to .cbz.
While there are not many legal free comic books, the CBZ format is an easy one to create and is a good choice for children who want to make their own e-books, slide shows, etc. In addition to being a reader for this format, View Slides can create and edit files in this format.
Like Read Etexts, View Slides supports most versions of Sugar and will use a new-style toolbar if the version of Sugar supports it. The screen shots in this chapter are a mix of old and new.
The Read toolbar is the same as Read Etexts without the Underline button:

Using the new style toolbar the most commonly used controls are always visible:

Like the other reading Activities you can hide the toolbar and view images full screen:

The Slides toolbar is used to organize the images in a .cbz file. You can add images, delete them, rename them, and extract images to create entries in the Journal. The Available Images column shows image files in the Journal as well as images on removable media like thumb drives and SD cards. The Slideshow Image column shows the images in your .cbz. When you select an entry in either column it will be previewed in the area above the image lists.

Read SD Comics
The Read SD Comics Activity is like a stripped down version of View Slides which is designed specifically for the XO-1 laptop. The XO-1 has 1 gigabyte of internal storage, which it uses for the operating system as well as the Journal. CBZ files can be very large. A graphic novel can easily take up 60 megabytes or more, and the Journal has perhaps 600 megabytes of available disk space. When you consider all the things that students will use their XO's for that doesn't leave room for a serious comic book collection.
Every XO laptop also has a slot for an SD card. The slot is designed to make it difficult to remove the card once it is inserted. An SD card is a reasonably cheap way to add up to 8 gigabytes of storage to your XO. The problem is, Sugar can't really use it for much. The Journal is limited to internal storage.
What Read SD Comics does is simple. You copy your comics onto the SD card. Next you launch Read SD Comics from the Activity ring and you'll see something like this:

This lets you navigate to your SD card (or USB thumb drive) and select a CBZ or Zip file. When you do you'll see a preview of the first page of the comic to the right. Press the Read Comic button and a new Journal entry will be created that links to the comic and the comic will be loaded for reading:

You can zoom in and out, view full screen, etc. just like with View Slides:

There are some features missing from Read SD Comics that are in View Slides:
- Annotations
- Multiple bookmarks
- Book sharing
However, you do get the full benefit of having a Journal entry. The last book you read will be at the top of the list, you can rename the entry and add descriptive text to it, and it will remember the page you left off on.
Read SD Comics is intended to be used on an XO-1 with an SD card but it may be useful with Sugar on a Stick as well. If you have a bunch of comics on a CD or DVD Read SD Comics will let you create links to them from the Journal and treat them as if they too were stored in the Journal. Of course, when you delete a Journal entry for Read SD Comics that does not delete the comic from the SD card; it just deletes the Journal entry that links to it.
Read SD Comics may be useful for other things than comics. For instance, if you've created a bunch of page scans for Project Gutenberg and put them in a Zip file you can use this Activity to check them over:

This is a collection of page scans for four Raymond Chandler detective novels. Raymond Chandler has been sleeping The Big Sleep since 1959, making his books public domain in Canada. I created this set of scans for Distributed Proofreaders Canada.


