


Overview of Record
The Record Activity can be used to record three types of media:
- Photographs
- Videos
- Audio Recordings
For those users who are running Sugar on an XO laptop, your machine comes with a camera and a microphone built in. These features allow you to create and share your own media. The Record Activity is a useful piece of software to help you make the most of your media creativity.
When you start up record, you encounter the following Activity UI.
In the sections below, we look at how you can use this UI to create, save and share a variety of media. The process of recording photos, videos and audio is remarkably similar. We go through the individual properties of each type of media recording, but make sure to read the photo section first because it has many controls that are shared in audio and video (and so are not repeated for brevity).
Taking and Manipulating Photos
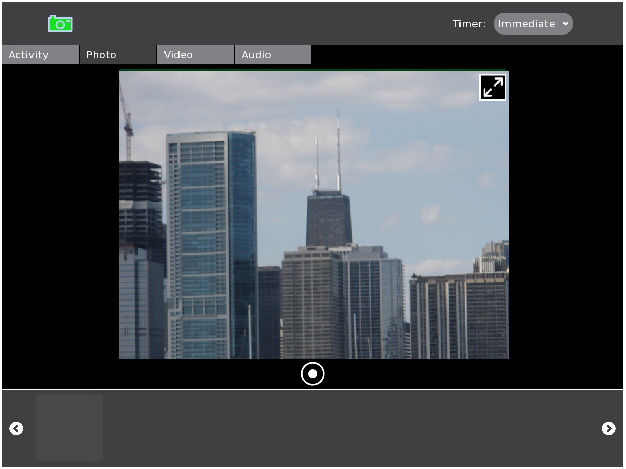
You can use the Record Activity to help you take photographs of the world around you. The marked up screenshot below highlights some of the key controls available in the main photo tab.
Let's look at some specific details about the items highlighted above:
- This item shows the photo tab has been highlighted. This means that the Record Activity is in photo capture mode and all of the controls you see in the toolbox and main window reflect this.
- Record allows users to set a timer before recording happens. In this case, the timer is a pulldown menu that allows you to chose among three options: "Immediate", "5 Seconds", and "10 Seconds". Delaying the timer might be useful if you want to give yourself some time to get to the right pose before the Record Activity takes a snapshot.
- You often see a double arrow at the top right corner of your picture window. This arrow puts record into full screen mode, where everything is hidden but the picture window and the record button (item 4 below). In full screen mode, you can navigate the pointer to the top right corner and a similar icon pops up to allow you to return to normal mode.
- This is the button that tells the Record Activity to start recording. In photo mode, Record takes a snapshot of whatever is in front of the camera.
- The area between the left and right arrows is called the tray. It is where previously recorded items are placed so that you can look at them later on.
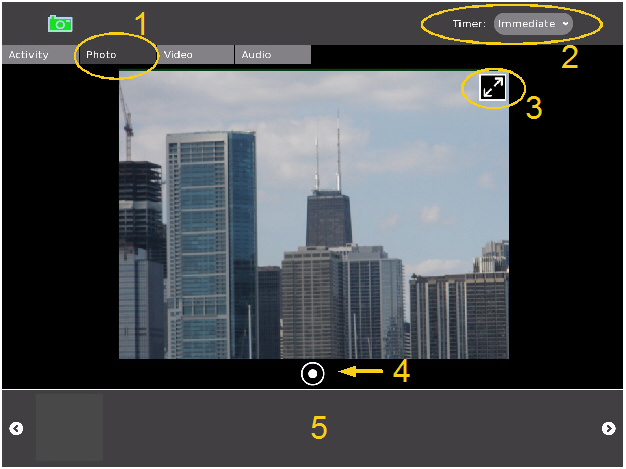
Once Record successfully takes a photo, it shows up as an icon on the tray. You can click the icon to view the photo and to update metadata about the specific picture taken.
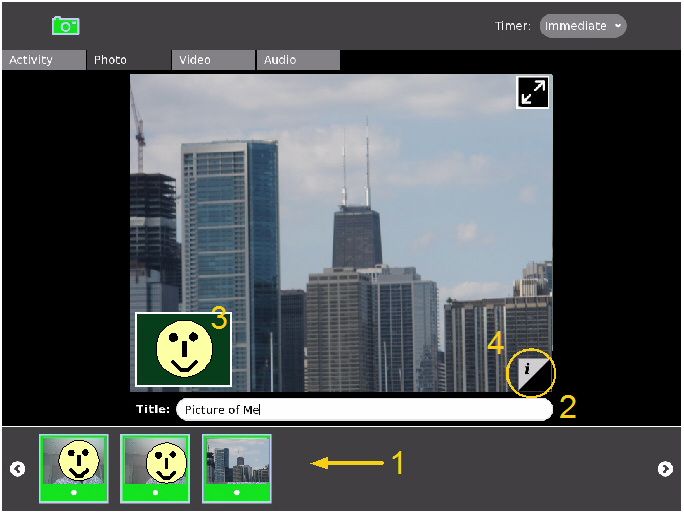
In the photo view screenshot above, item 1 shows how the tray displays a history of your previously taken photos. When you click on a photo, you are taken to the interface you see in the screenshot, which includes a text field where you can name your photo (item 2). You also see the image taken by your camera (in this case, the skyline of Chicago). Item 3 is a small output window of what your camera sees (in this case, a very happy student!). If you click on this small window, you are returned to the main photo screen from which you can take more pictures.
Item 4 on the bottom right of your image is a little tab that allows you to find out even more about the photo that was taken. The screenshot below shows the new window that appears. Here, you can read and enter new tags for your image, and find out about when the picture was taken and by whom. As with the photo view window, you have the output of your camera on the bottom left. You can click this to go back to taking photos.

Recording and Manipulating Videos
When you click the "Video" tab, the Record Activity then goes into video recording mode. Many of the details of the UI are very similar to recording photos: recorded videos show up in the tray at the bottom, you can name and tag your videos just as you name and tag photos, and you have many of the same UI controls for going in to fullscreen mode and navigating between video recording and viewing modes.
The screen capture below helps us to highlight a couple of items that are different or noteworthy in video mode.
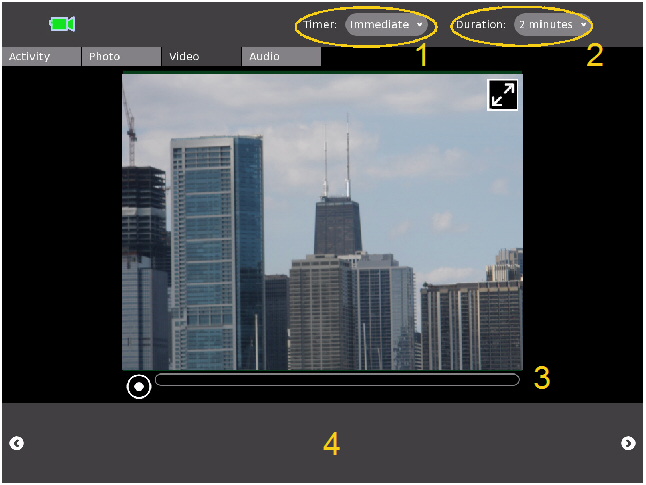
Notice that the toolbox now contains two specific control menus. Item 1 is a delay timer just like the one used on photo mode: it lets you delay the start of recording several seconds so you can get ready in front of the camera. The duration menu (item 2) allows you to specify a maximum length for your video. In the current implementation, you can record videos of 2, 4 or 6 minutes.
Once you are ready to record, click the button in item 3. When you finish recording, you should see your video show up in item 4. You can then click on the video to view it, name it, and update/view the tags assigned to the video.
Recording and Manipulating Audio
Finally, the Record Activity also allows you to record Audio. To do so, you simply go to the Audio tab in the Activity. An image appears in the picture window, but that is only be saved as a snapshot to help identify your audio recording. As with the photo and video modes, you see an icon for your recording show up once you are done. You can click on this icon to edit the name and tags assigned to your new audio recording.
The UI controls for audio recording are virtually identical to that of video recording. You have "Timer" and "Duration" controls in the toolbox that allow you to specify when and for how long your voice is recorded. You also have a tray at the bottom of the Activity that allows you to browse and view details of previously recorded audio.